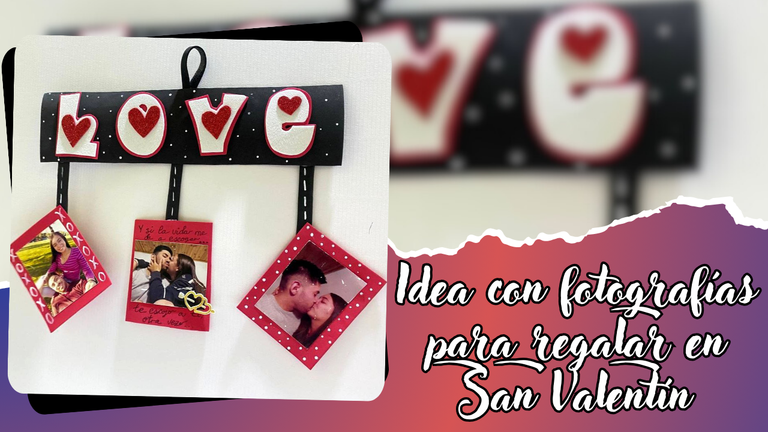
¡Bienvenidos amigos creativos!👩🎨
🙋♀️ ¡Hola gente bonita y creativa! Les mando un cordial saludo y mis mejores deseos para ustedes, espero que estén teniendo unos días súper lindos y así tengan un grandioso fin de semana✨. Los detalles con fotografías son mis favoritas, ya que perseveran con el tiempo permitiendo captar los momentos, puesto que es inevitable no revivir el momento con solo ver la fotografía. Así que para mí cualquier detallito que tenga una foto los valoro mucho, es por ello que decidí hacer una idea para celebrar este día, aparte de ser bonito sin duda es una opción económica que te ayudará a sorprender esa persona especial, sin más…
Welcome creative friends!👩🎨
🙋♀️ Hello beautiful and creative people! Hello beautiful and creative people! I send you a warm greeting and my best wishes for you, I hope you are having super nice days and so have a great weekend✨. Details with photographs are my favorite, as they persevere with time allowing to capture the moments, since it is inevitable not to relive the moment just by looking at the photograph. So for me any little detail that has a photo I value them a lot, that's why I decided to make an idea to celebrate this day, apart from being nice it is certainly an economical option that will help you to surprise that special person, without more....
¡Llegó la hora de crear! / It's time to create!✨❤️.
|
|---|
¿Cuál es el proceso?/ What is the process?⬇️
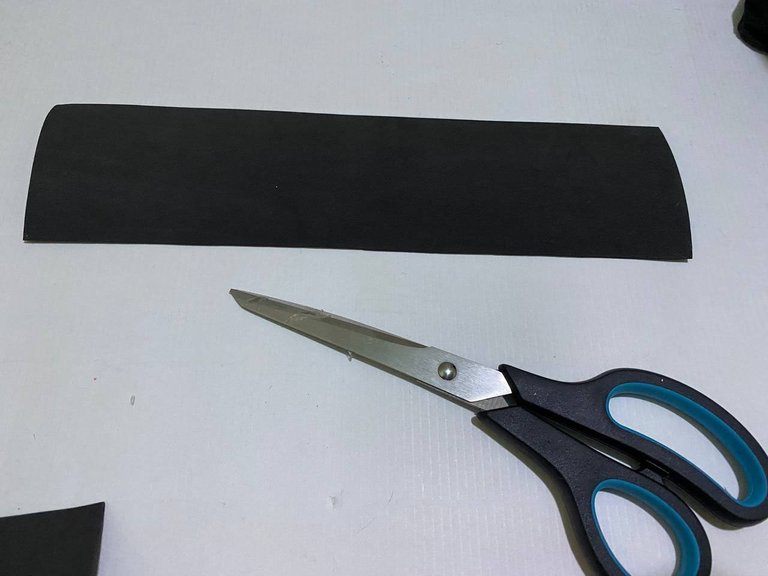
❤️ Paso 1 / Step1
Por mi parte utilice foami ya que era el material que tenía disponible, pero hay varias opciones como la cartulina o madera, cualquiera de ellas sería una buena opción. En foami liso color negro tome medidas de 28cm en forma horizontal con 7cm de manera vertical, seguidamente recorte lo más lineal posible.
I used foami since it was the material I had available, but there are several options such as cardboard or wood, any of them would be a good choice. In plain black foami I measured 28cm horizontally with 7cm vertically, then cut as linear as possible.

 |  |
|---|
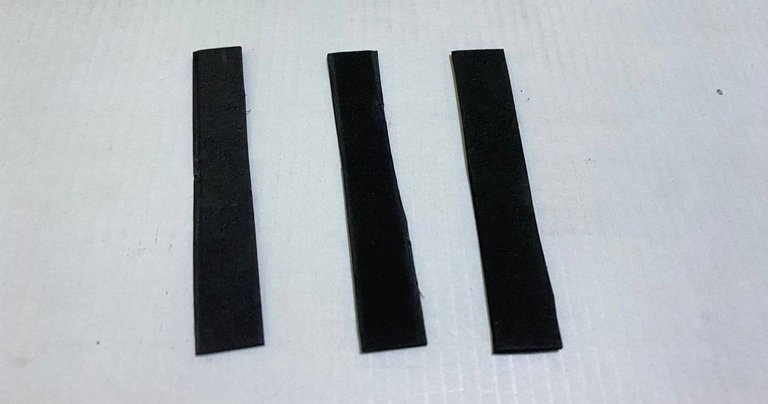
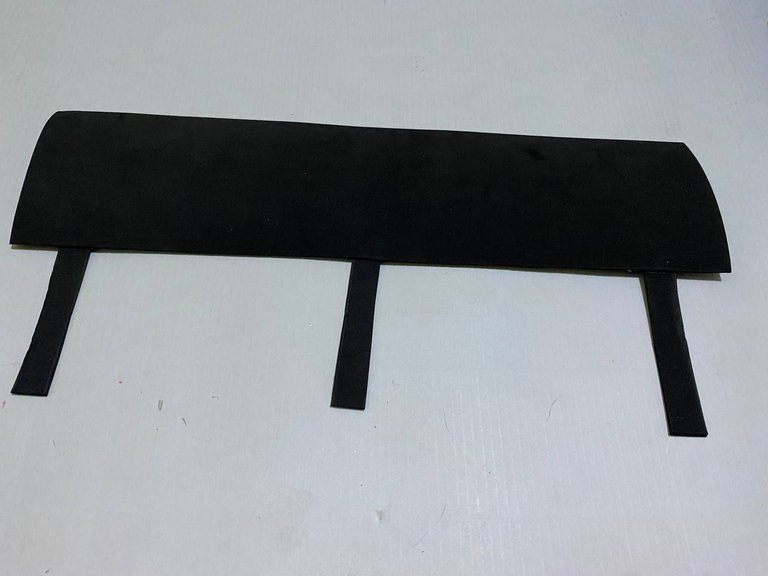
📷 Paso 2 / Step 2
Usando este mismo color realice tres tiras de 1cm de ancho por 7cm de largo, estás tiras las pegue una alejada de la otra sobre la base realizada en el paso anterior.
Using this same color, make three strips of 1cm wide by 7cm long, these strips are glued one away from the other on the base made in the previous step.
 |  |
|---|
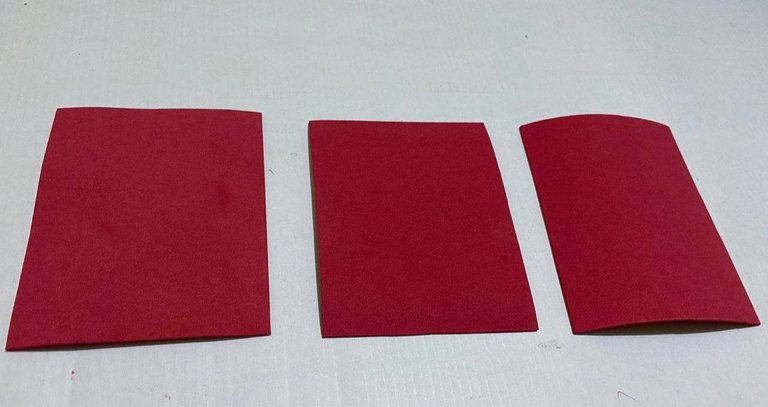
❤️ Paso 3 / Step 3
Posteriormente en foami liso color rojo recorte tres cuadrados de 8cm de ancho por 9,50cm de largo, estás medidas las saqué de acuerdo a las fotos que yo tenía, listo los cuadros procedí a pegar las fotos en cada uno de los cuadros.
Then I cut out three squares of 8cm wide by 9.50cm long in plain red foami, these measures were taken according to the photos I had, ready the pictures I proceeded to paste the photos in each of the pictures.
 |  |
|---|
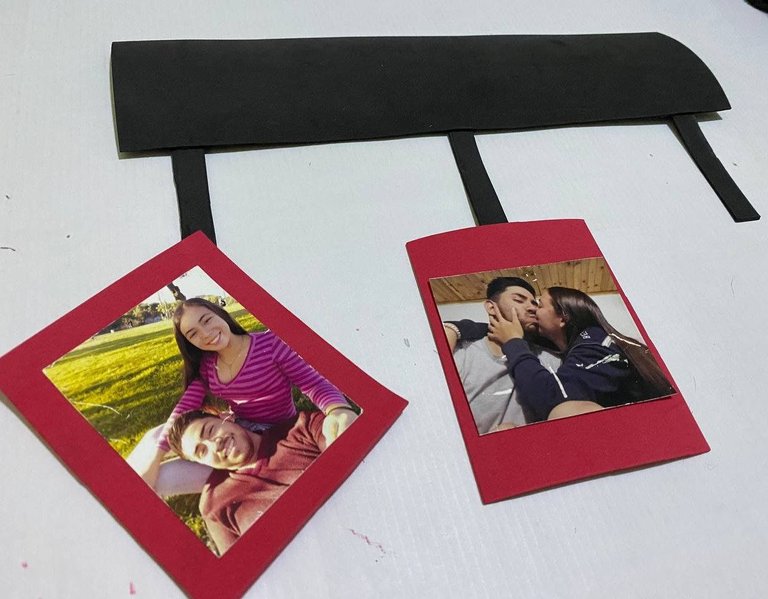
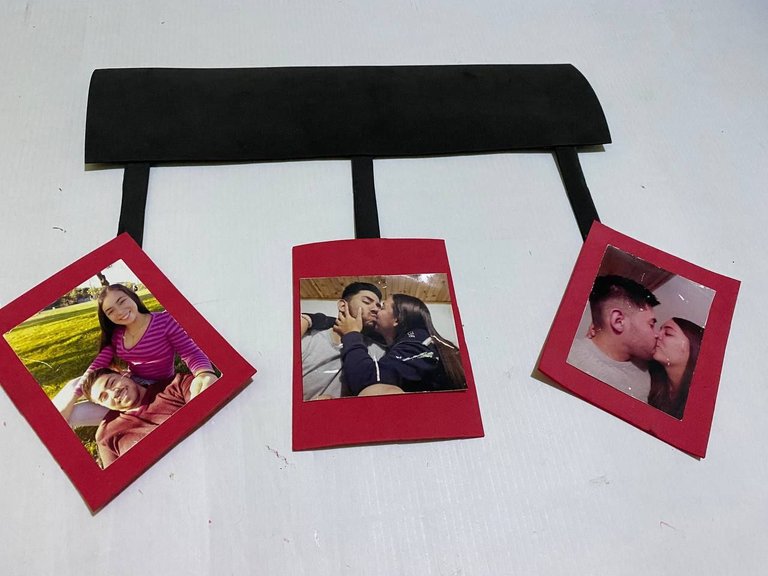
📷 Paso 4 / Step 4
Estás fotos con el borde rojo las pegues sobre las tiras que hice en el paso dos, las dos de las puntas las puse un poco en diagonal mientras la del medio si la dejé centrada.
These photos with the red border are glued on the strips that I made in step two, the two of the tips I put them a little diagonally while the middle one I left centered.
 |  |
|---|
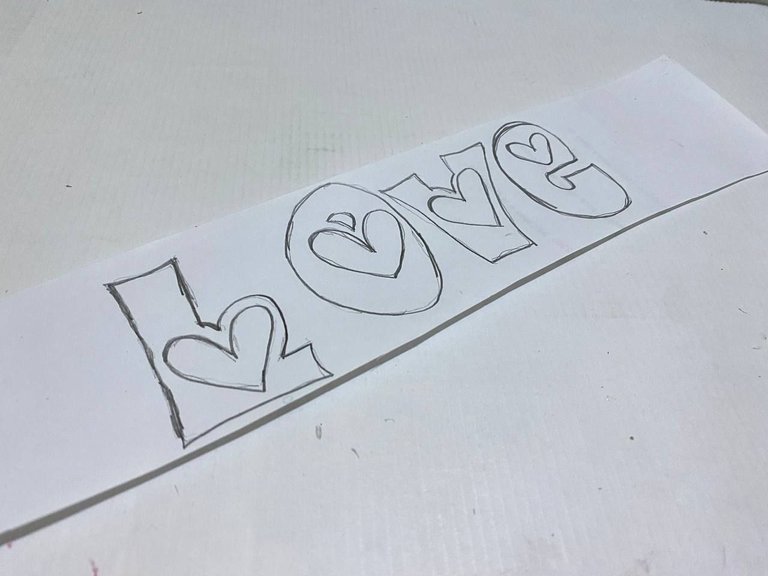
❤️ Paso 5 / Step 5
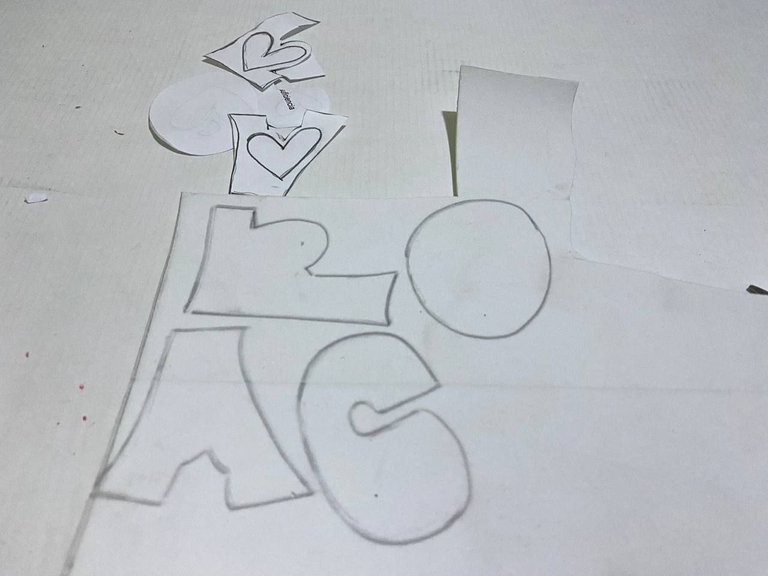
Luego en un trozo de hoja blanca realice la palabra LOVE en letras mayúsculas y agregándoles corazones a cada una de ellas, seguidamente transferí en foami escarchado color blanco y como siempre les recomiendo usar los moldes de forma al revés para que al voltear quede en el lado correcto y la escarcha no se dañe.
Then on a piece of white paper I made the word LOVE in capital letters and added hearts to each of them, then I transferred in white frosted foami and as always I recommend using the molds upside down so that when you flip it is on the right side and the frosting is not damaged.
 |  |
|---|
📷 Paso 6 / Step 6
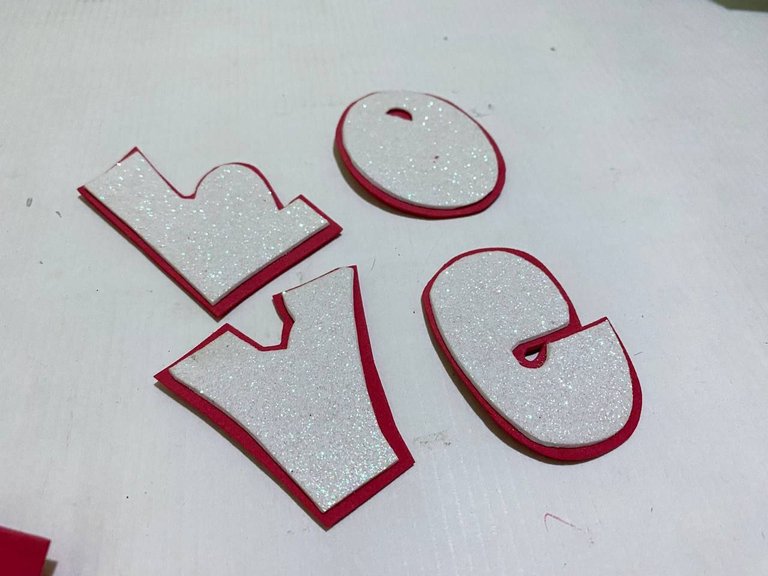
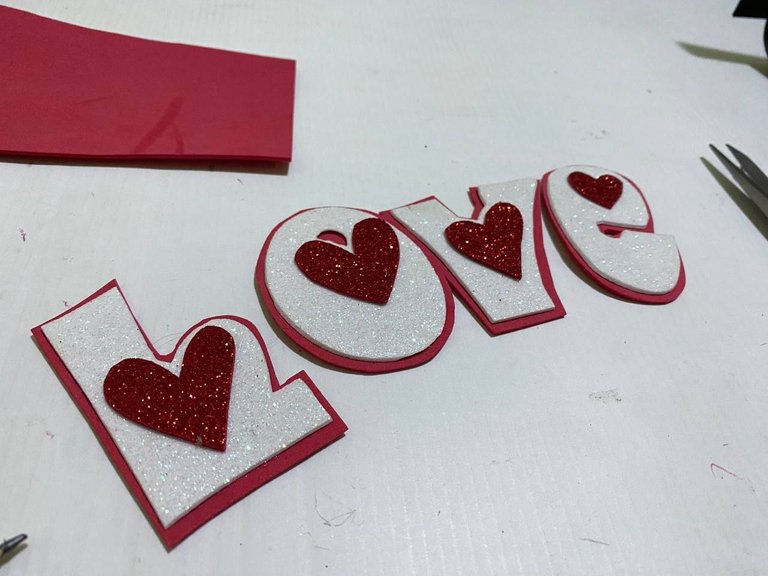
Para resaltar las letras y combinar un poco los colores pegue las letras LOVE sobre foami liso color rojo y recorte cada una de ellas dejando un pequeño borde. Por otro lado en foami rojo escarchado recorte los corazones que corresponden a cada letra y pegue sobre ellas.
To highlight the letters and combine the colors a little bit, glue the letters LOVE on plain red foami and cut out each one of them leaving a small border. On the other hand, cut out the hearts that correspond to each letter on frosted red foami and glue them on top.
 |  |
|---|
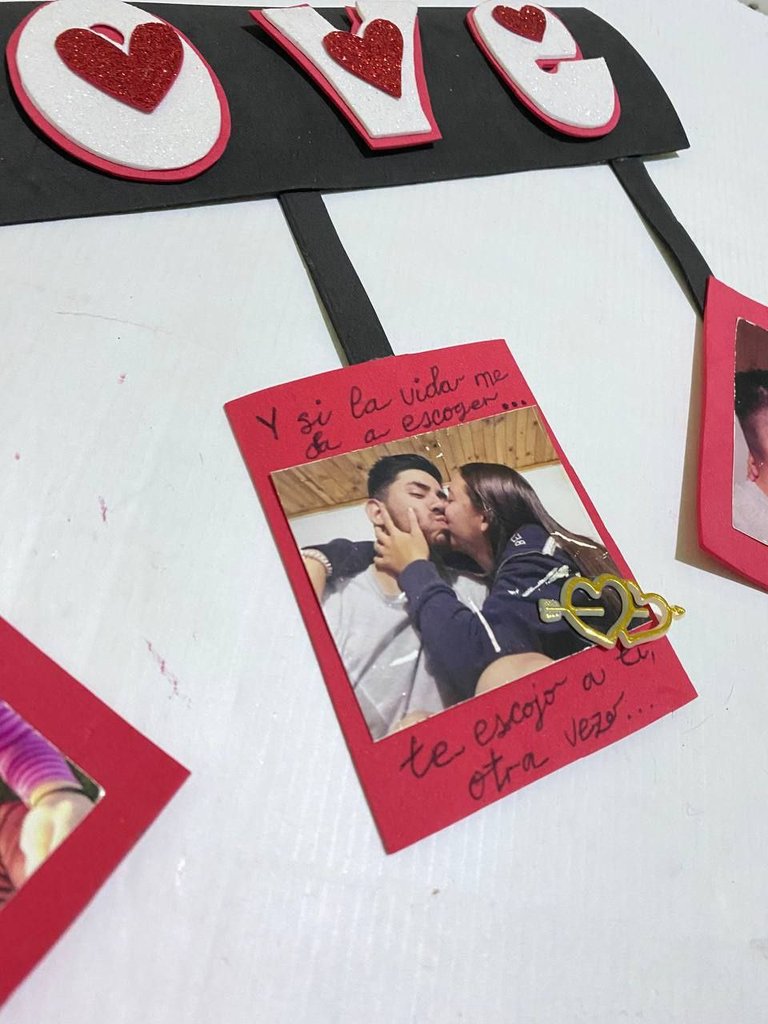
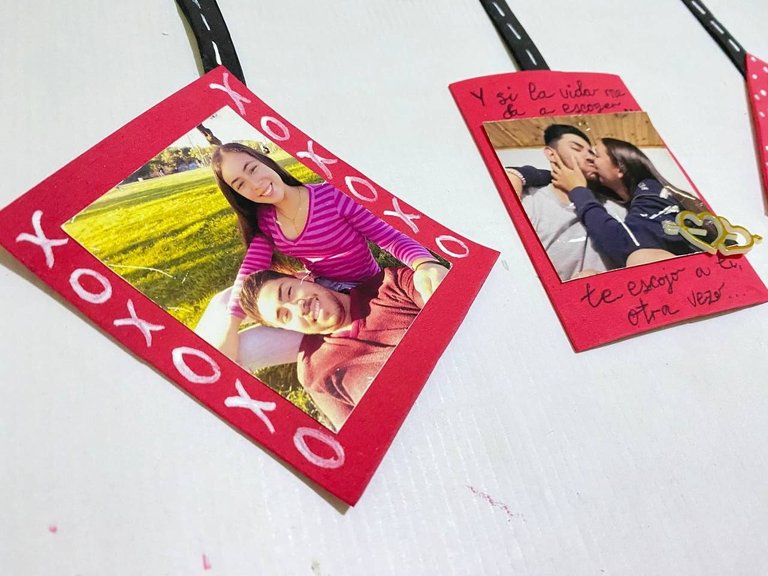
❤️ Paso 7 / Step 7
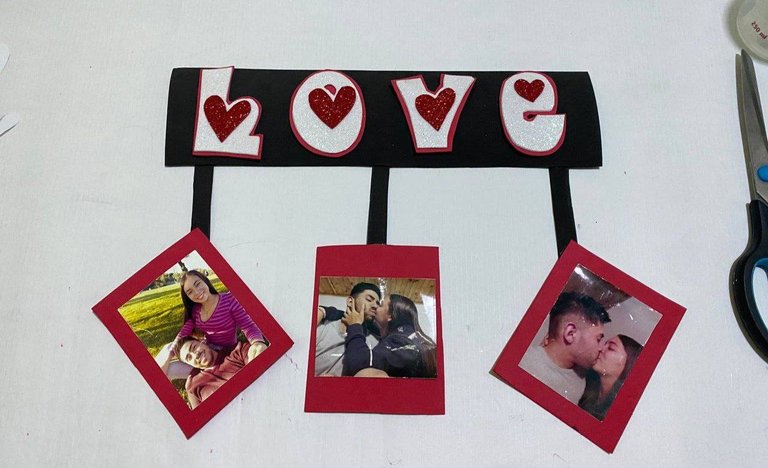
Las letras las pegue sobre la base negra y para las fotos decore colocando una linda frase en la foto del medio y para las otros solo decorados en blanco una XO que significa besos y abrazos y en la otro solo puntos.
I glued the letters on the black base and for the photos I decorated by placing a nice phrase in the middle photo and for the others I decorated only in white an XO that means kisses and hugs and in the other one only dots.
 |  |  |
|---|
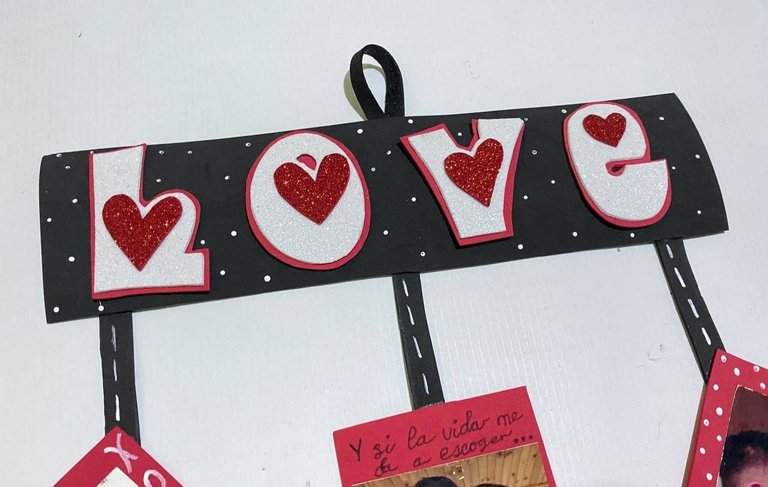
📷 Paso 8 / Step 8
Para dar un poco de luz en el área color negro agregue puntos de color blanco y para colgar pegue una pequeña tira en el centro de la base negra.
To give a little light in the black area add white dots and for hanging glue a small strip in the center of the black base.
 |  |
|---|
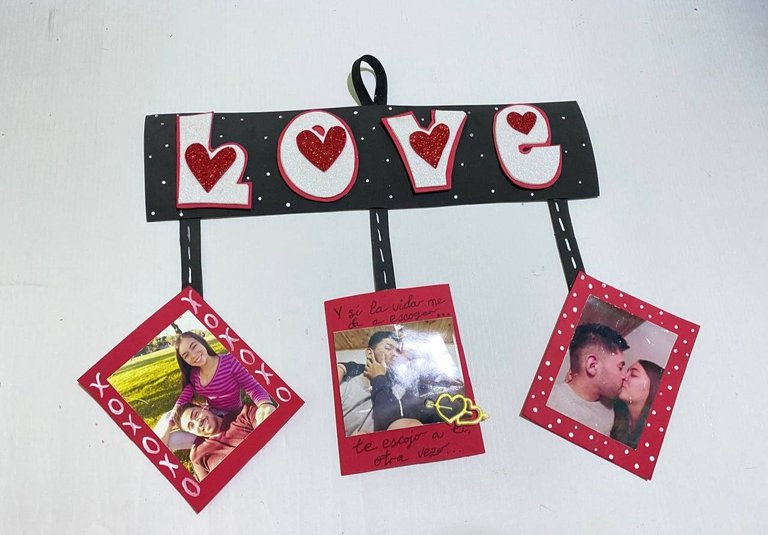
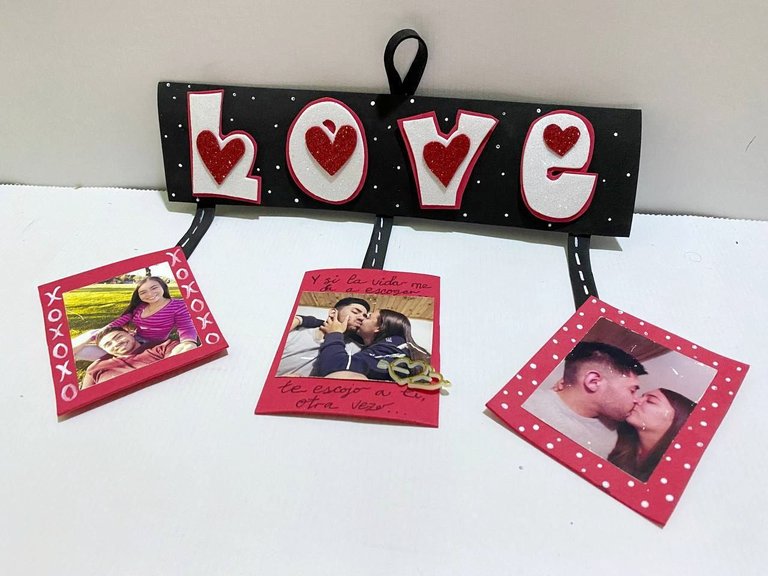
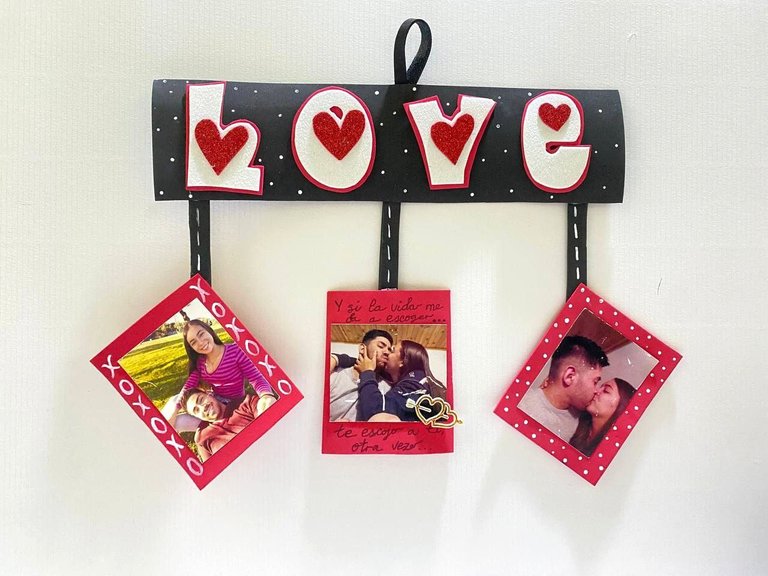
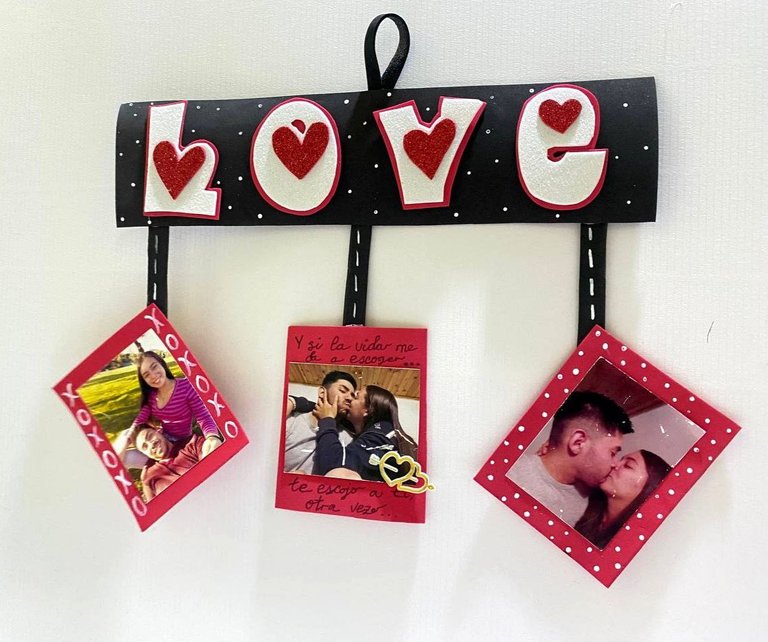
Creación finalizada / Creation completed⬇️
¡Y de esta forma obtuve un hermoso regalo con fotografías! 👩🏻🎨📷.
El resultado personalmente me gustó mucho, es una linda forma de mantener presente esos recuerdos aparte de ser económico, espero les haya gustado tanto como a mí.
And in this way I got a beautiful gift with photographs! 👩🏻🎨📷.
I personally liked the result very much, it is a nice way to keep those memories present besides being economical, I hope you liked it as much as I did.
See you in a new creation✨❤️👩🎨
Mil gracias por leerme una vez
Nos vemos en una próxima publicación.
Muchas bendiciones y abrazos digitales🤗
Thank you very much for reading me once
See you in an upcoming post.
Many blessings and digital hugs🤗
👩🏼💻 Edición: Inshot y Canva / Edition: Inshot and Canva
✨ Traducción: DeepL.com / Translation: DeepL.com

A very beautiful piece to conmmemorate special moments 💜
Posted using Neoxian City