| Esp | Eng |
|---|---|
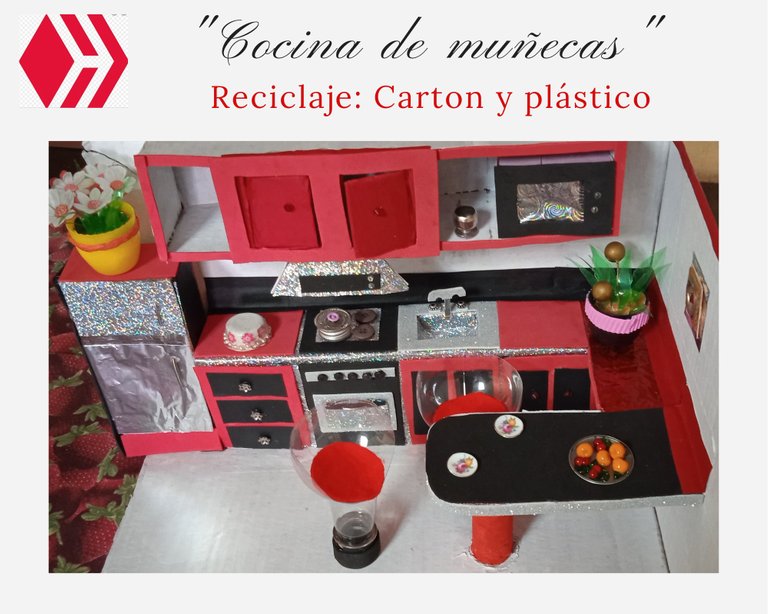
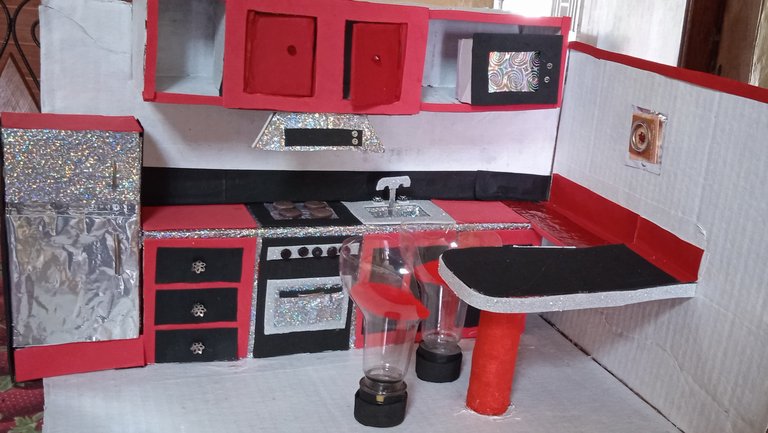
| Hola amigos, les presento Cocina de muñecas con material de provecho: Cartón, rollo de papel, botellas de plástico, y muchas ganas de hacer cosas hermosas y fabulosas. Mi hermosa cocina de muñecas, espero les guste. | Hello friends, I present Dolls kitchen with useful material: cardboard, paper roll, plastic bottles, lots of material and desire to make beautiful and fabulous things. My beautiful doll kitchen, I hope you like it. |
| Materiales: | Materials: |
| Cartón cantidad suficiente, silicon con su respectiva pistola o líquido, tirro, tijeras, exacto, regla, pintura al frío blanca, roja y negra, 1 rollo de papel higiénico, foami rojo, negro y plateado, papel metalizado plateado, cartulina roja y negra, botones, y accesorios para las manillas de puertas de los gabinetes y nevera, asi como para las llaves del fregadero. | Cardboard in sufficient quantity, silicone with its respective gun or liquid, tyro, scissors, exact, rula, white, red and black cold paint, 1 roll of toilet paper, red, black and silver foami, silver metallized paper, red and black cardboard, buttons, and accessories for cabinet and refrigerator door handles, as well as for sink faucets. |
| Instrucciones: | Instructions: |
| Paso 1 | Step 1 |
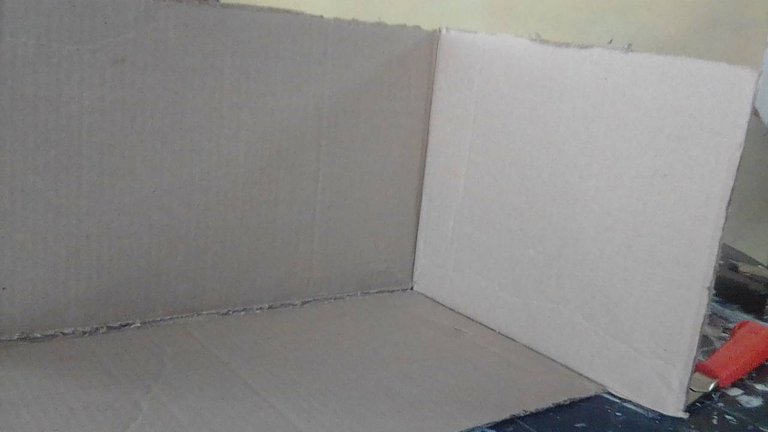
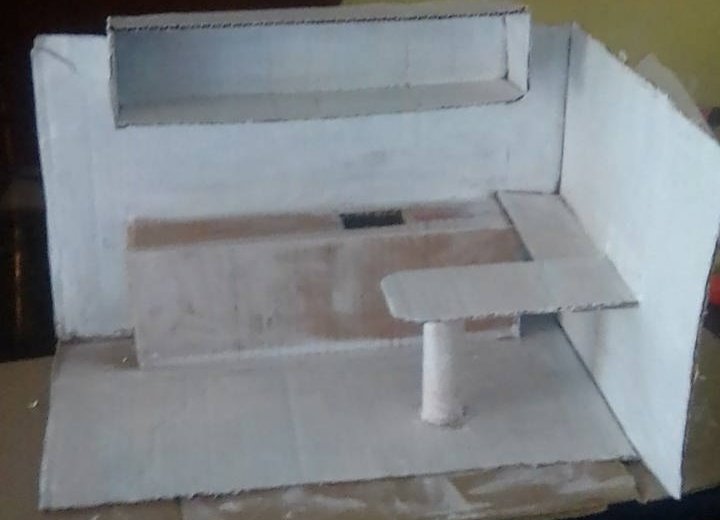
| Corté tres piezas con las siguientes medidas: la primera pieza 42 cm de ancho con 26 cm de alto, la segunda 32 cm ancho con 26 de alto para formar una L, la tercera para el piso 42 cm de ancho con 26 cm de alto. Marque en el cartón y luego corté con el exacto, pegue con silicon las paredes al piso y sujete con tirro. | I cut three pieces with the following measurements: the first piece 42 cm wide with 26 cm high, the second piece 32 cm wide with 26 cm high to form an L shape, the third piece for the floor 42 cm wide with 26 cm high. I marked on the cardboard and then cut with the exact cutter, glued the walls to the floor with silicone and fastened with straps. |
| Paso 2 | Step 2 |
|---|---|
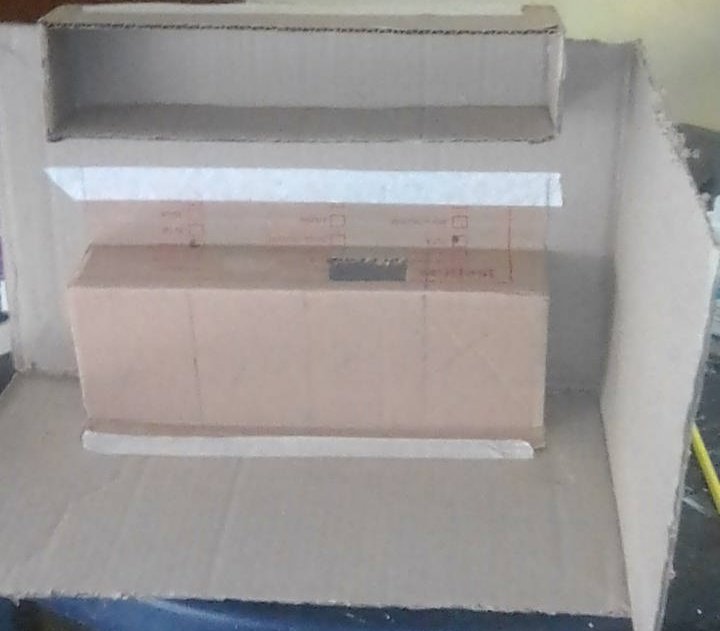
| La parte inferior y superior de los gabinetes, Corte cuatro piezas se 7cm de ancho por 32 de largo y 2 piezas de 7 cm de ancho por 7,5 cm de ancho y forme la parte inferior y posterior, pegue con silicon y ajuste con tirro, luego pegue a las paredes y piso y así tenemos lo principal de la cocina solo faltaría las puertas de los gabinetes y realizar la cocina, el fregadero, y mesones de trabajo. | The bottom and top of the cabinets, cut four pieces of 7cm wide by 32 long and 2 pieces of 7 cm wide by 7.5 cm wide and form the bottom and back, glue with silicone and adjust with tirro, then glue to the walls and floor and so we have the main part of the kitchen just missing the doors of the cabinets and make the kitchen, the sink, and countertops. |
| Paso 3 | Step 3 |
|---|---|
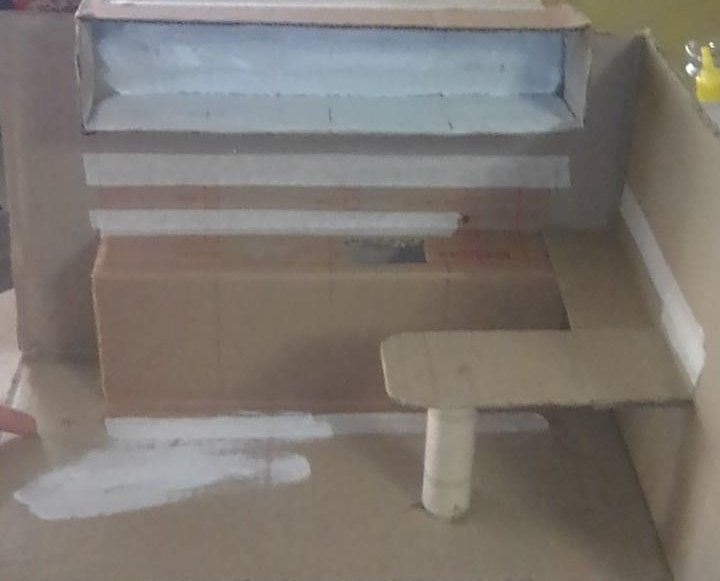
| En este paso haremos el mesón: Corto un listón de 22 cm largo por 5 cm de ancho en forma de U. Y la base es un rollo de papel higiénico cortado para que quede del grosor deseado, y lo coloque a la altura del rollo de papel para no cortarle. Corto las piezas y pago con silicon caliente y ajustó con tirro. | The bottom and top of the cabinets, cut four pieces of 7cm wide by 32 long and 2 pieces of 7 cm wide by 7.5 cm wide and form the bottom and back, glue with silicone and adjust with tirro, then glue to the walls and floor and so we have the main part of the kitchen just missing the doors of the cabinets and make the kitchen, the sink, and countertops. |
| Paso 4 | Step 4 |
|---|---|
| En el siguiente paso pintaremos nuestra cocina: Yo la pinte todo de blanco paredes, gabinetes y piso. | In the next step we paint tell you about our kitchen: I painted it all white walls, cabinets and floor. |
| Paso 5 | Step 5 |
|---|---|
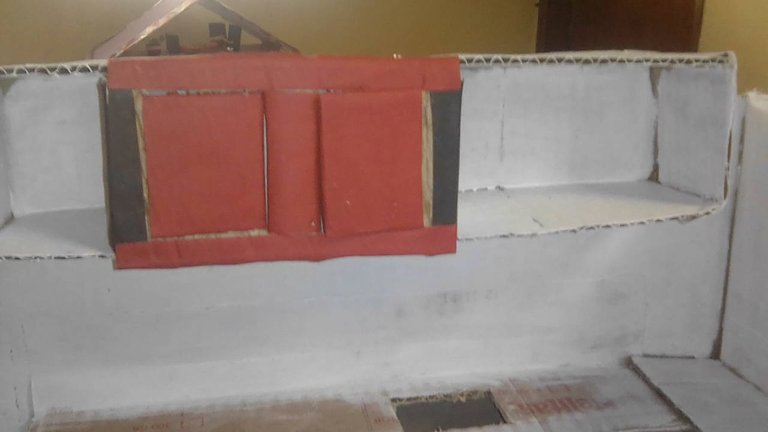
| En este paso haremos el gabinete superior frontal , corte tres piezas de 6 cm de ancho 10 cm de alto para los lados y separador de gabinetes pegue una en medio y las otras dos laa utilice para la pieza frontal con las medidas de 12 cm de ancho por 11 de alto. Corte en el medio con cuidado de dejar un lado sin cortar para hacer las puertas del gabinete. Y pegue con silicon y tirro cuidando que queden bien sujetas a la pieza superior. | In this step we will make the front upper cabinet, cut three pieces of 6 cm wide 10 cm high for the sides and cabinet separator glue one in the middle and the other two use it for the front piece with the measures of 12 cm wide by 11 cm high. Cut in the middle taking care to leave one side uncut to make the cabinet doors. And glue with silicone and tyro taking care that they are well attached to the top piece. |
| Paso 6 | Step 6 |
|---|---|
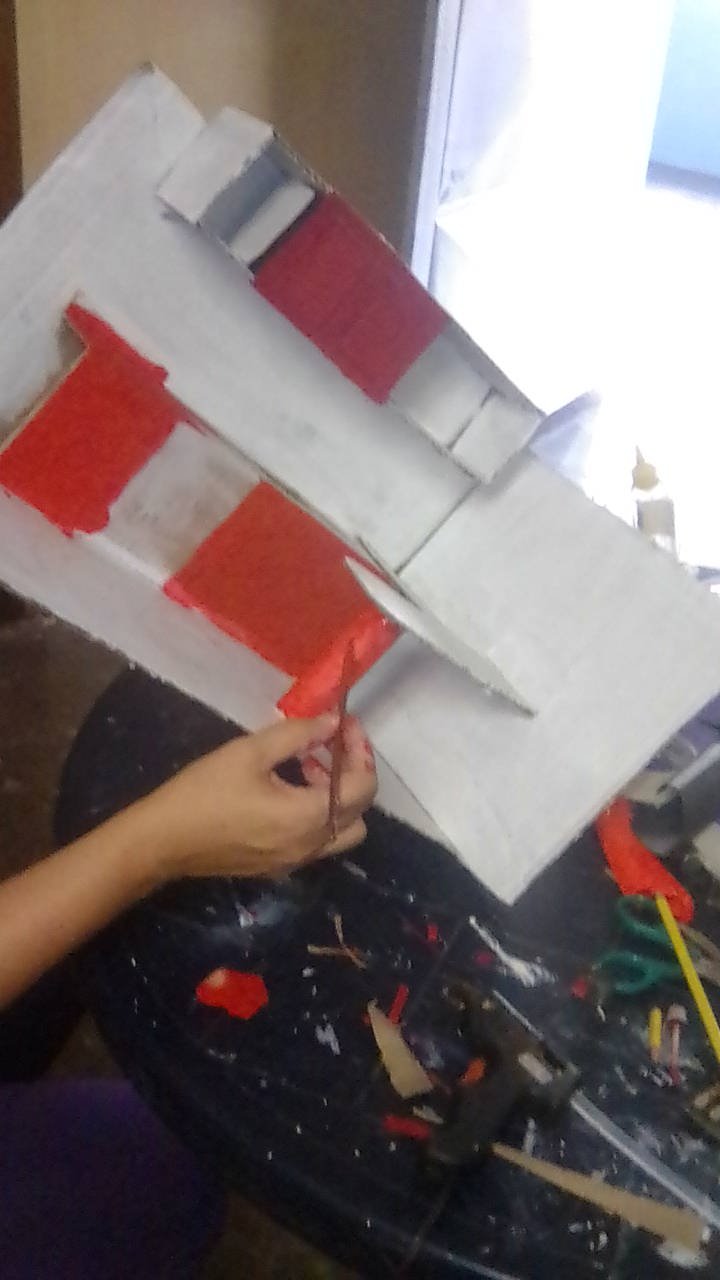
| Pinte con rojo la base del mesón y los gabinetes, lo hice para un mejor acabado aunque igual le pegue foami, cuando estaba haciendo los gabinetes y cocina. | I painted with red the base of the countertop and the cabinets, I did it for a better finish although I still glued foami, when I was making the cabinets and kitchen. |
| Paso 7 | Step 7 |
|---|---|
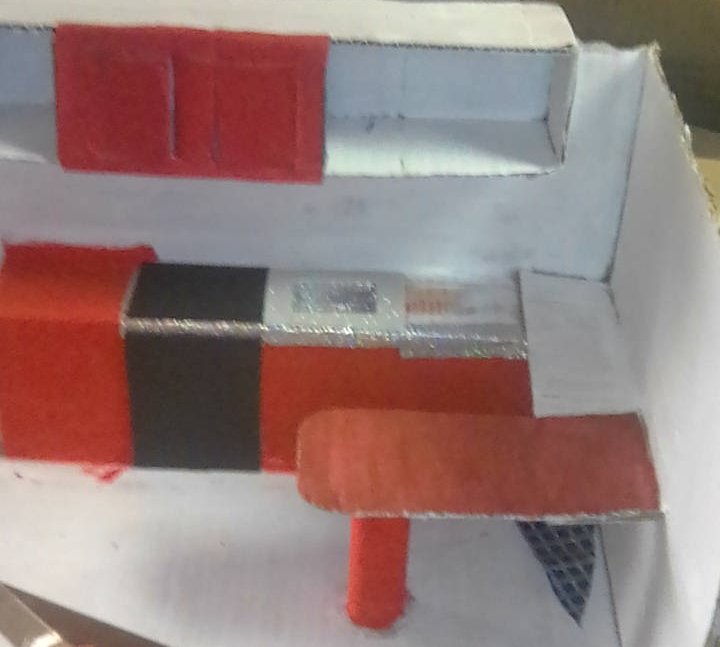
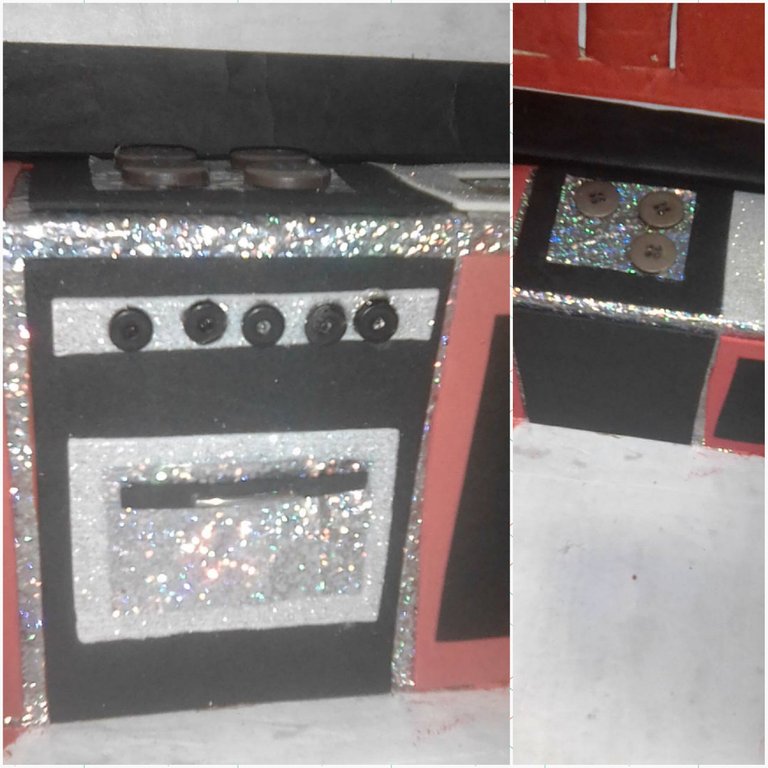
| Corte pedazo de foami negro y rojo de 5 cm ancho de 11 cm de alto, cuatro pedazos tres rojo y uno negro para la cocina. Antes de pegarlo, tape todas las orillas tanto inferiores como superiores con papel metalizado plateado para que se vea un mejor acabado. Para la cocina corte un pedazo de foami negro de 7 cm de ancho por 7 de alto, para el fregadero corte una cavidad cuadrada de 4 cm de ancho por 4 cm de largo para el fregadero, hice una cajita con las mismas medidas forre con papel metalizado introduje en la cabidad y lo pegue. Y listo la cocina y el fregadero, solo faltan los detalles | Cut a piece of black and red foami 5 cm wide and 11 cm high, four pieces, three red and one black for the kitchen. Before gluing, cover all the top and bottom edges with silver foil for a better finish. For the kitchen I cut a piece of black foami of 7 cm wide by 7 cm high, for the sink I cut a square cavity of 4 cm wide by 4 cm long for the sink, I made a little box with the same measures, lined it with metallic paper, put it in the cavity and glued it. And ready the kitchen and the sink, only the details are missing. |
| Paso 8 | Step 8 |
|---|---|
| Los otros pedazos de foami rojo de 5cm por 11 cm, los pegue a la parte superior de los mesones, y pegue foami tambien en la parte inferior para simular los gabinetes inferiores, solo faltan detalles para darle originalidad a nuestra cocina. | The other pieces of red foami of 5cm by 11 cm, I glued them to the top of the countertops, and also glued foami on the bottom to simulate the lower cabinets, only missing details to give originality to our kitchen. |
| Paso 9 | Step 9 |
| ------------ | ------------ |
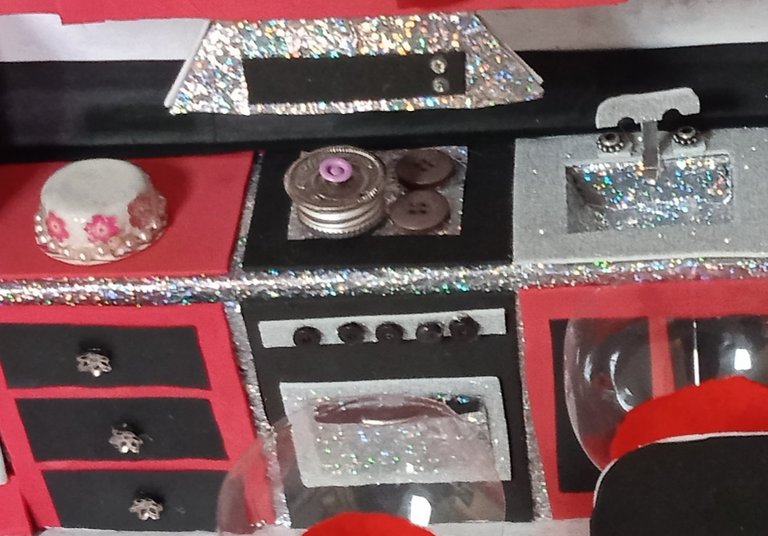
| La cocina, pegue 4 botones negro para simular las estufas, el horno pegue una pieza de 4 x 4 cm, plateada la pegue y coloque una pieza de metal que simula la manilla del horno, también pegue unos botones pequeños para simular los encenderdores. | The kitchen, glue 4 black buttons to simulate the stoves, the oven glue a piece of 4 x 4 cm, silver glue it and place a piece of metal that simulates the handle of the oven, also glue a few small buttons to simulate the igniters, the oven, the stove and the ovens. |
| Paso 10 | Step 10 |
|---|---|
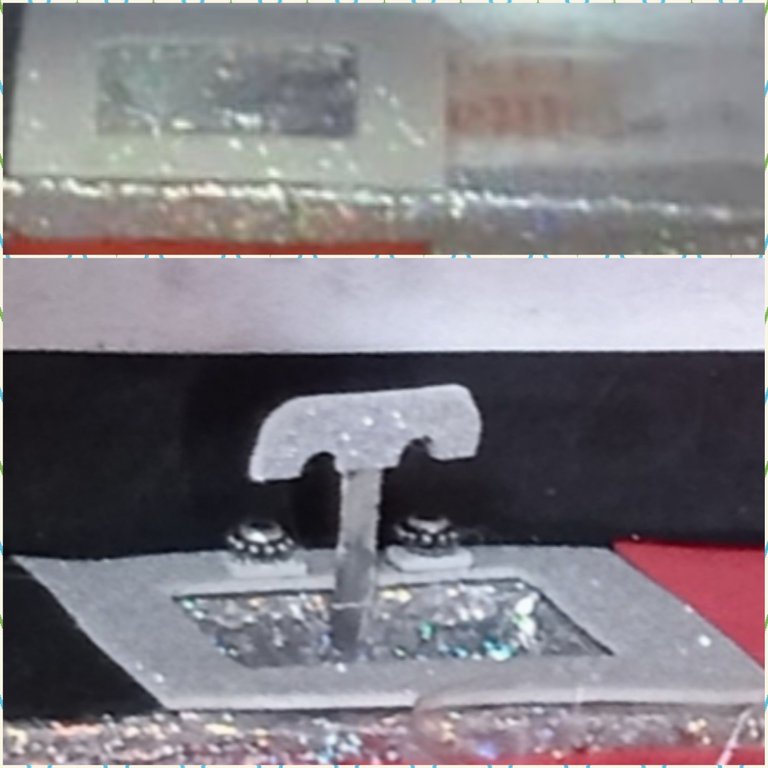
| El fregadero ya lo tengo adelantado solo debo ahora pegar la griferia que la hice en cartón y luego le pegue foami y aluminio, y coloque dos brochecitos que simulan los abridores de la griferia. | The sink is now ready, I just have to glue the faucet, which I made out of cardboard and then I glued foami and aluminum, and I put two little brooches that simulate the faucet openers. |
| Paso 11 | Step 11 |
|---|---|
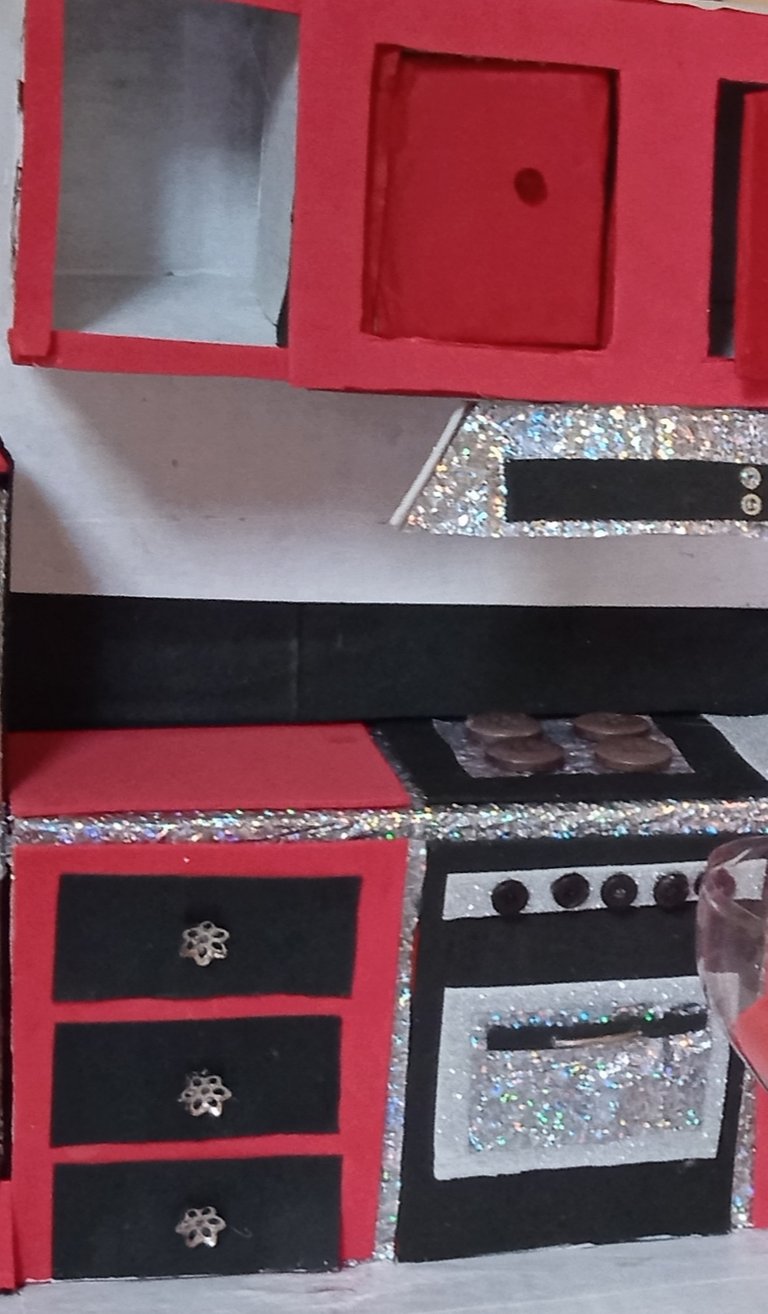
| Las puertas de los gabinetes lo hice en cartulina negra, y puse las manillas con cuentas para bisutería rojas y plata. | I made the cabinet doors out of black cardboard, and attached the handles with red and silver jewelry beads. |
| Paso 12 | Step 12 |
|---|---|
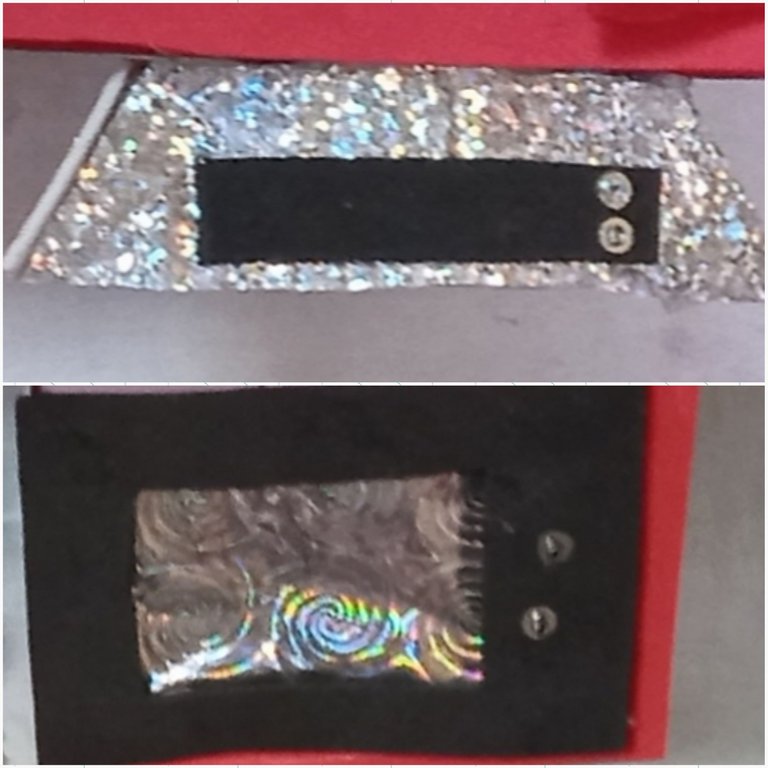
| El horno microondas lo hice con una cajita la forre con papel metal plateado, y coloque arriba foami negro, para simular los botones de encendido coloque una lentejuela y canutillos, igualmente la campana la forre en papel metal y foami negro e hice igualmente con lentejuelas y canutillos los botones de encendido. | I made the microwave oven with a little box I lined it with silver metal paper, and placed black foami on top, to simulate the power buttons I placed a sequin and beads, also the bell I lined it with metal paper and black foami and I also made the power buttons with sequins and beads. |
| Paso 13 | Step 13 |
|---|---|
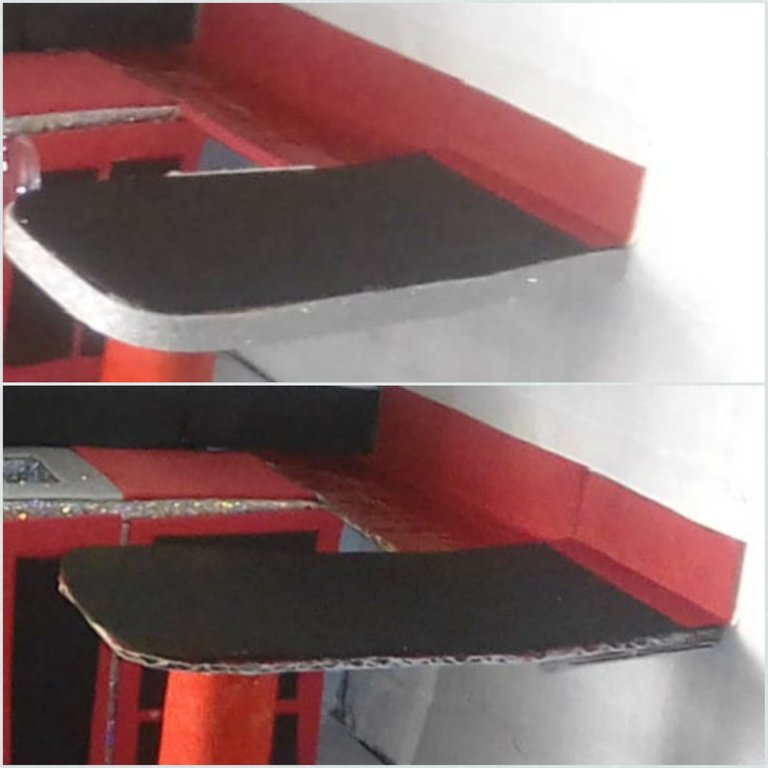
| El meson de trabajo lo forre de rojo metalizado, y el desayunado de negro de foami negro y borde de foami plateado. | I lined the work table with metallic red, and the breakfast table with black foami and silver foami border. |
| Paso 14 | Step 14 |
|---|---|
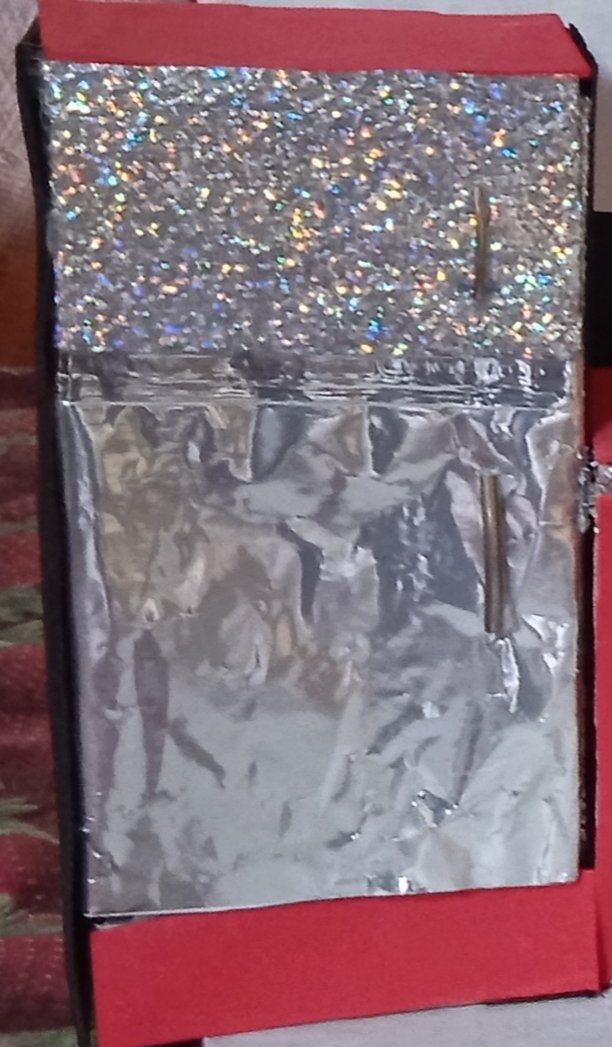
| La nevera la hice de una caja de celular y forre a mi gusto por supuesto en rojo, negro y plateado. | I made the cooler out of a cell phone box and lined it to my liking in red, black and silver of course. |
| Paso 15 | Step 15 |
|---|---|
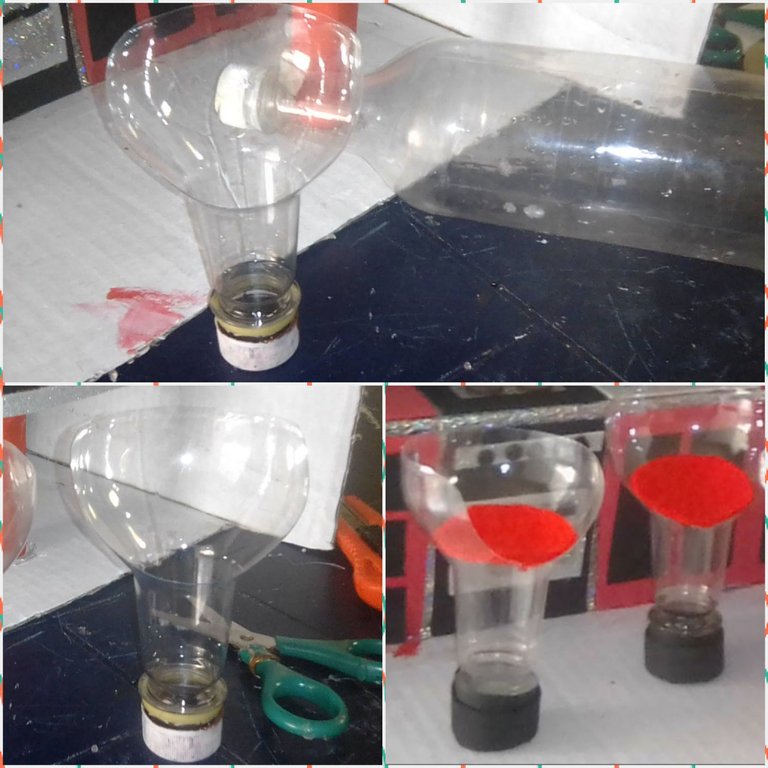
| Por último mis espectaculares y modernas sillas: son botella plásticas con sus tapas la corte con un exacto, corte 2 pedazos de fieltro redondo rojo, y forre las tapas con cartulina y foami, no quise pintarlas para darles un aire moderno y bohemio. | Finally my spectacular and modern chairs: they are plastic bottles with their lids, I cut them with an exacto, cut 2 pieces of red round felt, and lined the lids with cardboard and foami, I didn't want to paint them to give them a modern and bohemian air. |
| Despedida: | Farewell: |
|---|---|
| Lo demás es detalles: las flores, la torta, la olla, son de la casita de muñeca de mi niña, espero que les guste y gracias por visitar mi post | The rest is details: the flowers, the cake, the pot, are from my little girl's doll house, I hope you like it and thanks for visiting my post. |

Créditos:
Translated with www.DeepL.com/Translator (free version)
Fotos de mi propiedad tomadas con mi celular Samsung J2 Prime.
Foto de portada editada con Canva.
Congratulations @yanethstars! You have completed the following achievement on the Hive blockchain and have been rewarded with new badge(s):
Your next target is to reach 700 upvotes.
Your next payout target is 100 HP.
The unit is Hive Power equivalent because your rewards can be split into HP and HBD
You can view your badges on your board and compare yourself to others in the Ranking
If you no longer want to receive notifications, reply to this comment with the word
STOPTo support your work, I also upvoted your post!
Check out the last post from @hivebuzz:
Support the HiveBuzz project. Vote for our proposal!
Hermosa. Parece real. No vemos cosas como estás en Hive con mucha frecuencia.. Quedó fantástica y es una gran trabajo manual con muchísimos detalles.
Gracias por compartir.
Te felicito.
Cuando el trabajo habla por si solo,tanto esfuerzo y dedicación.
Gracias por llenar tu feed con contenido de valor