Tenía mucho tiempo que quería comenzar a subir mis dibujos a Hive, siempre he dibujado estos personajes Kawaii, los adorno porque transmiten mucha ternura y se los hacía mucho a mis hijas cuando estaban pequeñas, en sus cuadernos, los pintaba en franelas, y también se los regalaba con mensajitos de amor.
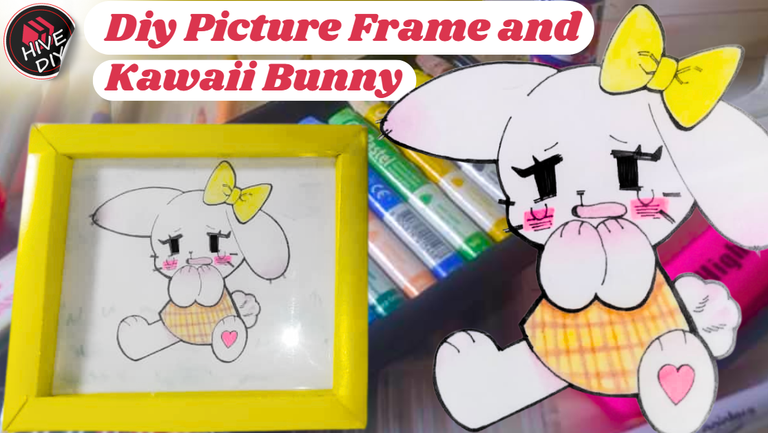
Hoy quería realizar una bella conejita, que es de mis preferidas, que coloreé con colores, delineé con estilógrafo y coloqué algo de color en el fondo con tizas, todo en tonos pasteles. No sabía como presentarla, así que realicé un marco o cuadro en cartulina, con un patrón o plantilla muy fácil de hacer, una opción que me parece ideal para preservar nuestros dibujos y regalarlos con una buena presentación. Los invito a ver este paso a paso.
I've been wanting to start uploading my drawings to Hive for a long time. I've always drawn these Kawaii characters, I decorate them because they convey a lot of tenderness and I made them a lot for my daughters when they were little, in their notebooks, I painted them on flannels, and I also gave them to them with little love messages.
Today I wanted to make a beautiful bunny, which is one of my favorites, which I colored with colors, outlined with a stylograph and put some color in the background with chalk, all in pastel tones. I didn't know how to present it, so I made a frame or painting on cardboard, with a pattern or template that is very easy to make, an option that I think is ideal to preserve our drawings and give them away with a good presentation. I invite you to see this step by step.

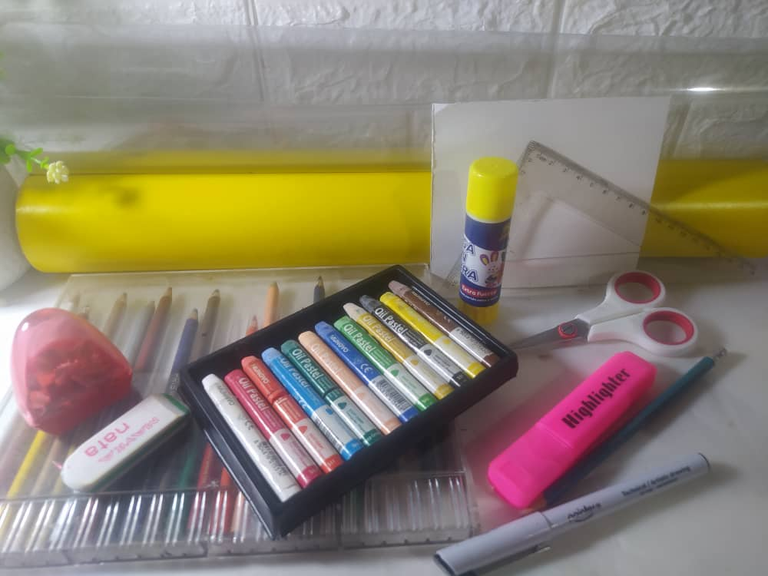
- Acetato.
- Cartulina amarilla.
- Cartulina beige.
- Colores y tizas.
- Lápiz, borrador, sacapuntas y resaltador.
- Estilógrafo.
- Pega en barra, regla y tijera.
- Cinta adhesiva.
- Acetate.
- Yellow cardboard.
- Beige cardboard.
- Colors and chalk.
- Pencil, eraser, sharpener and highlighter.
- Stylograph.
- Glue stick, ruler and scissors.
- Adhesive tape.

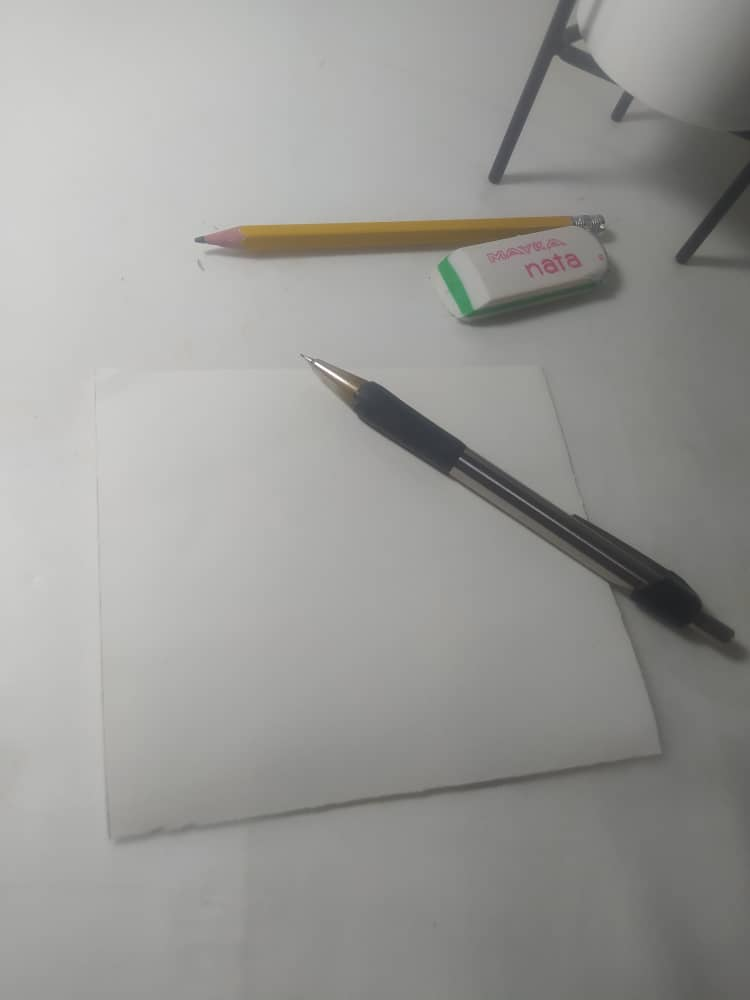
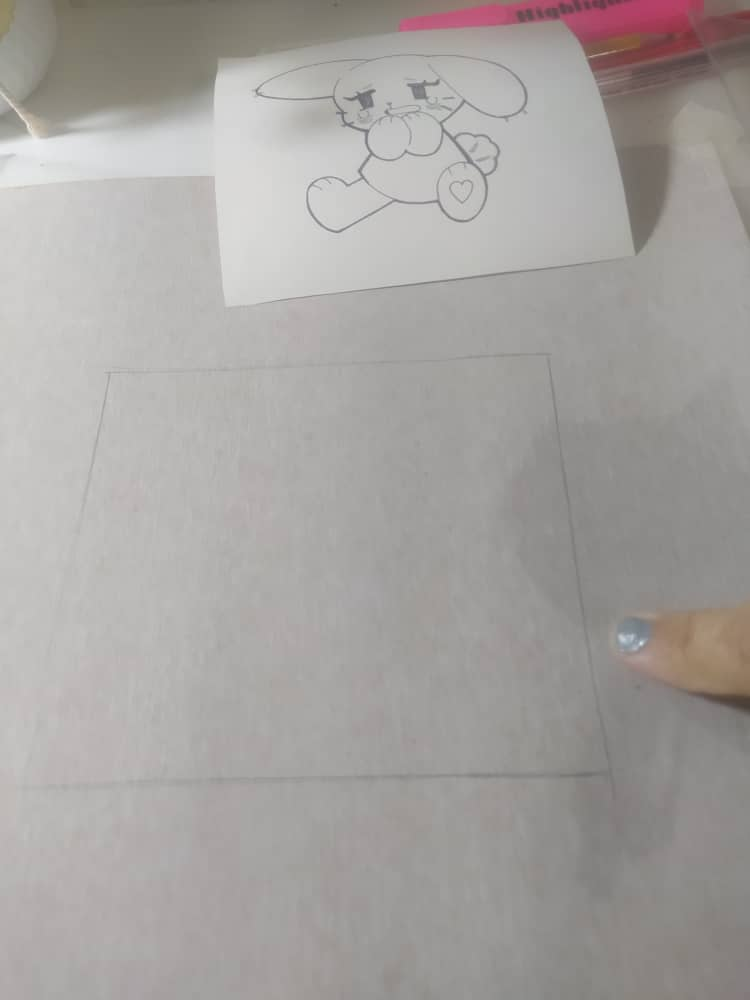
Corté un cuadrado en cartulina beige, que será el lienzo por decirlo de una forma, donde realicé mi dibujo. En este caso mide 12cms por 12cms, pero la medida es totalmente a gusto personal.
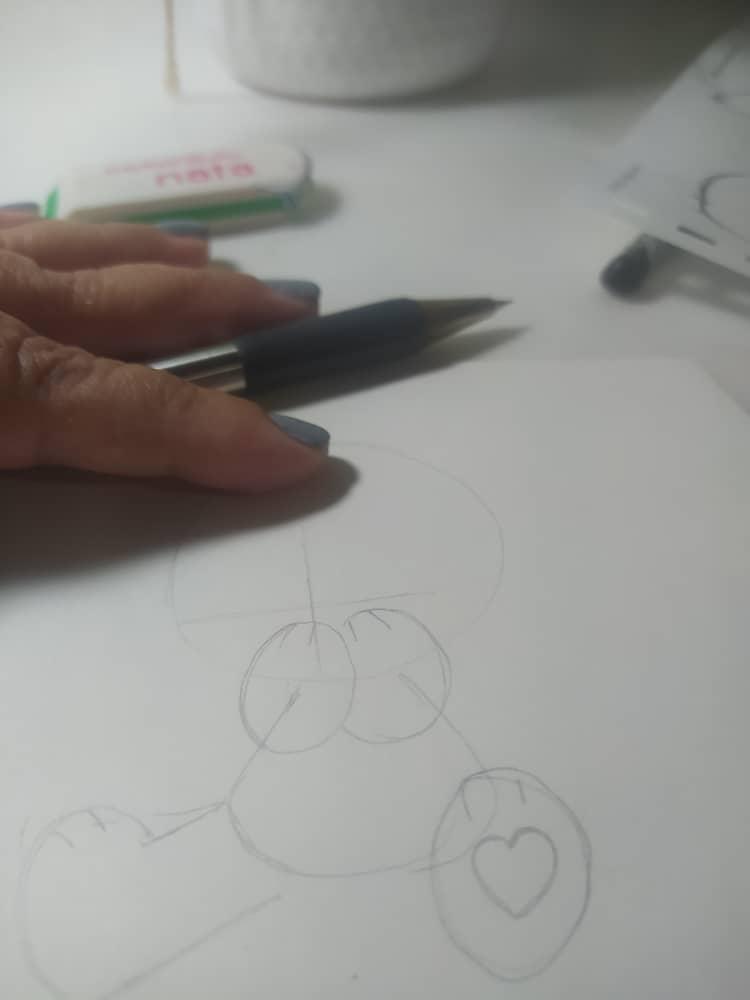
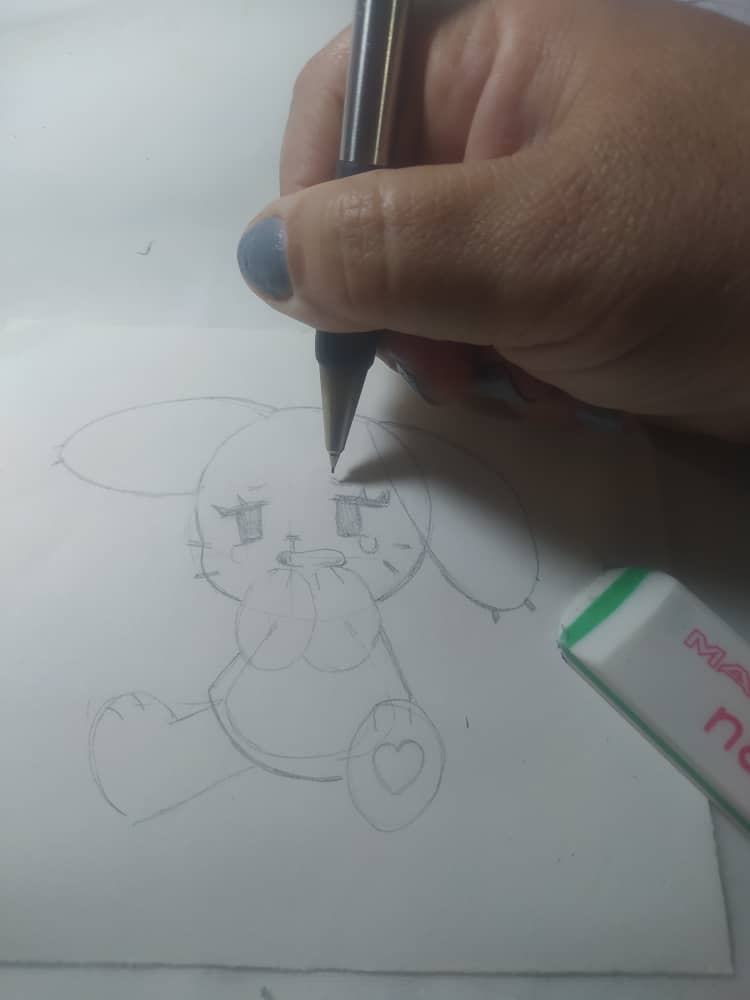
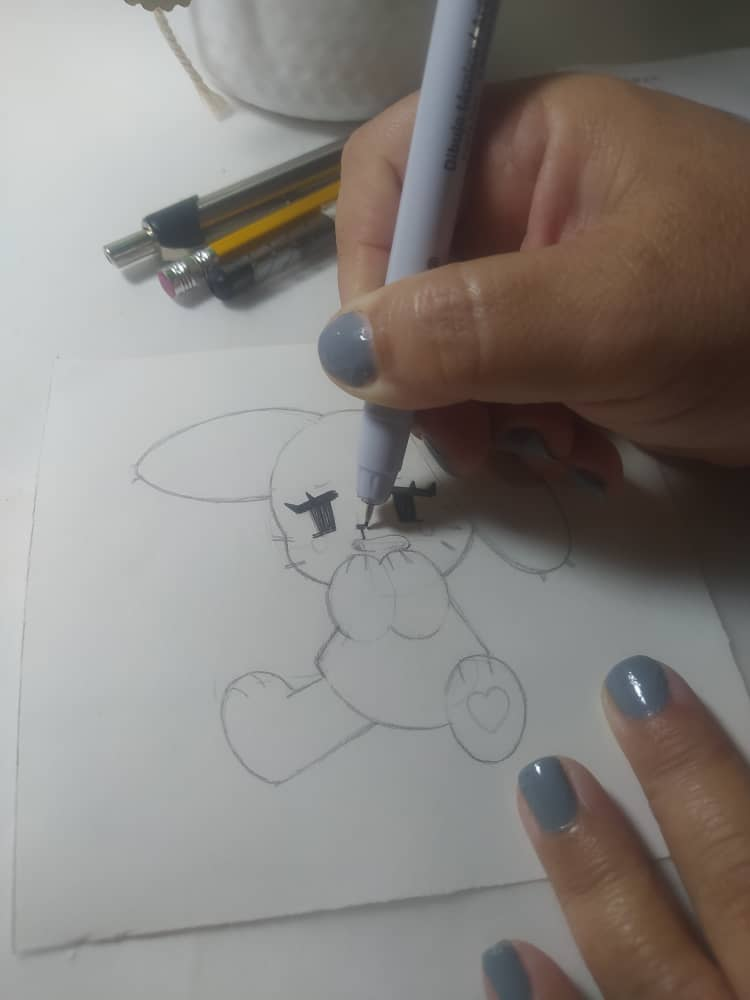
Realicé primero el boceto de la conejita, comenzando por la cabeza con un círculo que éste determinaría el tamaño de todo lo demás. Luego, comencé a darle el delineado definitivo con el estilógrafo, que es un marcador negro de punta muy fina.
I cut a square out of beige cardboard, which will be the canvas, so to speak, where I made my drawing. In this case it measures 12cm by 12cm, but the measurement is totally up to personal taste.
I first made the sketch of the bunny, starting with the head with a circle that would determine the size of everything else. Then, I began to give it the final outline with the stylograph, which is a very fine-tipped black marker.
 |  |  |  |
|---|
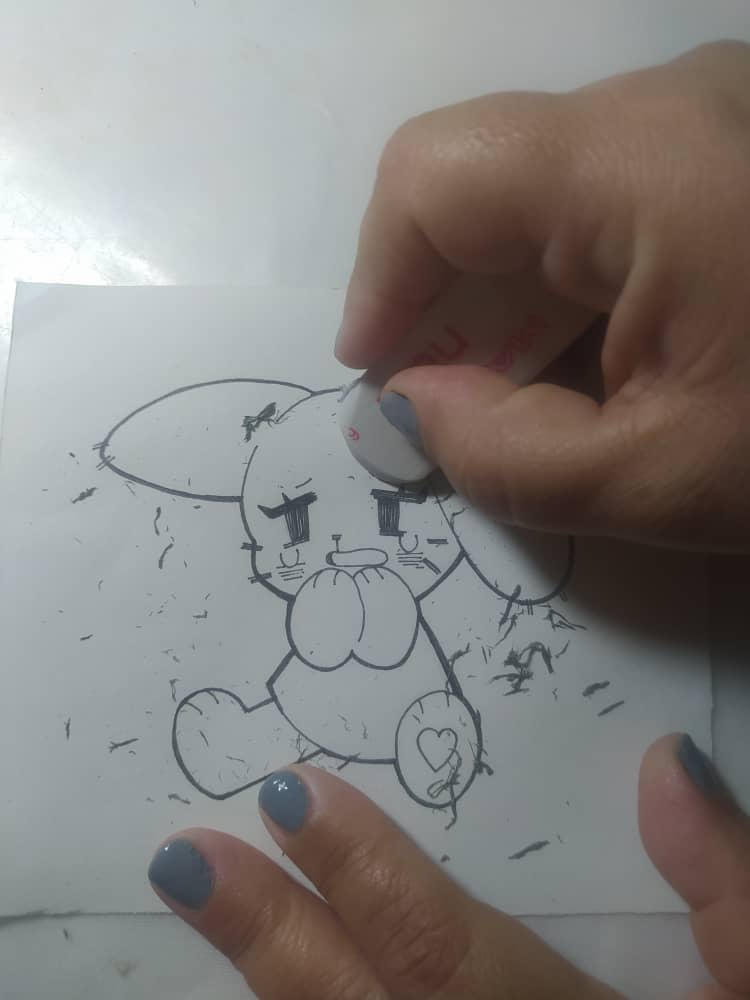
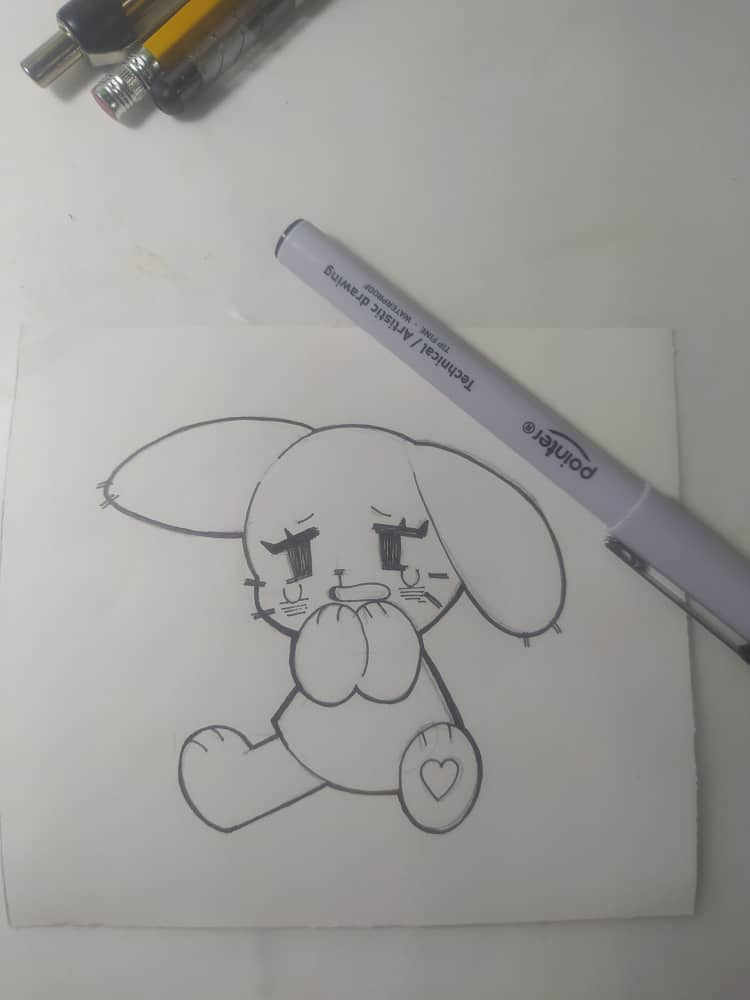
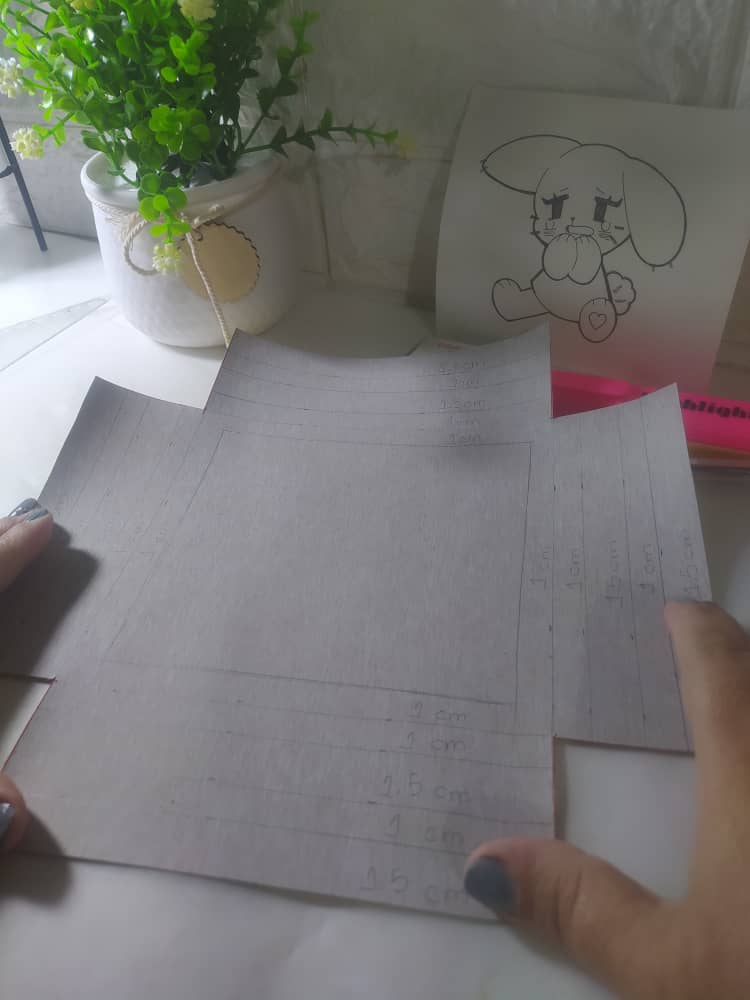
Teniendo el diseño terminado, borré todas las líneas realizadas con lápiz o portaminas, para tener el diseño ya limpio.
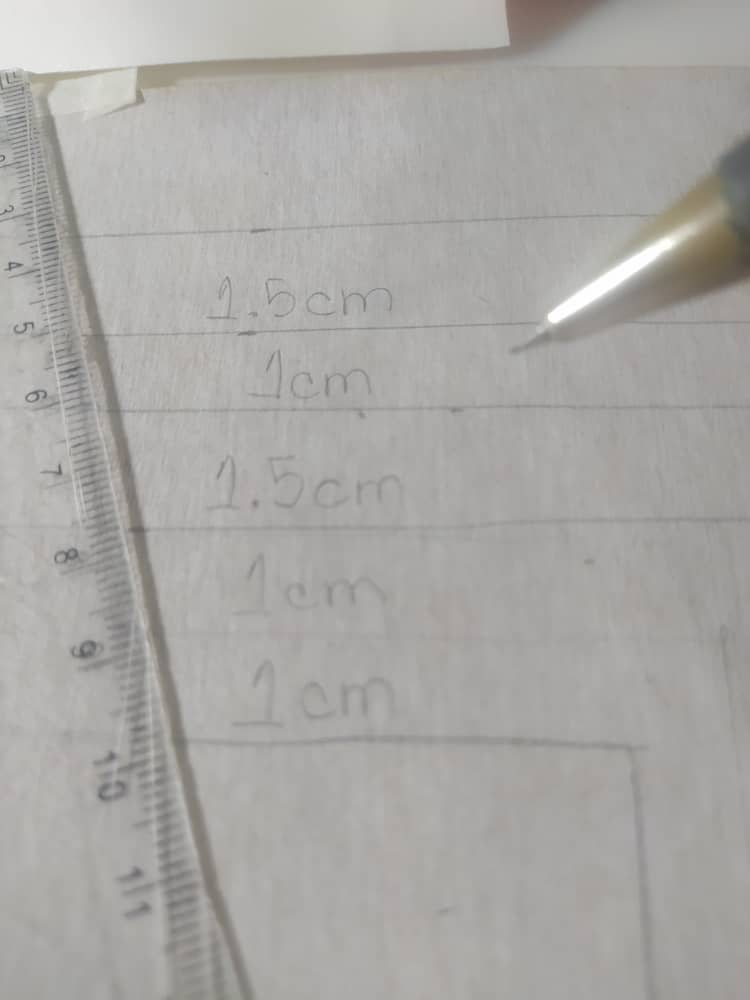
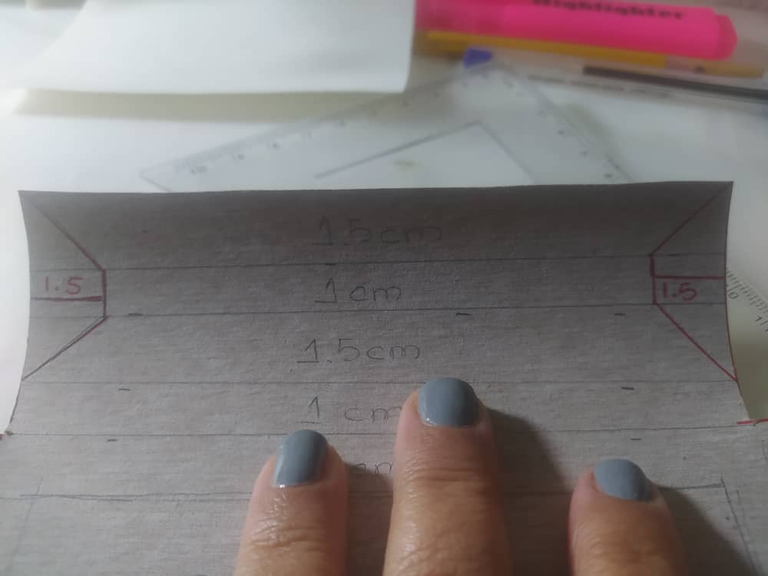
El cuadrado del dibujo lo marqué en el reverso de la cartulina amarilla, y a partir de ahí tracé líneas con las siguientes medidas, para formar el marco que se va a armar en su totalidad con solo la cartulina amarilla, las medidas son:
1 cm
1 cm
1,5 cms
1 cm
1,5 cms
Esto lo realicé por los cuadro lados del cuadrado:
Once the design was finished, I erased all the lines made with a pencil or mechanical pencil, so that the design was clean.
I marked the square of the drawing on the back of the yellow cardboard, and from there I drew lines with the following measurements, to form the frame that will be assembled entirely with only the yellow cardboard, the measurements are:
1 cm
1 cm
1.5 cms
1 cm
1.5 cmsI did this on the four sides of the square:
 |  |  |  |
|---|
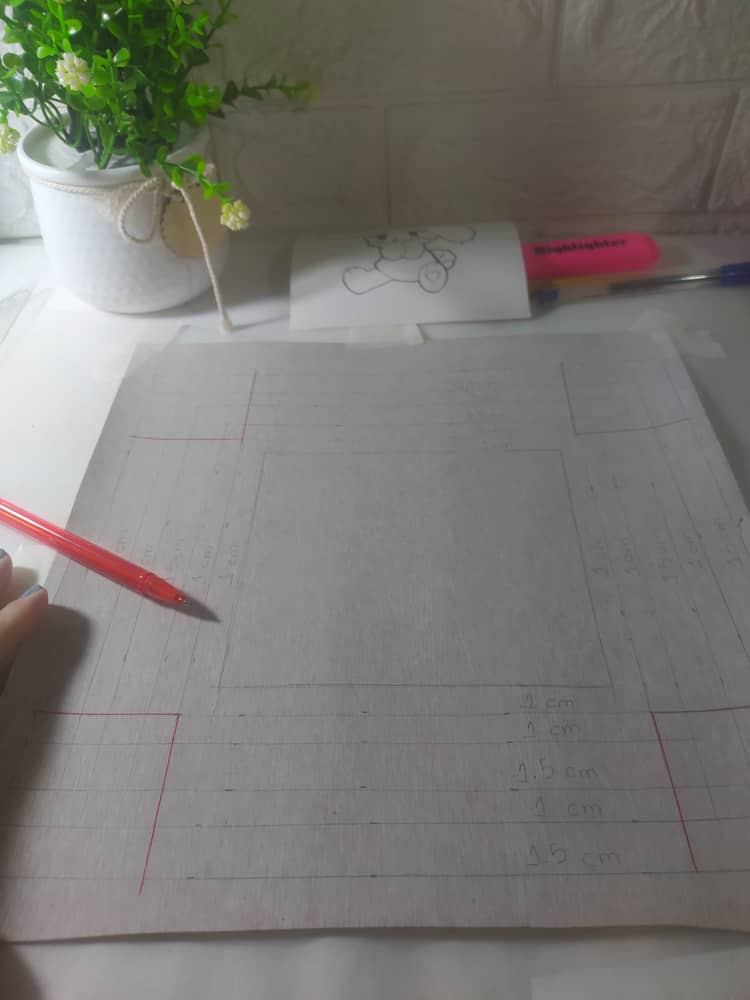
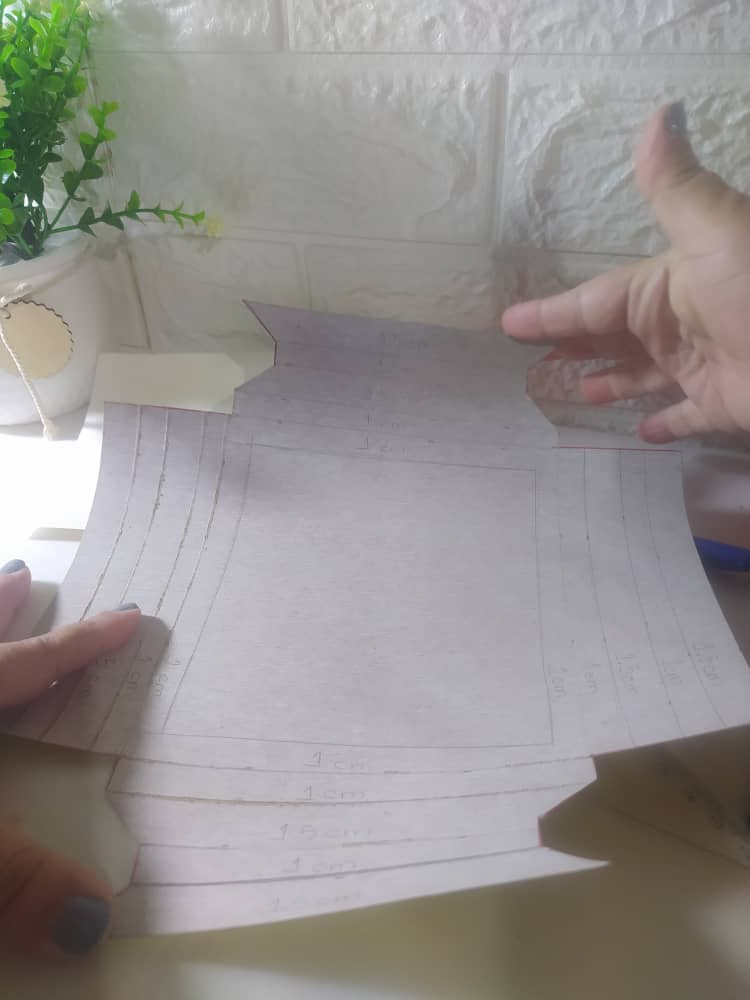
Al diseño le quito las 4 esquinas, esto lo hago desde la esquina de la primera marca de 1cm, y luego las recorto o elimino con la tijera. Es como cuando le quitamos las esquinas a un bolso, cartuchera o incluso las esquinas de una fonda para el colchón de la cama, exactamente igual.
Luego, en solo 2 lados (paralelos) voy a cortar un diseño que me permitirá poder guardar las esquinas del marco. Puedes acercas la foto, dando click sobre ella para entender el corte que es así: En la segunda línea de afuera para adentro, esa que es de 1cm de ancho, ahí marco 1cm hacia adentro y luego voy hacia los espacios de 1,5cms de ambos lados, marco y recorto. Se ve mejor en la siguiente imagen.
I remove the 4 corners from the design, I do this from the corner of the first 1cm mark, and then I cut them out or remove them with scissors. It's like when we remove the corners from a bag, pencil case or even the corners of a mattress pad, exactly the same.
Then, on only 2 sides (parallel) I'm going to cut a design that will allow me to save the corners of the frame. You can zoom in on the photo by clicking on it to understand the cut, which is like this: On the second line from the outside in, the one that is 1cm wide, there I mark 1cm inwards and then I go to the 1.5cm spaces on both sides, mark and cut out. It's better seen in the following image.
 |  |  |  |
|---|
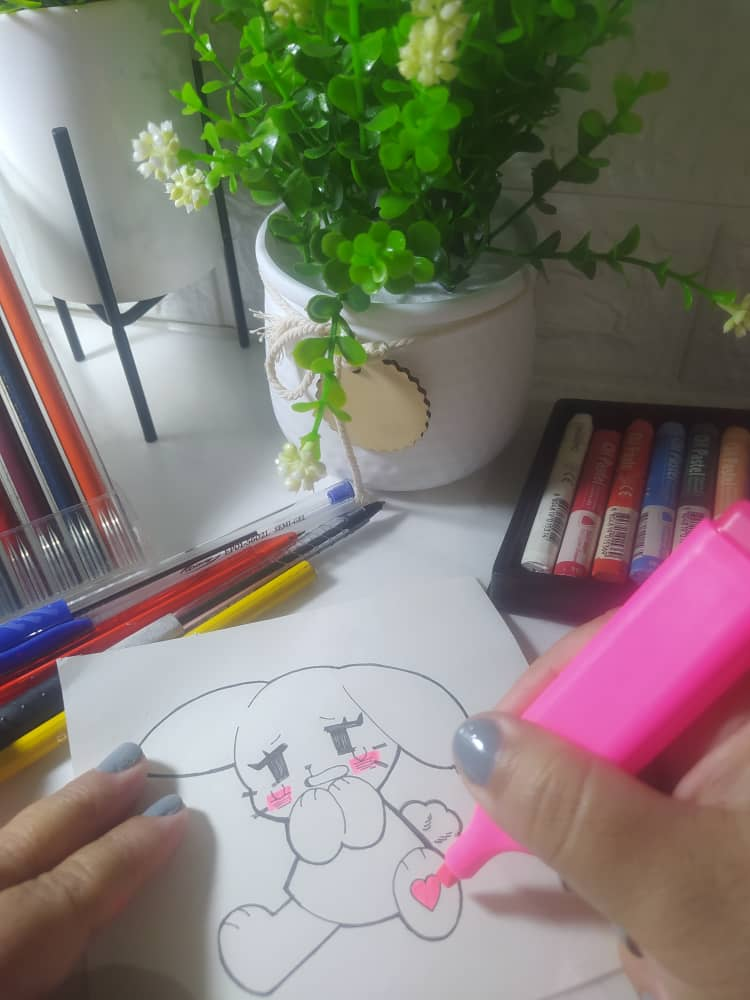
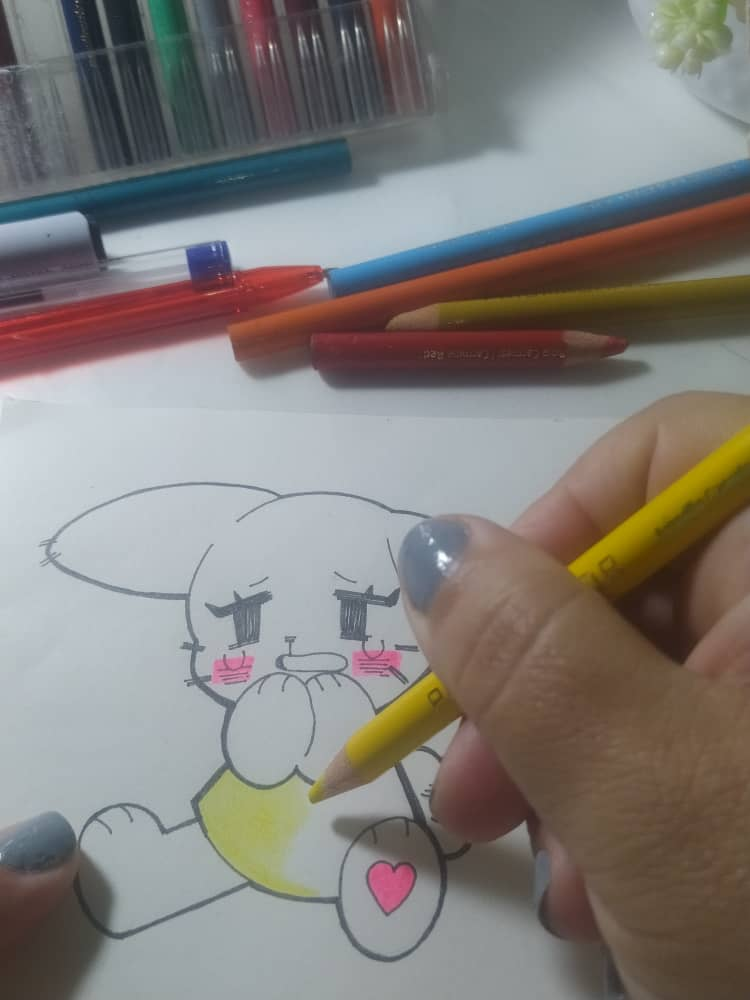
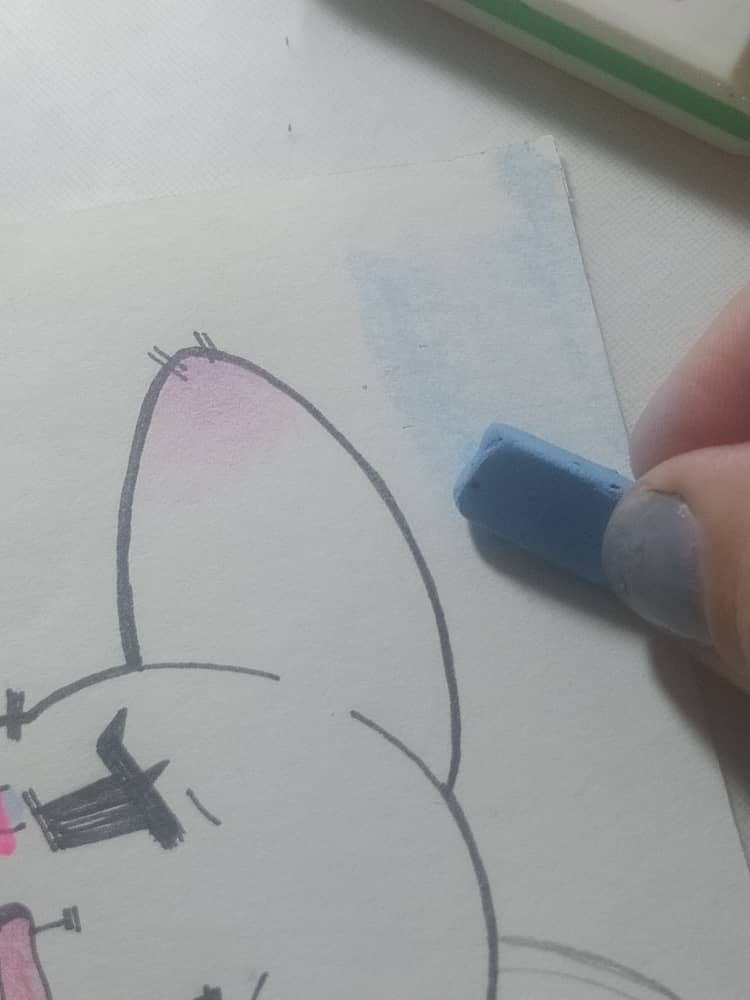
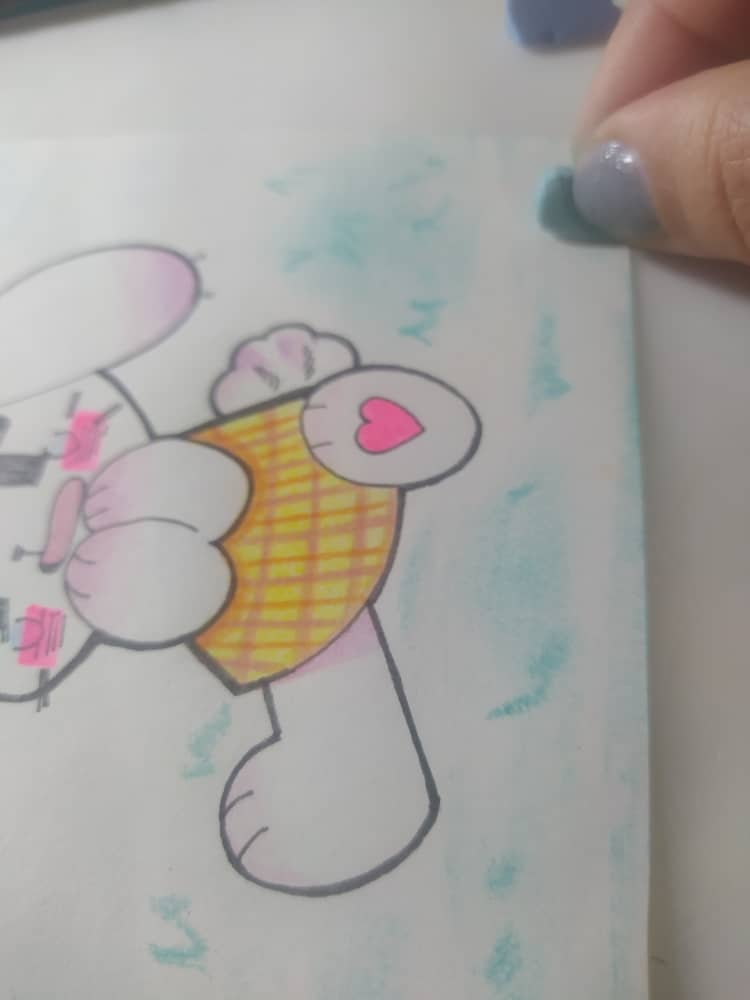
Retomando el díbujo, terminé de aplicar color con resaltador rosado, colores, y para el fondo tiza azul para un cielo y verde para una gramita. En persona el dibujo luce mejor que en las fotos de este post, porque en las fotos se ve muy claro, y en persona se ven más los colores pasteles.
En este punto, decidí realizarle un lazo a la conejita para hacerla más coqueta.
Getting back to the drawing, I finished applying color with a pink highlighter, crayons, and for the background, blue chalk for a sky and green for a grass. In person, the drawing looks better than in the photos of this post, because in the photos it looks very clear, and in person the pastel colors are more noticeable.
At this point, I decided to make a bow for the bunny to make it more flirtatious.
 |  |  |  |
|---|
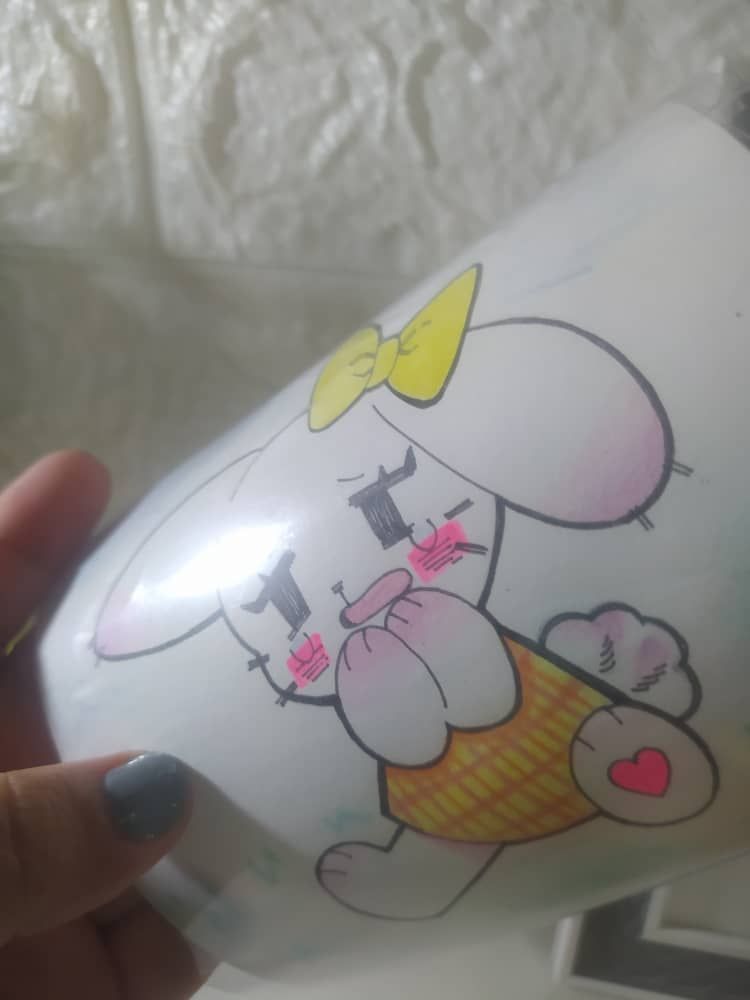
Este es un plus para que nuestros dibujos se vean lindos, y es simular un vidrio utilizando acetato. Así que corté un trozo de acetato que sea solo un poco más grande que el cuadrado de mi dibujo. Pueden ver cómo resalta ahora y con las luces se ve hermoso.
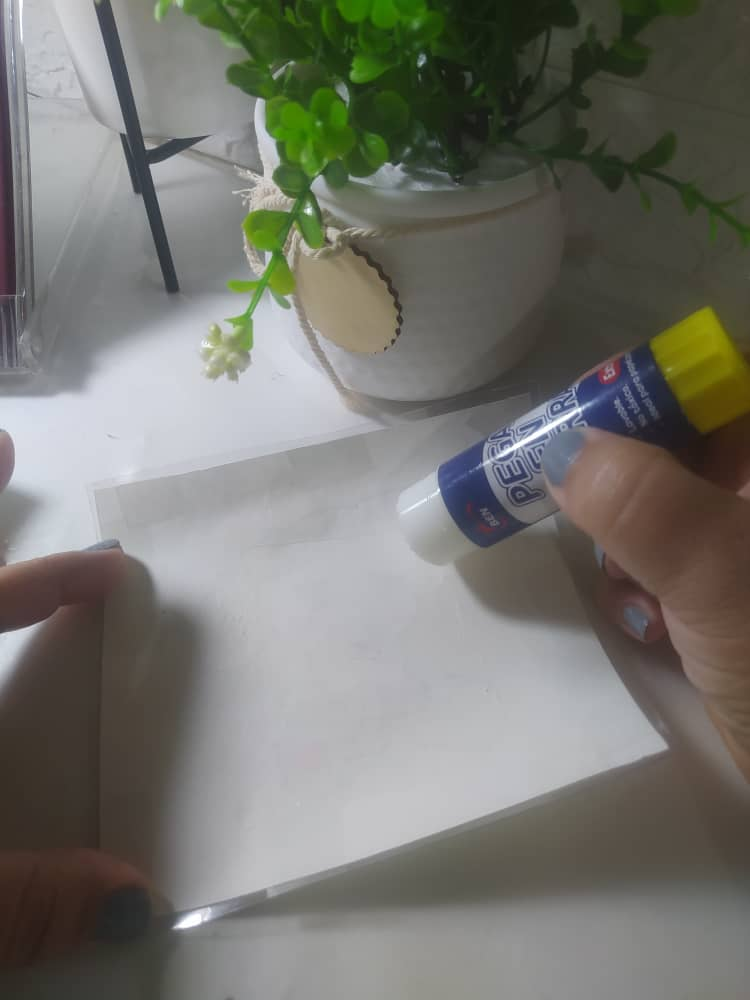
El cuadrado con el dibujo le aplico pegamento en barra y lo pego en la base que dibujé en la cartulina amarilla, en su reverso.
This is a plus for our drawings to look nice, and it is simulating glass using acetate. So I cut a piece of acetate that is just a little bigger than the square of my drawing. You can see how it stands out now and with the lights it looks beautiful.
I apply glue stick to the square with the drawing and stick it to the base that I drew on the yellow cardboard, on its back.
 |  |  |
|---|
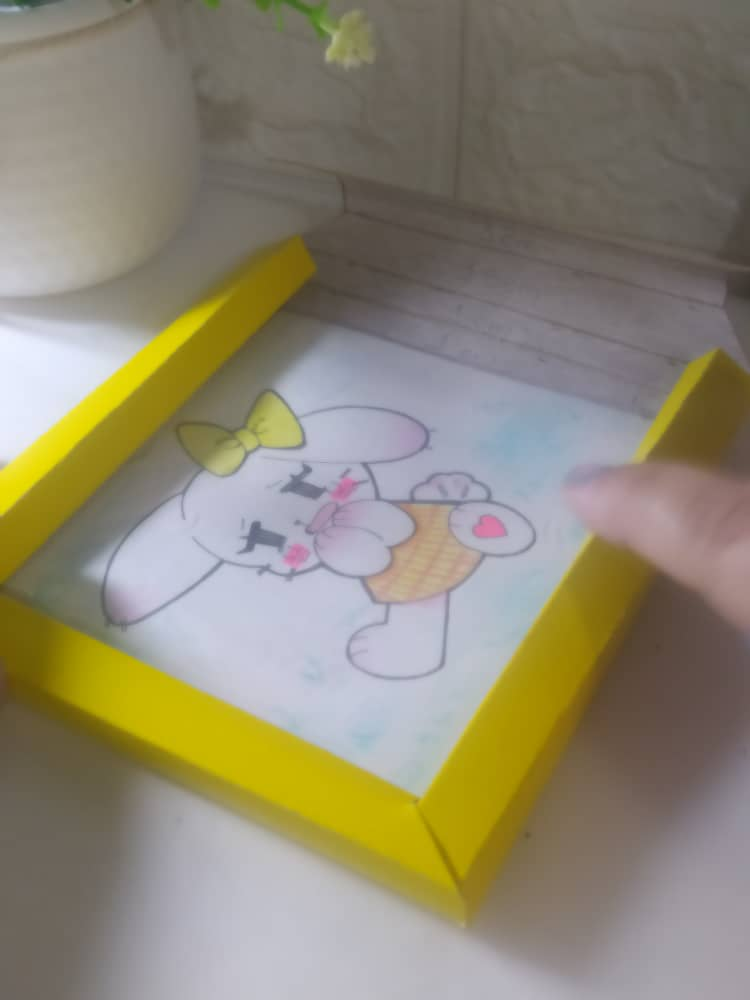
Arriba coloqué el acetato, que puede fijarse fácilmente con un poco de cinta adhesiva transparente, solo un poco en el borde para que no se vea.
Ahora hago los doblez en cada una de las líneas que hice en el reverso de la cartulina amarilla, y voy metiendo las esquinas en los cortes que había hecho. Si quieres tener más fijo todo, puedes aplicar un poco de silicón caliente en las esquinas, pero si haces todo bien se pueden mantener bien cerradas.
On top I placed the acetate, which can be easily fixed with a bit of transparent adhesive tape, just a little on the edge so that it can't be seen.
Now I make the folds on each of the lines that I made on the back of the yellow cardboard, and I put the corners into the cuts that I had made. If you want to keep everything more secure, you can apply a bit of hot silicone on the corners, but if you do everything right they can be kept closed well.
 |  |
|---|
Listo el marco o cuadro para lucir este dibujo de esta tierna Conejita Kawaii, puedes hacerle un triángulo para que esté en alguna mesa o escritorio, pero en mi caso solo le colocaré un poco de cinta adhesiva para pegarlo en la pared, ya que no pesa nada y se puede mantener bien fijo.
The frame or painting is ready to show off this drawing of this cute Kawaii Bunny. You can make a triangle so that it can be placed on a table or desk, but in my case I will just put a little adhesive tape on it to stick it to the wall, since it doesn't weigh anything and can be kept very fixed.
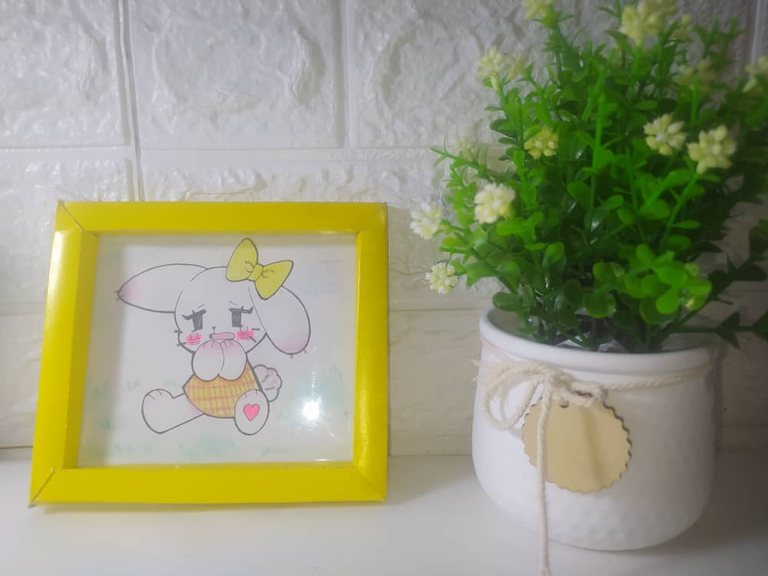
La cartulina amarilla que compré para hacer marcos es un pliegue grande, así que puede seguir utilizándola para hacer otros y lucir más dibujos con esa paleta de colores tan hermosa y tierna.
Estoy muy emocionada por haber empezado esta colección de dibujos o cuadro Kawaii, y de regalarlos a mis hijas, ya que les gustan mucho mis dibujos y yo me siento muy orgullosa por ello. El acetato, no lo olviden para darle más calidad a sus marcos y para lucir más sus dibujos. Deseo que les haya gustado este Tutorial y les agradezco por ver mi Publicación.
The yellow cardboard I bought to make frames is a big fold, so you can continue using it to make others and show off more drawings with that beautiful and tender color palette.
I am very excited to have started this collection of Kawaii drawings or paintings, and to give them to my daughters, since they really like my drawings and I feel very proud of them. Don't forget the acetate to give more quality to your frames and to show off your drawings more. I hope you liked this Tutorial and I thank you for viewing my Post.


I took the photos with my phone Redmi Note 8
Apps I used:
Canva Pro for Cover, Collage and Banners
I used Deepl Translator
My social networks:
Discord: YennysYaneth#0189
Twitter: @yennysferm
Instagram: @yennysyaneth
Las fotos las tomé con mi teléfono Redmi Note 8
Apps que utilicé:
Canva Pro para la Portada, Collage y Banners
Utilicé el Traductor Deepl
Mi redes sociales:
Discord: YennysYaneth#0189
Twitter: @yennysferm
Instagram: @yennysyaneth
Pero qué belleza, al fin nos colocaste uno de tus dibujos, y el marco te quedó precioso 😍🥰
!discovery 35
Gracias amiga @dayadam Ese marco es de mis preferido, queda prolijo y con buenas esquinas. Me alegra que te guste este dibujo Kawaii.
This post was shared and voted inside the discord by the curators team of discovery-it
Join our Community and follow our Curation Trail
Discovery-it is also a Witness, vote for us here
Delegate to us for passive income. Check our 80% fee-back Program
What a tender and beautiful drawing you give us and the frame is definitely spectacular, very eye-catching and beautiful. Thank you for letting us know your good work step by step and creative process
Oye qué genial idea, se podría hacer un collage de fotos, con diferentes cuadros de varios tamaños. Gracias por el tutorial
Sí este Marco es ideal para publicar en la pared nuestros dibujos o los dibujos de nuestros hijos, es con poco presupuesto, ya que aunque utilizas mucha cartulina porque lo lleva en el fondo y a los alrededores, pero solo contemplas ese gasto el de la cartulina y ya.
Me alegra que te haya gustado Gracias por pasar y comentar
Congratulations @yennysferm71! You have completed the following achievement on the Hive blockchain And have been rewarded with New badge(s)
Your next target is to reach 27000 upvotes.
You can view your badges on your board and compare yourself to others in the Ranking
If you no longer want to receive notifications, reply to this comment with the word
STOPCheck out our last posts:
Te quedo demasiado tierno.
Awwwwwww me muero de amor de lo tierna que es la conejita !😻 Parece que está diciendo "acaso no soy adorable" 😂, el marco está súper práctico ! Es una buena idea para decorar los cuartos
Me flipo la muñequita que dibujaste y cómo hiciste el cuadro, me dio muchas ideas, gracias por compartir.
Te robo la idea del marco jajaja, si supieras que haces unos días estoy con esa idea, trate de hacerlo, pero no me salió del todo bien, use papel blanco, creo que fue por eso, pero voy a volver a intentarlo con una cartulina, a ver, gracias por compartir, te quedo bonito el dibujo también, esas imágenes sirve de decoración, quedan muy lindos, saludos. 😉