¡Hola mi querida comunidad!
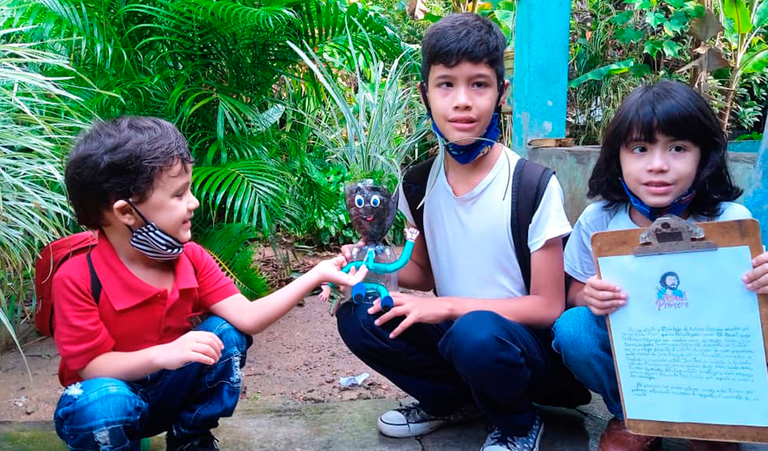
Hoy les cuento como realicé este nuevo objeto para decorar y que lo realicé junto a uno de mis niños que le mandaron a crear un matero para adornar la escuela donde asiste. Estuvimos ideando cómo hacer un matero diferente y comenzamos a buscar ideas que de alguna manera sea llamativo y de buenas ideas salió un matero divertido que se ha convertido en el centro de la escuelita. Les presentamos a “Greñudito”, así le colocaron el nombre a divertido matero.
La idea comenzó cuando su maestra le indicó que con la ayuda de los padres debía hacer un matero con material reciclable, es decir con botella de refresco u otro material que se le pudiera reutilizar de manera que también se convierta como un ejemplo para mostrar que podemos darles una nueva utilidad a los objetos, especialmente plástico que nos pueda servir para evitar la degradación de ambiente, aportando un granito de arena a la protección del planeta y llevándole una bonita idea para decorar el jardín de la escuela.
Era fin de semana teníamos otros compromisos, pero en dos días debíamos entregar ese trabajo, aun no teníamos la idea. Comenzamos a revisar por distintos lugares del jardín de la abuela y de algunos amigos quienes nos dieron una idea, la verdad es muy fácil, solo gastas en poco recurso para adquirir materiales que necesites para su elaboración, ejemplo: ojitos, manos, pies, entre otros y por el resto la mayoría de los materiales lo encontramos en casa.
De esta manera, les voy a mostrar cómo fue que conseguí ayudar a mi hijo.

Materiales a utilizar

Una botella de refresco plástica
Silicona
Tijera
Fomai del color que desees para brazos y piernas
Foami Beige, blanco, negro, azul, rojo
Planta
Agua
Objeto alargado de metal caliente (tubito)
Paso a Paso
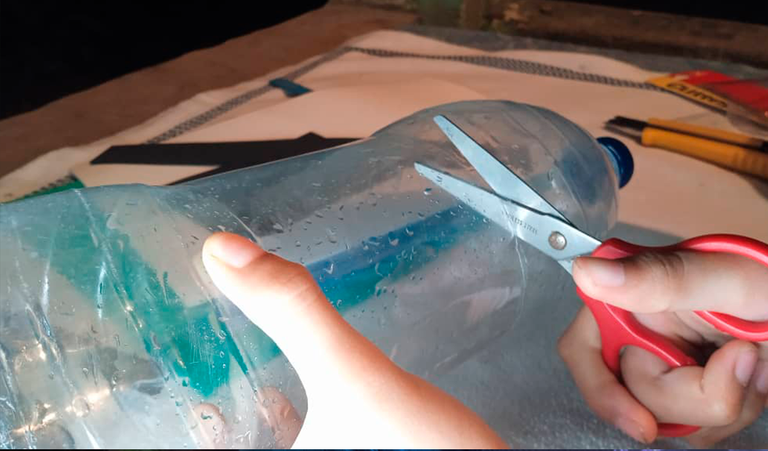
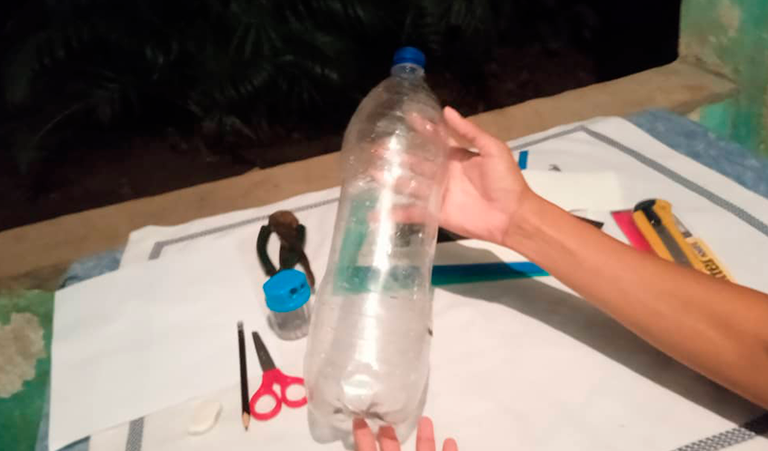
Paso 1: Tomamos una botella de refresco de dos litros y la recortamos como lo ves en la imagen, dividiéndola en tres partes, de las cuales la parte del centro no la vamos a utilizar, mi para la imagen para guiarte.
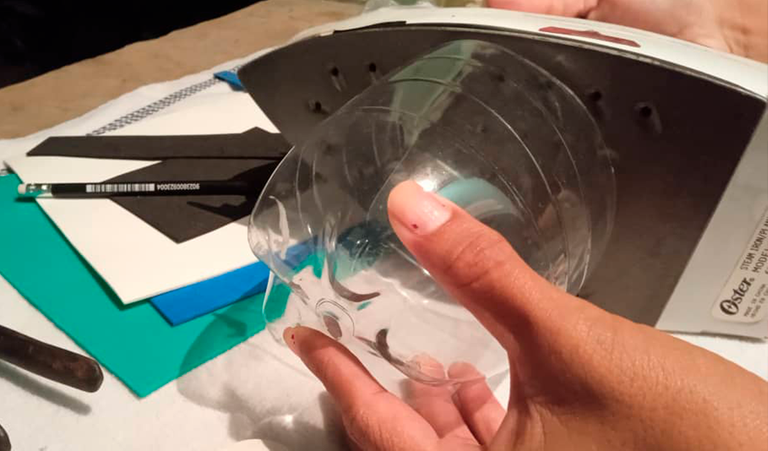
Paso 2:Una vez cortadas las botellas, calentamos una plancha y colocamos las partes de la botella recortada hacia la plancha para evitar asperezas.
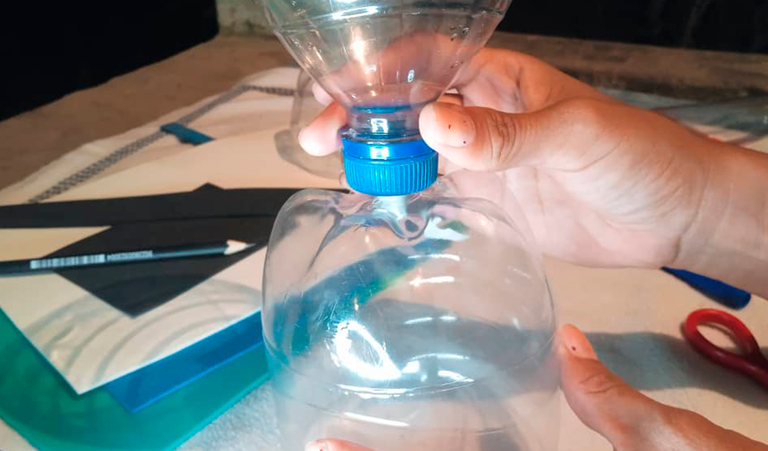
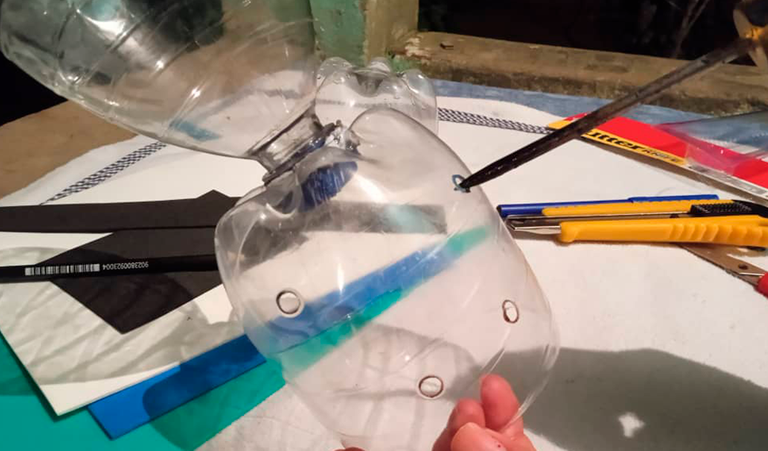
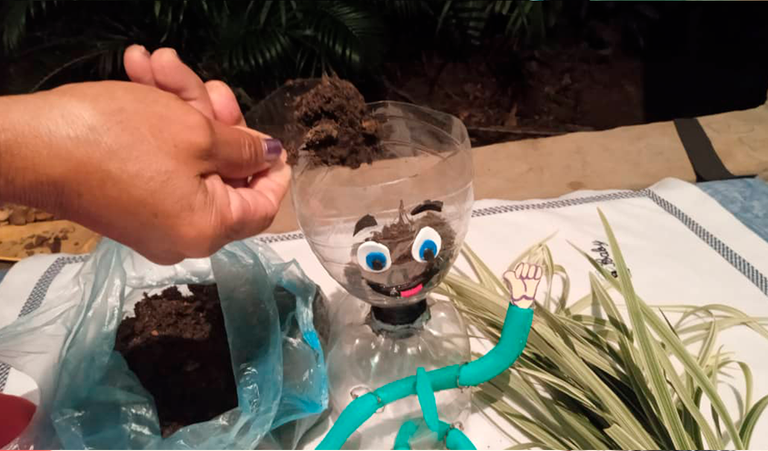
Paso 3:Paso 3: La parte de arriba de la botella la debemos tener con su tapa y le puedes echar un poquito de silicón para fortalecerla, igualmente se debe perforar varios agujeros en la tapa por donde va a salir el agua del matero.
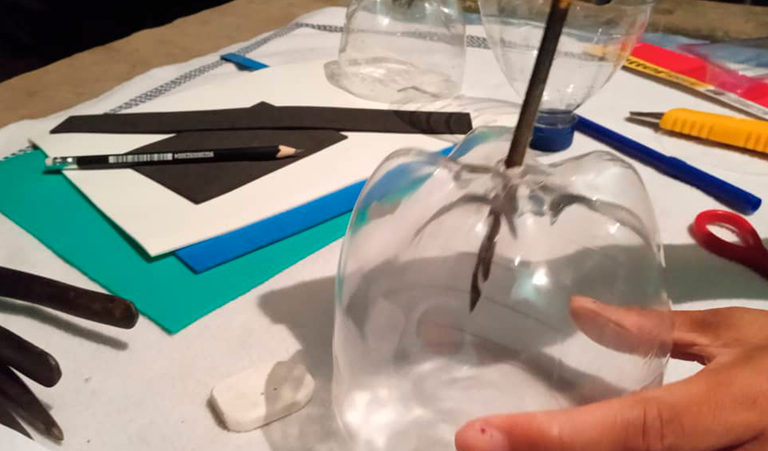
Paso 4:Mientras que en la parte de debajo de la botella perforaremos un circulo con el objeto caliente para que entre la otra parte de la botella de manera contraria, es decir quedando la tapa hacia abajo. Observa las imágenes para que te puedas guiar mejor.
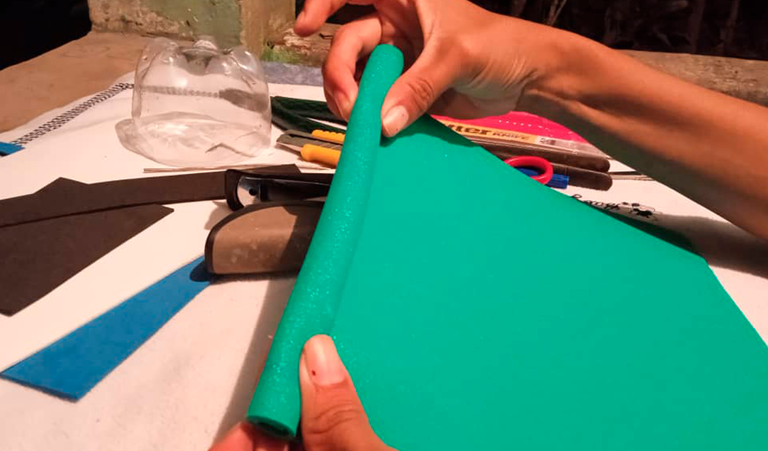
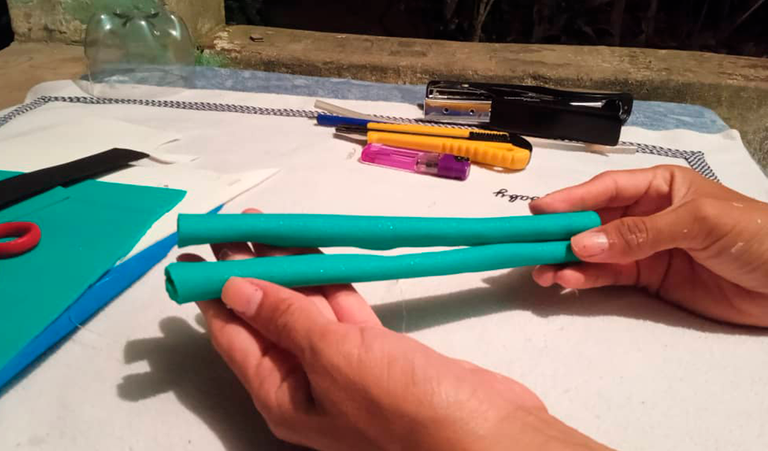
Paso 5:Para hacer las piernas y los brazos, tomé un foami color verde y realicé tres vueltas con el alambre por dentro, obteniendo un rollito de foami para los brazos que fui pegando con silicona y repetí el mismo proceso para hacer las piernas.
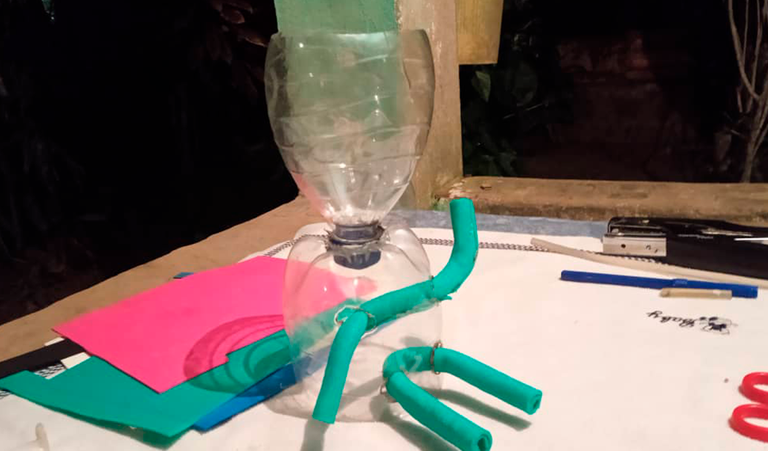
Paso 6:En la parte de abajo del cuerpo del muñequito perforé dos pequeños oricios de cinco centímetros aproximadamente de distancia entre cada uno, para colocar uno de los rollitos de foami, que van a ser los brazos y más abajo perforé dos pequeños orificios de dos centímetros aproximadamente de distancia para colocar uno de los rollitos de foami quedando hechas las piernas
Paso 7:Introducimos los rollitos por los orificios y permitirán que nuestro muñequito ya pueda tener brazos y piernas. Trata de abrir agujeros que permita que entren los rollitos sin problemas. En este caso tuvimos que ampliar más los orificios.
Paso 8:Introducimos los rollitos por los orificios y permitirán que nuestro muñequito ya pueda tener brazos y piernas. Trata de abrir agujeros que permita que entren los rollitos sin problemas. En este caso tuvimos que ampliar más los orificios.

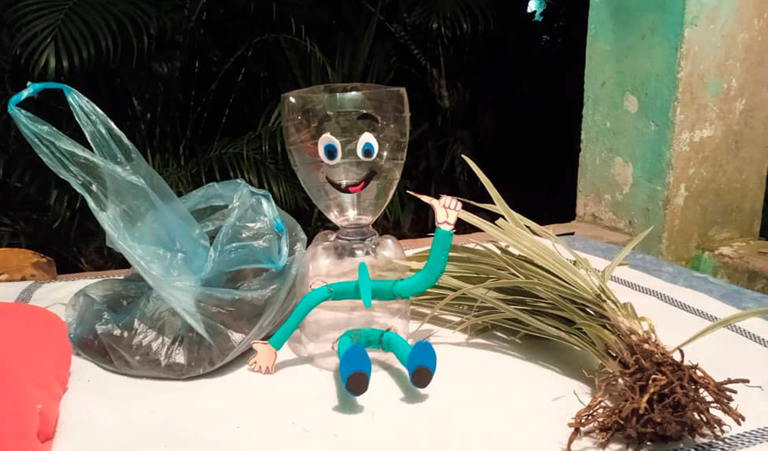
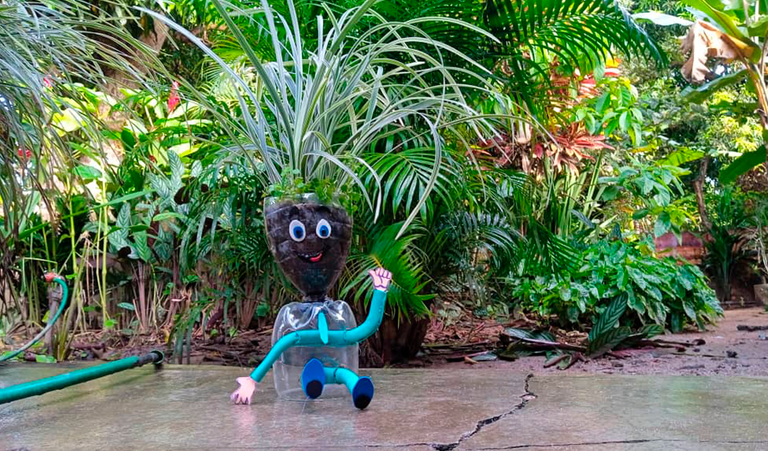
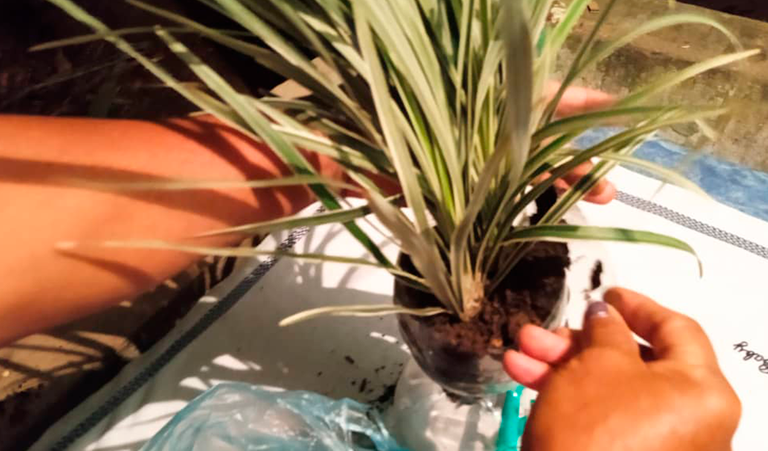
Paso 9:En la parte de arriaba del personaje, colocamos tierra negra abonada y sembramos la plantita, sus hojas son como unas cintas y se veía un aspecto de greñudo, luego le echamos un poquito de agua para que refrescara y no se dañara.
Paso 10:Así quedó el divertido matero que después mi hijo le llamó: Greñudito jijiji.
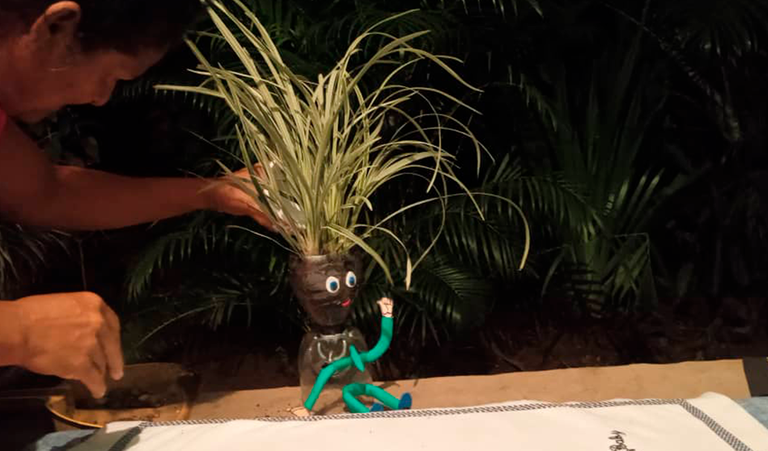
El día que fui acompañar al niño al salón y llevar el producto de nuestro trabajo, sus compañeritos recibieron el matero entre sonrisas y carcajadas por la actitud del muñequito.
Hasta aquí puedo contarles como hicimos este lindo matero, espero que te guste y puedas animarte hacer un marerito divertido para el jardín de tu casa. Gracias por leerme.
(Imágenes editada con Photoshop)
💖¡Hasta una próxima oportunidad mis Hivers!💖

Hello my dear community!
Today I will tell you how I made this new object to decorate and that I did it together with one of my children who sent him to create a flowerpot to decorate the school where he attends. We were devising how to make a different flowerpot and we began to look for ideas that were somehow striking and out of good ideas, a fun flowerpot emerged that has become the center of the school. We present to you "Greñudito", that's how they named the fun mate.
The idea began when his teacher told him that with the help of the parents he should make a flowerpot with recyclable material, that is, with a soda bottle or other material that could be reused so that it also becomes an example to show that we can give a new use to objects, especially plastic that can be used to prevent environmental degradation, contributing a grain of sand to the protection of the planet and bringing you a nice idea to decorate the school garden.
It was the weekend we had other commitments, but in two days we had to deliver that job, we still didn't have the idea. We began to review different places in the grandmother's garden and some friends who gave us an idea, the truth is very easy, you only spend a little money to acquire materials you need for its preparation, example: eyes, hands, feet, among others and for the rest most of the materials we find at home.
In this way, I am going to show you how I was able to help my son.
The materials to use
A plastic soda bottle
Silicone
Scissors
Foami del color que desees para brazos y piernas
Foami Beige or white, black, blue, red
Wire
Plant
Water
Long hot metal object (tube)
Step by Step
Step 1We take a two-liter soda bottle and cut it as you see in the image, dividing it into three parts, of which we are not going to use the center part, my for the image to guide you.
Step 2Once the bottles are cut, we heat a griddle and place the cut bottle parts towards the griddle to avoid roughness.
Step 3:We must have the upper part of the bottle with its lid and you can put a little silicone on it to strengthen it, also several holes must be drilled in the lid where the water will come out of the pot.
Step 4:While in the lower part of the bottle we will pierce a circle with the hot object so that the other part of the bottle enters in the opposite way, that is, leaving the lid downwards. Look at the images so you can better guide yourself
step 5:To make the legs and arms, I took a green foam and made three turns with the wire on the inside, obtaining a roll of foam for the arms that I glued with silicone and repeated the same process to make the legs.
step 6:In the lower part of the doll's body I drilled two small holes approximately five centimeters apart, to place one of the foami rolls, which will be the arms, and further down I drilled two small holes approximately two centimeters in diameter. distance to place one of the foami rolls, making the legs.
Step7: :We introduce the rolls through the holes and they will allow our doll to already have arms and legs. Try to open holes that allow the rolls to enter without problems. In this case we had to enlarge the holes further.
Step 8: :We painted some eyes, eyebrows, mouths, little hands and shoes and cut out foami to begin to build the character's face and place their little hands, shoes and other accessories that we glued with silicone.
step 9:In the upper part of the character, we placed fertilized black earth and planted the seedling, its leaves are like ribbons and it looked shaggy, then we poured a little water on it to cool it down and not get damaged..
step 10:This is how the funny planter was left that my son later called him: Greñudito jijiji..
The day I went to accompany the child to the living room and take the product of our work, his classmates received the pot between smiles and laughter at the attitude of the little doll.
So far I can tell you how we made this beautiful flower pot, I hope you like it and can encourage you to make a fun marerito for the garden of your house. Thanks for reading me.
(Images edited with Photoshop)
Congratulations @yohadice! You have completed the following achievement on the Hive blockchain And have been rewarded with New badge(s)
Your next target is to reach 24000 upvotes.
You can view your badges on your board and compare yourself to others in the Ranking
If you no longer want to receive notifications, reply to this comment with the word
STOPCheck out the last post from @hivebuzz:
Support the HiveBuzz project. Vote for our proposal!