¡Hola querida comunidad!
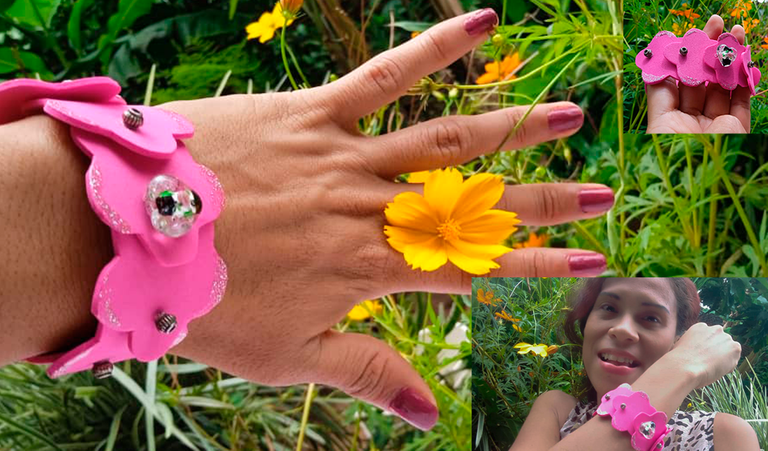
Nuevamente con ustedes, les envío un gran abrazo, en esta oportunidad me divertí creando un lindo brazalete decorados con material reusable, que nos puede servir para regalar en momentos de cumpleaños, entre otros eventos importantes, en especial cuando hay niñas.
No es difícil de hacer, es muy fácil de elaborar con poco material, tiempo y creatividad. Como en un momento les comenté, muy poco me había puesto hacer este tipo de trabajos, primero por mis ocupaciones y que sencillamente a veces uno le gusta comprar todo hecho sin saber el potencial que puedes lograr a desarrollar al esforzarte desarrollar tus propios accesorios.
Este brazalete lo imaginé de color fucsia así como lo vez en la imagen, y me gustó como quedó tanto que me gustaría verlo hecho con un material más resistente como el cuero, u otro tipo de material, de verdad desconozco un poco pero que pudiera tener más tiempo de durabilidad.
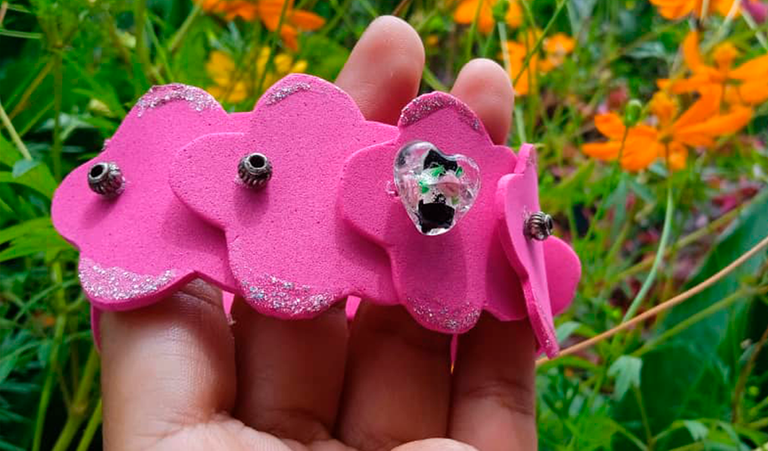
Les cuentos que los detalles que utilice para la decoración de esta pulsera son de otros objetos que no usaba y desde hace mucho tiempo he venido reciclando, aunque tenían otro modo de uso, pues ahora jugué en mi imaginación y hoy le doy otra formar de usarlos para la decoración de este brazalete.
A continuación, les presento la lista de materiales que utilicé para crear este brazalete.

Materiales a utilizar

Foamy de tu color preferido, yo usé fucsia
Hilo
Aguja
Silicona liquida
Tijera
Papel
Lápiz
Cartón
Piedras recicladas
Brillo de uñas escarchadas
Botón

Paso a Paso

Bueno en mi imaginación visualizaba esta pulsera con flores fucsia, entonces no sabía cómo hacer la flor en foamy y comencé de esta manera:
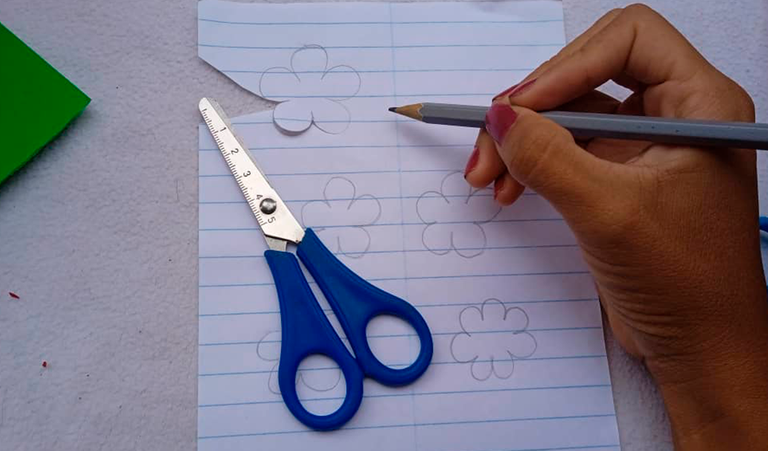
Paso 1: Comencé a dibujar en un papel flores, buscando una que me quede lo más bonita posible para luego hacer el molden que utilizaría para hacer varias flores de iguales.
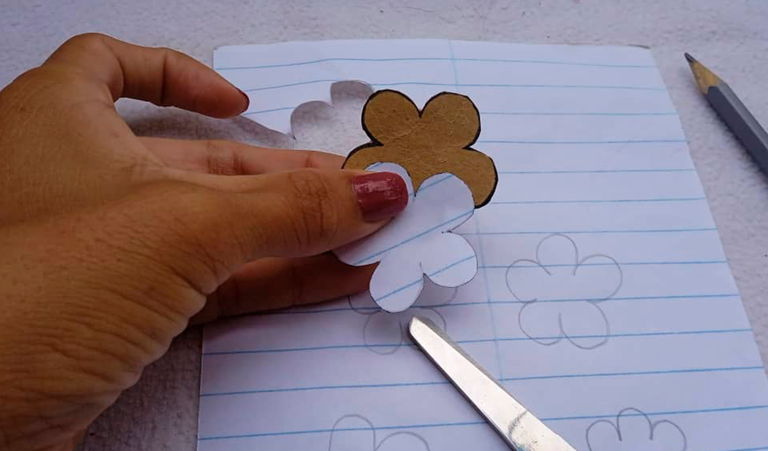
Paso 2:Una vez que terminé de hacer las flores decidí por una que me quedó como quería y comencé a recortarla para sacar un molden en cartón.
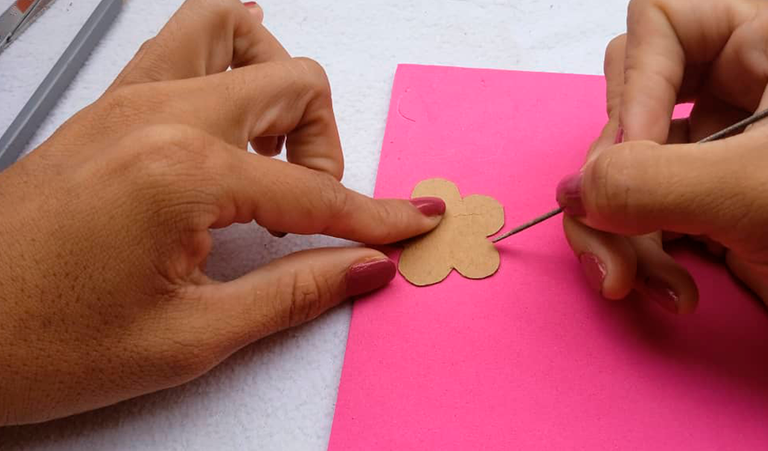
Paso 3:Al tener el molden comencé a dibujar las flores con una aguja grande en el material de foamy, así como lo pueden apreciar en la imagen. Es importante que no usemos lápiz para marcar la figura que deseamos sacar del foamy porque podemos dañar el material y no se vería bien.
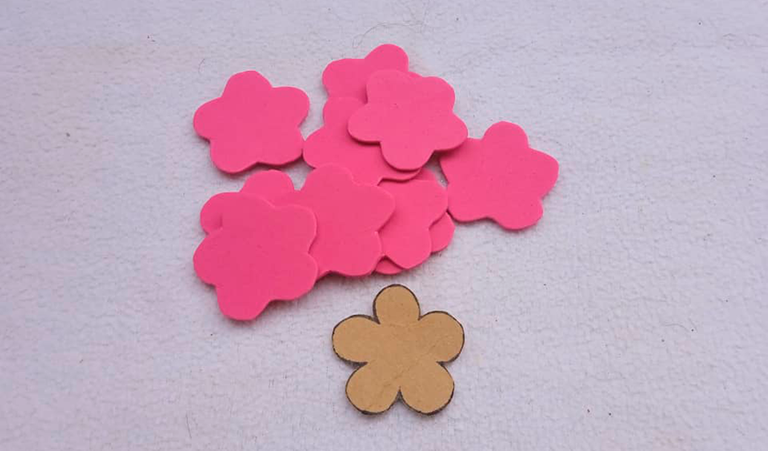
Paso 4:Marcando 9 flores pequeñas de 3. 5 cm, comencé a recortarlas y me quedaron así:
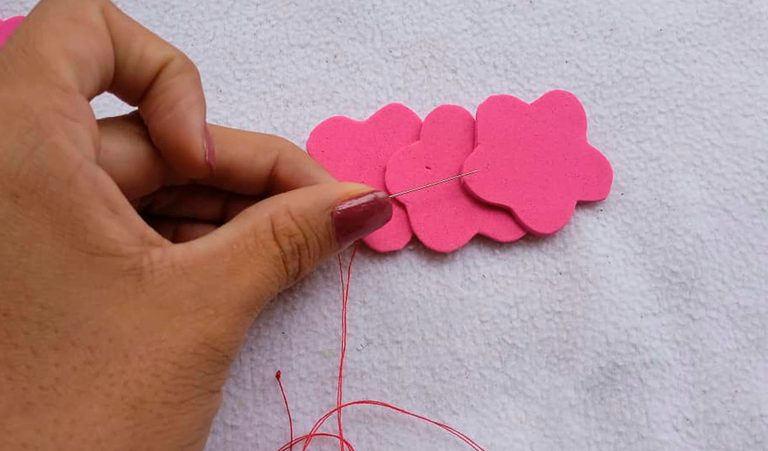
Paso 5:Ya teniendo las flores, comencé a pegarlas por un ladito una a una, haciendo un pequeño punto con la aguja y el hilo, tratando que no se vea tanto.
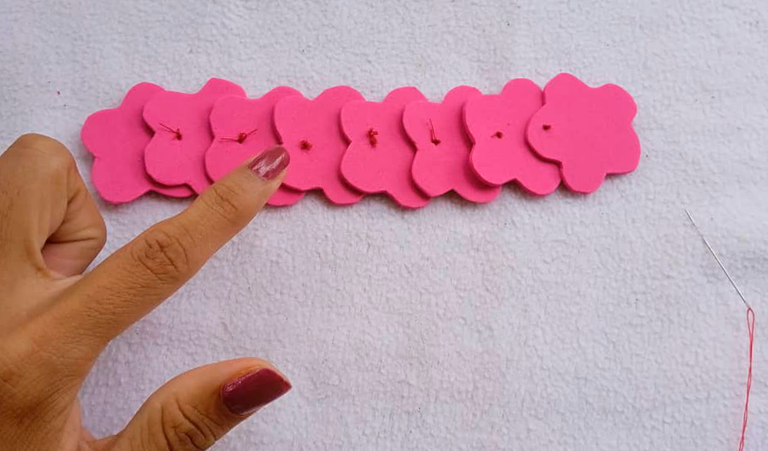
Paso 6:Así fui uniéndolas y al voltearlas quedaron todos los puntos muy evidentes. Aquí en esta imagen uní ocho y cuando me la medí faltaba una para que me quedara bien y luego se la anexé.
Paso 7:Recorté un trazo de foamy con las medidas de 1 cm de ancho por 14 cm de largo y pequé con silicona para tapar todos los puntos y también para que las flores queden un poco más firmes y se forme el brazalete.
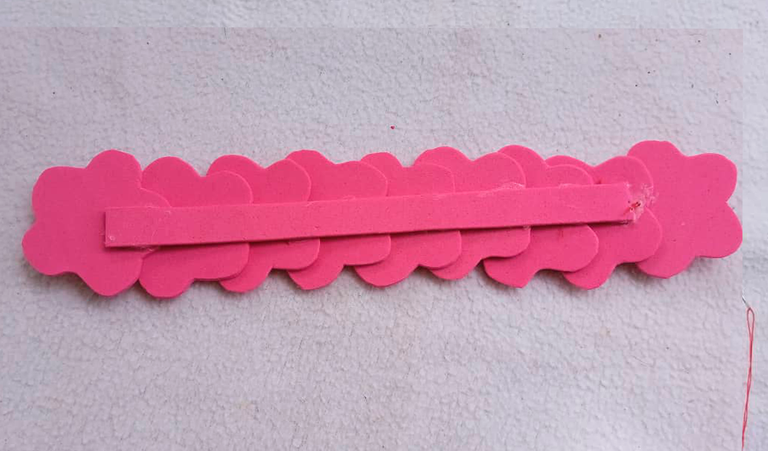
Paso 8:Una vez listo por la parte atrás, volteé hacia la parte delantera y ver dónde colocar todas los piedritas y objetos pequeños que encontré para decorar.
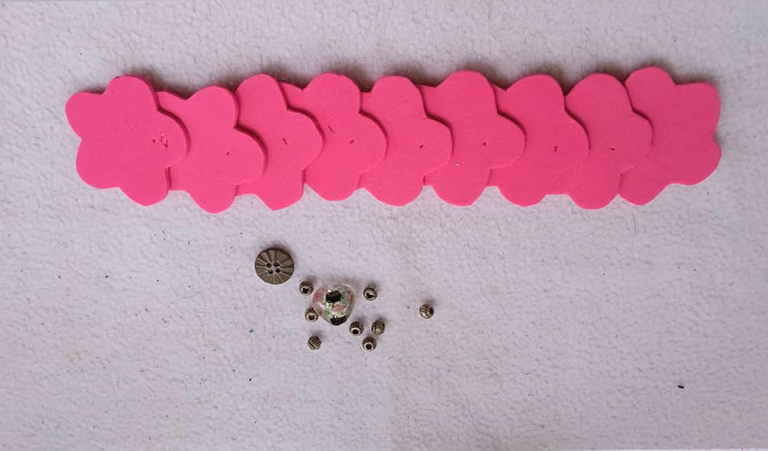
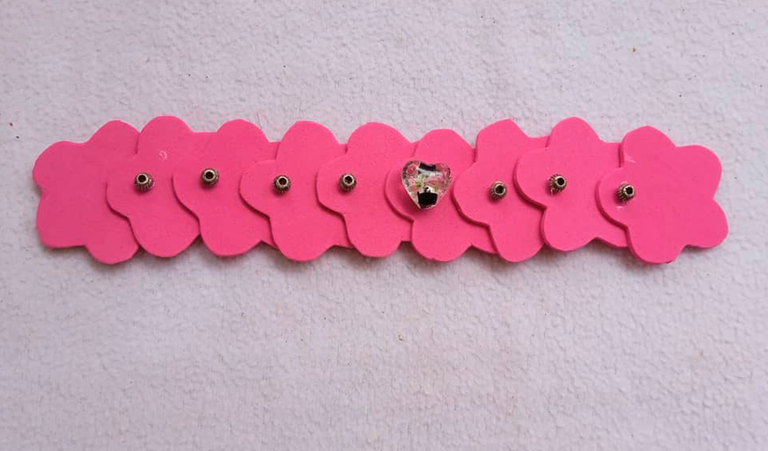
Paso 9:Decidí colocar el corazón transparente en el centro del brazalete y los otros objetos pequeñitos, uno en cada punto donde se veía cada el hilo. Ahí disimularía perfectamente. Procedía a pegarlo con silicona. Recomiendo que si hay una pega más la resistente la pueden la usen por la silicona.
Paso 10: Con mi brillo de uñas escarchado le coloqué en la orilla alrededor del brazalete, como lo vez en la imagen.
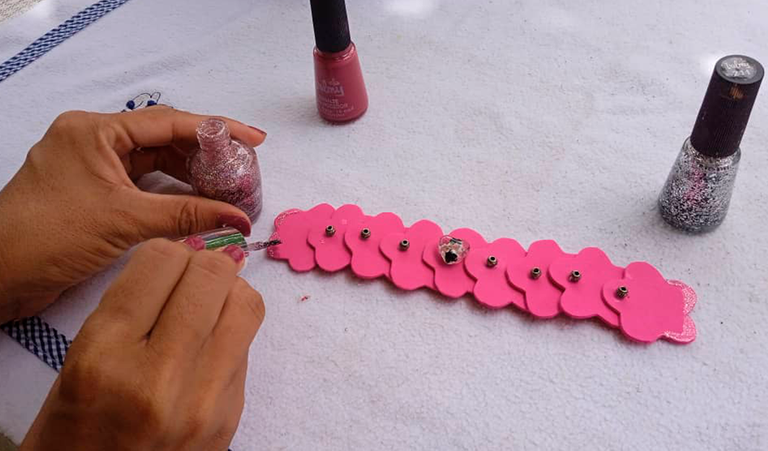
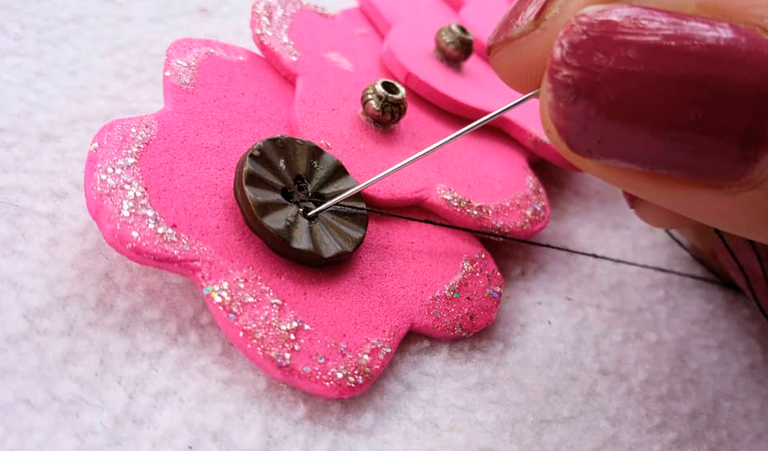
Paso 11:: Con mi brillo de uñas escarchado le coloqué en la orilla alrededor del brazalete, como lo vez en la imagen.
Listo, ya terminé el producto final y como les dije me quedó muy linda, no había trabajado haciendo este tipo de accesorios con foamy pero si tenía la curiosidad, como igual quiero hacer otros proyectos con este material que luego les mostraré.
Es así como esté me quedó este brazalete, está muy bonito y como te dije es lindo hacer este tipo de objetos que a nosotras las mujeres nos encanta, más si son para niñas, sería ideal regalar brazalete como este en fiesta y otras actividades, de verdad me encantó en producto final.
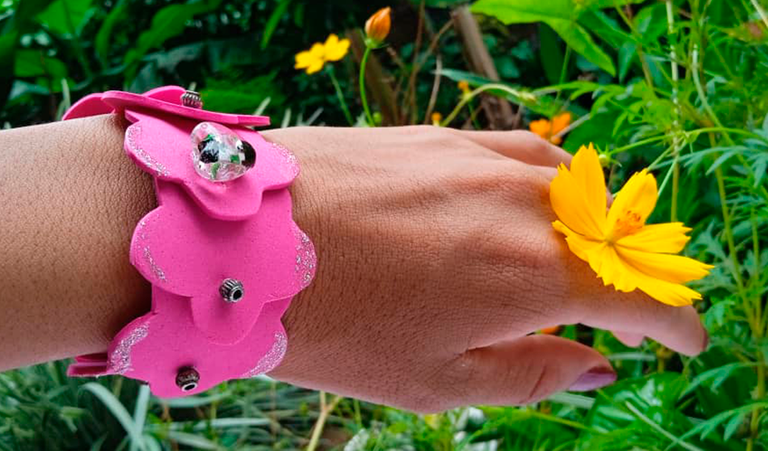
Espero que ustedes también se animen hacerlas, al igual hay personas que tienen grandes experiencias en trabajos con foamy y otras haciendo pulseras que se conocen cada una de las piedritas piedras, objetos, yo quedo admirada por el trabajo que muchos hacen. Apenas estoy aprendiendo, es bonito trabajar con este material y bueno en cuando a los demás materiales estoy usando los reusables.
Este post llegó hasta aquí mi querida comunidad, es un placer escribirles.
(Imágenes editada con Photoshop)
💖¡Hasta una próxima oportunidad mis Hivers!💖

ingles
Hello dear community!

Again with you, I send you a big hug, this time I had fun creating a nice bracelet decorated with reusable material, which can be used to give away at birthdays, among other important events, especially when there are girls.
It is not difficult to do, it is very easy to make with little material, time and creativity. As I told you at one point, I hadn't put much effort into doing this type of work, first because of my occupations and that sometimes you simply like to buy everything ready-made without knowing the potential that you can develop by making an effort to develop your own accessories.
I imagined this bracelet in a fuchsia color just as you see it in the image, and I liked how it turned out so much that I would like to see it made with a more resistant material such as leather, or another type of material, I really don't know a little but that could have more durability time.

I tell you that the details that I used to decorate this bracelet are from other objects that I did not use and for a long time I have been recycling, although they had another way of use, because now I played in my imagination and today I give you another way of using them for the decoration of this bracelet.
Below is the list of materials I used to create this bracelet.

The materials to use

Foamy of your favorite color, I used fuchsia
Thread
Needle
Liquid silicone
Scissors
Papel
Paper
Cardboard
Piedras recicladas
Frosty nail glitter
Button

Step by Step

Well, in my imagination I visualized this bracelet with fuchsia flowers, so I didn't know how to make the foamy flower and I started this way:
Paso 1: I began to draw flowers on a piece of paper, looking for one that was as beautiful as possible to then make the mold that I would use to make several identical flowers.

Paso 2:Once I finished making the flowers I decided on one that was the way I wanted and I started cutting it to make a cardboard mold.

Paso 3:Having the mold, I began to draw the flowers with a large needle in the foamy material, as you can see in the image. It is important that we do not use a pencil to mark the figure that we want to remove from the foamy because we can damage the material and it would not look good.

Paso 4:Marking 9 small flowers of 3.5 cm, I began to cut them and they turned out like this:

Paso 5:Once I had the flowers, I began to glue them on one side one by one, making a small point with the needle and thread, trying not to show it so much.

Paso 6:This is how I joined them and when I turned them all the points were very evident. Here in this image I joined eight and when I measured it one was missing so that it would fit me well and then I attached it.

Paso 7:I cut out a line of foamy with the measurements 1 cm wide by 14 cm long and sintered with silicone to cover all the points and also so that the flowers are a little firmer and the bracelet is formed.

Paso 8:Once the back was ready, I turned to the front and see where to put all the pebbles and small objects I found to decorate.

Paso 9:I decided to place the transparent heart in the center of the bracelet and the other small objects, one at each point where the thread was visible. It would hide perfectly there. I proceeded to glue it with silicone. I recommend that if there is a more resistant paste, they can use it for the silicone.

Paso 10:With my frosty nail polish I placed it on the edge around the bracelet, as you see in the image.

Paso 11:At the end of the previous step, I decided to sew the button on the last flower to place it as the bracelet brooch and I opened a kind of little eye on the first flower so that the button closes.

Done, I finished the final product and as I told you it turned out very nice, I had not worked making this type of accessories with foamy but if I was curious, I still want to do other projects with this material that I will show you later.
This is how this bracelet turned out for me, it's very pretty and as I told you it's nice to make this type of objects that we women love, especially if they are for girls, it would be ideal to give a bracelet like this at parties and other activities, of I really loved the final product.

I hope that you will also be encouraged to do them, just as there are people who have great experiences in working with foamy and others making bracelets who know each of the pebbles, stones, objects, I am admired by the work that many do. I'm just learning, it's nice to work with this material and well as for the other materials I'm using the reusable ones.
This post got here my dear community, it is a pleasure to write to you.
(Images edited with Photoshop)
💖Until next time my Hivers!💖

Hermoso y muy creativo, me gustó mucho que le agregaras piedras de colores a cada pieza de foami y el brillo es encantador. Bendiciones para ti 🌹
Que bueno que te guste la idea. Que las bendiciones también sean para ti.
I've never thought of creating a bracelet using this type of material, but you have shown me that it's possible and looks good as well. Congrats!
Hi @erikah! I tell you that I didn't know if it was going to look so pretty either, but I like the fuchsia color and I got creative. Thank you very much for reading the post!
A little experimenting never hurts 😃
That's right, now I'm going for the tendrils
Nice
Thank you
Beautiful job. Foamy is an incredible material, it is very versatile, easy to get and cheap.