
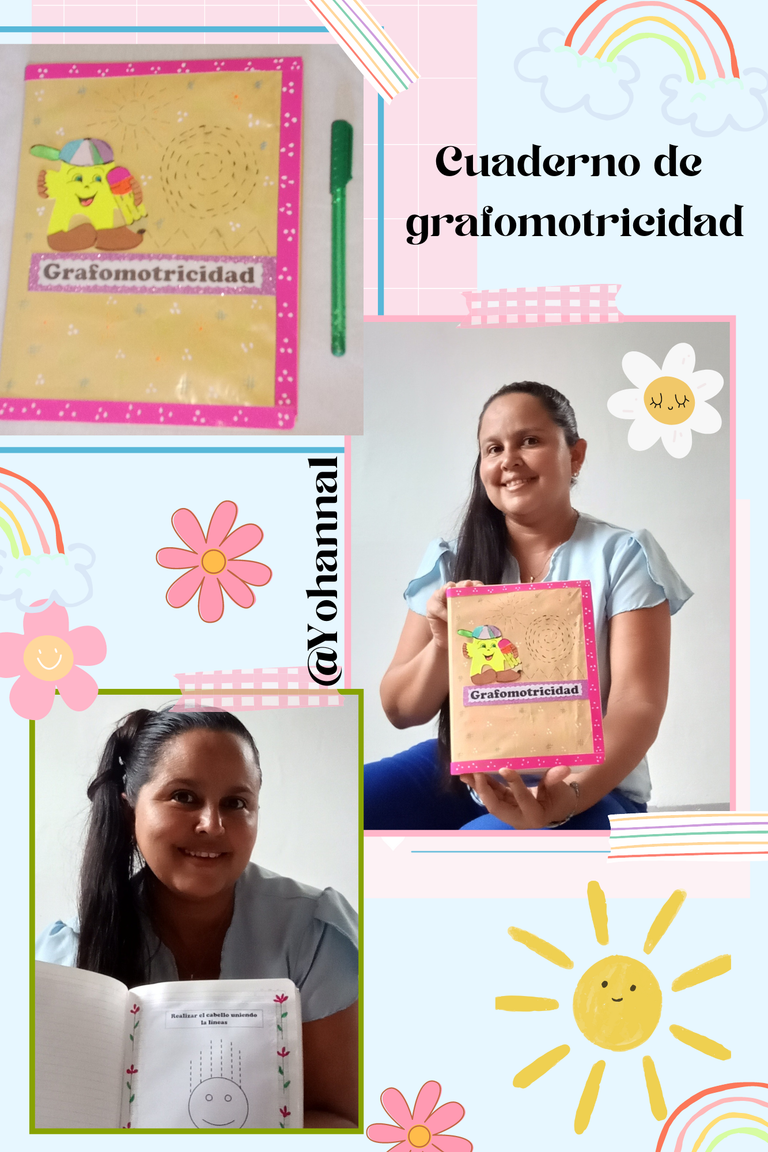
Hola! Amigos les quiero compartir esta idea de la realización de un cuaderno para trabajar trazos, es muy práctico y divertido, te muestro más adelante el material requerido y el paso a paso desde decorar la portada hasta el contenido interno, el cual fue realizado con ayuda del programa Microsot PowerPoint 2010 en su barra de herramientas de imágenes formas. Así que vamos a creer este lindo cuaderno.
Hello! Friends, I want to share this idea of making a notebook to work on strokes, it is very practical and fun, I will show you later the required material and the step by step from decorating the cover to the internal content, which was made with the help of Microsoft PowerPoint 2010 program in its shapes images toolbar. So let's create this cute notebook.
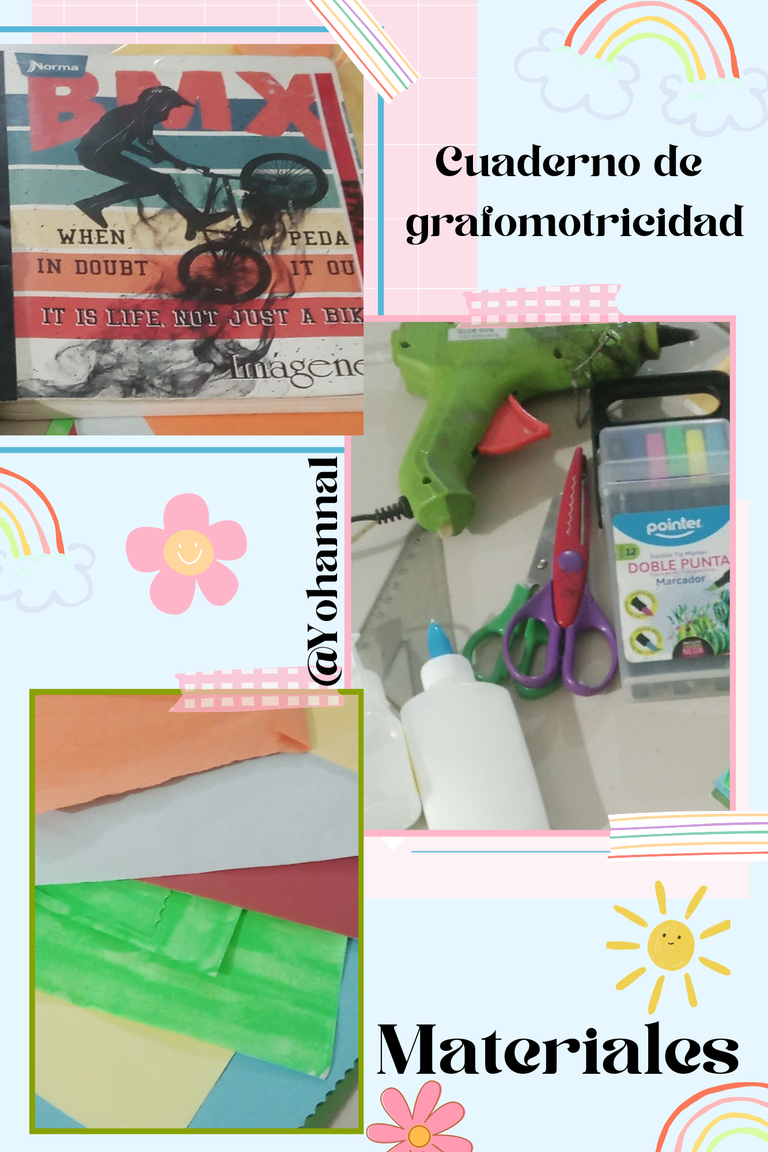
Materiales
- Cuaderno nuevo o usado
- Papel escolar el color de tu preferencia
- Silicón líquido
- Pega
- Tijera
- Regla
- Marcador o bolígrafos
- Molde o dibujos de preferencia
Materials
- New or used notebook
- School paper the color of your preference
- Liquid silicone
- Job
- Scissors
- Ruler
- Marker or pens
- Mold or drawings of preference
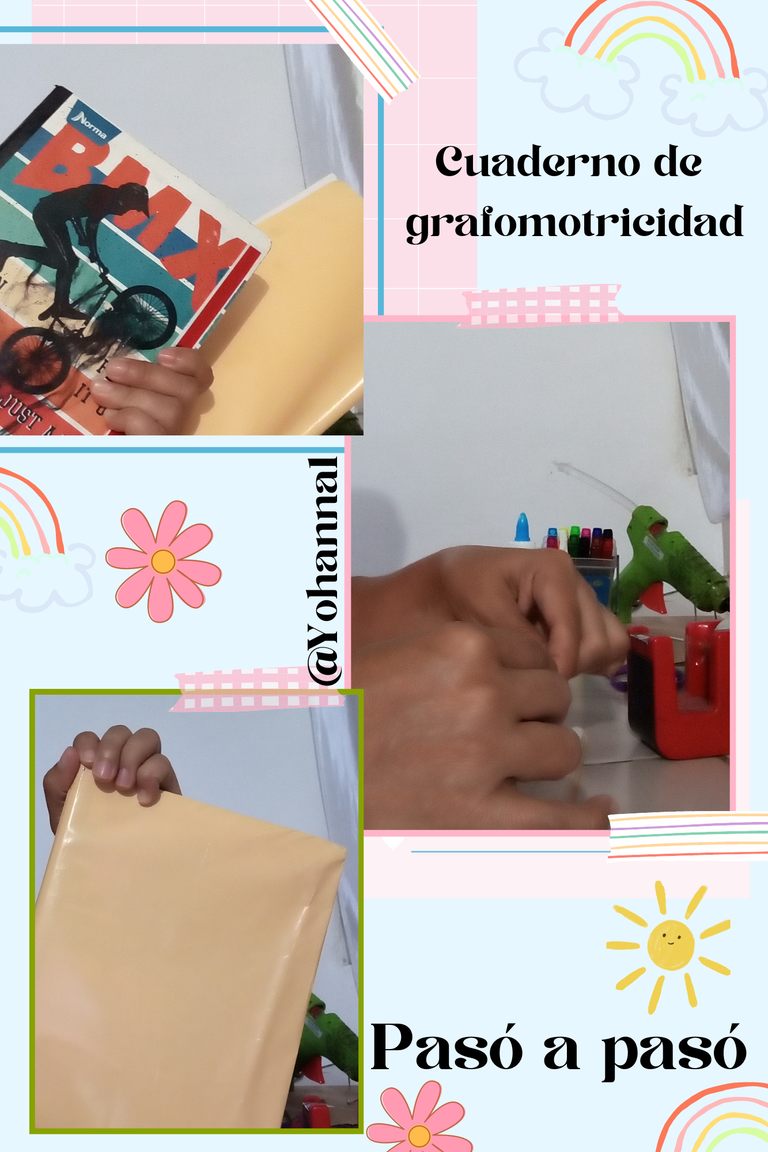
Pasó a pasó
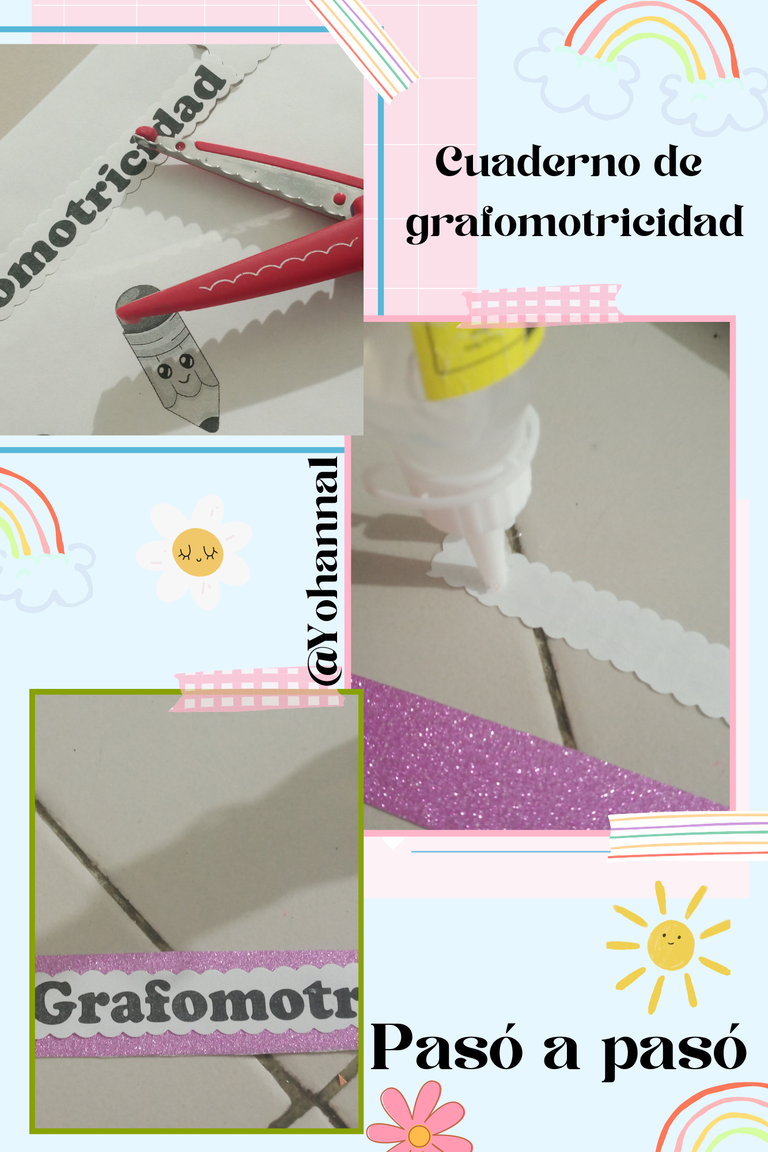
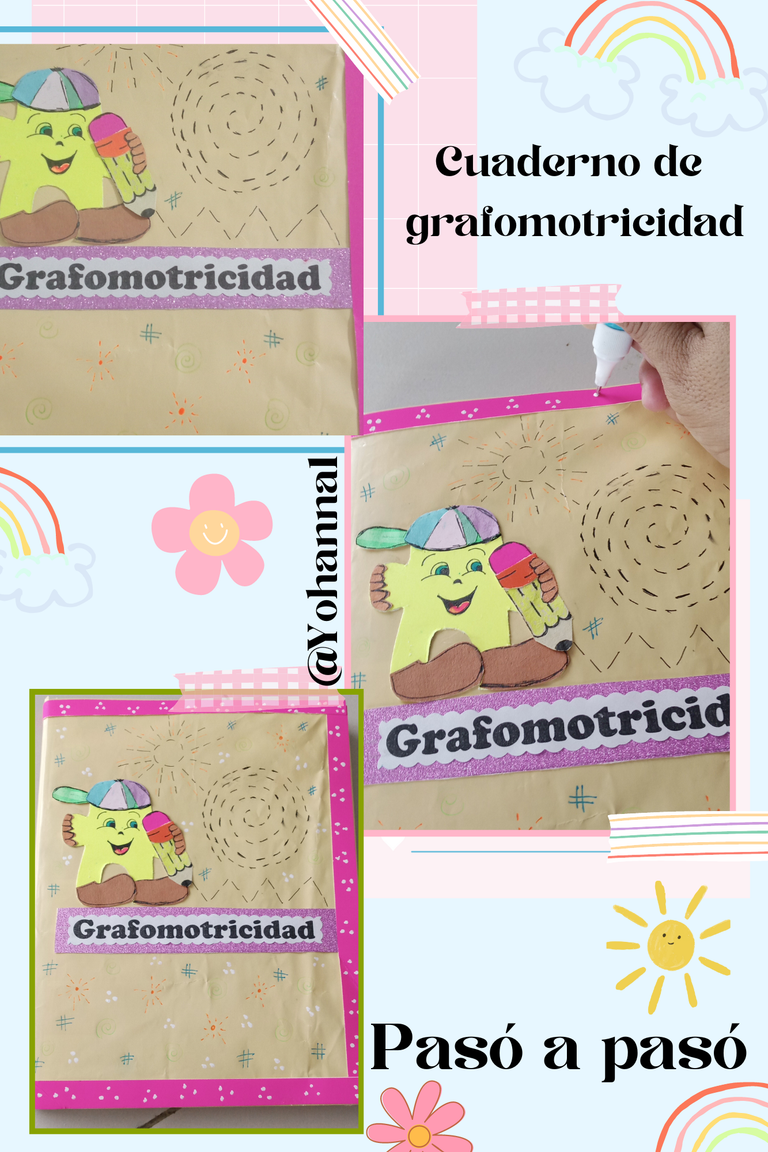
Comenzamos envolviendo el cuaderno con papel escolar un color salmon, con ayuda de pegamento.
Step by Step
We start by wrapping the notebook with salmon-colored school paper, with the help of glue.
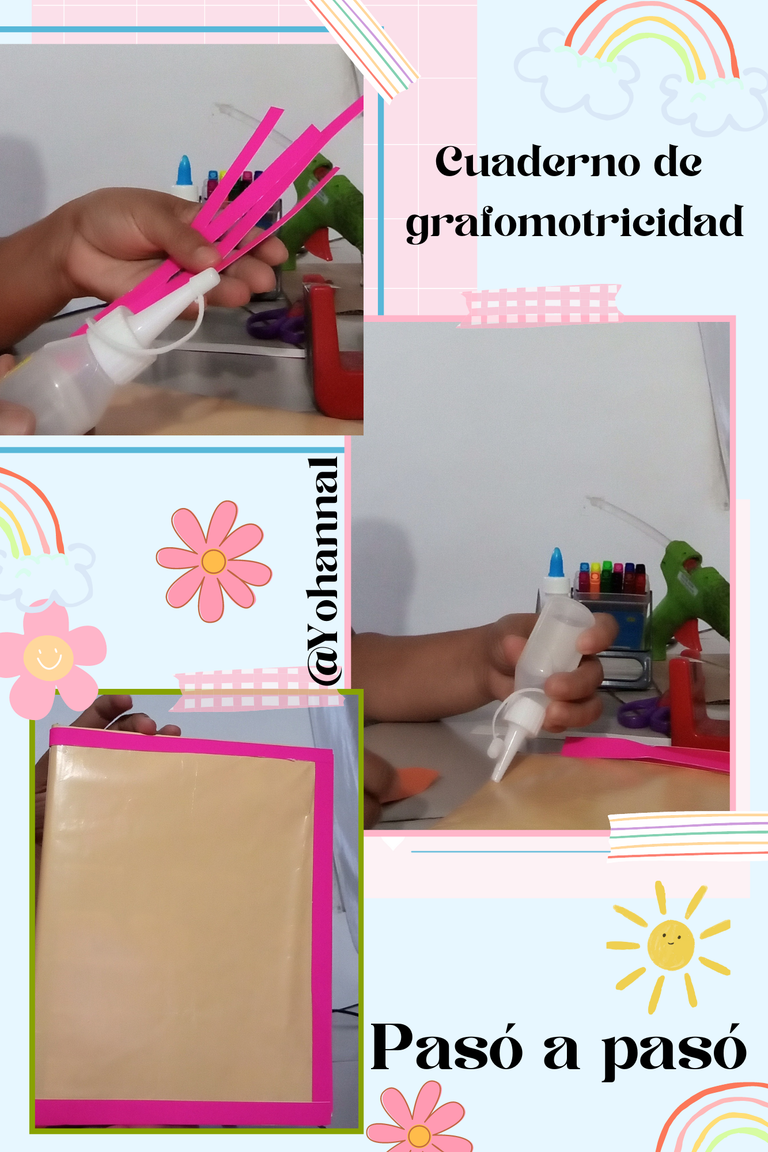
Cortamos tiras de color fucsia para los bordes, recortamos la letras (Grafomotricidad) que identificara el cuaderno, se pega al papel color lila escarchado se recorta con una tijera de figuras y se pega.
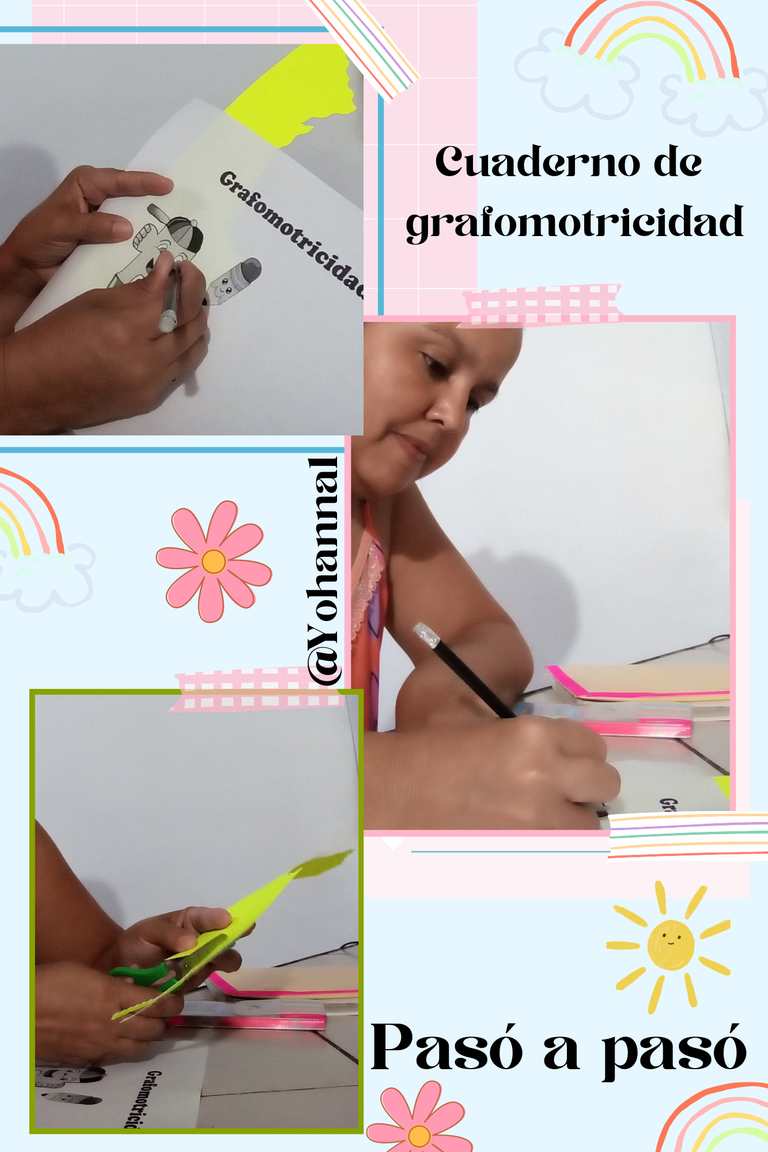
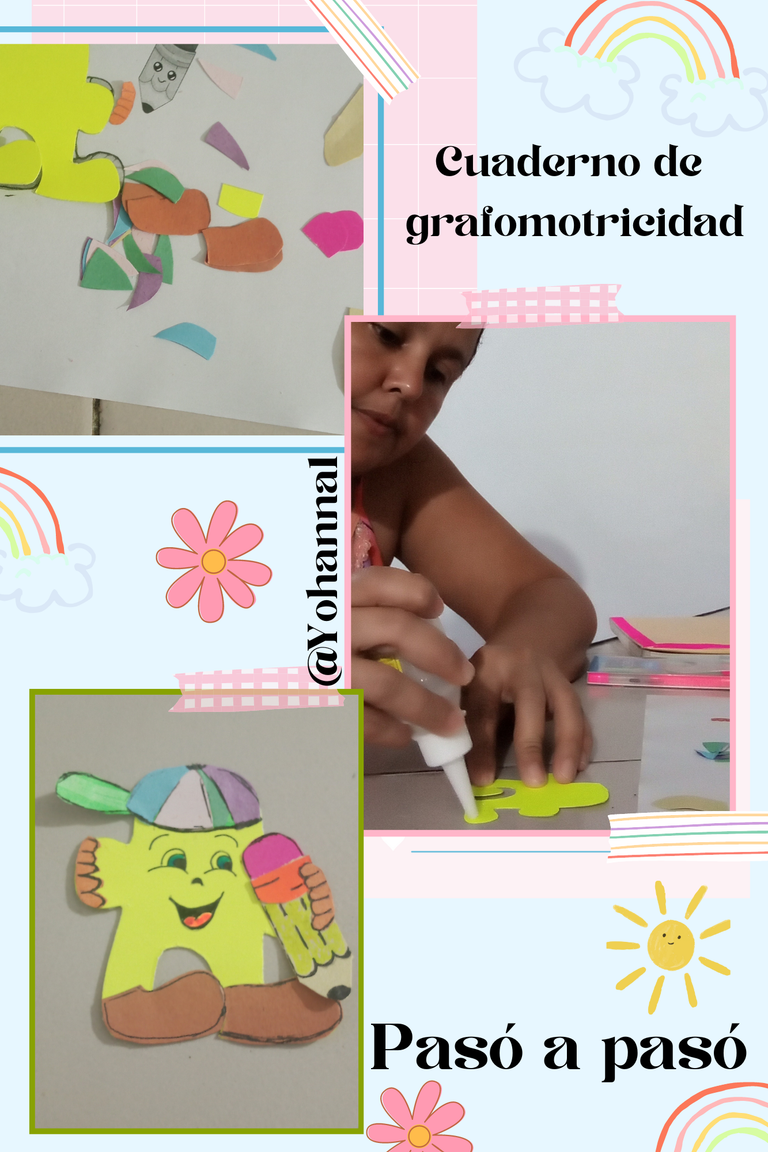
Dibujamos en cartulinas la pieza del dibujo o imagen que acompañara la palabra grafomotricidad en la portada, una vez lista vamos armando y pegando.
We cut fuchsia strips for the edges, cut out the letters (Graphomotor) that will identify the notebook, glue it to the frosty lilac paper, cut it out with figure scissors and glue it.
We draw on cardboard the piece of the drawing or image that will accompany the word graphomotor skills on the cover, once ready we put it together and paste it.
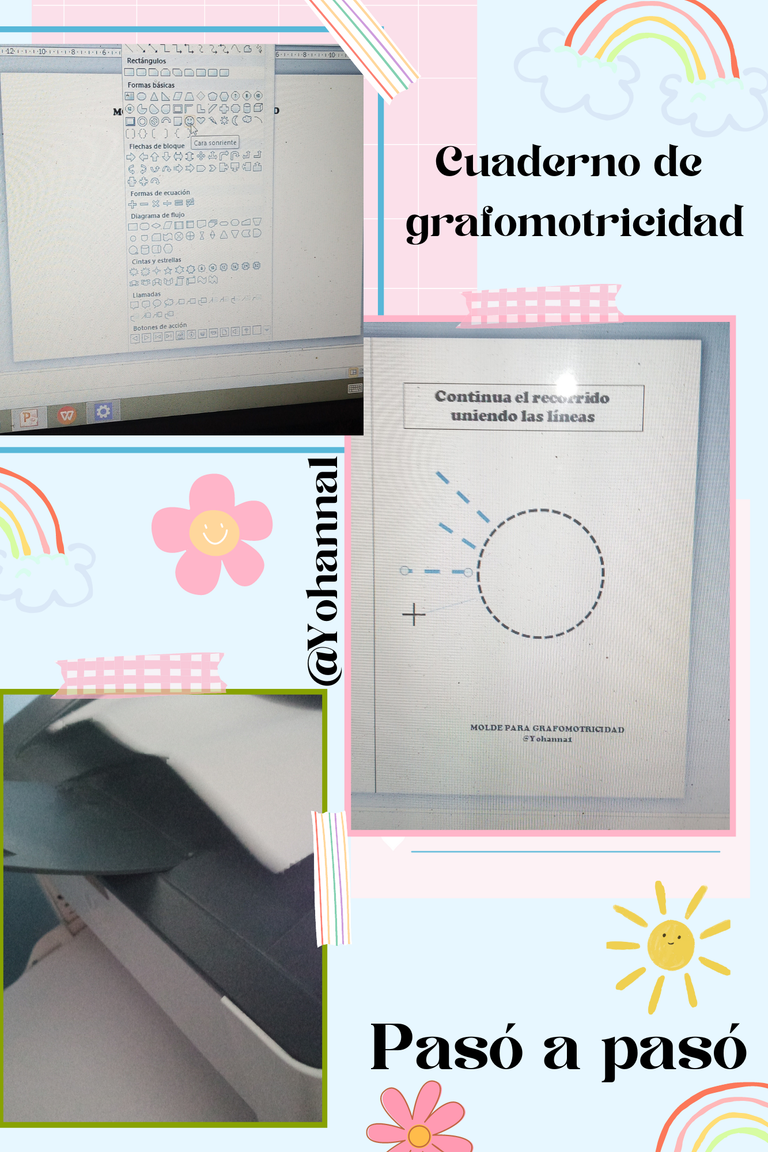
Te muestro un poco como fue la elaboración de la imágenes, utilizando la herramienta de Microsot PowerPoint 2010, una vez insertada la imagen, se inserta líneas o la figura que deseas puntear la selecciona y vas a menú de herramienta donde dice forma selecciona, bajas hasta contorno de forma, y seleccionas guiones allí se despliega la pestaña y puede elegir los punto para la figura.
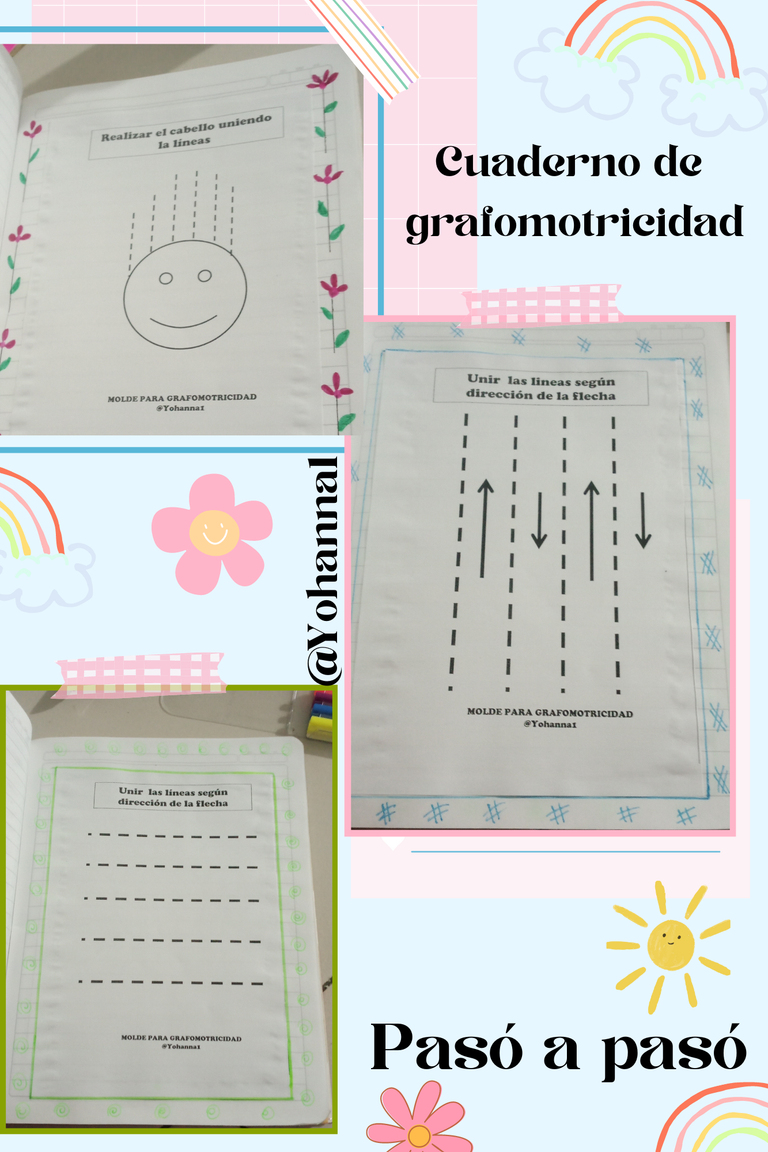
Lista las imágenes o dibujos que utilizaremos para arma en el cuaderno, imprimimos y recortamos todo de forma rectangular para luego pegar a cada hoja.
Acá te comparto algún molde que realice y utilice en la elaboración del cuaderno
I show you a little how the images were created, using the Microsoft PowerPoint 2010 tool, once the image is inserted, insert lines or the figure you want to point, select it and go to the tool menu where it says shape, select, go down to shape outline, and you select dashes there the tab is displayed and you can choose the points for the figure.

List the images or drawings that we will use to create in the notebook, we print and cut everything out in a rectangular shape and then glue it to each sheet.

Here I share with you some mold that I made and used in the making of the notebook.


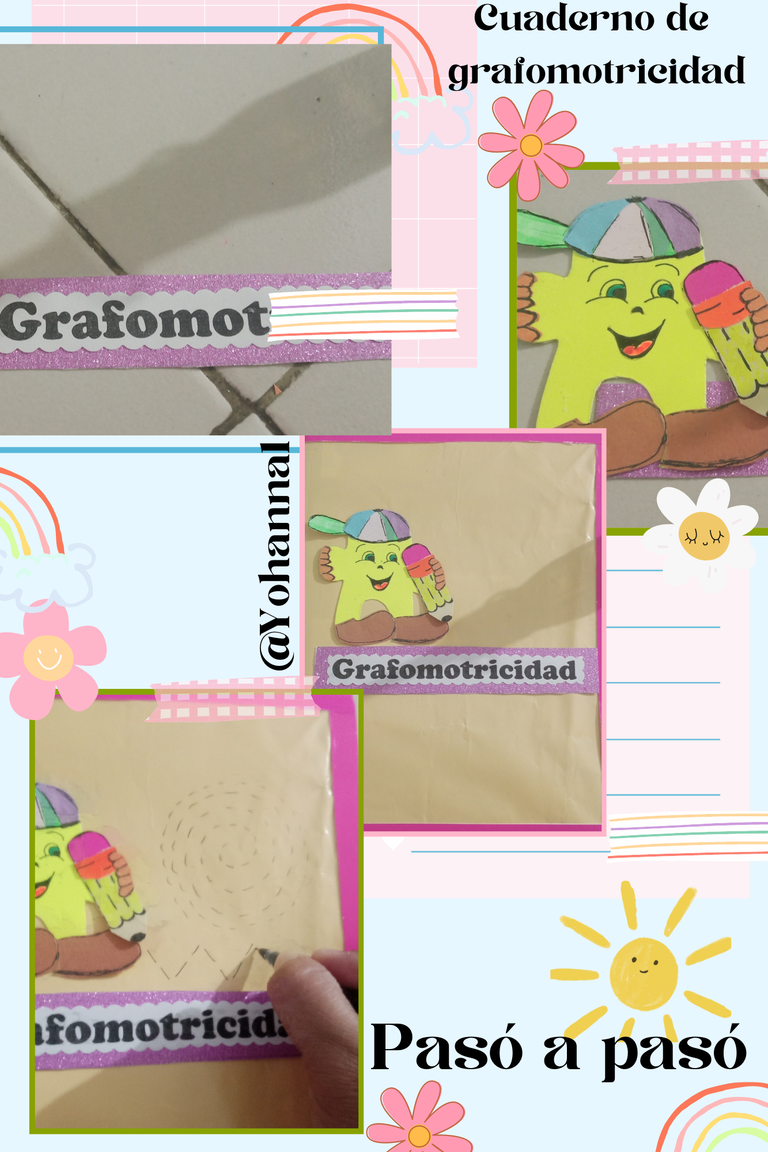
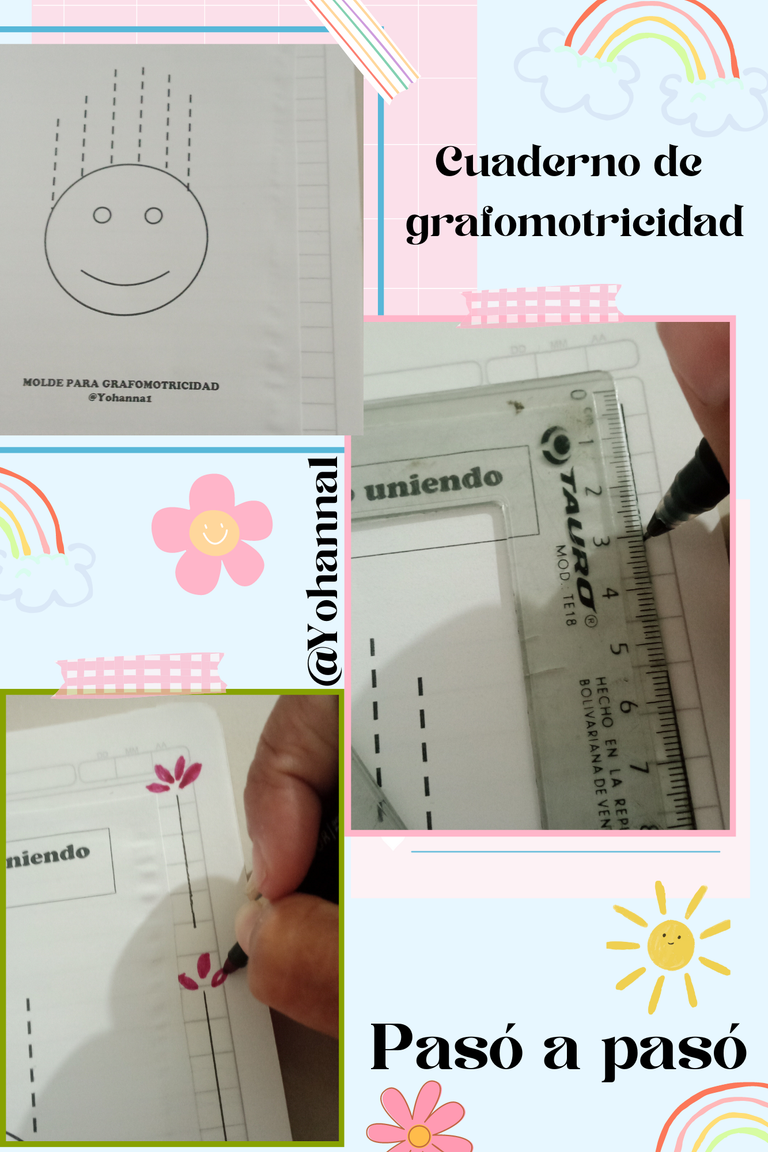
Se inicia a remarcar con un bolígrafo el borde de la imagen para hacer su margen y se remarca el borde con figuras para hacerlo más llamativo
We begin to highlight the edge of the image with a pen to make its margin and highlight the edge with figures to make it more striking.
Para darle mejor acabado a la portada se le coloco con corrector puntitos blancos.
To give the cover a better finish, I put white dots on it with concealer.
Listo! Para ser utilizado por los niños para divertiste en su tiempo libres al mismo tiempo estimular su motricidad
Ready! To be used by children to have fun in their free time while stimulating their motor skills.
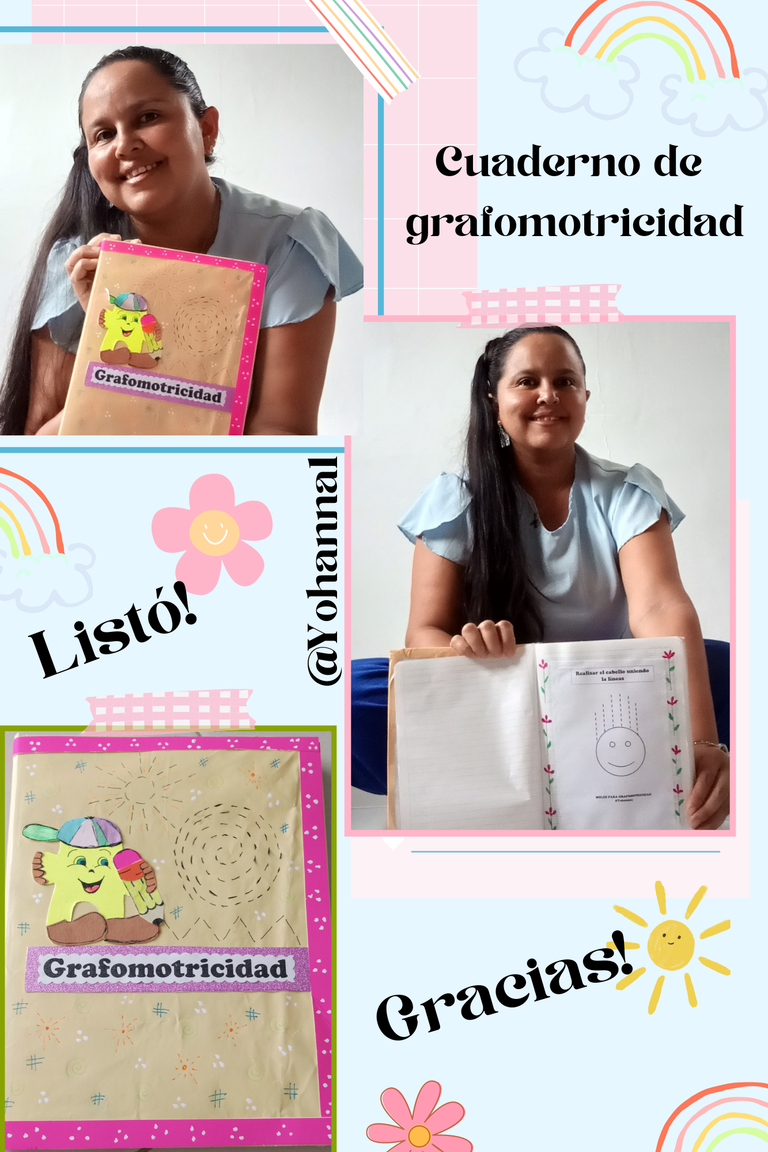
Espero le guste! Agradecida por cada apoyo. Dios los bendigas!
I hope you enjoy it! Grateful for every support. God bless you!
Contenido: Original del Autor.
Imágenes: Originales tomadas con mi teléfono
Recursos: Computador y teléfono infinix hp 10
Programa: Canva, Microsoft PowerPoint 2010 y Polish
Traducido con traductor google
Todos los Derechos Reservados: @yohanna1
Content: Original by the Author.
Images: Originals taken with my phone
Resources: Computer and phone infinix hp 10
Program: Canva, Microsoft PowerPoint 2010 and Polish
Translated with google translator
All Rights Reserved: @yohanna1
Congratulations @yohanna1! You have completed the following achievement on the Hive blockchain And have been rewarded with New badge(s)
Your next target is to reach 5000 upvotes.
You can view your badges on your board and compare yourself to others in the Ranking
If you no longer want to receive notifications, reply to this comment with the word
STOP