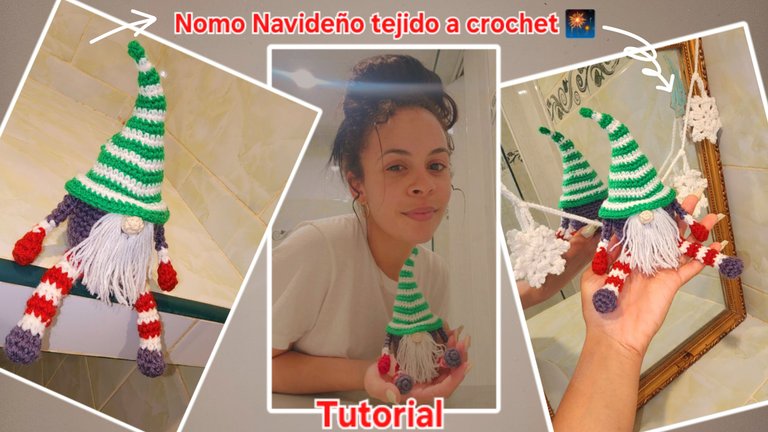
Muy buenas noches y bendiciones a todos los amigos creativos de esta comunidad hermosa y a todos los del mundo entero. Les deseo en este mes que culmina nuestro año 2024 que sus hogares estén llenos de felicidad y risas. Deseo que usted y sus familias estén bien y puedan cumplir cada uno de sus sueños. Por mi parte estoy genial, y agradecida con Dios, porque mi familia también lo está.
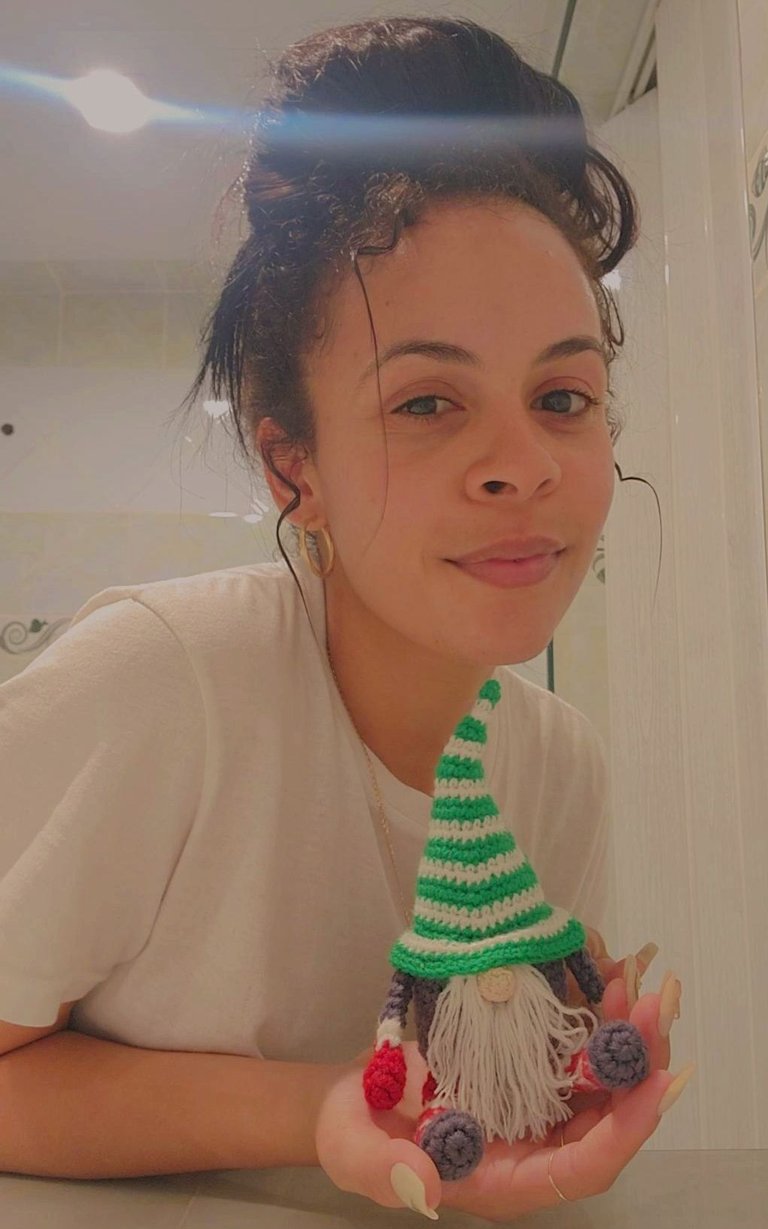
Estaba ansiosa por crear un nomo navideño, me gustan muchos, pero nunca lo había creado, así que decidí crear el patrón en crochet y estoy muy contenta porque me ha encantado el resultado. Es muy fácil de realizar y lleva muy poca lana. Mide aproximadamente 18 cm sentado, quise que quedara así pequeño porque me parece muy chulo así. Quedé como siempre enamorada y ha embellecido mi hogar con su presencia.
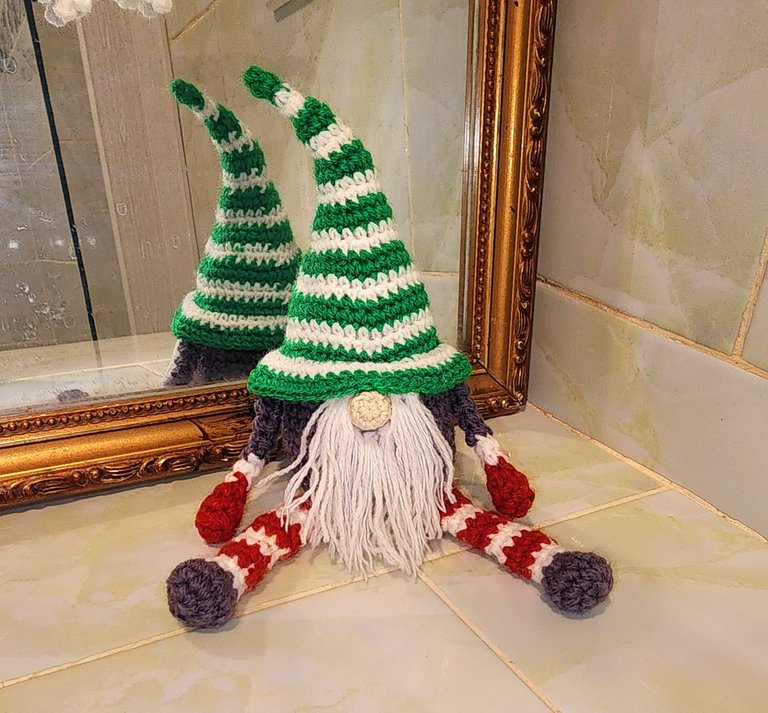
Les traigo el tutorial para todos los que amen los amigurumis y los deseen realizar.
Así que sin más el paso a paso.
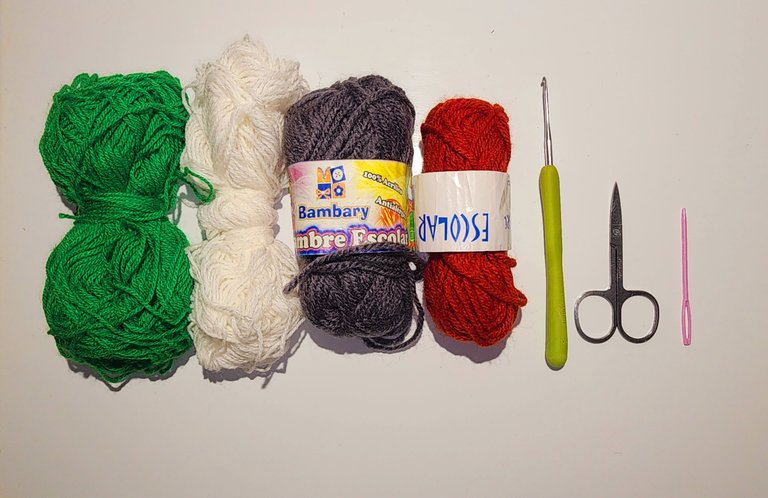
✨️Materiales✨️
- Lana de color verde, blanca, gris y roja.
- Agujeta.
- Tijera.
- Aguja lanera.
- Relleno.
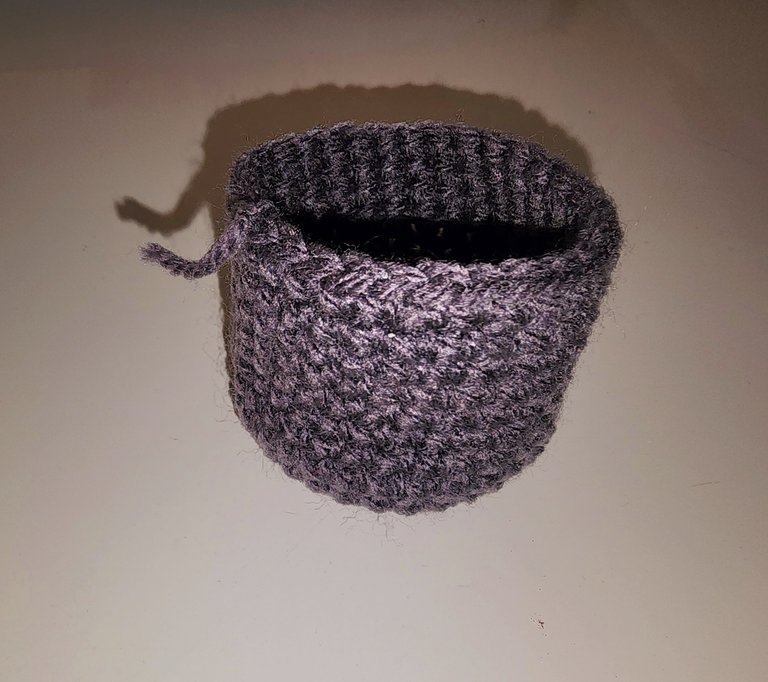
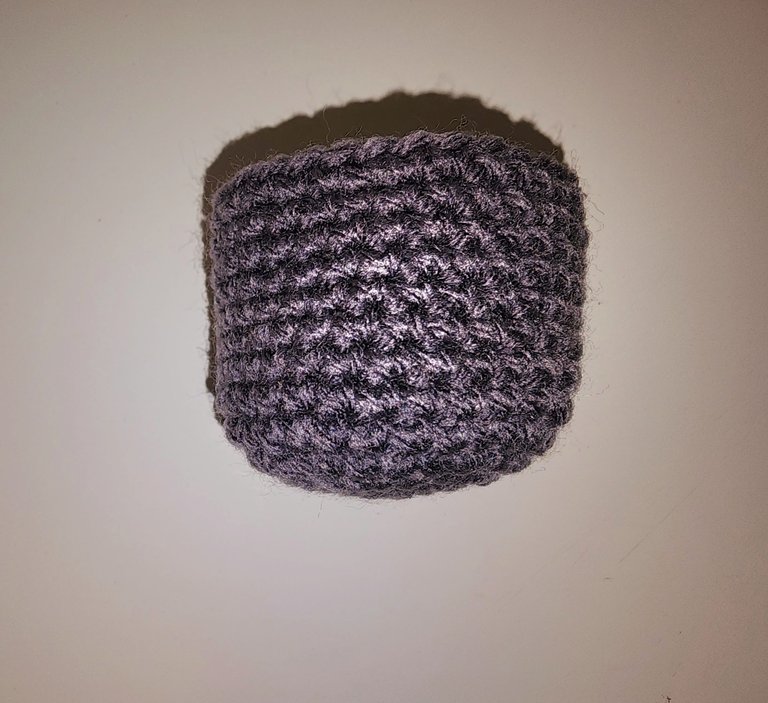
✨️Cuerpo✨️
V1 - Comenzamos con hilo gris, haciendo un anillo mágico y dentro hacemos 6 pb.
V2 - Hacemos 6 aumentos quedando un total de 12 pb.
V3 - Hacemos secuencias de 1 pb + 1 aumento quedando un total de 18 pb.
V4 - Hacemos secuencias de 2 pb + 1 aumento quedando un total de 24 pb.
V5 - Hacemos secuencias de 3 pb + 1 aumento quedando un total de 30 pb.
V6 - V14 - Hacemos estos 30 pb sin aumentos ni disminuciones.
Cerramos con punto deslizado, cortamos hilo y escondemos.
✨️Nariz✨️
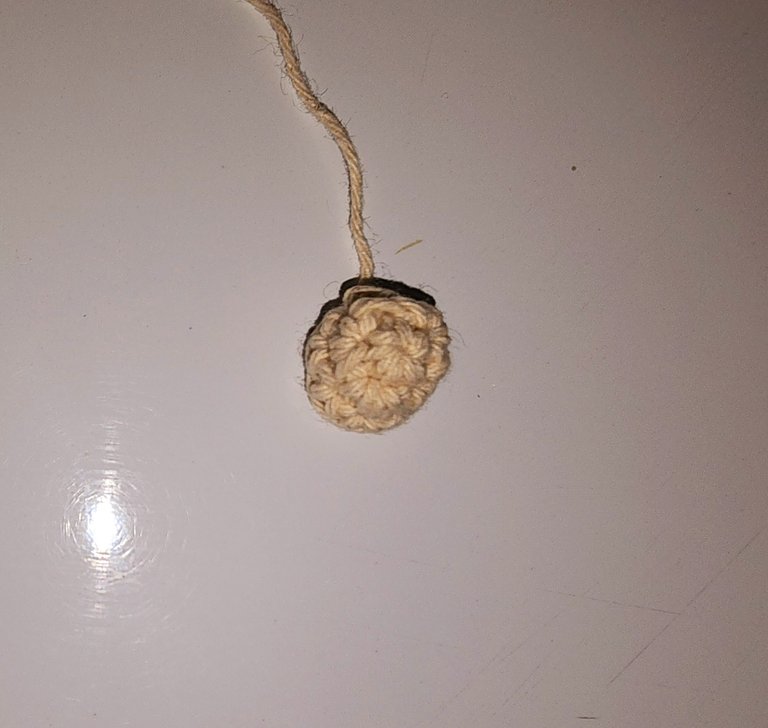
V1 - Comenzamos con hilo color piel, anillo mágico y dentro hacemos 4 pb.
V2 - Hacemos 4 aumentos quedando un total de 8 pb.
V3 - Hacemos estos 8 pb sin aumentos ni disminuciones.
Cerramos, cortamos hilo largo para coser.
✨️Manos✨️
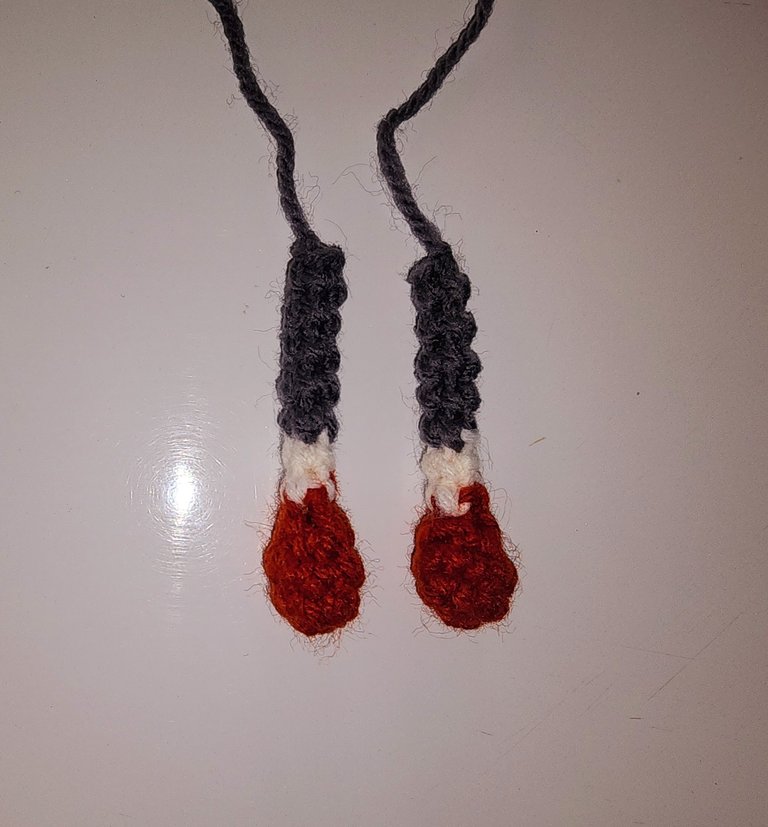
V1 - Comenzamos con hilo rojo, anillo mágico y dentro hacemos 4 pb.
V2 - Hacemos 4 aumentos quedando un total de 8 pb.
V3 - Hacemos estos 8 pb sin aumentos ni disminuciones.
V4 - Hacemos 4 disminuciones quedando un total de 4 pb.
V5 - V6 - Cambiando a hilo blanco hacemos estos 4 pb sin aumentos ni disminuciones.
V7 - V11 - Cambiando a hilo gris hacemos estos 4 pb sin aumentos ni disminuciones.
Cerramos y cortamos hilo largo para coser.
Hacemos dos manos iguales.
✨️Patitas✨️
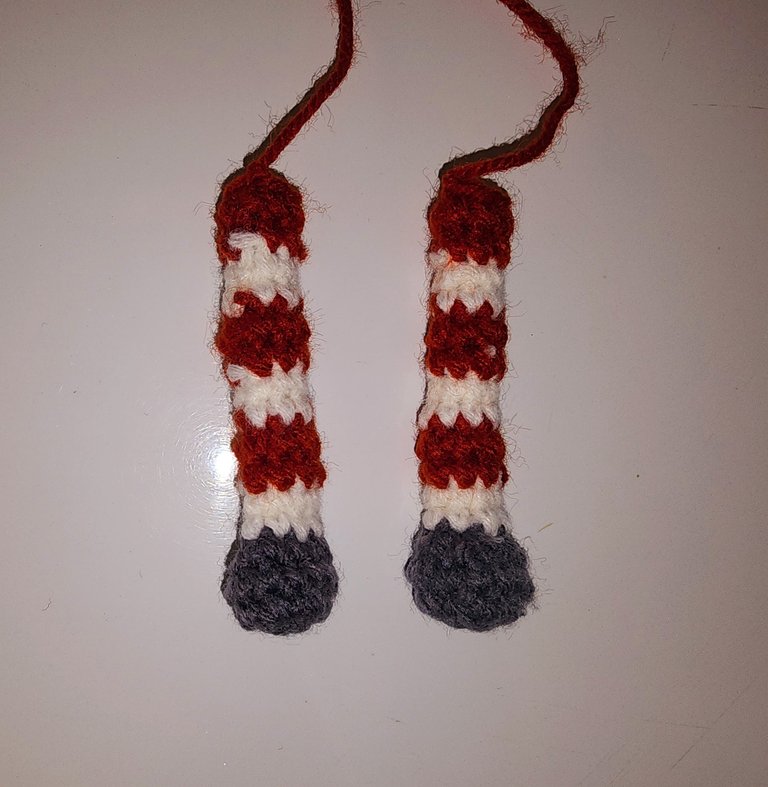
V1 - Comenzamos con hilo gris, anillo mágico y dentro hacemos 6 pb.
V2 - Hacemos 6 aumentos quedando un total de 12 pb.
V3 - Hacemos estos 12 pb sin aumentos ni disminuciones.
V4 - Hacemos 4 disminuciones + 3 pb quedando un total de 7 pb.
V5 - Cambiando a hilo blanco hacemos estos 7 pb sin aumentos ni disminuciones.
V6 - V16 - Continuamos haciendo estos 7 pb sin aumentos ni disminuciones. Lo haremos haciendo dos vueltas blancas y dos rojas.
✨️Gorro✨️
V1 - Comenzamos con hilo verde, anillo mágico y dentro hacemos 4 pb.
V2 - Hacemos estos 4 pb sin aumentos ni disminuciones.
V3 - Cambiando a hilo blanco hacemos secuencias de 1 pb + 1 aumento quedando un total de 6 pb.
V4 - Hacemos estos 6 pb sin aumentos ni disminuciones.
V5 - Cambiando a hilo verde hacemos secuencias de 2 pb + 1 aumento quedando un total de 8 pb.
V6 - Hacemos estos 8 pb sin aumentos ni disminuciones.
V7 - Cambiando a hilo blanco hacemos secuencias de 3 pb + 1 aumento quedando un total de 10 pb.
V8 - Hacemos estos 10 pb sin aumentos ni disminuciones.
V9 - Cambiando a hilo verde hacemos secuencias de 4 pb + 1 aumento quedando un total de 12 pb.
V10 - Hacemos estos 12 pb sin aumentos ni disminuciones.
V11- Cambiando a hilo blanco hacemos secuencias de 5 pb + 1 aumento quedando un total de 14 pb.
V12 - Hacemos estos 14 pb sin aumentos ni disminuciones.
V13 - Cambiando a hilo verde hacemos secuencias de 6 pb + 1 aumento quedando un total de 16 pb.
V14 - Hacemos secuencias de 7 pb + 1 aumento quedando un total de 18 pb.
V15 - Cambiando a hilo blanco hacemos secuencias de 8 pb + 1 aumento quedando un total de 20 pb.
V16 - Hacemos secuencias de 9 pb + 1 aumento quedando un total de 22 pb.
V17 - Cambiando a hilo verde hacemos secuencias de 10 pb + 1 aumento quedando un total de 24 pb.
V18 - Hacemos secuencias de 11 pb + 1 aumento quedando un total de 26 pb.
V19 - Cambiando a hilo blanco hacemos secuencias de 12 pb + 1 aumento quedando un total de 28 pb.
V20 - Hacemos secuencias de 13 pb + 1 aumento quedando un total de 30 pb.
V21 - Cambiando a hilo verde hacemos secuencias de 14 pb + 1 aumento quedando un total de 32 pb.
V22 - Hacemos secuencias de 15 pb + 1 aumento quedando un total de 34 pb.
V23 - Cambiando a hilo blanco hacemos secuencias de 16 pb + 1 aumento quedando un total de 36 pb.
V24 - Hacemos secuencias de 17 pb + 1 aumento quedando un total de 38 pb.
V25 - Cambiando a hilo verde hacemos secuencias de 18 pb + 1 aumento quedando un total de 40 pb.
V26 - Hacemos secuencias de 19 pb + 1 aumento quedando un total de 42 pb.
V27 - Cambiando a hilo blanco hacemos secuencias de 20 pb + 1 aumento quedando un total de 44 pb.
V28 - Hacemos secuencias de 21 pb + 1 aumento quedando un total de 46 pb.
V29 - Cambiando a hilo verde hacemos secuencias de 22 pb + 1 aumento quedando un total de 48 pb.
V30 - Hacemos secuencias de 23 pb + 1 aumento quedando un total de 50 pb.
Cerramos y cortamos hilo largo para coser al cuerpo.
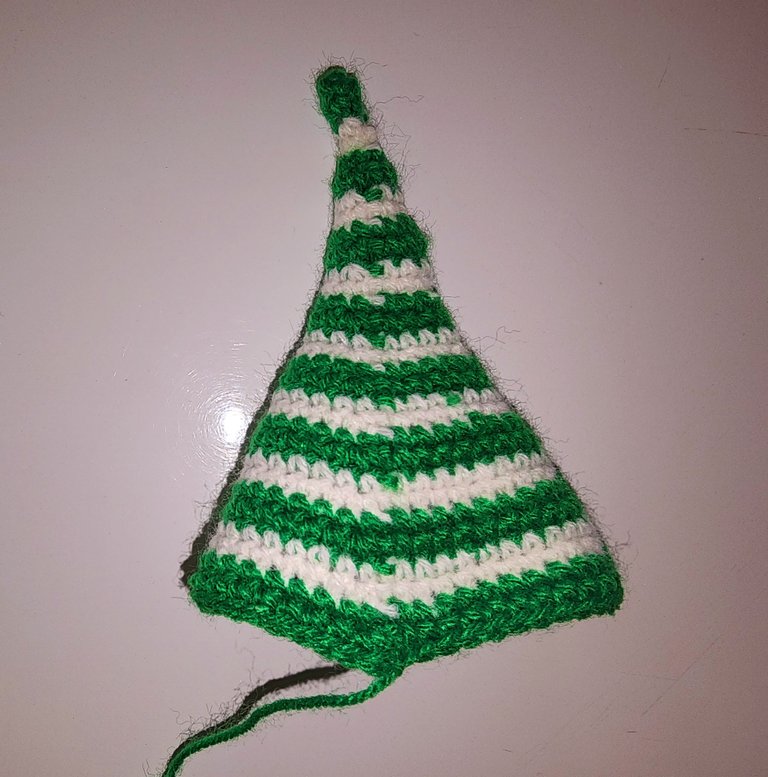
💫 Ahora que ya tenemos todas las piezas para formar nuestro nomo, solo nos queda coser con la ayuda de nuestra aguja lanera.
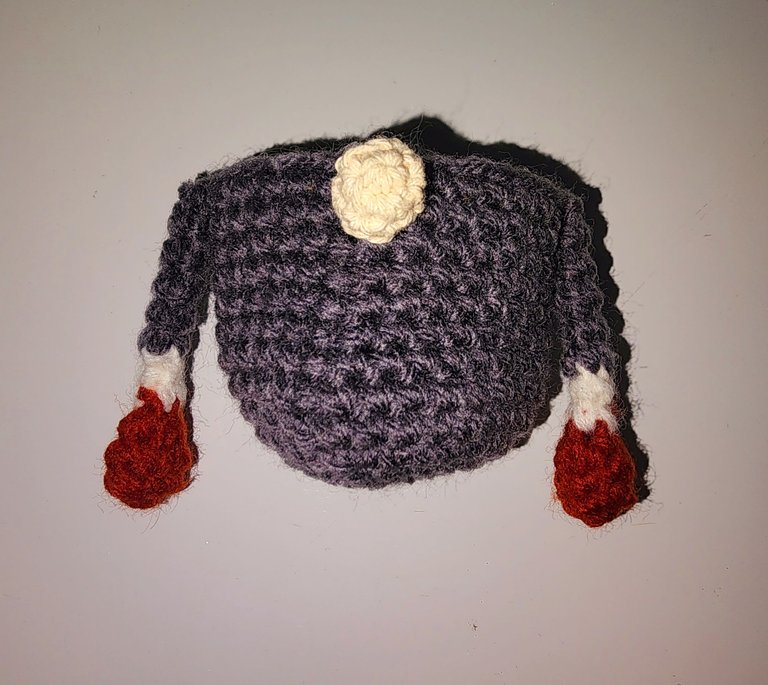
💫Comenzamos por coser la nariz al cuerpo, esta va exactamente entre las vueltas 13 y 14, buscamos en centro que le daremos y la cosemos.
💫 Ahora vamos a coser las manos, guiándonos como centro la nariz, vamos a contar 7 puntos a cada lado y ahí cosemos las manos.
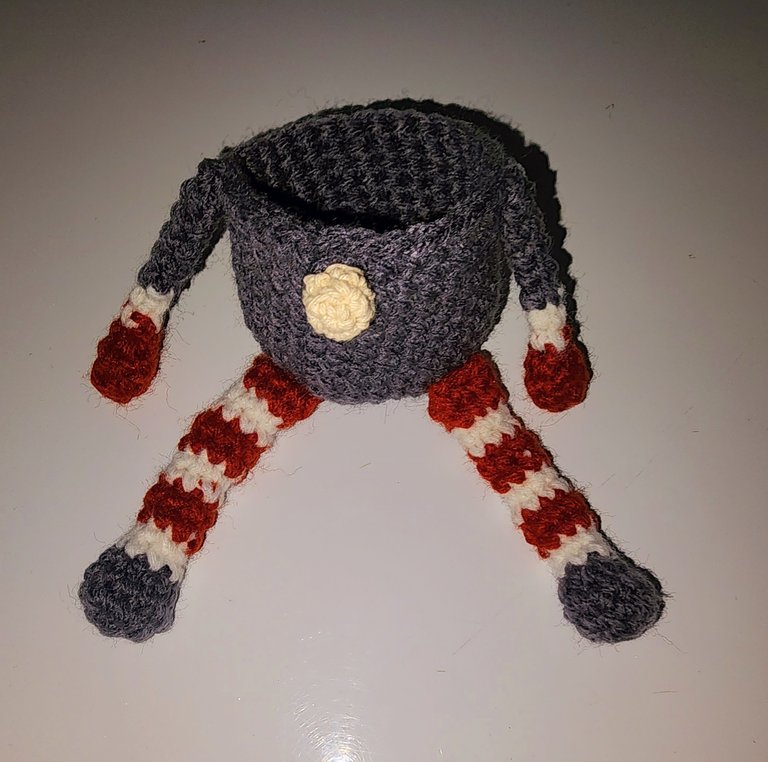
💫 Ahora vamos a coser las patitas, sigamos guiándonos como centro la nariz y contemos 3 puntos a cada lado, estas van entre las vueltas 5 y 6.
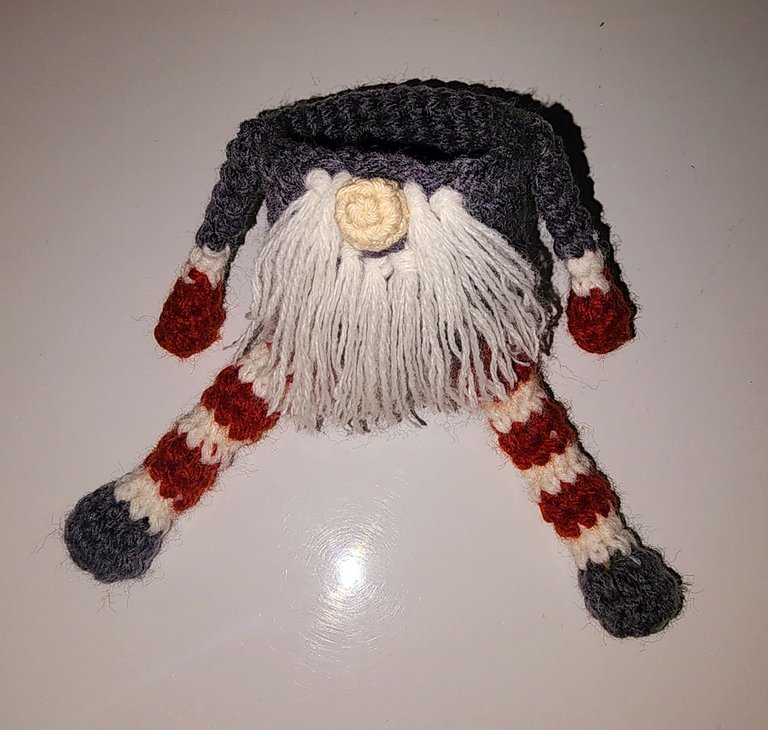
💫 Ahora vamos a cortar hilos blancos y vamos a colocarlos alrededor de la nariz, esta sería su barba.
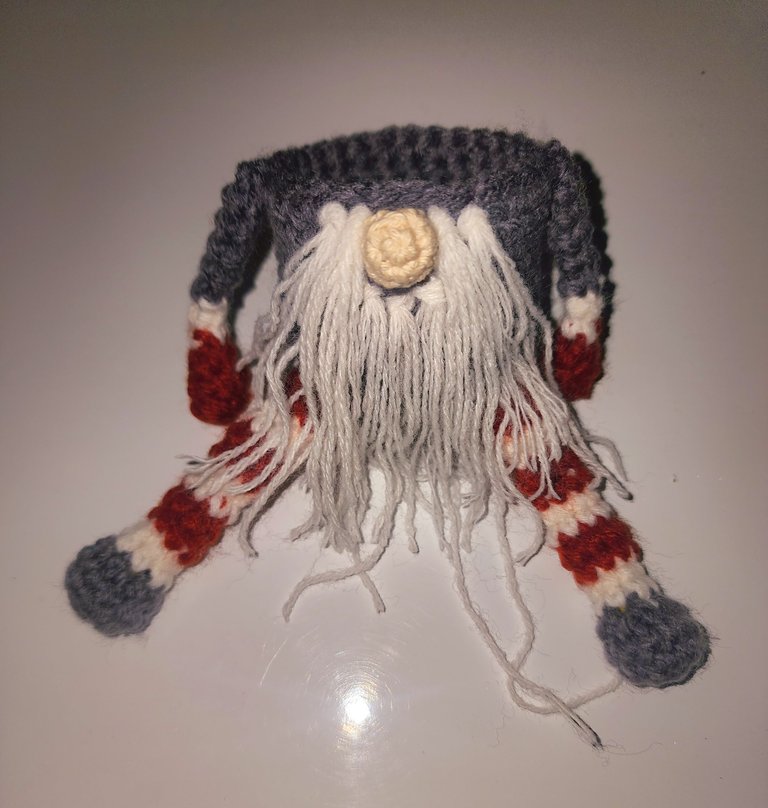
💫 Ahora vamos a rellenar el cuerpo y también el gorro y coseremos el gorro al cuerpo con la ayuda de la aguja lanera. Las puntadas vamos a darlas en la última vuelta del cuerpo y en la vuelta 26 del gorro. De esta manera quedará un vuelo del gorro que cae en la nariz.
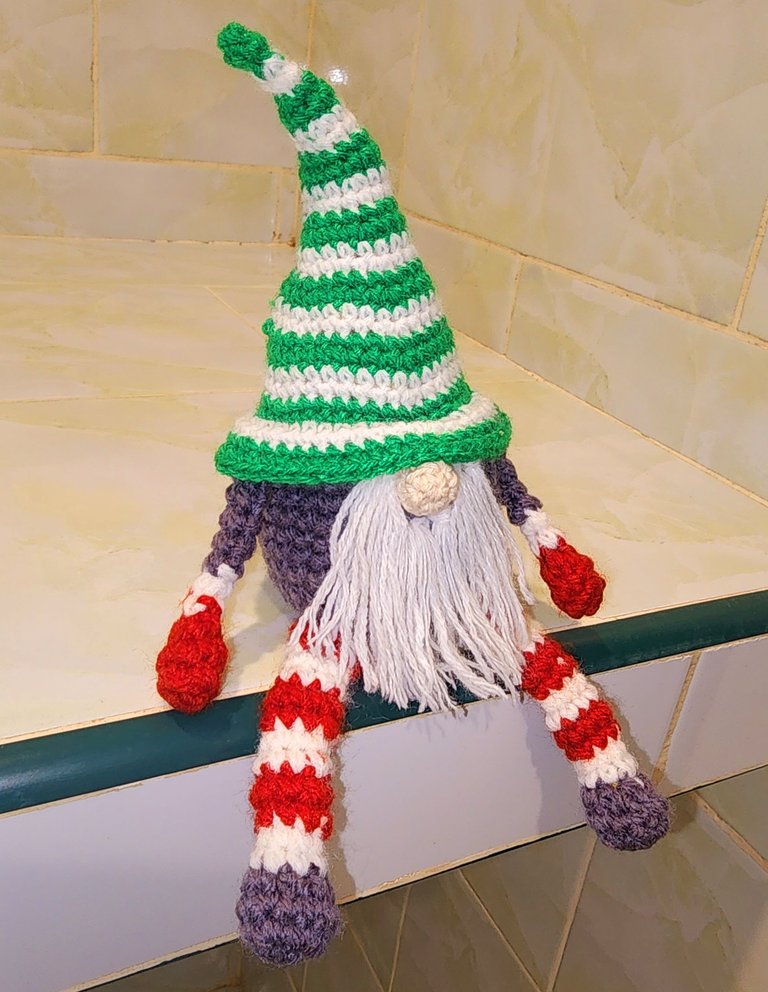
Y listo amigos y amigas, así de bello queda este nomo navideño, se ve tan hermoso para adornar nuestro hogar en esta época del año tan bonita y colorida.
Gracias de antemano por leerme.
¿Te gustó este proyecto?
Bendiciones, miles y abrazos virtuales 🤗.
Hasta una nueva publicación 🙌.
✨️💫Versión en English✨️💫
Good evening and blessings to all the creative friends of this beautiful community and to everyone around the world. I wish that in this final month of our year 2024 your homes are filled with happiness and laughter. I hope that you and your families are well and can fulfill each of your dreams. As for me, I am great, and grateful to God, because my family is also well.
I was eager to create a Christmas gnome, I like them a lot, but I had never created one before, so I decided to create the crochet pattern and I am very happy because I have loved the result. It is very easy to make and requires very little yarn. It measures approximately 18 cm seated, I wanted it to be small because I think it looks really cute that way. I was, as always, in love with it and it has beautified my home with its presence.

I bring you the tutorial for all those who love amigurumis and wish to make them.
So without further ado, the step by step.
✨️Materials✨️
- Yarn in green, white, gray, and red colors.
- Crochet hook.
- Scissors.
- Yarn needle.
- Stuffing.

✨️Body✨️
R1 - We start with gray yarn, making a magic ring and crochet 6 sc inside.
R2 - Crochet 6 increases, totaling 12 sc.
R3 - Crochet sequences of 1 sc + 1 increase, totaling 18 sc.
R4 - Crochet sequences of 2 sc + 1 increase, totaling 24 sc.
R5 - Crochet sequences of 3 sc + 1 increase, totaling 30 sc.
R6 - R14 - Crochet these 30 sc without increases or decreases.
Close with a slip stitch, cut yarn and weave in the ends.


✨️Nose✨️
R1 - Start with skin color yarn, magic ring and crochet 4 sc inside.
R2 - Crochet 4 increases, totaling 8 sc.
R3 - Crochet these 8 sc without increases or decreases.
Close, cut a long yarn tail for sewing.

✨️Arms✨️
R1 - Start with red yarn, magic ring and crochet 4 sc inside.
R2 - Crochet 4 increases, totaling 8 sc.
R3 - Crochet these 8 sc without increases or decreases.
R4 - Crochet 4 decreases, totaling 4 sc.
R5 - R6 - Switching to white yarn, crochet these 4 sc without increases or decreases.
R7 - R11 - Switching to gray yarn, crochet these 4 sc without increases or decreases.
Close and cut a long yarn tail for sewing.
Make two identical arms.

✨️Legs✨️
R1 - Start with gray yarn, magic ring and crochet 6 sc inside.
R2 - Crochet 6 increases, totaling 12 sc.
R3 - Crochet these 12 sc without increases or decreases.
R4 - Crochet 4 decreases + 3 sc, totaling 7 sc.
R5 - Switching to white yarn, crochet these 7 sc without increases or decreases.
R6 - R16 - Continue crocheting these 7 sc without increases or decreases. Do two white rounds and two green rounds.

✨️Hat✨️
V1 - We start with green yarn, magic ring and make 4 sc inside.
V2 - Make these 4 sc without increases or decreases.
V3 - Switching to white yarn, make sequences of 1 sc + 1 increase resulting in a total of 6 sc.
V4 - Make these 6 sc without increases or decreases.
V5 - Switching to green yarn, make sequences of 2 sc + 1 increase resulting in a total of 8 sc.
V6 - Make these 8 sc without increases or decreases.
V7 - Switching to white yarn, make sequences of 3 sc + 1 increase resulting in a total of 10 sc.
V8 - Make these 10 sc without increases or decreases.
V9 - Switching to green yarn, make sequences of 4 sc + 1 increase resulting in a total of 12 sc.
V10 - Make these 12 sc without increases or decreases.
V11- Switching to white yarn, make sequences of 5 sc + 1 increase resulting in a total of 14 sc.
V12 - Make these 14 sc without increases or decreases.
V13 - Switching to green yarn, make sequences of 6 sc + 1 increase resulting in a total of 16 sc.
V14 - Make sequences of 7 sc + 1 increase resulting in a total of 18 sc.
V15 - Switching to white yarn, make sequences of 8 sc + 1 increase resulting in a total of 20 sc.
V16 - Make sequences of 9 sc + 1 increase resulting in a total of 22 sc.
V17 - Switching to green yarn, make sequences of 10 sc + 1 increase resulting in a total of 24 sc.
V18 - Make sequences of 11 sc + 1 increase resulting in a total of 26 sc.
V19 - Switching to white yarn, make sequences of 12 sc + 1 increase resulting in a total of 28 sc.
V20 - Make sequences of 13 sc + 1 increase resulting in a total of 30 sc.
V21 - Switching to green yarn, make sequences of 14 sc + 1 increase resulting in a total of 32 sc.
V22 - Make sequences of 15 sc + 1 increase resulting in a total of 34 sc.
V23 - Switching to white yarn, make sequences of 16 sc + 1 increase resulting in a total of 36 sc.
V24 - Make sequences of 17 sc + 1 increase resulting in a total of 38 sc.
V25 - Switching to green yarn, make sequences of 18 sc + 1 increase resulting in a total of 40 sc.
V26 - Make sequences of 19 sc + 1 increase resulting in a total of 42 sc.
V27 - Switching to white yarn, make sequences of 20 sc + 1 increase resulting in a total of 44 sc.
V28 - Make sequences of 21 sc + 1 increase resulting in a total of 46 sc.
V29 - Switching to green yarn, make sequences of 22 sc + 1 increase resulting in a total of 48 sc.
V30 - Make sequences of 23 sc + 1 increase resulting in a total of 50 sc.
Close and cut long yarn to sew to the body.

💫 Now that we have all the pieces to assemble our gnome, we just have to sew with the help of our tapestry needle.
💫We start by sewing the nose to the body, it goes exactly between rounds 13 and 14, we look for the center we will give it and sew it.
💫 Now we are going to sew the hands, using the nose as the center, we will count 7 stitches on each side and there we will sew the hands.

💫 Now we are going to sew the feet, continuing to use the nose as the center and counting 3 stitches on each side, these go between rounds 5 and 6.

💫 Now we are going to cut white threads and place them around the nose, this will be its beard.


💫 Now we are going to stuff the body and also the hat, and we will sew the hat to the body with the help of a wool needle. We will make the stitches on the last round of the body and on round 26 of the hat. This way, there will be a flap of the hat falling onto the nose.

And there you have it, friends, this lovely Christmas gnome is complete, it looks so beautiful to decorate our home in this lovely and colorful time of the year.

Thank you in advance for reading.
Did you like this project?

Blessings, a thousand and virtual hugs 🤗.
Until the next post 🙌.

Recursos empleados
| RECURSO / RESOURCE | FUENTE / SOURCE |
|---|---|
| Edición / Edition: | @yunacrochet |
| Imágenes / Pictures: | Samsung Galaxy s22 Ultra |
| Translated / Traducción: | Hive Translator by @noakmilo |
Posted Using InLeo Alpha
Has sido votado por
PROYECTO ENLACE
'Conectando Ideas y Comunidades'
PROYECTO ENLACE es un proyecto de curación de habla hispana enfocado en recompensar contenido de calidad y apoyar autores en su proceso de crecimiento en HIVE.
Creemos y apostamos por el futuro de esta gran plataforma, y estamos muy emocionados de poder hacerla crecer junto a esta comunidad. Así que te invitamos a publicar en nuestra COMUNIDAD y estar atento a todas las actividades que tenemos preparadas y que estaremos publicando en breve.
¿QUIERES AUTOMATIZAR TUS GANANCIAS DE CURACIÓN? SE PARTE DEL PROYECTO ENLACE APOYANDO A NUESTRO TRAIL EN HIVE.VOTE INGRESA AQUÍ PARA CONOCER LOS DETALLES.
¿QUIERES INVERTIR ENLACE? DESCUBRE COMO HACERLO Y GENERAR INGRESOS DE FORMA SEMANAL MEDIANTE TU DELEGACIÓN DE HP AQUÍ TE EXPLICAMOS COMO.
Te invitamos a participar en nuestro servidor de Discord: https://discord.gg/3S9y7BbWfS
Atentamente
EQUIPO ENLACE 2024
Muchas gracias, será un enorme placer para mí participar. Bendiciones 🤶.
Está precioso, muy bien detallado el paso a paso, fácil de seguir.
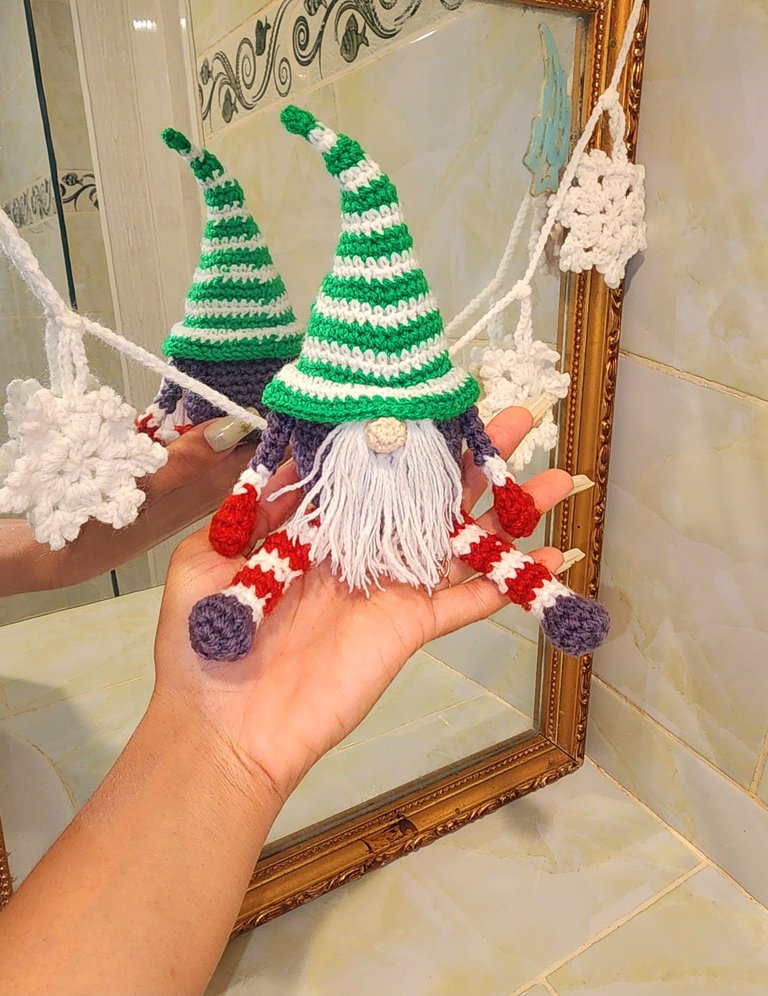
También amé la guirnalda de la foto jeje
Muchas gracias amiga, tenía muchos deseos de realizar uno. La guirnalda fue también hecha con todo mi amor jjj. Bendiciones 🤗😘.
Que cosita más chula, me encanta, todo lo que haces es pura belleza 😍😍😍
Muchas gracias mi amiga, lo hago con todo mi amor. Bendiciones 🎅 😘.