Español
Buenos dias mi bella comunidad de Hive y a todos los miembros que la integran; que esta semana sea de grandes éxitos en sus tutoriales.
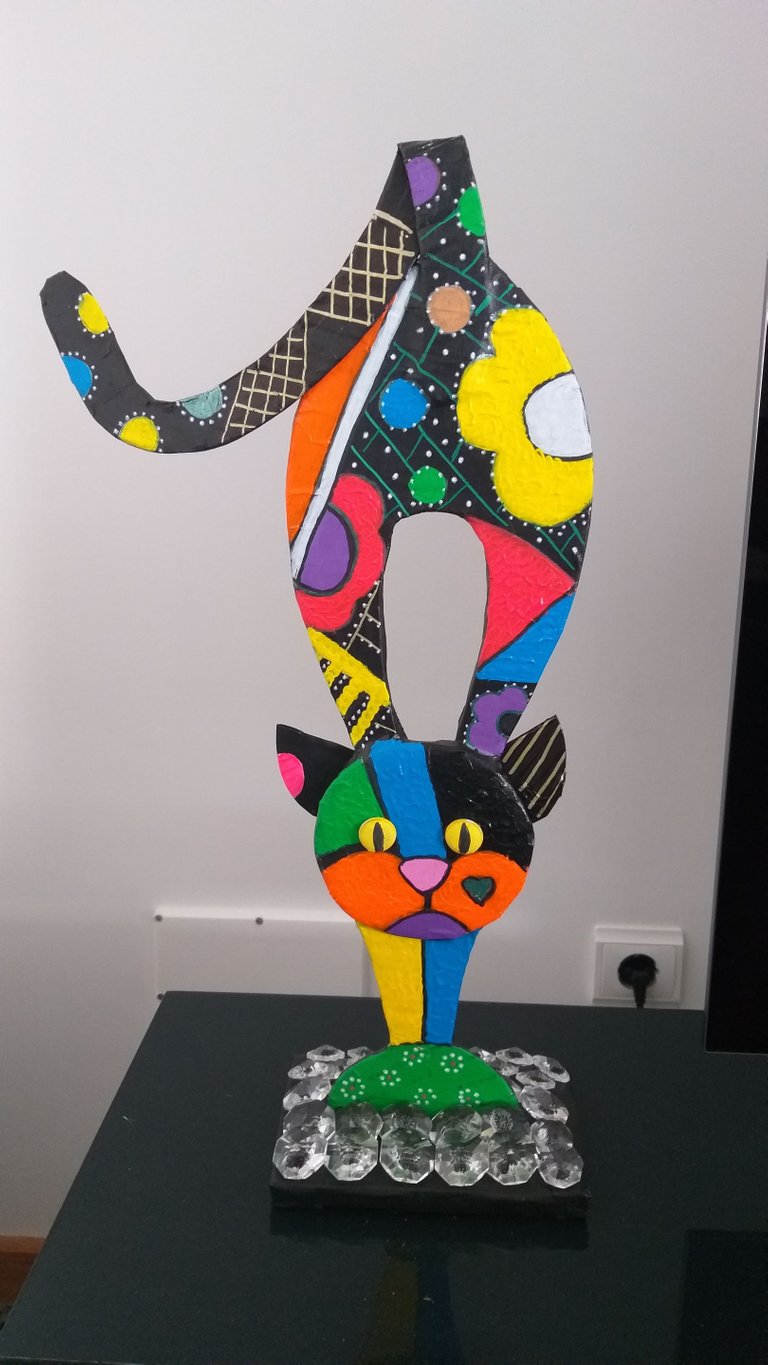
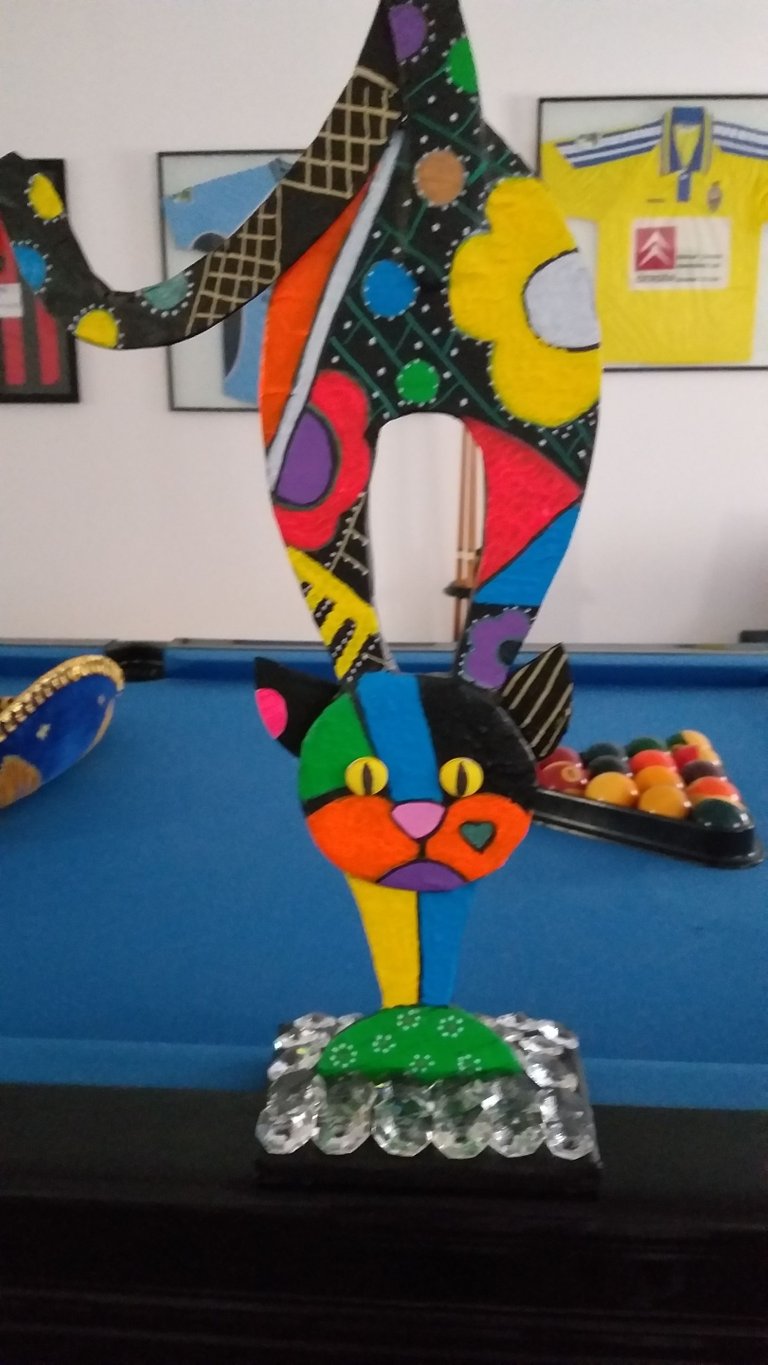
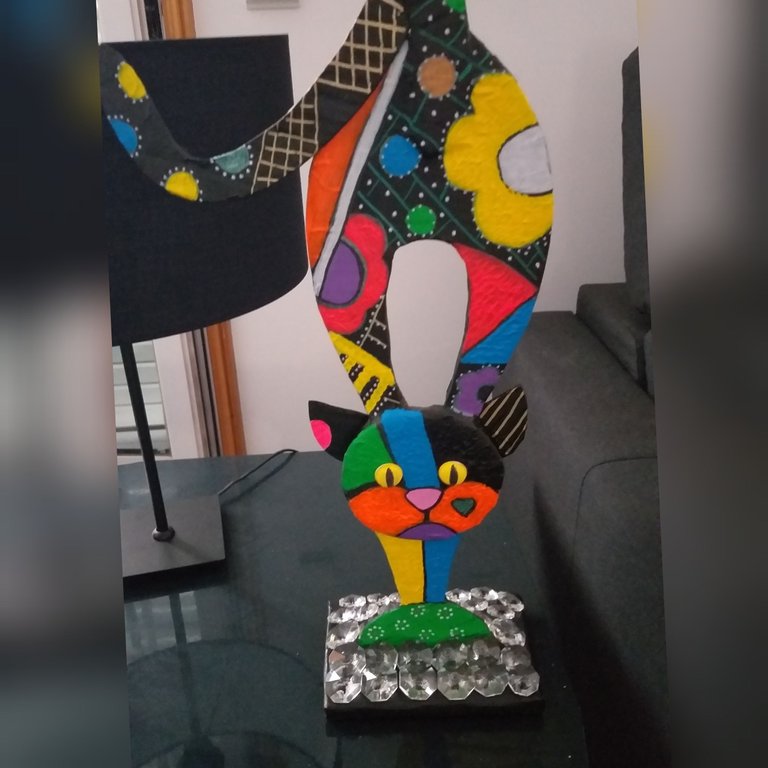
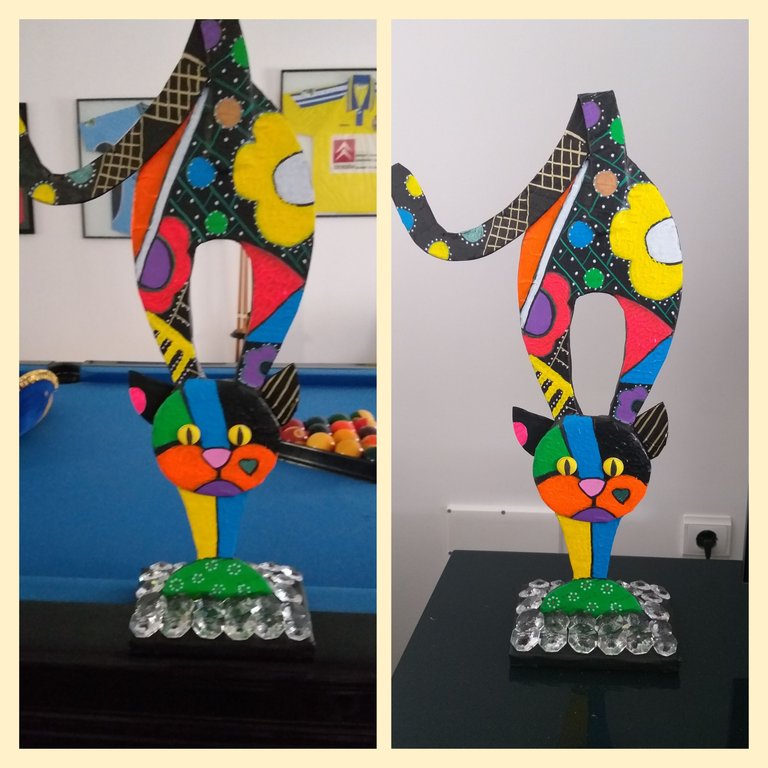
La propuesta que les traigo hoy fue inspirada por un gato decorativo que vi en una tienda de artículos para el hogar, me llamó la atención los coloridos con que estaba pintado; pero el material era de madera y decidí sustituirlo por cartón😉😊 así los ánimo a que reciclen el cartón y me acompañen a realizar este colorido gato🐈
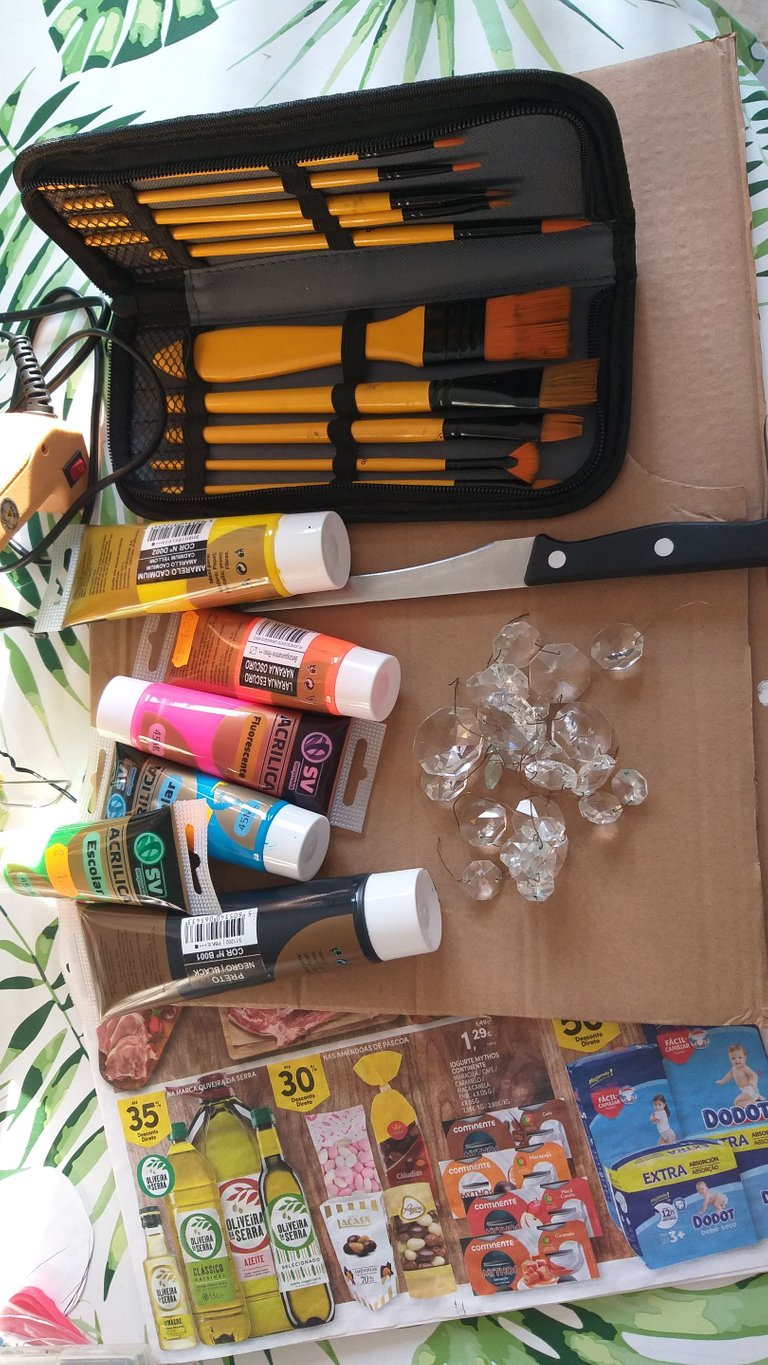
Los Materiales a utilizar para hacer este lindo gato son:
Cartón
Tijera
Un exacto, cúter o cuchillo
Pinturas acrílicas de colores vivos.
Pinceles finos y uno grueso
Marcador y un lápiz
Tirro o cinta de construcción
Yeso o polvo tapa grietas
una brocha pequeña
Periódico, revista o papel bond
Pistola de silicona y barras de silicona o pegamento de secado rápido
Palitos parrillero o de floristería.
Pasos para realizar el gato
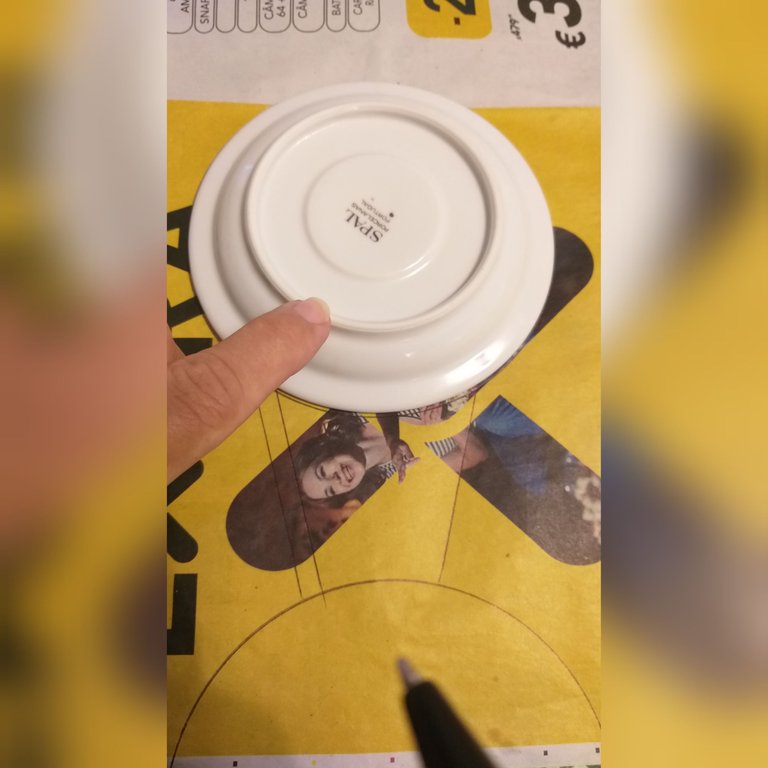
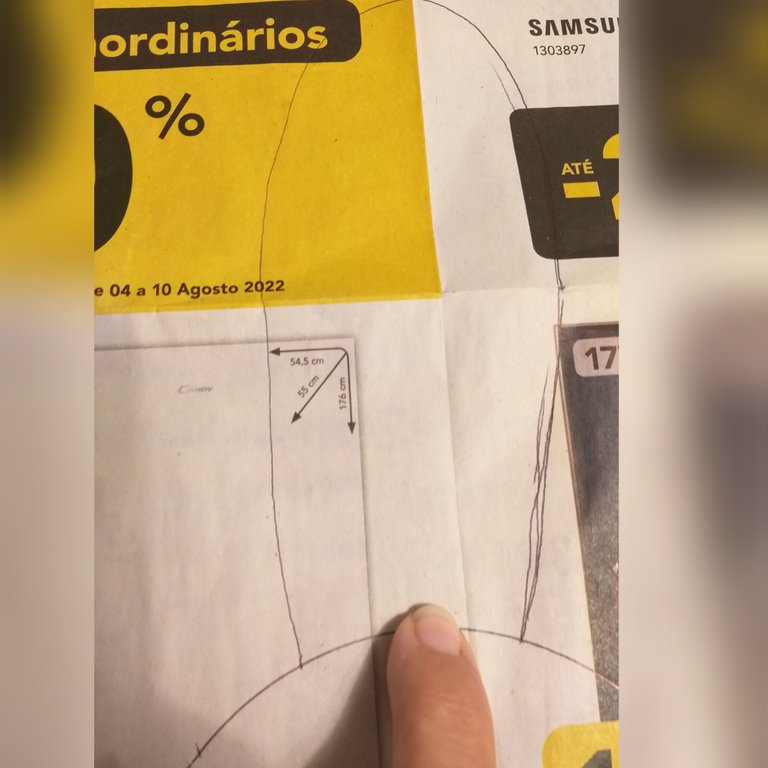
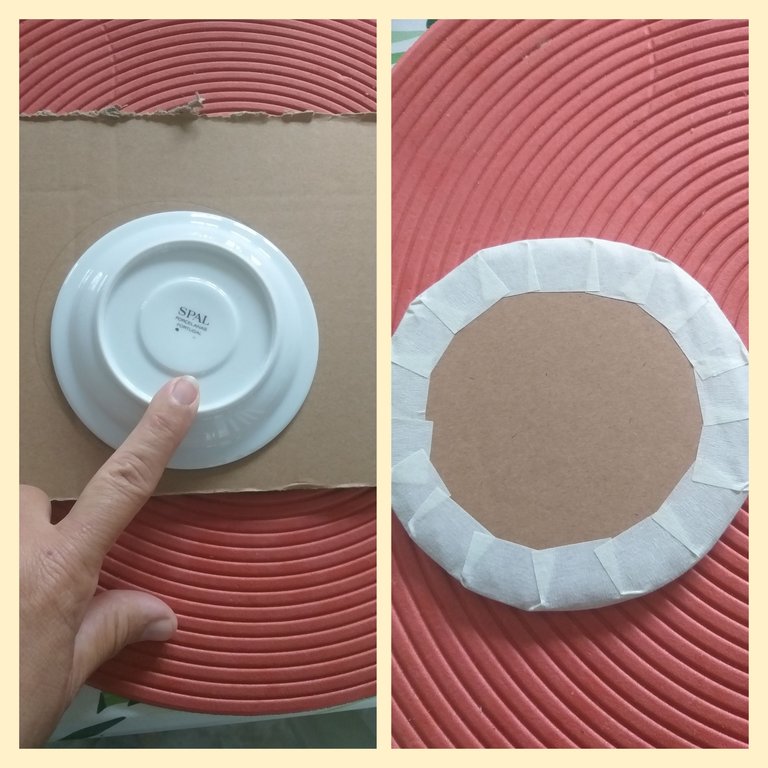
1👣. Lo primero que vamos hacer es dibujar con el lápiz o bolígrafo la imagen que deseamos en el periódico, revista o papel bond. Como pueden observar en la imagen utilicé un plato pequeño de los que se usan para servir la taza con café, dibujé sólo la mitad del plato para hacer las patas del gato.
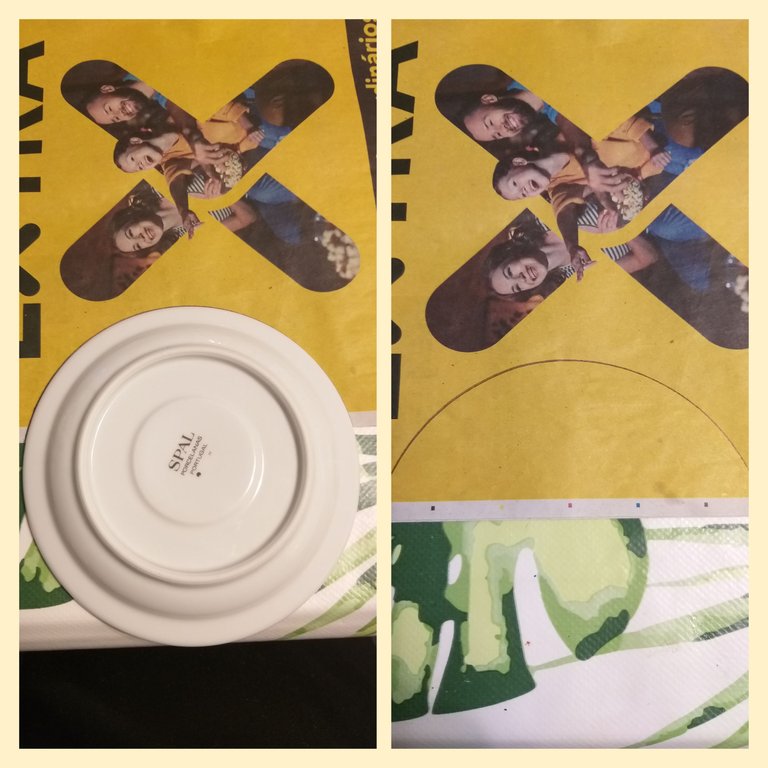
2👣. Luego con una regla trazamos dos lineas en diagonal de 8cm cada una de largo por 7cm de ancho y después dibujamos el plato encima de las lineas.Observar la imagen
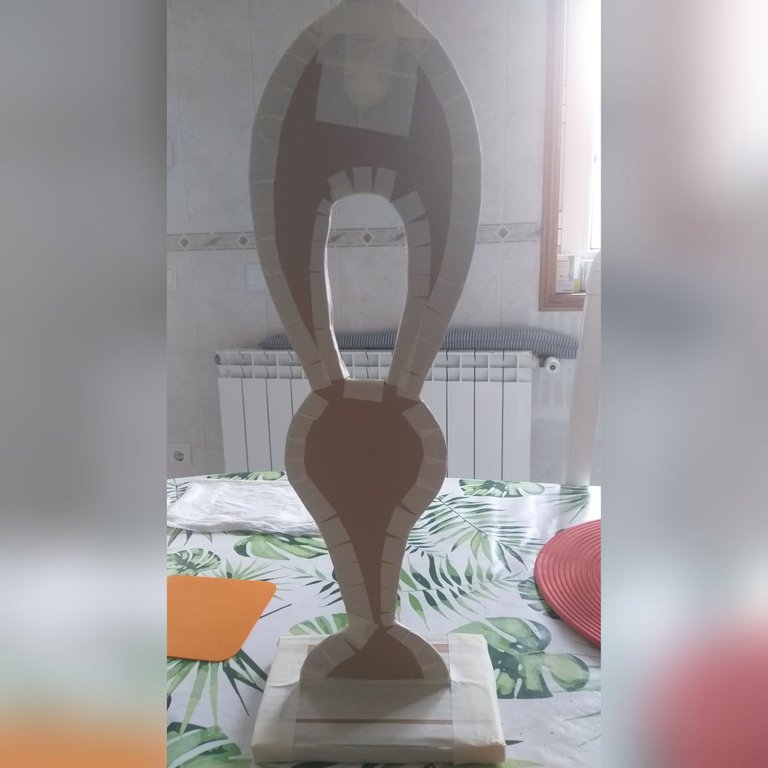
3👣. Después realizamos el cuerpo del gato seguido de la cabeza, como si fuera una letra U invertida y luego otra más grande. Las medidas de la primera U es de 8cm de ancho por 10 cm de largo y para la otra u 6cm de ancho en la parte debajo y luego 13cm de ancho y de largo 20cm. Las medidas puede hacerla a su gusto; si desea el gato más grande deberá darle más centímetros.
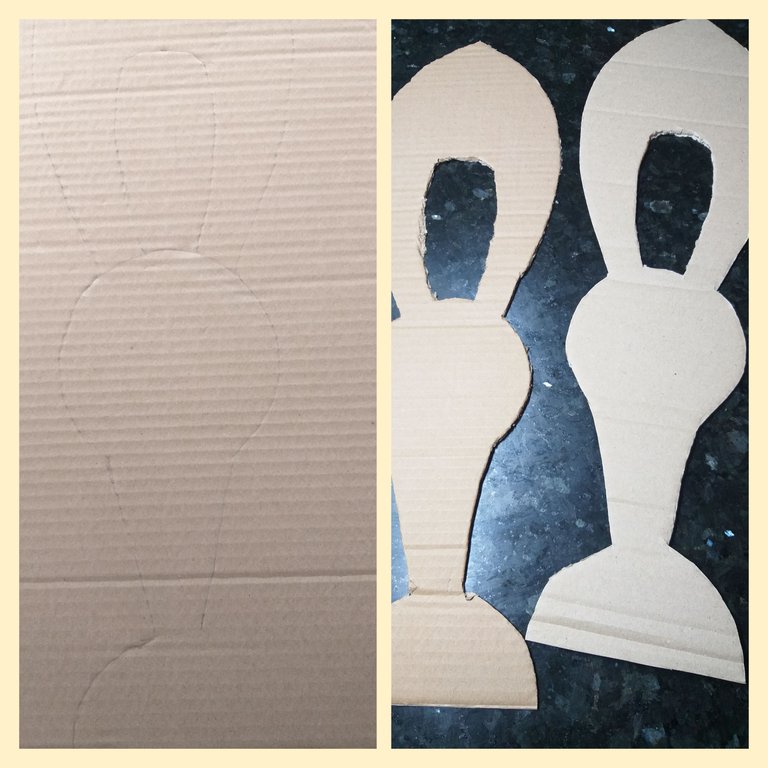
4👣. En este siguiente paso recortamos la figura con la tijera y la transferimos al cartón con el lápiz o bolígrafo. El grosor del cartón es de 2cm
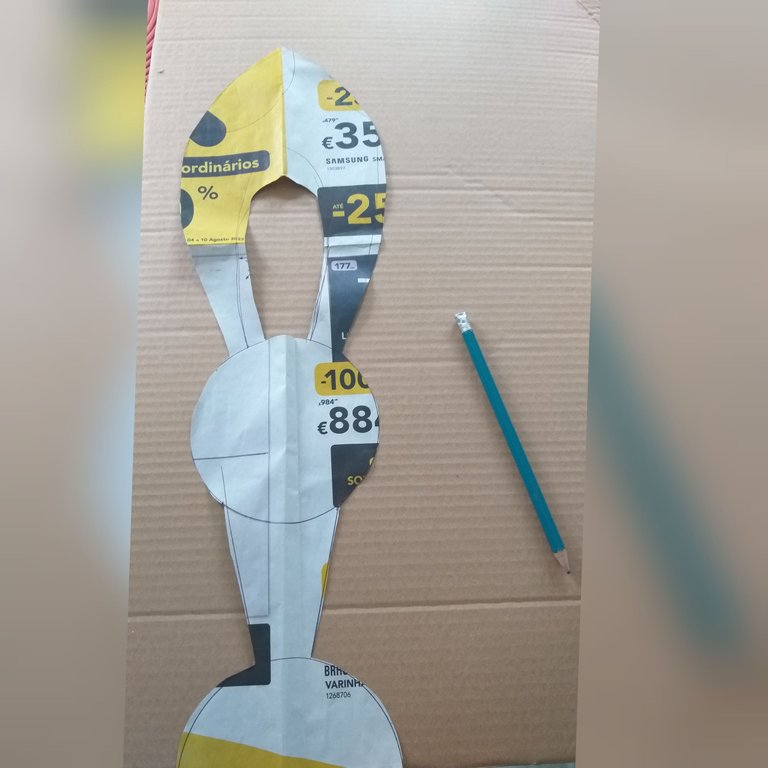
5👣. Luego que hemos transferido la figura al cartón recortamos; podemos utilizar un exacto, cúter o como en éste caso utilicé un cuchillo por flojera de buscar el cúter en mis herramientas🙈🤭🤭. Debemos de hacer dos piezas iguales con el cartón.
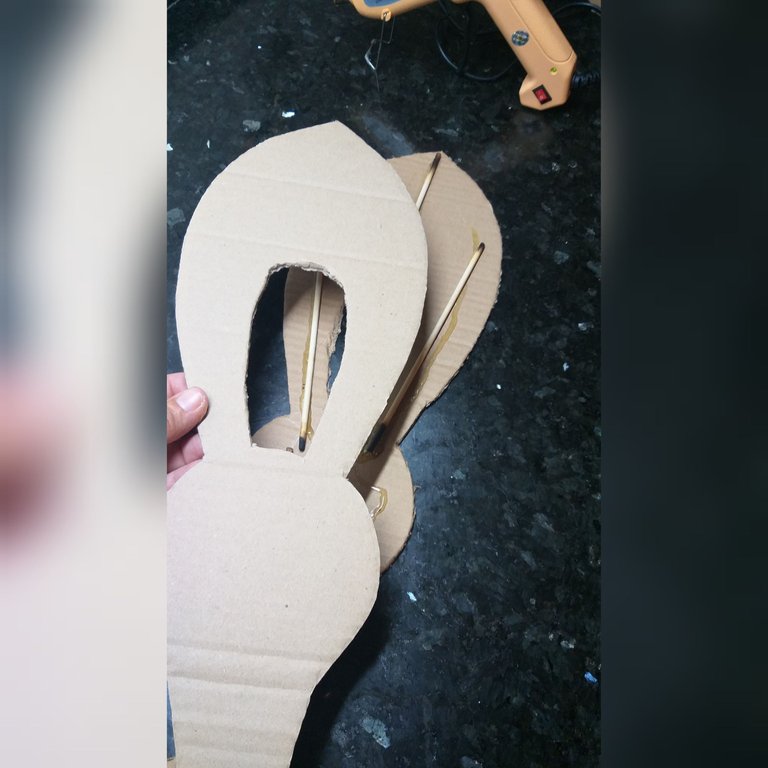
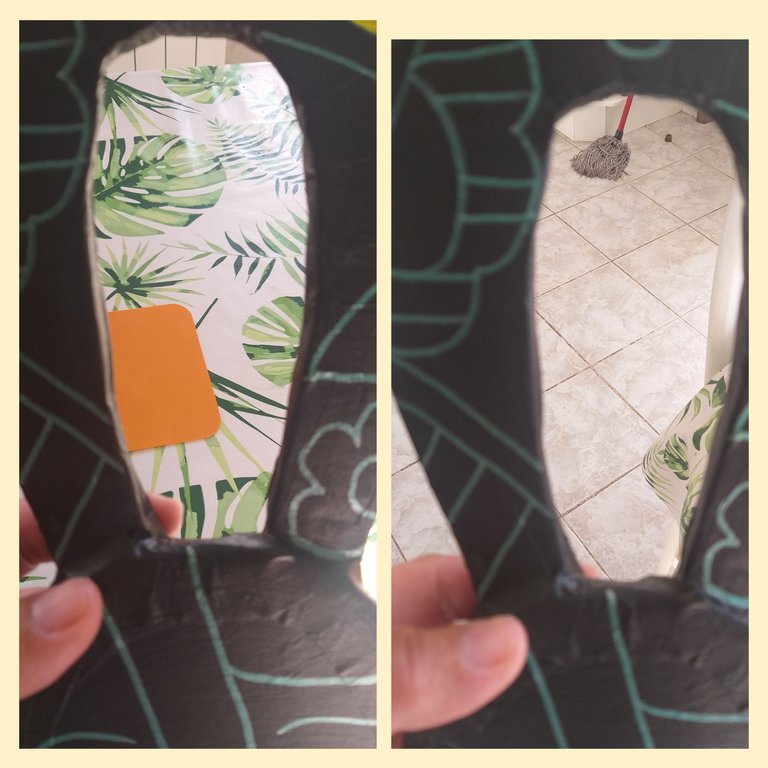
6👣. Cuadramos los palos parrilleros en el cartón y pegamos con silicon caliente; esto es para darle más dureza a nuestro gato.Observar la imagen dónde ubicamos los palos parrilleros.
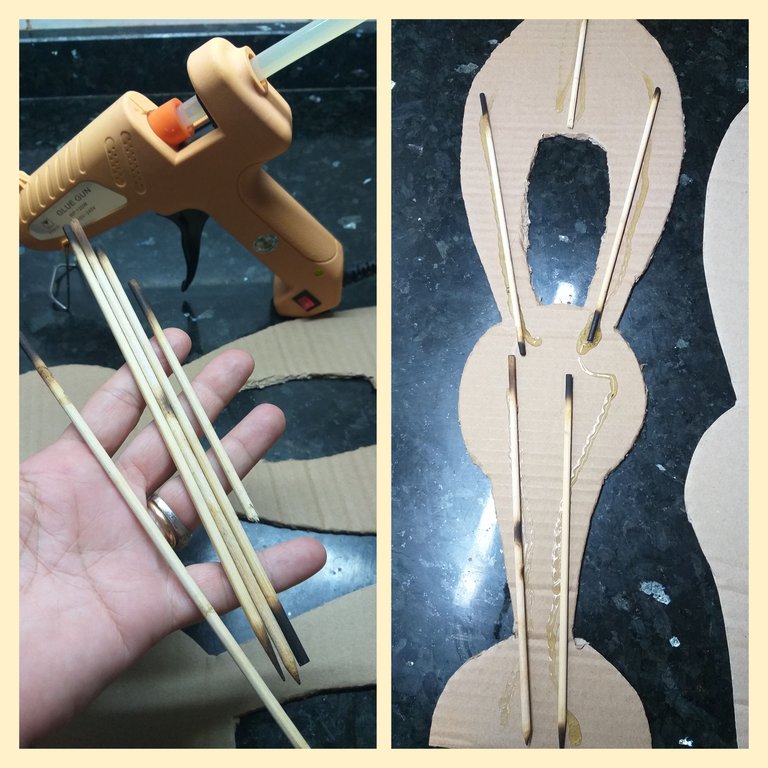
7👣. Pegamos la otra pieza igual encima, tapando los palitos parrillero.
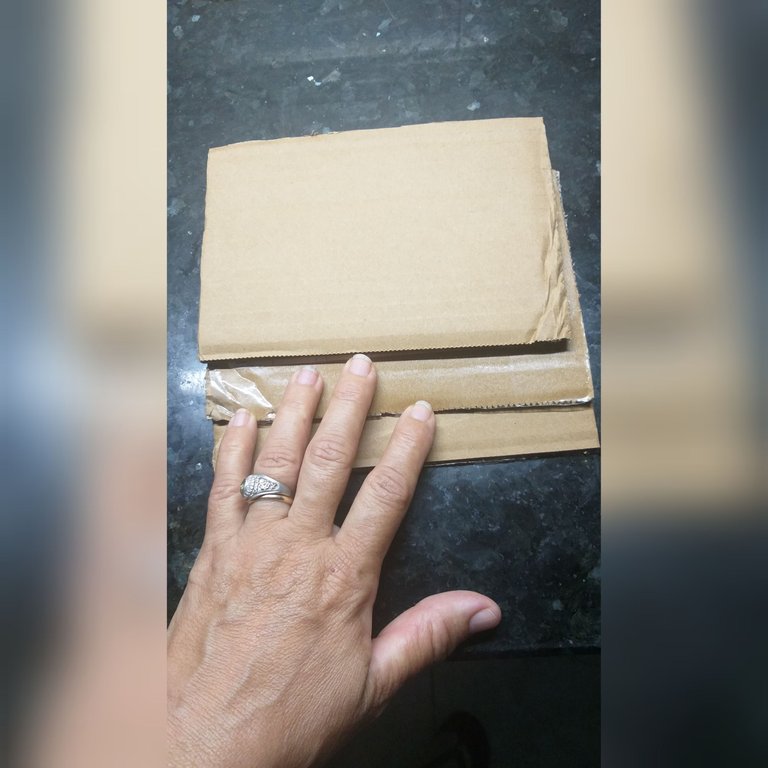
8👣. Vamos hacer tres rectángulos con las siguientes medidas 20cm de largo por 25 cm de ancho. Y los pegaremos con silicon caliente uno encima del otro será la base del gato.
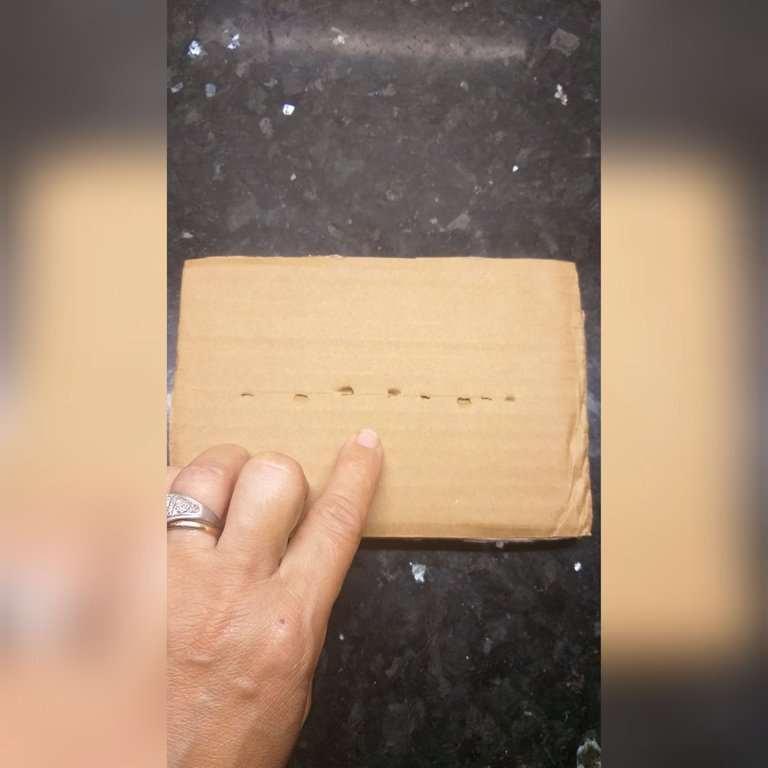
9👣. Con el cuchillo haremos una abertura del tamaño de las patas del gato.
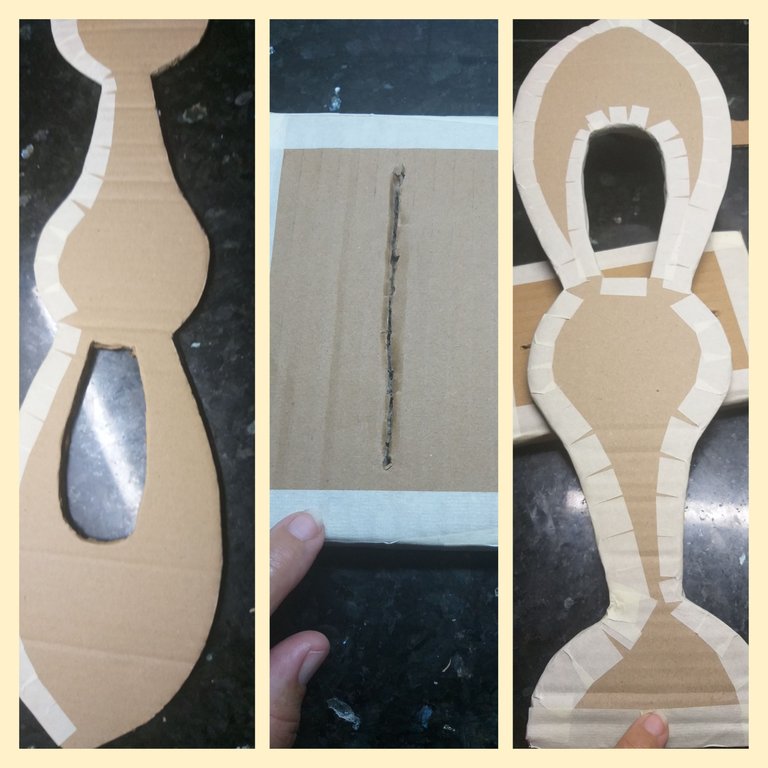
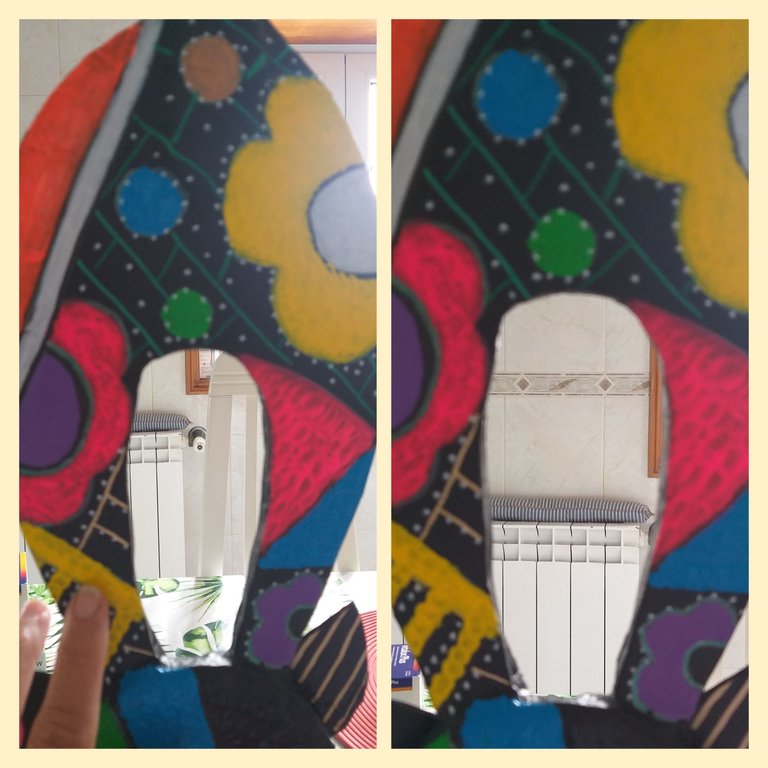
10👣. Con el tirro o cinta de construcción cubrimos todos los bordes de cada pieza; con la tijera le hacemos pequeños cortes para poder pegar mejor el tirro al cartón. Observar las imágenes.

11👣. Marcamos otra figura circular con el mismo plato y igual le cubrimos los bordes con el tirro o cinta de construcción. Este circulo será la cara que quedará 3D.
12👣. Luego le hacemos un rabo con cartón y también le colocamos tirro y luego lo pegamos a la base con silicon caliente.Dibujamos las orejas y con el silicon las pegamos a los lados de la cabeza y también pegamos el círculo a la cara.
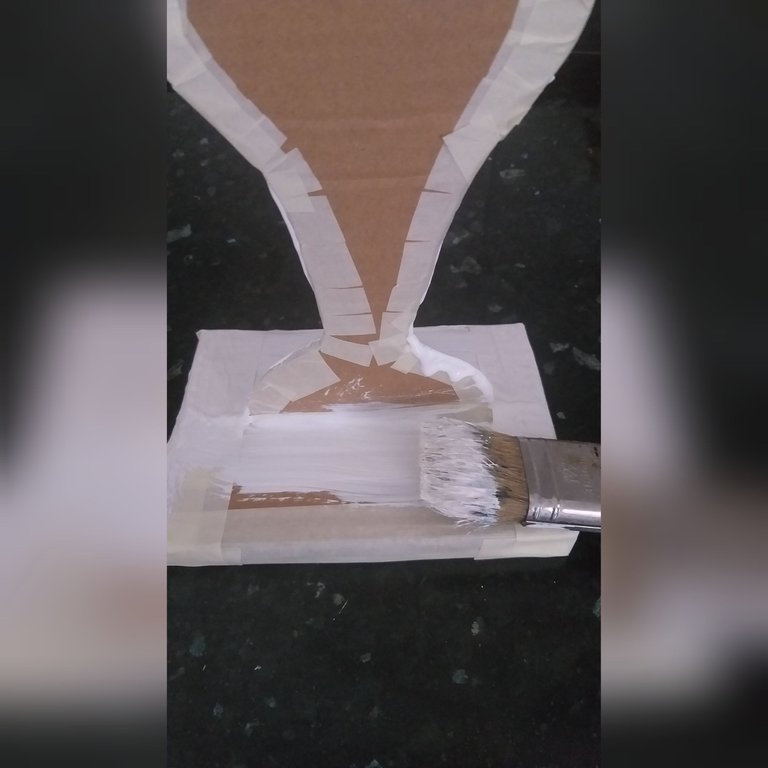
13👣. Preparamos la mezcla de yeso o polvo tapa grita con agua; la mezcla deberá quedar como una pintura y luego con la brocha cubrimos toda la pieza, como si tuviéramos pintando.Dejamos secar
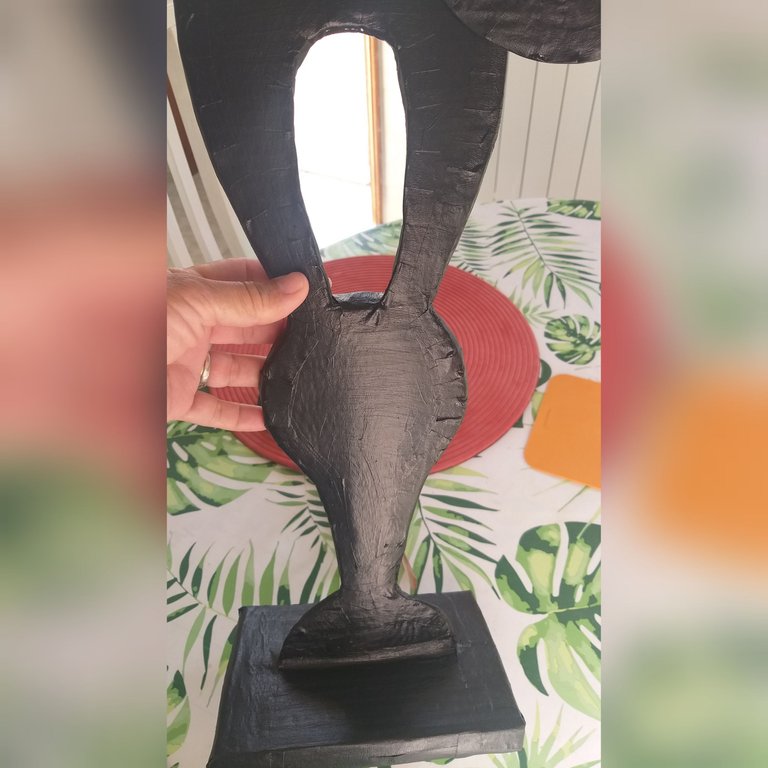
14👣. Luego con pintura acrílica de color negro pintamos toda la pieza del gato. También pueden pintarlo de otro color y dejamos secar bien.
15👣. En éste paso dibujaremos con un marcador,lápiz o bolígrafo flores rayas y las figuras que deseamos, dejen volar la imaginación😉👍.
16👣. Ya que tengamos toda la pieza del gato con figuras, pintaremos con pintura acrílica cada dibujo con diferentes colores. Dejen secar la pintura, si no queda bien el color vuelvan a pintar de nuevo.

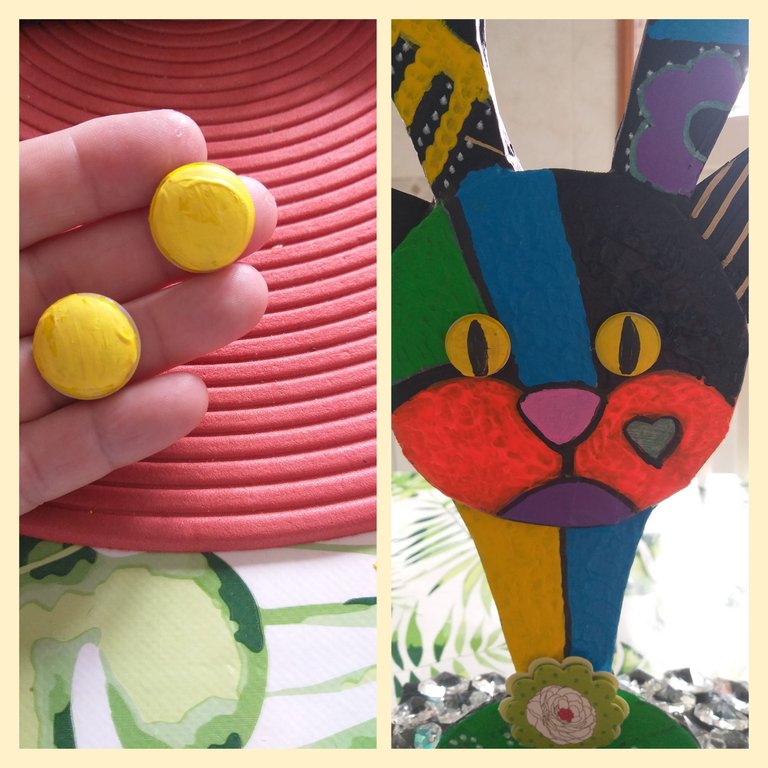
17👣. Con unos botones le haremos los ojos al gato y los pegamos con el silicon caliente.
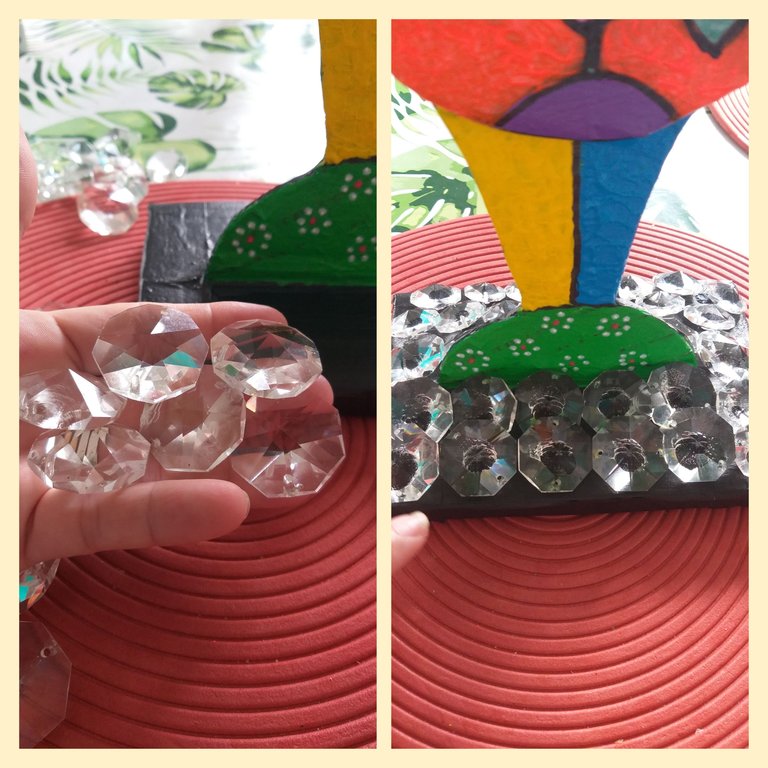
18👣. Se me ocurrió pegarle a la base unos cristales que tenía de una lámpara vieja y así le dará estabilidad a la pieza.
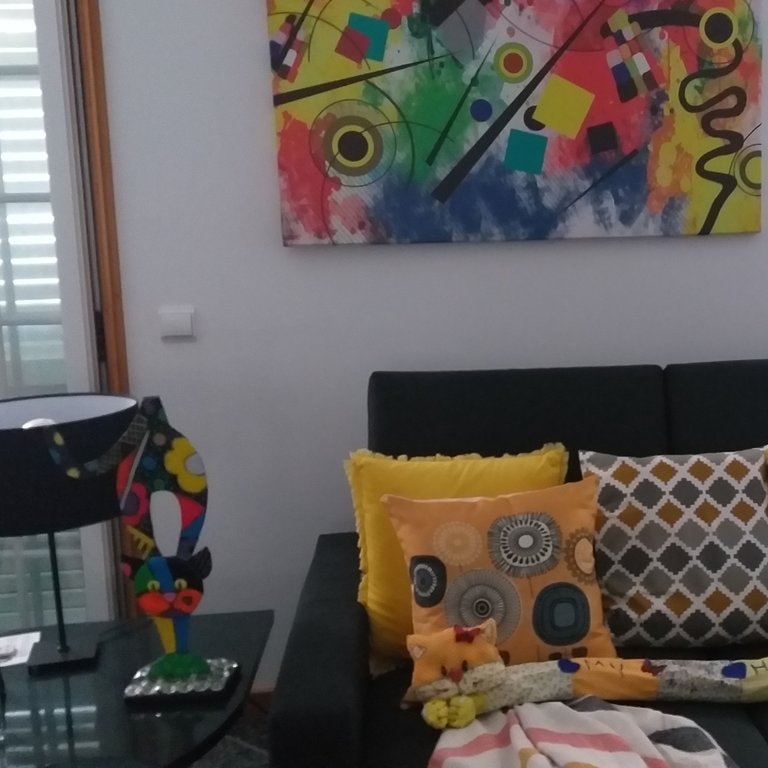
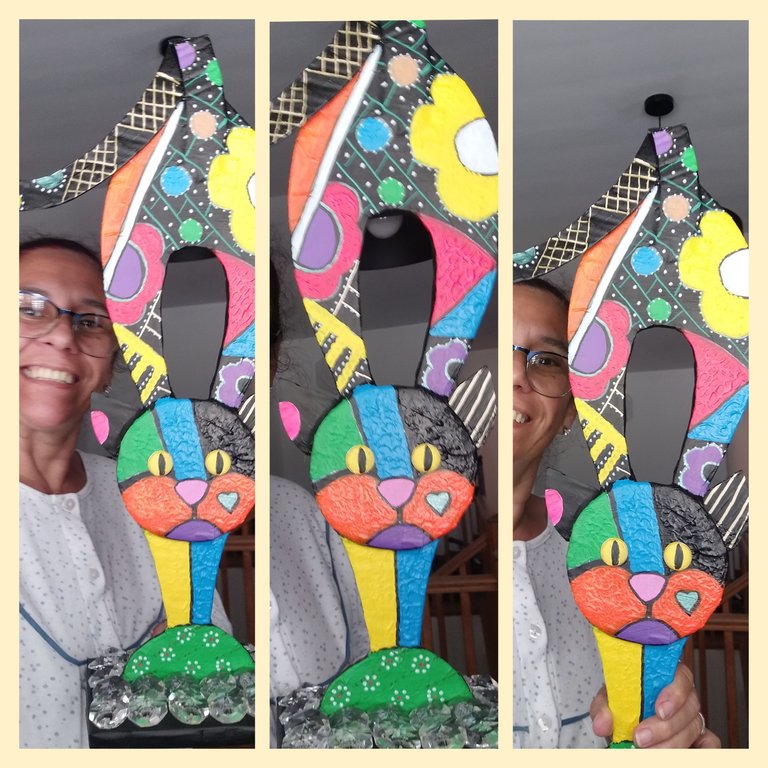
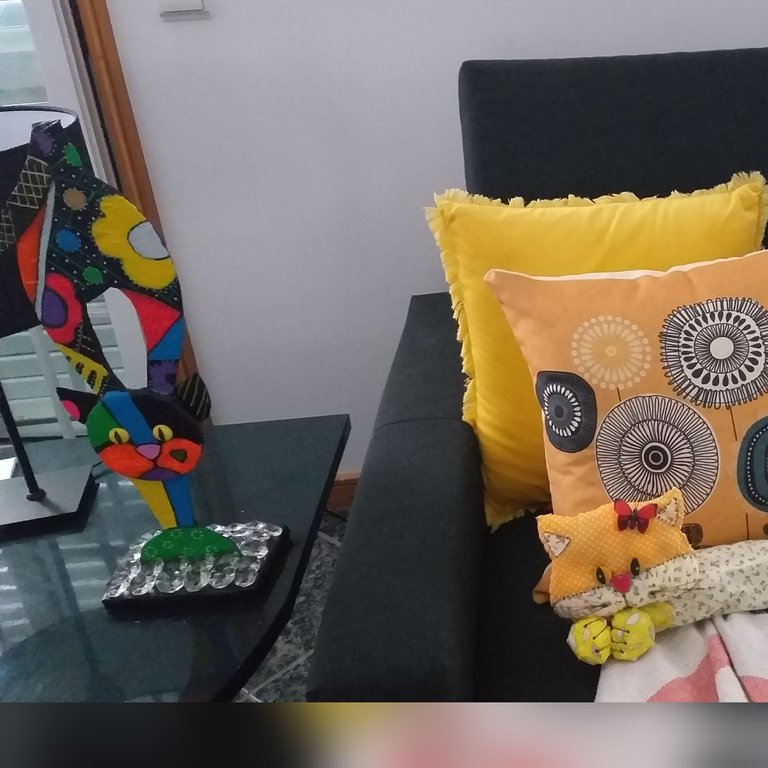
Resultado final
Espero que le haya gustado mi gato colorido con cartón. Gracias por su apoyo y los lindos comentarios.Mil Bendiciones
Las fotos son tomadas de mi teléfono móvil Samsung Galaxy A6 y organizadas por la aplicación GridArt.
English
Good morning my beautiful Hive community and all the members that make it up; May this week be a great success in your tutorials.
The proposal that I bring you today was inspired by a decorative cat that I saw in a home goods store, the colors with which it was painted caught my attention; but the material was made of wood and I decided to replace it with cardboard😉😊 so I encourage you to recycle the cardboard and join me in making this colorful cat🐈
Materials to use to make this cute cat are:
Paperboard
Scissors
An exact, cutter or knife
Acrylic paints in bright colors.
Fine brushes and one thick
Marker and a pencil
*Strip or construction tape
Plaster or powder cover cracks
a small brush
Newspaper, magazine or bond paper
Glue gun and glue sticks or quick-drying glue
Barbecue or florist sticks.
Steps to make the cat
1👣. The first thing we are going to do is draw with the pencil or pen the image we want in the newspaper, magazine or bond paper. As you can see in the image, I used a small plate that is used to serve the cup with coffee, I drew only half of the plate to make the cat's legs.
2👣. Then with a ruler we draw two diagonal lines of 8cm each long by 7cm wide and then draw the plate on top of the lines. Observe the image.
3👣. Then we make the body of the cat followed by the head, as if it were an inverted letter U and then another larger one. The measurements of the first U is 8cm wide by 10cm long and for the other one 6cm wide at the bottom and then 13cm wide and 20cm long. The measurements can be made to your liking; if you want the biggest cat you will have to give it more centimeters.
4👣. In this next step we cut out the figure with scissors and transfer it to the cardboard with a pencil or pen. The thickness of the cardboard is 2cm
5👣. After we have transferred the figure to the cardboard we cut it out; we can use an exact, cutter or as in this case I used a knife because I was lazy to look for the cutter in my tools🙈🤭🤭. We must make two equal pieces with the cardboard.
6👣. We square the barbecue sticks on the cardboard and glue with hot silicone; this is to give our cat more hardness. Observe the image where we place the grill sticks.
7👣. We glue the other equal piece on top, covering the grill sticks.
8👣. We are going to make three rectangles with the following measurements: 20cm long by 25cm wide. And we will glue them with hot silicone one on top of the other, it will be the base of the cat.
9👣. With the knife we will make an opening the size of the cat's paws.
10👣. With the plaster or construction tape we cover all the edges of each piece; With the scissors we make small cuts to be able to better stick the shot to the cardboard. Observe the images.
11👣. We mark another circular figure with the same plate and we still cover the edges with the shot or construction tape. This circle will be the face that will remain 3D.
12👣. Then we make a tail with cardboard and we also put tyro on it and then we glue it to the base with hot silicone. We draw the ears and with the silicone we glue them to the sides of the head and we also glue the circle to the face.
13👣. We prepare the mixture of plaster or dust cap screams with water; the mixture should be like a paint and then with the brush we cover the entire piece, as if we were painting. Let dry
14👣. Then with black acrylic paint we paint the entire piece of the cat. You can also paint it another color and let it dry well.
15👣. In this step we will draw with a marker, pencil or pen striped flowers and the figures we want, let the imagination fly😉👍.
16👣. Once we have the whole piece of the cat with figures, we will paint with acrylic paint each drawing with different colors. Let the paint dry, if the color does not look good, paint again.
17👣. With some buttons we will make the cat's eyes and stick them with hot silicone.
18👣. It occurred to me to glue some crystals that I had from an old lamp to the base and thus give the piece stability.
Final score
I hope you liked my colorful cat with cardboard. Thank you for his support and the nice comments. A thousand blessings
The photos are taken from my Samsung Galaxy A6 mobile phone and organized by the GridArt application.
Quedó muy hermoso ese gato @zullyarte !!!🥰
Que bueno que te guste esa es la mayor satisfacción. Gracias y Bendiciones
Bellísimo amiga
Gracias mi bella
Contrasta perfectamente con el cuadro colorido que tienes en la sala, he visto esos gatos de madera aca en Mérida y son lindos, pero es mucho mejor hacerlo tu mismo y al ver como quedo sentirte orgulloso de haber logrado lo que querías
Un saludo y muy lindo tu gatito
Si y también son cariñosos☺asi nos ahorramos y reciclamos. Gracias amiga por tu apoyo bendiciones
Te quedó precioso. Me gustó mucho esta técnica @zullyarte... Me da muchas ideas y eso me gusta 🤭.
Gracias por compartir el paso a paso.
Posdata: me encantan tus pinceles 🖌️😍
🎆🎇🎉🎊🌧️💐✨🌾🌱🌹🌙🌿🍃🥀⚡🌺☘️🍀🌈🌷⭐🪴🌵🌸🌟💮🌴🌳💫☀️💮☔🌲🌳🌍🌌🌠☄️🏵️🐝🌻🌼🍄🐞🦋💙☕💜🍍🎆🎇🎉🎊
!PIZZA
Gracias amiga por tu lindo comentario y apoyo , te deseo un Bendecido dia.
PIZZA Holders sent $PIZZA tips in this post's comments:
(4/5) @chacald.dcymt tipped @zullyarte (x1)
Learn more at https://hive.pizza.
Bellísimo amiga. Hermoso trabajo. Mil bendiciones para ti mi bella @zullyarte ☺️❤️🌹🥰😘🤗✨🌈💗🌺💐💕
Muchas gracias amiga igualmente muchas bendiciones para ti también.
Saludos amiga me encantó tus gatos, felicidades hermoso como todos tus trabajos 😚😚😚😚
Que lindaaa gracias amiga. Tengo problema con el internet y ahora es dificil ver los trabajos de la comunidad, ya que eliminaron esa aplicación. Bendiciones mi vida
Que hermoso y colorido te quedo el gato 🐱 son lindos para decorar, te cuento que yo tambien hace mucho tiempo cuando comencé a publicar en esta cimunidada también relice uno de esos gatos y también lo hice en cartón. Prima toda una artista 🎨 felicidades y bendiciones para ti y tu familia 👪. Abrazo fuerte
Holaa mi bella prima , me imagino que te quedaría preciso,así como todo lo que haces❤🥰. Gracias y un Bendecido día
Congratulations @zullyarte! You have completed the following achievement on the Hive blockchain and have been rewarded with new badge(s):
Your next target is to reach 1000 comments.
You can view your badges on your board and compare yourself to others in the Ranking
If you no longer want to receive notifications, reply to this comment with the word
STOPTo support your work, I also upvoted your post!
Check out the last post from @hivebuzz:
Pero que ingenio!! Una preciosidad de colores me ha encantado, y con las piezas de cristales ha sido perfecta!!!
Pd; que envidiable tu kit de pinceles ♥
Gracias corazón por tu lindo comentario y apoyo. Cuando lo vi en una tienda de artículos del hogar me encanto , y decidí hacerlo con cartón😊Bendiciones.
Gracias por responderme, que encantadora!! ♥