Welcome to the sharing of item rendering! Whether you're a seasoned artist or just starting out, this tutorial will walk you through the steps to create compelling items.
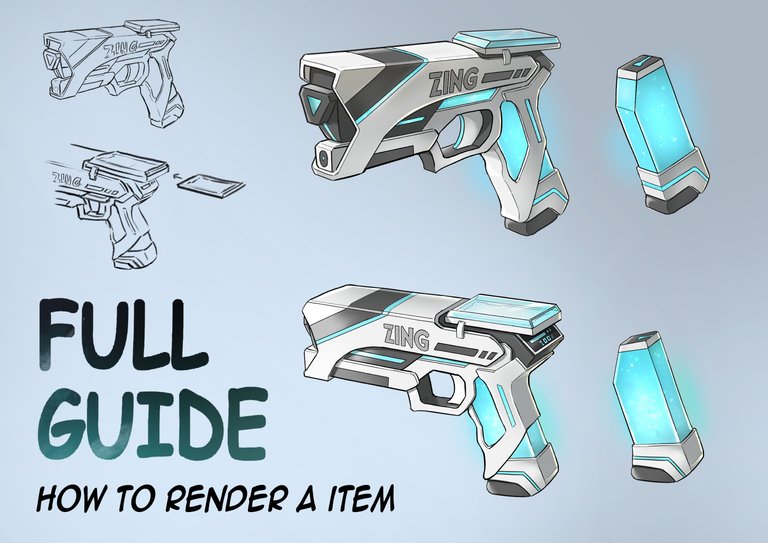
Step 1: Reference and Sketch
Find references to inspire your item. Sketch a rough outline, focusing on capturing its unique features.
Step 2: Base Color
Infuse life into your item by adding a well-balanced base color. Pay attention to the color ratio, experimenting with textures and patterns to amplify its overall visual appeal.
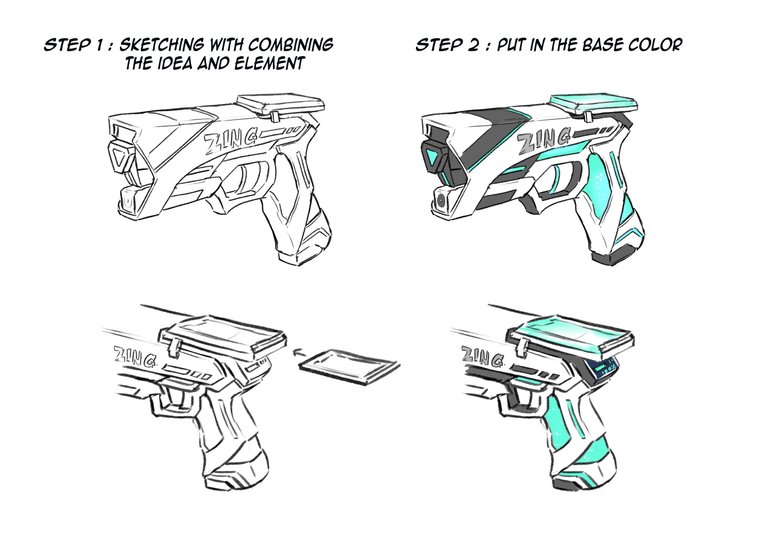
Step 3 and Step 4: Line Art with Perspective Grid
Lower the sketch opacity and craft clean line art using a perspective grid. This technique ensures that your item possesses a solid structure, especially when it involves intricate details. Bring back the base color to maintain vibrancy.
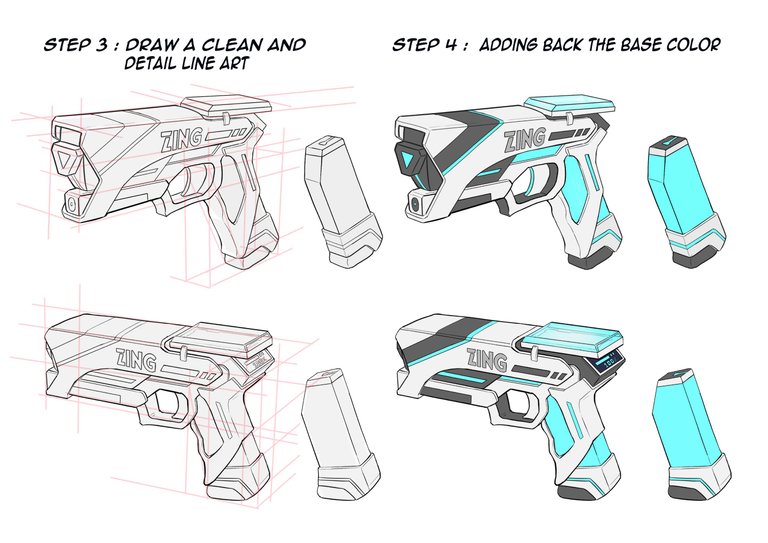
Steps 5 and 6: Shadows and Material Presentation
Using "Multiply" layers with a subtle gray color to introduce shadows, enhancing the depth of your item. Use a soft brush on a "Glow Dodge" layer to illuminate elements like electricity ammo, making them visually captivating.
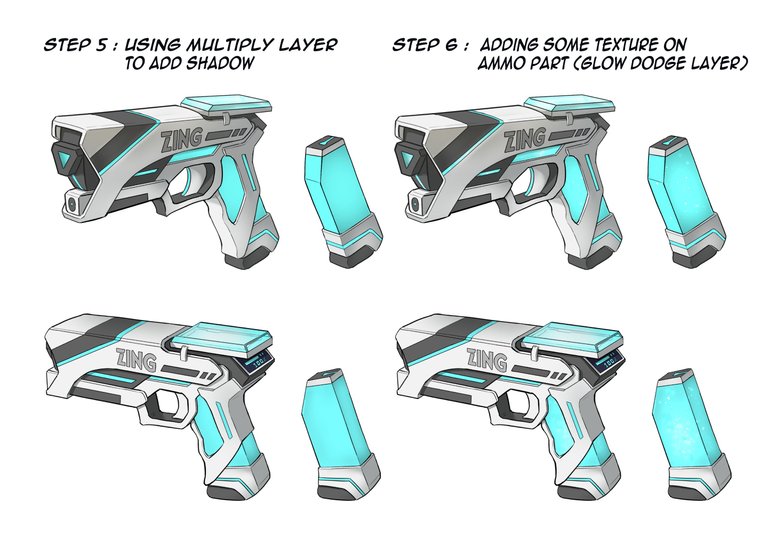
Last Step: Touch up and color testing
Adding an "Overlay" layer to apply highlights and reflective light, adding a touch of realism and material presenting. Also adding a light color with softbrush to let the ammon look glowing. Explore different color variations to discover the most visually captivating combination.
Tools Used:
Hardware: Wacom Intuos Pro
Software: Clip Studio Paint Ex

Original
https://peakd.com/hive-131131/@holozing/healing-gloves-and-capture-device-and-ammo-reveal
Some sharing for perspective:
At college, I practice for drawing perspective for a long time. This method allowed me to sketch a solid and accurate foundation for my items, ensuring a more realistic and visually appealing result.
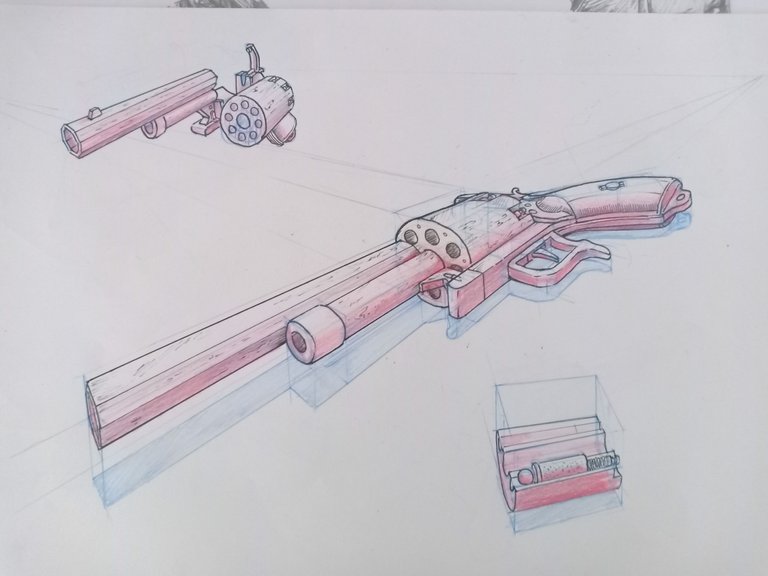
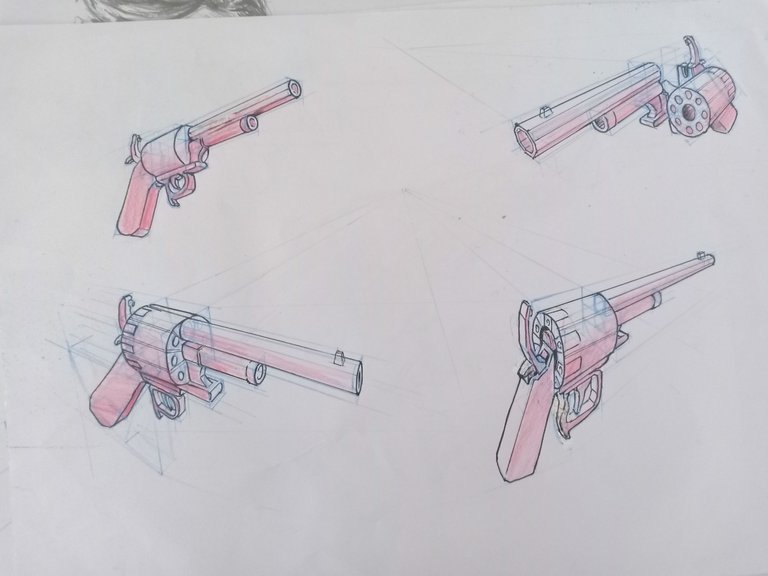
Thought I'd share the concept I gave @craizuss just as a point as to how good he is, lol. He turned this to that above, simply amazing.
This is the reference i get inspired from haha ,great idea 😄
What an amazing work by @craizuss, it's hard to believe how he transformed this initial imagination into a realistic looking gun. The glowing magazine just stealing the show here, keep going!
sheeeshh really the best @craizuss
Hahaha that is just awesome.
lol yes from this to that its amazing
Amazing how he made that from this concept 😍
Awesome work🤩 but bro you gotta make us a tutorial on how to use grid lines for perspective drawings 😂🙏. I liked this approach very much. It's much more aesthetically pleasing to see the gun in that way.
Certainly! Yes, I'll create a tutorial on using grid lines for perspective drawings in the future. Stay tuned!
Nice! Appreciate it bro.
Wow, the idea that the charge of these guns is "liquid" fascinates me! You have a very cool handling of the perspectives, it looks really nice and sense, functional but aesthetic at the same time ✅ ✨
Thank you! I'm thrilled you find the concept fascinating, and I appreciate your positive feedback on the perspectives and aesthetics! ✨
This is amazing, it is really a great guide. Looking forward to that day I will draw like you.
Happy weekend
Thank you! I'm glad you found the guide helpful. Keep practicing, and you'll definitely reach your drawing goals. Have a happy weekend! 😊
Amazing work Boss 😍...
I really love it.
Love the perspective grid! It's been a long time since I pretended to draw. Is that two-point perspective you're using for the revolver? With focal points top left and top right?
Yes, that's correct! The perspective grid for the revolver is based on a two-point perspective, with focal points positioned at the top left and top right.
Interesting post! Thanks for adding value to HIVE.
You're welcome! Appreciate the support on HIVE. 😊
This is really nice and I appreciate you sharing every part of it.
Thank you!
I've really learnt alot from this post but I have a question, can I do it with my smartphone or must it be a computer?
Doing it on a smartphone is possible, but the drawing space may be limited, making it a bit challenging to showcase your skills effectively. A computer would provide a better platform for your creative work.
Thanks for the information
I loved your explanation, it was quite a process to get the result. I hope to be able to use it in the game.😊
this is great. really cant wait to play
Congratulations @craizuss! You have completed the following achievement on the Hive blockchain And have been rewarded with New badge(s)
Your next target is to reach 2500 upvotes.
You can view your badges on your board and compare yourself to others in the Ranking
If you no longer want to receive notifications, reply to this comment with the word
STOPCheck out our last posts:
Congratulations @craizuss! Your post has been a top performer on the Hive blockchain and you have been rewarded with this rare badge
You can view your badges on your board and compare yourself to others in the Ranking
If you no longer want to receive notifications, reply to this comment with the word
STOP$WINE