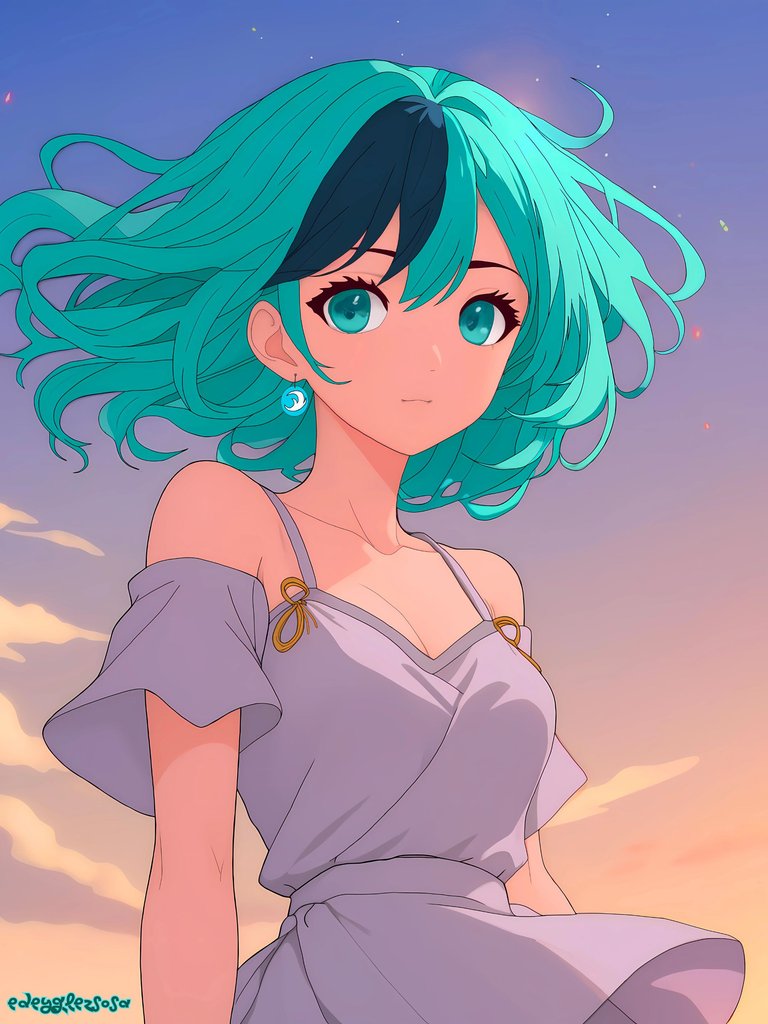
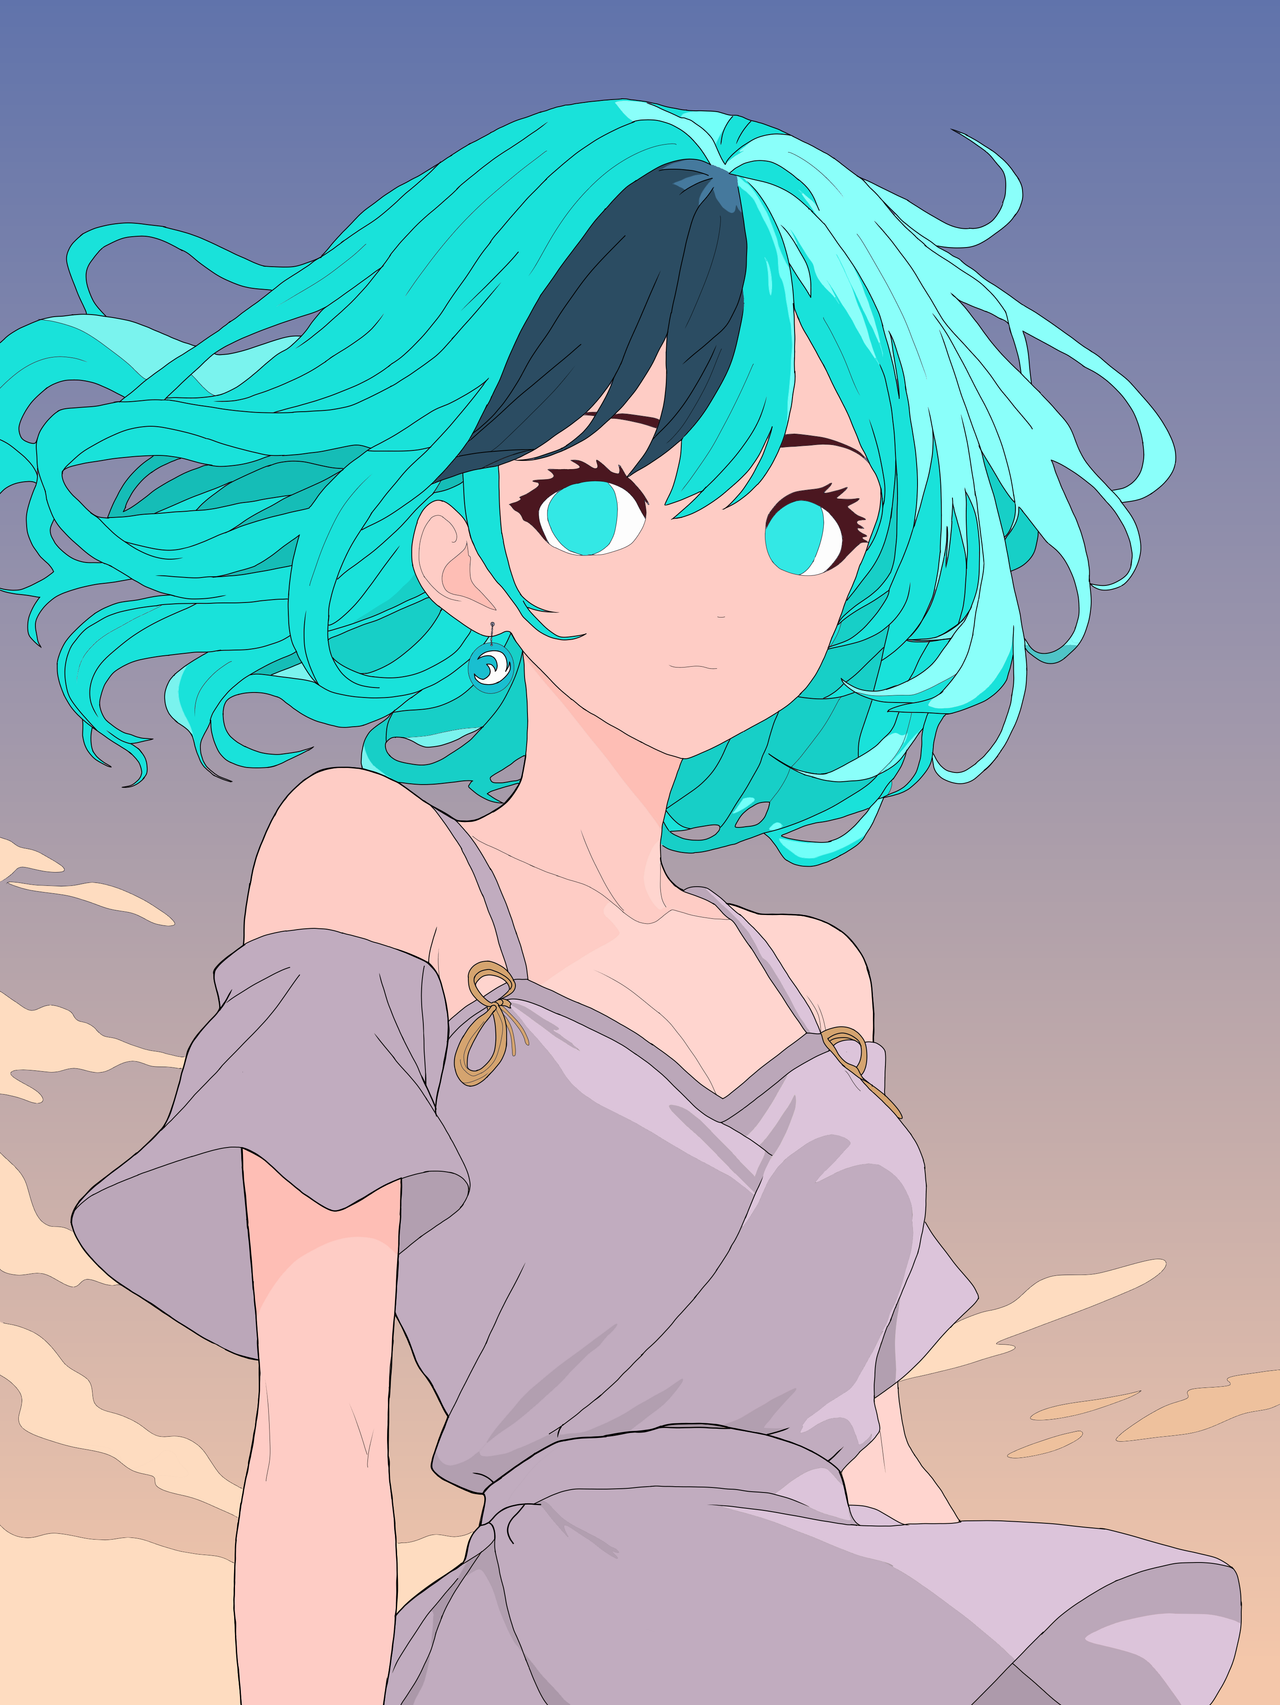
Greetings, holo-fan friends.
Today I will share with you another of my fan art drawings in digital format. I continue making casual makeovers to the healers and this time it was the Ocean Healer's turn. For this I will make a change of costume, hairstyle and add accessories without changing the essence of the character or its main characteristics.
Saludos, amigos holo-fanáticos.
El día de hoy les compartiré otro de mis dibujos fan art en formato digital. Continúo haciéndole cambios de look casuales a los sanadores y esta vez le tocó a la Sanadora del Océano. Para ello haré un cambio de vestuario, peinado y agregaré accesorios sin cambiar como tal la esencia del personaje o sus características principales.
To get into a more context, I tell you that the scene I represent is a typical scene of the anime series that I like so much, in which the protagonists walk at sunset on the beach. With the sea breeze ruffling their short hair and the last rays of sunlight partially illuminating their face and body. That's how I imagined it and that's how I'm going to show it to you.
Para entrar a un más en contexto, les cuento que la escena que represento es una escena típica de las series de anime que tanto me gustan, en la cual los protagonistas pasean al atardecer por la playa. Con la brisa marina alborotando su pelo corto y los últimos rayos del sol iluminando parcialmente su rostro y cuerpo. Así la imaginé y así se las voy a mostrar.
Step by step // Paso a paso
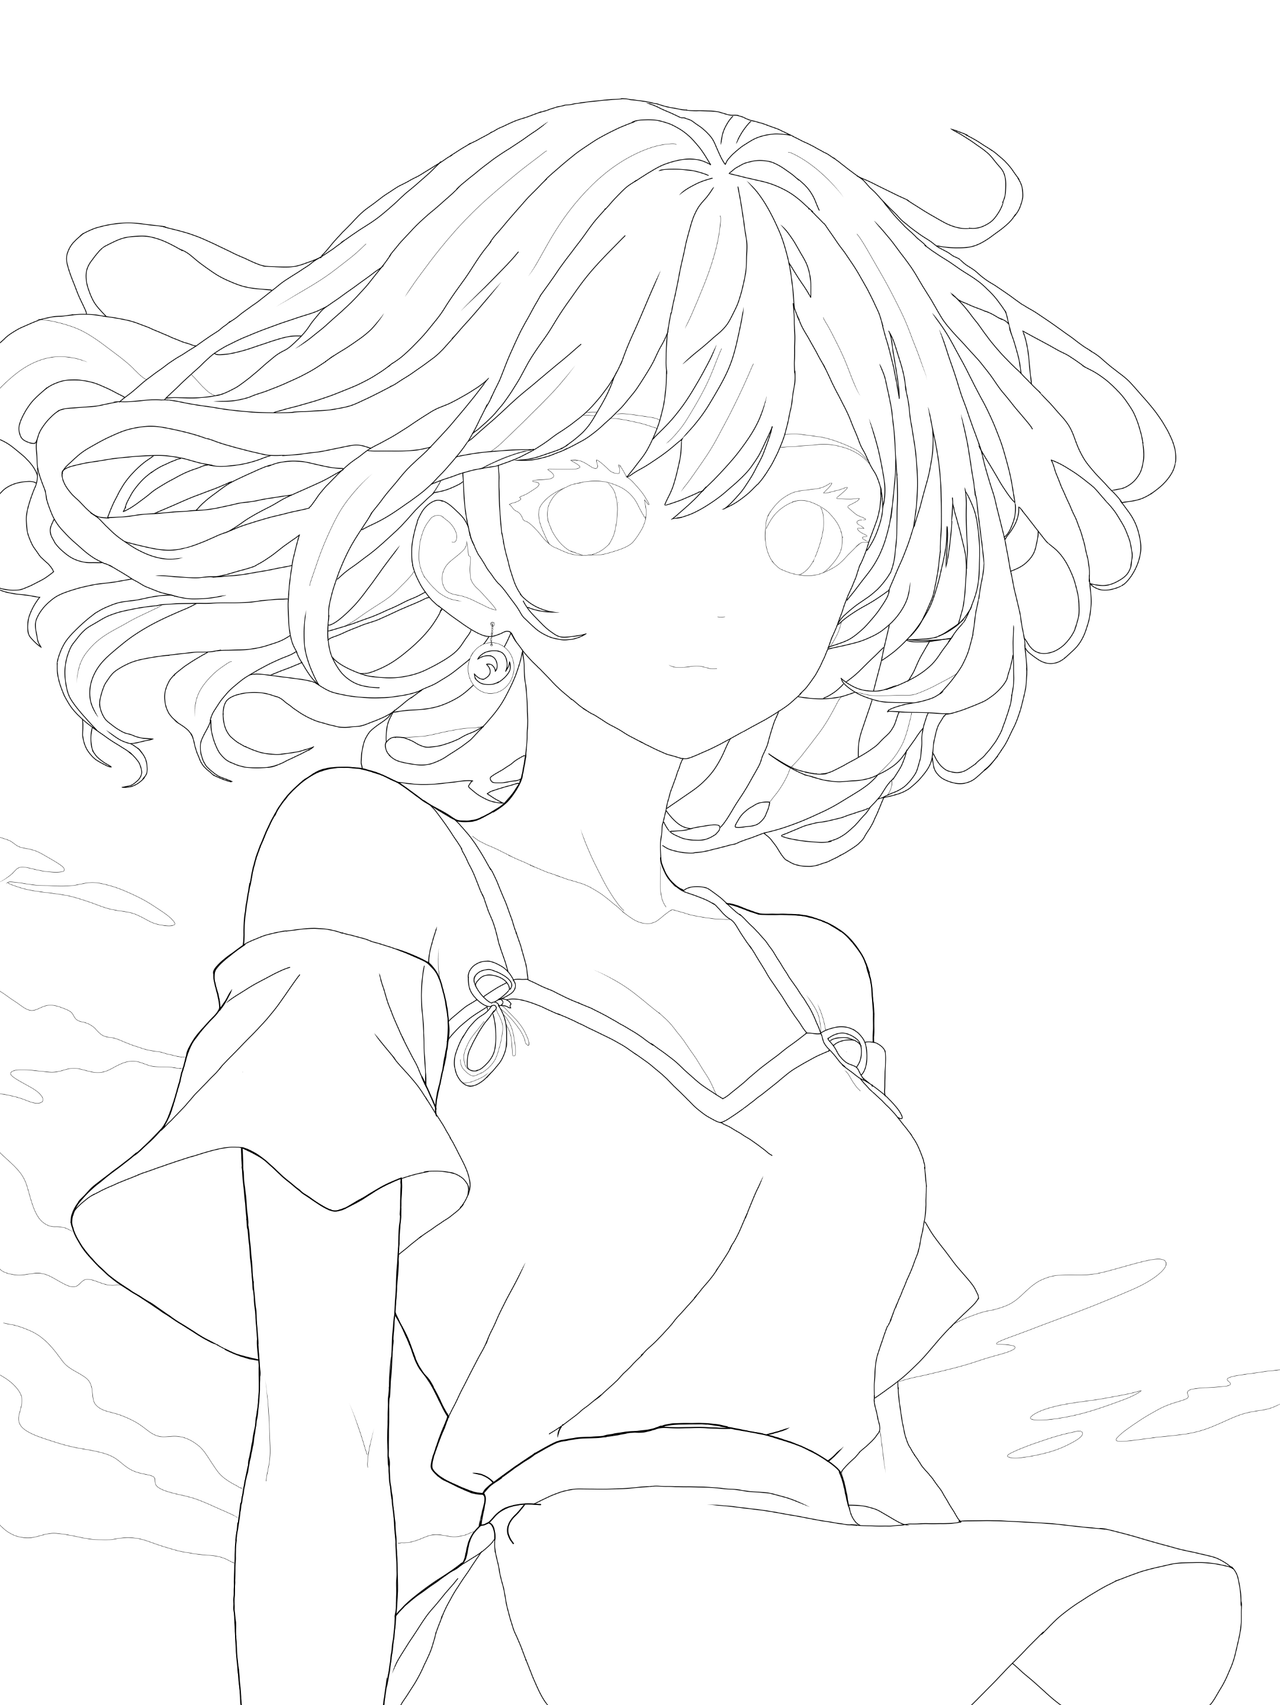
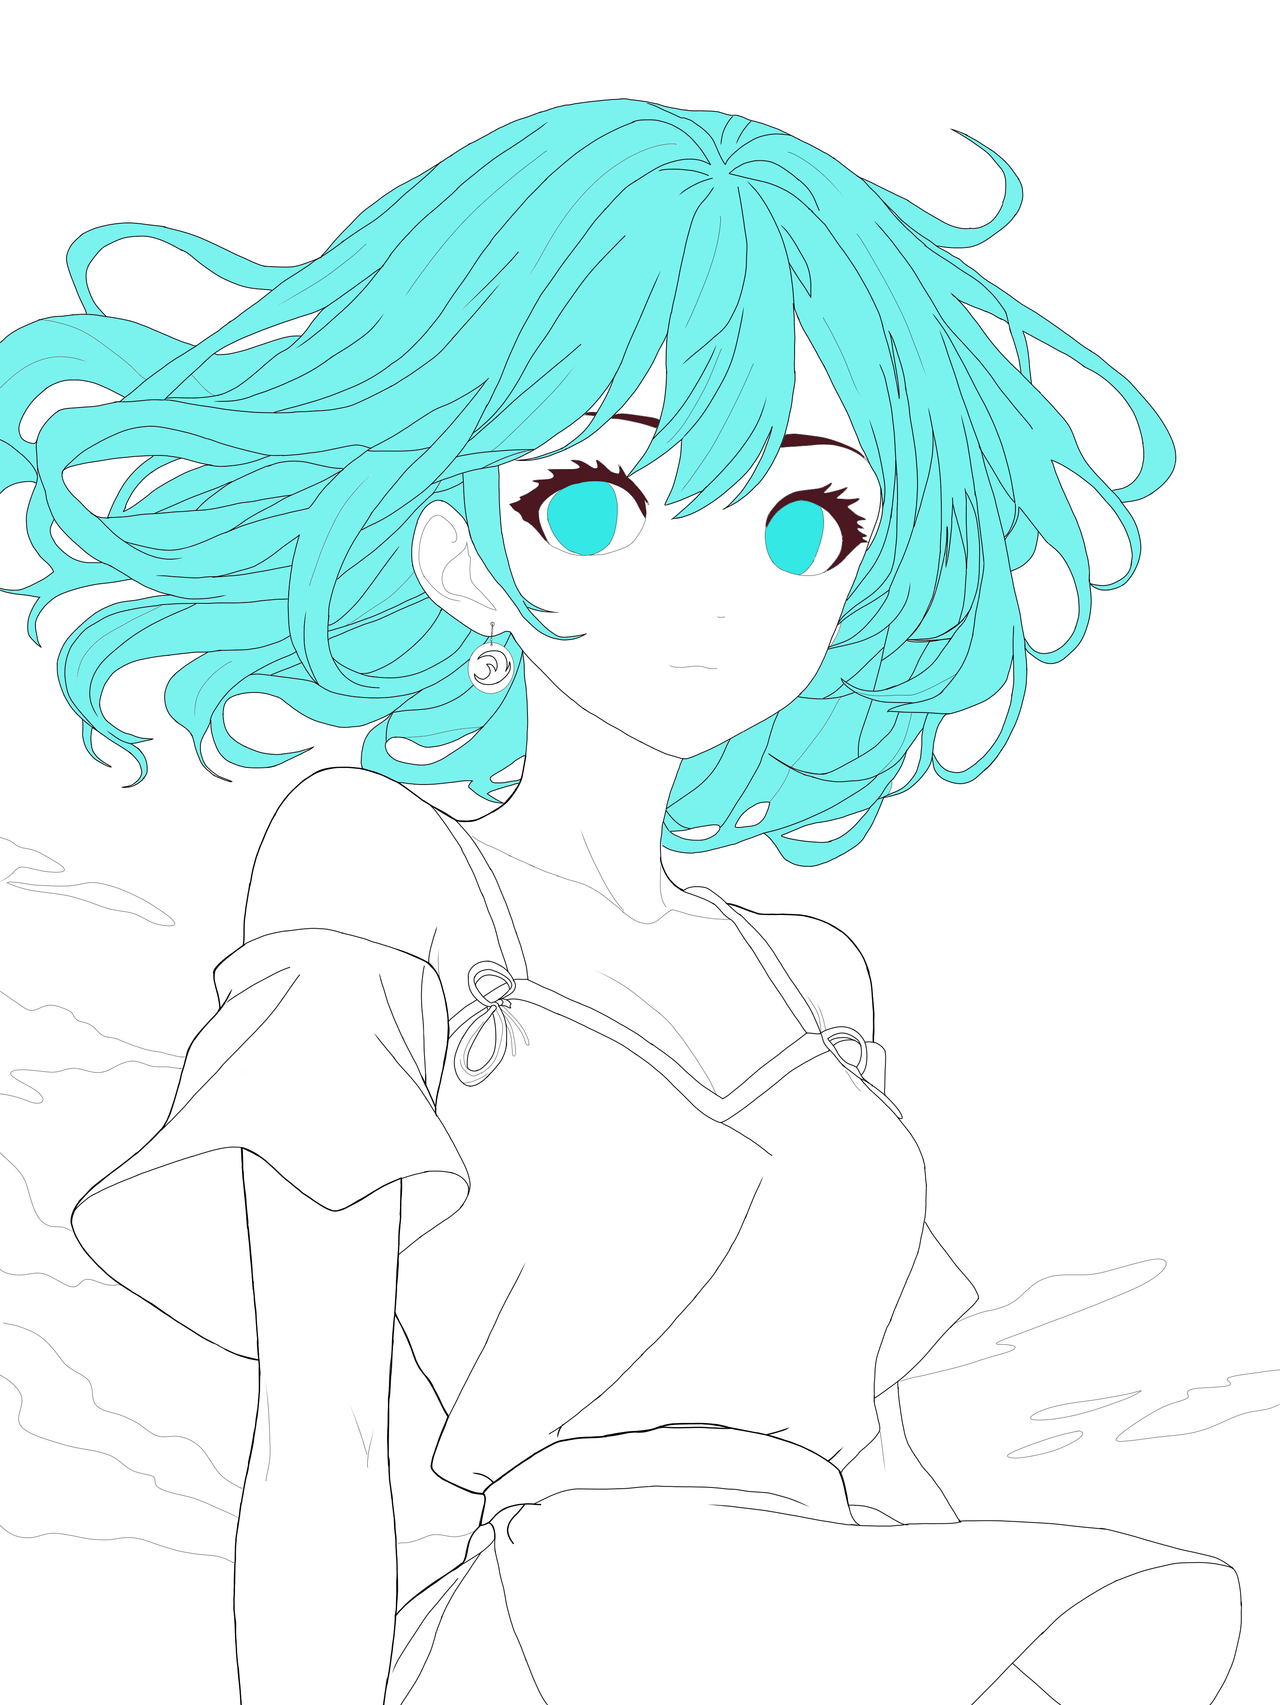
I'll start by drawing the outline of the body in a relaxed pose and with one shoulder slightly higher than the other to give the feeling that you're looking at it from below, either because it's up on a wall or on a rock. Use a little imagination.
After the silhouette, I draw the hair and the dress. As for the hair, little by little I realized that drawing it in movement is not as simple as I thought, so I used some designs I found to give a hook shape to the ends of the hair to disguise the beginning and end of each strand.
Comenzaré dibujando el contorno del cuerpo en una postura relajada y con un hombro ligeramente más levantado que el otro para dar la sensación de que lo estás viendo desde abajo, ya sea porque está subida en un muro o en una roca. Usa un poco la imaginación.
Luego de la silueta, dibujo el cabello y el vestido. En cuanto al cabello, poco a poco me di cuenta de que dibujarlo en movimiento no es tan simple como pensé, así que me auxilié un poco en algunos diseños que encontré para dar forma de gancho a las puntas del pelo y disimular así el inicio y final de cada mechón.
 |
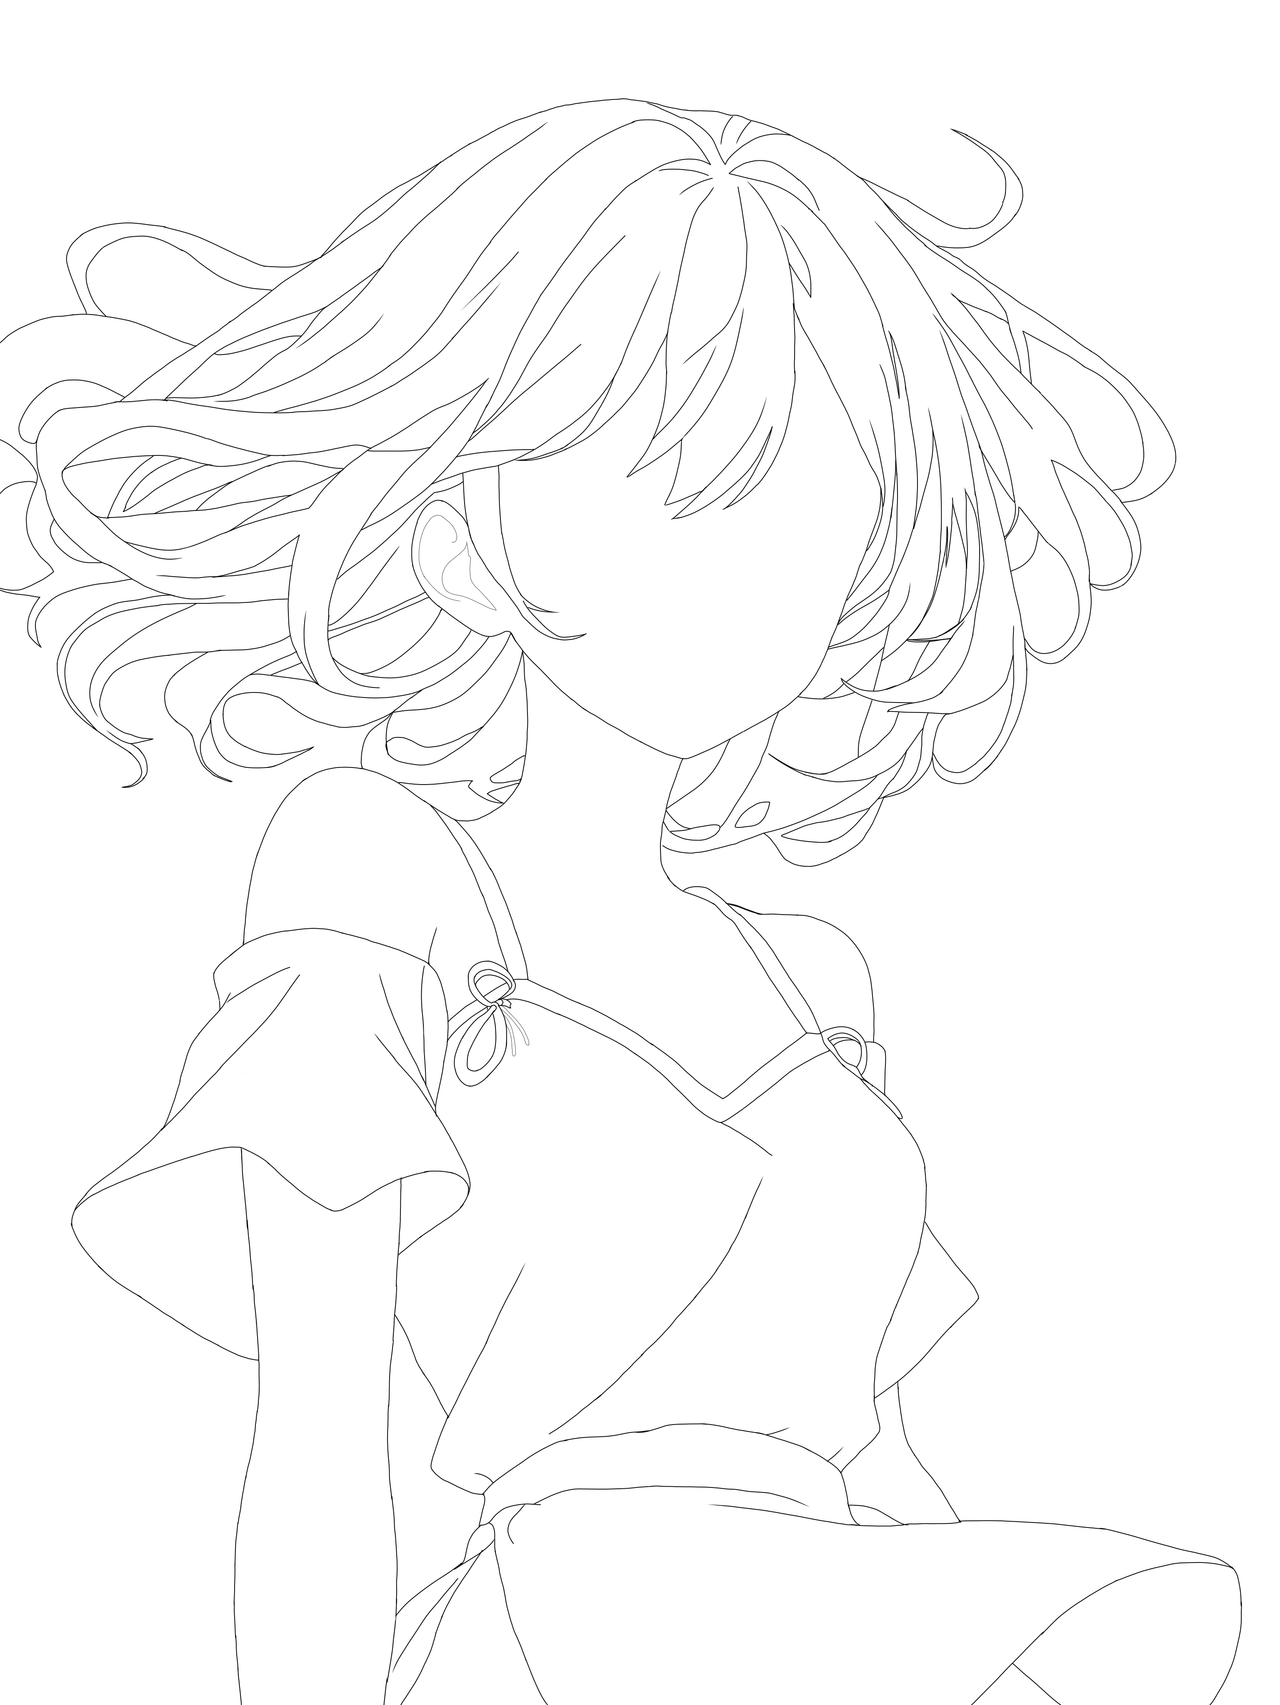 |
I then thickened some lines on the silhouette of the body and dress. Although I didn't add logos on her clothing, I included an earring in her ear that does have her emblem. And I also drew the face and some additional details with some lines of thinner thickness so that they don't get too marked when coloring.
A continuación engrosé algunas líneas de la silueta del cuerpo y el vestido. Aunque no agregué logotipos en su ropa, incluí un arete en su oreja que sí posee su emblema. Y también dibujé el rostro y algunos detalles adicionales con algunas líneas de grosor más fino para que no se marquen mucho a la hora de dar color.
 |
 |
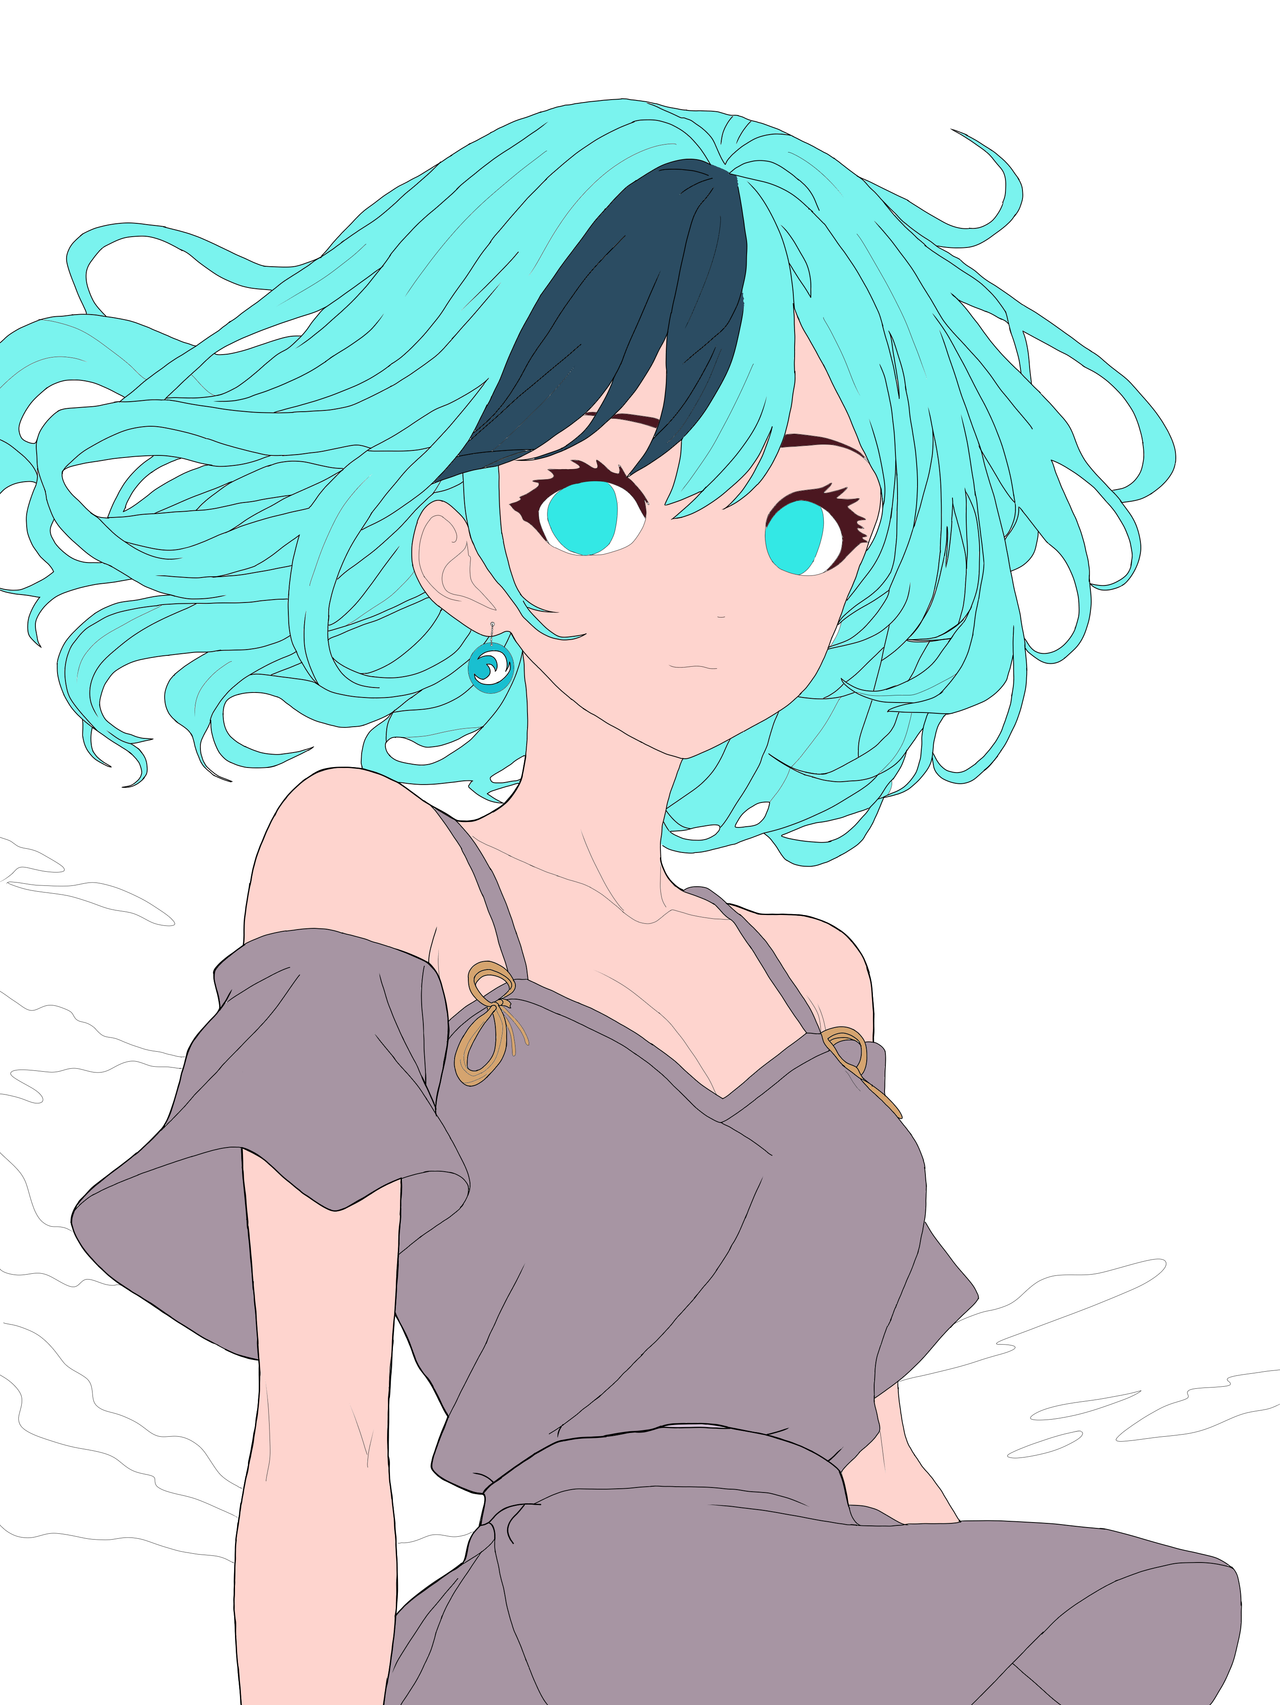
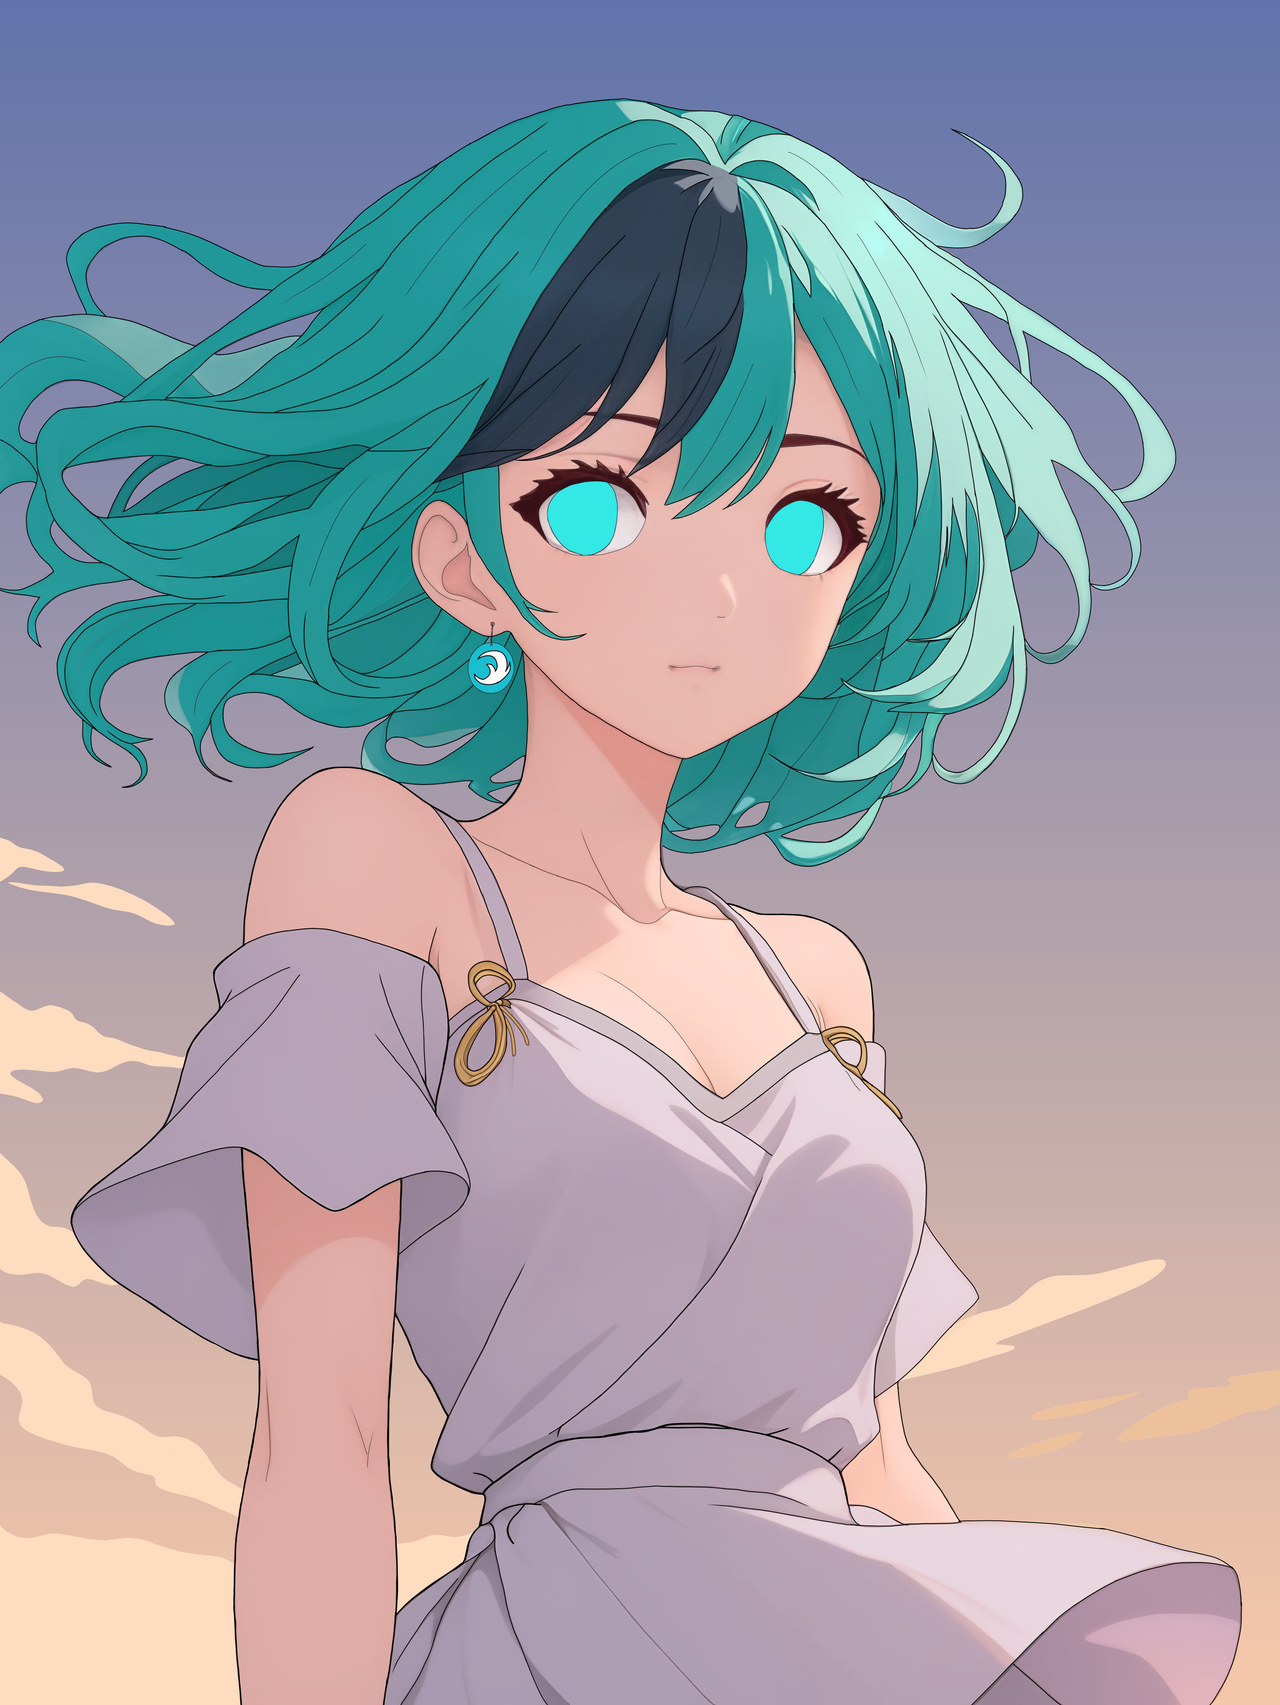
After finishing with the line art, I went on to give color, this being one of the easiest steps, since the drawing is dominated by the color of the hair and eyes, which is the same but with different tones, and the color of the dress and the skin. I wanted to make the hair darker, but I realized that it was hiding the lines of the hair, so I lightened it and I will try to darken it later.
Luego de acabar con el line art, pasé a dar color, siendo este uno de los pasos más sencillos, pues en el dibujo predomina el color del pelo y ojos, que es el mismo pero con diferentes tonos, y el color del vestido y la piel. El mechón del pelo lo quería hacer más oscuro, pero me percaté de que ocultaba las líneas del cabello, así que lo aclaré y trataré de oscurecer más adelante.
 |
 |
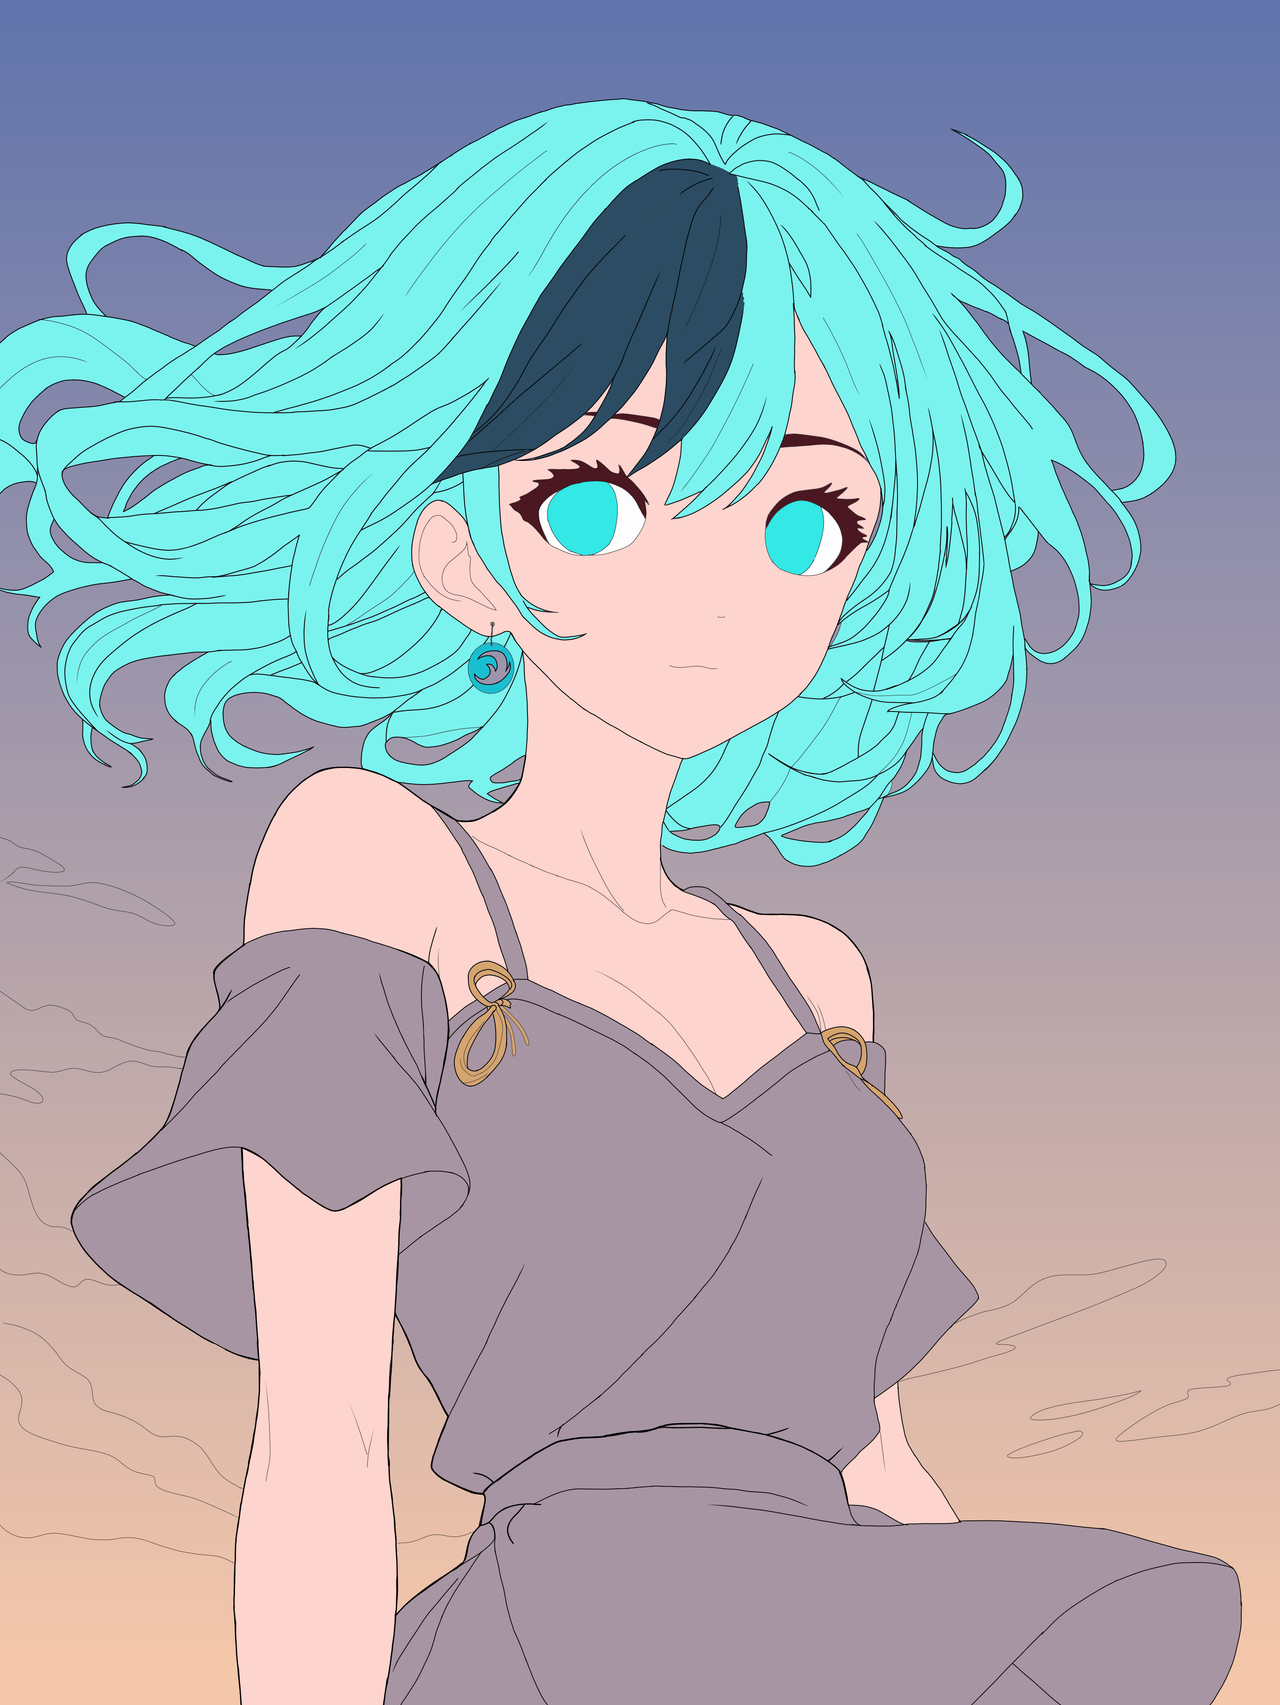
As for the background, I did the same as in previous drawings. I created a new white layer, chose two colors, one dark and the other lighter, and using the gradient tool, created a sunset-looking background. Then I colored the clouds I had drawn in the previous step and removed their lines. I could have used the cloud brush from the Medibang tool, but I got to try it and didn't like how it looked on the gradient background.
En cuanto al fondo, hice lo mismo que en dibujos anteriores. Creé una nueva capa en blanco, escogí dos colores, uno oscuro y el otro más claro, y utilizando la herramienta de gradiente, creé un fondo con aspecto de atardecer. Luego di color a las nubes que había dibujado en el paso anterior y eliminé sus líneas. Podría haber utilizado el pincel de nubes de la herramienta Medibang, pero llegué a probarlo y no me gustó cómo quedó sobre el gradiente del fondo.
 |
 |
 |
Roughly speaking, we are almost done. It only remains to light the right side of the drawing applying more light in the lower part. Remember that it is a sunset. Here something curious happened to me and it is that when I shaded the hair, it darkened a little taking a more blue-green color than navy blue.
The rest of the shadows will focus more on the left side of the character and under her chin, being this the darkest place. Also in each fold of the dress I applied a lighter shadow. By the way, if you notice, the color of the dress I had to lighten it, because the shading made it look very dark.
A grandes rasgos, ya casi terminamos. Solo queda iluminar el lado derecho del dibujo aplicando más luz en la parte baja. Recuerden que es un atardecer. Aquí me pasó algo curioso y es que al dar el sombreado en el cabello, este se oscureció un poco tomando un color más verde azul que azul marino.
El resto de las sombras se enfocarán más en la parte izquierda del personaje y bajo su barbilla, siendo este el lugar más oscuro. También en cada pliegue del vestido apliqué una sombra más leve. Por cierto, si se fijan, el color del vestido tuve que aclararlo, pues al dar sombreado, este se veía muy oscuro.
 |
 |
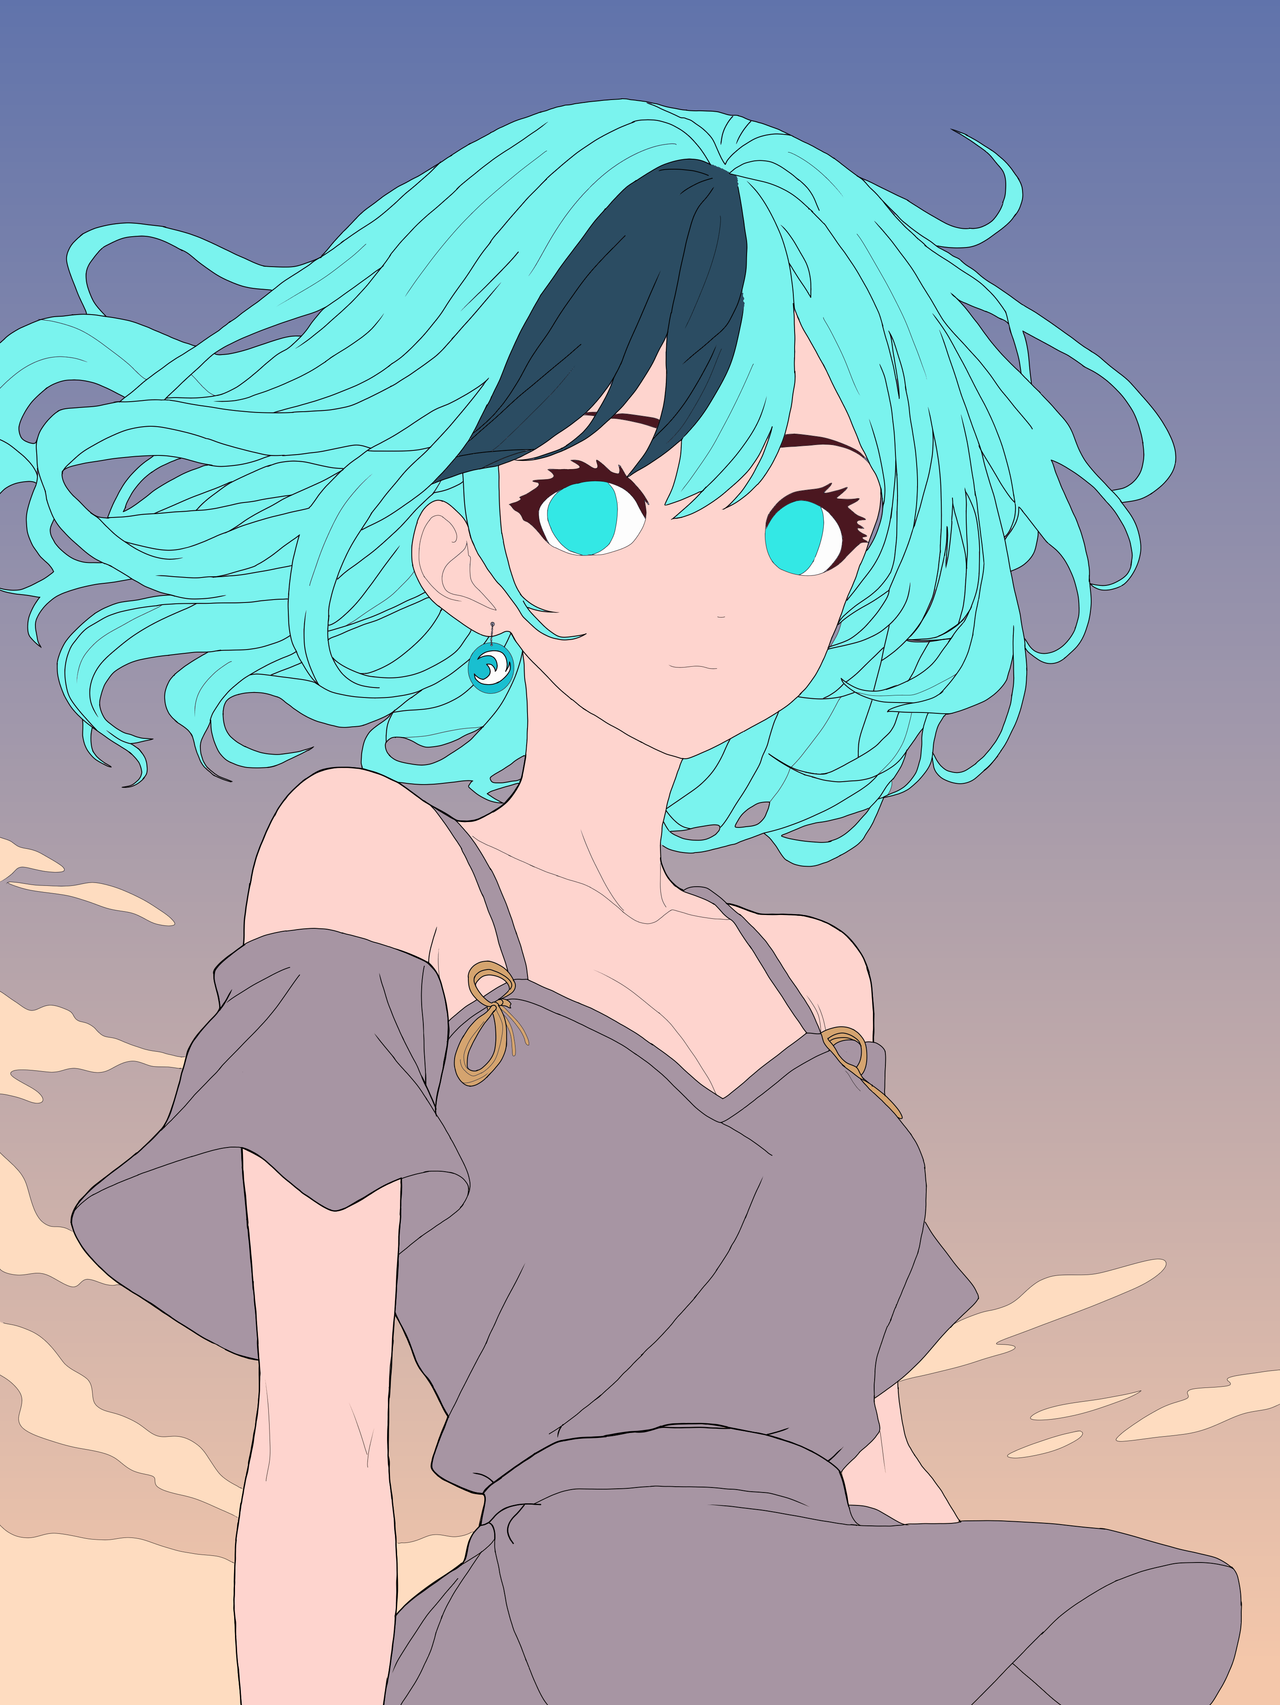
As for the background, there is not much more to do. Remember I told you that I had removed the contour lines of the clouds? Well, to improve their appearance a bit, I applied a light tone with the aerographer brush and 6% opacity. This gives a blur effect.
Additionally, I added some colorful sparkles in the upper part, while I was giving a finish to some specific areas, ending in the eyes, which I colored by areas using three shades of the same navy blue color.
En cuanto al fondo, no hay que hacer mucho más. ¿Recuerdan que les dije que había removido las líneas del contorno de las nubes? Pues, para mejorar un poco su aspecto, les apliqué un tono claro con el pincel aerógrafo y opacidad al 6%. Esto le da un efecto blur.
Adicionalmente, agregué algunos destellos coloridos en la parte superior, a la vez que fui dando un acabado a algunas zonas en específico, terminando en los ojos, los cuales coloreé por zonas utilizando tres tonos del mismo color azul marino.
 |
 |
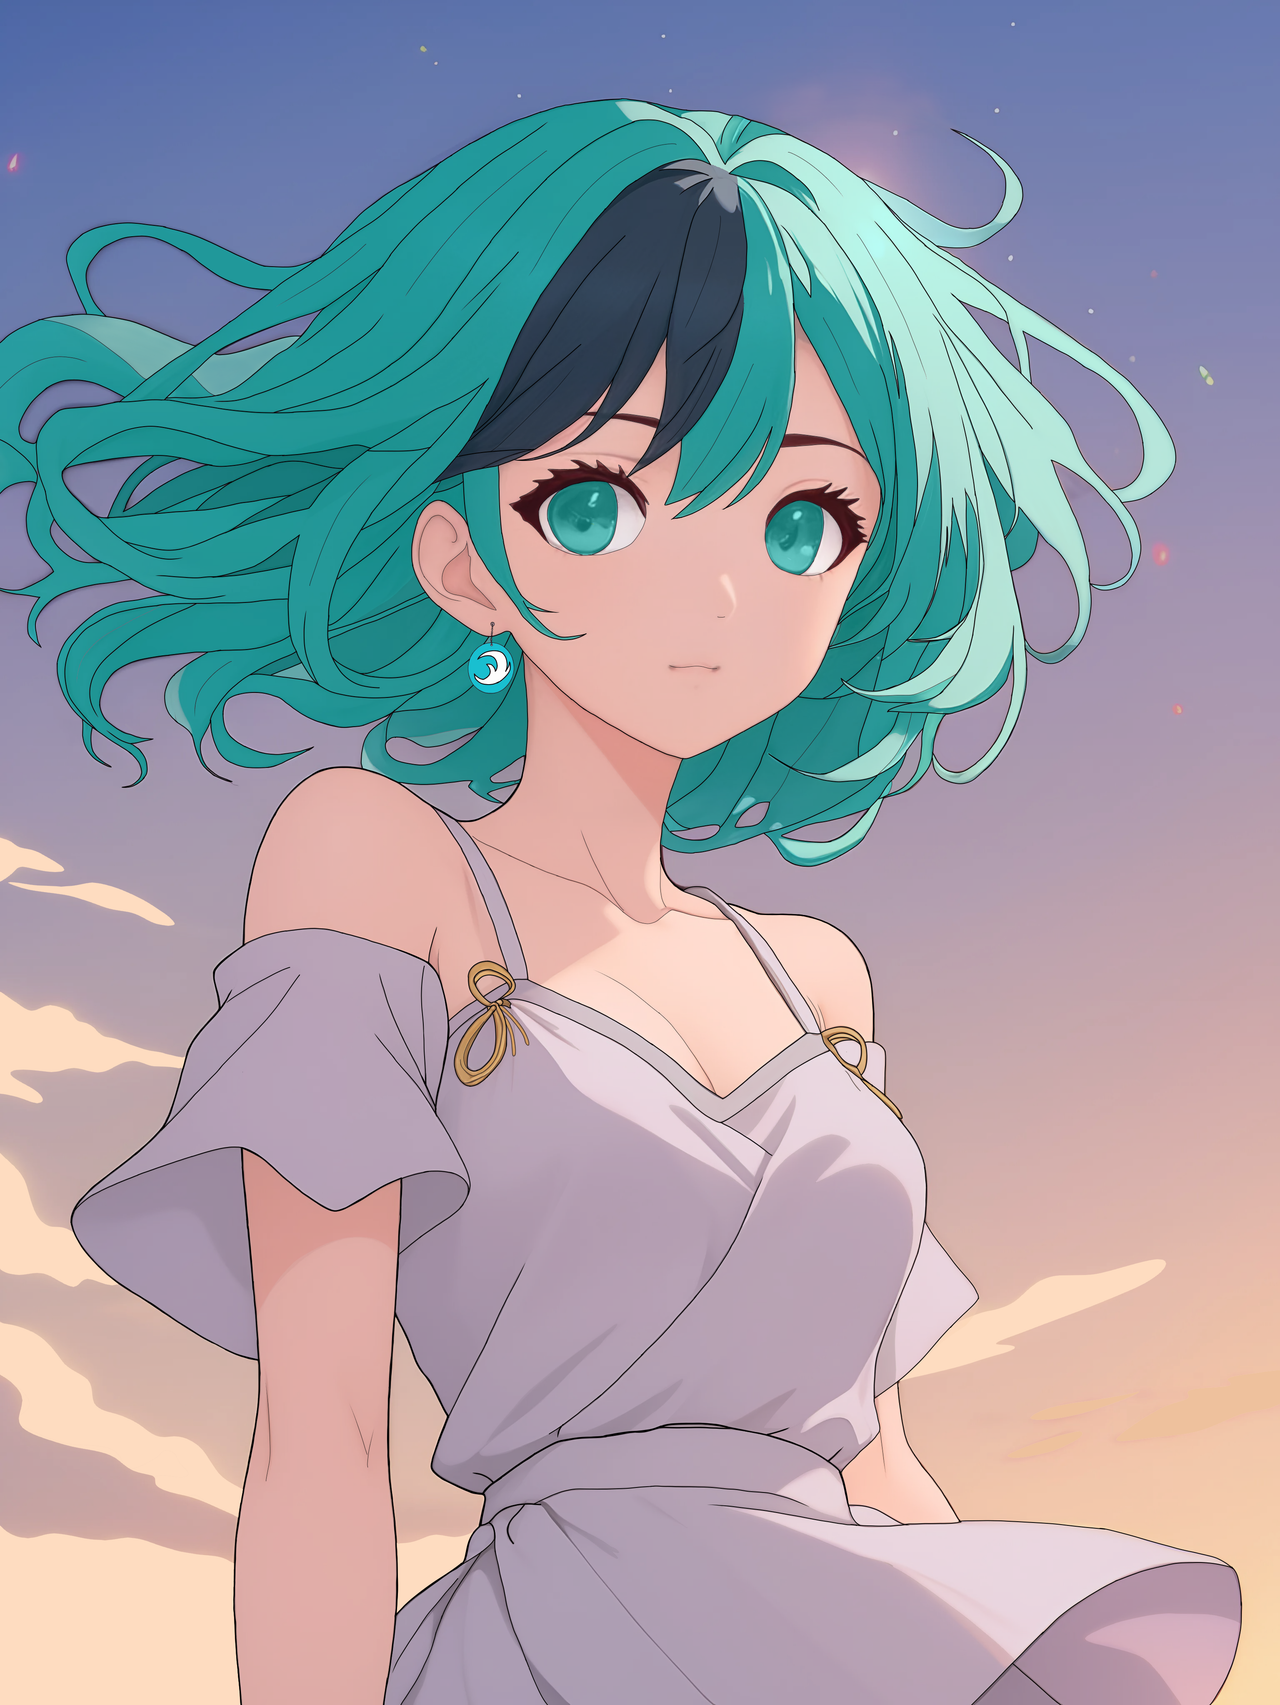
Finished Drawing // Dibujo Terminado
When the drawing was ready, I exported it to my phone and from the gallery I increased the saturation a little and applied a warm filter. All this with the aim of yellowing some areas a bit, since, as you may remember, the scene I represent takes place during sunset and at that time of the day warm tones predominate.
Cuando el dibujo estuvo listo, lo exporté para mi teléfono y desde la galería le subí la saturación un poco y apliqué un filtro de calidez. Todo esto con el objetivo de amarillentar un poco algunas zonas, ya que, como recordarán, la escena que represento se lleva a cabo durante el atardecer y en ese momento del día predominan los tonos cálidos.


Credits and Resources // Créditos y Recursos
Cover page created in Canva
Translated by DeepL
Drawn using MediBang Paint
Image edited with my Samsung Galaxy A53

Cover page created in Canva
Translated by DeepL
Drawn using MediBang Paint
Image edited with my Samsung Galaxy A53
Congratulations @edeyglezsosa! You have completed the following achievement on the Hive blockchain And have been rewarded with New badge(s)
Your next payout target is 6000 HP.
The unit is Hive Power equivalent because post and comment rewards can be split into HP and HBD
You can view your badges on your board and compare yourself to others in the Ranking
If you no longer want to receive notifications, reply to this comment with the word
STOP