Arte Digital | Digital Art
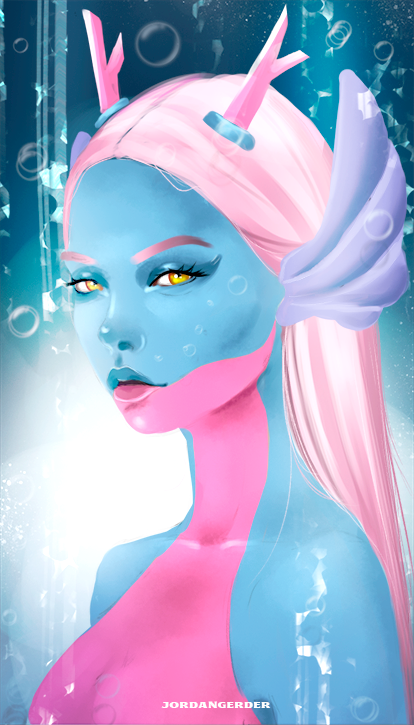
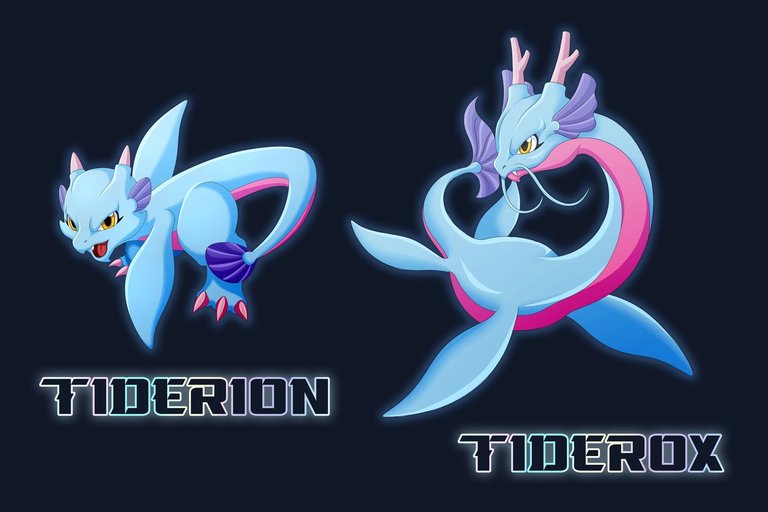
We see a little of the creation process, it is always good to see what is behind each art, join me⏩⏩⏩...Hello people, how are you today? Special greetings to the @holozing team @acidyo, today I dedicate a little art to your community, I have transformed this character, inspired by one of the creatures from the holozing world, I love the idea of recreating or rather humanizing these with a little fantasy characters, it's good to find new creatures that I can make fanarts for, I think they look amazing with the humanistic touch, tiderox is a kind of sea beast, I say it because of the shape of its ears in the shape fin and he also has the same model on his tail and his arms or legs are similar to the fins of a dolphin, I wanted to make my character under the sea to relate him even more with the marine world...
Materiales | Materials
- Desktop computer
- Tableta Huion H950P
- Programa Adobe Photoshop 2019
- Ordenador de mesa
- Huion H950P tablet
- Adobe Photoshop 2019 program
Proceso | Process
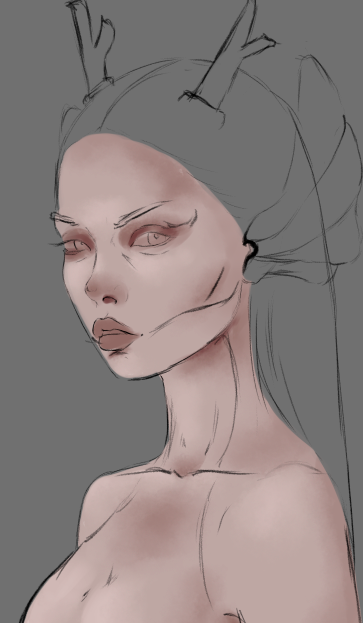
Paso 1
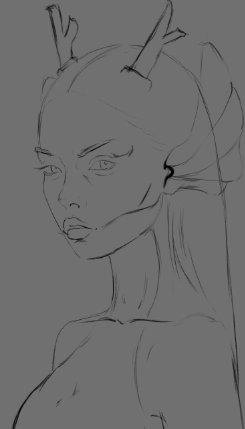
- Iniciamos con un bosquejo de lo que sería el personaje, creando una silueta y dejando que fluyan lineas sobre él, asi es como resulta mas facil su creación:
Step 1
- We start with a sketch of what the character would be, creating a silhouette and letting lines flow over it, this is how its creation is easier:
Paso 2
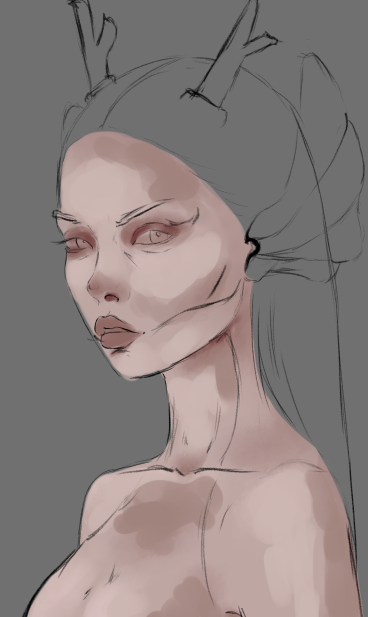
- Una ves que conseguimos un bosquejo mas claro, o donde se aprecie el personaje al cual agregaremos volumen y forma, agrego parches de tres colores no muy sataturados, una base, un color para identificar sus sombras y otro tono para identificar la luz o la parte alta del cuerpo:
Step 2
- Once we get a clearer sketch, or where the character to which we will add volume and shape can be seen, I add patches of three not very saturated colors, a base, a color to identify its shadows and another tone to identify the light or the part. body height:
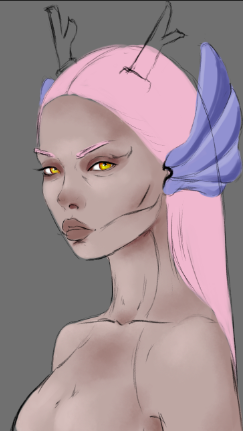
Paso 3
- Mezclamos los colores que agregamos anteriormente, para esto uso un pincel suave de bordes difusos, con este el proceso es mucho mas facil, seguidamente voy dando forma a su cuerpo que seria la parte del personaje de inspiracion:
Step 3
We mix the colors that we added previously, for this I use a soft brush with diffuse edges, with this the process is much easier, then I will shape his body which would be the part of the inspiration character:
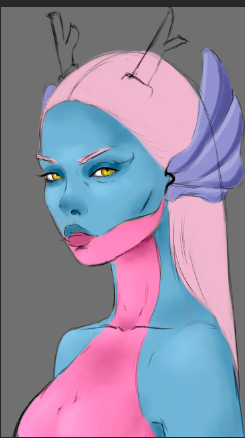
Paso 4
- Una vez detallado sus ojos y cabello, hago el trabajo de color en su piel queria que llevara el mismo tono de color que la bestia en la cual me he inspirado, fue tan simple como agregar el color y con un modo de capa se adapto muy bien dejando visibles las partes altas y bajas del cuerpo...
Step 4
- Once his eyes and hair were detailed, I did the color work on his skin. I wanted him to have the same color tone as the beast I was inspired by. It was as simple as adding the color and with a layer mode he adapted very well. well leaving the upper and lower parts of the body visible...

Paso final
- Para finalizar todo el proceso de creación agregué detalles finales como brillos, mas luces y ajustes totales de color.
Final step
- To finalize the entire creation process, I added final details such as highlights, more highlights and total color adjustments.
We got an incredible result, I really enjoyed the creation process. I hope you liked it, I have elaborated it with love for all the viewers who visit this publication, see you in the next one 😍
𝑮𝒓𝒂𝒄𝒊𝒂𝒔 𝒑𝒐𝒓 𝒗𝒊𝒔𝒊𝒕𝒂𝒓 𝒎𝒊 𝒃𝒍𝒐𝒈, 𝒂𝒑𝒓𝒆𝒄𝒊𝒐 𝒎𝒖𝒄𝒉𝒐 𝒕𝒖 𝒂𝒑𝒐𝒚𝒐 / 𝑻𝒉𝒂𝒏𝒌 𝒚𝒐𝒖 𝒇𝒐𝒓 𝒗𝒊𝒔𝒊𝒕𝒊𝒏𝒈 𝒎𝒚 𝒃𝒍𝒐𝒈, 𝑰 𝒓𝒆𝒂𝒍𝒍𝒚 𝒂𝒑𝒑𝒓𝒆𝒄𝒊𝒂𝒕𝒆 𝒚𝒐𝒖𝒓 𝒔𝒖𝒑𝒑𝒐𝒓𝒕.
TWITTER ⚪ NFT SHOWROOM ⚪ INSTAGRAM ⚪ DISCORD



Very beautiful artwork
Awesome work~~ 😍