Feliz domingo amigos creativos de la comunidad Holozing, espero se encuentren bien y con muchos ánimos, ya entrando en una nueva semana y muchos de nosotros ya nos estamos preparando para estos días de vacaciones. Más sin embargo seguimos creando y compartiendo nuevas manualidades relacionadas a la temática de Holozing.
Happy Sunday creative friends of the Holozing community, I hope you are well and in good spirits, as we enter a new week and many of us are already preparing for these vacation days. However, we continue to create and share new crafts related to the Holozing topic.
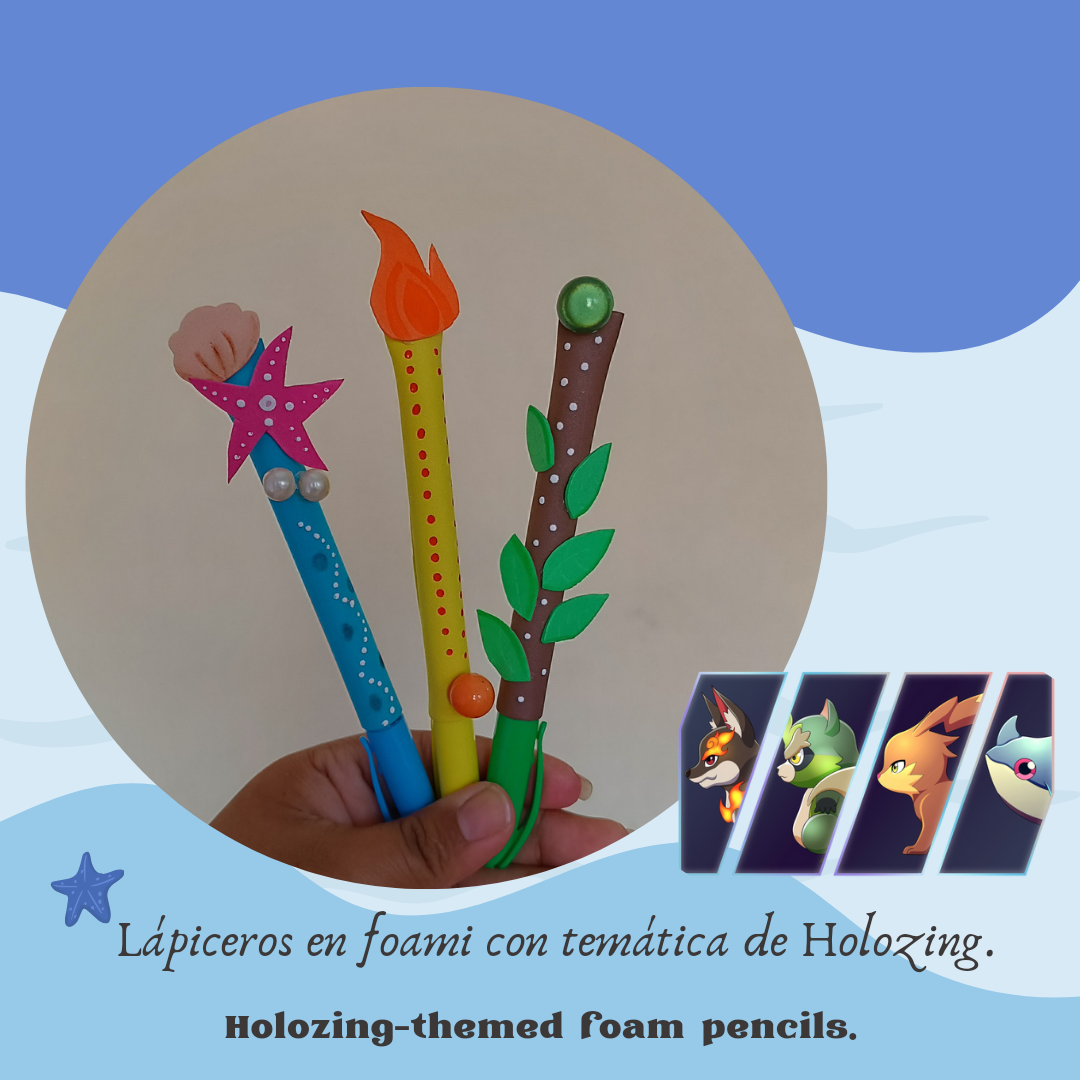
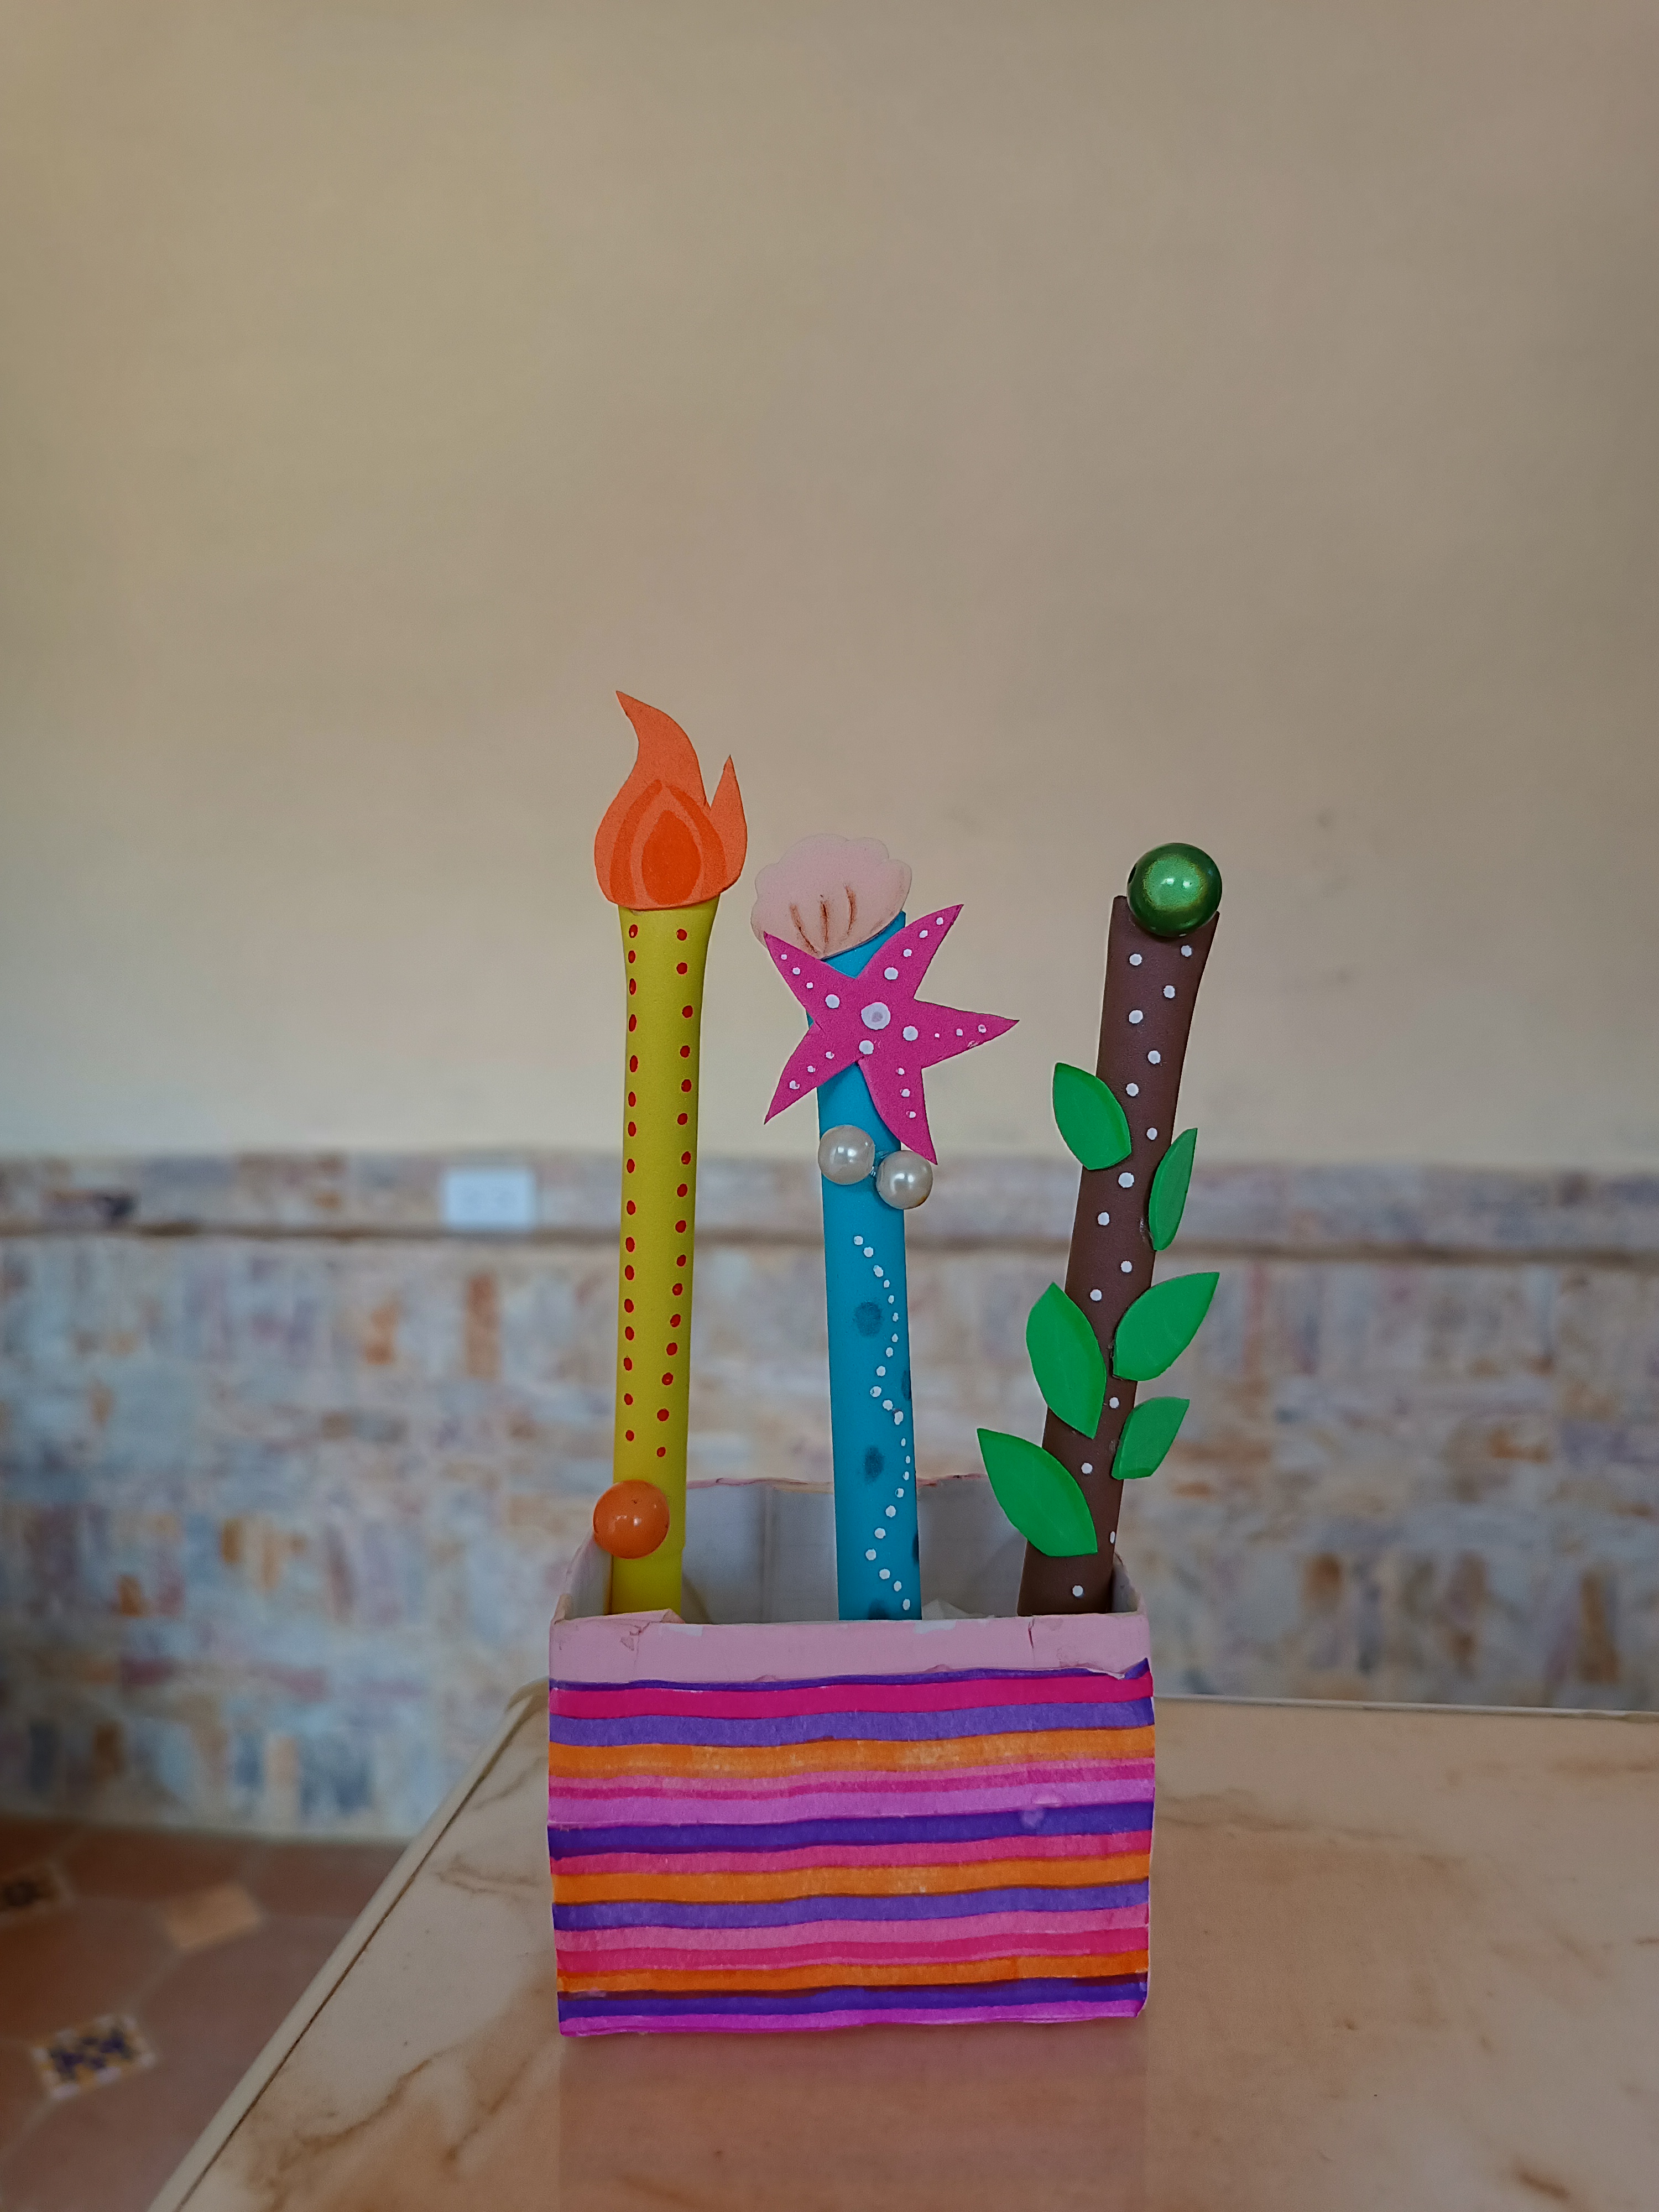
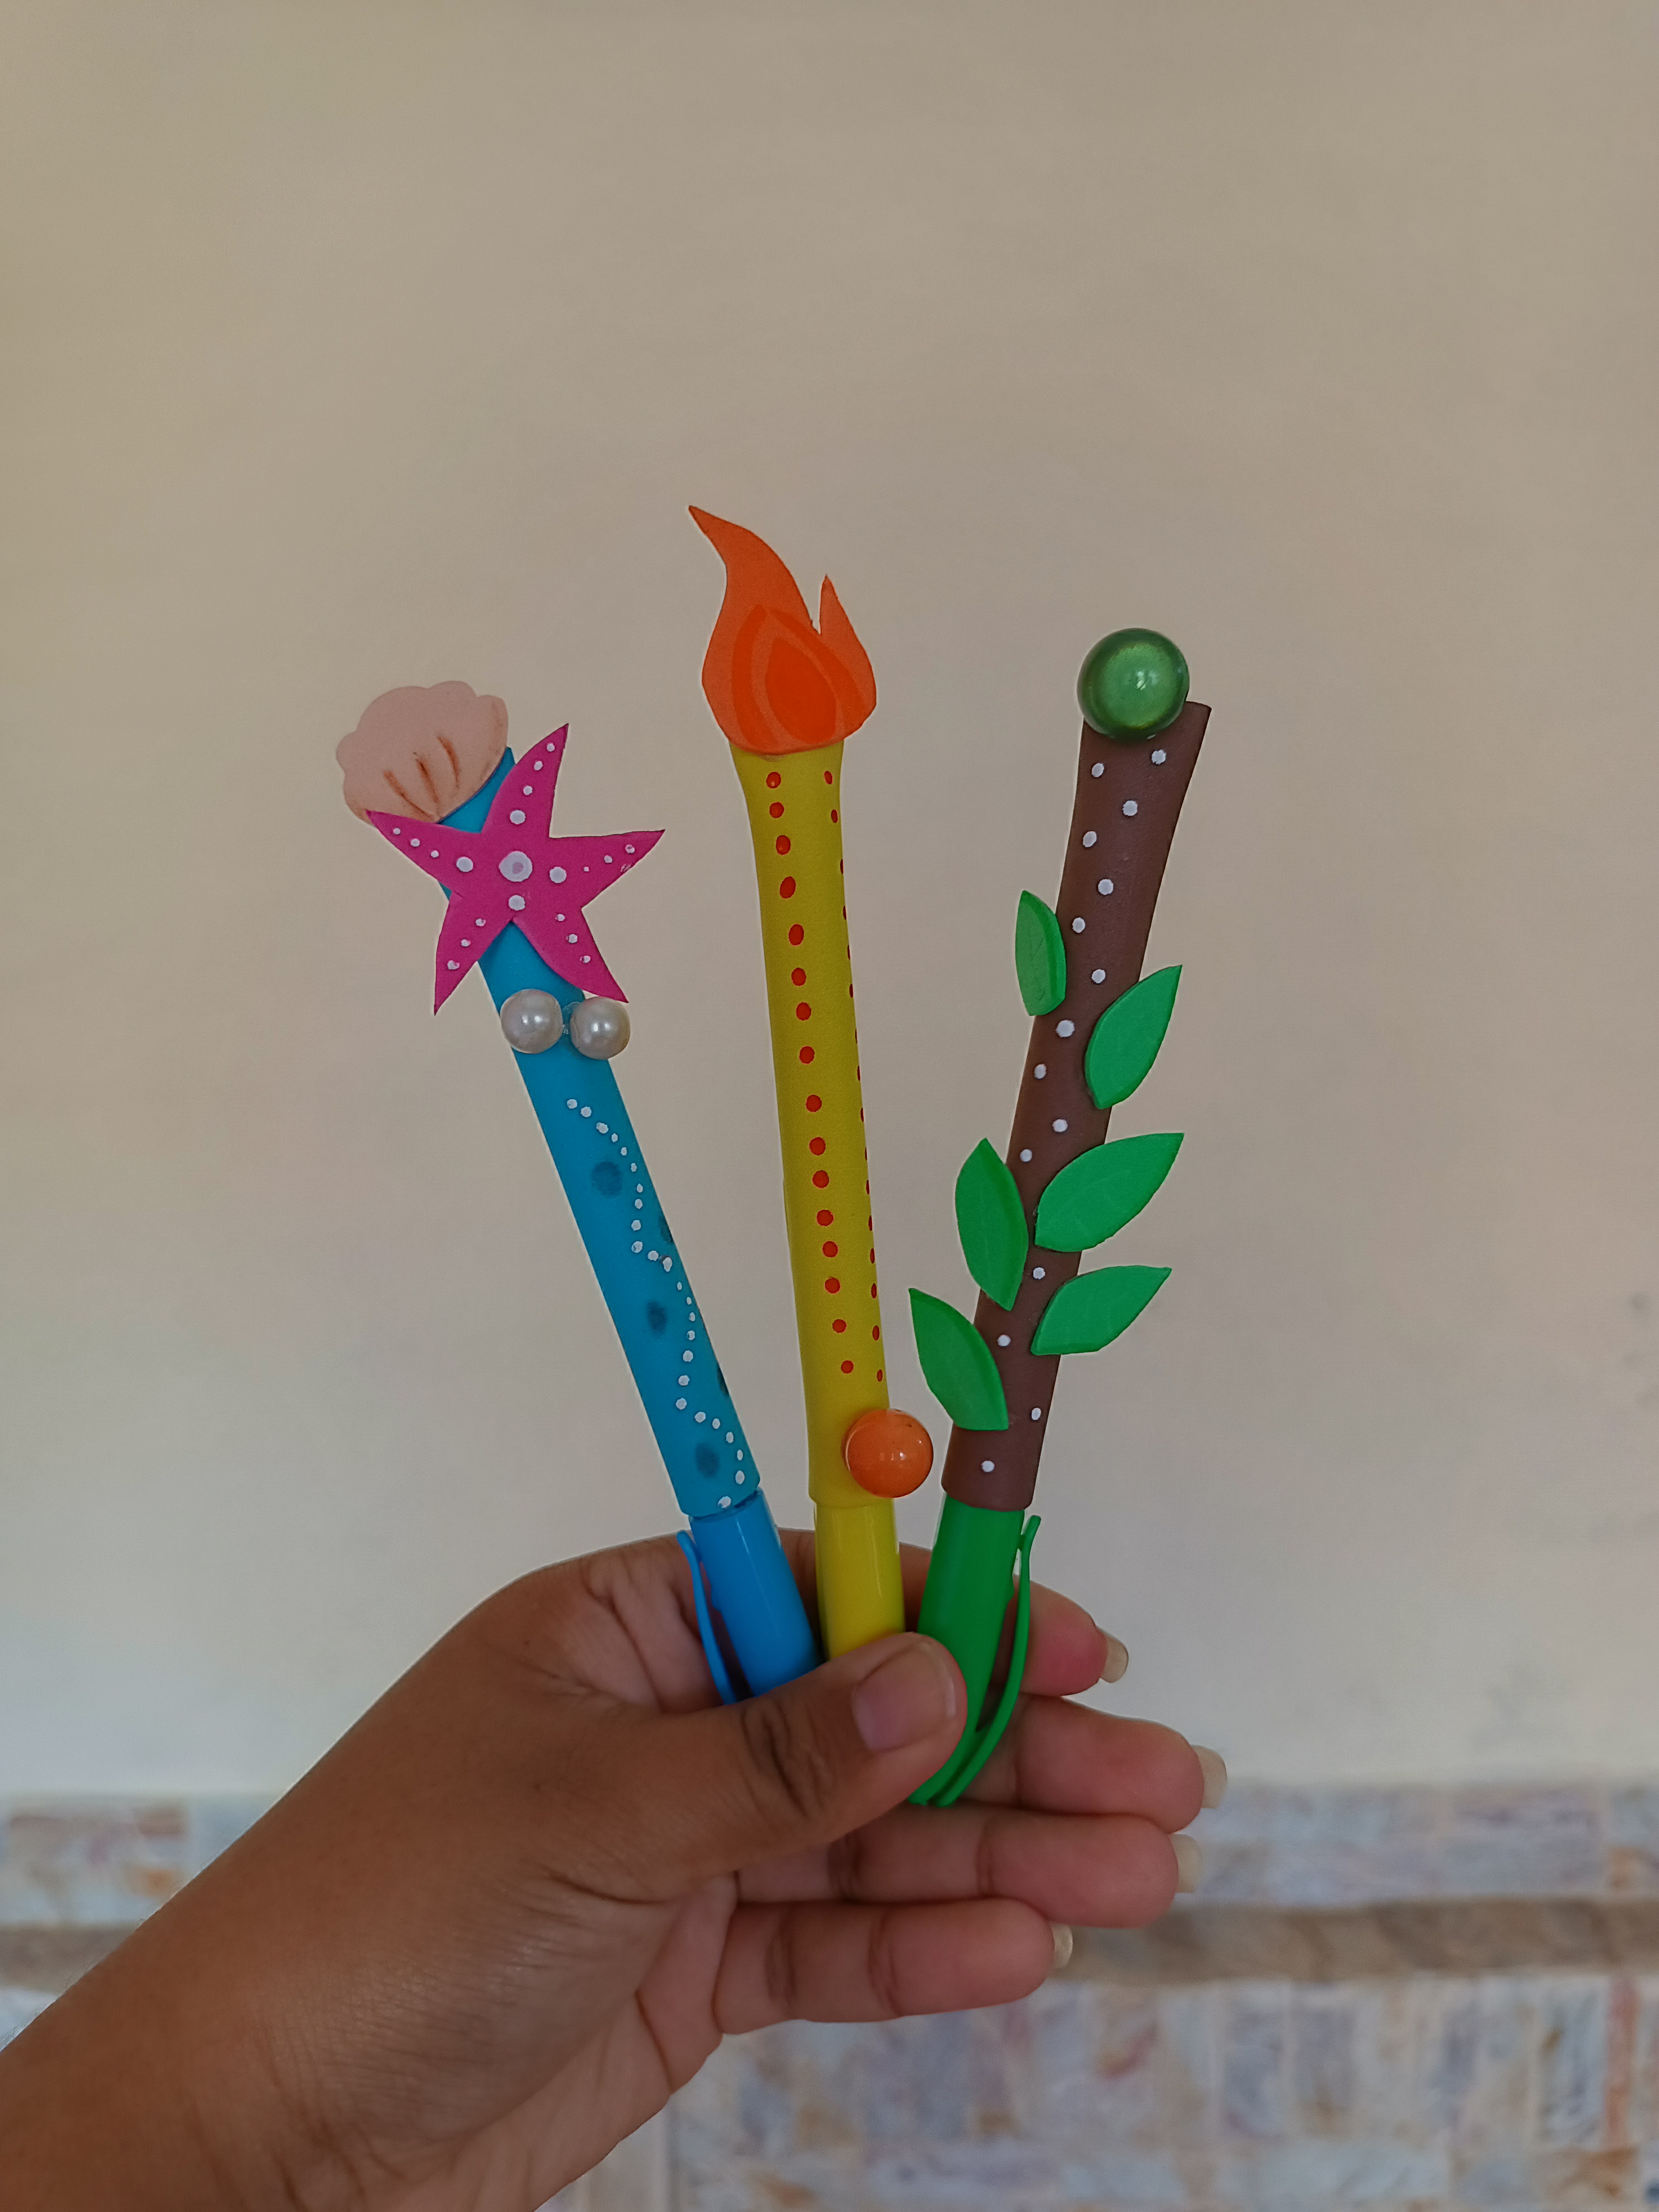
Hoy les quiero compartir una linda decoración de lápiceros en foami inspirados en los principales personajes, estos lápiceros los podemos utilizar durante nuestras actividades diarias, además licen muy bien. El principal tema que quise abarcar es el bosque, el océano y el fuego, a continuación les muestro el paso a paso y los materiales.
Today I want to share with you a beautiful foam pencil decoration inspired by the main characters. We can use these pencils during our daily activities, and they also look very good. The main theme I wanted to cover is the forest, the ocean and fire, below I show you the step by step and the materials.
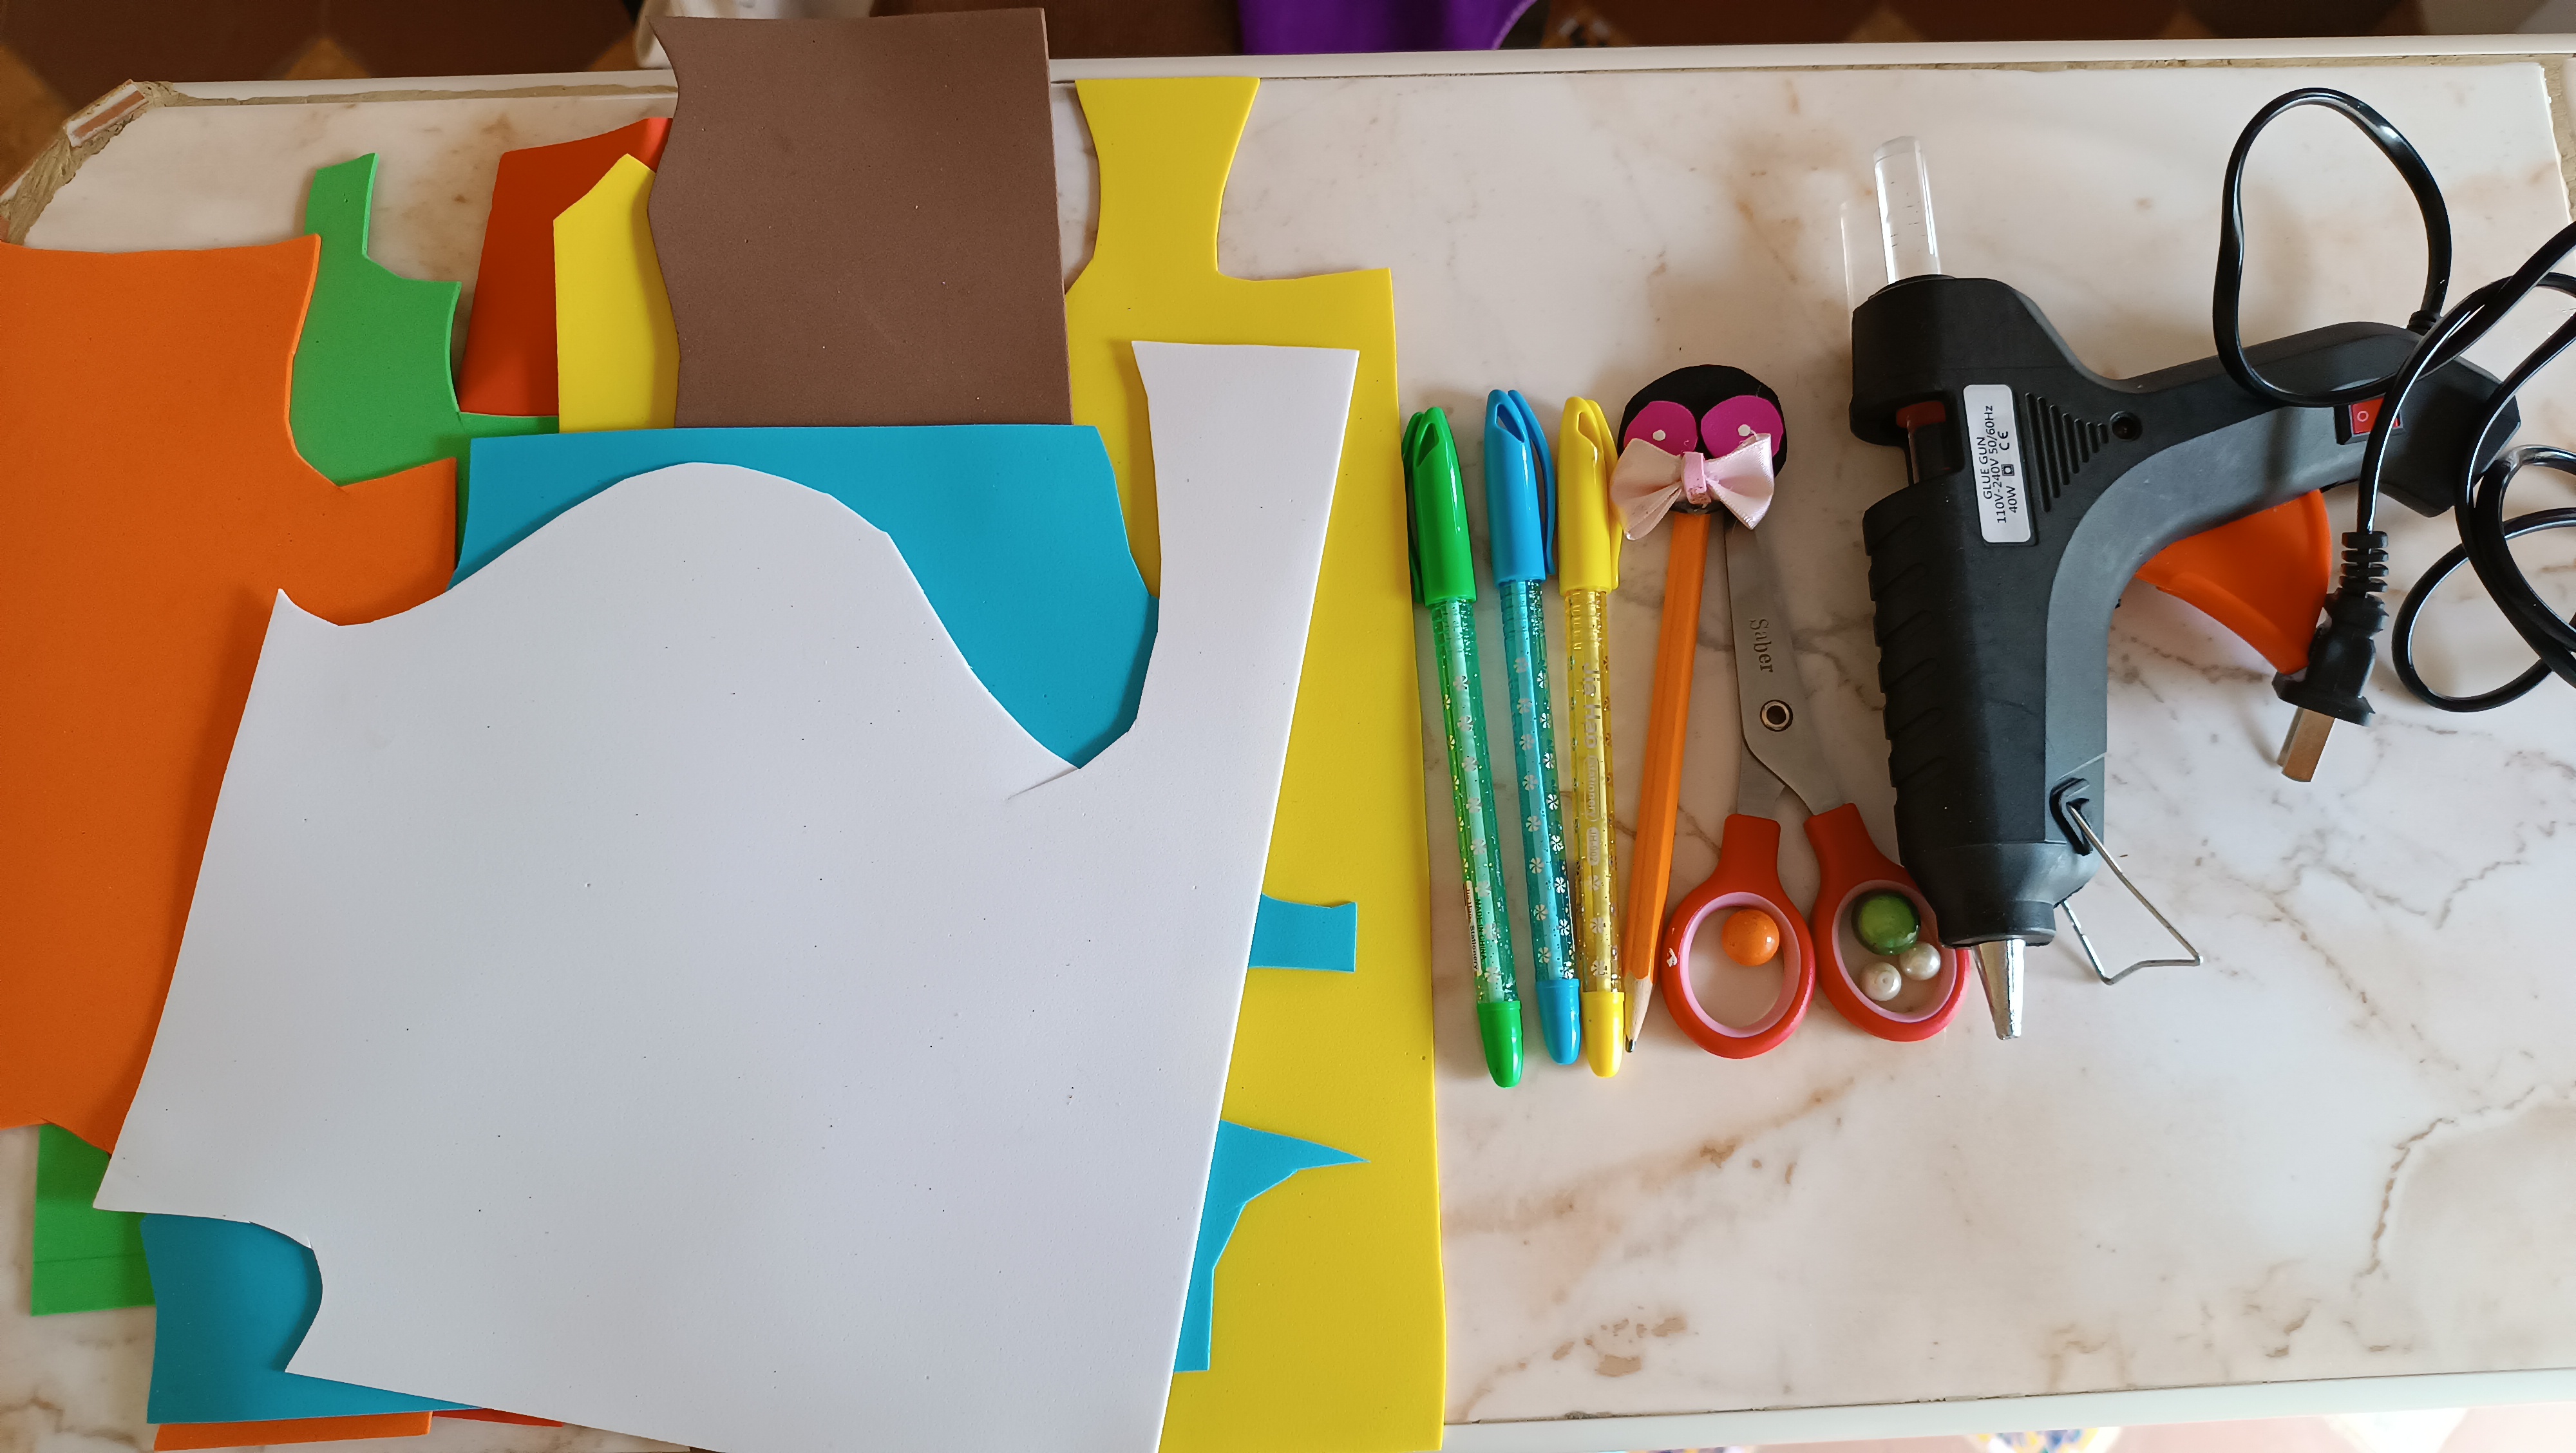
Materiales:
🍀Foami de colores variados (marrón, verde, azul, amarillo, naranja, blanco, rosa, color piel).
🍀Piedras color verde, blancas, naranja.
🍀Pintura de color rojo y blanco.
🍀Tijera.
🍀Silicón.
🍀Marcadores.
🍀Tres lapiceros.
🍀Palillos.
Materials:
Foami of various colors (brown, green, blue, yellow, orange, white, pink, skin color).
Green, white and orange stones.
Red and white paint.
Scissors.
Silicone.
Markers.
Three pencils.
Chopsticks.
Paso a paso / Step by Step
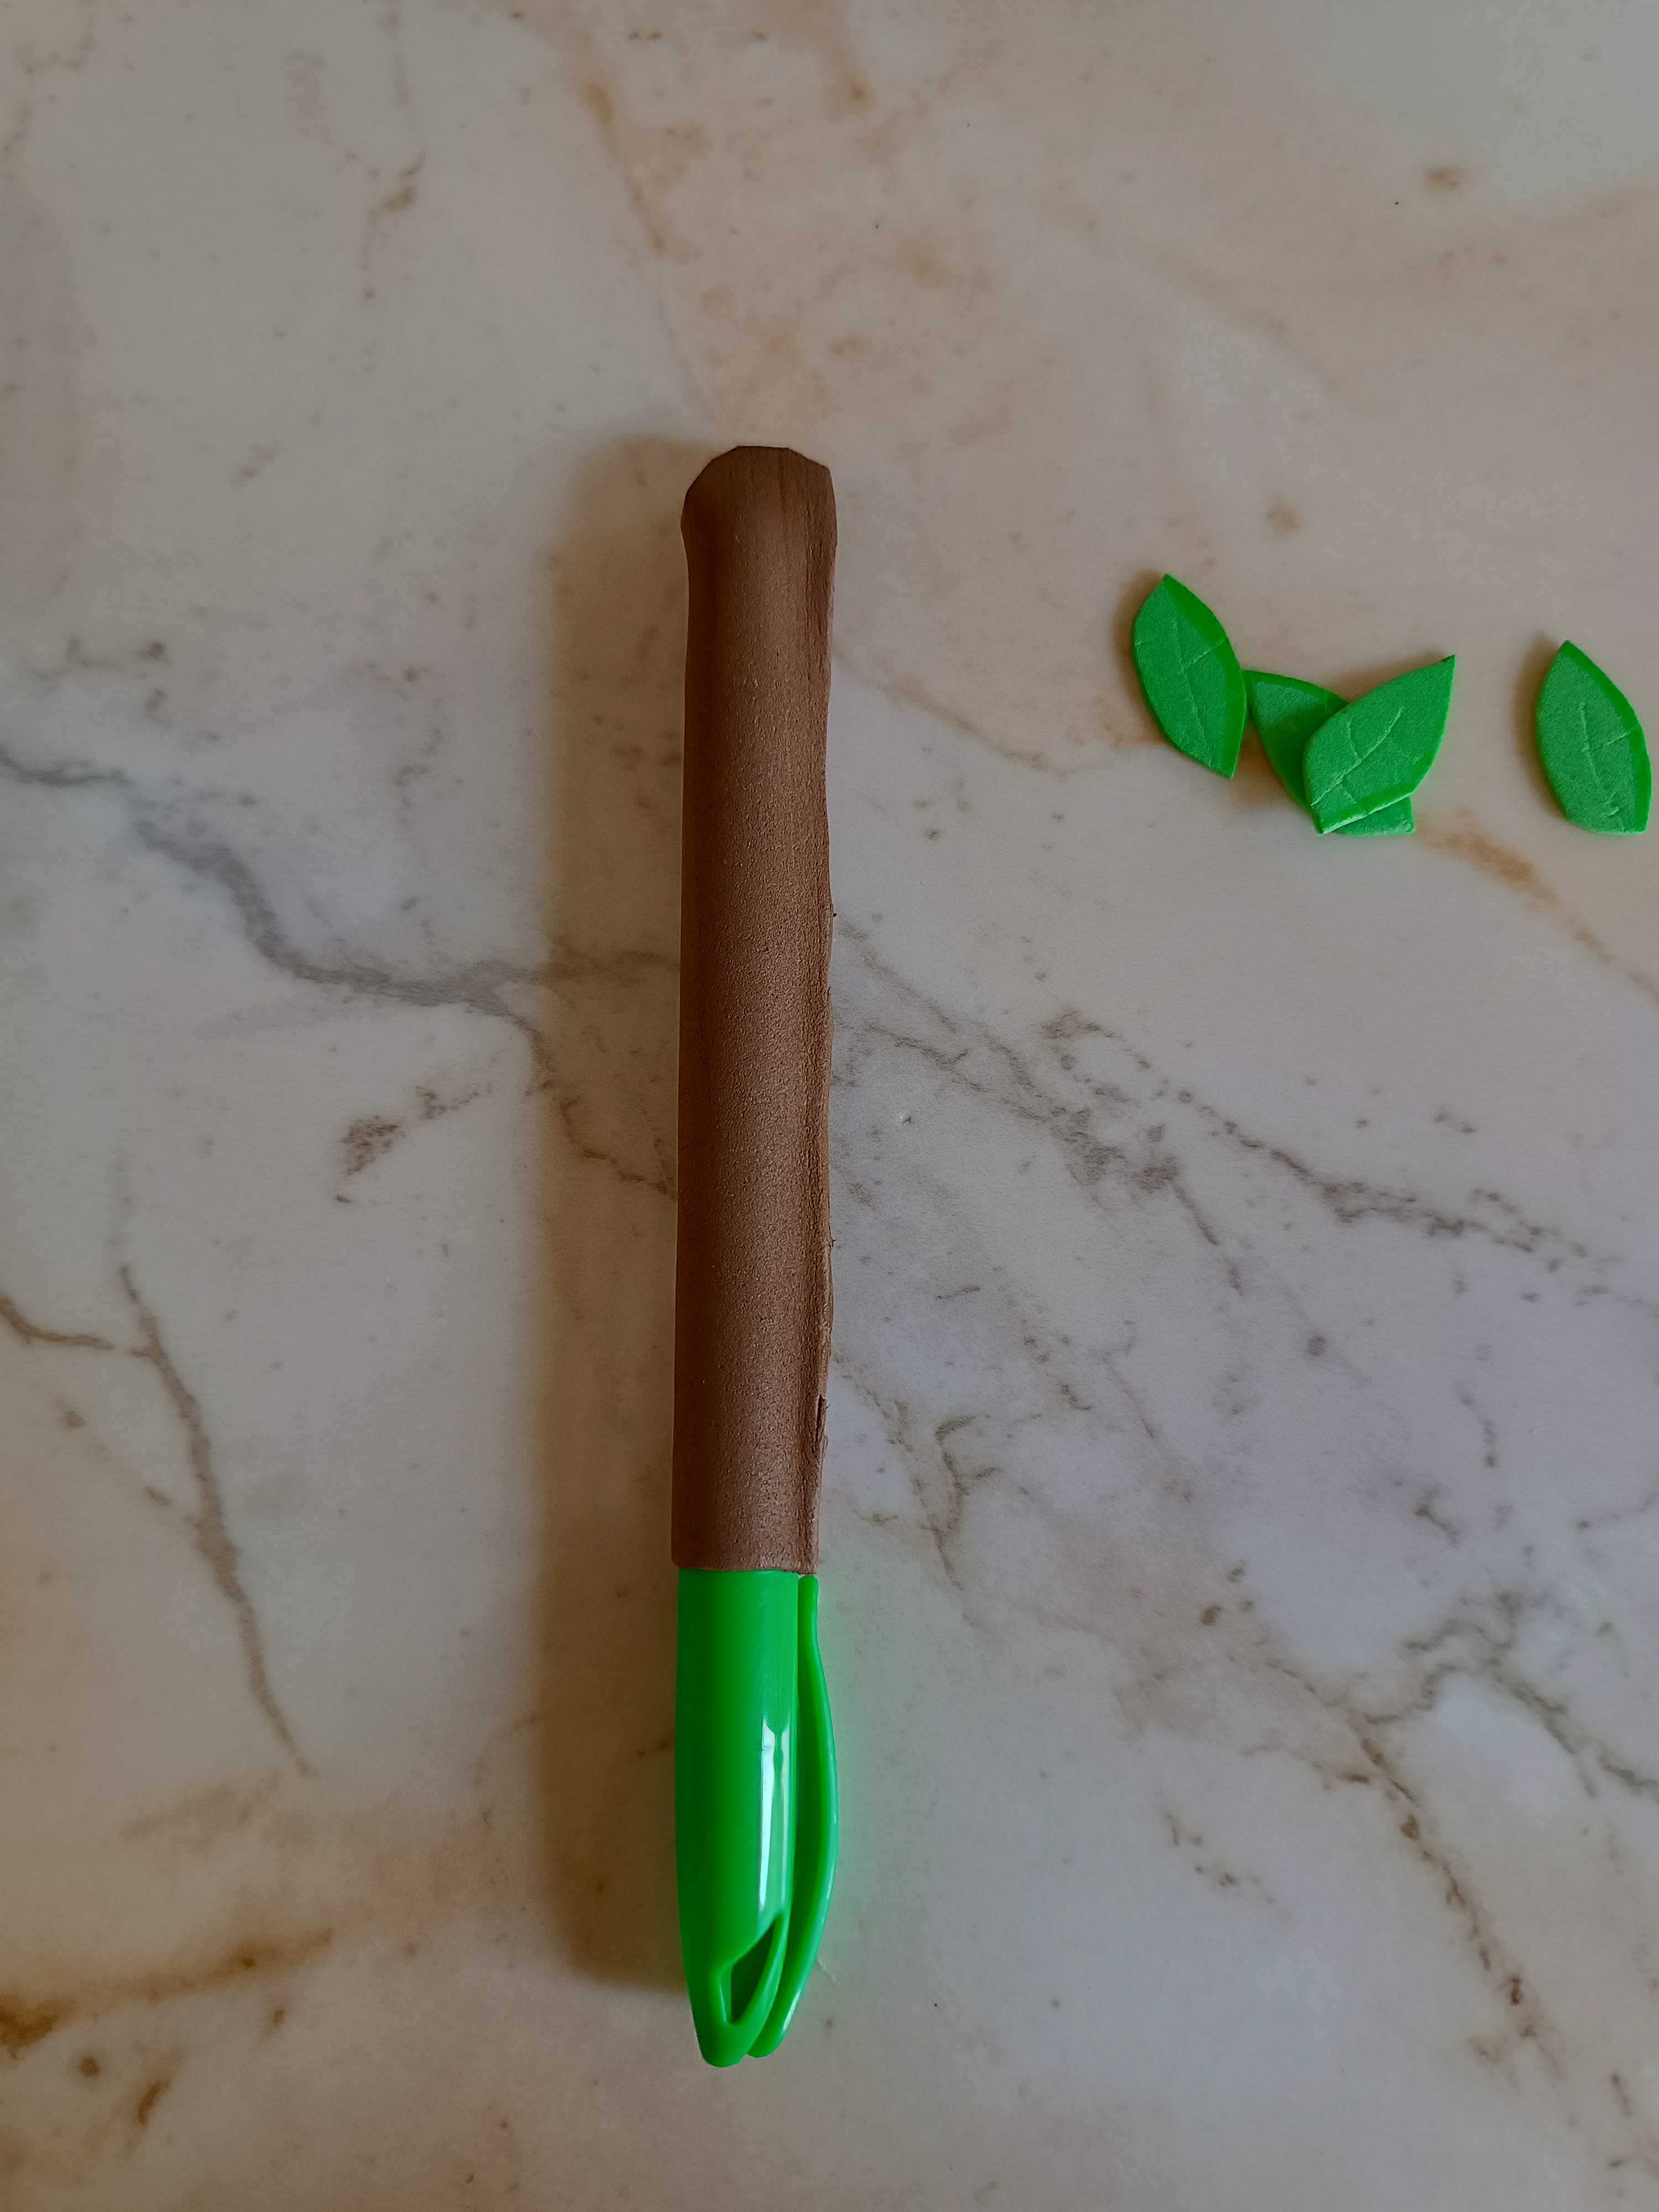
Para el primer lapicero voy a utilizar foami de color marrón, tomé la medida exacta del largo del lapicero y corté una franja, luego con silicón voy pegando las puntas corté el sobrante del foami de los laterales y de la parte superior.
For the first pen I am going to use brown foam, I took the exact measurement of the length of the pen and cut a strip, then with silicone I glue the tips and cut the excess foam from the sides and top.
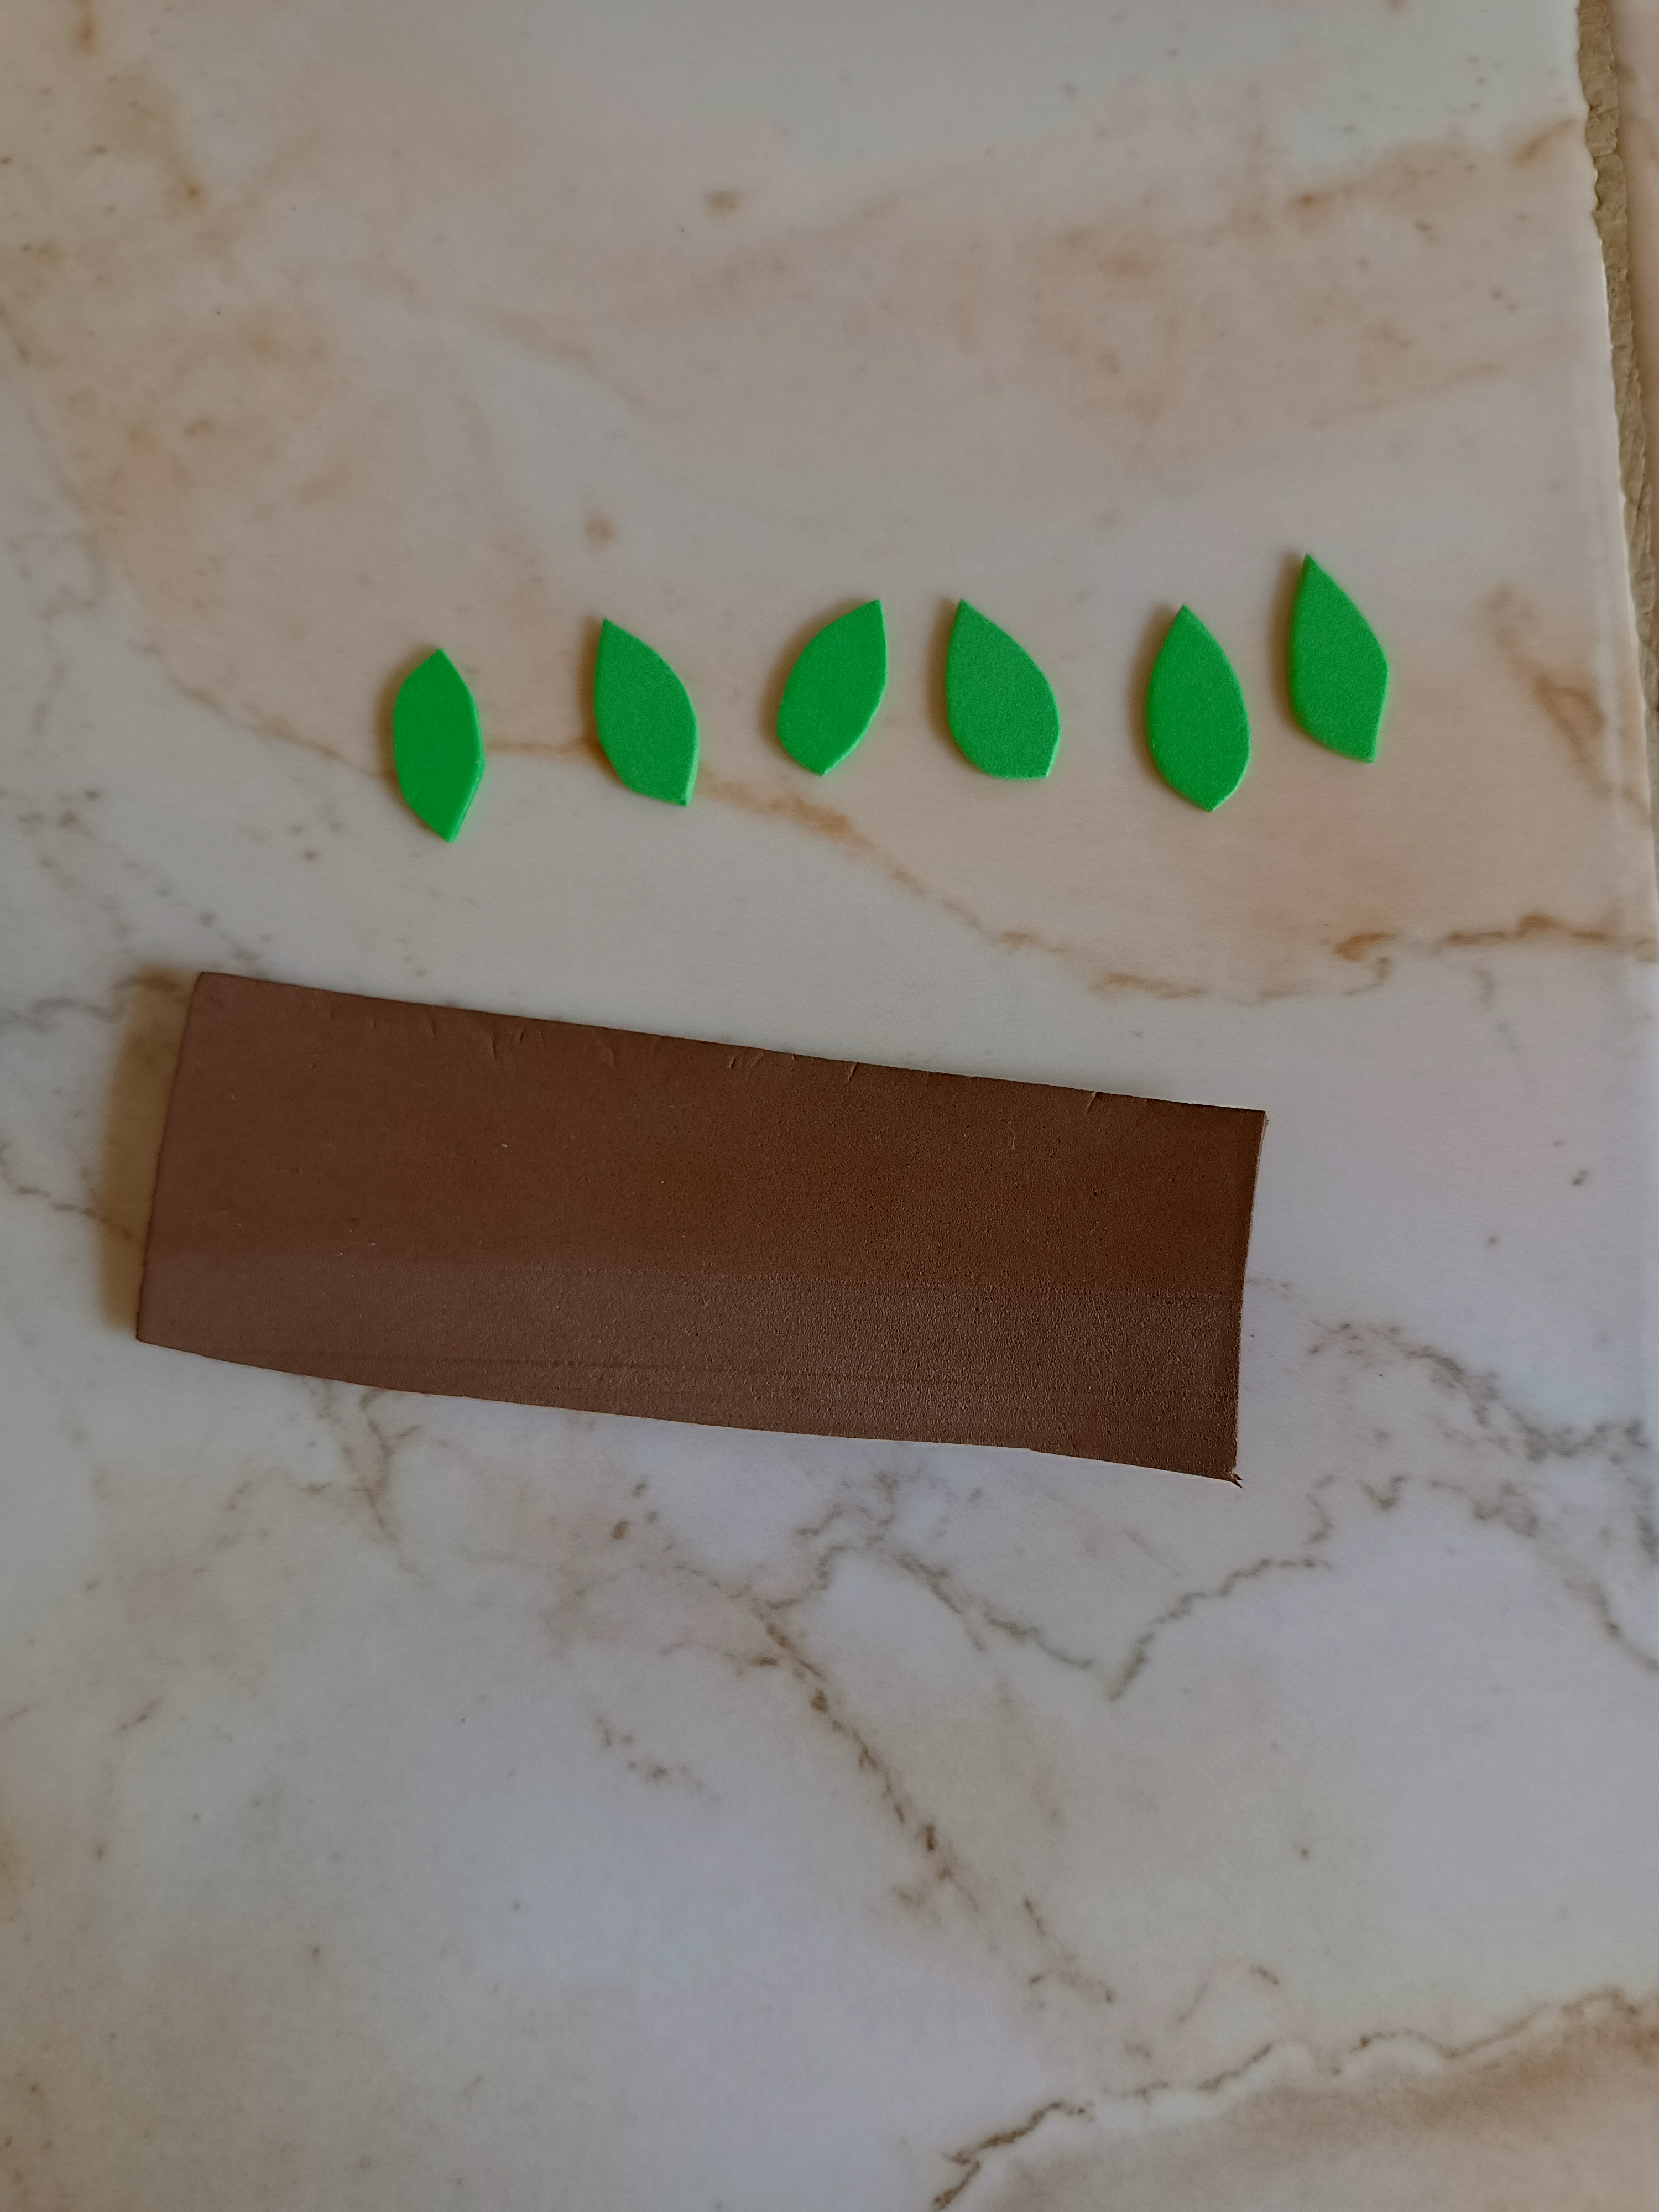
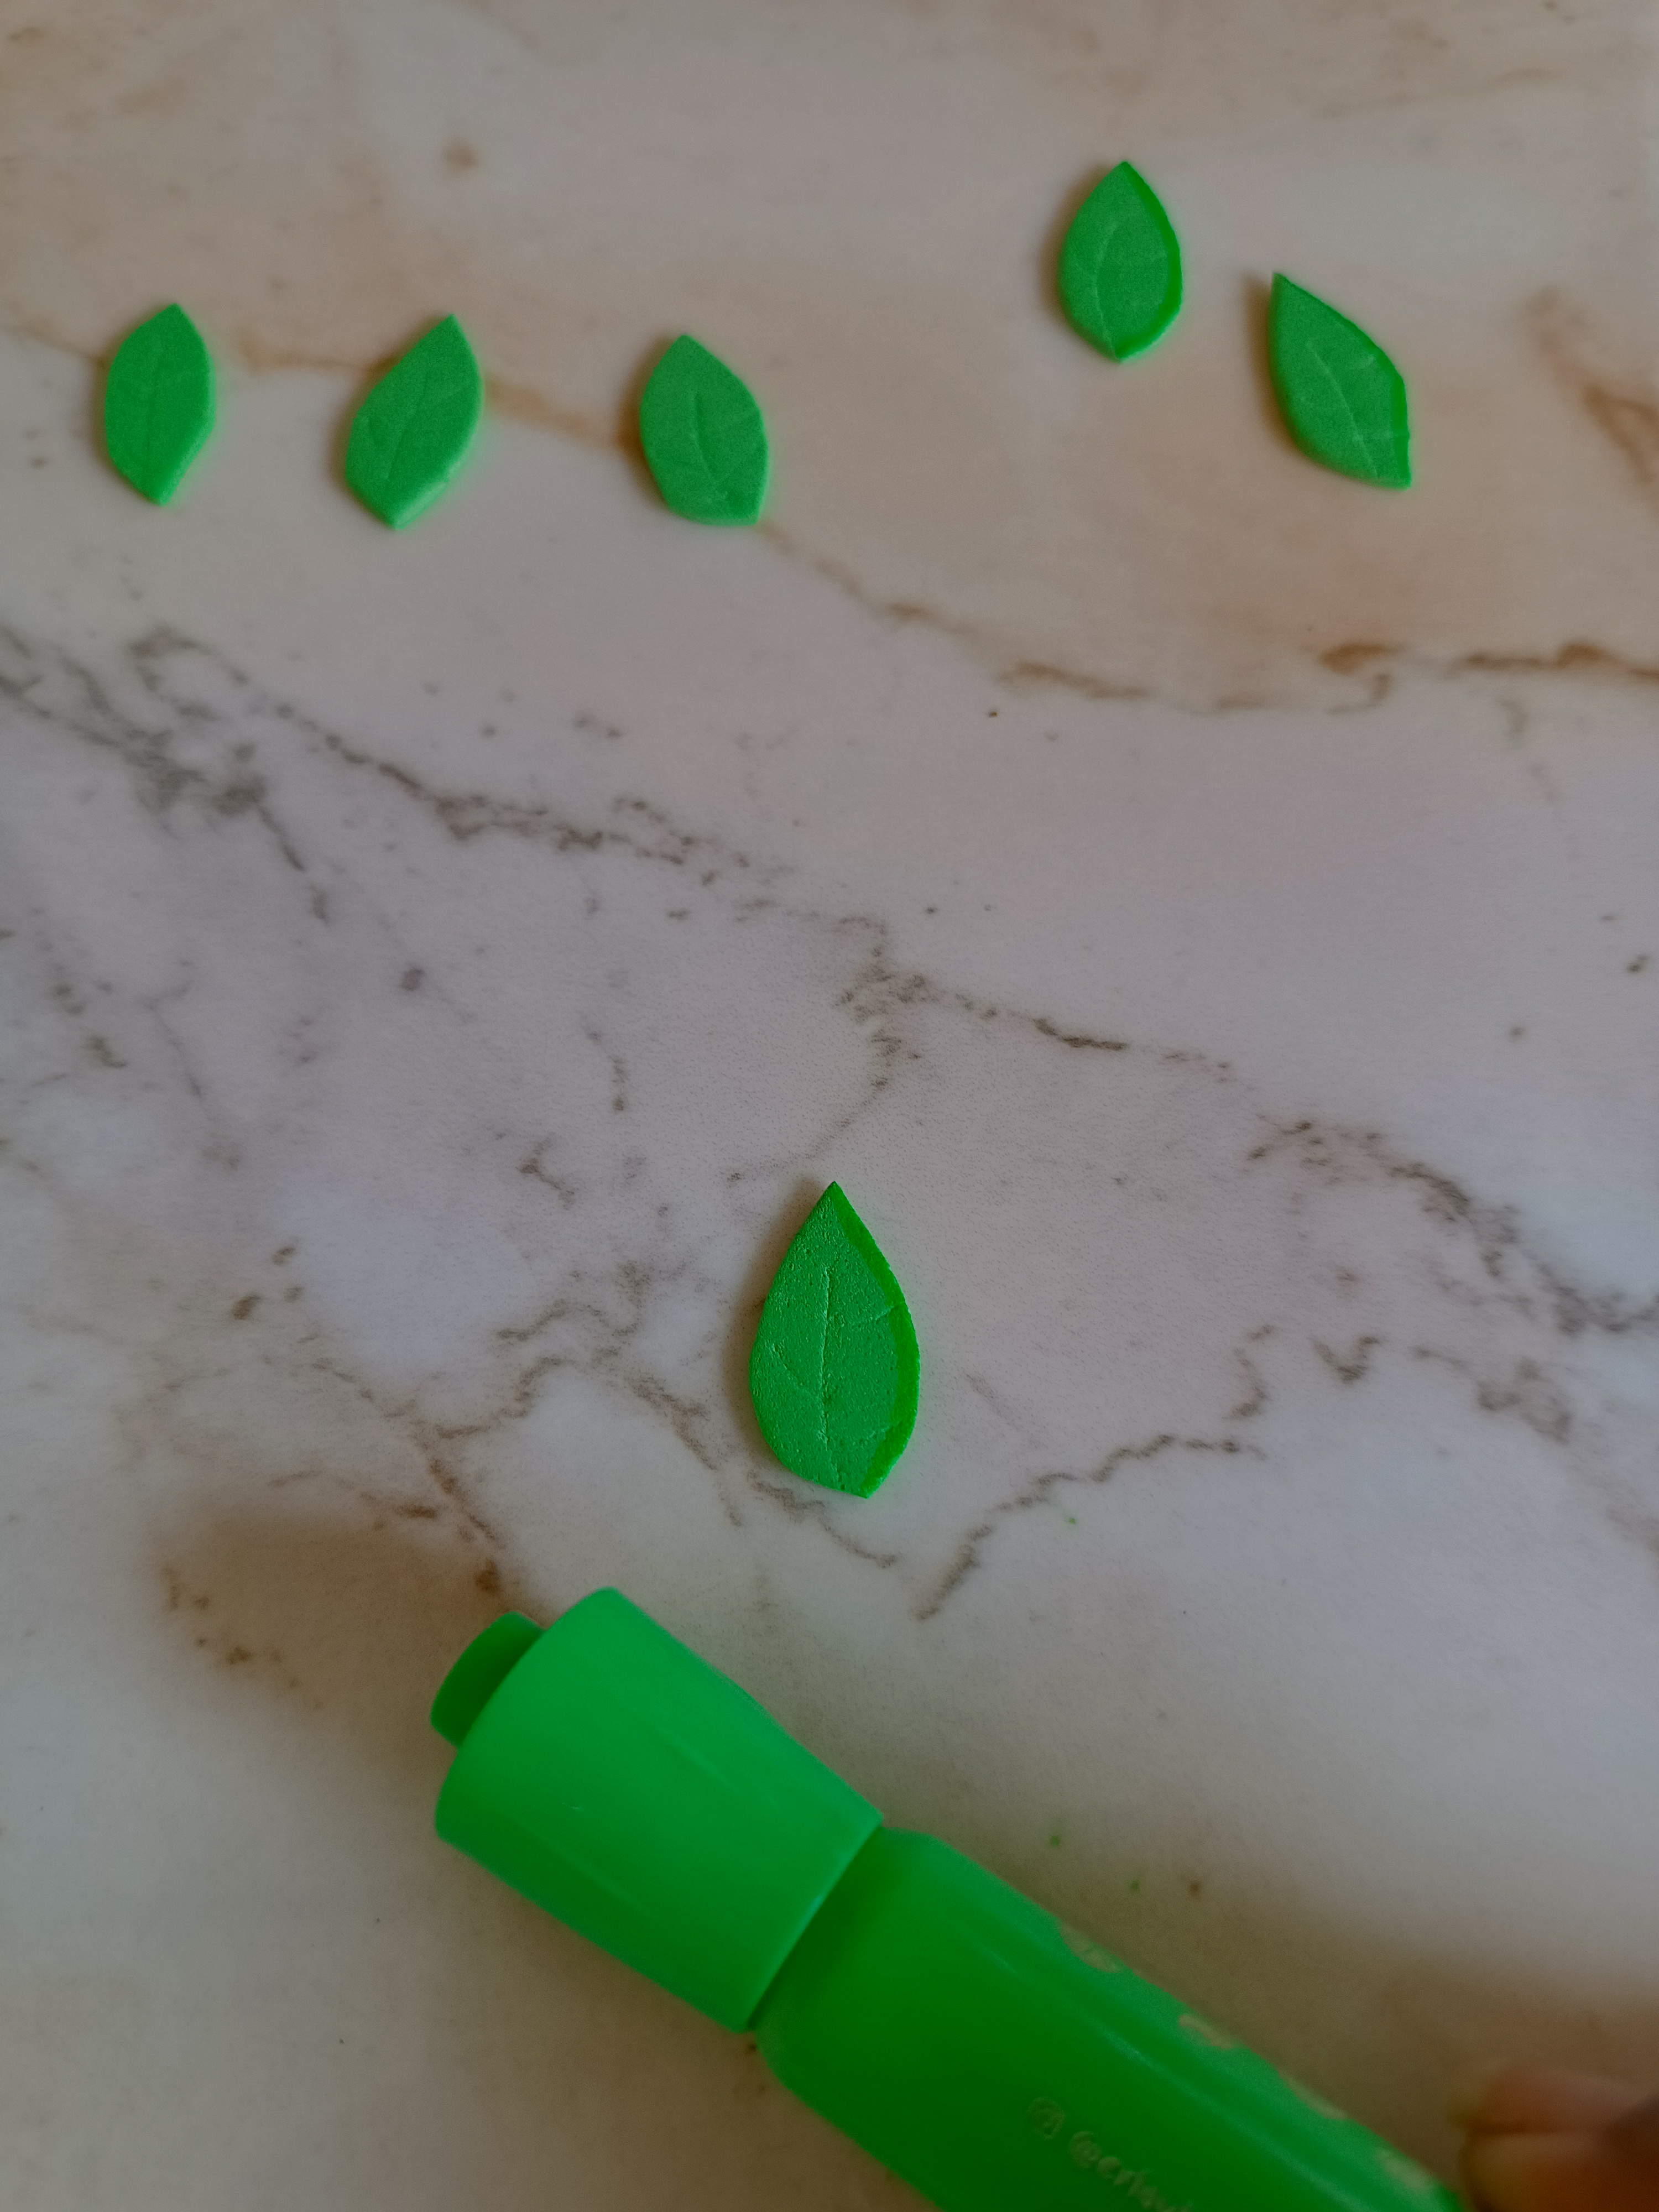
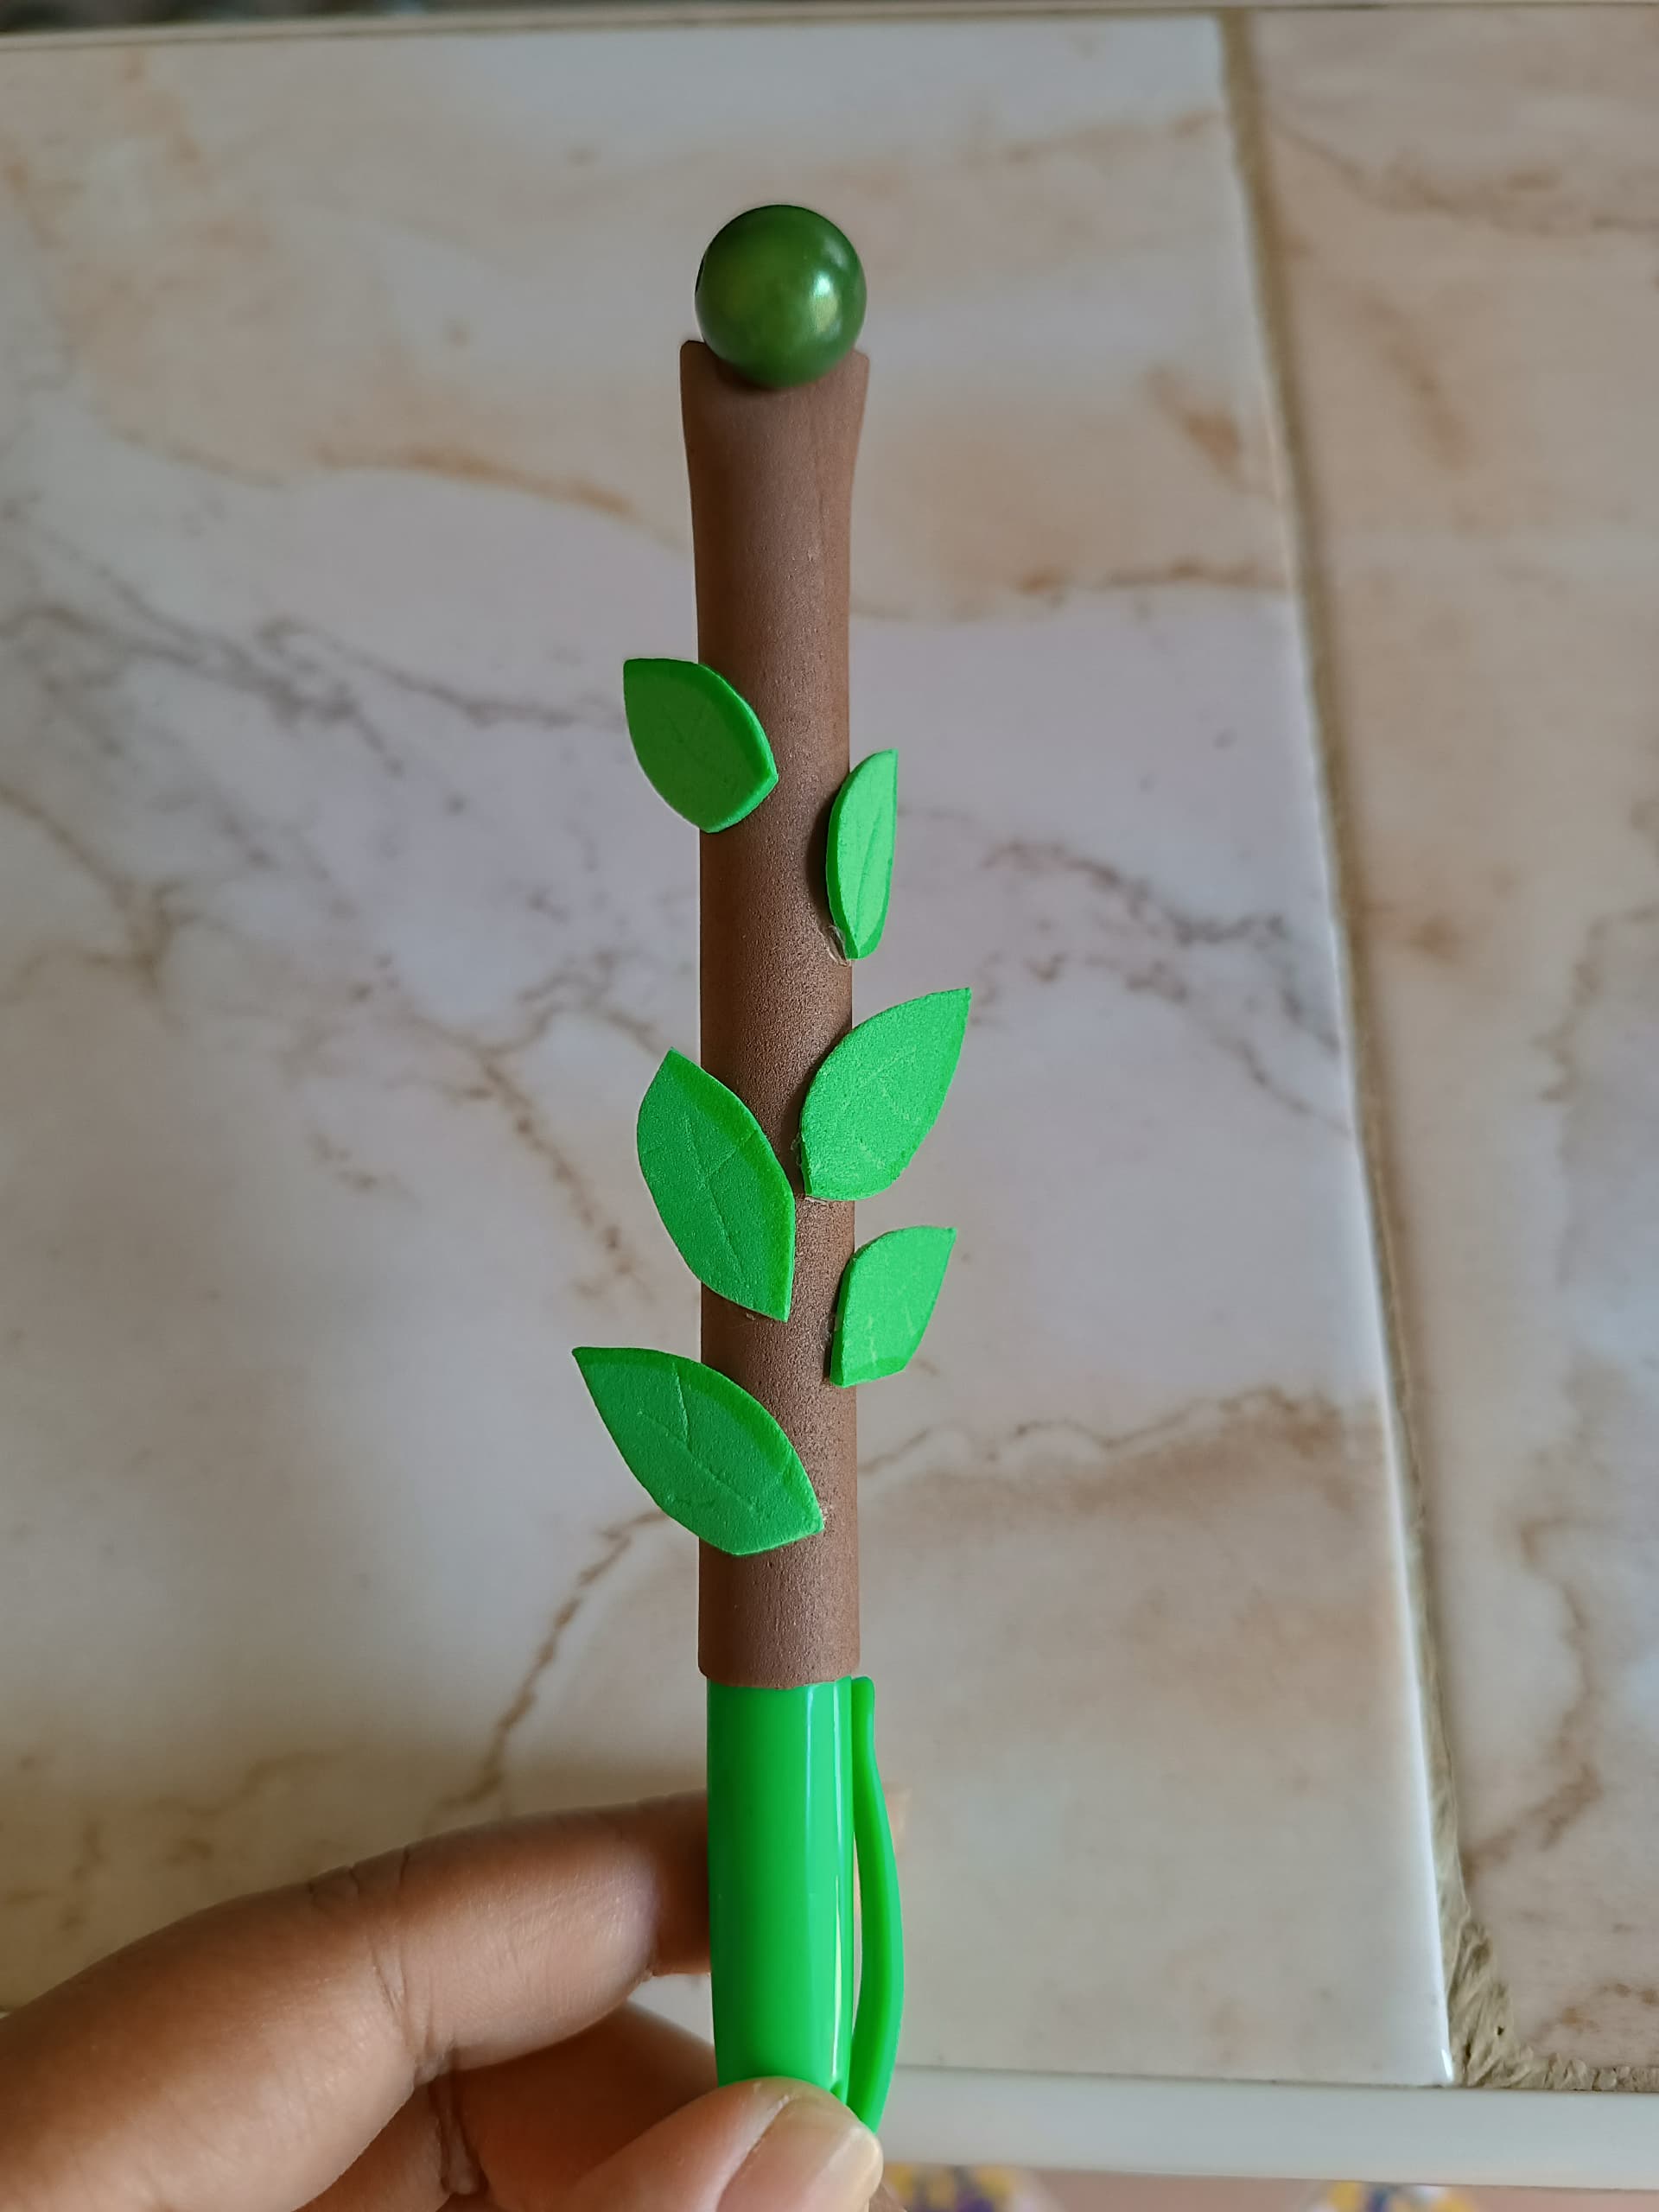
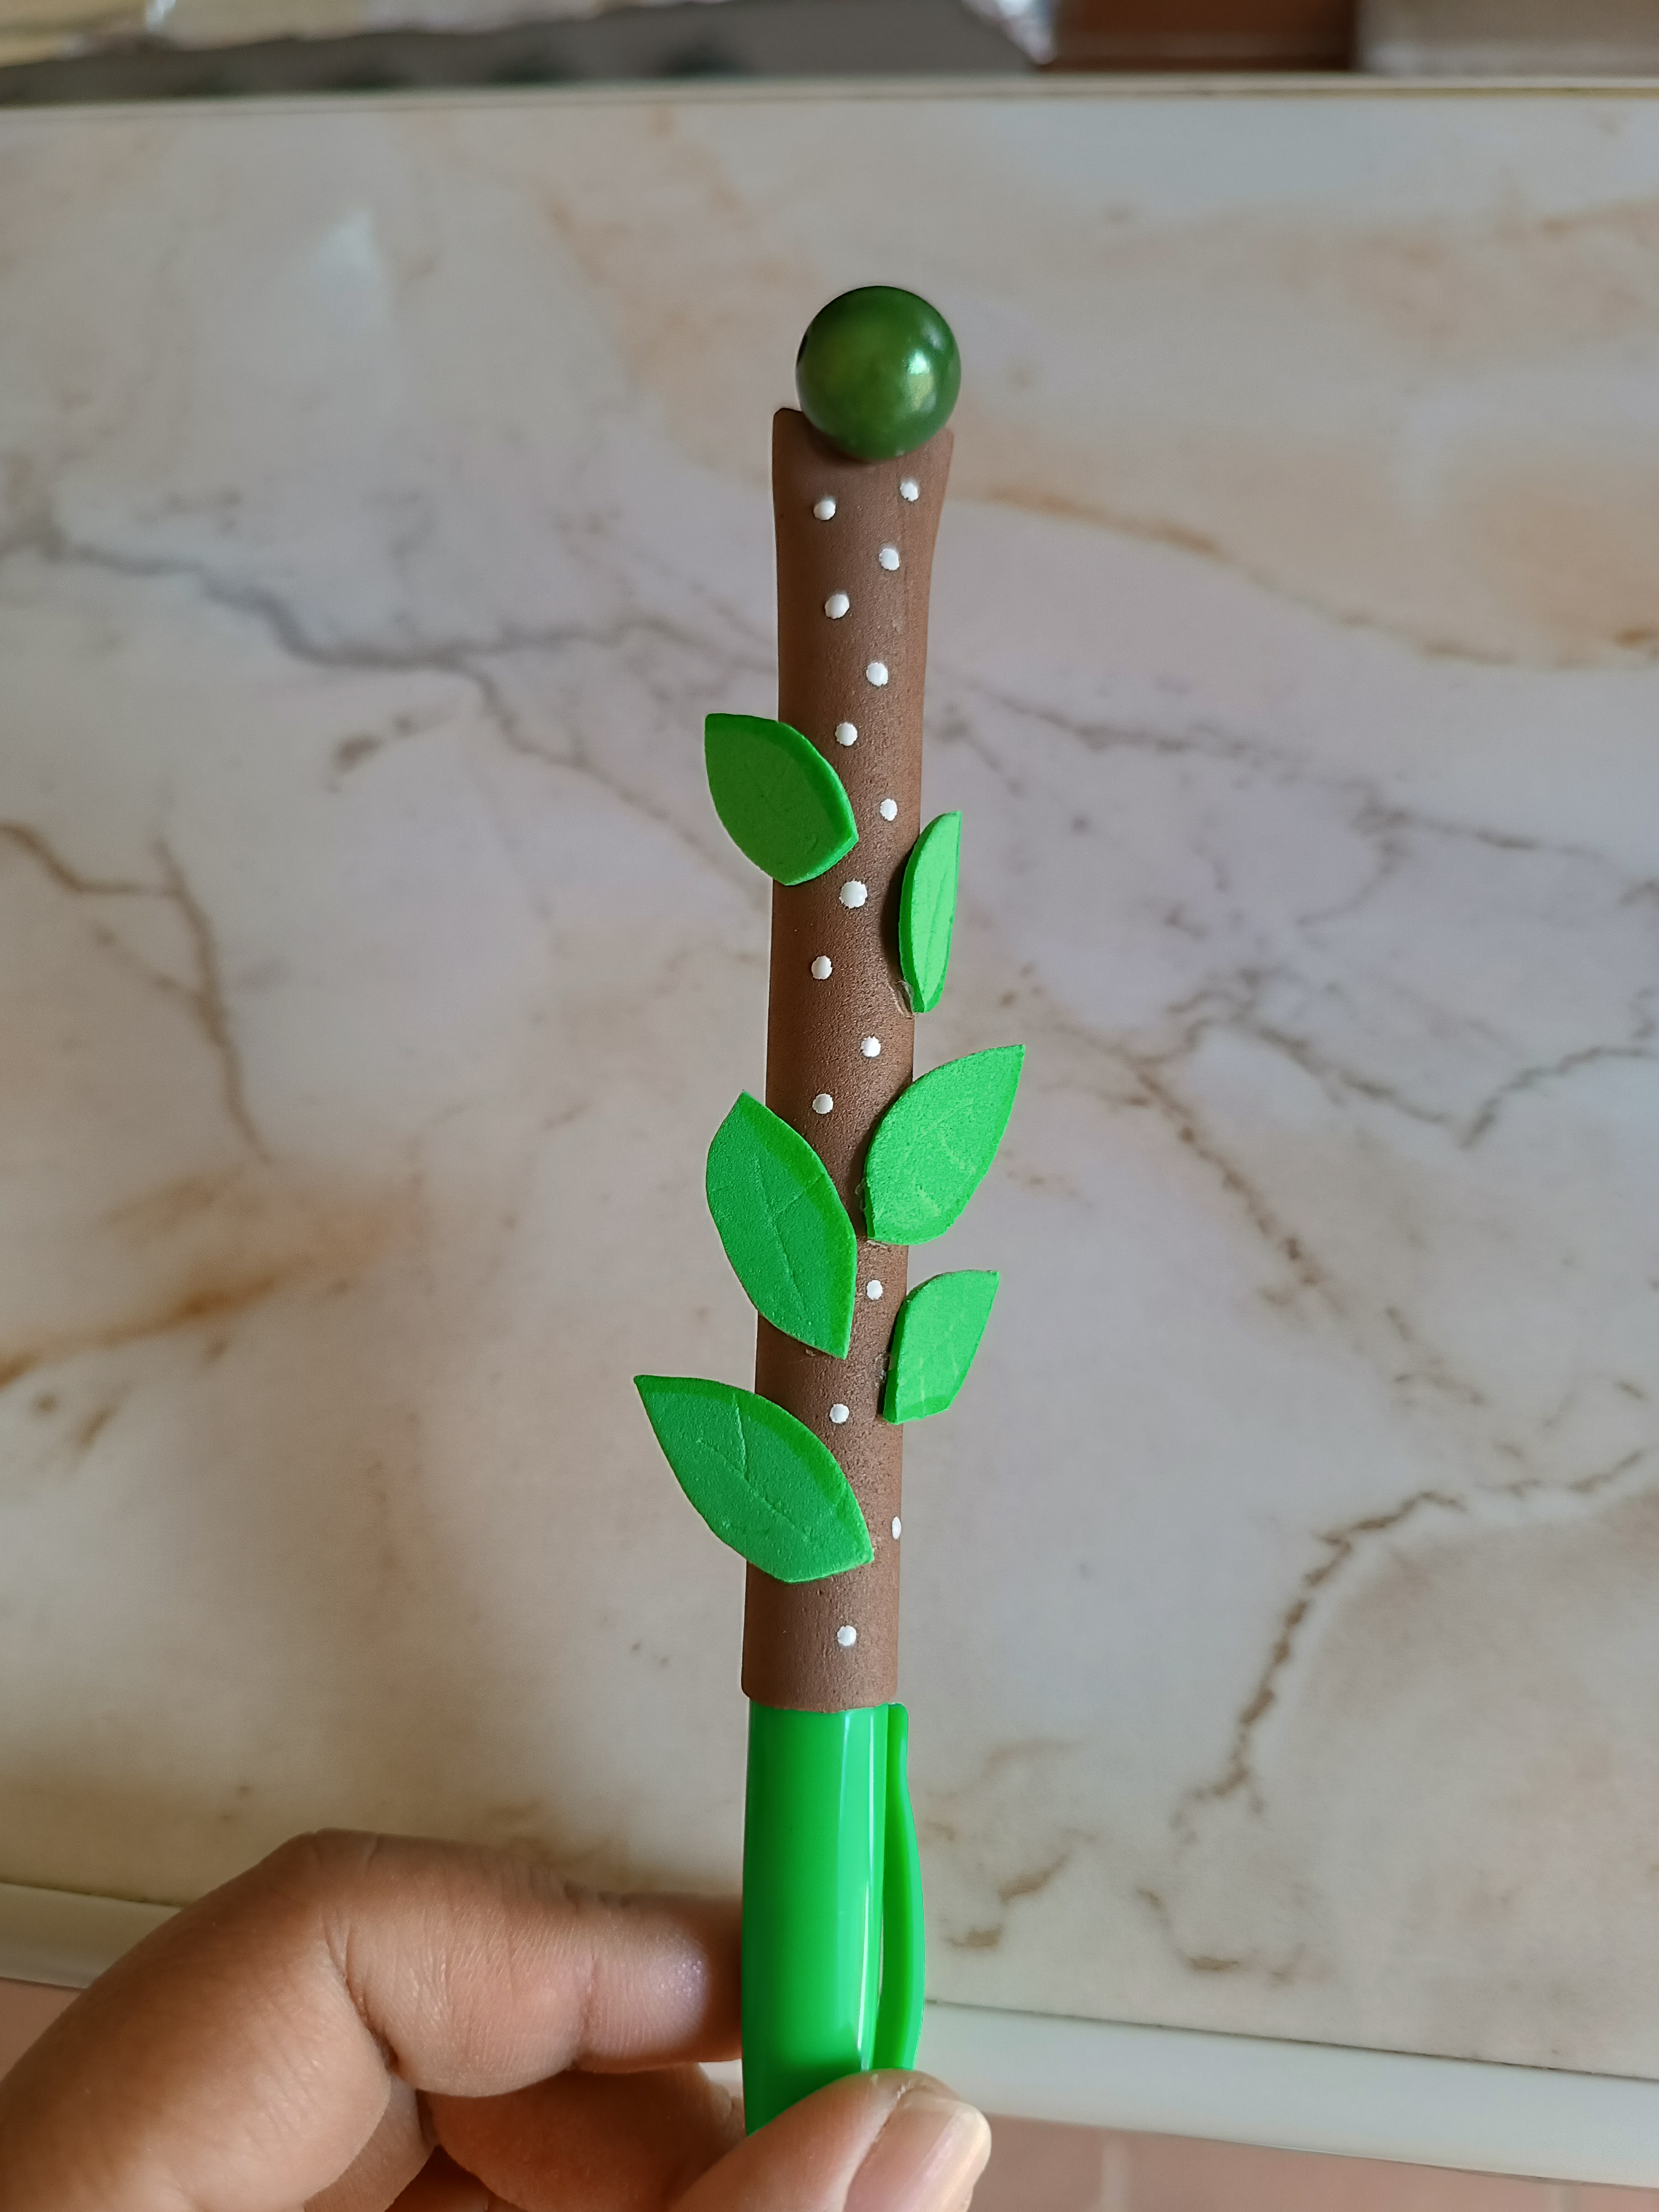
Ahora introducimos el lapicero en el foami, que quede bien justo, con foami verde realizamos unas pequeñas hojas color verde, realizamos los detalles con marcador y con un palito de altura, las pegamos en centro del lápicero, para complementar colocamos pequeños puntos blancos y una piedra color verde en la parte superior.
Now we insert the pen into the foam, so that it fits perfectly, with green foam we make some small green leaves, we make the details with a marker and with a tall stick, we glue them in the center of the pencil, to complement. We place small white dots and a green stone on top.
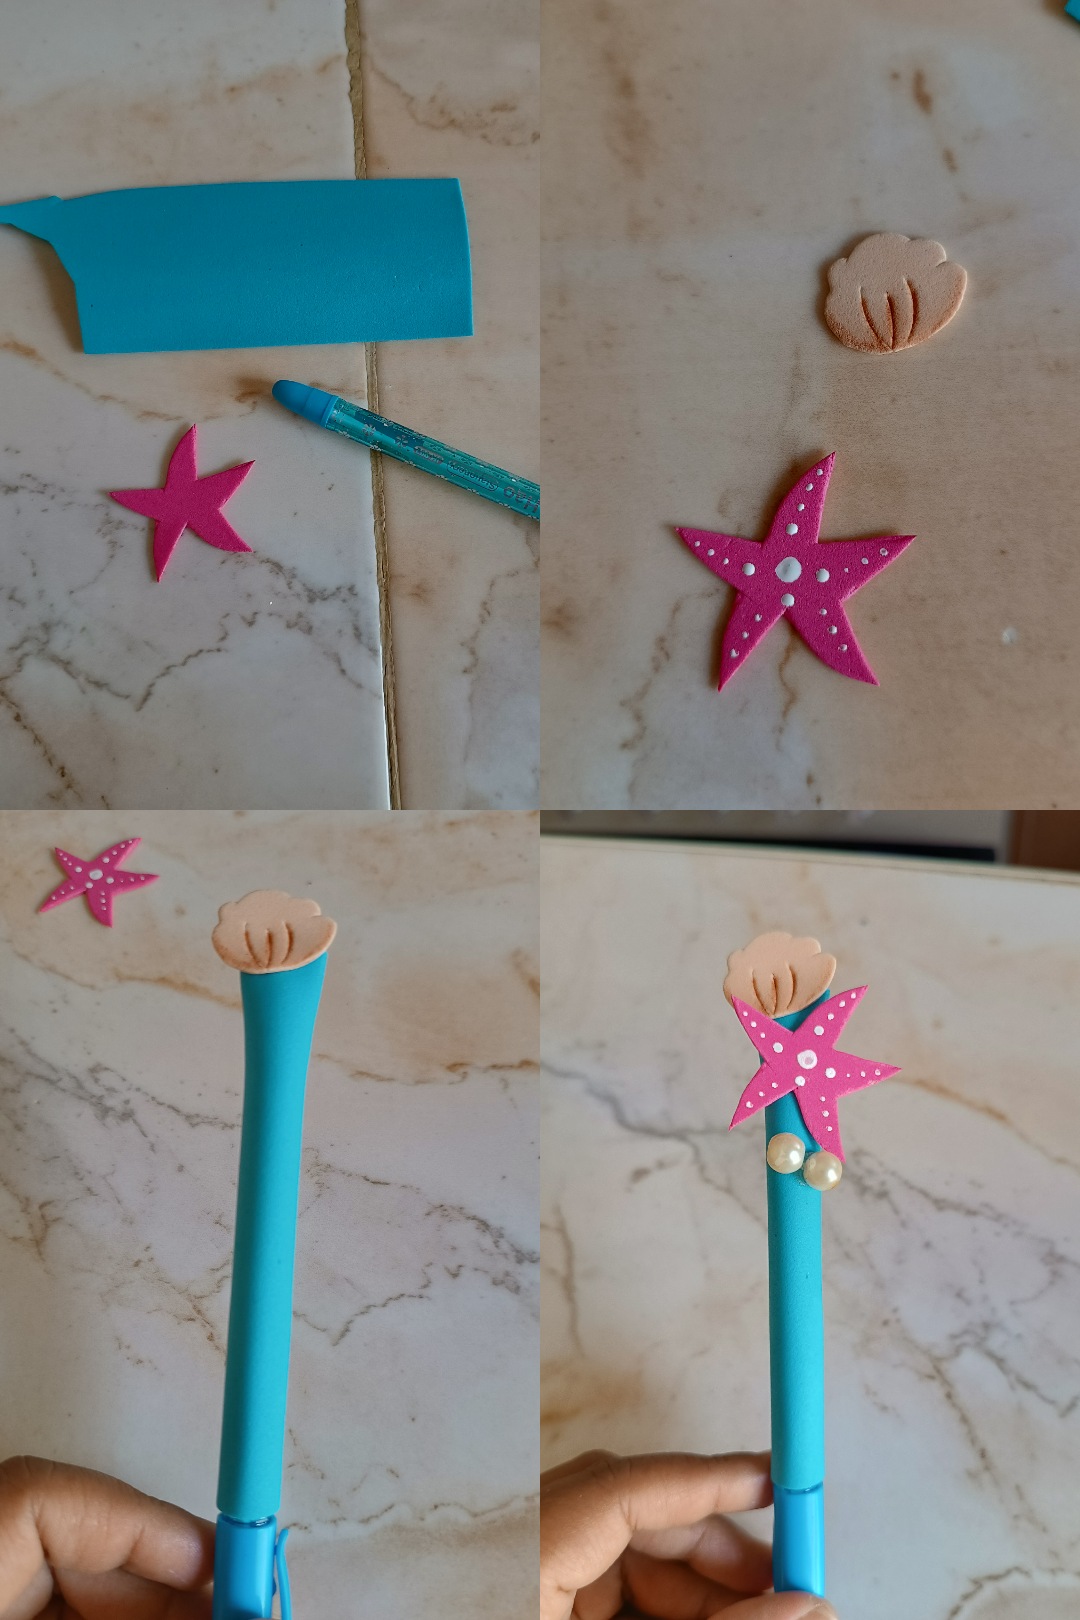
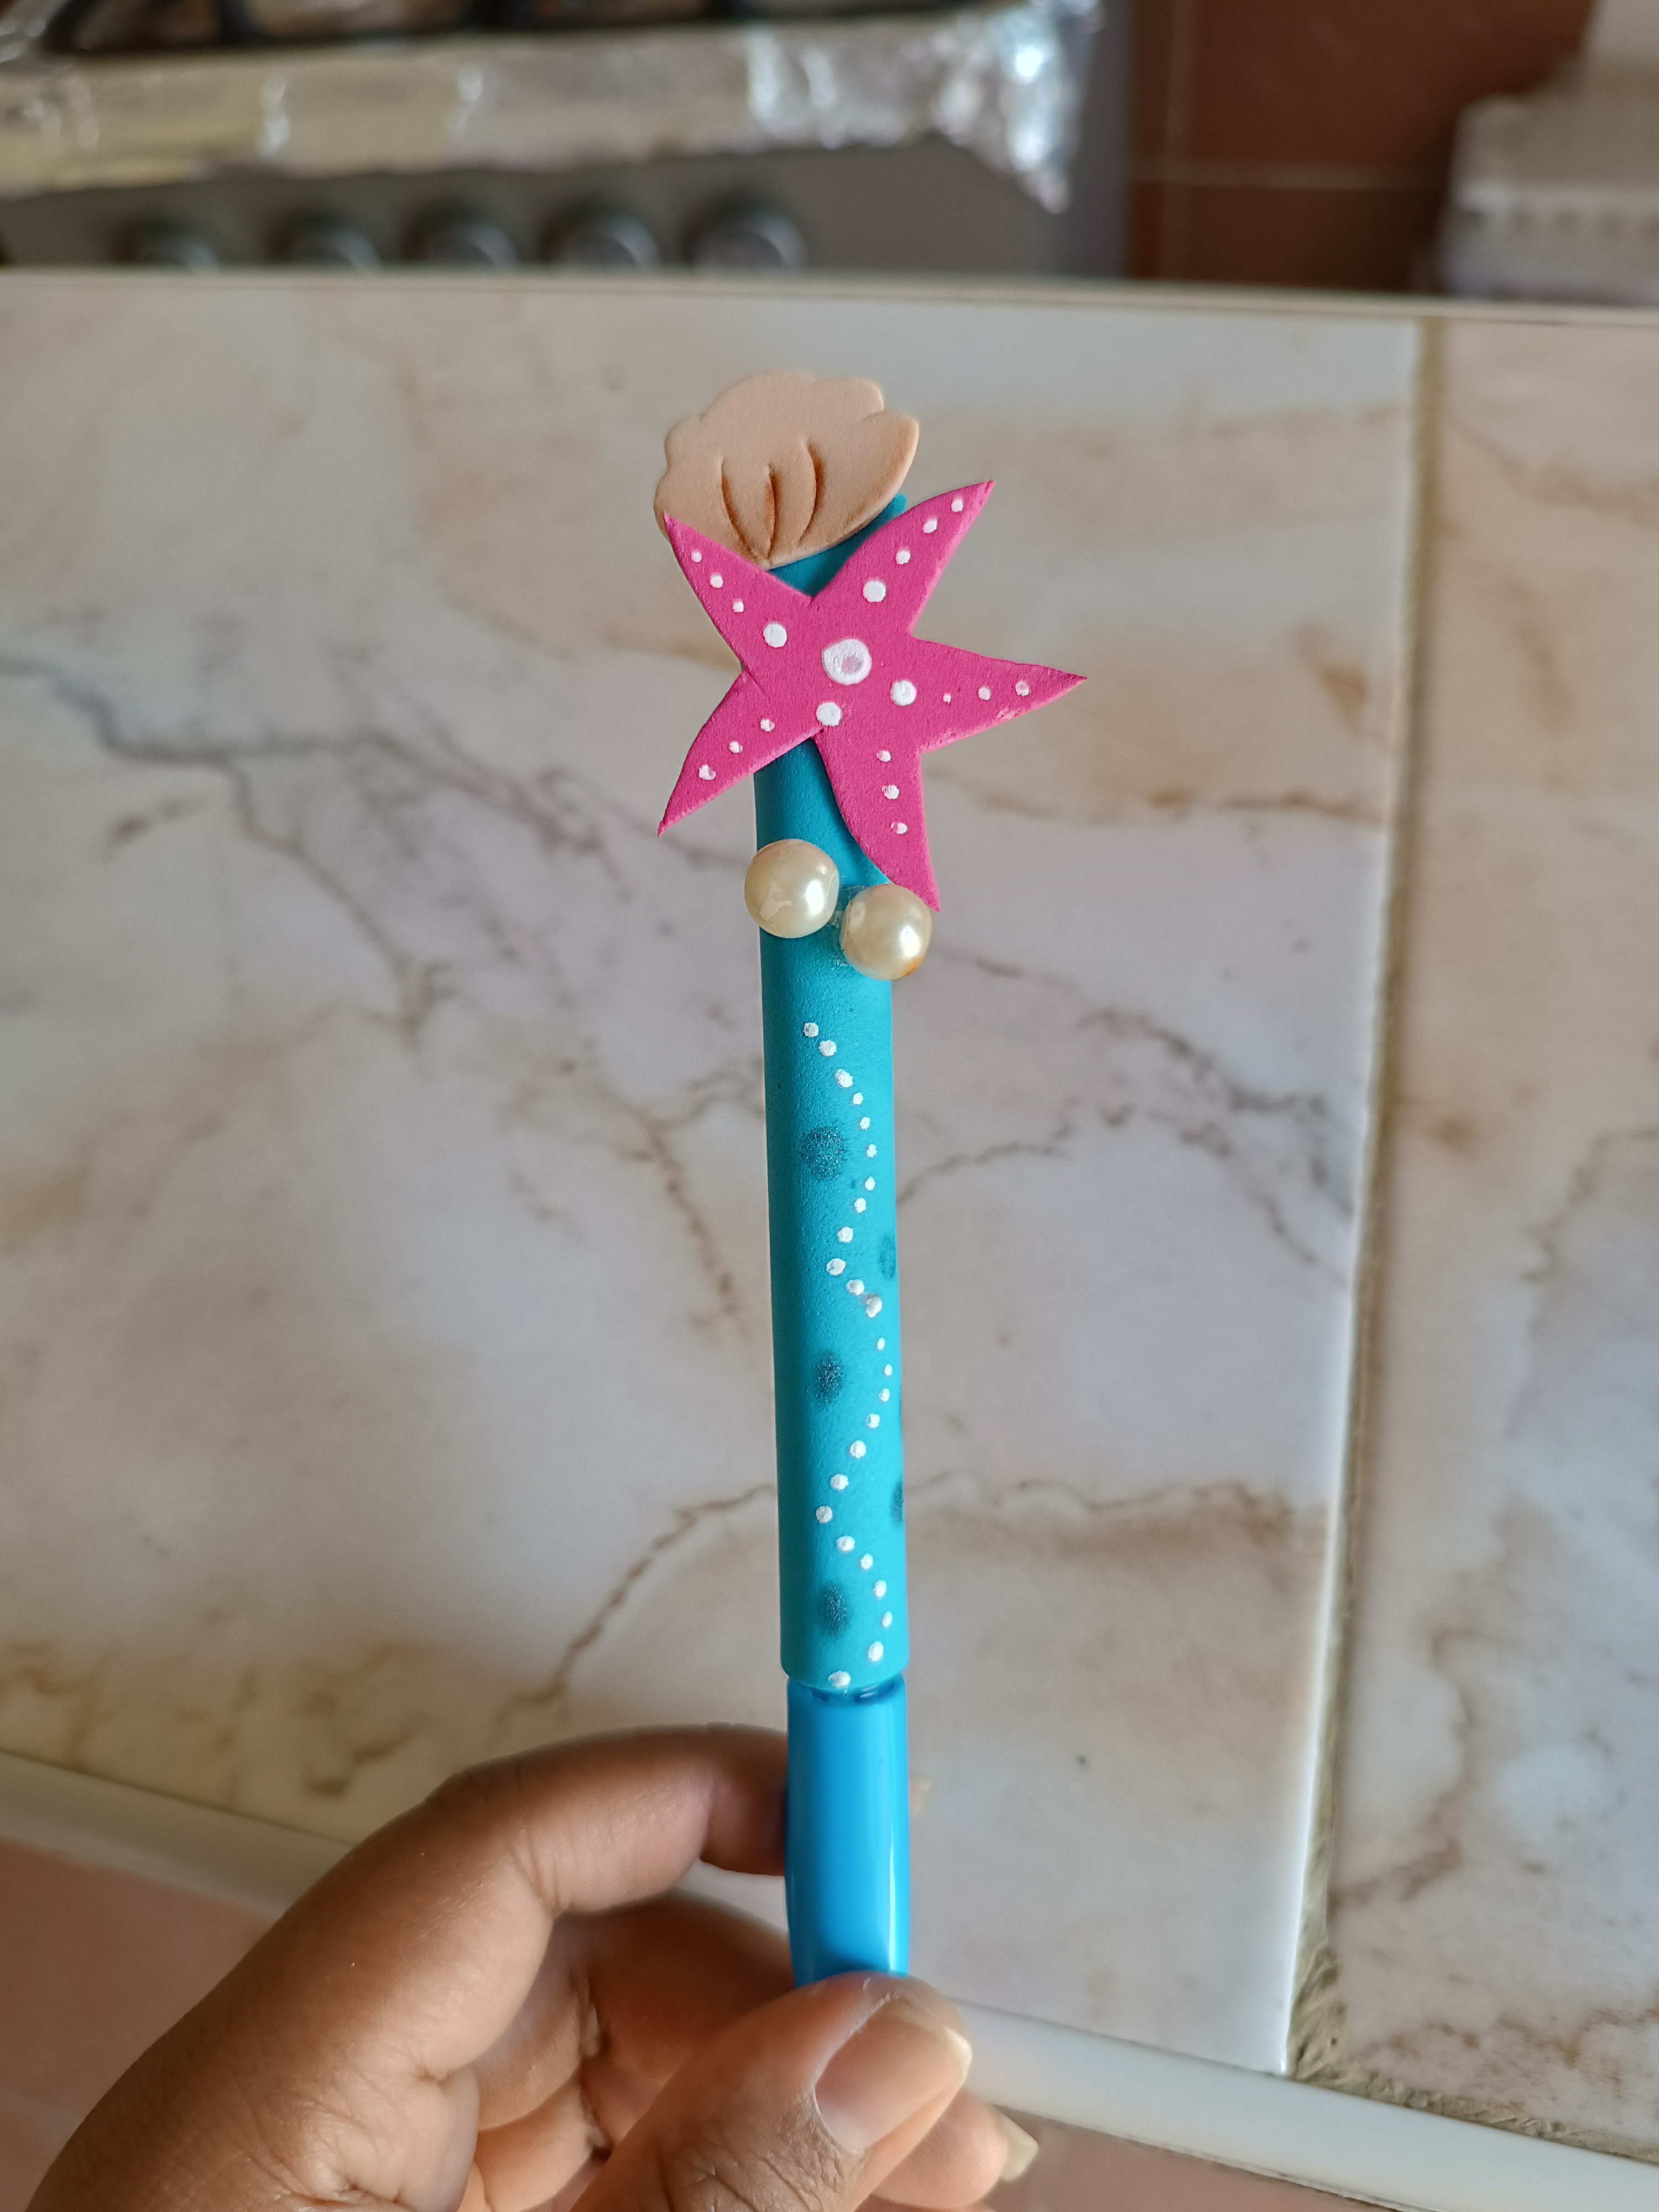
Ahora para el lapicero con temática del océano cortamos de igual forma una franja de foami color azul, para la decoración realicé una estrella de mar en foami fucsia colocando unos pequeños puntos, también realicé una caracola de mar los pequeños detalles de las lineas los realicé con un palillo y sombras de color marrón, también realicé pequeños puntos de color blanco y azul en la parte frontal para finalizar coloqué dos perlas.
Now, for the ocean-themed pen, we cut a strip of blue foam in the same shape. For the decoration I made a starfish in fuchsia foam by placing some small dots. I also made a sea shell. I made the small details of the lines with a toothpick and brown shadows, I also made small white and blue dots on the front to finish I placed two pearls.
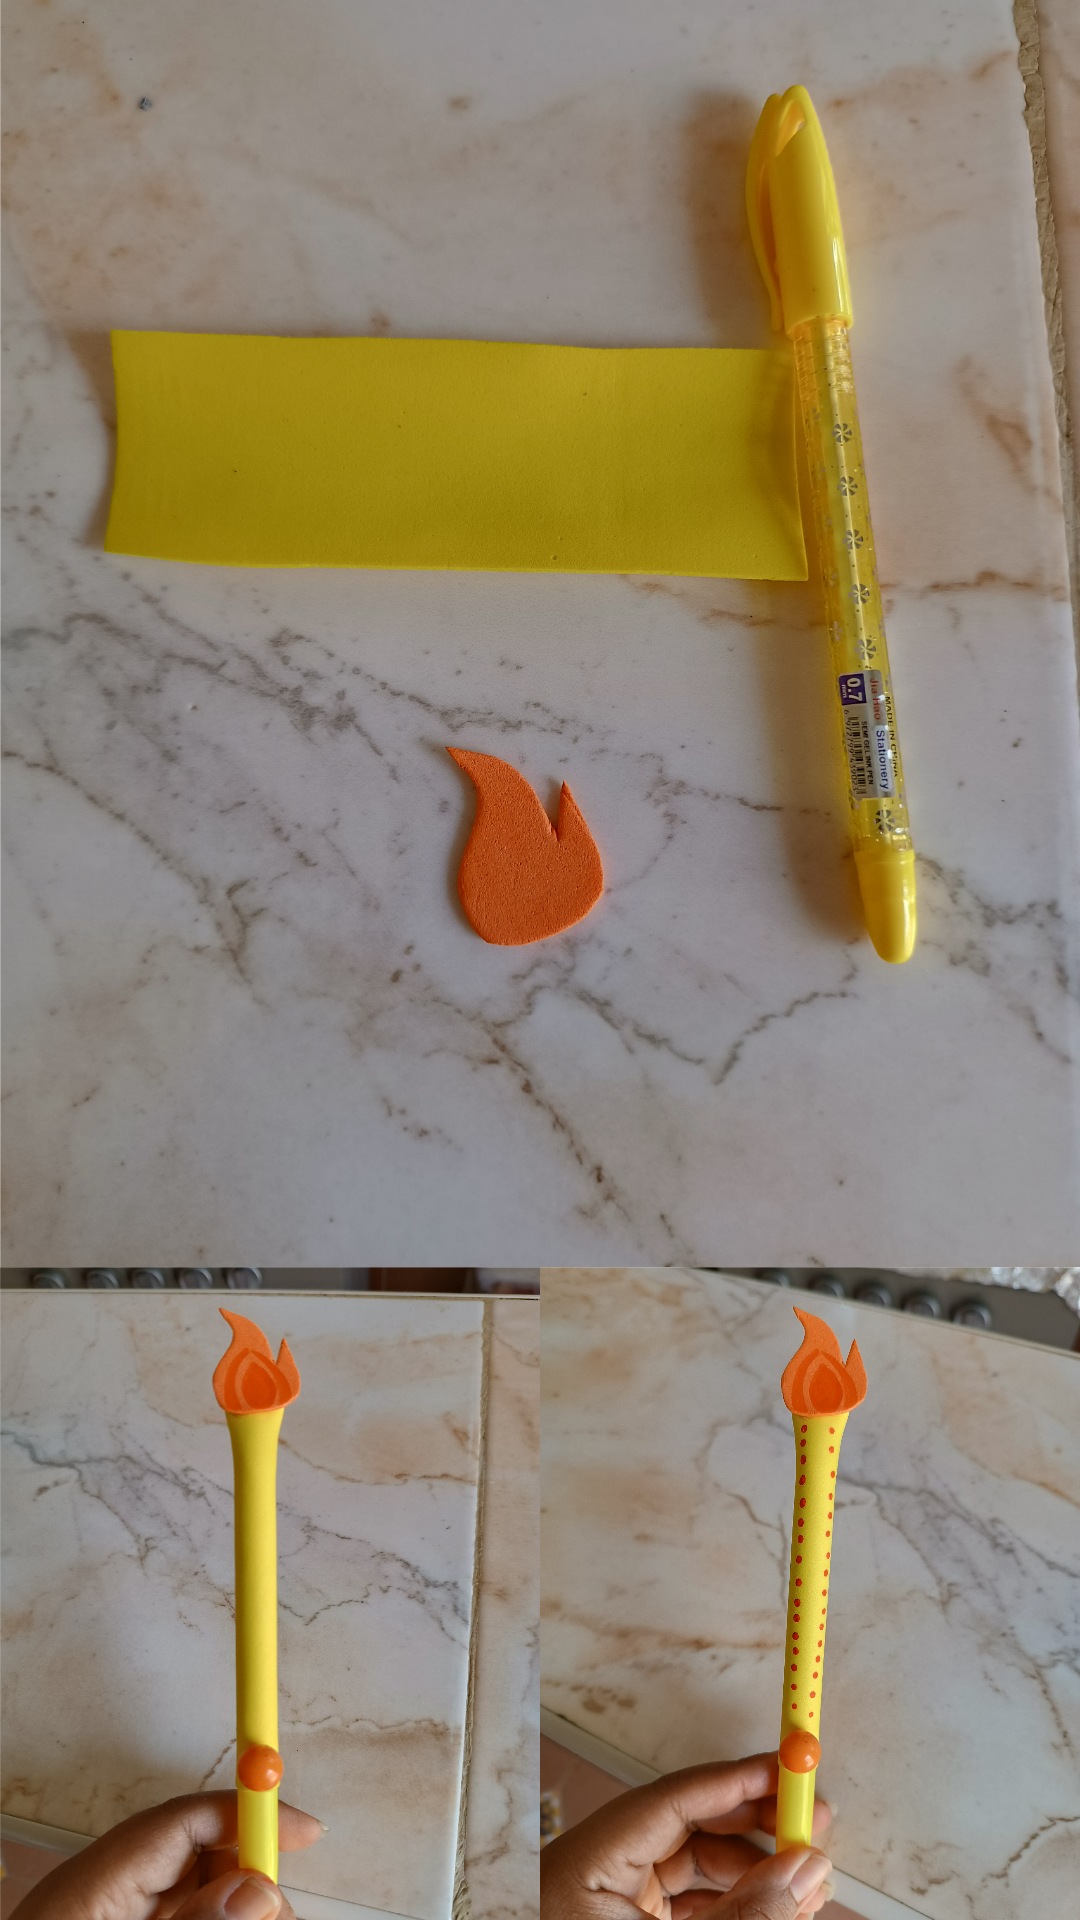
Por último corté una franja de color amarillo, realicé el mismo paso anterior ahora realicé una figura de fuego los detalles los realicé con marcador rojo, por último realicé puntos de color rojo y coloqué una piedra color naranja en la parte inferior.
Finally I cut a yellow stripe, I did the same step as before, now I made a fire figure, I made the details with a red marker, lastly I made red dots and placed an orange stone at the bottom.
Y lista la decoración de estos tres lindos lápiceros inspirados en el juego, gracias por visitar mi publicación nos vemos en una próxima oportunidad.
And ready the decoration of these three cute pencils inspired by the game, thank you for visiting my publication, see you next time.

Contenido original. - original content.
Los separadores y banner fueron realizados en Canva. - The dividers and banner were made in Canva.
Las fotografias son tomadas con mi teléfono Redmi Note 11s y editadas en PicsArt - The photographs are taken with my Redmi Note 11s phone and edited in PicsArt.
Traducción de: Google traductor - Translation of: Google translator.