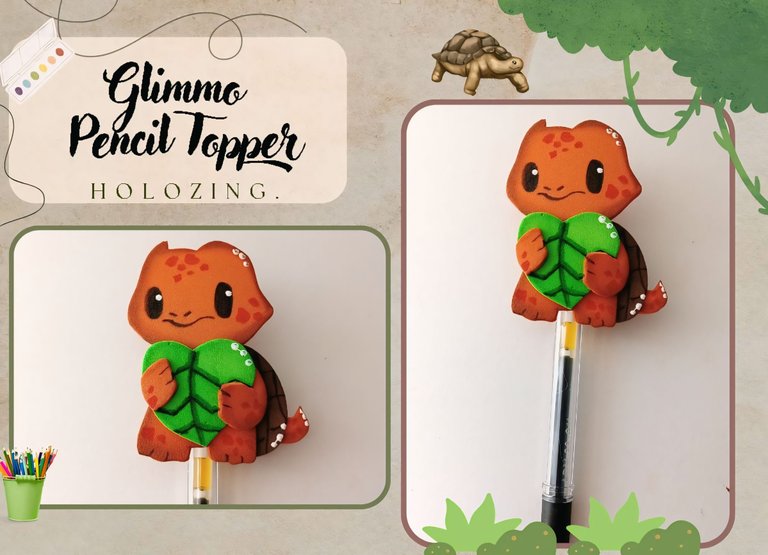
🔸Sin más que añadir, a continuación los dejo con el paso a paso:
✨Good afternoon, holozing friends!✨ I hope you are all doing well. I am doing very well for this part, thank God. As always, I am happy to stop by here again to share a nice pencil decoration idea, inspired by Glimmo. That's right, the little ones at home could not be left without their pencil decoration of this new creature. I must mention that I was surprised to see these new creatures, I admit that Glimmo is my new favorite, always after Miu Miu haha, because I can't abandon that little ball of fur with a bitter face.
I loved the colors they used for this creature and its evolution. I can't wait to create new ideas with the new creatures.
🔸Without more to add, then I leave you with the step by step:
♥️ESPERO QUE TE GUSTE,
¡Empecemos!
♥️I HOPE YOU LIKE IT,
Let's start!

✂️ MATERIALES | ✂️ MATERIALS

- Foami naranja.
- Foami verde.
- Foami marrón.
- Pinturas y marcadores.
- Hoja blanca.
- Pegamento.
- Tijeras.
- Lápiz.
- Orange foam.
- Green foam.
- Brown foam.
- Paints and markers.
- White paper.
- Glue.
- Scissors.
- Pencil.

✨ PROCEDIMIENTO | ✨ PROCESS

✨ PASO 1:
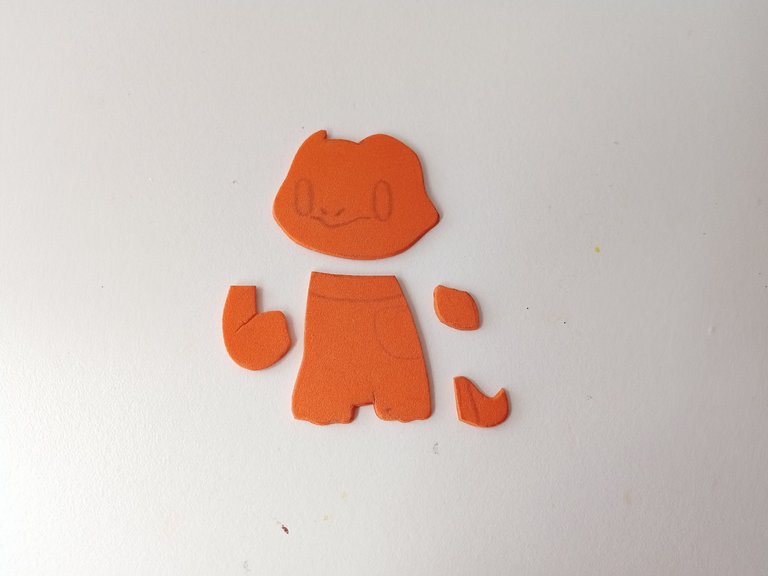
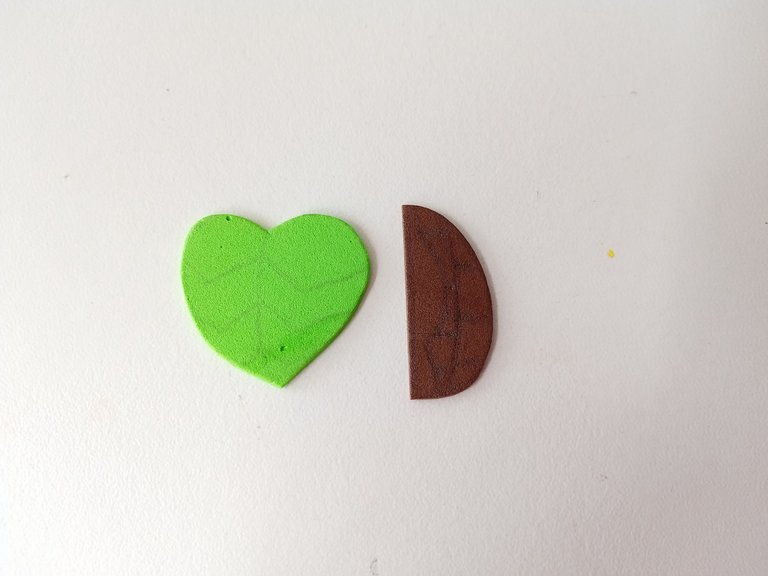
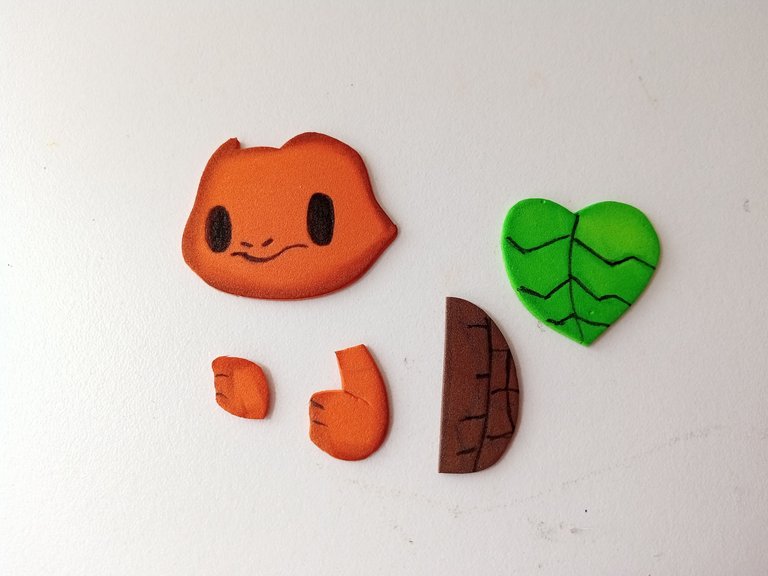
Lo primero que hice fue dibujar el diseño de Glimmo en una hoja blanca, pero cada parte de su cuerpo separada para poder sacar los patrones de cada una de las piezas y luego transferir a los colores correspondientes de foami, como explico a continuación:
✨ Cabeza, cuerpo, patas y cola en foami naranja.
✨ Caparazón en foami marrón y foami verde.
✨ STEP 1:
The first thing I did was draw Glimmo's design on a white sheet, but each part of his body separated so I could get the patterns from each of the pieces and then transfer them to the corresponding colors of foam, as I explain below:
✨ Head, body, legs and tail in orange foam.
✨ Shell in brown and green foam.


✨ PASO 2:
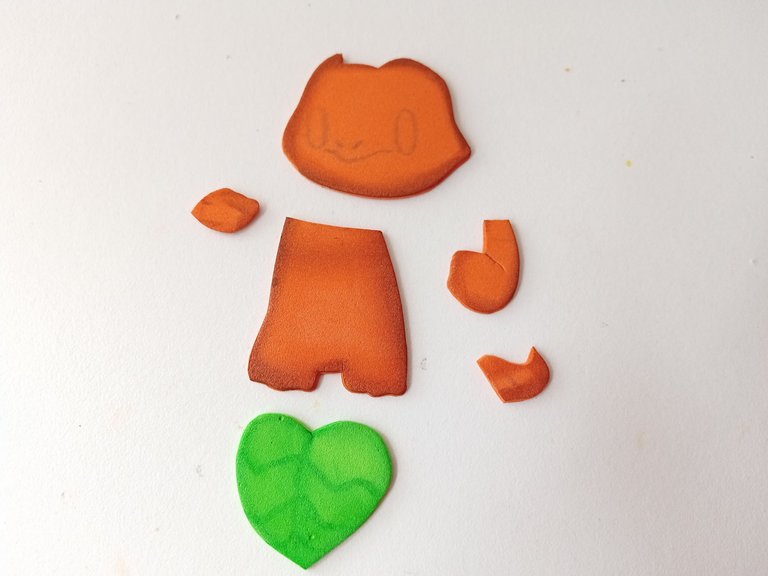
Al tener todas las piezas recortadas, comencé a dar color a los bordes con pinturas y con ayuda de un pañito fui difuminando los bordes. En el caso del cuerpo, utilicé pintura marrón como contraste porque así es el diseño original y para el caparazón, simplemente utilicé los mismos colores, pero un tono más oscuro para que hiciera contraste. Seguidamente, con marcador negro, fui dibujando los detalles del rostro, patas y caparazón.
✨ STEP 2:
Once I had all the pieces cut out, I began to color the edges with paints and with the help of a cloth I blurred the edges. In the case of the body, I used brown paint as a contrast because that is the original design and for the shell, I simply used the same colors, but a darker tone to make it contrast. Next, with a black marker, I drew the details of the face, legs and shell.


✨ PASO 3:
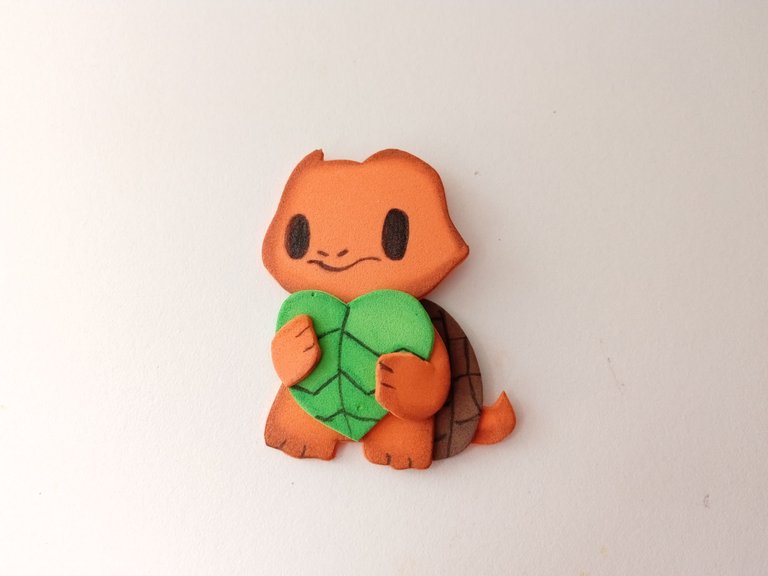
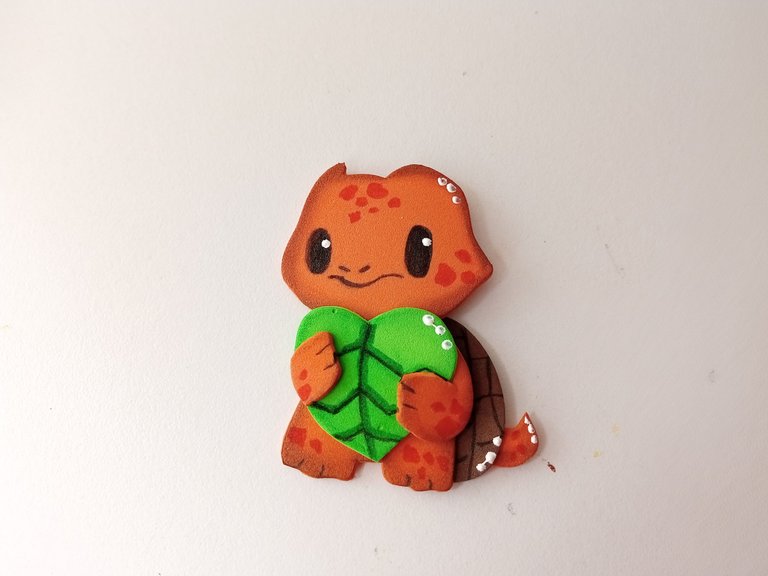
Al estar secas todas las piezas, comencé a pegar poco a poco las piezas, primero pegando la cabeza y cuerpo, para después pegar el caparazón, patas y cola. Con pintura naranja pinté los detalles del cuerpo, algunas sombras al caparazón con verde y puntos de luz con pintura blanca.
✨ STEP 3:
Once all the pieces were dry, I began to glue the pieces little by little, first gluing the head and body, then gluing the shell, legs and tail. With orange paint I painted the details of the body, some shadows on the shell with green and points of light with white paint.


✨ PASO 4:
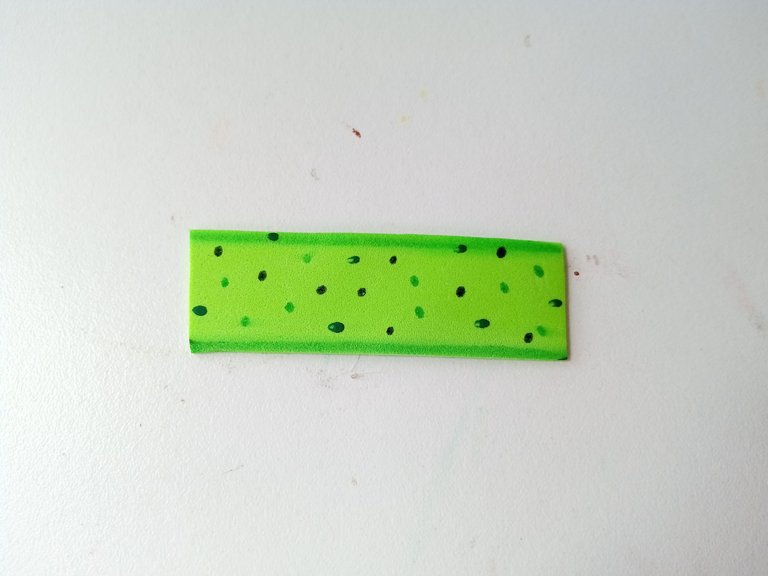
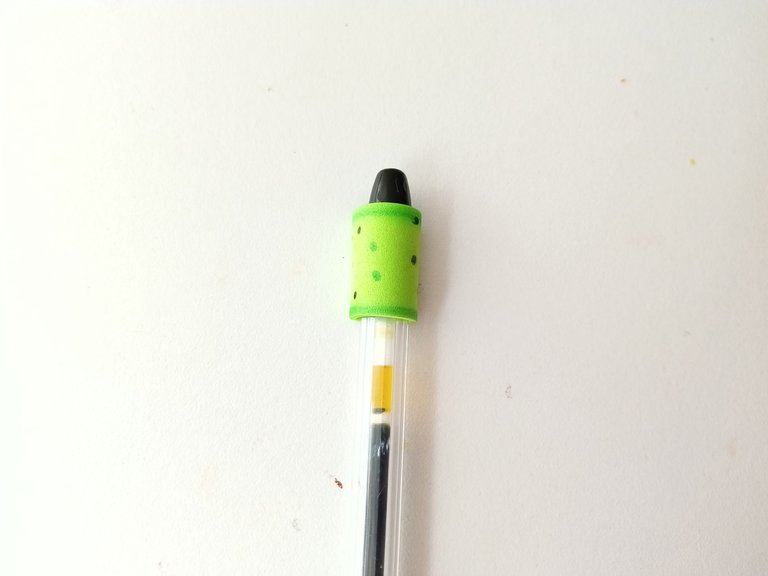
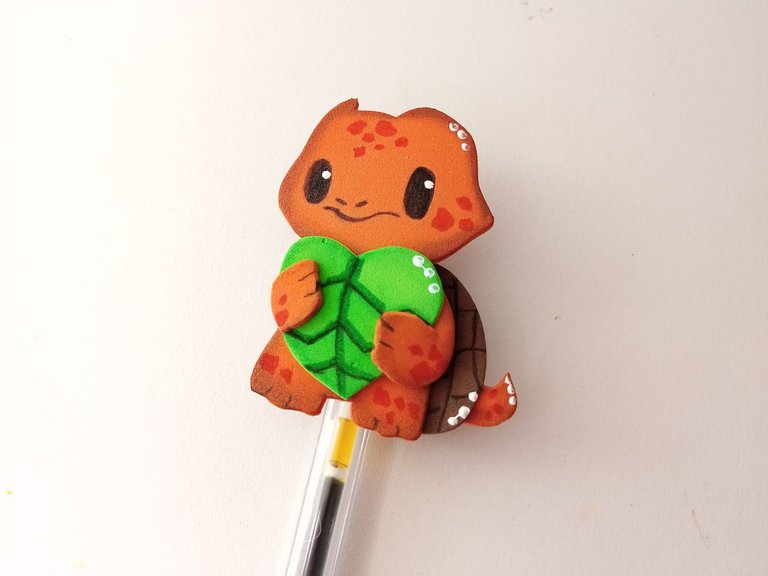
Mientras secaba, recorté una tira de 4 cm x 1.5 cm en foami verde, di color a los bordes con pintura verde y pinté algunos puntos con distintos tonos de verde por toda la tira. Al estar seco, pegué en la parte superior del lápiz o lapicero y encima pegué a Glimmo.
✨Así ya tenemos lista nuestra decoración para lápiz inspirada en Glimmo, para que los pequeños vayan contentos a clases.
✨ STEP 4:
While it was drying, I cut a 4 cm x 1.5 cm strip of green foam, colored the edges with green paint and painted some dots with different shades of green throughout the strip. When it was dry, I glued it to the top of the pencil or pen and on top I glued Glimmo.
✨So now we have our Glimmo-inspired pencil decoration ready, so that the little ones can go to school happily.


❤️ Hasta la próxima publicación.
❤️ Until the next post.


Todas las fotografías son de mi propiedad.
Separador y Fotos editadas en Canva
All photographs are my property.
Photos edited in Canva
Posted Using InLeo Alpha
It's so cute to send your pencil. I also learned how to make a pencil again after seeing your method. Thank you very much.
I'm so glad you liked my creation to decorate the pencils. 🤭✨
Que bonito @valenpba !! Súper creativo diseño de Glimmo en foami !! Gracias por compartir El Paso a paso saludos desde cuba 🇨🇺👏😊
Muchas gracias, amigo! Agradezco tu comentario, pues tú también elaboras excelentes ideas.
Muchas gracias y saludos.🤭✨👋🏻
Que lindo quedó el dragón, es una excelente idea para decorar los lapices 😍😍
Muchas gracias! Me alegra mucho que te haya gustado esta idea, amiga.
Saludos ✨
Como siempre haciendo cositas lindas 🥰🥰
Muchas gracias Ami linda! 💕
Amiga, que cosita más linda, me encantó!
Gracias por compartirlo.
Muchas gracias, amiga. Me alegra que te haya gustado mi idea para decorar lápices 💕
Muy lindo amiga. El toque de los bordes difuminado lo hacen ver más bellos.
Muchas gracias,Ami! Cierto? Los bordes le dan un toque muy bonito y da más detalle a los diseños. Gracias bella
💕
Amiiiiiii, pero esto te quedó demás de belloooo✨🩷
Gracias ami bella! Te mando un abrazo.💕💕
Ay Dios mío, esto si que está muy precioso!! Ami me encanta cómo te quedó, los detalles sin duda lo son todo. Está precioso
Gracias Ami!! Me alegra que te haya gustado mi Rosita. 💕
¡Enhorabuena!
✅ Has hecho un buen trabajo, por lo cual tu publicación ha sido valorada y ha recibido el apoyo de parte de CHESS BROTHERS ♔ 💪
♟ Te invitamos a usar nuestra etiqueta #chessbrothers y a que aprendas más sobre nosotros.
♟♟ También puedes contactarnos en nuestro servidor de Discord y promocionar allí tus publicaciones.
♟♟♟ Considera unirte a nuestro trail de curación para que trabajemos en equipo y recibas recompensas automáticamente.
♞♟ Echa un vistazo a nuestra cuenta @chessbrotherspro para que te informes sobre el proceso de curación llevado a diario por nuestro equipo.
🏅 Si quieres obtener ganancias con tu delegacion de HP y apoyar a nuestro proyecto, te invitamos a unirte al plan Master Investor. Aquí puedes aprender cómo hacerlo.
Cordialmente
El equipo de CHESS BROTHERS
Muchas gracias por el apoyo, amigos 💕