🔸Sin más que añadir, a continuación los dejo con el paso a paso:
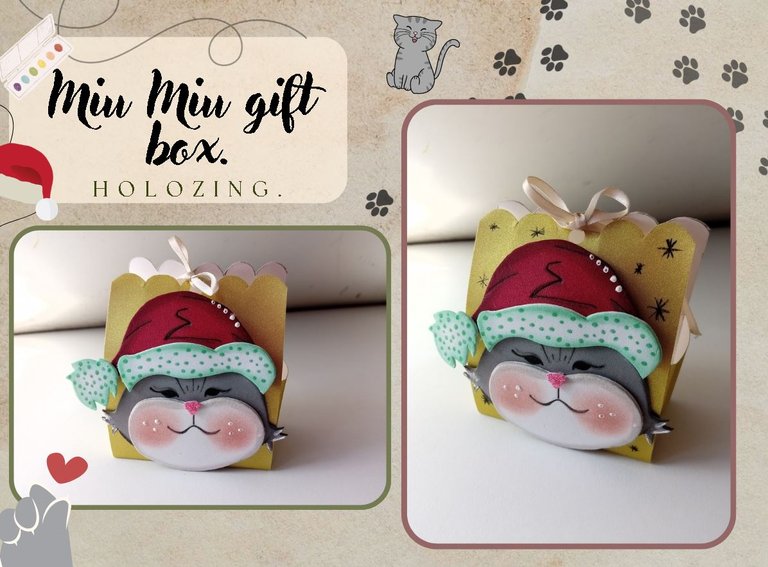
✨Good afternoon, holozing friends!✨ I hope you are all doing well and had a happy holiday. For this part, I am very well, thank God. As always, I am happy to stop by here again to share with you a nice gift box idea for Three Kings Day. I know that many do not celebrate this day, but in case someone likes the idea I wanted to share it with you and well, it was also an excuse to be able to make Miu Miu with her bitter face and a Christmas hat, since it was the first idea that came to me for the list of Christmas creations.
🔸Without more to add, then I leave you with the step by step:
♥️ESPERO QUE TE GUSTE,
¡Empecemos!
♥️I HOPE YOU LIKE IT,
Let's start!

✂️ MATERIALES | ✂️ MATERIALS

- Cartulina escarchada dorada.
- Foami escarchado rosa.
- Foami gris.
- Foami rojo.
- Foami blanco.
- Perforadora.
- Pinturas y marcadores.
- Cinta delgada.
- Pegamento.
- Tijeras.
- Regla.
- Lápiz.
- Golden frosted cardboard.
- Pink frosted foam.
- Gray foam.
- Red foam.
- White foam.
- Hole punch.
- Paints and markers.
- Thin tape.
- Glue.
- Scissors.
- Ruler.
- Pencil.

✨ PROCEDIMIENTO | ✨ PROCESS

✨ PASO 1:
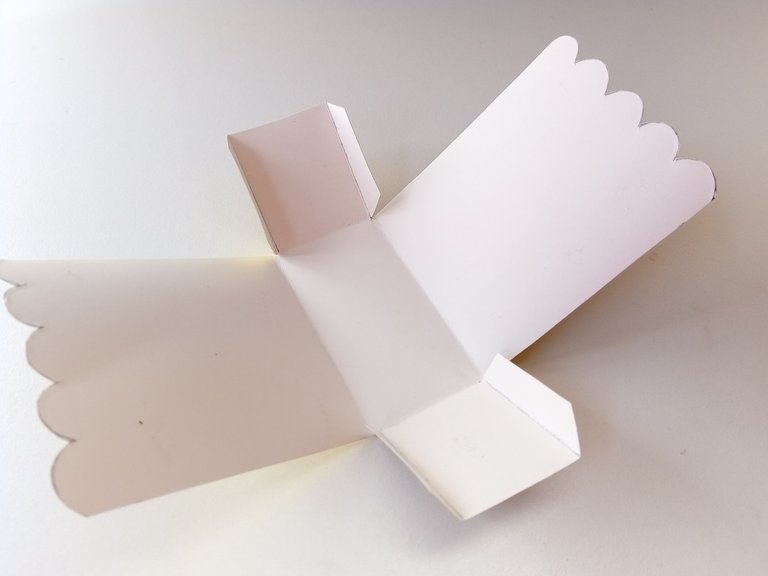
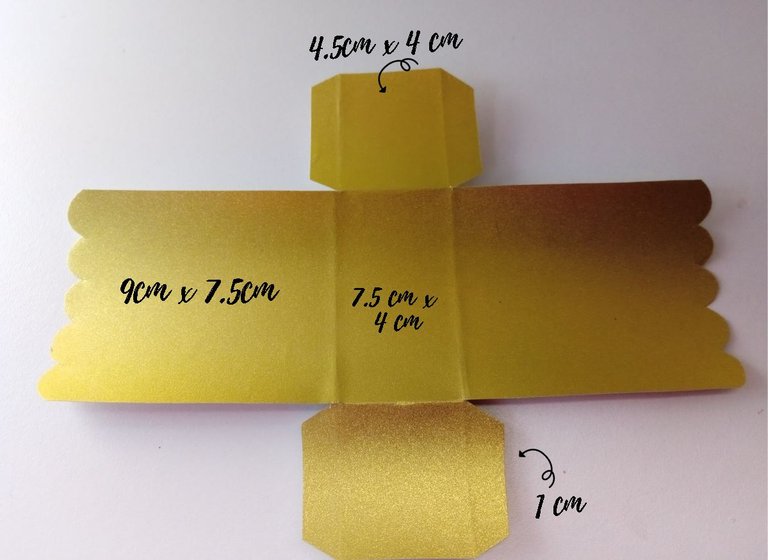
Lo primero que hice fue tomar la cartulina escarchada dorada y trazar las medidas del diseño de la caja, que en este caso fueron los siguientes: Paredes largas de 9 cm x 7.5 cm; base de 7.5 x 4 cm; paredes cortas de 4.5 x 4 cm y pliegues de 1 cm. Seguidamente, recorté, pero a las paredes más largas les recorté un borde con diseños ovalados en la parte superior. Al estar recortado, comencé a doblar las partes de la caja para que fuera agarrando la forma y sea más fácil a la hora de pegar.
✨ STEP 1:
The first thing I did was take the gold frosted cardboard and trace the measurements of the box design, which in this case were the following: Long walls of 9 cm x 7.5 cm; base of 7.5 x 4 cm; short walls of 4.5 x 4 cm and folds of 1 cm. Next, I cut it out, but I cut out an edge with oval designs on the top of the longer walls. Once it was cut out, I began to fold the parts of the box so that it would take shape and be easier when gluing.


✨ PASO 2:
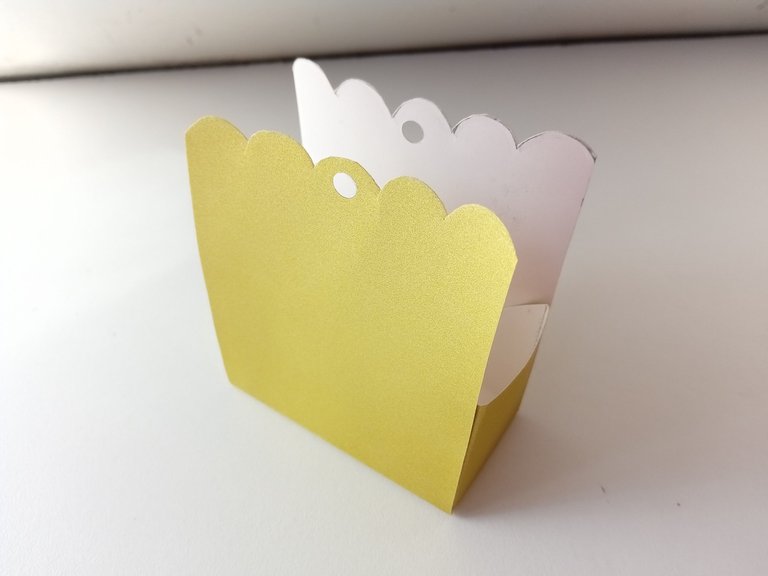
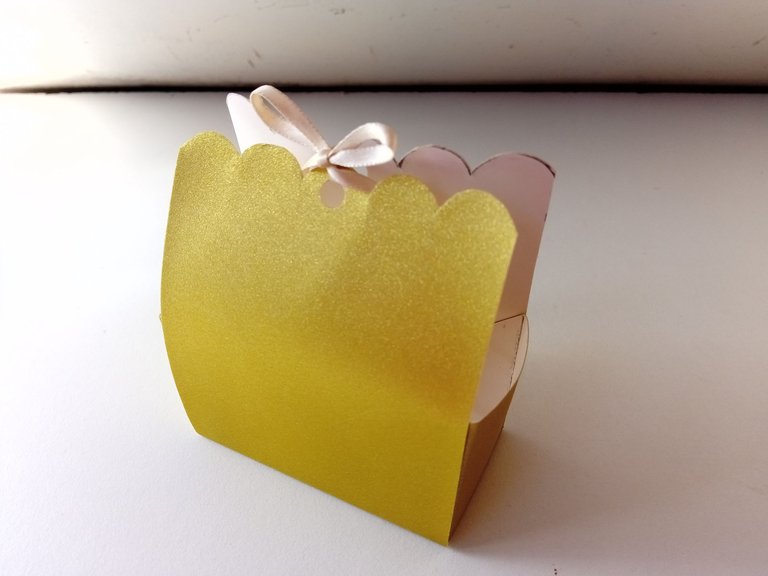
Luego, pegué hasta formar la cajita, que simplemente es pegar los pliegues de las paredes más cortas por dentro de las partes largas y listo. Al estar lista, abrí un hueco con ayuda de la perforadora justo en medio del borde superior y amarré un lacito para cerrar la cajita.
✨ STEP 2:
Then, I glued until I formed the little box, which is simply gluing the folds of the shorter walls inside the long parts and that's it. When it was ready, I opened a hole with the help of the hole punch right in the middle of the upper edge and tied a bow to close the box.


✨ PASO 3:
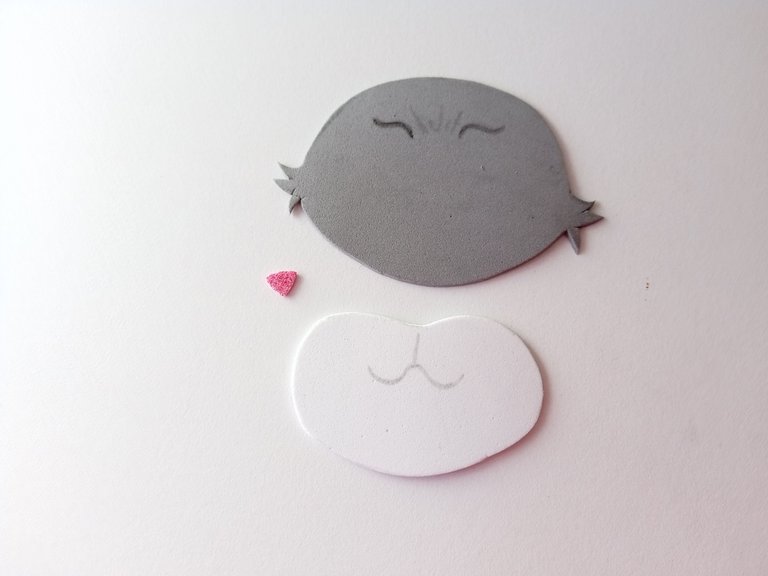
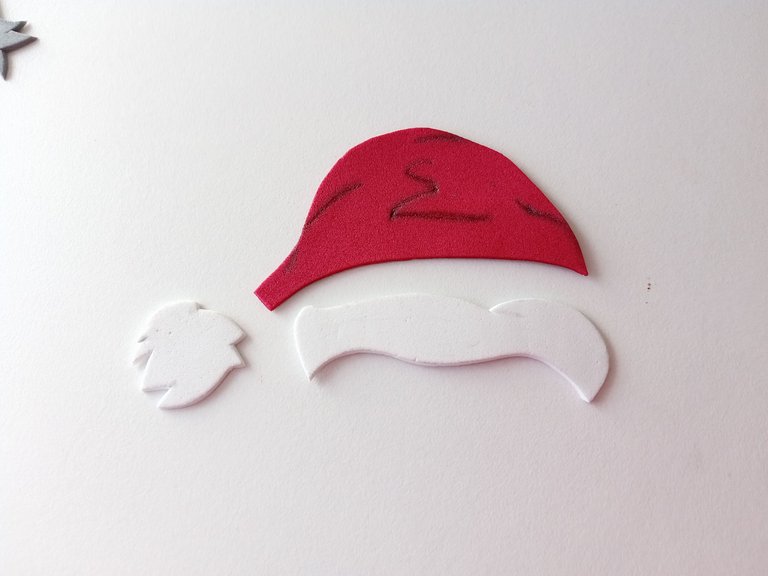
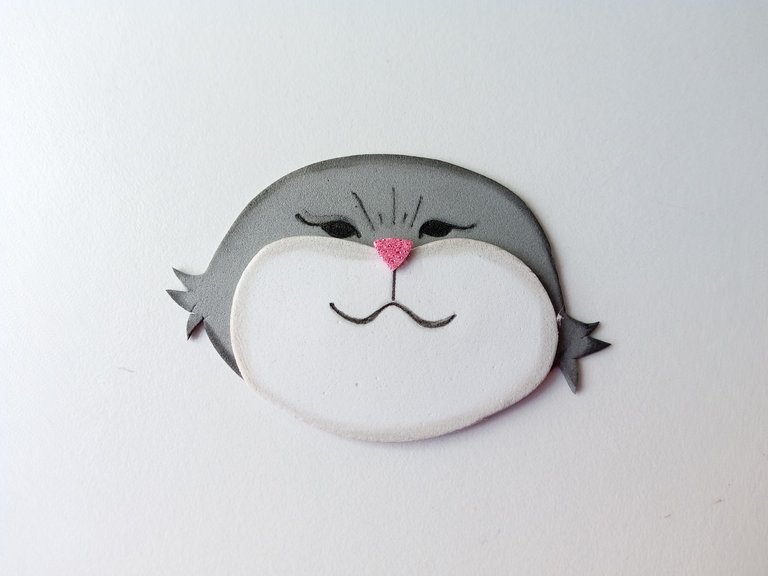
Ahora sí, llego el momento de elaborar al protagonista Miu Miu, así que comencé dibujando el diseño en una hoja blanca y luego transferí cada una de las piezas a los colores correspondientes de foami como explico a continuación: cabeza en foami gris, mitad de la cara en foami blanco, nariz en foami escarchado rosa, gorro en foami rojo y partes del gorro en foami blanco. Al estar listas las piezas, recortamos.
✨ STEP 3:
Now it's time to make the Miu Miu character, so I started by drawing the design on a white sheet and then I transferred each of the pieces to the corresponding colors of foam as I explain below: head in gray foam, half of the face in white foam, nose in pink frosted foam, hat in red foam and parts of the hat in white foam. When the pieces were ready, we cut them out.


✨ PASO 4:
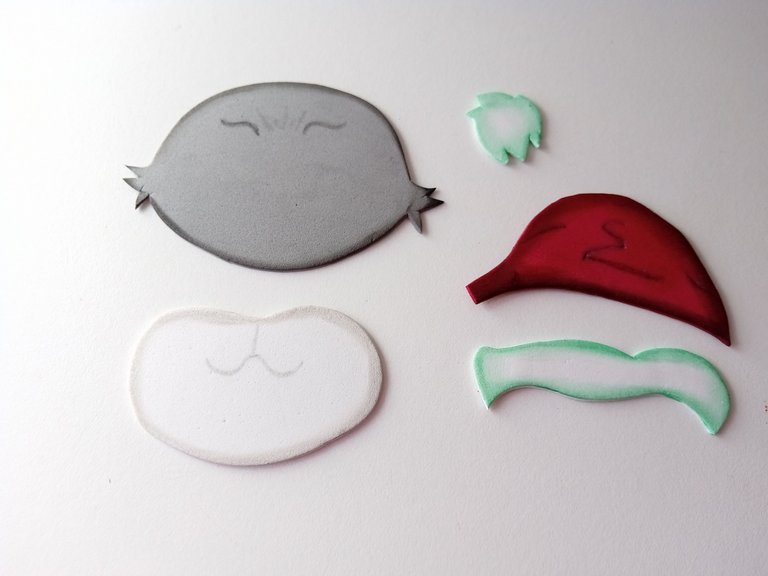
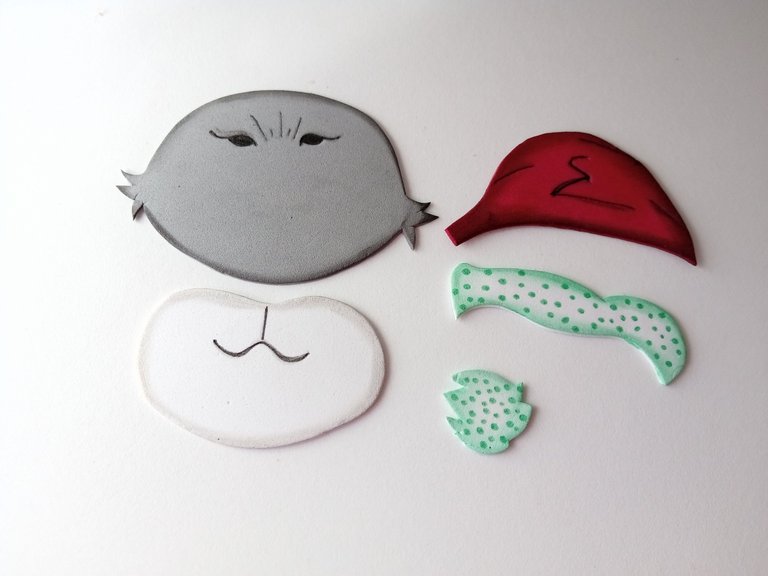
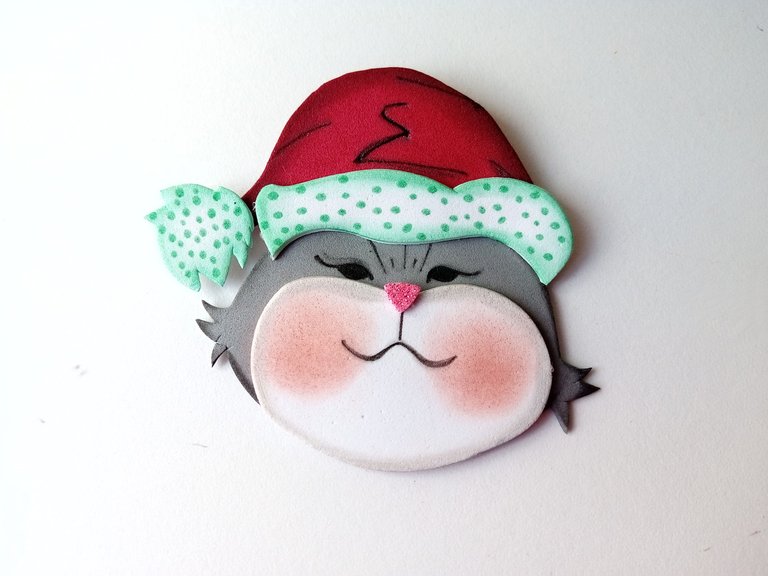
Seguidamente, comencé a dar color a los bordes con pinturas que hicieran contraste con los colores de las piezas y difuminé con un pañito. Al estar seco comencé a dibujar el rostro con marcador negro, para definir también un poco más el gorro, junto con marcador verde para dar un diseño a las partes blancas del mismo y nuevamente, dejamos secar.
✨ STEP 4:
Next, I began to color the edges with paints that contrasted with the colors of the pieces and I blended them with a cloth. When it was dry, I began to draw the face with a black marker, to also define the hat a little more, along with a green marker to give a design to the white parts of it and again, we let it dry.


✨ PASO 5:
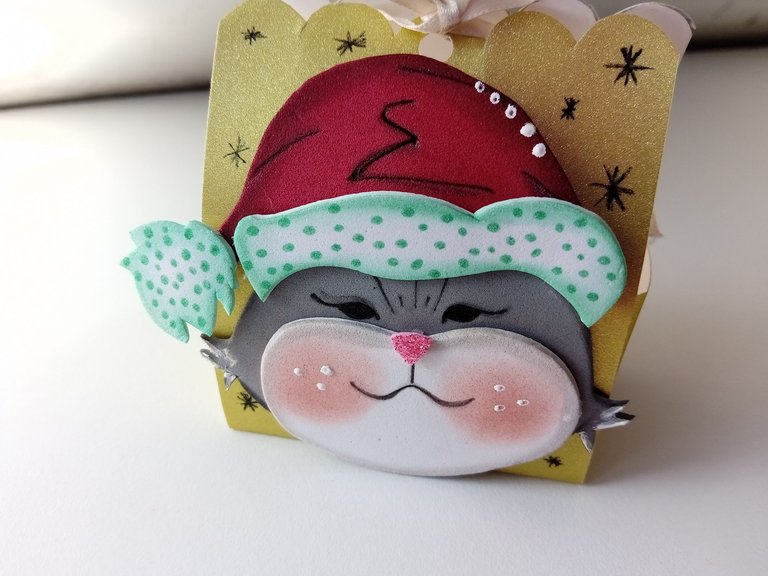
Ahora sí, llego el momento de pegar las piezas de Miu Miu, así que inicié pegando todas las piezas de la cara, seguidamente las piezas del gorro, luego uní ambas piezas hasta formar, pinté un poco de rubor en las mejillas, pegué a la caja y di puntos de luz con pintura blanca a las mejillas y gorro.
✨ STEP 5:
Now it's time to glue the Miu Miu pieces together, so I started by gluing all the face pieces, then the hat pieces, then I joined both pieces together until they were formed, painted a little blush on the cheeks, glued them to the box and added highlights with white paint to the cheeks and hat.

❤️ Hasta la próxima publicación.
❤️ Until the next post.


Todas las fotografías son de mi propiedad.
Separador y Fotos editadas en Canva
All photographs are my property.
Photos edited in Canva
Posted Using InLeo Alpha
Esto es realmente hermoso excelente 👌
Muchísimas gracias amiga! 💕
Que hermoso amiga, me encanta porque se parece a mi gatita Gray jajaja. Divino 😍
Jaja es verdad Vane! Siempre que lo voy a hacer, me acuerdo de ella 🤭💖
Que lindo. Miu miu quedó bien elaborado. Listo para impresionar
Muchas gracias 🤭. Está listo para rellenarse de dulces 🤭
Demasiado lindo, amo los gatos y me encantó tu creatividad para crear esto 😍💗
Muchísimas gracias bella! Me alegra mucho que te haya gustado 💕
Que hermosa cajita Ami. Me encantó! Además parece fácil hacerlo 🥰
Gracias mi Eve! Sí, intenté hacer una cajita sencilla. 🤭💕
Now this is so adorable, the warmth and excitement that would come with receiving this gift box would be out of this world. Fantastic job friend, well done.
Thank you so much for the support, friends! I really tried to put a lot of important details into this creation 🤭💕
Que ternura de cajita, aunque no celebro el día de reyes, me parece una excelente idea tu manualidad 🥰
Discord Felicitaciones, su publicación ha sido votada por @ dsc-r2cornell. Puedes usar el tag #R2cornell. También, nos puedes encontrar en
Muchísimas gracias amigos💖