🔸Sin más que añadir, a continuación los dejo con el paso a paso:
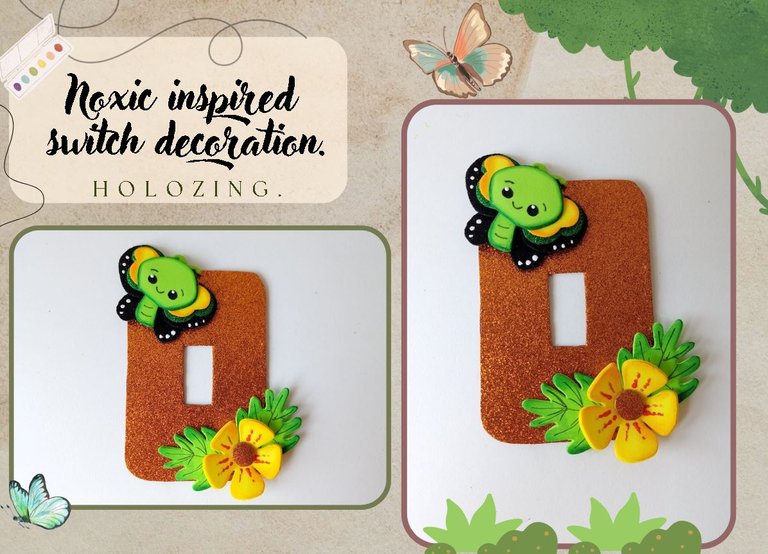
Good afternoon, holozing friends! I hope you are all doing well, I am happy to stop by here again to share with you some nice ideas to decorate the switch inspired by Noxic. Since I started with these decorations with the community's creatures and characters, I think that the results have been nice and I always come up with some ideas to create new decorations with the creatures.
If I'm not mistaken, Noxic is the first more detailed butterfly I've made out of foam and the truth is that the first time I made it, I was a little nervous about how the final result would be, even though I liked both designs, I think this one is my favorite.
🔸Without more to add, then I leave you with the step by step:
♥️ESPERO QUE TE GUSTE,
¡Empecemos!
♥️I HOPE YOU LIKE IT,
Let's start!

✂️ MATERIALES | ✂️ MATERIALS
- Foami escarchado verde.
- Foami escarchado negro.
- Foami escarchado cobrizo.
- Foami amarillo.
- Foami verde.
- Pinturas y marcadores.
- Hoja blanca.
- Tijeras.
- Regla.
- Lápiz.
- Green frosted foam.
- Black frosted foam.
- Copper frosted foam.
- Yellow foam.
- Green foam.
- Paints and markers.
- White paper.
- Scissors.
- Ruler.
- Pencil.
✨ PROCEDIMIENTO | ✨ PROCESS
- ✨ PASO 1:
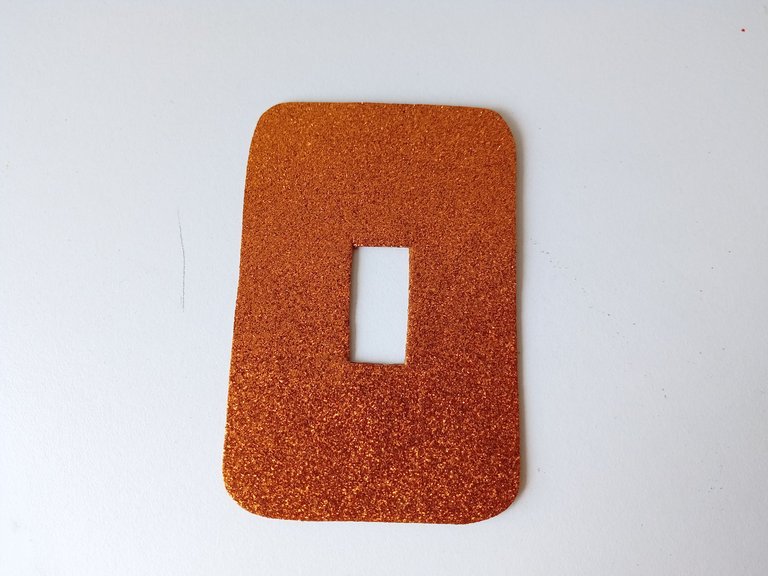
Lo primero que hice fue tomar las medidas del interruptor que iba a decorar. Luego, pasé esas medidas al foami escarchado cobrizo y recorté, las medidas que utilicé fueron de 11 cm por 7.3 cm, pero igualmente, deben tomar las medidas de su interruptor porque no todos son iguales o no tienen el mismo diseño.
- ✨ STEP 1:
The first thing I did was take the measurements of the switch that I was going to decorate. Then, I transferred those measurements to the frosted copper foam and cut it out. The measurements I used were 11 cm by 7.3 cm, but you should also take the measurements of your switch because not all of them are the same or do not have the same design.

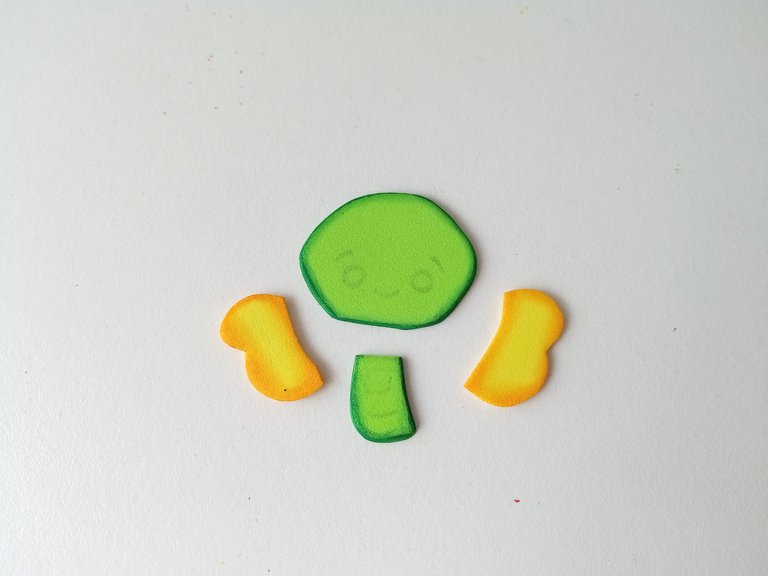
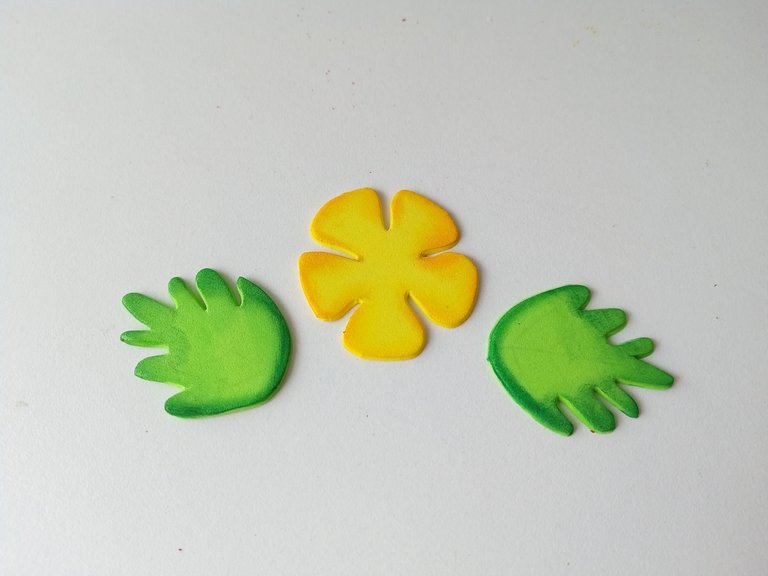
- ✨ PASO 2:
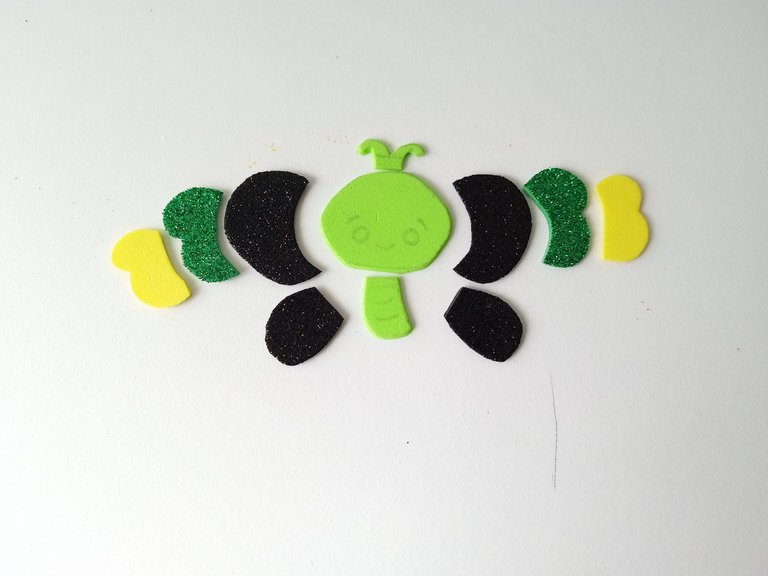
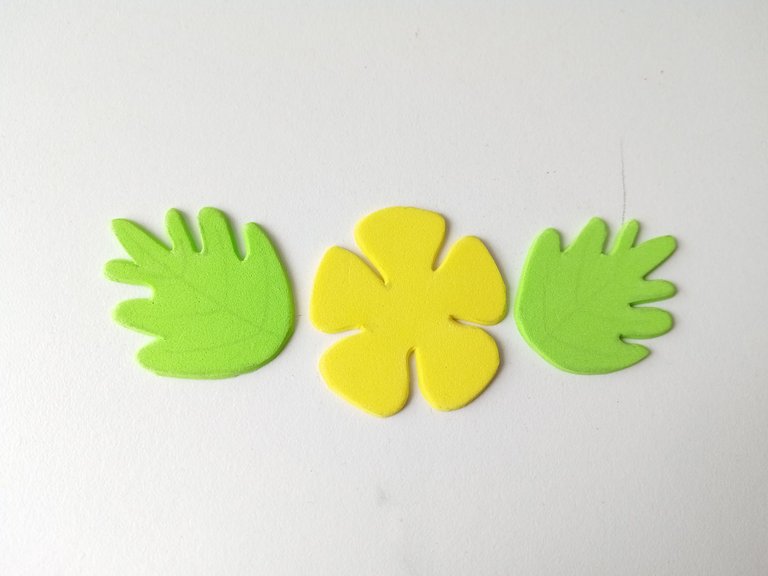
Seguidamente, comencé a dibujar el diseño de Noxic en una hoja blanca y luego, transferí cada una de las partes del cuerpo a los colores correspondientes de foami, de la siguiente manera: cabeza, antenas y cuerpo en foami verde, base de las alas en foami escarchado negro, y los colores de la parte interna en foami escarchado verde y foami amarillo. Además, dibujé y recorté una flor en foami amarillo, el centro de la flor en foami escarchado cobrizo y las hojas en foami verde.
- ✨ STEP 2:
Next, I began to draw Noxic's design on a white sheet and then, I transferred each of the body parts to the corresponding colors of foam, as follows: head, antennae and body in green foam, base of the wings in black frosted foam, and the colors of the inner part in green frosted foam and yellow foam. In addition, I drew and cut out a flower in yellow foam, the center of the flower in frosted copper foam and the leaves in green foam.
- ✨ PASO 3:
Al tener listas las piezas de las decoraciones, comencé a dar color con pinturas a los bordes del foami liso, con colores que contrasten o un color más oscuro que cada pieza, recuerden difuminar con ayuda de un pañito. Por otra parte, di más detalles con marcador negro, dibujando ojos, cejas, boca y algunos detalles a las hojas.
- ✨ STEP 3:
Once the decoration pieces were ready, I began to paint the edges of the smooth foam with contrasting colors or a darker color than each piece. Remember to blend them with a cloth. On the other hand, I added more details with a black marker, drawing eyes, eyebrows, mouth and some details on the leaves.
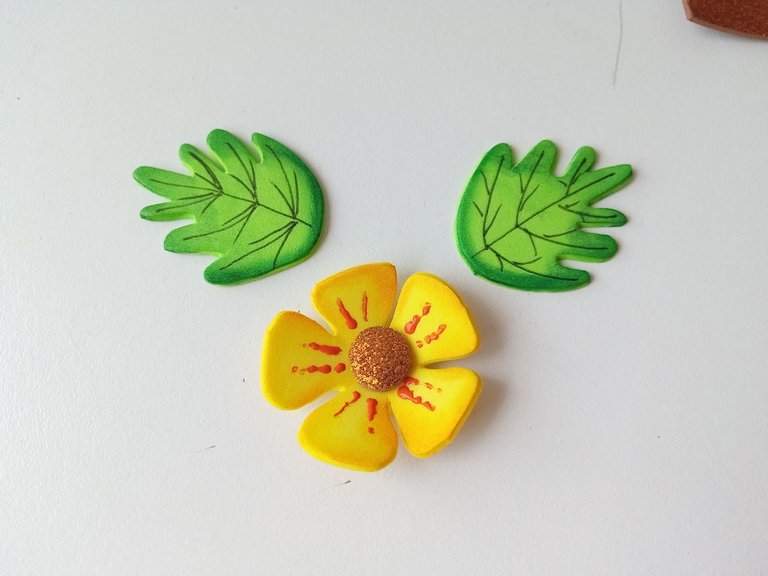
- ✨ PASO 4:
Al estar todo seco, comencé a pegar las piezas hasta formar a Noxic, y di toques de luz con pintura blanca a los ojos y alas. Además, pegué la flor junto con las hojas y di detalles con pintura en la parte interna. Finalmente, pegué a Noxic en la parte superior izquierda de la base y la flor en la parte inferior derecha.
- ✨ STEP 4:
Once everything was dry, I began to glue the pieces together until Noxic was formed, and I added touches of light with white paint to the eyes and wings. In addition, I glued the flower together with the leaves and added details with paint on the inside. Finally, I glued Noxic to the top left of the base and the flower to the bottom right.
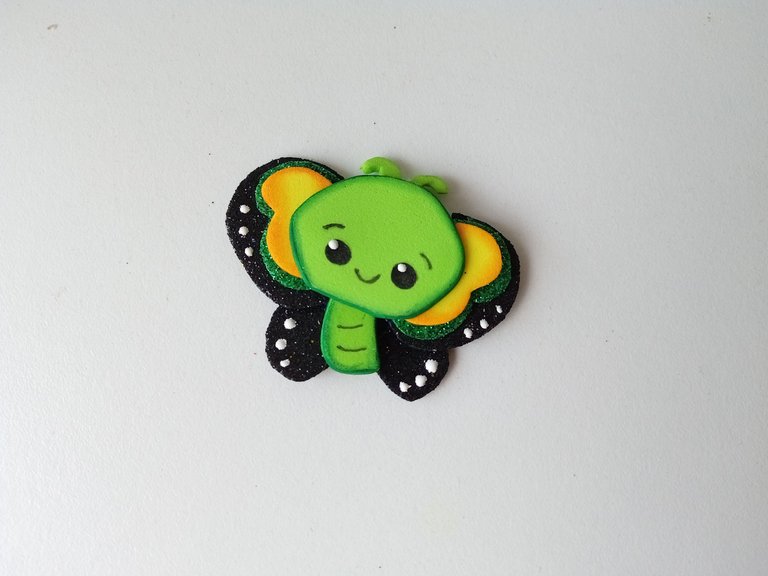
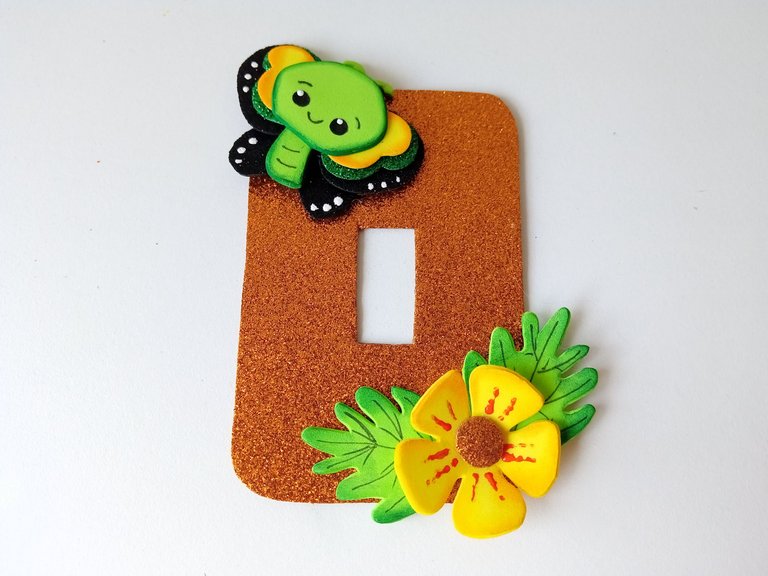
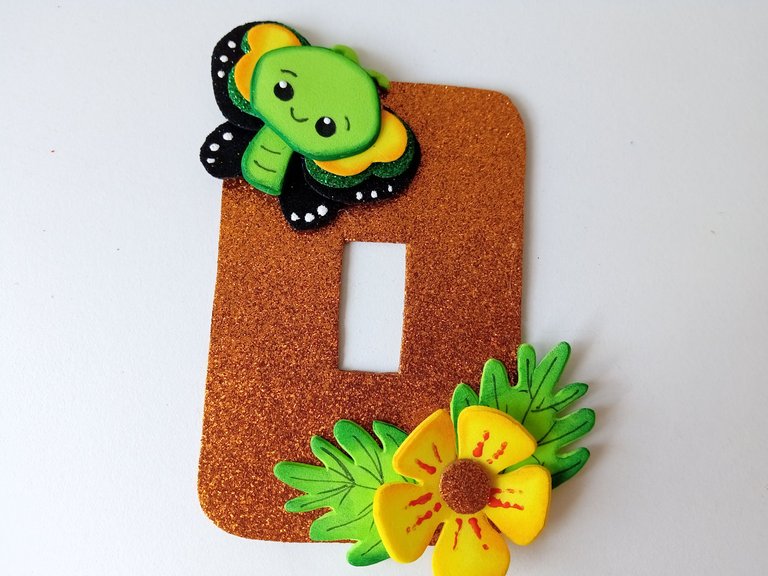
✨¡And ready!✨ This is how I made this beautiful decoration to decorate the light switch, with a Noxic theme. What do you think? Do you like to decorate light switches or do you prefer to leave them as is? I think it is perfect to decorate the little ones' room. I hope you liked the step by step and are encouraged to make it.
❤️Until the next post.
❤️ Hasta la próxima publicación.
❤️ Until the next post.


Todas las fotografías son de mi propiedad.
Separador y Fotos editadas en Canva
All photographs are my property.
Photos edited in Canva
Discord Felicitaciones, su publicación ha sido votada por @ dsc-r2cornell. Puedes usar el tag #R2cornell. También, nos puedes encontrar en
Muchas gracias por el apoyo amigos 💕
Amiiiii🩷😍
Esto te quedó realmente hermoso ¡Me encanta!
Gracias amiga bella 💕 me alegra que te haya gustado 🤭
Ayyyy pero que lindura 😍 amé como te quedó la flor. Es un adorno bellísimo para el interruptor 🥰
Gracias mi Mary! Sí, creo que es lindo para la habitación de los pequeños 💕🤭
Que hermoso mi Valen, me encantó como te quedó y los colores que usaste están realmente divinos 😍💕