Introduction
Here we go again! This week, we’re diving into one of the most unpredictable abilities in Splinterlands—the one that can turn battles into absolute chaos (and sometimes comedy gold). Let’s talk about Scattershot!
What does it do?
Simple—Magic and Ranged attacks target a random enemy unit instead of the usual left-to-right order. Sounds like a wildcard, right? Well, that’s because it is!
Why Scattershot is Awesome
- Bypasses Taunt: Got a pesky tank soaking up all the damage? Scattershot doesn’t care! It might just ignore that beefy frontline and hit the fragile support units in the back.
- Wrecks Your Opponent’s Plans: If they’re expecting a focused attack, Scattershot can completely mess up their setup. You never know where the shots will land, which adds an element of surprise.
When It Goes Wrong…
Of course, it’s not all fun and games. Sometimes Scattershot has a mind of its own and keeps hitting the absolute worst targets—like chipping away at a heavily armored tank instead of taking down the glass cannon hiding in the back. It’s a gamble, and when luck isn’t on your side, it can feel painfully frustrating.
Best Ways to Use Scattershot
- Pair it with Blast! If the attack lands somewhere in the middle, the splash damage can still hurt multiple units.
- Use multiple Scattershot units! One rogue shot is risky, but several? Now you’ve got a real chaos machine in action.
- Combine with Affliction or Poison. Even if the attacks are scattered, landing a status effect can still be valuable.

Ability

Magic and ranged attacks target a random enemy unit
Notes:
- Scattershot can target Camouflaged
 Units and is not influenced by Taunt
Official ability information from splinterlands: List abilities
Synergies / strategy
Abilities benefits
Poison - Having a unit with scattershot and poison is really funny with the chance to poison you complete linup of your opponent.
Blast - Same with blast great if you hit one of the opponents that is in the middle doing adjacent unit damage. As unpredictable you its also possible to hit the first or last unit then blast is less effective/
Halving - With scattershot and halving it perfect to half the damage of the entire team if you are a bit lucky.


Ruleset benefits
Explosive weaponry - this is guaranteed fun to when you bring a scatteshot unit
Unprotected - All armor is removed within this ruleset. This makes your ranged Scattershot attacks all the more impactful - able to effectively reduce the health of opposing Units.
Back to Basics - Units lose all abilities. A ruleset such as this is prime Conqueror Jacek territory. Throw off your opponent by targeting random Unit! This is especially impactful as they may front load their lineup with strong melee Units, and leave the back line to low-health ranged and magic attack Units.
![]()
![]()
![]()
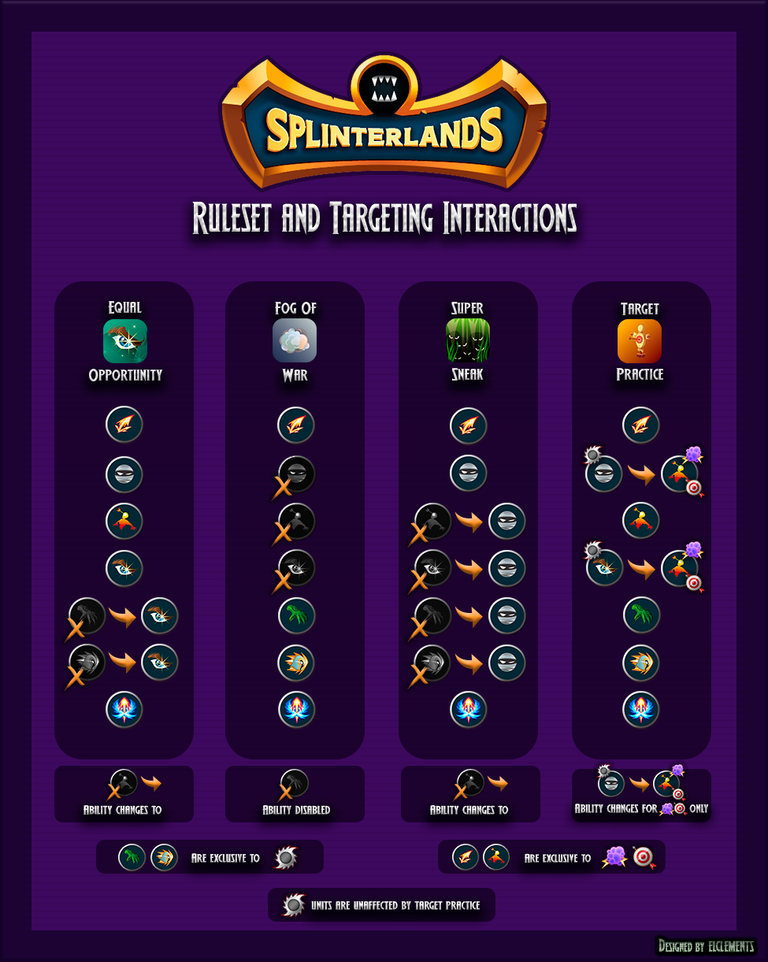
Equal Opportunity / Fog of War / Super Sneak / Target Practice - What important to know is that with all these ruleset scattershot is not changed. Take note and use that in your advantage.
![]()
![]()
![]()
![]()
Select / favorite
Here are mine scattershot units:

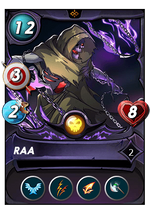
One summoner that give all unit scattershot is:

This time i did not have a direct unit in my mind other then the summoner because everybody get scattershot and is always fun to watch 🤣.
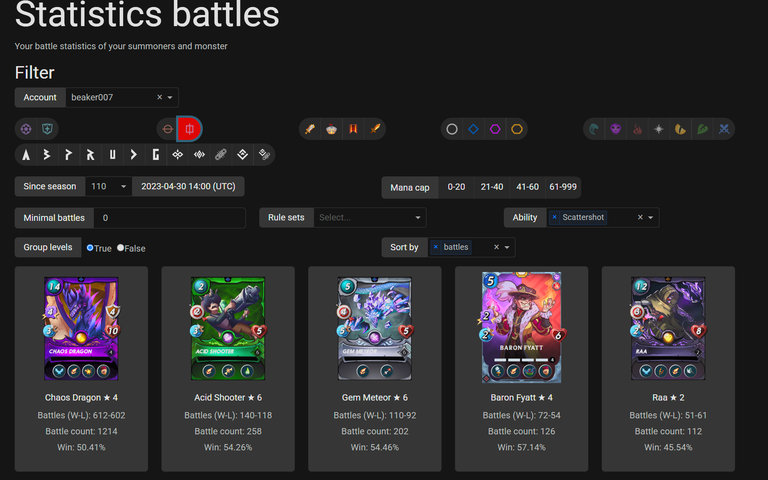
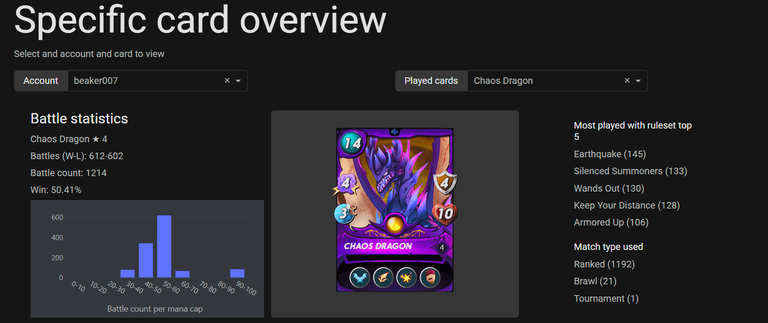
So i use my statistics to pick my favorite most used / best performing unit:
Most used:
Best performing with minimal 100 battles:
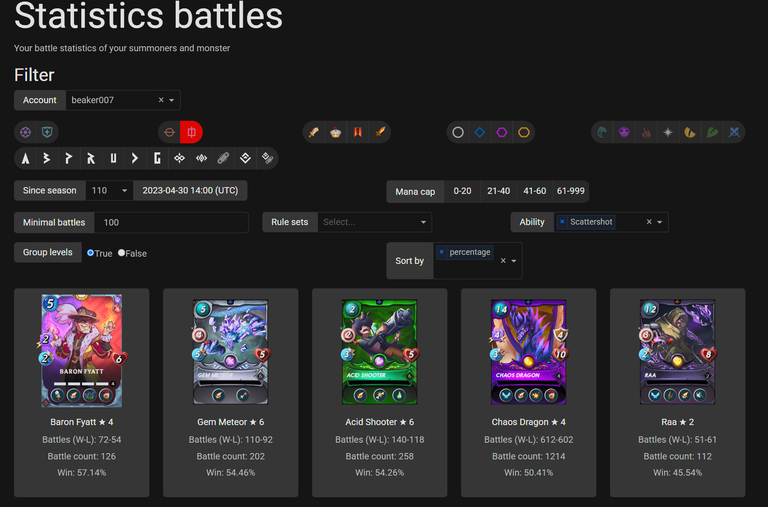
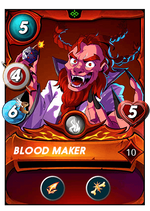
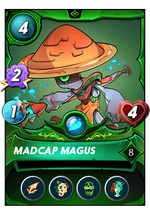
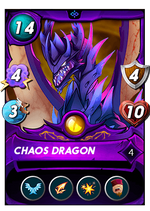
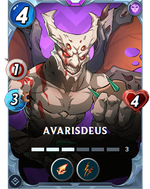
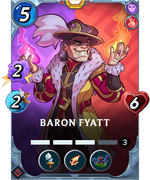
Based om my statistics there are two unit i would pick, Baron Fyatt or Chaos Dragon. I picked Chaos Dragon because if you look at the scattershot it perfectly paired with the blast damage which making a perfect unit.
I like Baron Fyatt because of the halving ability but i have not used it that often yet (but it is on the rise)
Here is the more detailed statistics of my Chaos Dragon:
Strategy

High mana match with no extra rulesets. Often i like this, this is where you see the unit shine with it core abilities and no restriction or buffs by rulesets.
Rulesets
![]()
Standard:
No change to standard gameplay rules or mechanics.
The Lineup
Summoner
| Card | Reason |
|---|---|
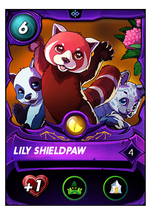 | It time for lilly i do not play it that often but its very strong to control where you opponent will hits. Note you can easily work around this with scattershot |
Units Lineup
| #1 | #2 | #3 | #4 | #5 | #6 |
|---|---|---|---|---|---|
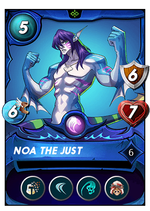 |  | |  |  |  |
Noa the Just (lvl 6)
Because of Lily i expect most of the unit need to attack in the front, so two heavy health units in the front to protect my attacking units. This unit may defend the front lineup first with its speed dodge and backfire i hope on some missed.
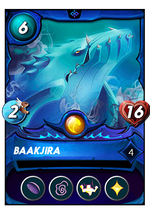
Baakjira (lvl 4)
Second high health tank is Baakjira this unit will be boosted by the martyr of Noa the just. When that happen the heal is even better. Each round, restores 1/3 of max health (rounded down).
Chaos Dragon (lvl 4)
Here it is in the third position, heavy magic damage with 4. The blast will do some extra damage and hope with the scattershot it will hit the middle users 🤣.
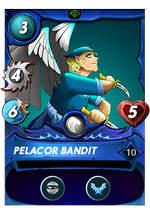
Pelacor Bandit (lvl 10)
Sneak unit that does a solid 4 damage. As you can see my strategy is not to hit the front but go to all units other then the front.
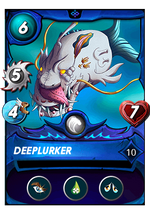
Deeplurker (lvl 10)
One of my favorite unit within splinterlands with the opportunity and poison. It will target the weakest units and if lucky it will also poison it.
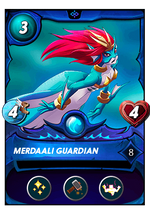
Merdaali Guardian (lvl 8)
As i'm not scared for sneak unit because of lily, its a very important unit to keep the front line unit alive.
The Battle
Reference
Link to the battle:
Link to battle
Rounds
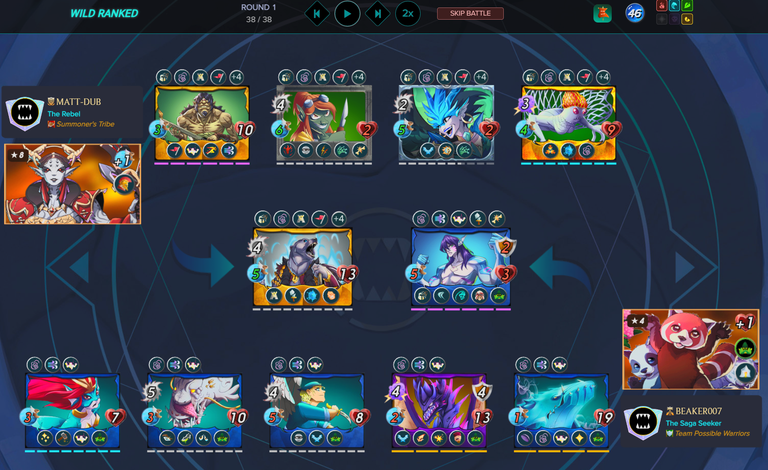
Start :
My opponent went for a Sneak melee strategy, meaning their attacks would primarily target my backline. Good thing I brought Lily Shieldpaw! Thanks to her Camouflage ability, all my units would be forced to attack my frontline instead—completely shutting down their sneak strategy before it even begins.
On their side, Arkemis the Bear is in the front, rocking the Halving ability, which cuts enemy damage in half. Sounds scary? Not really. My frontline units don’t even have an attack, so there’s nothing for Arkemis to reduce! Big win for me already.
Everything’s looking solid, but there’s one potential problem: Katrelba Gobson.
This beast can snowball out of control with Bloodlust, gaining extra stats every time it lands a kill. If it starts steamrolling my team, things could get ugly real fast.
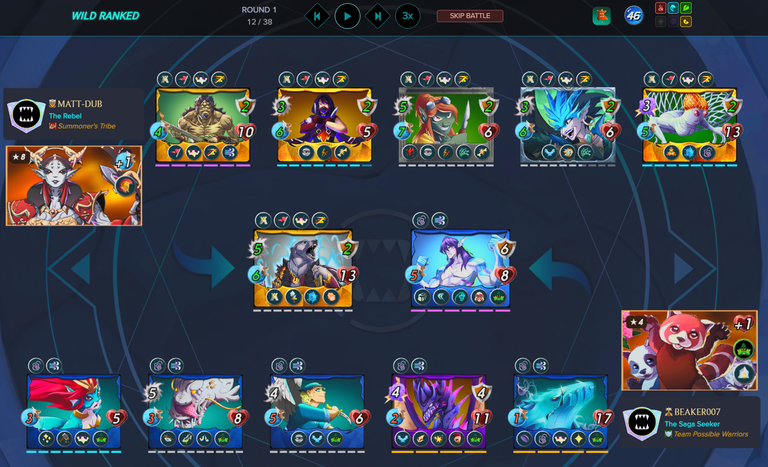
Round 1:
The battle kicks off with three misses from my opponent’s melee attackers. That’s a huge win for me because every miss triggers Noa the Just’s Backfire ability, dealing -2 damage per miss. That’s six free damage without me lifting a finger!
Meanwhile, Chaos Dragon lands a lucky hit on the most dangerous threat—Katrelba Gobson! Not only does it chip away at Katrelba’s health, but thanks to Blast, the splash damage takes out Dhampir Infiltrator in the process. One less Sneak attacker to worry about!
The downside?
Noa the Just took some serious hits and is barely hanging on. If Katrelba gets the kill, Bloodlust will kick in, making it even more dangerous next round.
Round 2:
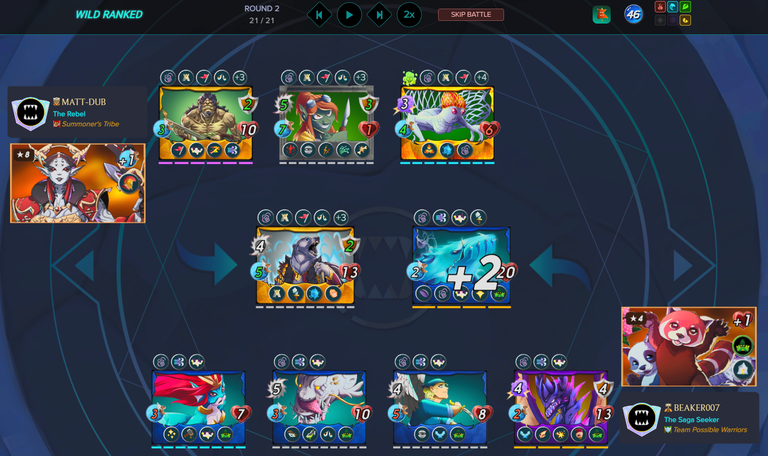
Uh-oh… Katrelba got the kill. That means Bloodlust has activated, boosting its stats. But honestly? I’m not too worried. Sure, it's stronger now, but it still doesn’t have enough health to survive much longer.
Meanwhile, Chaos Dragon is on fire! 🔥 This time, it lands a perfect shot on Halaran Huntress, taking it out instantly and splashing more Blast damage onto Katrelba. Not quite enough to finish the job, but it’s getting close.
And here’s the real MVP of the battle: Baakjira.
This thing is a literal wall—with 20 health and boosted healing, it’s practically unbreakable. And that’s before adding Merdaali Guardian’s extra healing into the mix!
At this point, I don't see how my opponent's team can break through this tank. Baakjira is an absolute beast! 😂
Round 3:
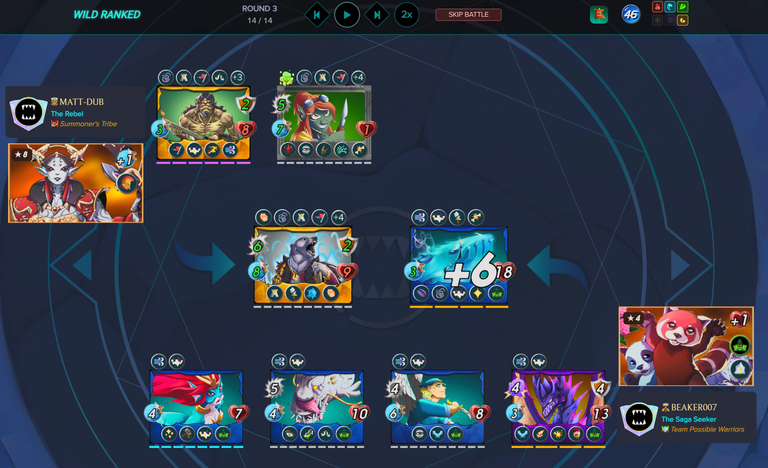
Katrelba goes all in, smashing Baakjira for 10 damage! But does Baakjira care? Nope. It shrugs it off like a champ, healing right back up like nothing happened. This tank is straight-up unkillable. 😂
This round, Chaos Dragon wasn’t feeling too lucky. Instead of hitting a key target, it lands a shot on the frontliner, doing just one Blast damage. Not ideal, but no worries—because Deeplurker comes in clutch! It lands a hit on Katrelba and poisons it. That means next round, it’s guaranteed dead.
And let’s not forget—after this round, my opponent only has one unit left that can actually attack. Thane Newsong has no attack power, so this match is basically over. GG.
Round 4:
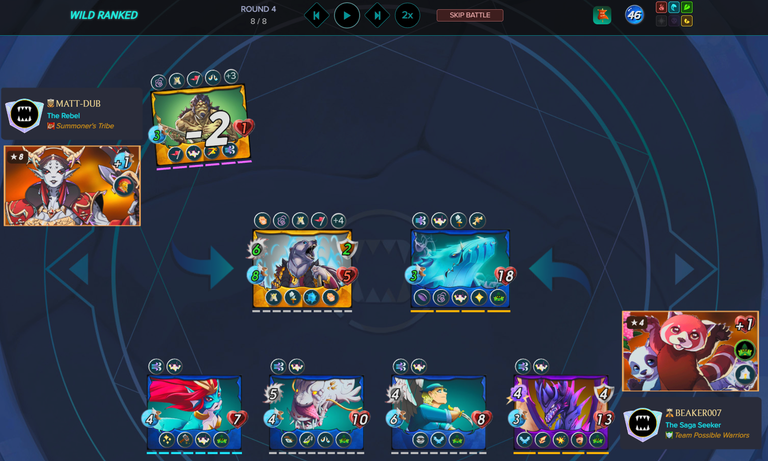
As expected, Katrelba falls to poison—no more Bloodlust shenanigans! That leaves my opponent with just one real attacker left. And guess what? Baakjira is still standing strong with 18 health! 💪
Sure, it lost 2 health from Cripple last round, but with constant healing, it’s barely feeling the damage. This tank is just built different.
At this point, it’s just a matter of time. One or two more rounds, and this match is a wrap!
Round 5:
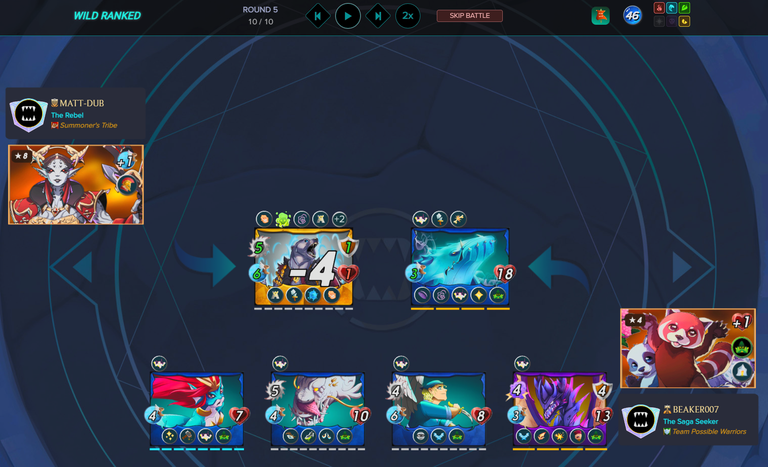
It's all up to Arkemis the Bear now. But let’s be real—this fight is already over. 😆
My team unleashes everything on poor Arkemis, and by the end of the round, it’s left clinging to life with just 1 health. One more hit and it’s game over.
Round 6:
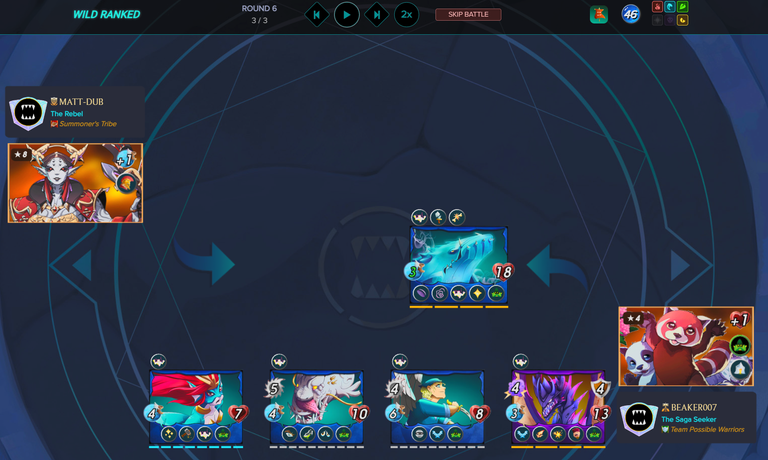
And just like that, Arkemis the Bear drops without my team even lifting a finger! 💀 Poison does the job, sealing the deal before my attackers could even swing. A clean, decisive victory!
Conclusion
This battle was a perfect example of how strategy and abilities can completely shift the outcome of a fight. Here’s the final recap:
✅ Lily Shieldpaw completely shut down the Sneak strategy, keeping my backline safe.
✅ Baakjira was an absolute wall, tanking huge hits and healing like a champ.
✅ Chaos Dragon’s Blast wrecked key threats early on, and as always, Scattershot made it fun to watch where the next attack would land. No surprise—this is my favorite Scattershot unit! 🎯💥
✅ Deeplurker’s Poison sealed the deal, finishing off Katrelba and Arkemis effortlessly.
In the end, Poison did the final job, and the victory was mine! 💪🔥 GG!
Previous ability strategy posts
Below you will find references to the other ability strategies / analysis posts.
 Affliction
 Amplify
 Backfire
 Blind
Blind Bloodlust
 Camouflage
 Conscript
 Close Range
 Cleanse
 Cripple
 Deathblow
 Demoralize
 Dispel
 Divine Shield
 Dodge
Dodge Double Strike
 Enrage
 Flying
 Forcefield
 Fury
Fury Giant Killer
 Headwinds
 Heal
Heal Tank Heal
 Immunity
 Inspire
 Knock Out
 Last Stand
 Life Leech
 Magic Reflect
 Martyr
 Opportunity
 Oppress
 Phase
Phase Piercing
 Protect
 Reach
Reach Recharge
 Redemption
 Reflection Shield
 Repair
 Resurrect
 Retaliate
 Return Fire
 Rust
Rust Scattershot
That's all for this week hope you enjoyed reading this ability strategy/analysis. See you all on the battlefield.
![]()
Do you also want to be part of this amazing play to earn game consider using my referral link.
Congratulations @beaker007! You have completed the following achievement on the Hive blockchain And have been rewarded with New badge(s)
Your next target is to reach 2000 replies.
You can view your badges on your board and compare yourself to others in the Ranking
If you no longer want to receive notifications, reply to this comment with the word
STOPCheck out our last posts:
Thanks for sharing! - @yonilkar
