
🔥Welcome to a new weekly post
This time, I want to spotlight a card that I believe is underrated — one with tremendous potential when used correctly. That's exactly what I’m here to show you today.
The strategy I’ll present is quite simple, so I’ll keep this post straightforward and easy to follow as well.
WHEN TO USE LIFE SAPPER
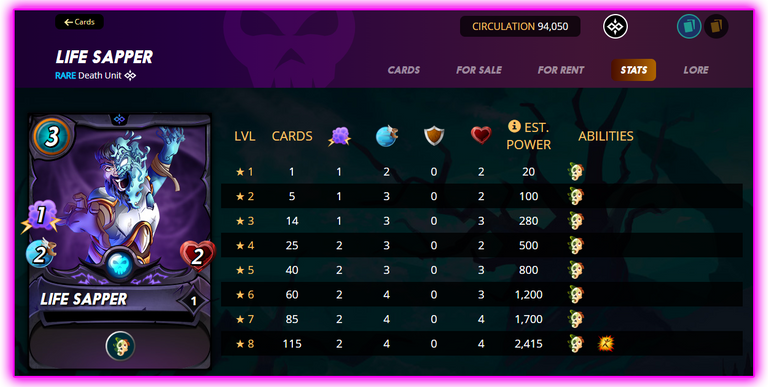
This card comes with the LIFE LEECH ability, which allows it to gain health every time it deals damage to an enemy's life points.
Personally, I see tremendous potential in the Bronze League, where matches are often decided by sustain and survival. Even in the Silver League, it holds its own thanks to its two points of magic attack.
The strategy is straightforward: all you need to do is combine two key abilities, such as LIFE LEECH + TANK HEAL.

This strategy allows your card’s health to scale indefinitely, as long as it keeps dealing damage and receiving heals.
Unfortunately, within the Death Splinter, there’s only one card that provides the Tank Heal ability — Corrupted Pegasus — which makes this combo a bit tricky to pull off using only monsters.
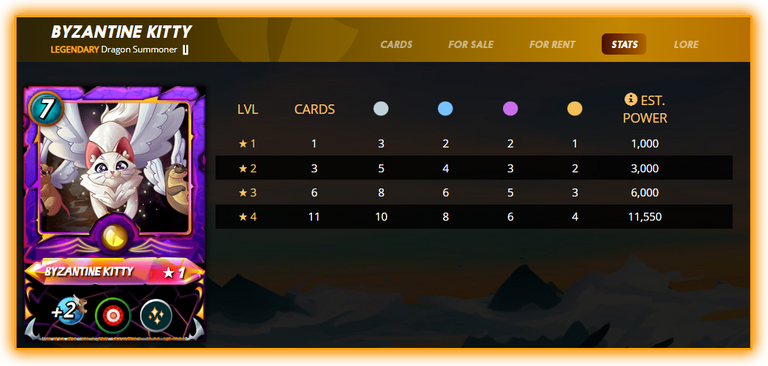
That’s why the most practical and effective option is to use the summoner BYZANTINE KITTY, who grants Tank Heal along with other powerful buffs. Kitty is so strong, in fact, that it's known for being one of the few counters to the popular Llama + Flesh Golem strategy.
BATTLE STRATEGY
The core idea is to build up as much health as possible with LIFE SAPPER in order to outlast the enemy through fatigue, while your tank holds the front line and absorbs damage for as many rounds as it can.

SUMMONER
One of the key components of this strategy is Byzantine Kitty, a Legendary Dragon Summoner who provides +2 Speed, True Strike, and the powerful Tank Heal ability.
She’s widely regarded as one of the strongest summoners in the game, thanks to the incredible utility and survivability she brings to the battlefield.
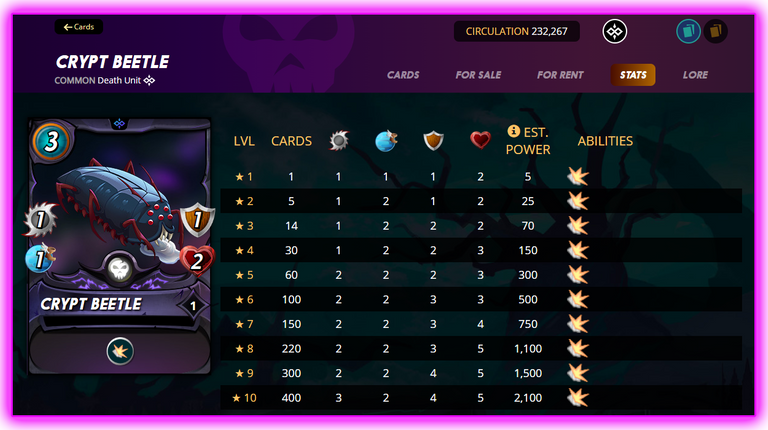
TANQUE CRYPT BEETLE
In this particular battle, the mana cap is 19, so we need a low-cost tank — and that’s where Crypt Beetle comes in.
It’s a solid choice for its cost, but be cautious: its main weakness is magic attacks, which bypass its armor and can take it down quickly.
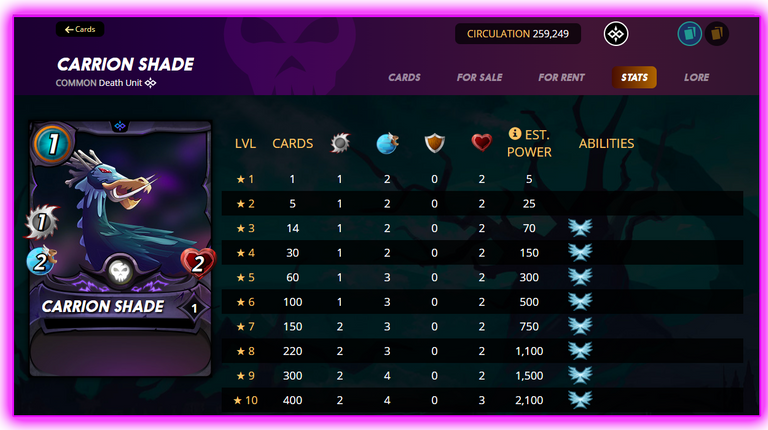
CARRION SHADE
For this setup, we need a card that can draw attacks from enemies with the Opportunity ability.
Under different conditions, I would’ve gone with Chaos Agent, but since neutral cards weren’t allowed in this match — and considering that it’s not always as effective in Bronze League — I opted for another option instead.
LIFE SAPPER
This is our star card, and while using it at level 2 would be ideal, our budget constraints limit us to level 1.
Even so, it performs surprisingly well, especially considering it still gains a valuable +1 Speed — which can make a big difference in battle.
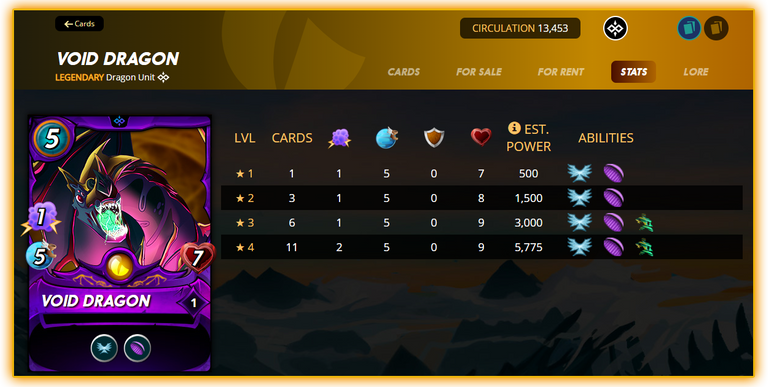
VOID DRAGON
This is another key card in the lineup, with the primary role of dodging Sneak attacks.
It starts with 5 Speed, and with +2 from Byzantine Kitty, it reaches a total of 7 Speed — plus it has the FLY ability, which boosts its dodge chance even further. All of this makes it incredibly effective at avoiding backline damage and staying in the fight longer.
BATTLE
The battle is very simple, the order of attack is as follows:
⚔️ Round 1 – Turn-by-Turn Breakdown
Void Dragon attacks first due to having the highest Speed. It deals 1 damage to Chaos Knight.
Life Sapper, with 4 Speed, follows up and also deals 1 damage to Chaos Knight, gaining +1 life from its Life Leech ability.
Crypt Beetle attacks next. Even though it also has 4 Speed, it attacks later because it's a Common card (you can read more about attack order based on rarity here). Unfortunately, its attack deals no damage because Chaos Knight has the Shield ability, which reduces melee damage.
Venari Crystalsmith heals the damage dealt to Chaos Knight, essentially undoing all the progress from our first three attacks. Then it attacks Crypt Beetle, but the damage is negated by Beetle’s own Shield ability.
Celestial Harpy, using Opportunity, targets Crypt Beetle (the card with the lowest health), but again, no damage is dealt thanks to its Shield.
Stitch Leech uses Sneak to go after Void Dragon with two points of melee damage. Fortunately, several of these attacks are dodged due to Dragon’s high speed and Fly ability.
Finally, Chaos Knight attacks Crypt Beetle, dealing 1 damage and leaving it at just 1 HP. Thankfully, Byzantine Kitty’s Tank Heal activates immediately, restoring health to Crypt Beetle and keeping it alive.
After several rounds, the battle remains relatively even. Although the enemy eventually manages to deal some damage to Void Dragon, it holds on impressively — dodging multiple attacks and fulfilling its role as a distraction for Sneak and Opportunity abilities.
By Round 10, Void Dragon is finally taken down, but not before doing an outstanding job.
At the same time, if you check the battle image, you’ll see that Life Sapper has already accumulated 11 health points, putting us in a strong position for the second half of the match.

By Round 20, even without Void Dragon, Life Sapper continues to hold strong on its own.
Although Stitch Leech deals 2 points of damage, Life Sapper is able to recover 1 HP each time thanks to its Life Leech ability. This steady healing allows it to survive the pressure and maintain a solid position until fatigue kicks in.
Starting in Round 21, fatigue damage begins to take effect — dealing -1 HP per round, and increasing with each passing turn. From this point forward, it becomes a test of endurance, and Life Sapper is more than ready for it.

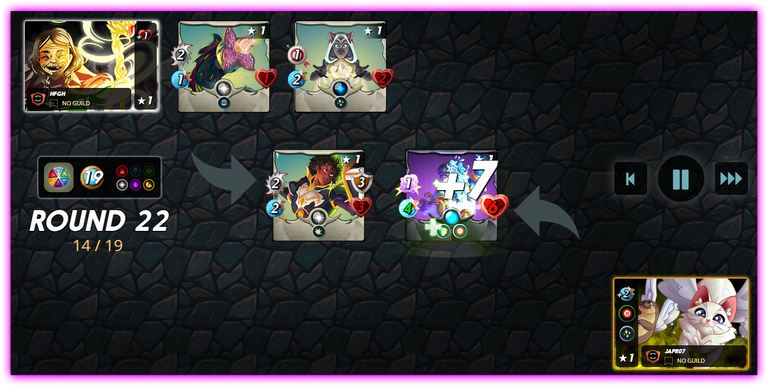
By Round 22, fatigue has taken a heavy toll on both teams. At this point, Life Sapper is the only card I have left on the battlefield.
However, thanks to its Life Leech ability, it manages to heal for +7 HP with each attack — making it incredibly hard to take down.
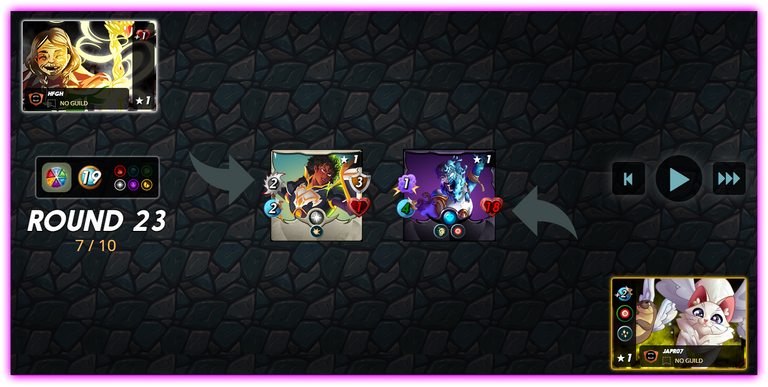
As fatigue continues to wear down the enemy team, their cards begin to fall one by one, and at this stage, it’s clear: victory is only a matter of time.
In the final moments of the battle, it’s all said and done — Life Sapper, supported by Tank Heal, stands strong with 18 health points, while the opponent is left with just 1 HP remaining.
This outcome proves that the strategy worked perfectly. It’s also worth noting that key dodges throughout the match helped avoid critical damage that could’ve changed the course of the fight.
All things considered, this is a very solid and reliable strategy, especially for longer battles where survivability and scaling are the keys to victory.
BONUS
As I mentioned earlier, this is truly one of the strongest strategies available — so much so that it can even defeat the infamous Llama + Flesh Golem combo, which is widely considered one of the most powerful setups in Bronze League, especially in low mana battles.
With just 13 mana, the key to beating this formation lies in the smart combination of Tank Heal and Life Leech. When used correctly, this synergy provides enough sustain and scaling to outlast even the toughest opponents.


Information HereIn our clan @fallen.angels we have innovative ideas to benefit everyone, see the next post, you will not regret it