Hey everyone, welcome back to my Splinterlands Blog, it's a Saturday for me so it's time to make my second Splinterlands blog post for this weeks Splinterlands Community Engagement Challenge, and this week the task is to make another tutorial post, I like making them to help people or improve what they are already doing, so today I chose to make this post about the importance of making blog posts yourself about this awesome game, because it's fun to do and when your dedicated it can earn you some extra funds you can use to buy Splinterlands assets with like cards and SPS so you can win more battles and be more competitive, and be honest, who doesn't like to win and earn more!?
To find out how you can participate in this challenge yourself, check out the Splinterlands post here.

Is this really worth my time?
Well.. it depends on how you look at it, when I count the hours I spend in making blog posts and compare it what I could earn working these hours, most definitely not! But it's fun for me, and I learn to be better at English this way because English isn't my native language.
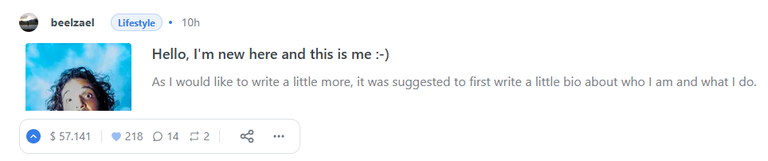
When you start as a fresh Hive Blogger, and never ever have posted on Hive before, you should make a introduction post first like this new member has done, you can read his post here as an example. I picked this post because @beelzael made a wonderful first post and already received a big upvote on it, after doing so you should spend some time as well to learn the Hive etiquette, the do's and don'ts but people like @azircon are far better capable of explaining this than me so you could follow him and read his posts to get started.
It's cool to not only make Splinterlands related posts but also try different topics you like, for example make a post about going on a hiking trip or how you make a dish well know in your country, anything goes!
Follow @splinterlands to see what challenges you can join.
This is a nice start and when you do this you can easily see when a new challenge launched. Every week, there are three new challenges but you need to choose because you can only get upvotes from the team with two, but of course you can just join for fun too 😉
Social Media Challenge: This challenge gives us mostly a task to make a post about anything Splinterlands related or to share a cool battle.
Community Engagement Challenge: This challenge varies in tasks, I'm making this post for this weeks Community Engagement Challenge because this time the task is to make a post explaining a part of Splinterlands but it sometimes also is about expanding Splinterlands Lore, which I really like!
Splinterlands Art Contest: This is for the artistic members, which I am not 😅 to make a drawing or painting (on paper or digital) about Splinterlands related content.
When you first start, not many people know you but when you put time and effort in to your posts and make them stand out from all other posts and with commitment you can do this, just don't get discouraged when some posts don't get a lot of likes, it takes time. For me this took over two years, just enjoy making your posts. 🙂
Make your post stand out
So in the rest of this post, I will show you how to make a post that looks nice, learning to do this takes time as well and you will see when you are dedicated to do this every week, you will develop your own style in making your posts, don't try to copy other people, be yourself, but of course you can use other people's posts as an example. 😉
Step 1: Making a thumbnail
I think posts will get more views when you have cool thumbnails and it's actually not that hard to make them, it makes your post stand out between all other posts made around the same time. I use Photopea to make them, it's totally free and works like Adobe, so first thing you'll need is a nice background to work with, you can get copyright free backgrounds from Freeimages or just google something you like, beware of copyright though, I'm not 100% sure how this works, if I'm not sure I'll make a 'sources' sentence on the bottom of my posts where I got the image from with a link to the original picture, on Freepik you can generate a link you can use in your posts to mention the original owner.
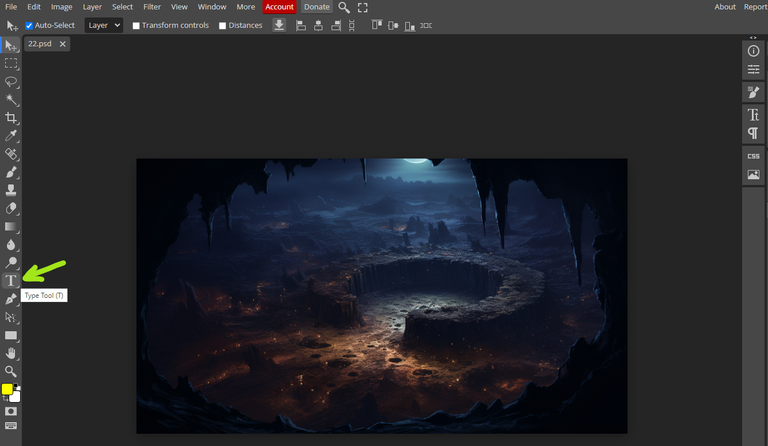
So I found a nice background to use and saved it on my computer, next, I opened it in Photopea -> File -> Open and select the background, and I'll select the Type Tool to insert text.
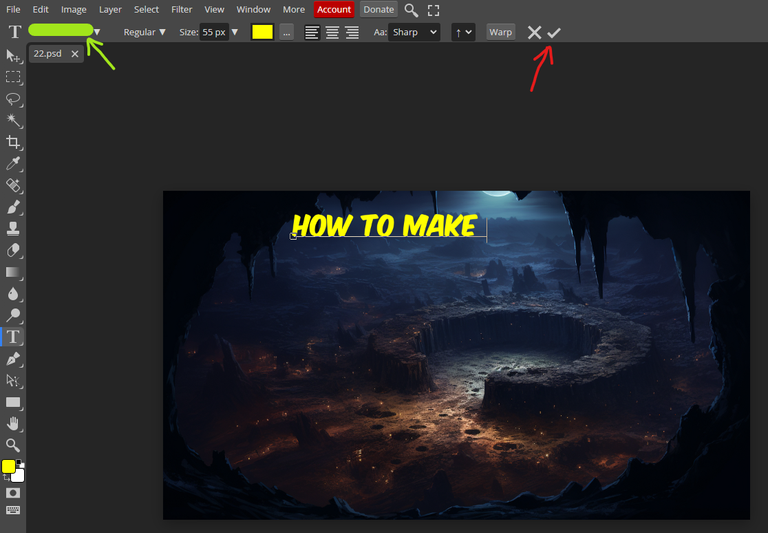
On the top left you can select different fonts, try things out until you found something cool to make your own style, after a few tries I found a font I use every time now, I'm not sharing which one to avoid people copying me 😆.
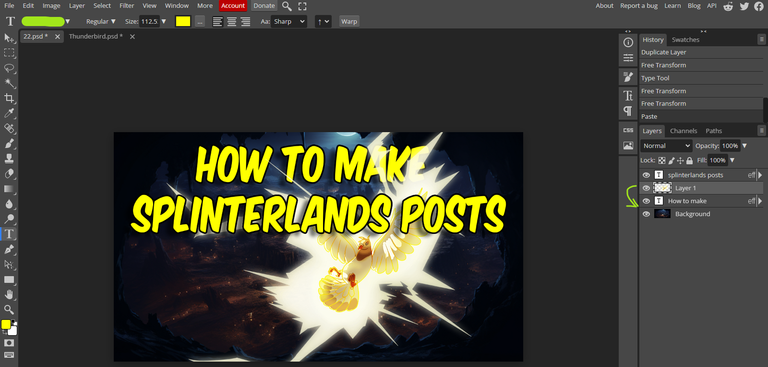
Next, left click somewhere on your background and start typing, when you're done, click confirm (the red arrow)
now we have the start of the text, but it doesn't look very cool just yet... press CTRL + ALT + T to select the text again and a box will appear around it.
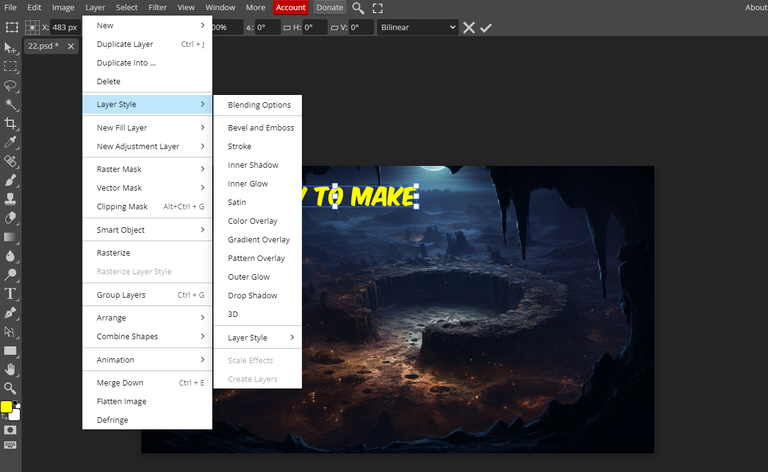
You can now drag it to make it the right size, and do different cool things with it to make it pop out a bit more in the 'layer' tab and then layer style, here you can select different things, just play with it, experiment and see what looks cool, for now, I'll add stroke and drop shadow.
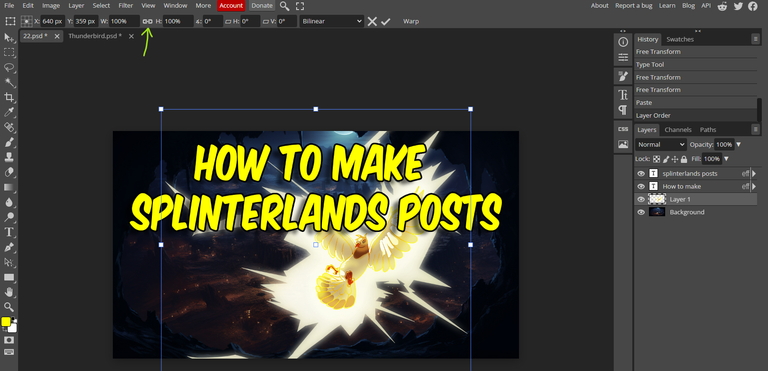
next, drag and move it until it's the correct size to your liking, when you click the icon on the green arrow you can toggle the keep aspect ratio on or off, again, just experiment with it. I made my test a little bigger and pulled it a bit more up to make the letters longer.

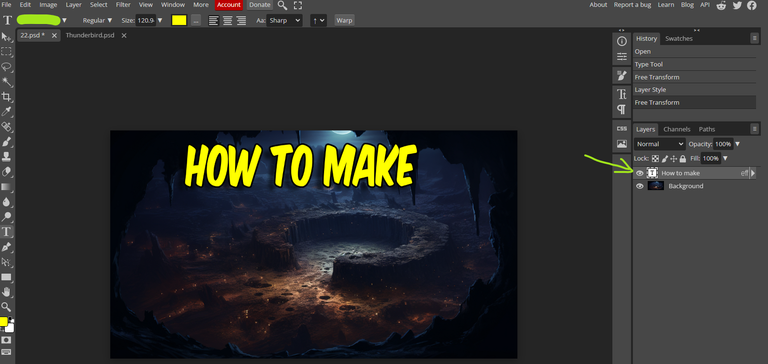
When you're done with the first text, you'll see you have one extra layer at the right of your thumbnail displaying your background and now also your first text line, click right on it and select 'duplicate layer'.
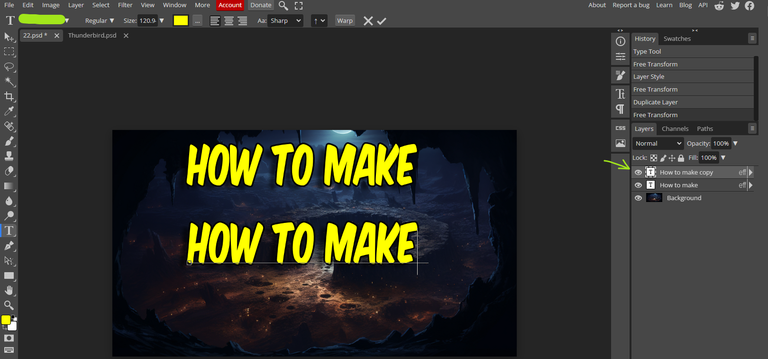
next, hit CRTL + ALT + T again to select the copied layer and drag it down, select confirm when you're done, now you can left click on the new text line to adjust the text, but this way you will keep you current style for every piece of text you make without doing this over and over again, notice by copying our original layer, we've now created an extra layer on the right of our picture.
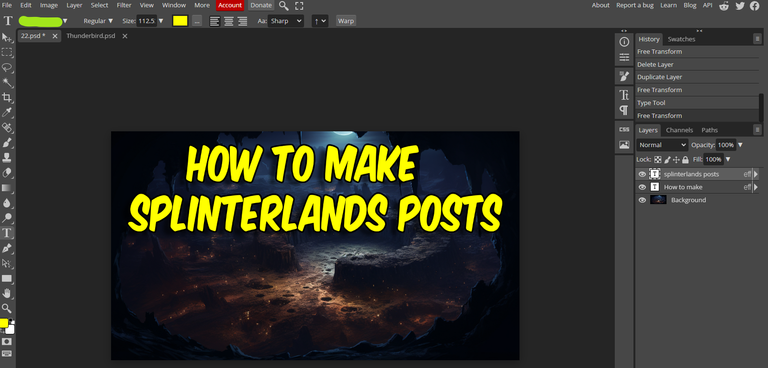
Just adjust the text with backspace and type in the nest line, in this case I removed 'how to make'and replaced it with 'splinterlands posts'. When I click confirm, I can select the text I just made with CTRL + ALT + T again and drag it around to put it where I want.
You can adjust every layer any time you want by selecting it on the right in the layer overview and then CTRL + ALT + T to select and adjust it.
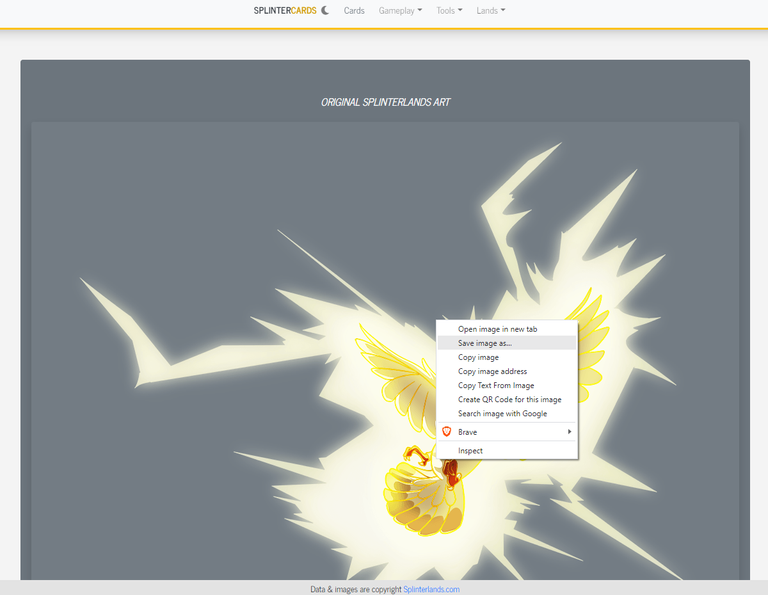
To make things even cooler, we can now add PNG pictures, meaning they have a transparent background, you can find all splinterlands card art at splintercards, just type in what card you're searching for, select it and scroll down to see the image, for this post I searched the card 'thunderbird', clicked on it and scrolled down, next, right click on the image and select save image as and save it somewhere on your computer.
I know this all looks pretty complicated, but trust me, once you did this a few times, making a thumbnail won't take you more than 15 minutes 😉.
On photopea, I click on 'file' in the top left, and 'open' to select the thunderbird image I just saved. This will open a new tab inside photopea, we now have our main thumbnail tab, called 22.psd for me, and our image, thunderbird.psd.
press CTRL + A to select it and CTRL + C to copy it, next, go to our main thumbnail tab again and press CTRL + V to paste the image inside our thumbnail.
now we have thunderbird inside our thumbnail but it overlays part of the text, text should be above picture layers in the layer list, so we have to drag 'layer 1'containing the thunderbird image down below all text layers but above the background layer, when it's at the right position, the text will overlay the thunderbird image, now select the 'layer 1' in the list and press CTRL + ALT + T again to select it so we can resize it, keep it mind we now have to keep the correct aspect ratio so we have to lock it, if we don't it will ruin the picture.
whenever you do something wrong, just press CTRL + Z to undo your last step.
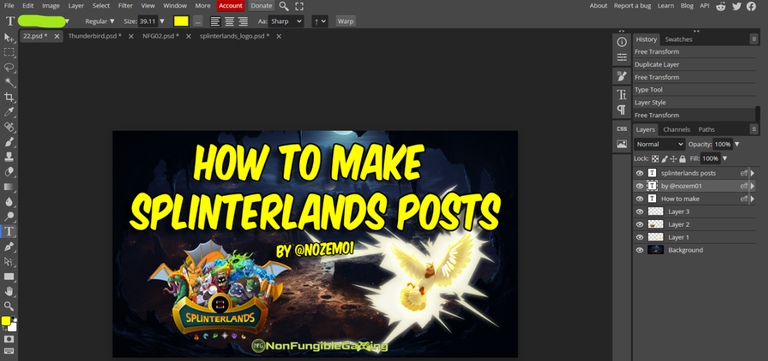
Next, I inserted two more pictures, the splinterlands logo and my guilds logo, as well as putting one extra but smaller line of text in it.
when you're looking for an image, just google it, like 'splinterlands logo png'.
and keep it in a separate folder, some pictures I use for almost every thumbnail and not having to search for it every time, saves time 😀.
The end result looks like this:
last, click 'file' -> export as -> JPG and save the end result on your computer.
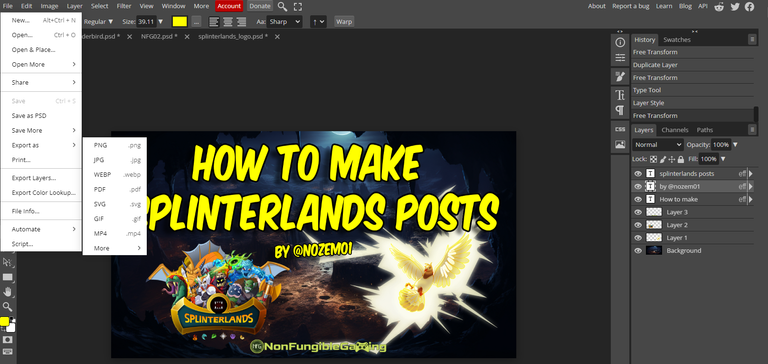
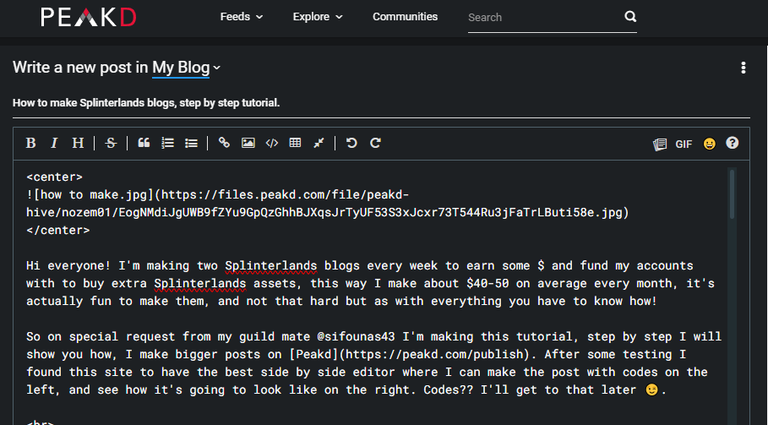
I want to be this to be my main picture so we have to insert it as the first picture in the post, and because I already typed a lot for this post, I have to scroll all the way up again and select upload file, and then select the thumbnail image file.
So at the very top, above all my other text is now the code to insert my thumbnail, remember I talked about codes? by typing < center > above the image code line and < /center > below it (without the spaces of course) you'll make sure your image will always be centered in the middle of the screen, no matter it's size.
If you want to learn more about using Photopea, search YouTube! I learned to make my thumbnails with this great video.
A lot of cool things you can do with codes are explained in this post to make you text layout better, for example when you want to have a empty space between two pieces of text, you can type < br > again, without the spaces of course.


And everything else.. is just trial and error, see what works and what doesn't, the more you'll do this, the better and faster you'll get at it.
I also use banners in between pieces of text because when I don't, my post just becomes one big wall of text that isn't very pleasant to read.
some other banner examples I use (and you can download by right clicking on them):


Join Hive Communities
On hive there are a lot of different communities, you can find a list here and join the ones you like, when you have joined a community, you can directly post in them by selected the community in the top left when using peakd:

By posting in the right community, you can make sure your posts can be found by people interested in the topic, read the community rules before posting!
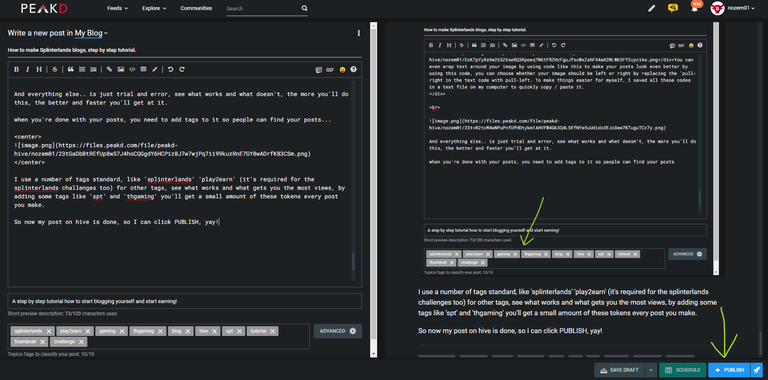
when you're done with your posts, you need to add tags to it so people can find your posts...

I use a number of tags standard, like 'splinterlands' 'play2earn' (it's required for the splinterlands challenges too) for other tags, see what works and what gets you the most views, by adding some tags like 'spt' and 'thgaming' you'll get a small amount of these tokens every post you make.
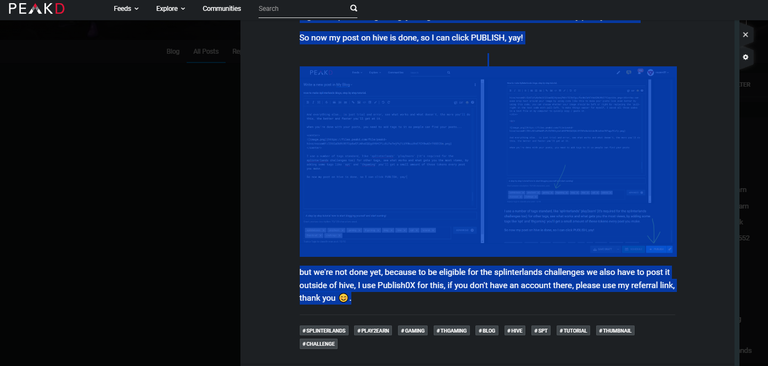
So now my post on hive is done, so I can click PUBLISH, yay!
but we're not done yet, because to be eligible for the splinterlands challenges we also have to post it outside of hive, I use Publish0X for this, and the best thing is, you'll earn a few cents by posting it over there too!! If you don't have an account there, please use my referral link, thank you 😊.
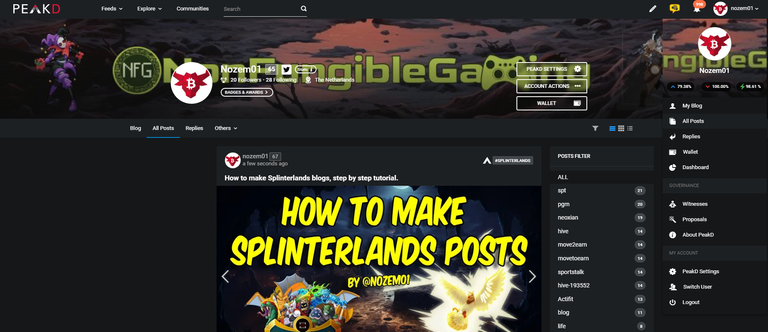
On PeakD, click your account on the top right and select 'all posts' in the dropdown menu and select the post we just made, it could take a while before it shows sometimes.
next, select all pictures and text by dragging everything AAALLLLL the way down..
when you've reached the bottom and selected everything for the post, hit CTRL + C to copy it.
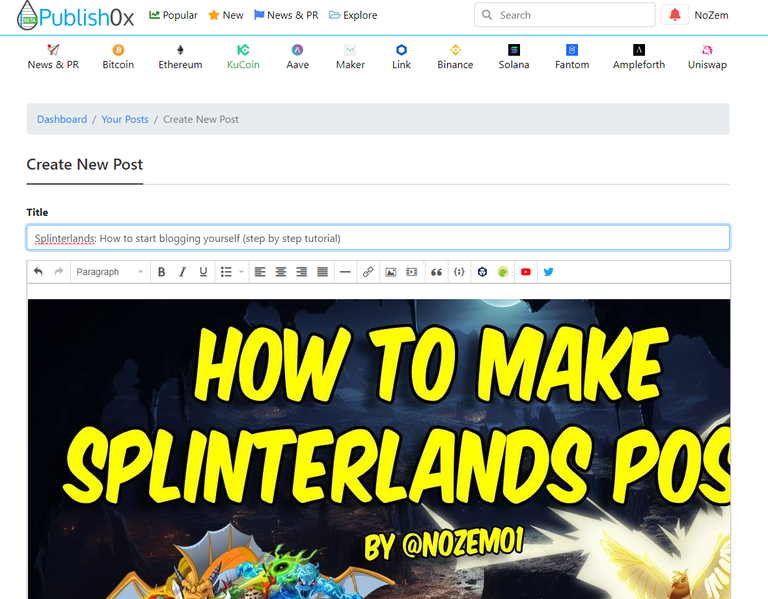
Next, open a new window and visit Publish0X, you'll need an account for this of course (don't forget my ref link 🤗)
Type in the title you want for the post, and click in the main text window, then select CTRL + V to paste your whole post in here.
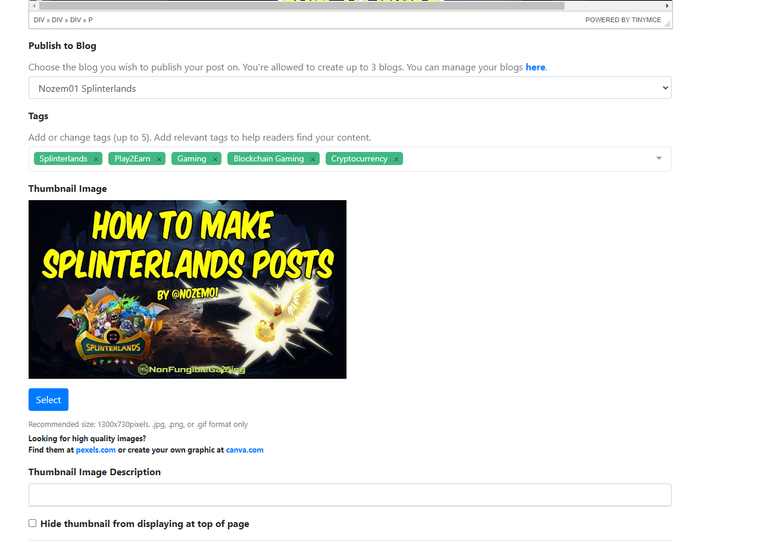
If you haven't made a blog yet, you'll have to start a blog to be able to post in, I just named my blog 'nozem01 splinterlands' other people won't see this I think.
Tags, again, very important, you HAVE to use 'splinterlands' and 'play2earn' next to that I use 3 more, I always try to use the maximum allowed, the more people that can find my post, the more chance of rewards!
Scroll down a bit more and click on 'save & preview' here you can see what your post will look like, it's a different site so the layout will be a bit different too, change if you like, or click 'publish post' to publish.
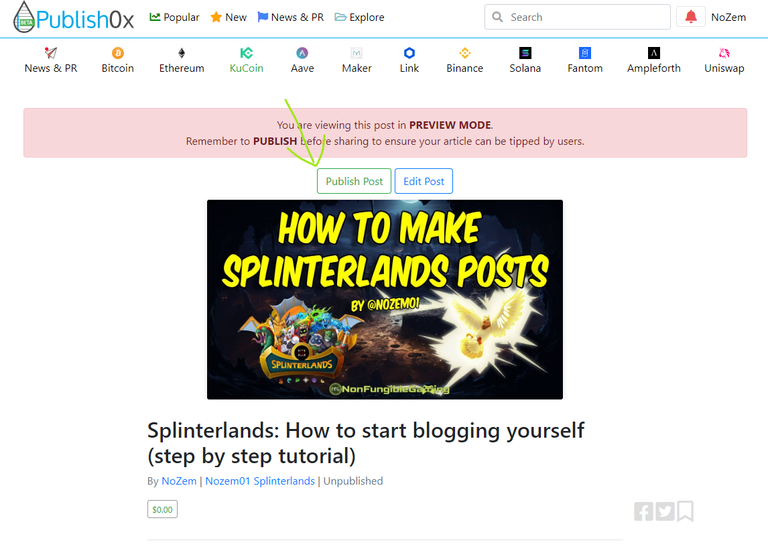
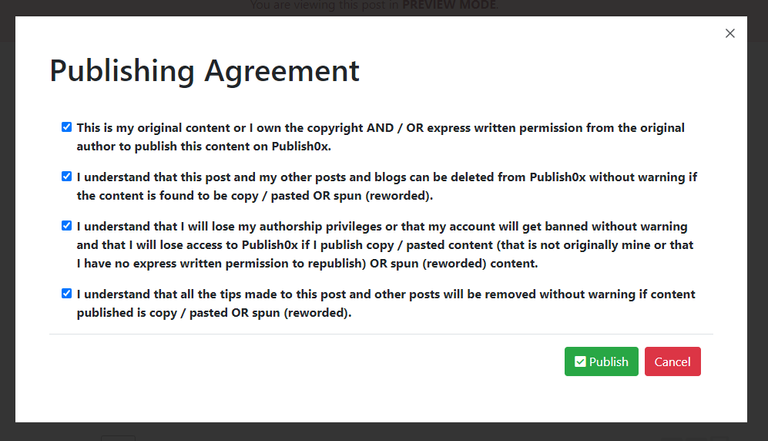
Click all checkboxes in the publishing agreement and click 'publish'.
Almost done!
Only thing we need to do now is to post both links in to the Splinterlands Challenge, so the link to our hive post AND the link to publish0x, it is of course even better to share your posts on other platforms as well like X and Reddit.
Make a comment on the challenge post for this week you're working on which at least contains the two links, my comment is always something like:
My entry for this week:
Hive:
link to my post on hive
Publish0x:
link to my post on publish0x
X:
link to my post on X
Doing this every week, you can earn some extra funds, no guarantee for upvotes though but it's really nice!
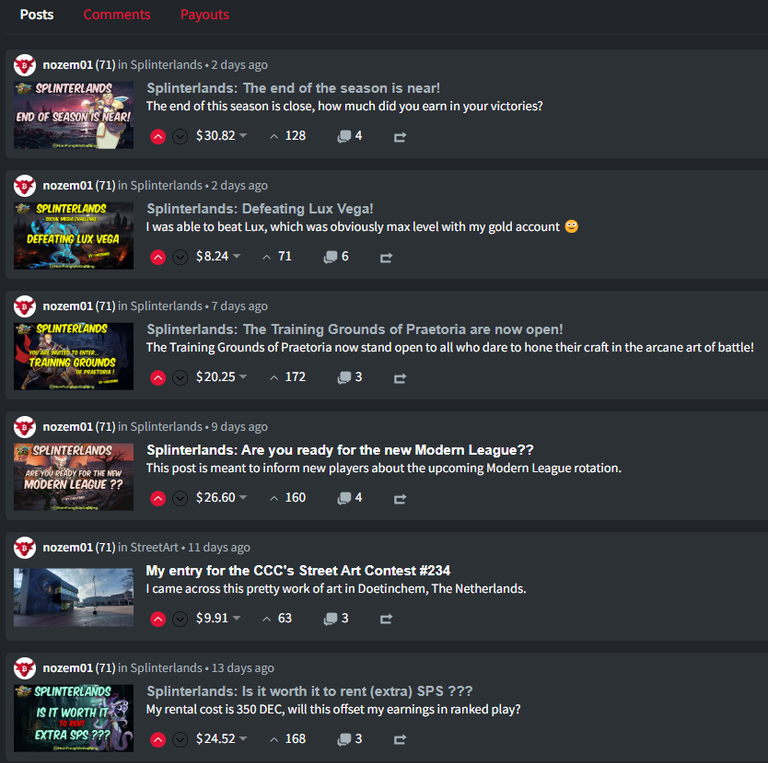
Of course, I'm getting only half but still it's about $17 in one week!
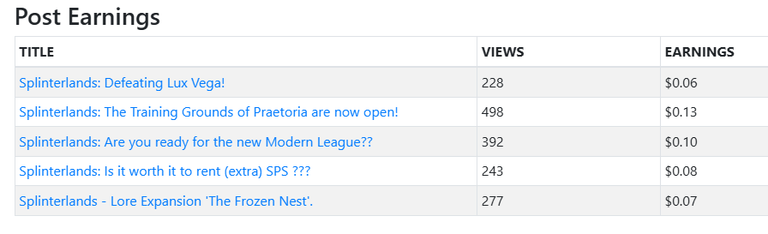
On top of that, the posts on Publish0x also gets rewarded, only a couple of cents but the purpose of making posts like this outside hive is to spread the word and advertise for this awesome game, when the game thrive, we thrive! 🙂
So... I hope this all helps 😃 and sorry for the BIG post! 😅
So, after 7 days you get half of the amount that's under your post, the other half goes to the curators. (that's the people who upvoted your post) You receive half in HBD (Hive Backed Dollar) which is liquid, and the other half in Hive Power, which is staked Hive.
Don't be an extractor!
So, earning is nice, but don't be a leecher and only extract value, there's actually a very good new rule to the challenges:
New Rule: Community Commitment & Reward Eligibility
To ensure the long-term sustainability and growth of the Hive ecosystem, we will evaluate the long-term commitment of participants when selecting winners. Specifically, we will review past rewards earned and currently held Hive Power (HP) as part of the selection process.
Which basically means you will only get upvoted if you have an investor mindset, for me this means spending the HBD I earn in to my Splinterlands account but I am saving all staked hive in to my account to grow so in a while I will be able to upvote other people with more than just a few cents.
So, what's holding you back?
So I hope this post helps you to get started, if you have any issues and require help, let me know in the comments and I'll see if I can help you.
Any reason why you should not start making blog posts? Of course you need the time, and feel like doing so, the reason that held me back was that I am not a native English speaker, but I was convinced by my British friend @alberich to do it anyway, and now, three years later I'm still here!
One more thing left... make a little outro, like a goodbye, and, very important, insert your splinterlands referral link in it! just save this piece of text as you made it the first time to paste in at the end of every post you make, mine looks like this:
Thank you for reading!!!
If you haven't made an account already, please consider using my referral link to sign up, I'll happily send the amount I get for your signup back to you in DEC or SPS to help you start.
Have a great day!
The rewards earned on this comment will go directly to the people( @nozem01 ) sharing the post on Reddit as long as they are registered with @poshtoken. Sign up at https://hiveposh.com. Otherwise, rewards go to the author of the blog post.
Great post and a very interesting point about Publish0x, I should do that as well...
Yeah, it only helps spreading the word for little effort. It pays awfully, no more than 10 cents on most posts with it's better than nothing.
Please consider using my ref link when you do 😁👍
Amazing post! Thanks for being part of Hive.
Have you heard about Block Horse Racing?
There’s a special reward waiting in your wallet to help you start your adventure in the BHR-Game universe.
Let’s create a strong community together on Hive!
Thanks for sharing! - @azircon
