Entonces, ya sin más, empecemos con este dibujo, el cual es uno de mis favoritos… ¡Vamos allá! (˵ •̀ ᴗ •́ ˵ )
Hiii, friends of the Hivearte community... I'm back, fortunately, how are you doing?, I hope very well! I'm super delayed with the uploading of my drawings, this one was done about three months ago and just starting to write this post, sorry, but better late than never, right? Besides, I REALLY wanted to share it with you!
So, without further ado, let's start with this drawing, which is one of my favorites... Here we go! (˵ •̀ ᴗ •́ ˵ )

Les cuento, este dibujo de acá es uno que hice hace cosa de casi un año. Me gustó mucho en su momento, porque sentí que el cabello lo detallé de una forma muy llamativa, y pensaba que era el encanto de ese dibujo. Hace un mes, o un poco más, estaba ordenando mis dibujos a lápiz viejos, y me lo encontré.
Cuando veo mis dibujos después de tanto tiempo, la reacción natural es pensar que estaban un poco feos, con los defectos siendo más notorios que nunca. En este caso, reflexioné que este dibujo viejo no estaba “tan mal”, y me dieron ganas de intentar hacer una cosa: inmortalizarlo en digital y, mejor aún, darle un toque de color para que resultara aún más llamativo, no solo el cabello.
Lo que hice fue tomarle foto a mi dibujo y abrirla en la aplicación de Sketchbook. Una vez ahí, le bajo la opacidad a la imagen y abro otra capa para comenzar el trabajo; porque sí, puede parecer fácil, pero fue una larga tarea de varios días, recuerden que yo dibujo con el dedo, desde mi celular; además de que corregí algunos errores de los cuales no era consciente antes.
Let me tell you, this drawing here is one I did almost a year ago. I liked it a lot at the time, because I felt that I detailed the hair in a very striking way, and I thought that was the charm of that drawing. A month ago or so, I was sorting through my old pencil drawings and I found it.
When I look at my drawings after so long, the natural reaction is to think they were a bit ugly, with the flaws being more noticeable than ever. In this case, I realized that this old drawing wasn't “so bad”, and I felt like trying to do one thing: immortalize it in digital and, better yet, give it a touch of color to make it even more striking, not just the hair.
What I did was to take a picture of my drawing and open it in the Sketchbook app. Once there, I lower the opacity of the image and open another layer to start working; because yes, it may seem easy, but it was a long task of several days, remember that I draw with my finger, from my cell phone; plus I corrected some errors of which I was not aware before.
Proceso (˵ •̀ ᴗ •́ ˵ )
Entre los colores de Sketchbook, encontré una paleta de colores muy amplia, la cual contenía colores entre el rojo y el naranja. Nunca he tenido idea de como usar paletas de colores, porque nunca me había permitido experimentar mucho con colores, pero decidí intentar usar esta paleta para mi dibujo, guiándome solo de mi intuición.
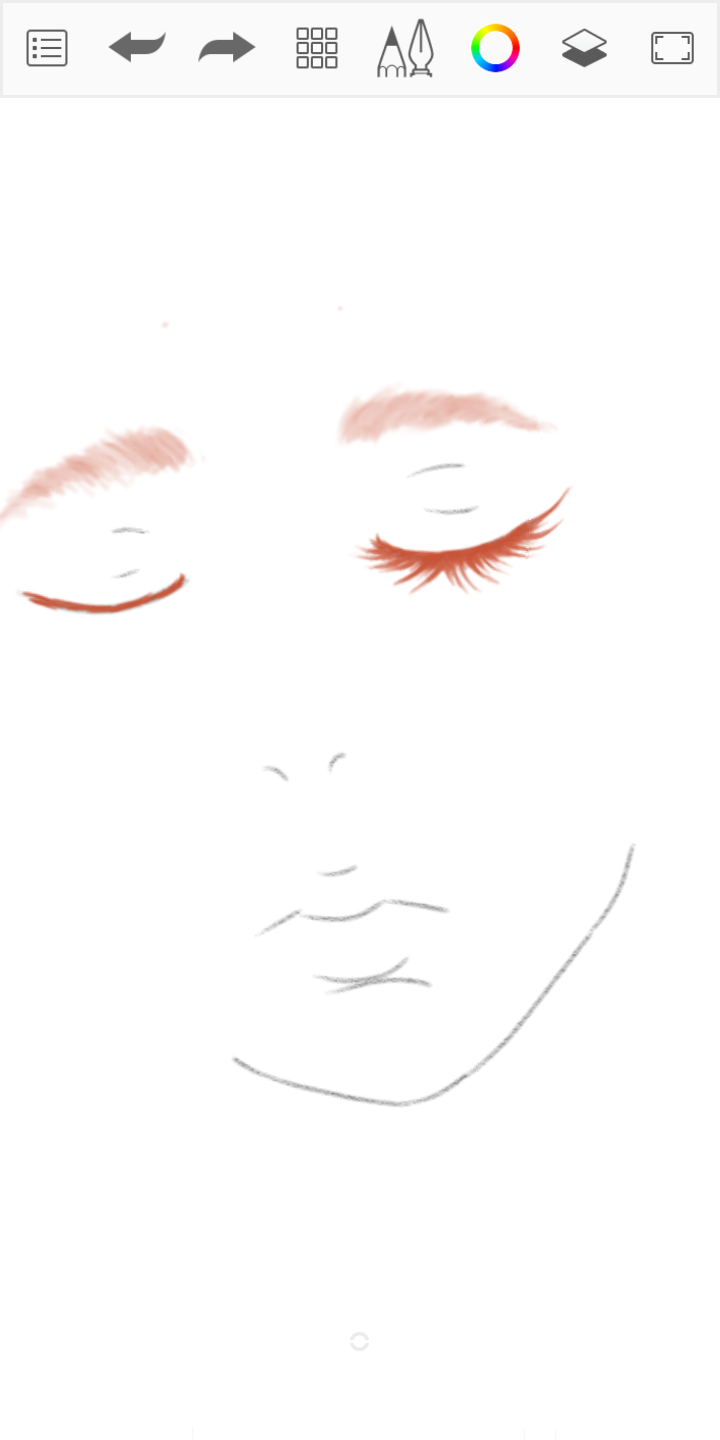
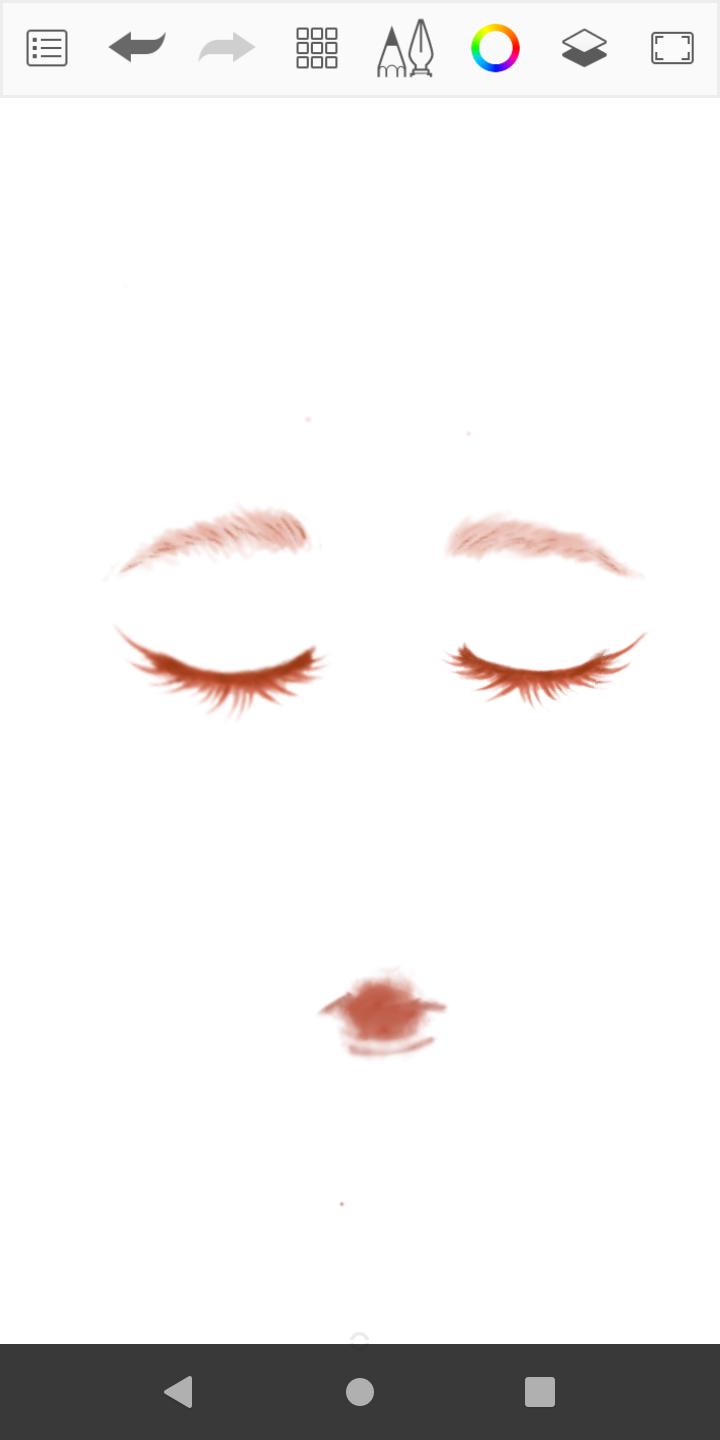
Por alguna razón, comencé dibujando las cejas, con trazos cortos y pequeños, intentando seguir la forma de una ceja. Cuando sentí que parecían cejas lo suficiente, pasé a remarcar los ojos. Esto que hice es algo que no recomiendo: fijarse demasiado en perfeccionar un elemento del dibujo sin al menos hacer un bosquejo de los demás. Pero bueno, era uno de mis primeros dibujos más "complejos" en digital, por lo que experiencia no sobraba.
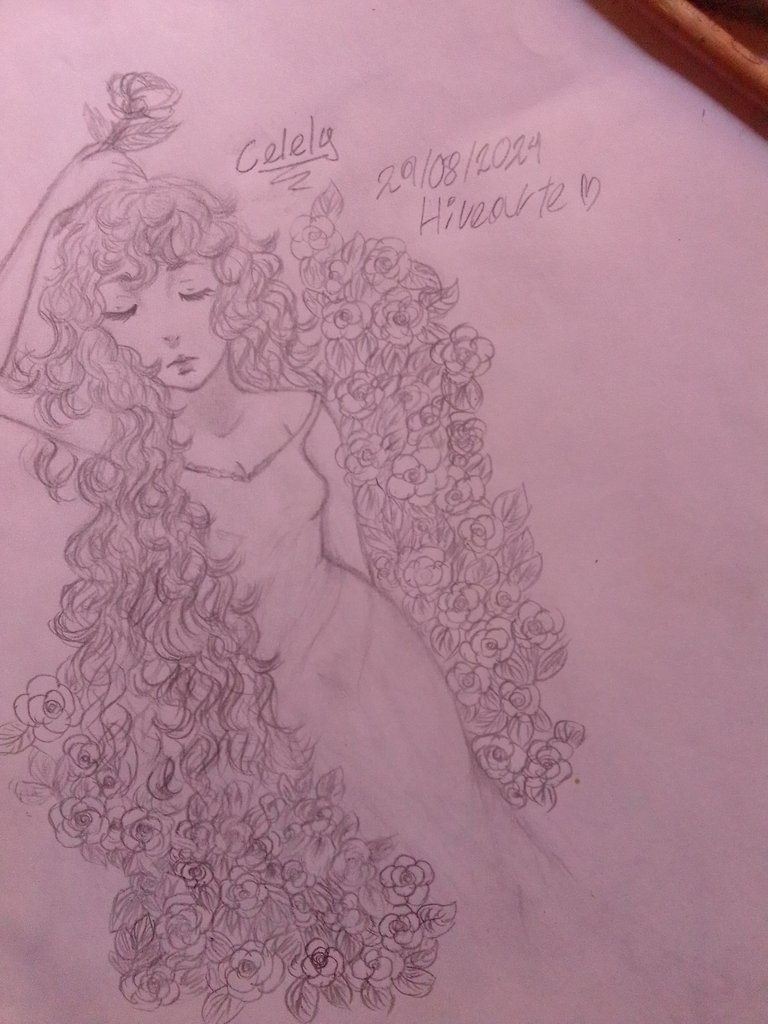
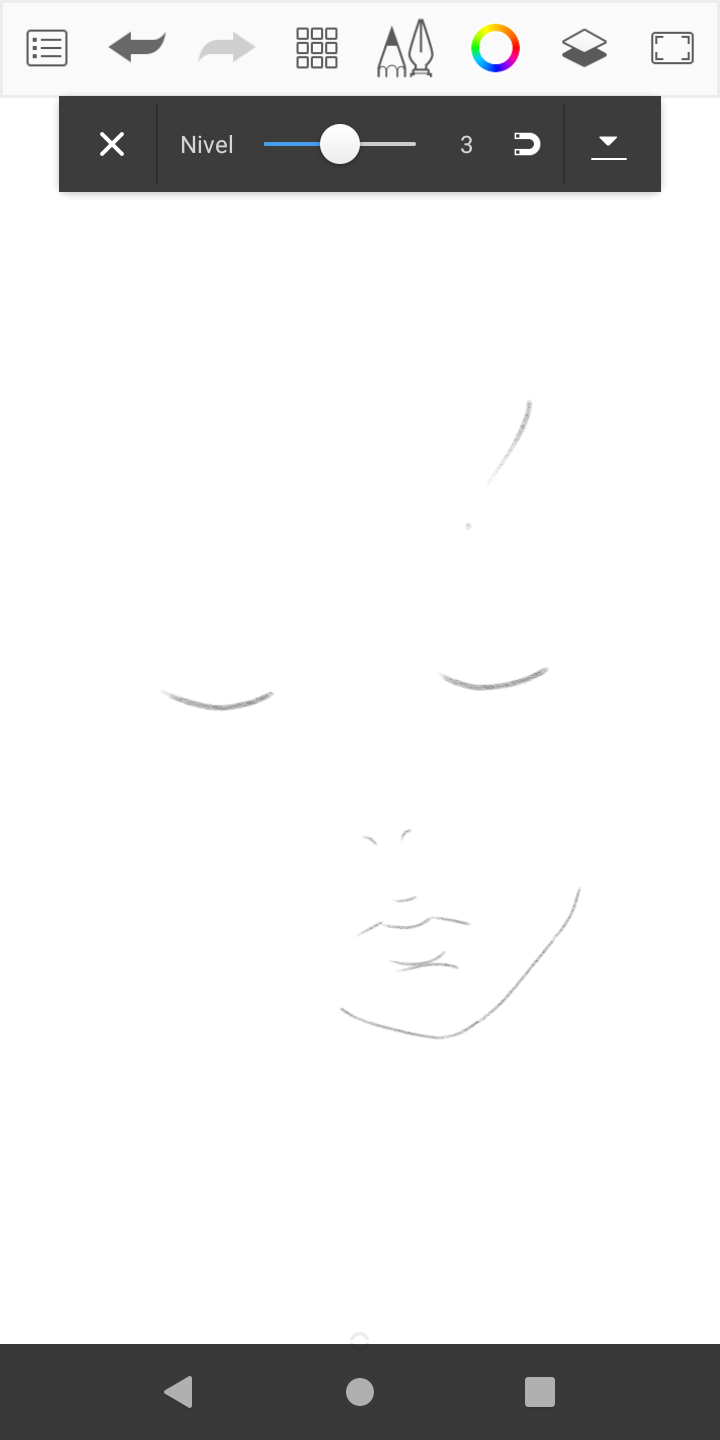
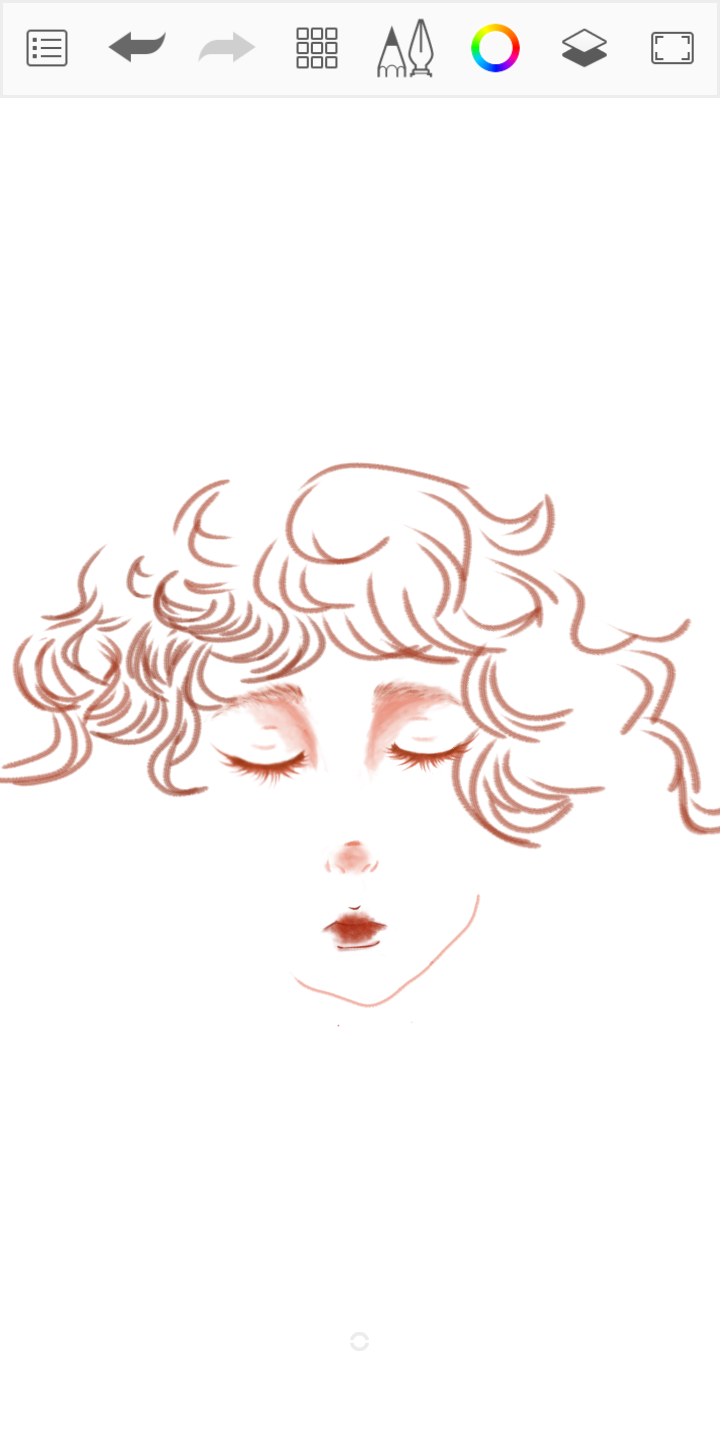
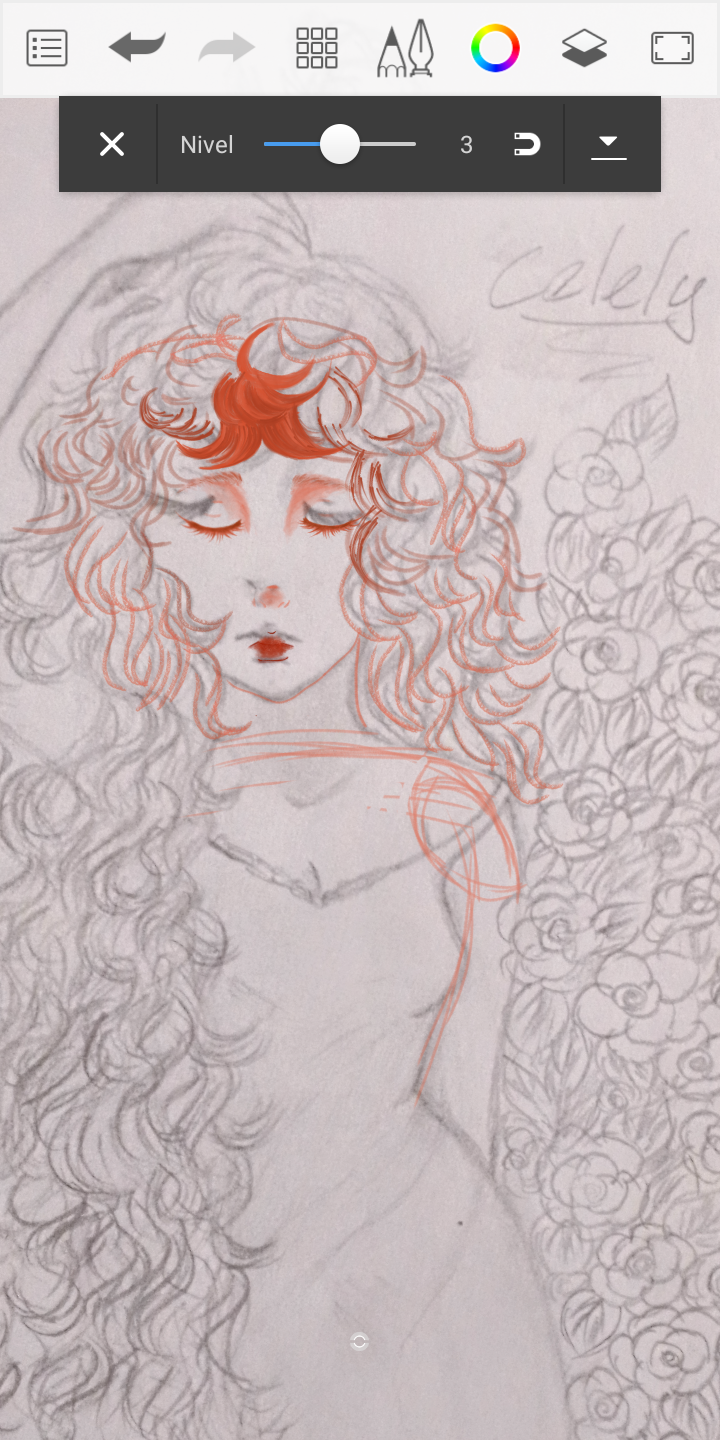
I started by tracing the most striking features of the face, with a gray color, just as a guide. The first thing I noticed was that, in the original drawing, the eyes were in the wrong position, so I straightened them with the “select” tool and then the “transform” tool, which is useful to mold a line to our liking, as far as possible. This is one of the things I like about digital drawing: mistakes can be repaired quickly and leaving no trace.
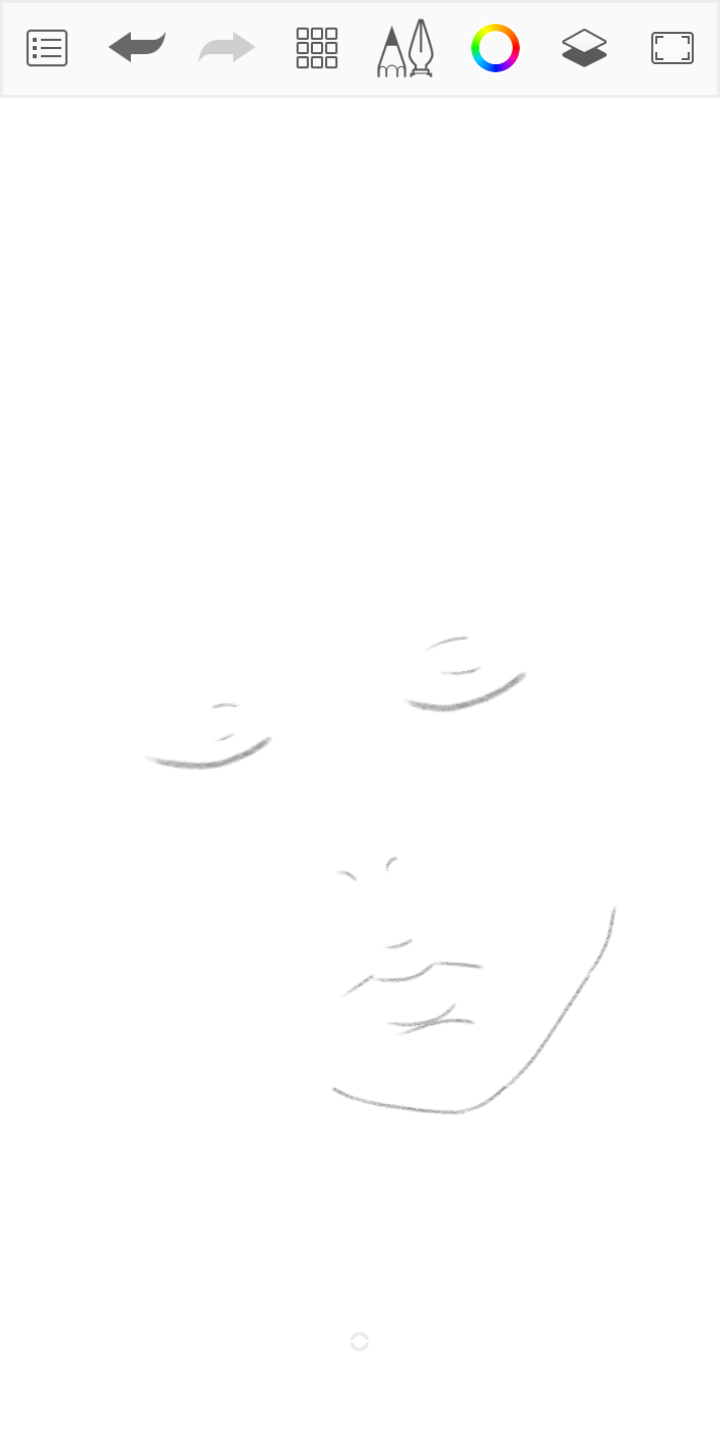
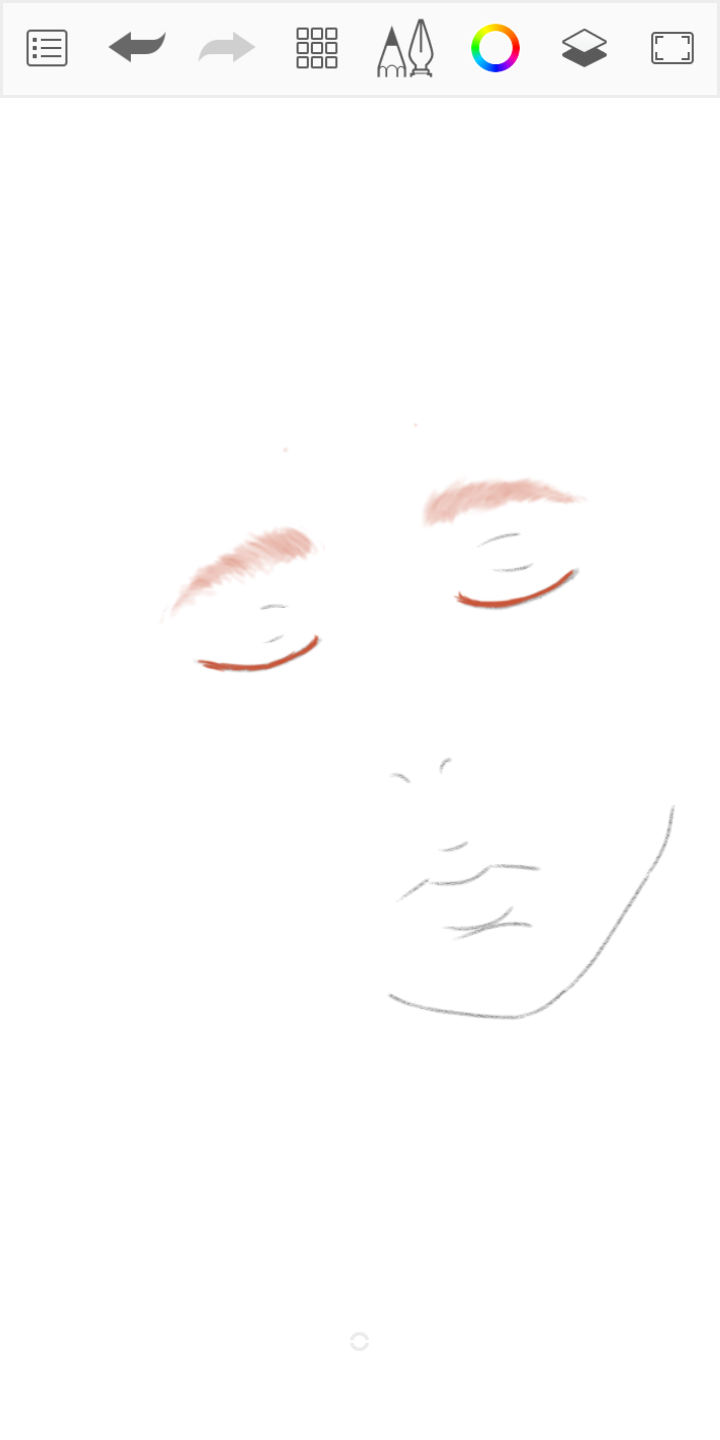
Among the colors in Sketchbook, I found a very wide color palette, which contained colors between red and orange. I've never had any idea how to use color palettes, because I had never allowed myself to experiment much with colors, but I decided to try to use this palette for my drawing, guided only by my intuition.
For some reason, I started by drawing the eyebrows, with short, small strokes, trying to follow the shape of an eyebrow. When I felt they looked enough like eyebrows, I moved on to highlighting the eyes. This is something I don't recommend: focusing too much on perfecting one element of the drawing without at least sketching the others. But well, it was one of my first more “complex” digital drawings, so there wasn't plenty of experience.
 |  |
|---|---|
 |  |
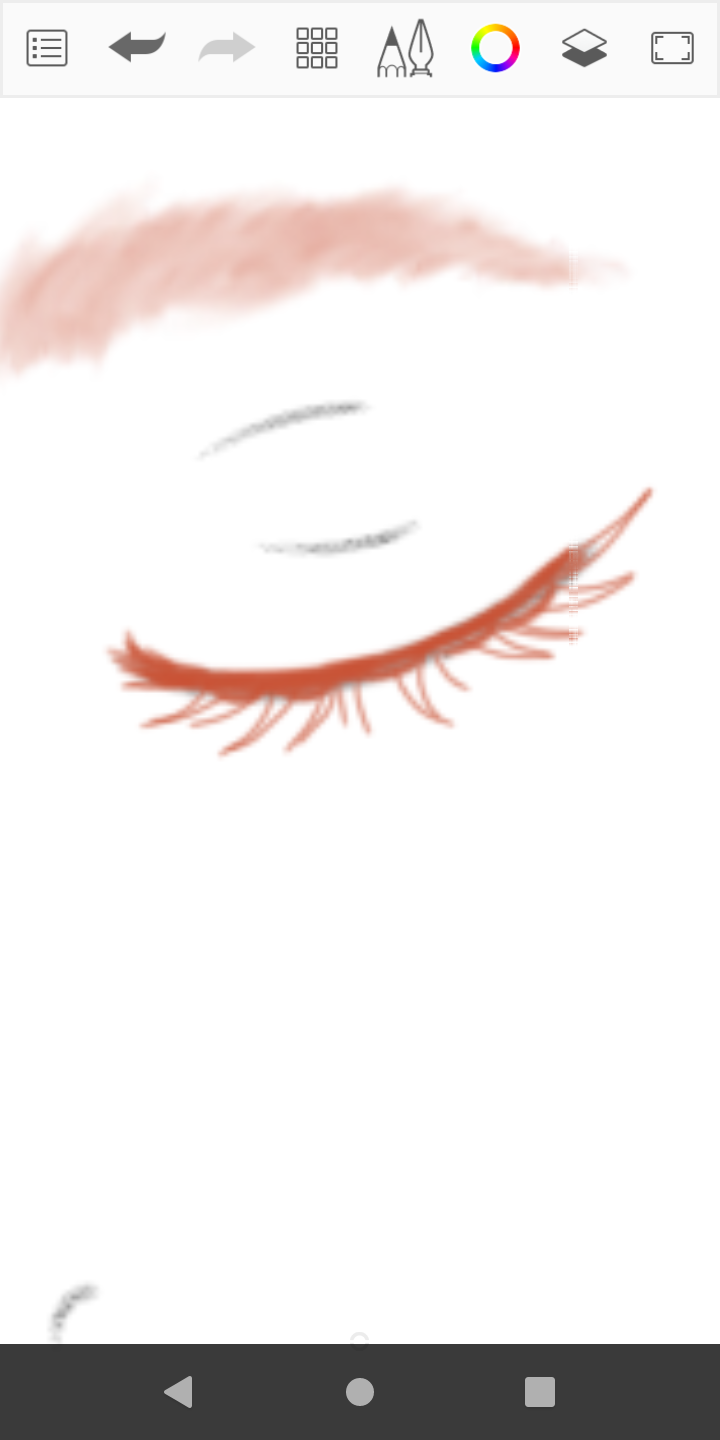
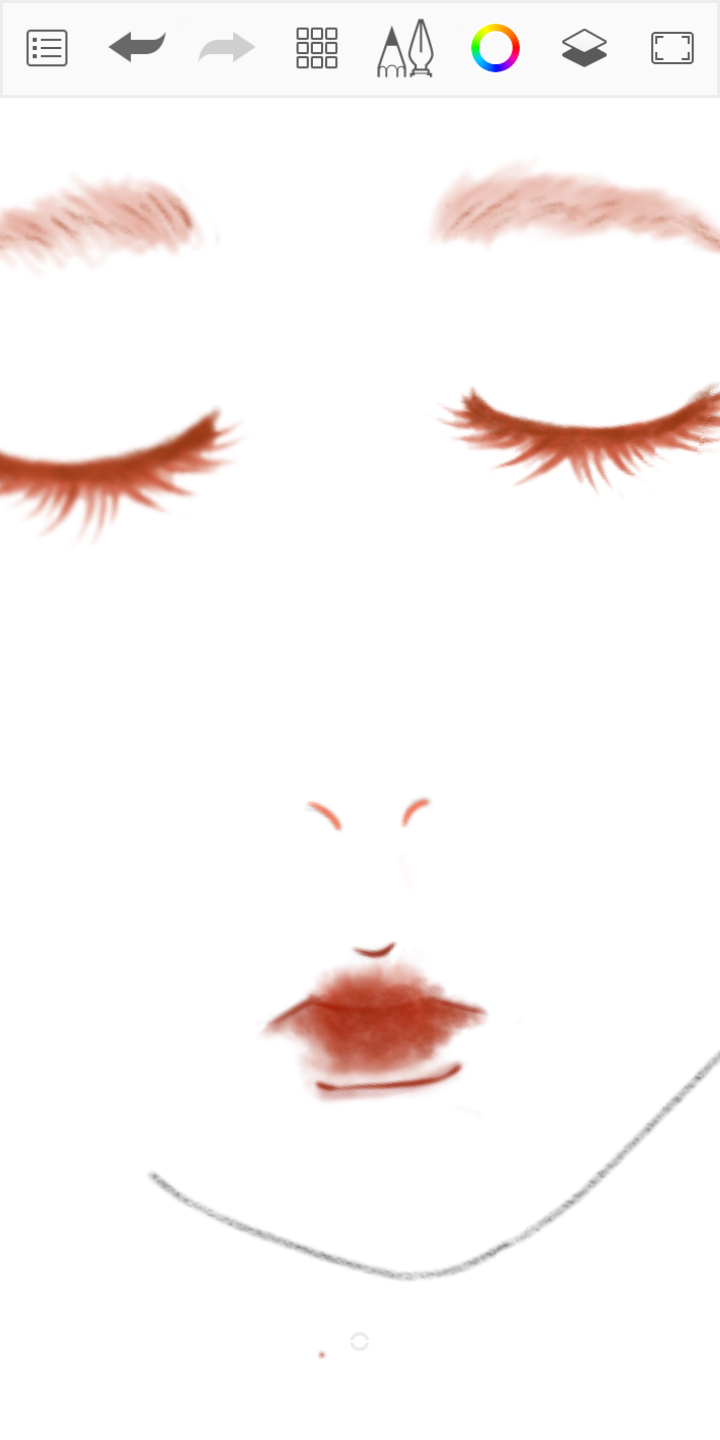
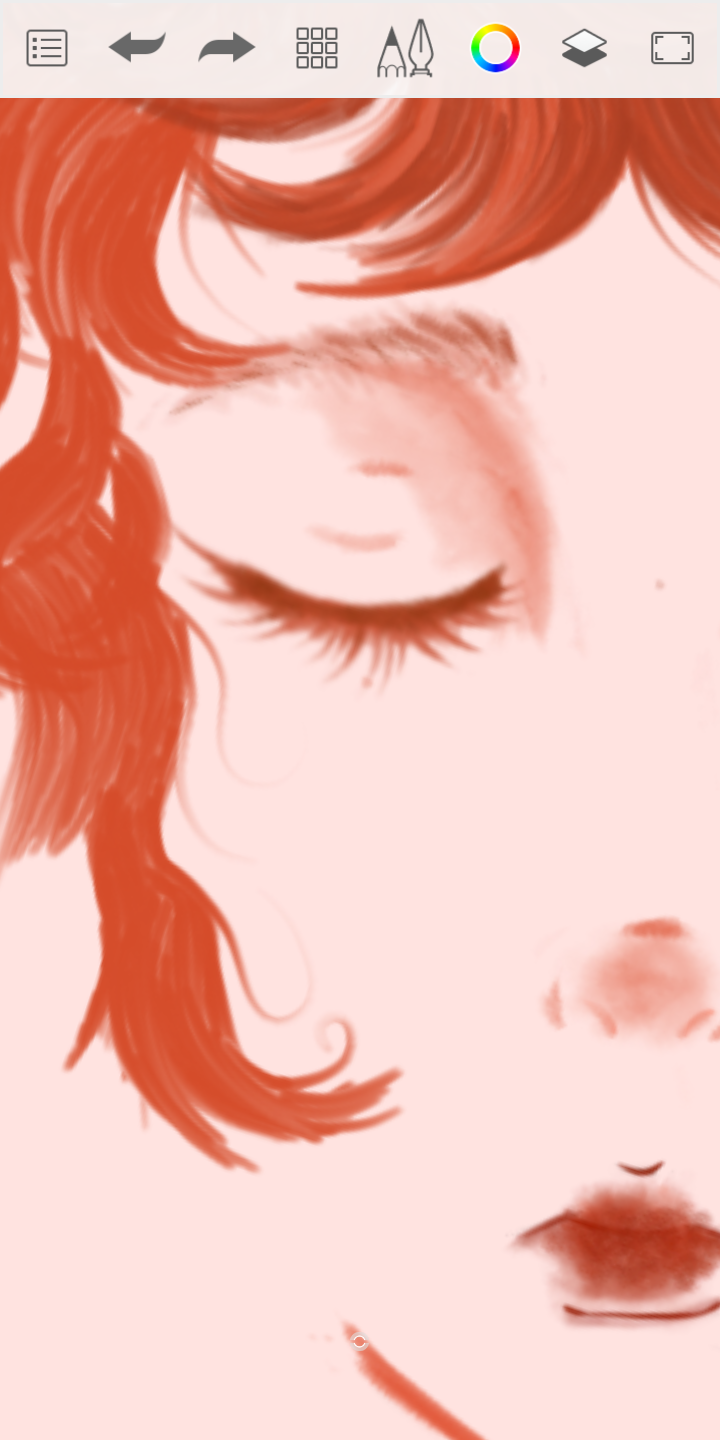
Luego, hice un bosquejo de lo que serían las pestañas.
Las pestañas eran un elemento que se me complicaba demasiado en los dibujos en digital, pues yo no tenía manera de hacer que me quedaran trazos delgaditos, y terminaba viéndose muy feo todo.
Para hacer las pestañas yo tomé un pincel de esos que dejan un acabado como si estuvieras pintando con témperas, y le bajé el tamaño y la fluidez al mínimo, esto haría que el trazo fuera muy corto y bastante delgado. Sin embargo, esto no es suficiente para que quede tan delgado como una pestaña, por lo cual yo suelo usar luego la herramienta de "goma de borrar blanda", y la pongo en tamaño mínimo, entonces procedo a pasarla rápida y delicadamente en la punta de cada grupo de pestañas. Así es como deja un acabado de "picos" en la punta de las pestañas.
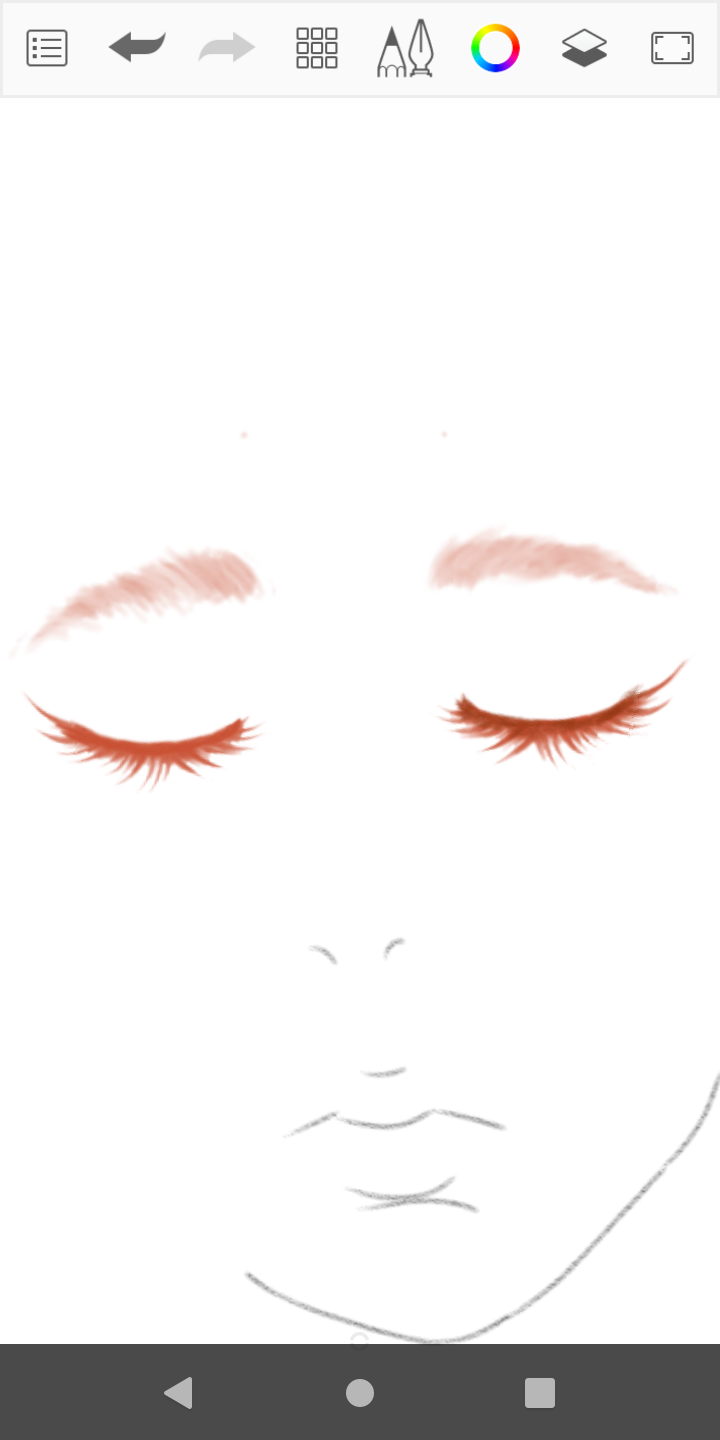
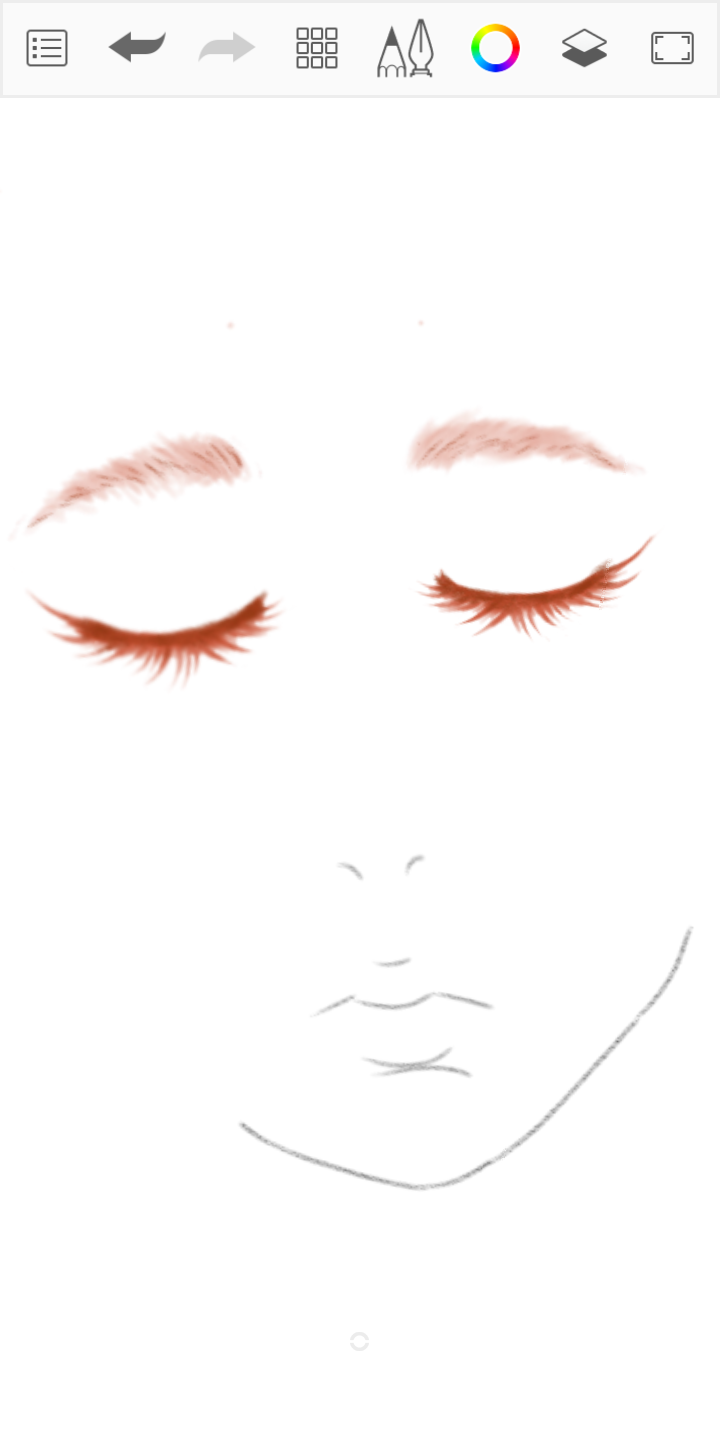
Una vez que ya hice las pestañas, paso ahora el pincel con un color más oscuro, solo haciendo algunos trazos aquí y allá, la idea es solo darle unos detalles más oscuros a las pestañas, de manera que parezcan pelos más oscuros. Y luego, con un color más claro, repito el proceso en otras áreas, para dar pequeños brillos y pelos más claros. Todo este proceso lo estoy haciendo con el Zoom muy alto, entonces es algo prácticamente imperceptible, pero me gusta pensar que este detalle va a cambiar el acabado del dibujo.
No sé si se ha entendido la explicación de las pestañas, intento ser clara.
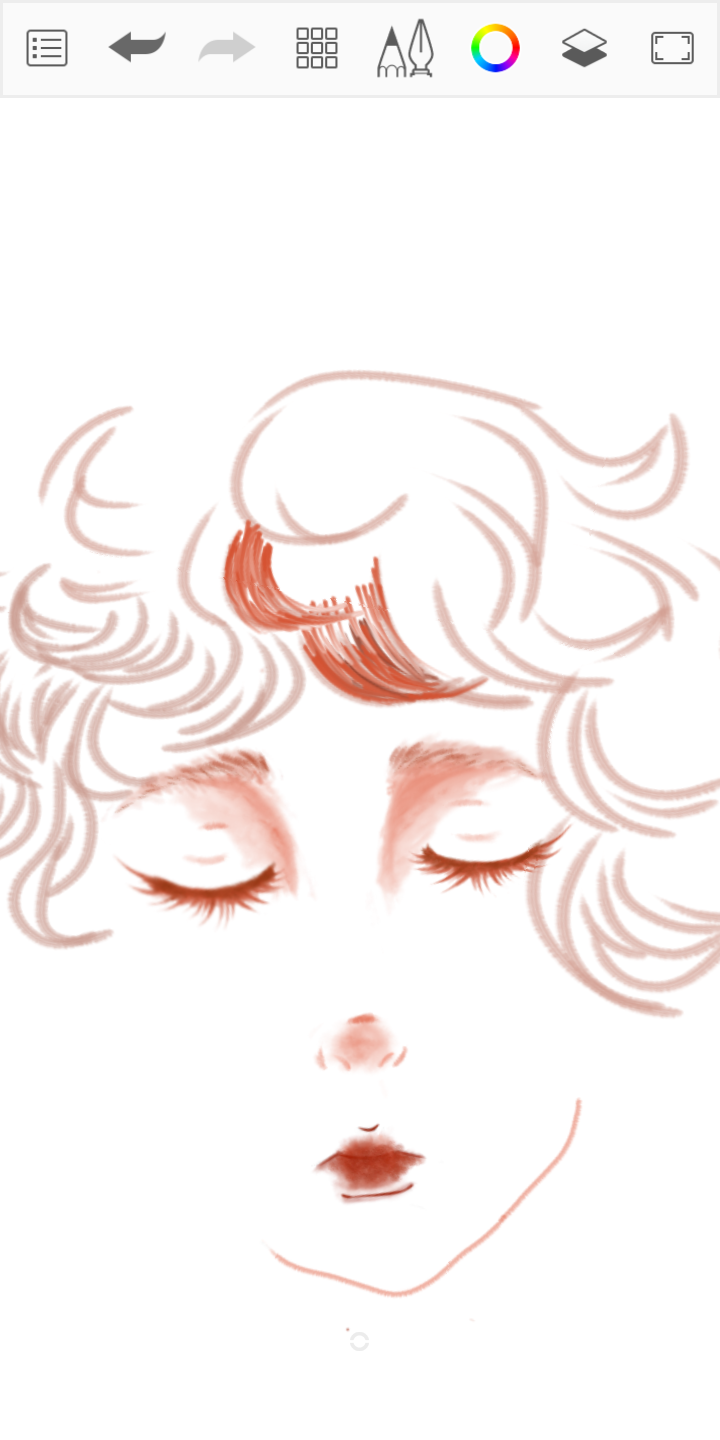
Then, I made a sketch of what would be the eyelashes.
The eyelashes were an element that was too complicated for me in digital drawings, because I had no way of making thin strokes, and it ended up looking very ugly.
To do the eyelashes I took one of those brushes that leave a finish as if you were painting with tempera, and I lowered the size and fluidity to the minimum, this would make the stroke very short and quite thin. However, this is not enough to make it as thin as an eyelash, so I usually then use the “soft eraser” tool, and set it to minimum size, then proceed to quickly and gently run it over the tip of each group of eyelashes. This is how it leaves a “spiky” finish on the tip of the lashes.
Once I've done the lashes, I pass the brush with a darker color, just making a few strokes here and there, the idea is just to give some darker details to the lashes, so that they look like darker hairs. And then, with a lighter color, I repeat the process in other areas, to give little shimmers and lighter hairs. I am doing all this process very zoomed in, so it is something practically imperceptible, but I like to think that this detail is going to change the finish of the drawing.
I don't know if the explanation of the eyelashes has been understood, I tried to be as clear as possible.
 |  |
|---|---|
 |  |
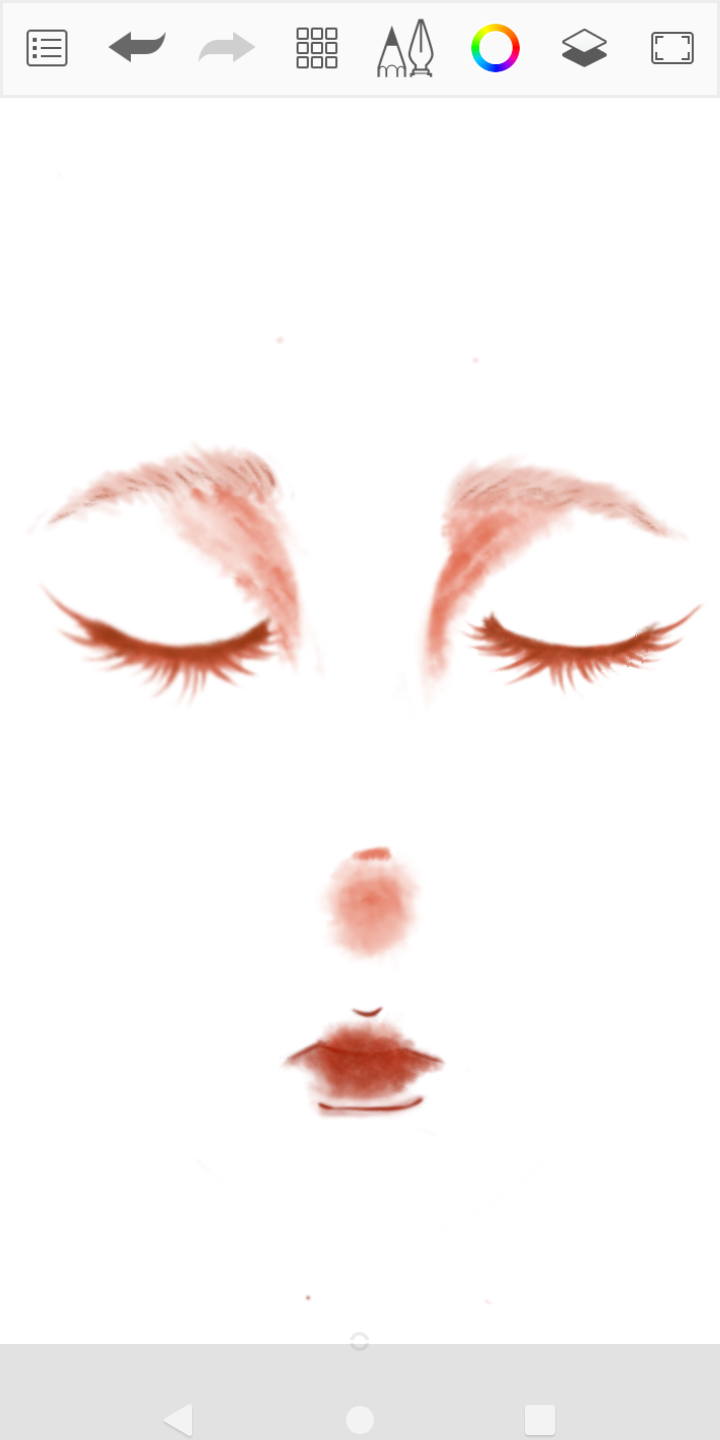
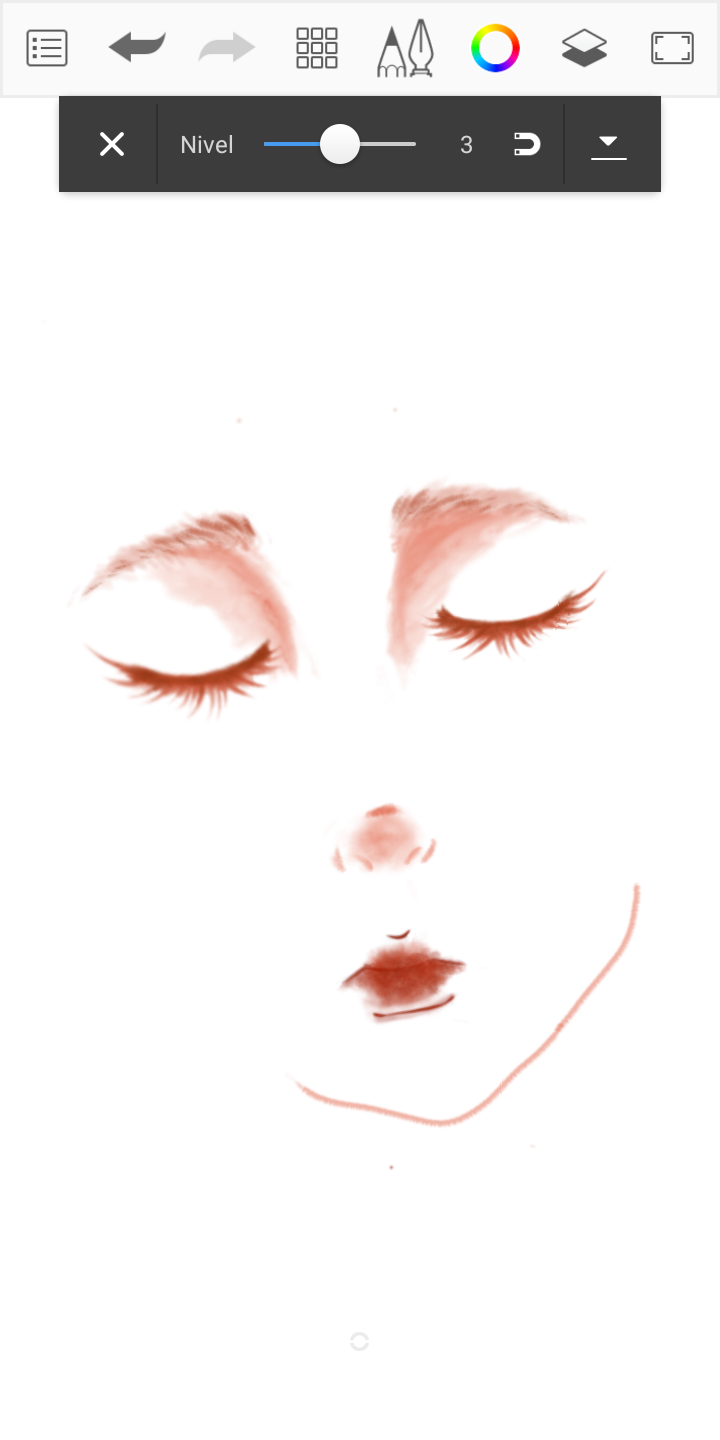
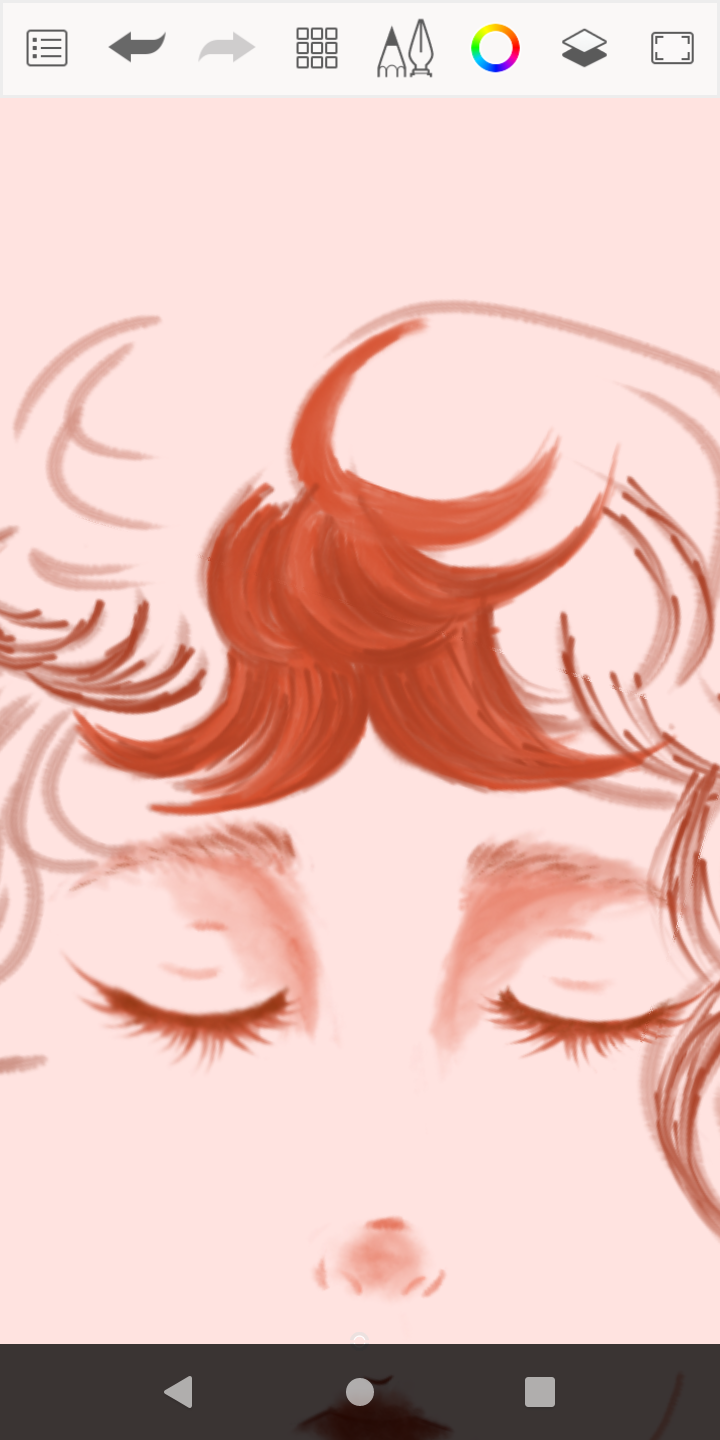
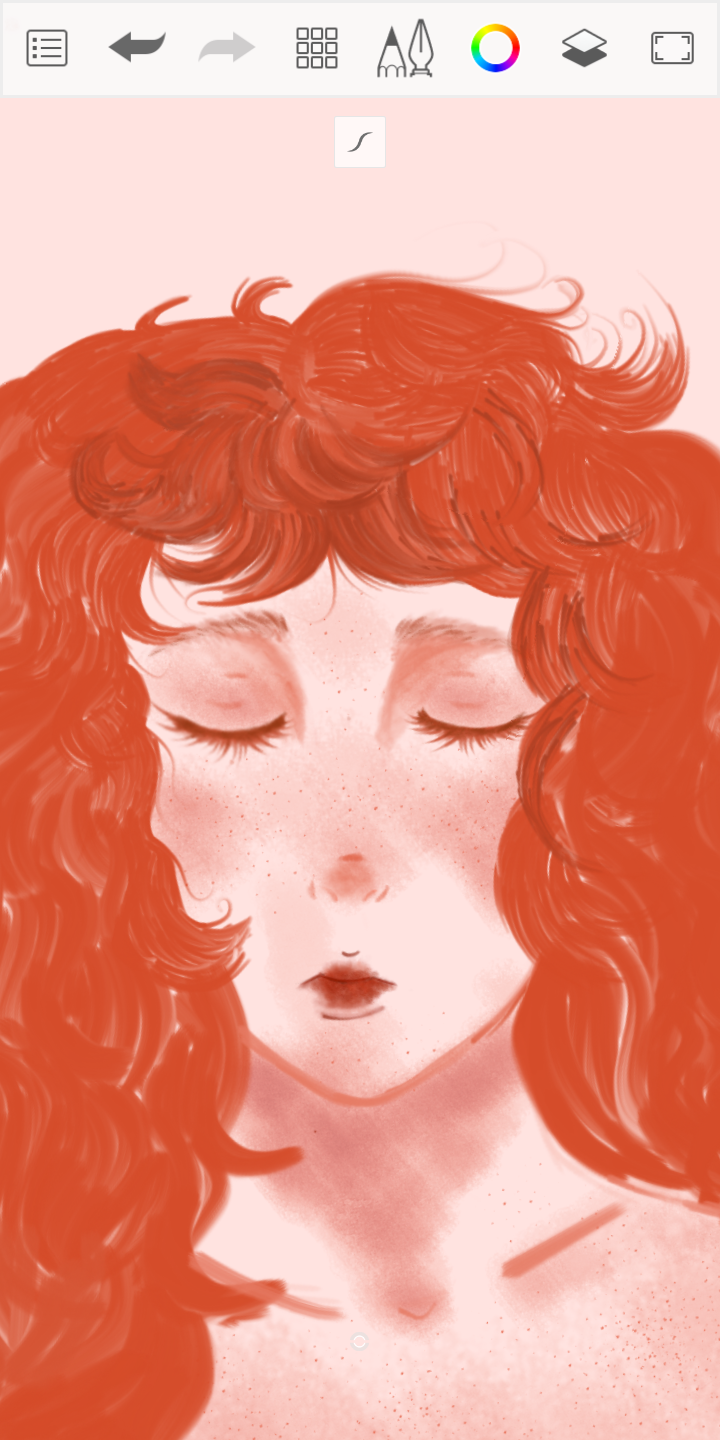
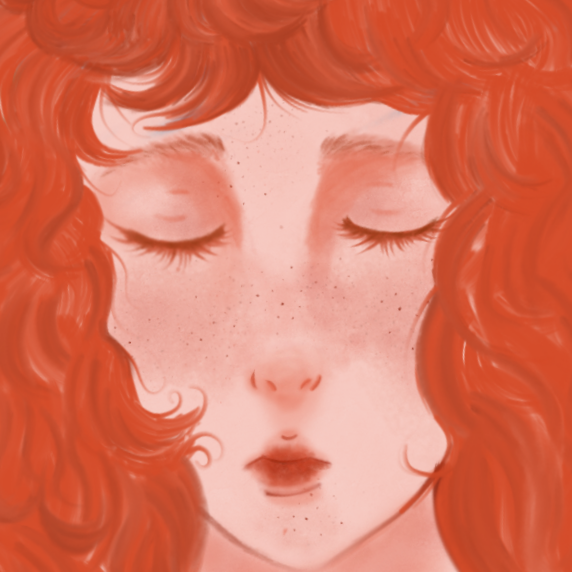
Los labios son más simples de explicar. Tomé el pincel que se llama “acuarela de sal” y lo apliqué a toquecitos en toda el área donde van los labios. Luego, con un lápiz con un color más oscuro, tracé los detalles de los labios. También detallé un poco lo que vendrían siendo las fosas nasales, con ese mismo lápiz pero con un color anaranjado.
Añadí algunos detalles en la nariz e intenté trazar lo que vendría siendo la mandíbula y barbilla.
Con el pincel de “acuarela de sal”, nuevamente, me encargué de añadir las sombras del rostro, todo a toquecitos y difuminando un poco las áreas donde, según yo, la sombra sería más ligera.
Con esto ya estaría listo el rostro.
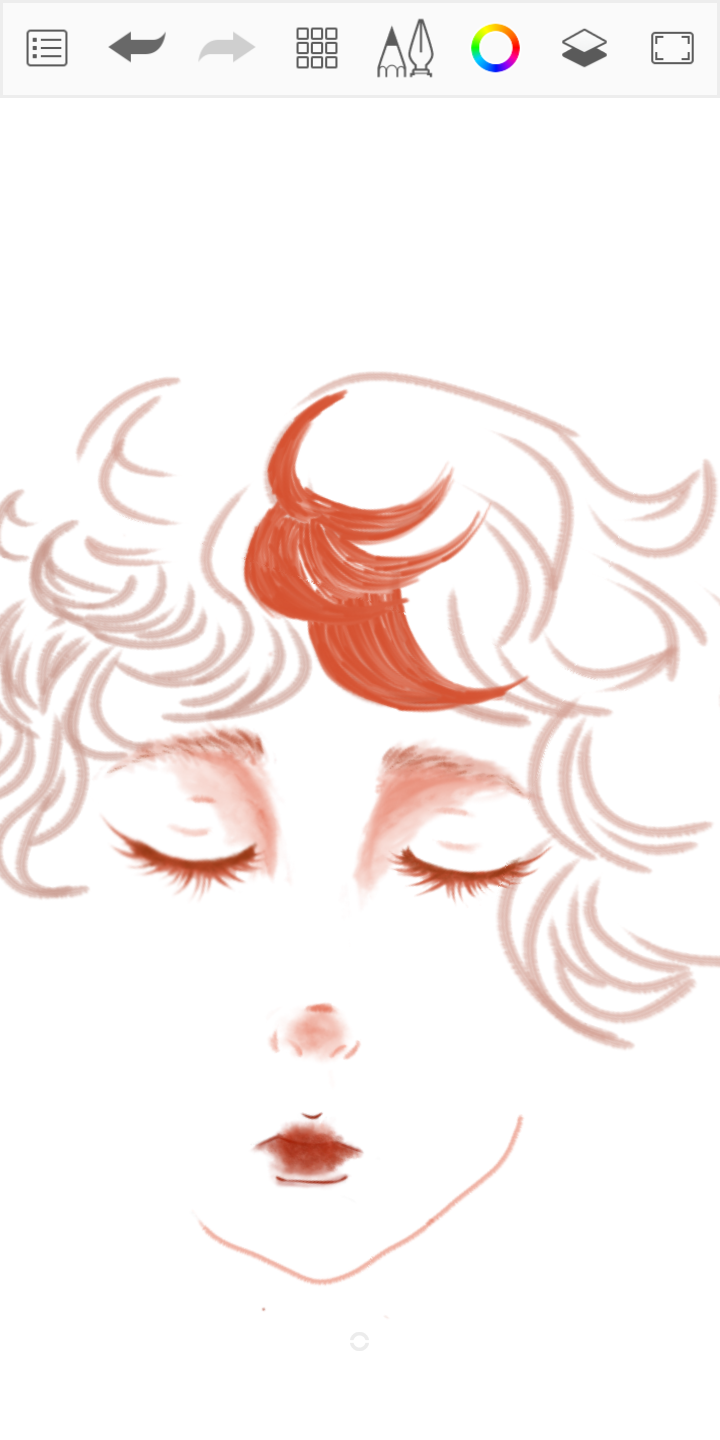
The lips are simpler to explain. I took the brush called “salt watercolor” and dabbed it all over the area where the lips go. Then, with a darker color pencil, I traced the details of the lips. I also detailed a little bit what would be the nostrils, using the same pencil but with an orange color.
I added some details to the nose and tried to trace what would become the jaw and chin.
With the “salt watercolor” brush, again, I added the shadows of the face, all in small touches and blurring a little the areas where, according to me, the shadow would be lighter.
With this, the face was ready.
 |  |
|---|---|
 |  |
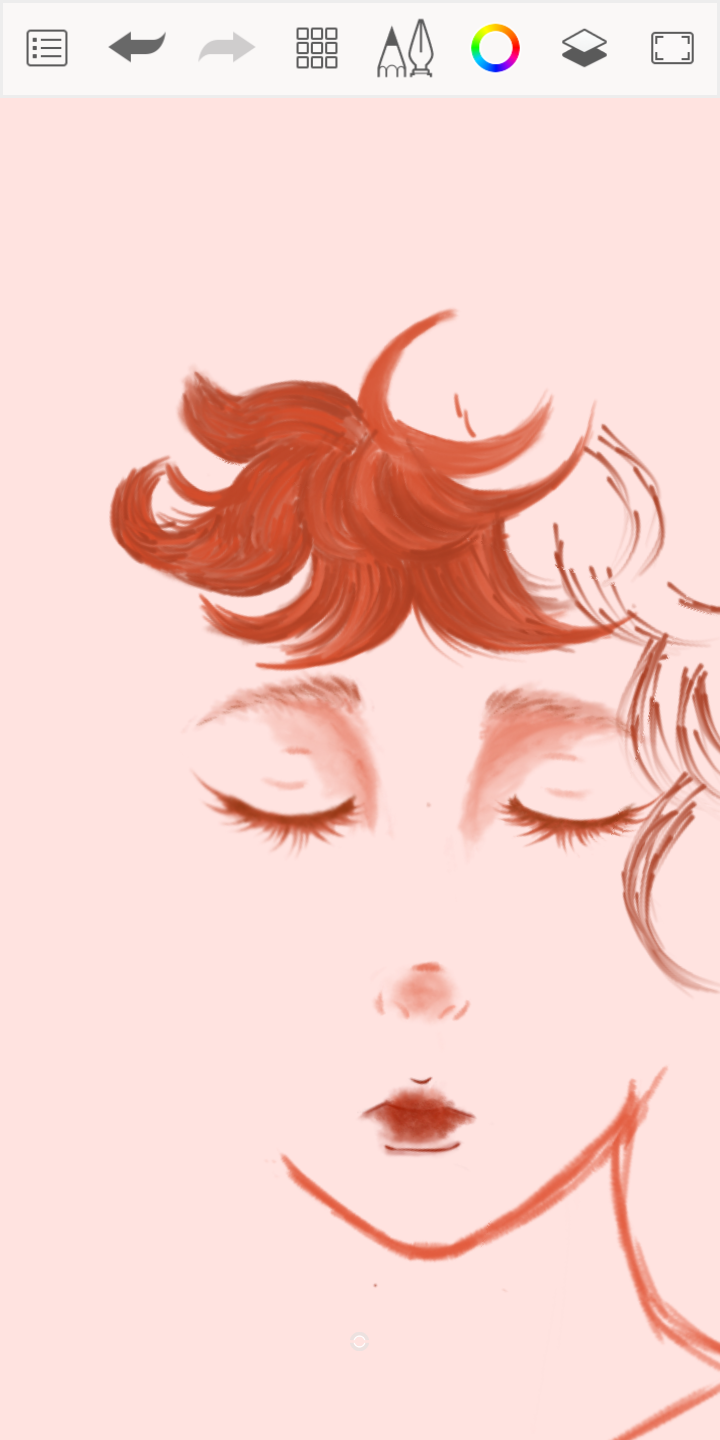
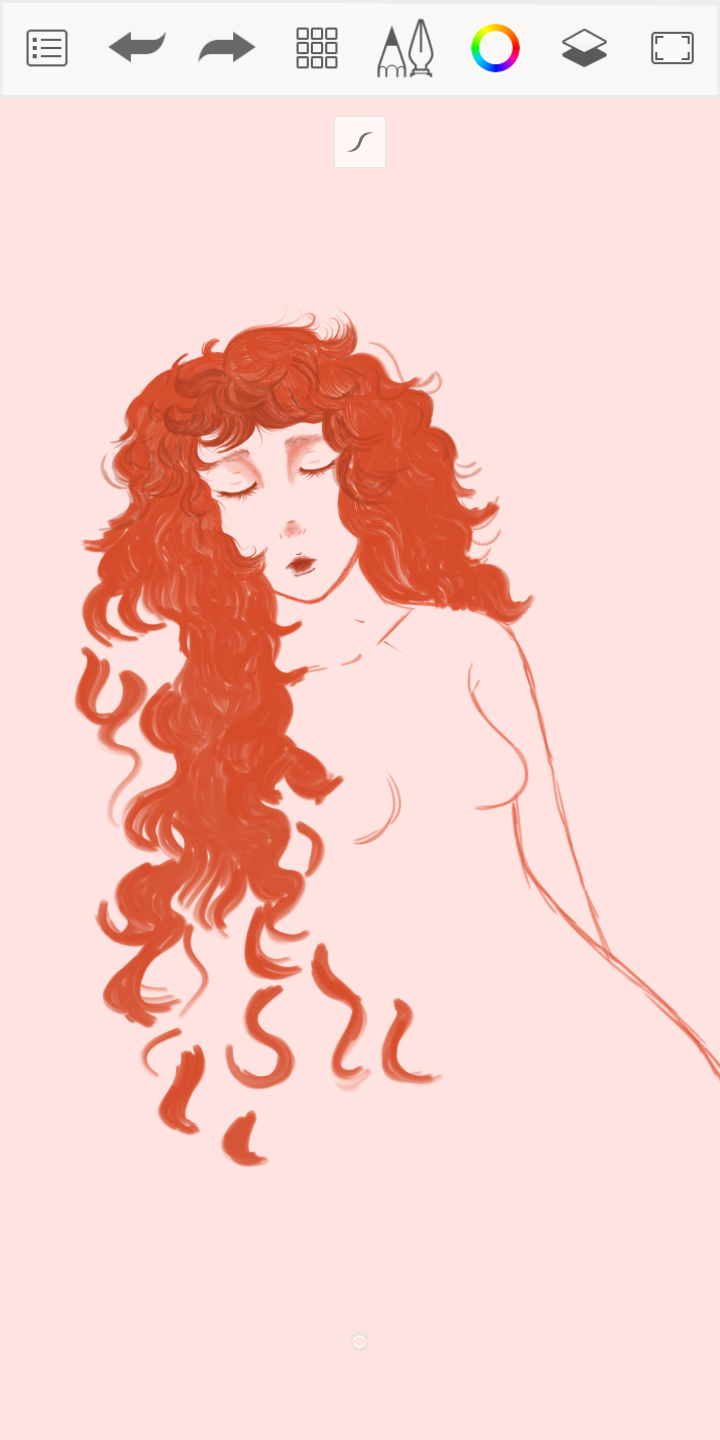
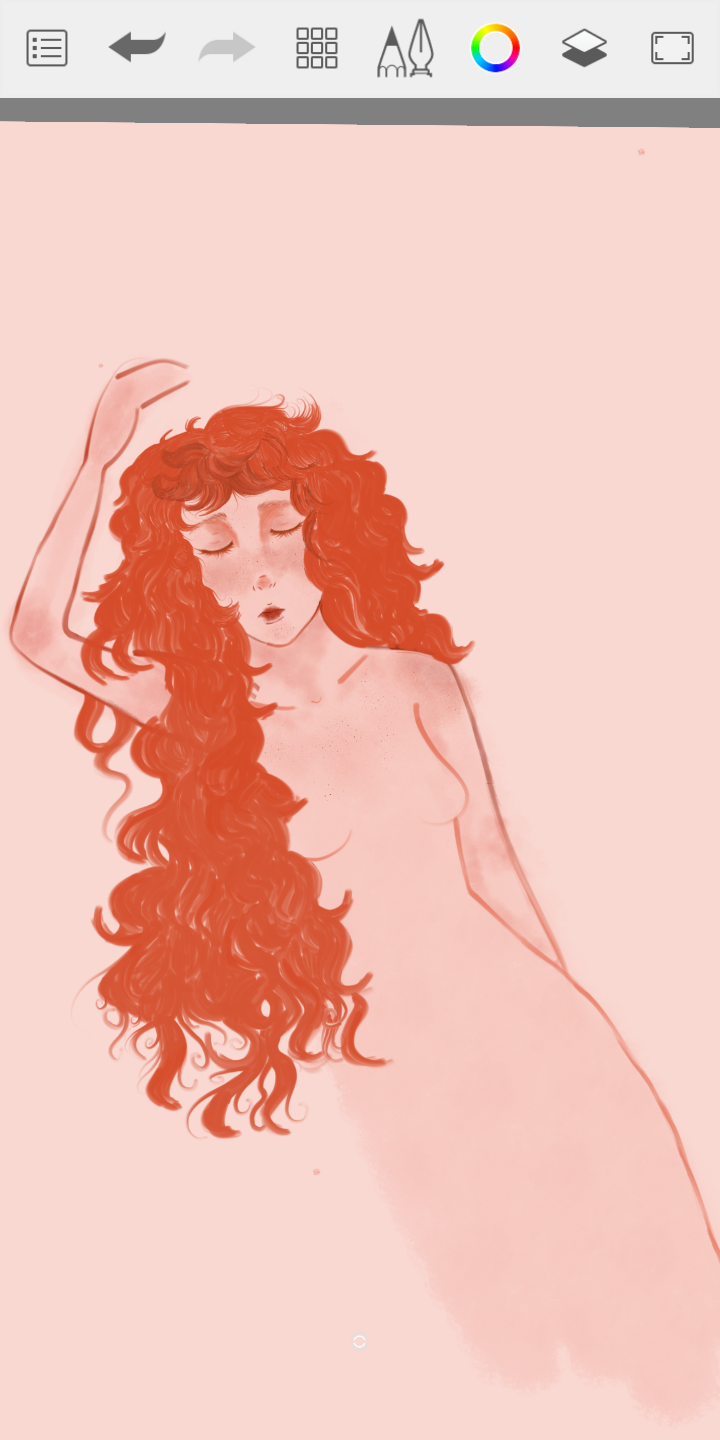
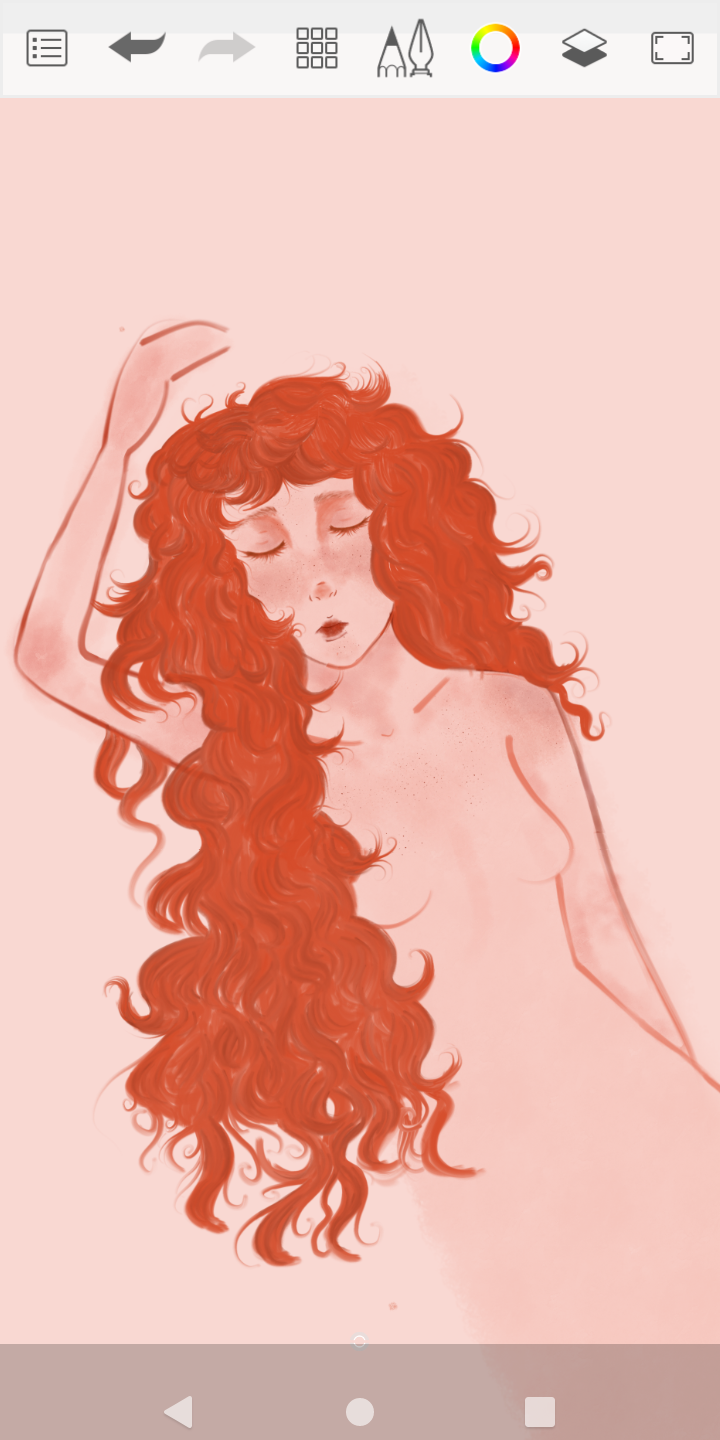
El cabello: la parte más complicada de todo el dibujo y la que me tomó como 2 días en completar.
Este elemento fue tan difícil de dibujar, porque era la primera vez que intentaba dibujar cabello rizado u ondulado en digital, por lo que todo el proceso se trató sobre experimentar.
Aquí lo explicaré de manera simple.
Primero, hice un bosquejo del cabello, su forma y en qué direcciones iba a estar orientado. Esta capa solo sirvió como guía.
Con uno de los pinceles que dejan "acabado de témpera", me encargué de hacer pequeños trazos que irían siguiendo la dirección de los cabellos, guiándome del bosquejo. En el área del flequillo quise que se viera perfecto, entonces utilicé un pincel muy pequeño, intentando detallar todo en la medida de lo posible. Luego, con un color más oscuro que el del cabello, intenté añadir una especie de sombras, y estas las difuminaba hacia donde se orientan los cabellos.
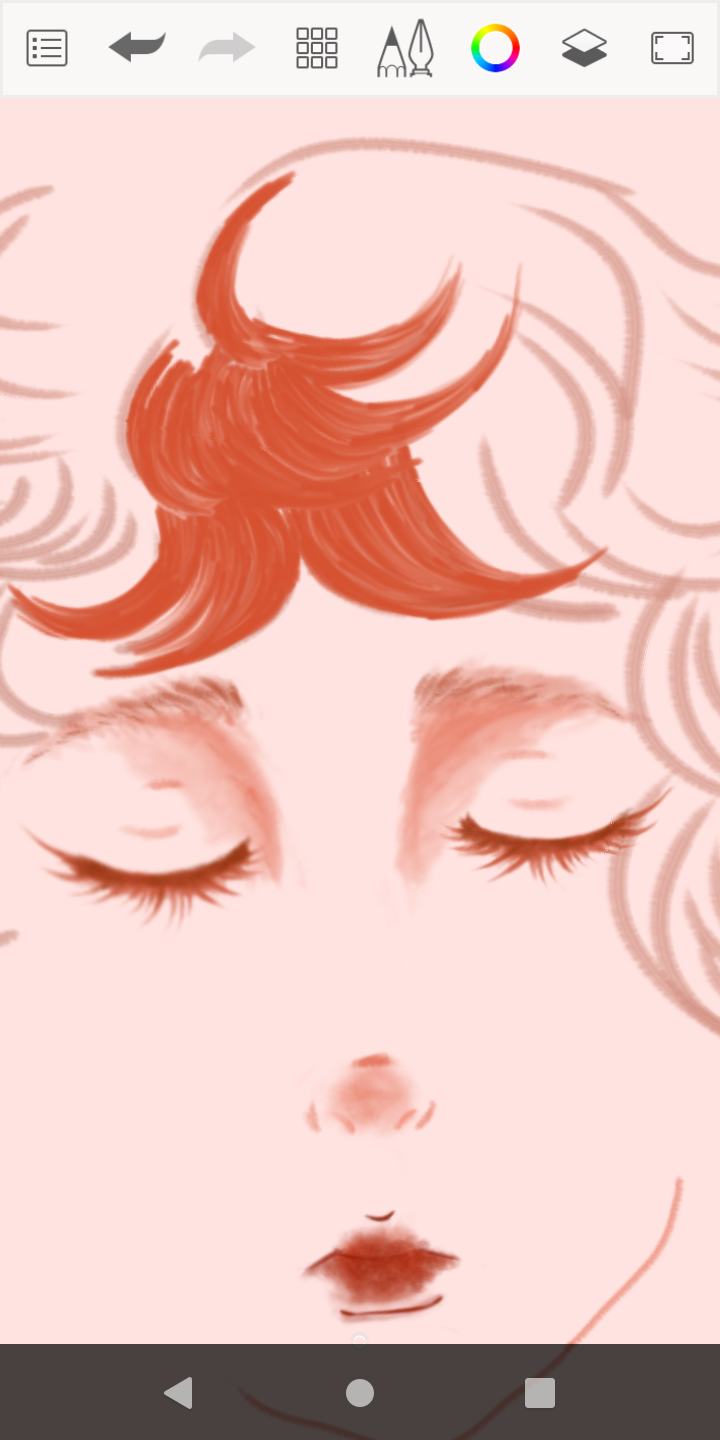
The hair: the most complicated part of the whole drawing and the one that took me about 2 days to complete.
This element was so difficult to draw, because it was the first time I tried to draw curly or wavy hair in digital, so the whole process was about experimenting.
I'll explain it simply.
First, I made a sketch of the hair, its shape and in which directions it was going to be oriented. This layer only served as a guide.
With one of the brushes that leave a “tempera finish”, I made small strokes that would follow the direction of the hair, guided by the sketch. In the fringe area I wanted it to look perfect, so I used a very small brush, trying to detail everything as much as possible. Then, with a color darker than the hair, I tried to add some kind of shadows, and I blurred them towards the direction of the hair.
 |  |  |
|---|---|---|
 |  |  |
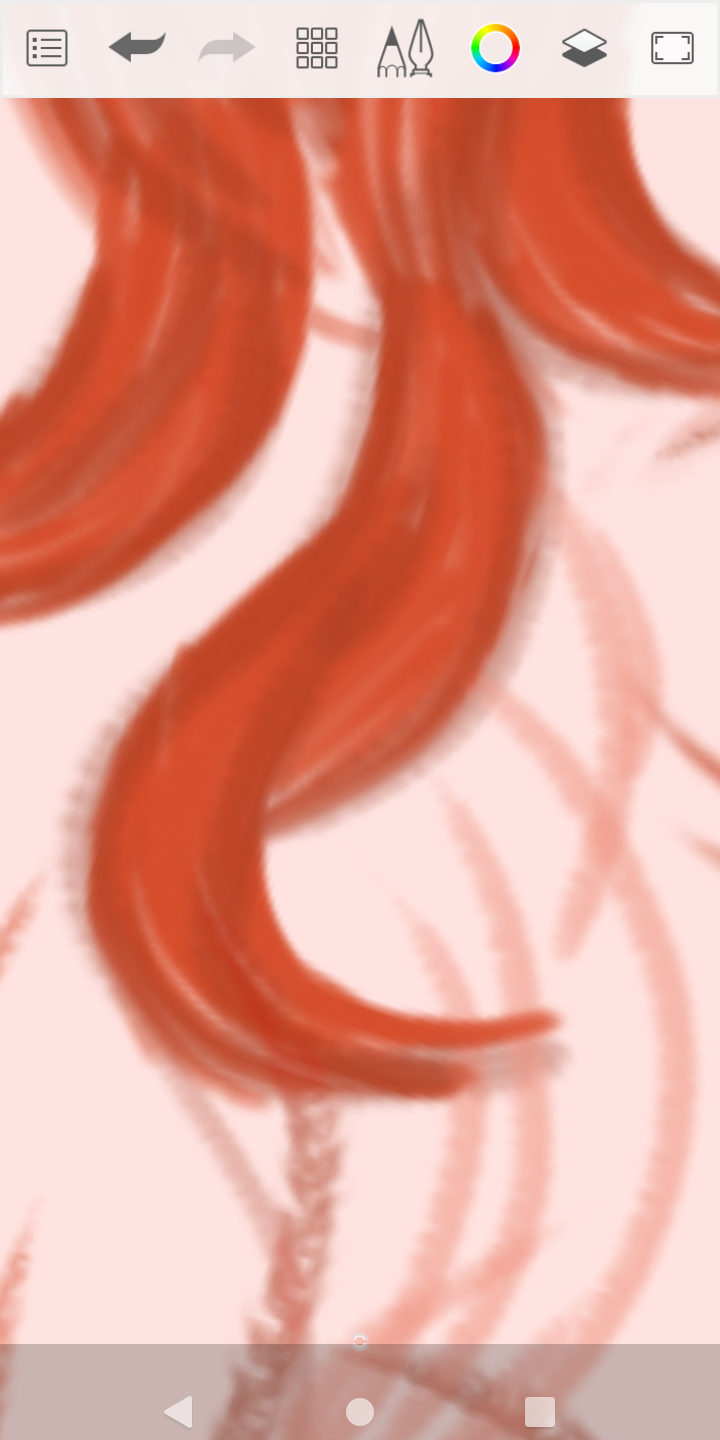
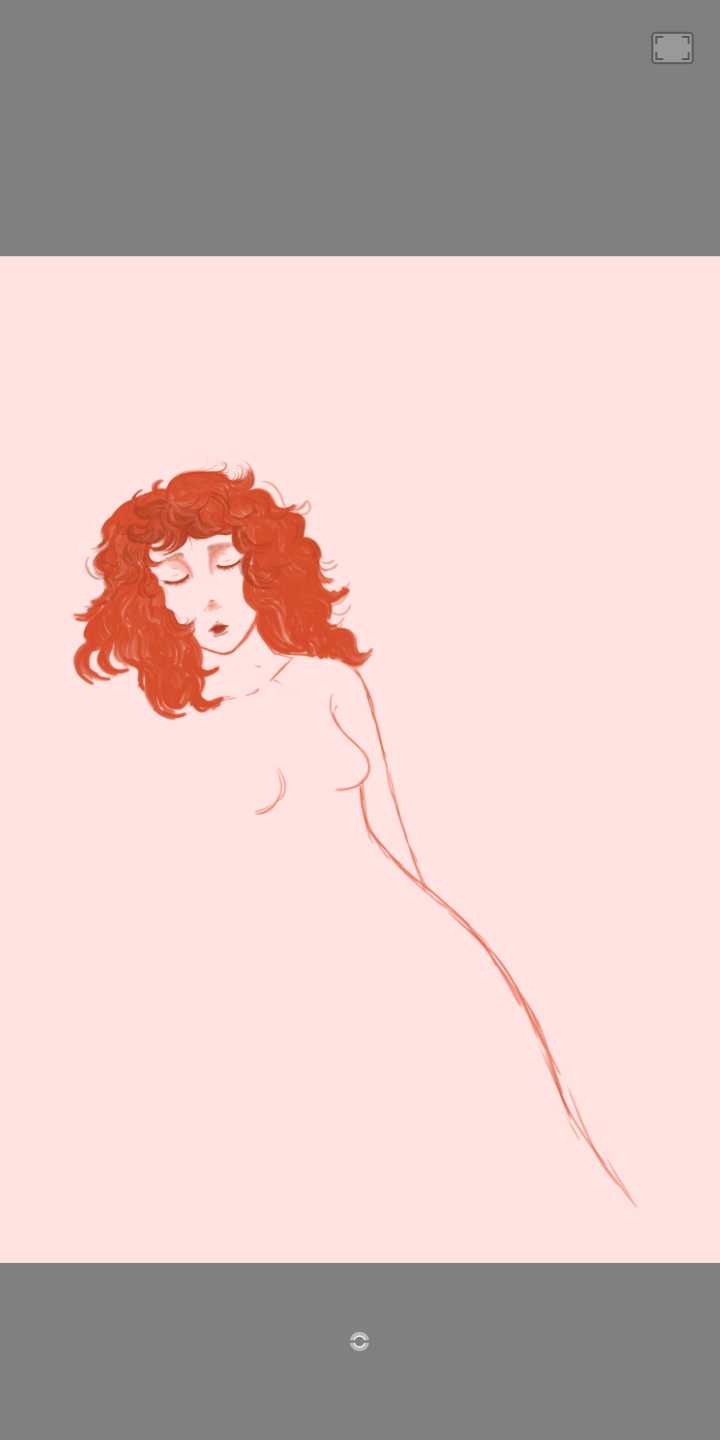
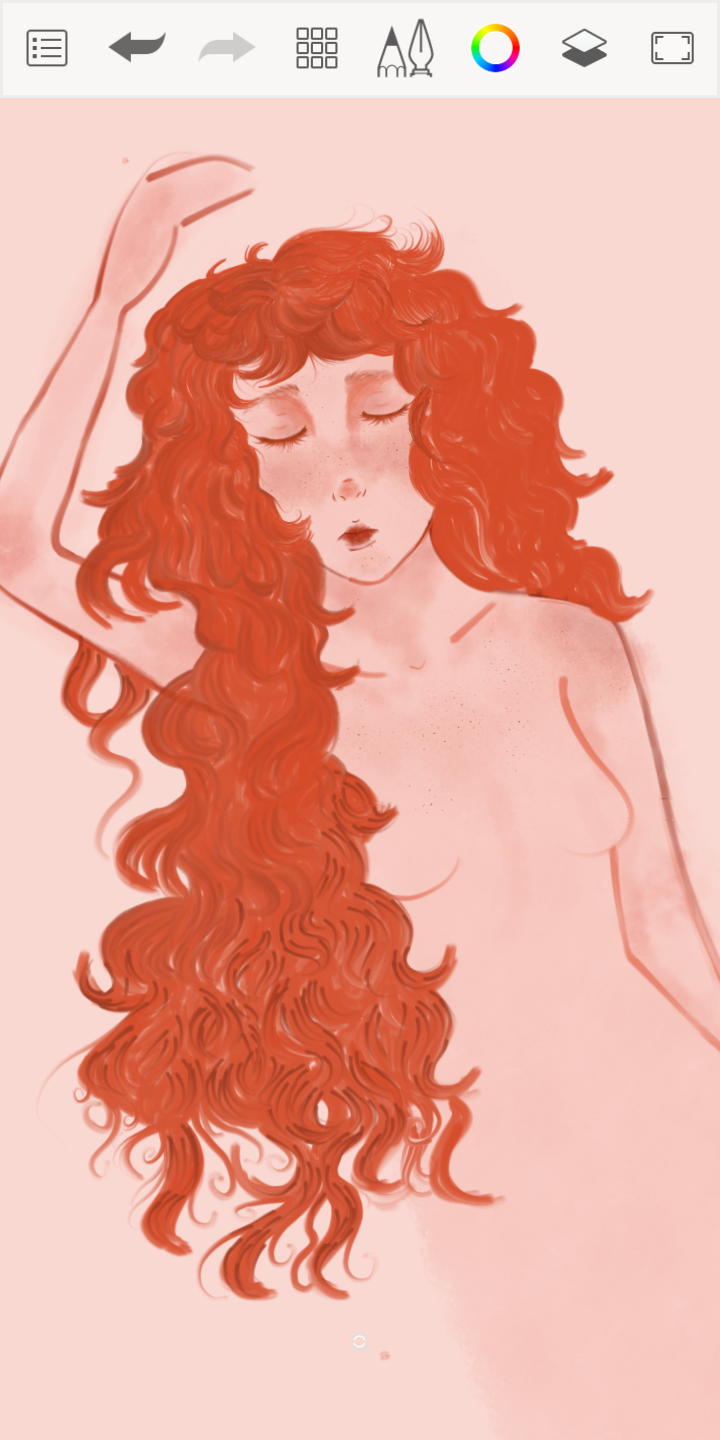
Utilizaba, cada tanto, mi dibujo a lápiz como guía, pero me di cuenta de que el cabello estaba un poco mal dibujado, como desproporcionado, así que no lo tomé como una referencia fiel, sino que también añadí y obvié ciertos trazos del dibujo original.
En las imágenes de abajo, pueden ver un poco la manera en la que hacía los mechones, con un color rojo/naranja de base y luego un color marrón por encima, para luego difuminarlo. Esto lo hacía para darle algo de profundidad al cabello, ¿podría decirse? Y para acentuar ese tipo de cabello rizado/ondulado de nuestro personaje.
También hice un boceto del cuerpo, guiándome del dibujo a lápiz, y noté algunos errores que corregí esta vez. Por ejemplo, el cuerpo lo hice un poco más alargado, porque siento que estaba mal, proporcionalmente, al ser demasiado pequeño en comparación a la cabeza.
Every now and then, I used my pencil drawing as a guide, but I realized that the hair was a bit badly drawn, it was kind of disproportionate, so I didn't take it as a faithful reference, in turn I added and omitted certain strokes from the original drawing.
In the images below, you can see a bit of the way I did the highlights, with a red/orange base color and then a brown color on top, and then blurred it. I was doing this to give the hair some depth, I guess? And to accentuate that curly/wavy type of hair on our character.
I also did a sketch of the body, guided by the pencil drawing, and noticed some mistakes that I corrected this time. For example, I made the body a bit more elongated, because I feel it was off, proportionally, being too small compared to the head.
/div>
 |  |
|---|---|
 |  |
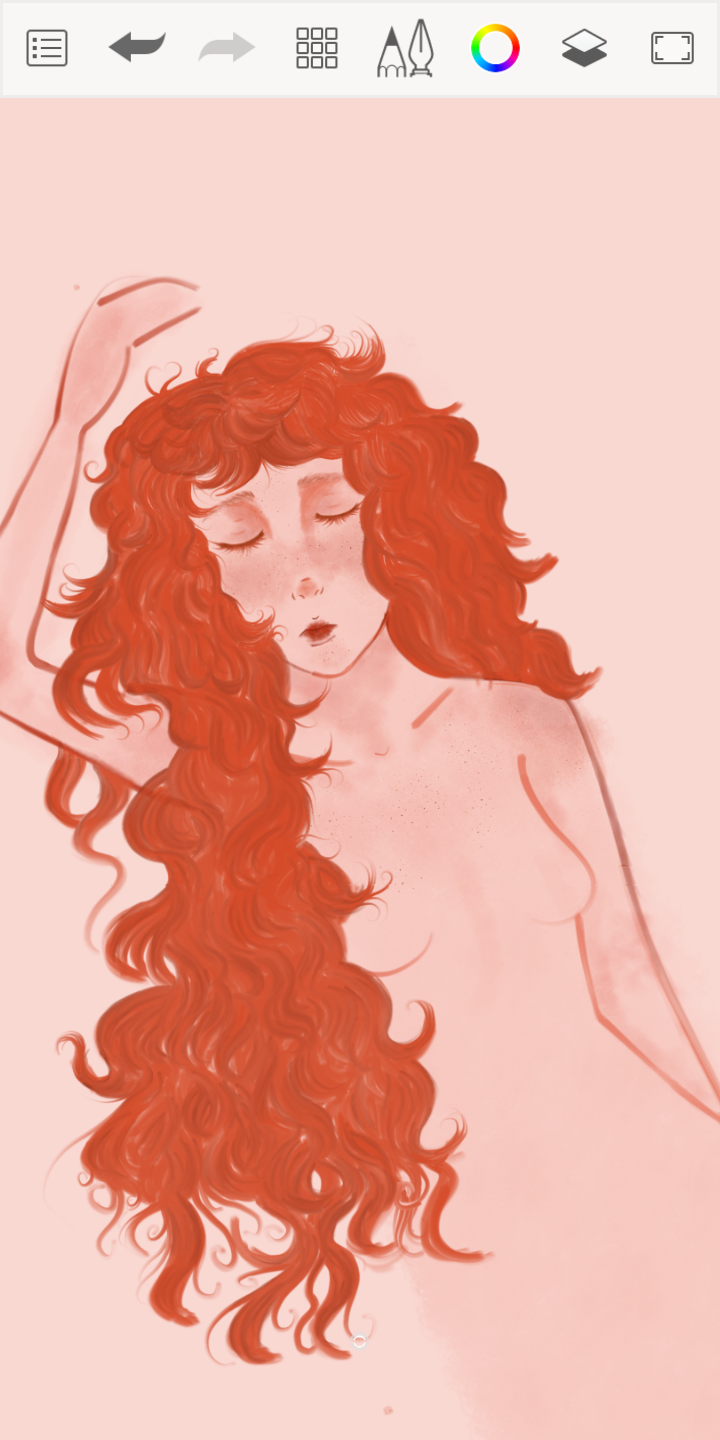
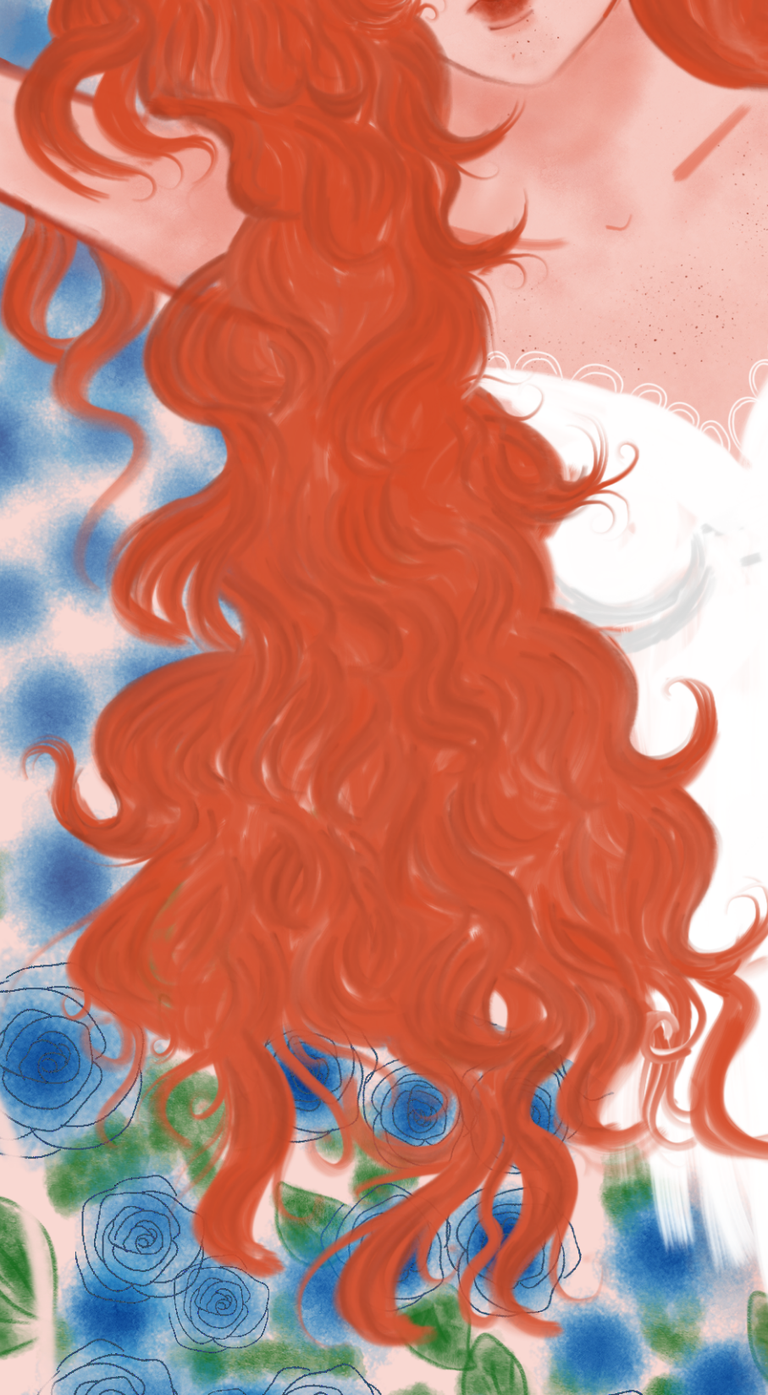
También me tomé la libertad de hacer algunos detallitos de cabellos rebeldes, para ver como quedaba, y me encantaron.
I also took the liberty of doing some unruly hair details, to see how it would look, and I loved them.
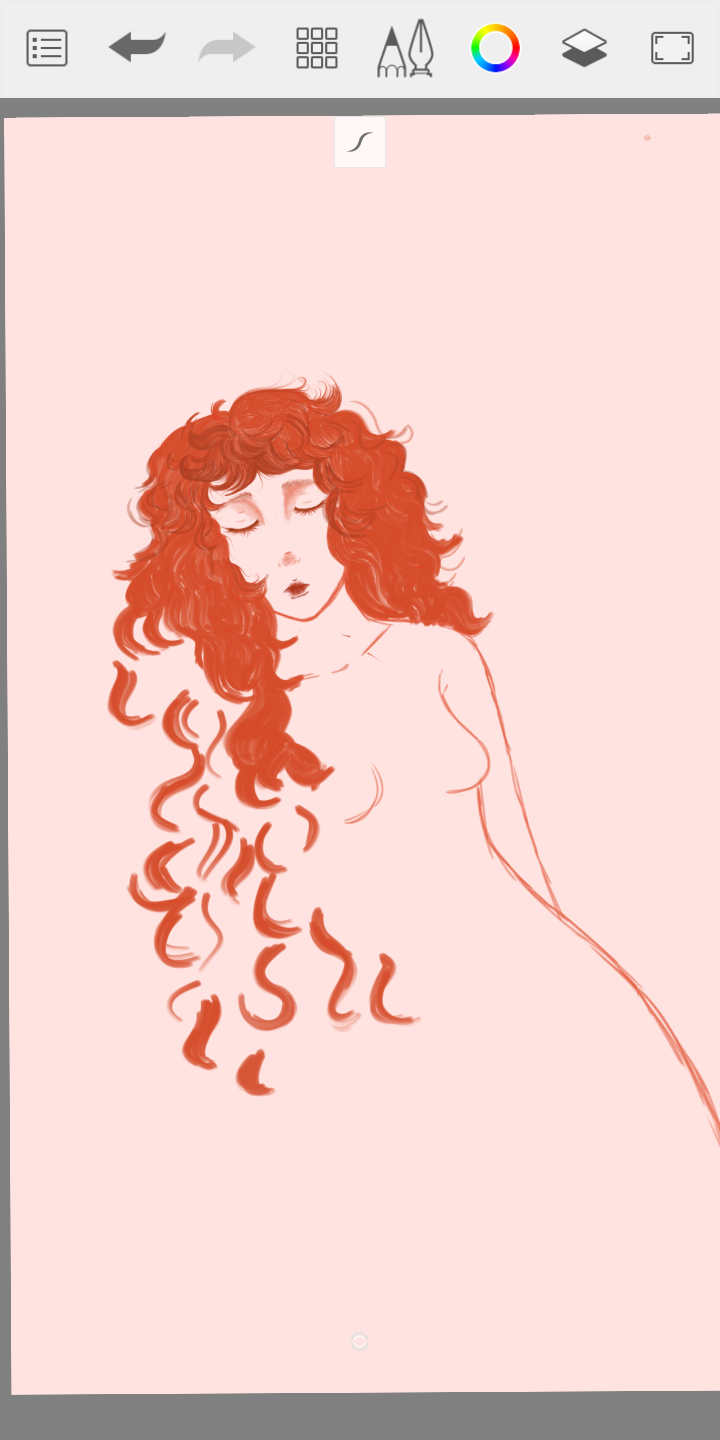
Tomó al menos tres capas, ya que este pincel tiene la característica de arrastrar color, entonces tuve que dibujar los mechones de cabello por secciones separadas, para que no ocurrieran accidentes. Como ven, dibujé los mechones siguiendo esas formas que suele hacer el cabello rizado u ondulado, como de “s” y curvas.
Amo mucho este estilo de cabello, así como también me encanta el cabello naranja/rojizo.
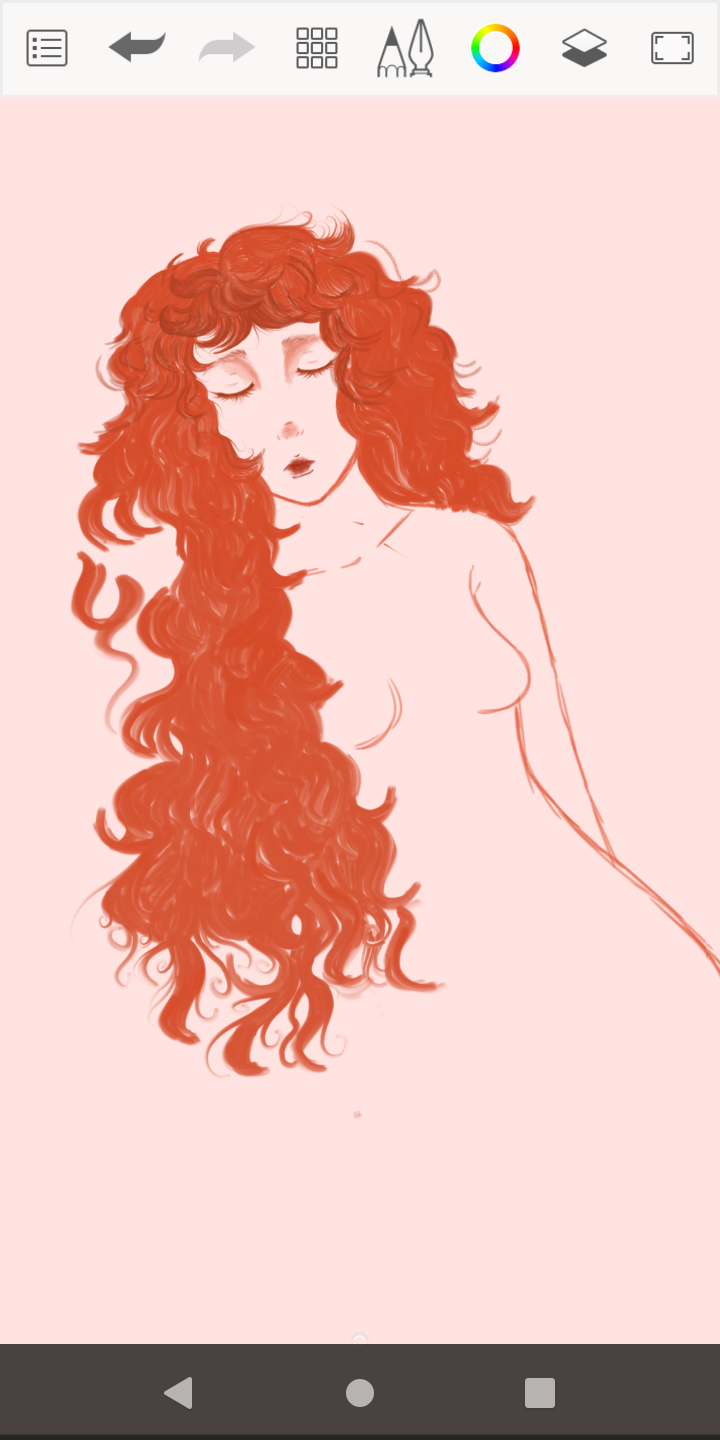
Una vez que terminé el cabello, por fin, me encargué de dar detalles de “cabellos rebeldes”, de manera que esto le diera un toque más suelto a la cabellera. La idea es que el cabello realmente se vea como si fuera libre, ahí yaciendo encima de las rosas, pero no es momento de dibujar las rosas aún…
I continue repeating the same process of following the sketch, and tracing the strands of hair with a brush with a “tempera finish”, this time I increased the size of the brush stroke, for the time i tried not to add any shadows, so I dedicated myself to complete what would be the hair. Little by little.
It took at least three layers, since this brush has the characteristic of dragging color, so I had to draw the strands of hair in separate sections, so that no accidents would happen. As you can see, I drew the strands following those shapes that curly or wavy hair usually make, like “s” and curves.
I love this hairstyle as much as I love orange/reddish hair.
Once I finished the hair, I finally took it upon myself to do “unruly hair” details, so that this would give the hair a looser feel. The idea is for the hair to really look like it's free, just lying there on top of the roses, but it's not the time to draw the roses yet....
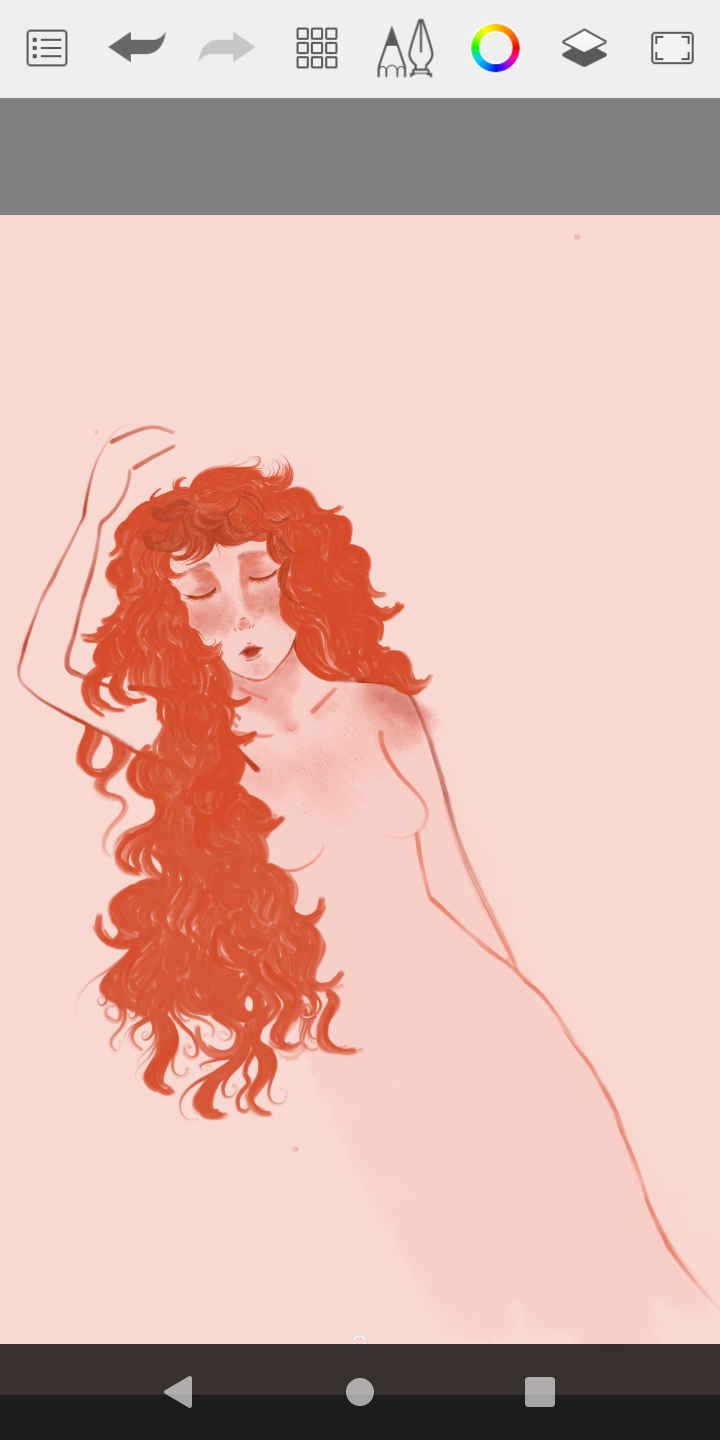
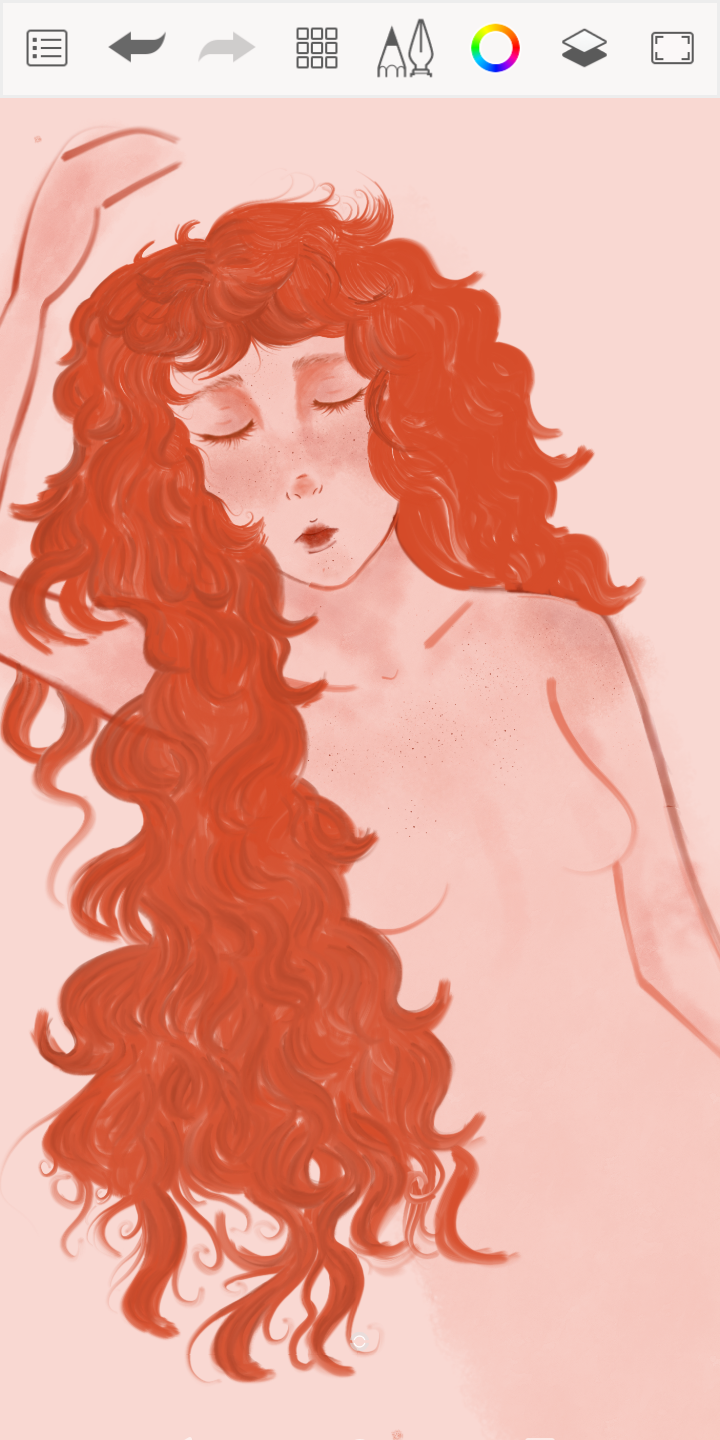
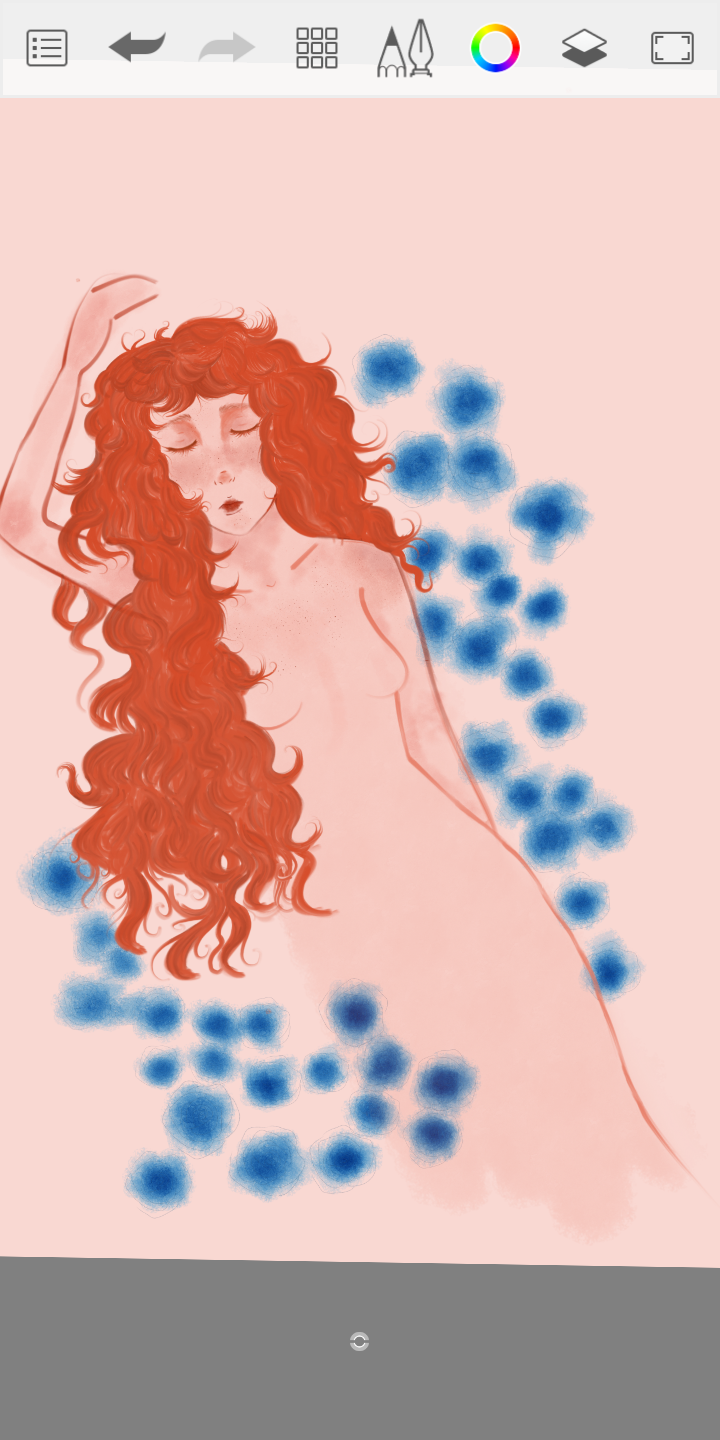
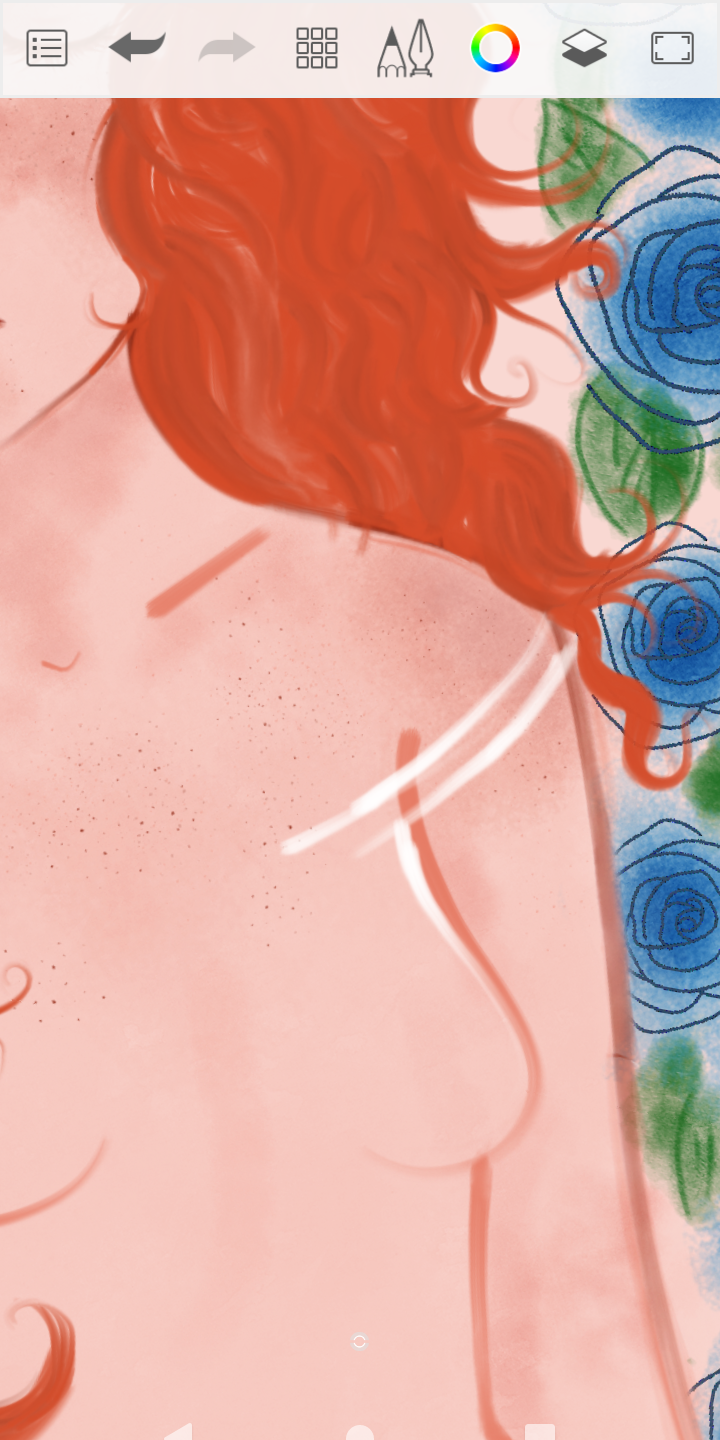
Aquí añadí algunas sombras y efectos de “sonrojo” en el rostro, pero bajé un poco la opacidad de esa capa, para dar un efecto más ligero, todo esto usando el pincel “acuarela de sal”. Luego, con el pincel de “moteado” añadí pecas marrones por toda su nariz, mejillas, barbilla, pecho y hombros. Algo muy sutil, que solo puede ser apreciado de cerca, pero que quería que estuviera ahí igual. El brazo lo dibujé guiándome muy superficialmente del dibujo a lápiz, pero esta vez lo hice más pequeño, porque me di cuenta de que en el dibujo original se ve demasiado largo. Con un pincel que se llama literalmente “pincel” le añadí el color a la piel del personaje, usando la opacidad baja. Casi no se puede notar porque es un color un poco más oscuro que el del fondo del dibujo. Luego, añadí el mismo color de “rubor/sombra” en el codo y muñeca, pera darle algo de detalles al brazo y que no se viera tan plano. También cambié el trazo de la mandíbula y mentón, haciendo que fuera un trazo más delicado.
Por otro lado, ya añadí esa sombra/profundidad en el cabello. Las hice siguiendo el mismo proceso para dibujar el cabello, solo que luego la difuminé un poco. Hice eso por todo el cabello y después añadí más “cabellos rebeldes”. Por fin está listo el cabello.
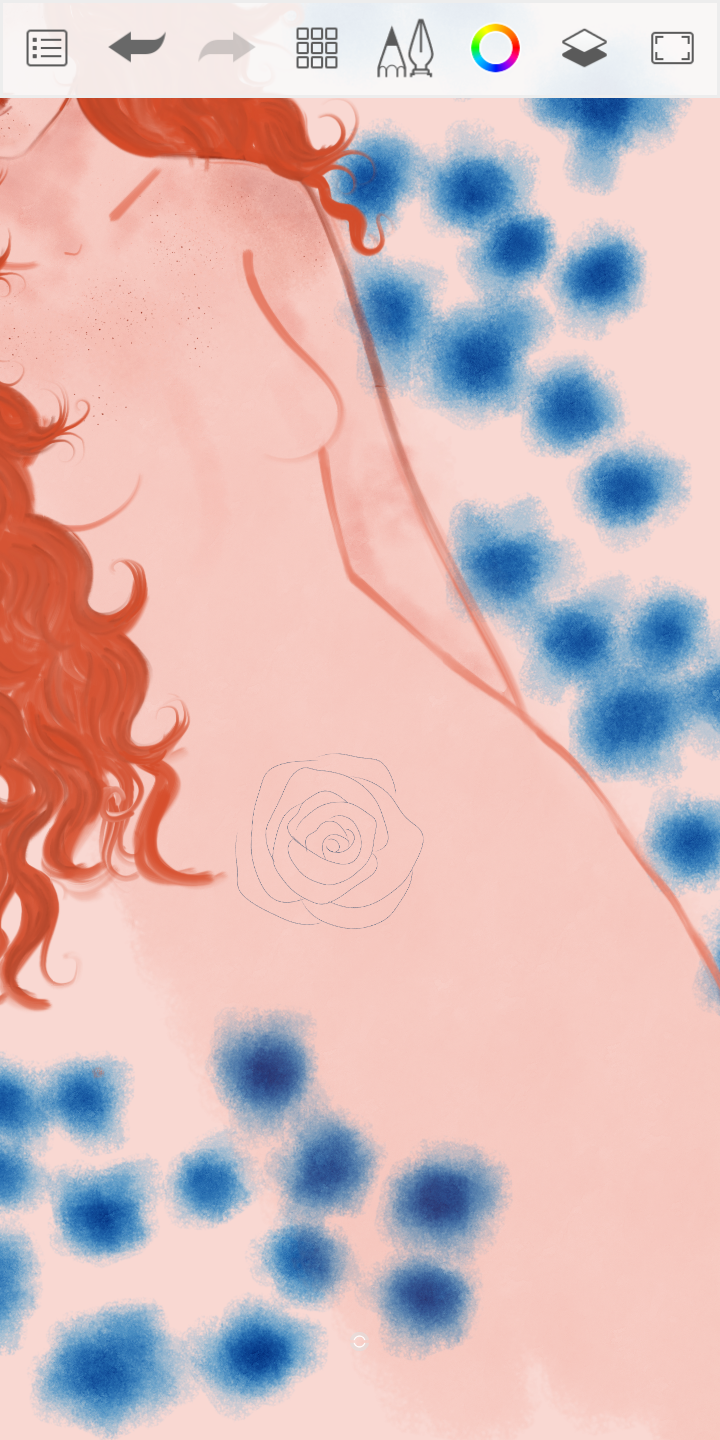
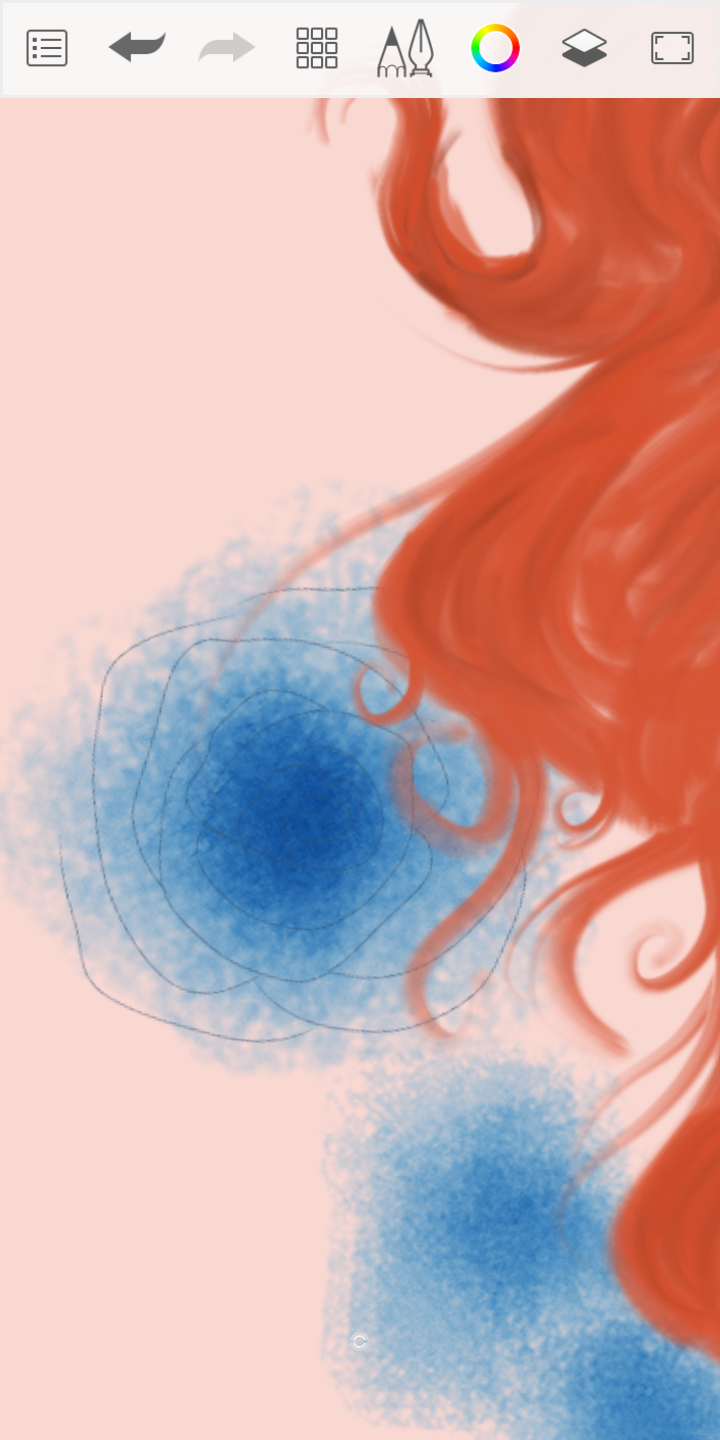
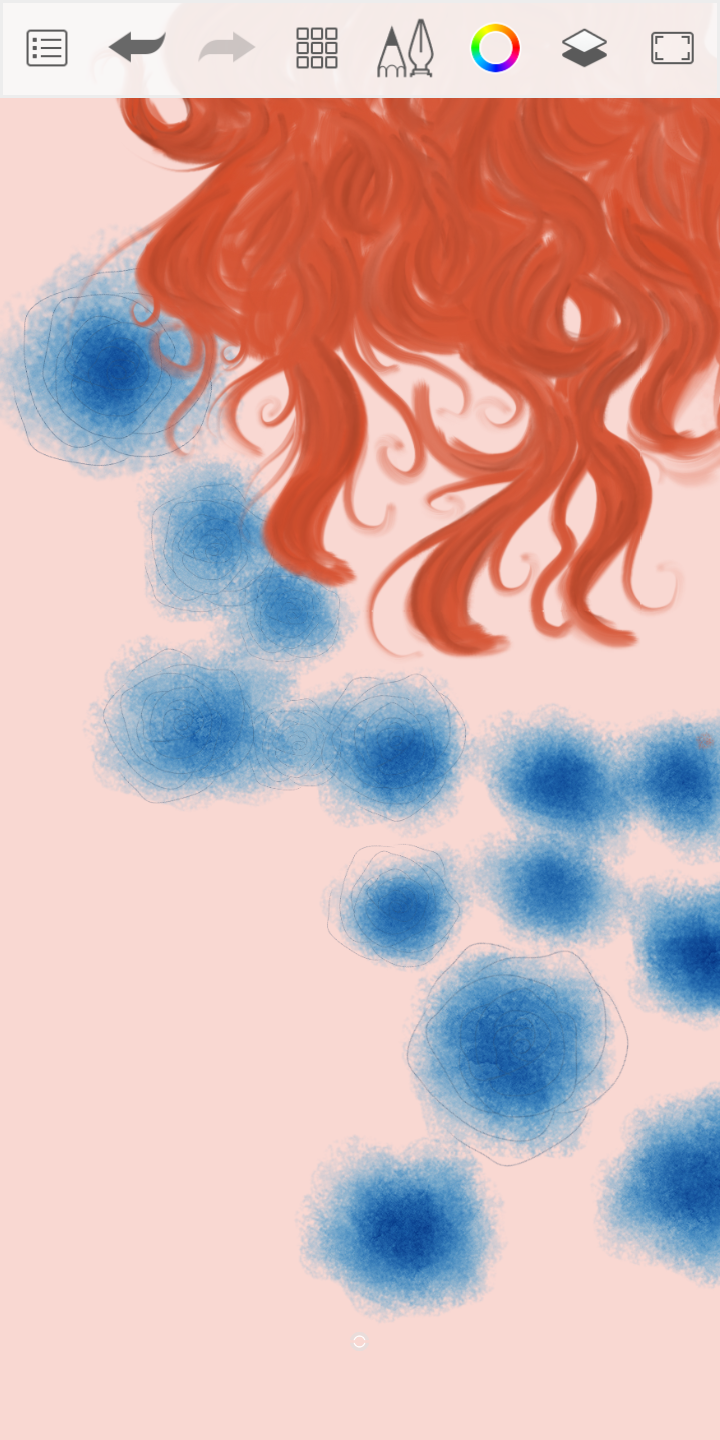
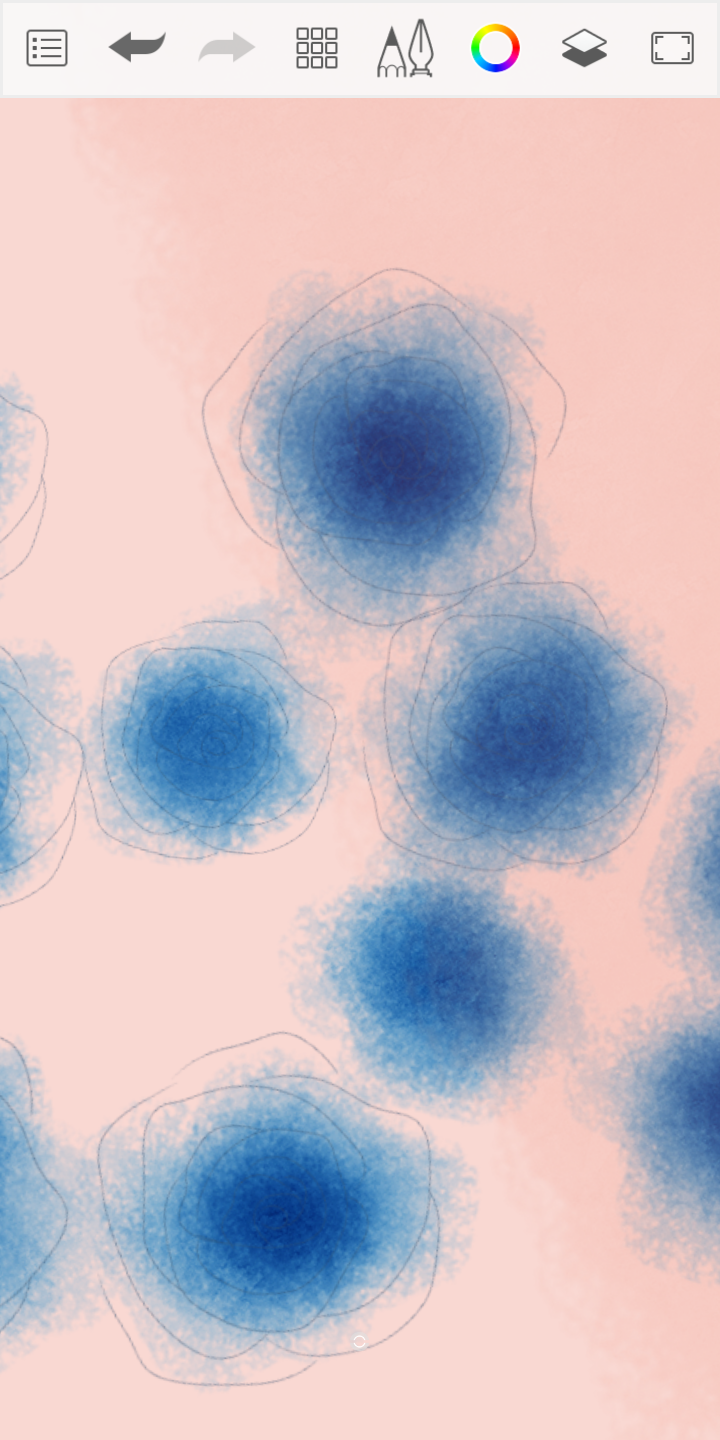
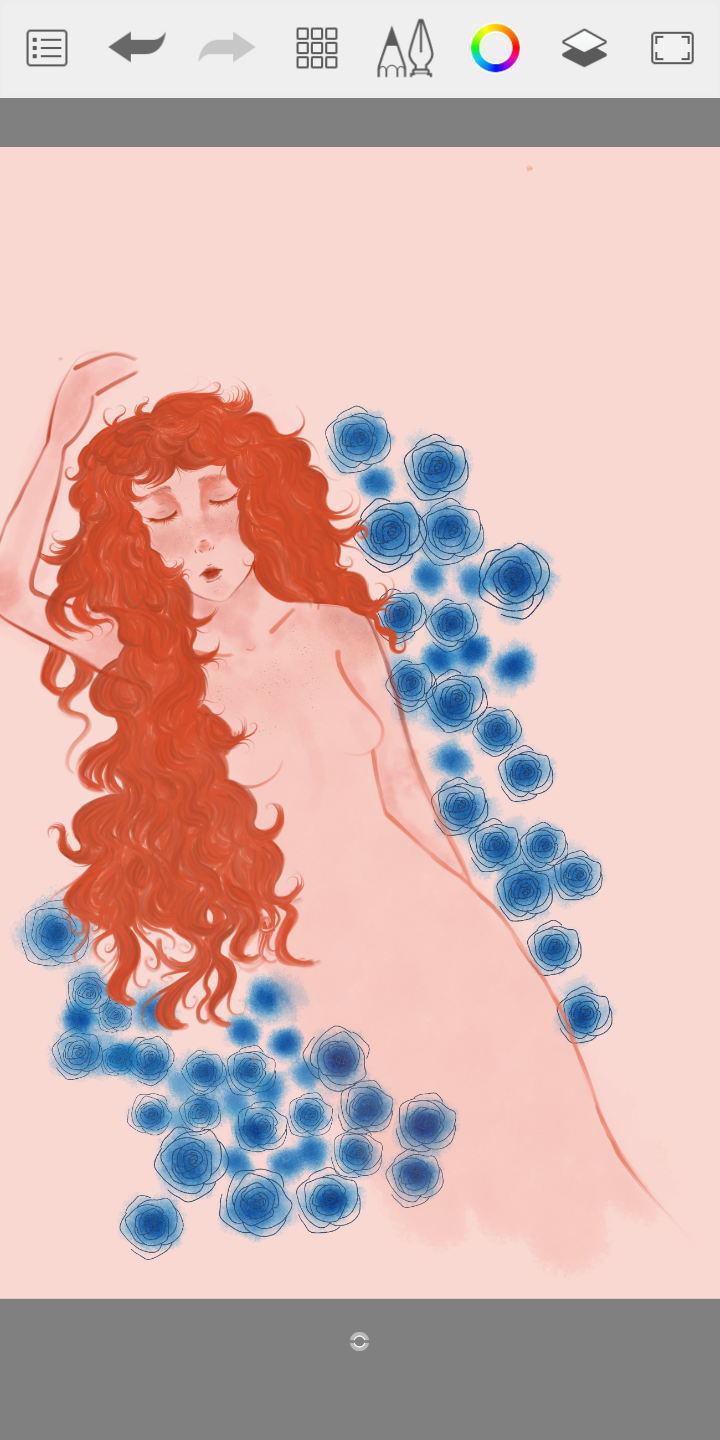
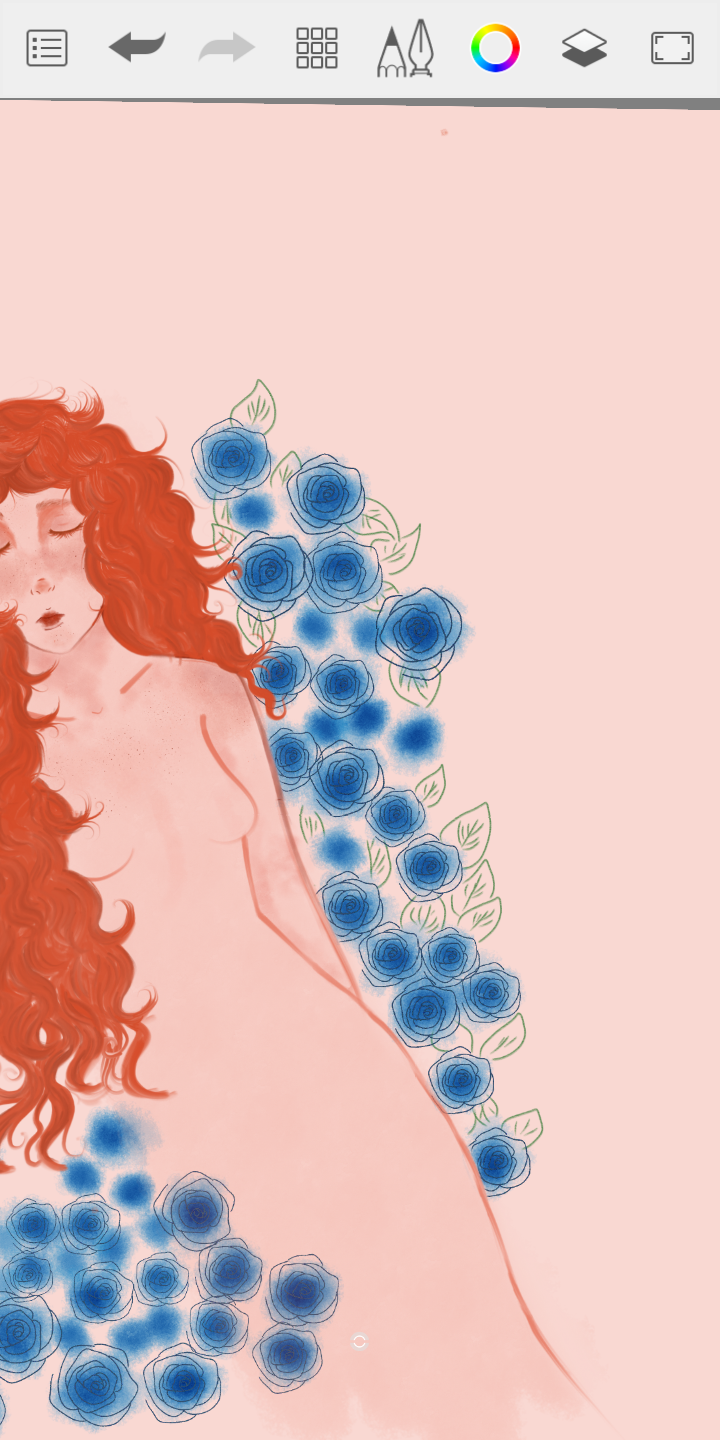
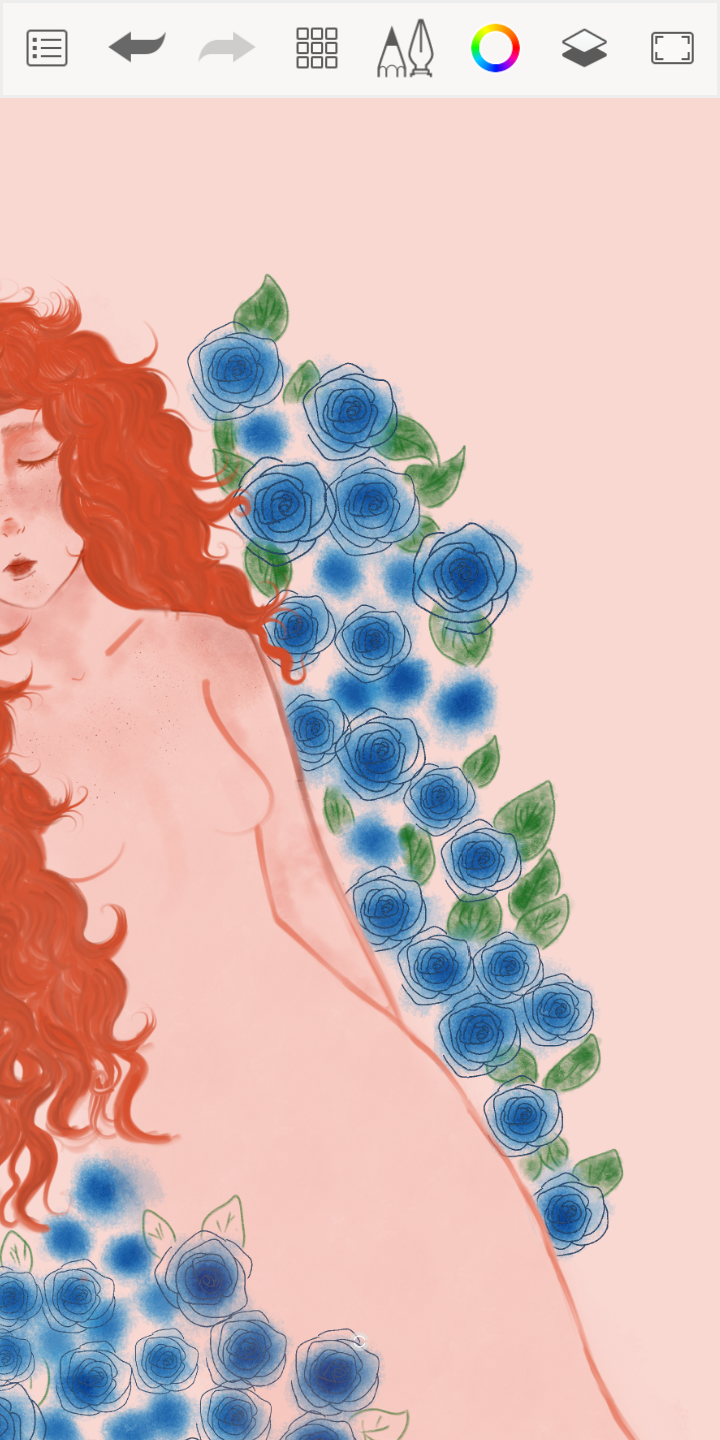
Para hacer las rosas, tomé el pincel de “acuarela” e hice varios puntos de distintos tamaños alrededor de la chica. Los hice dando varios toques en el mismo sitio, ya que este pincel tiene la característica de aplicar color más oscuro en el centro del trazo. Luego, dibujé una rosa. En la primera imagen se puede ver el dibujo que hice. No sé mucho como dibujar rosas, así que solo hice una especie de triángulo y después trazos alrededor, como si este triángulo va abriéndose. Luego tomé ese dibujo de la rosa, lo seleccioné y lo recorté, para luego ir pegándolo encima de cada punto azul. Espero que se entienda lo que quise explicar. Luego “engrosé” el trazo de las rosas, usando la herramienta de “duplicar” varias veces y luego fusioné todo. Ustedes pensarán que inventé demasiado solo para dibujar unas rosas… Yo les responderé que tienen razón, pero obtuve experiencia al menos jajajaja, y ahorré algo de tiempo después de todo.
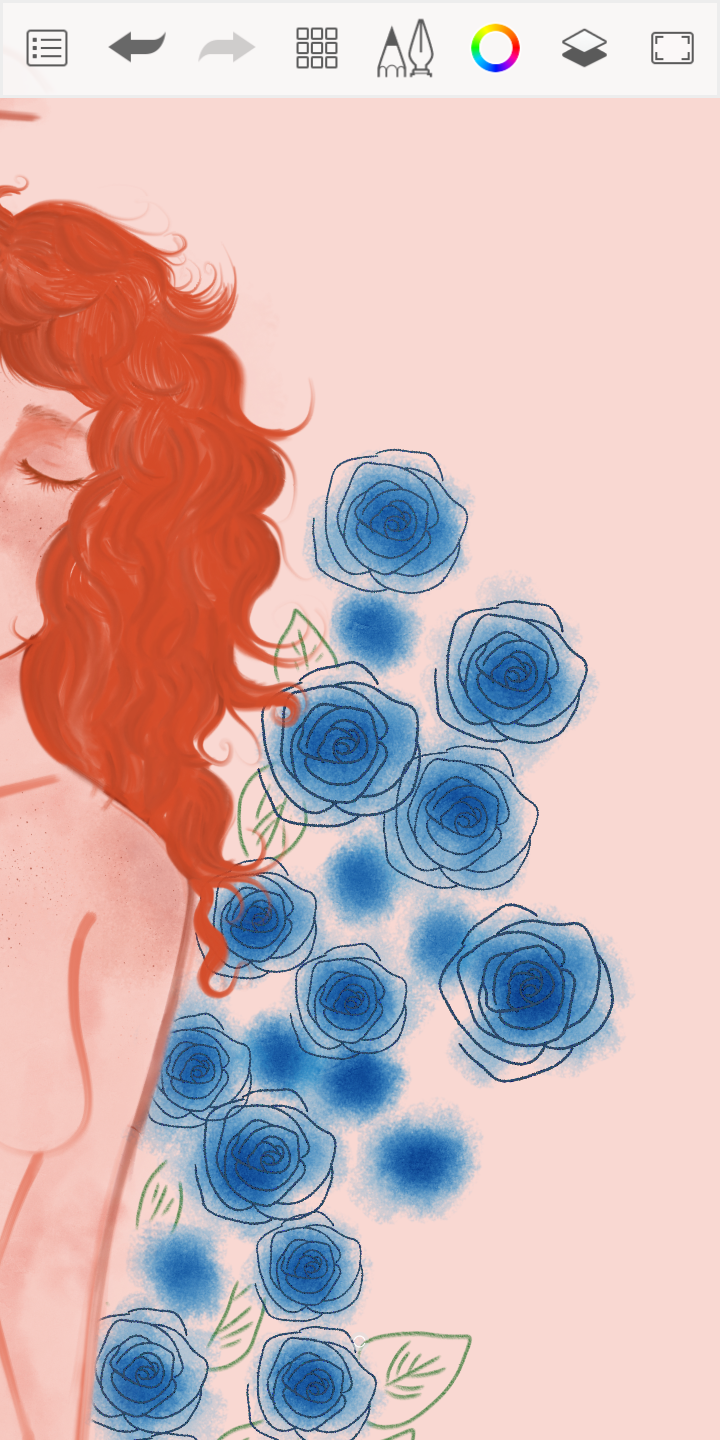
Aquí hice varias hojas alrededor de algunas rosas, y luego las rellené de color. En esta parte, sentí que faltaban más rosas arriba, por lo cual, simplemente copié la capa donde estaban solo los puntos azules y lo verde de las hojas, y la pegué donde hacía falta, borrando lo que sobrara. No quise hacerlo detallado para que no llamara tanto la atención, después de todo esto solo vendría siendo el fondo del dibujo; el foco principal es la pelirroja.
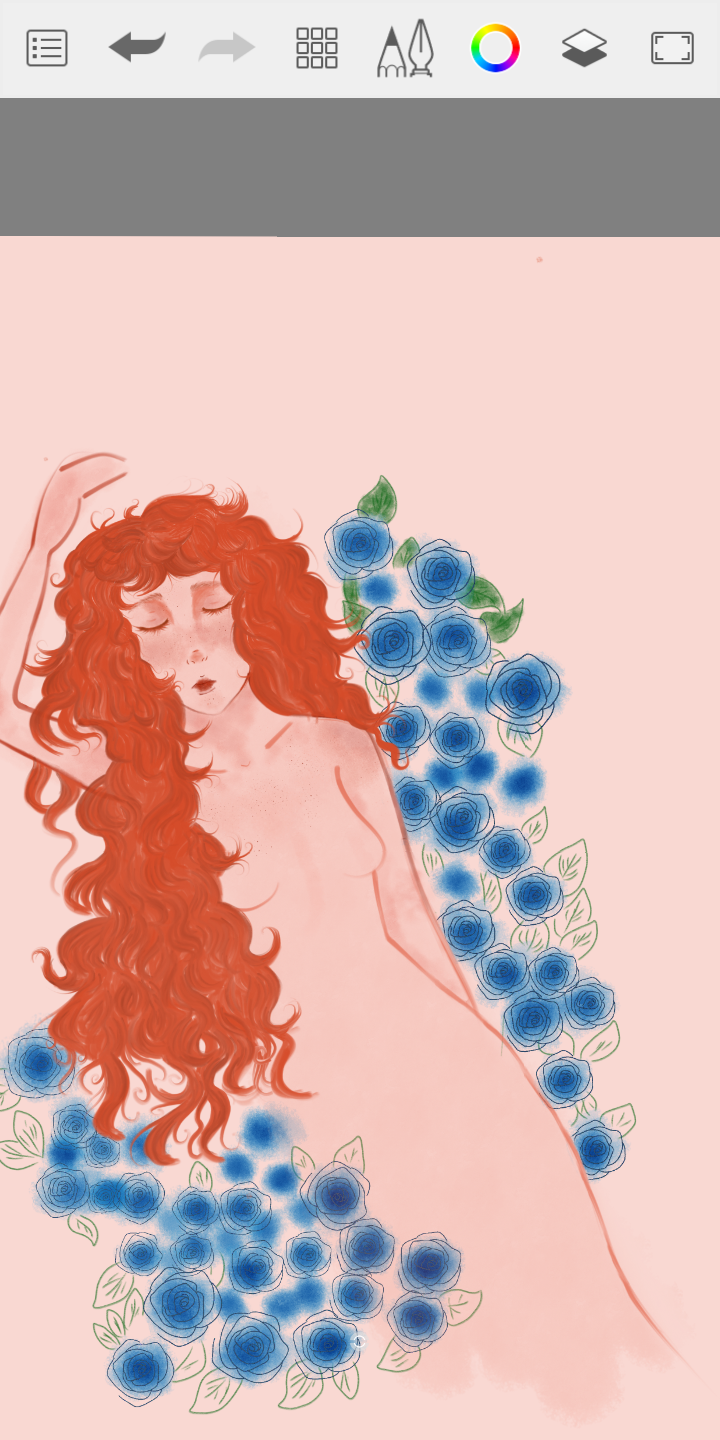
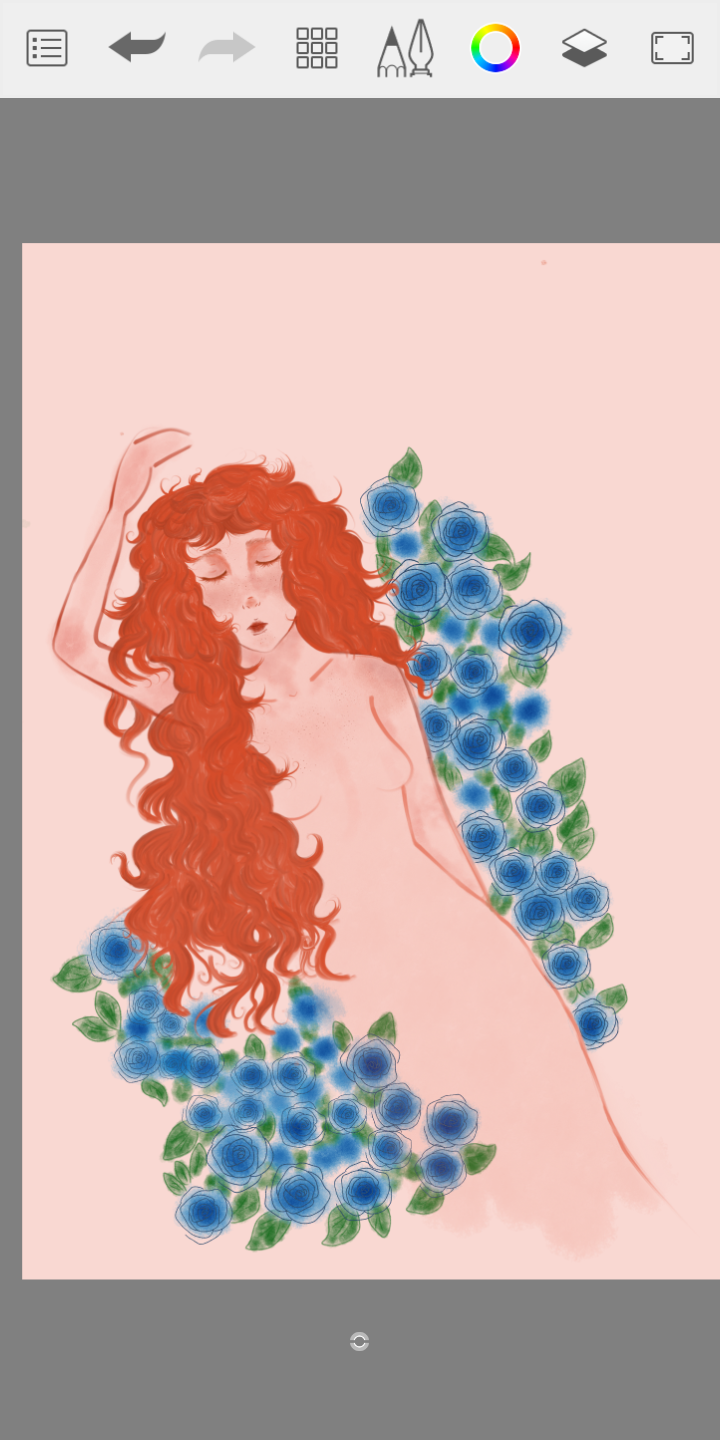
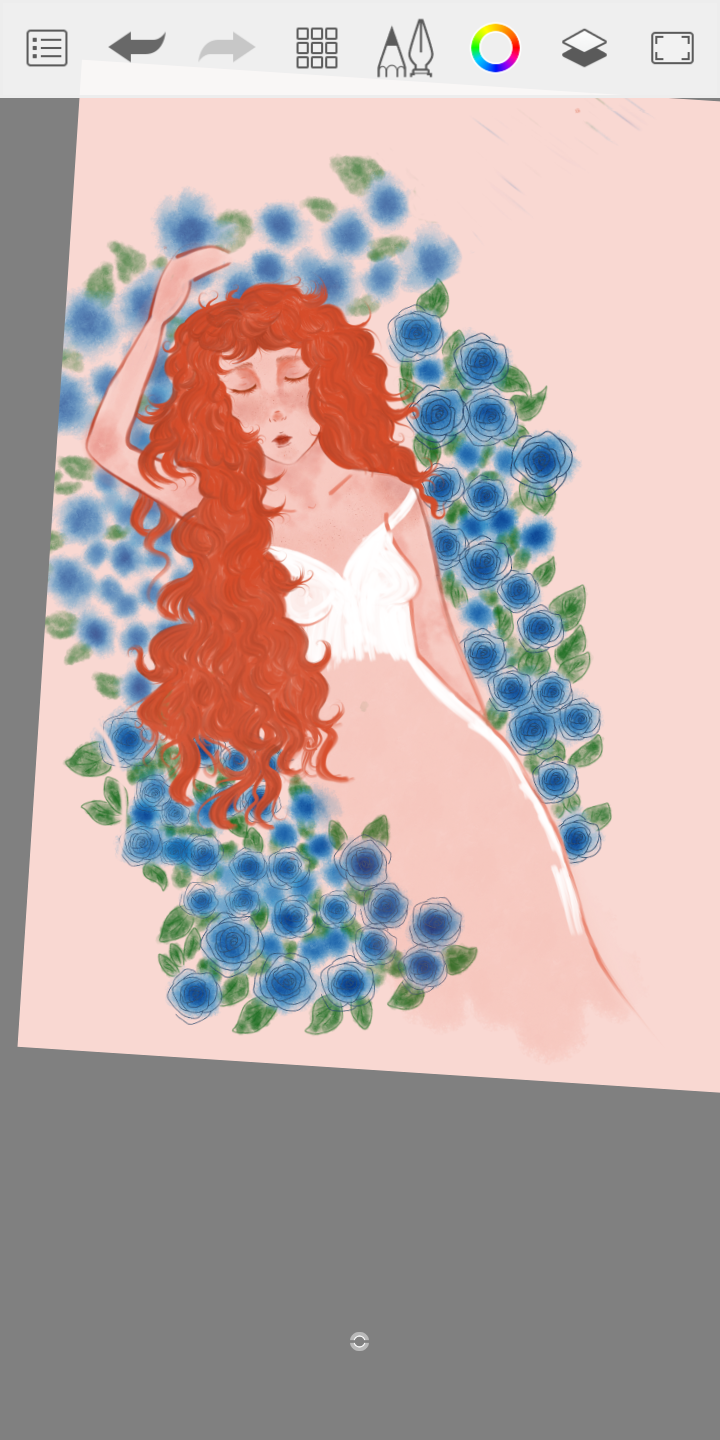
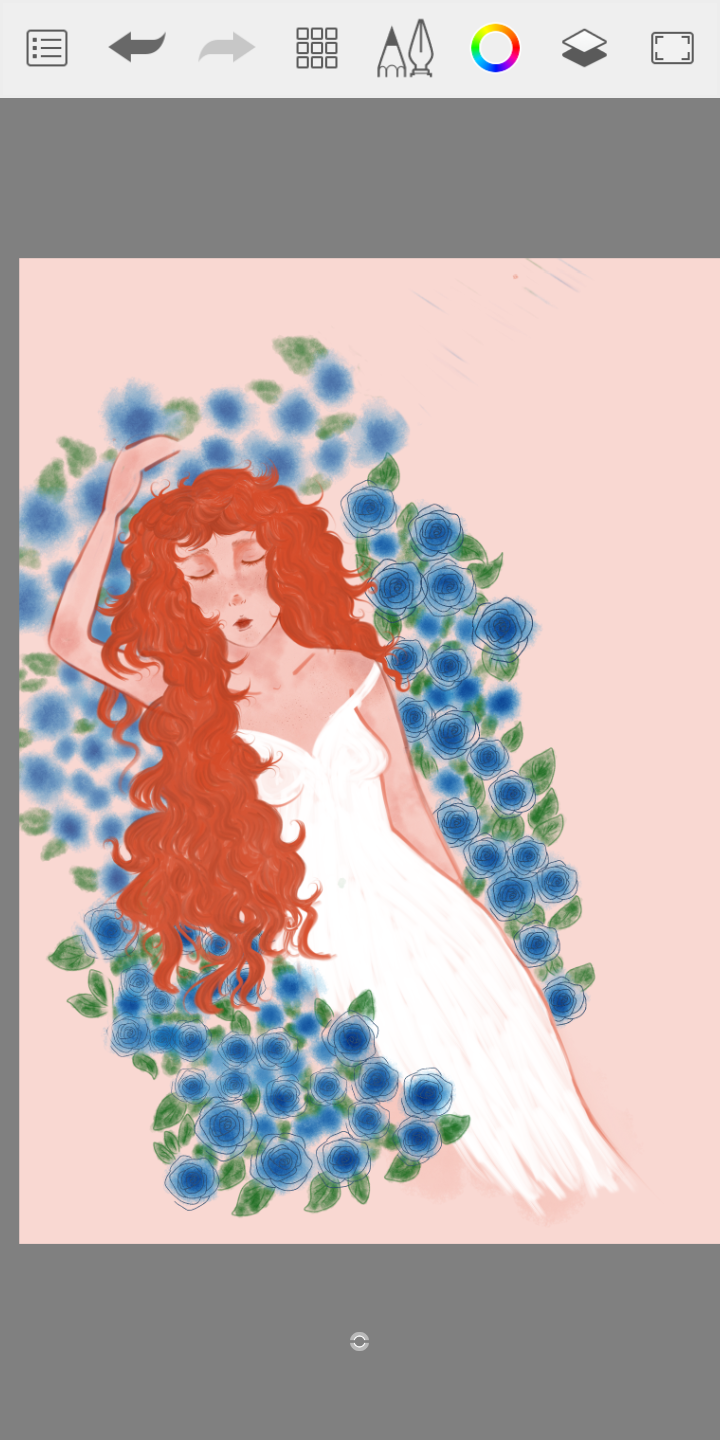
Por último, solo falta hacer el vestido. Sentí que de verde sería muy llamativo, de rojo ya había mucho en el dibujo y azul también había mucho. Entonces, simplemente usé blanco. Con uno de los pinceles con “acabado de témpera”, dibujé el tirante del vestido cayendo delicadamente por su hombro, después dibujé la forma de corazón en el escote y el resto fue ir rellenando de color blanco lo demás, es un vestido largo. Y listo. Lo único fácil del dibujo fue el vestido.
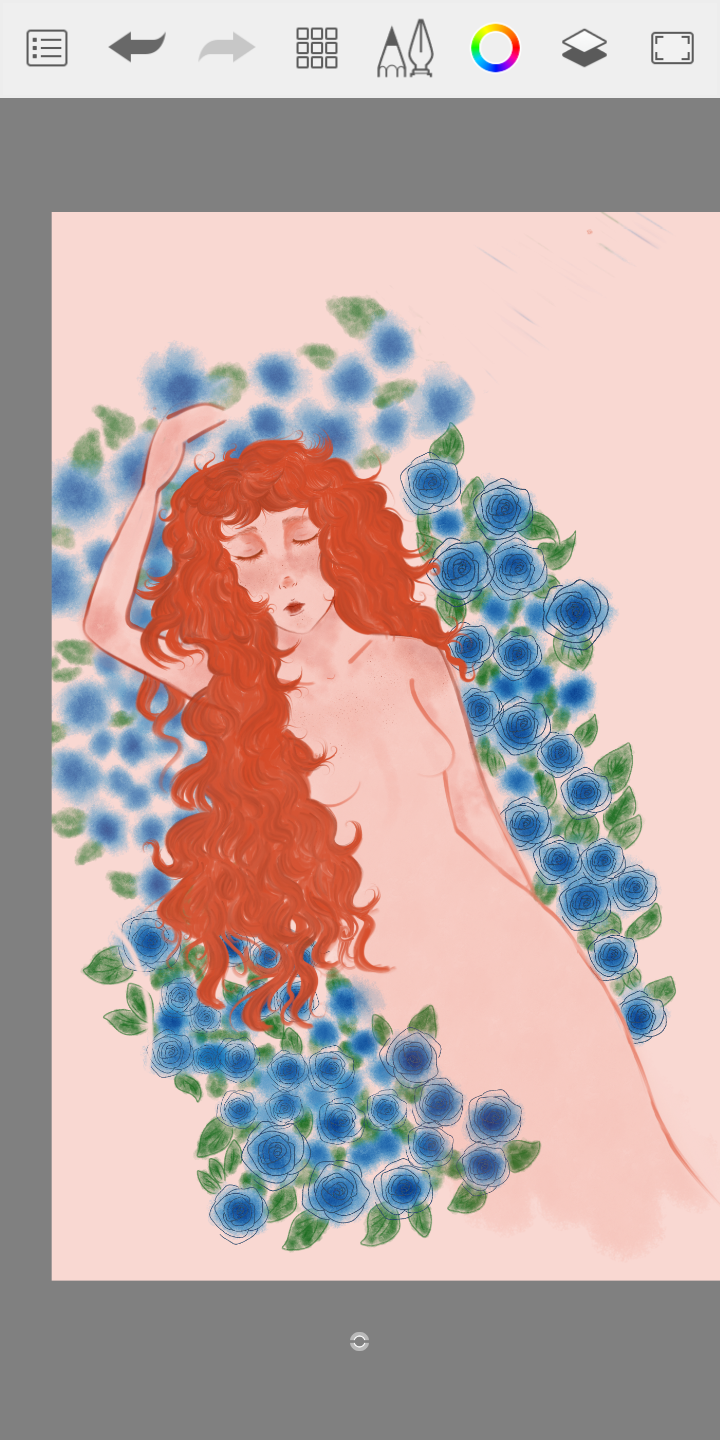
A continuación, el dibujo finalizado, donde hice actualizaciones de errores que vi mucho después de terminarlo (importante añadir que este dibujo tiene alrededor de dos meses terminado, solo que apenas le estoy haciendo su post explicando el proceso jajaja). Añadí unos pequeños detalles en el escote, algo así como un encaje. Le hice sombras en el área del vestido y el brazo derecho (derecho desde mi punto de vista). La mano la puse un poquito más grande y le detallé los dedos, aunque no sé dibujar manos tan bien, es mejor que no hacerlo. La nariz la cambié, porque no me gustaba como se veía de lejos la anterior; lo que hice fue quitarle esa línea que tenía encima, le hice el sombreado debajo, y uno muy pequeño y un poco más oscuro dentro de las fosas nasales. Y listo.
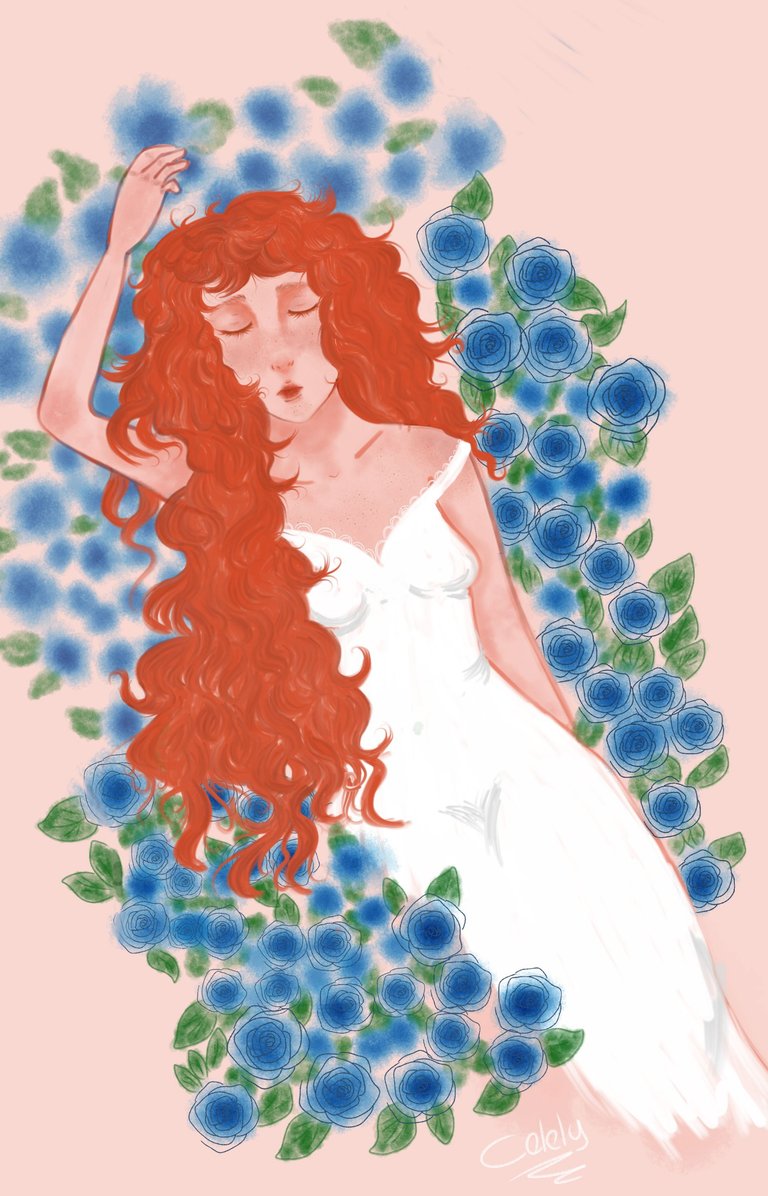
No se parece casi nada al dibujo a lápiz, ya que esta vez intenté darle otro enfoque. Siento que este tiene un poco más de personalidad, no solo por los colores, sino por la forma en la que lo dibujé. Cosas mías. Cuando terminé de hacer este dibujo, me recordó mucho a un personaje de un libro, que era una reina de las hadas (las hadas en esta historia se asemejan más a los elfos), ella es descrita con un cabello rojo muy largo, por eso le puse de título “Reina roja”. Aunque también me dio vibras a una diosa.
Y sin nada más que añadir, queridos, espero que hayan disfrutado el post tanto como yo disfruté hacerlo. Se me cuidan, pórtense bien y no se olviden de sonreír. Haaasta la próxima, muaaak. (˶ᵔ ᵕ ᵔ˶)♡
Créditos | Credits
|
|---|
~~~ embed:1829225555914338582?t=LS65s2vgpQ1U9f-JqKATHQ&s=19 twitter metadata:Tm90X0NlbGVseXx8aHR0cHM6Ly90d2l0dGVyLmNvbS9Ob3RfQ2VsZWx5L3N0YXR1cy8xODI5MjI1NTU1OTE0MzM4NTgyfA== ~~~
Contáctenos para saber más del proyecto a nuestro servidor de Discord.
Si deseas delegar HP al proyecto: Delegue 5 HP - Delegue 10 HP - Delegue 20 HP - Delegue 30 HP - Delegue 50 HP - Delegue 100 HP.
Muchas gracias por el apoyo. 💙✨