Holiii, amigos de la comunidad de Hivearte, ¿cómo se encuentran el día de hoy?, ¡Espero que muy bien!
Hoy les vengo a mostrar otro de los dibujos por los cuales estoy orgullosa, sobre todo porque es de las pocas veces que dibujo a un hombre.
Antes, me gustaba mucho dibujar mujeres por su belleza y delicadeza, pero ahora pienso que no todas las mujeres son bellas de una forma delicada, y que la belleza masculina también es interesante. No lo sé, simplemente estoy hablando de cómo me gusta admirar los rasgos faciales del ser humano, desde una perspectiva artística. Y más que todo, me encanta la diversidad de los rasgos.
Pero, sin tanto rodeo, los invito a ver el proceso de este dibujo, ¡vamos allá!
Hiii, friends of the Hivearte community, how are you today? I hope you are doing great!
Today I'm here to show you another of the drawings I'm proud of, especially because it's one of the few times I draw a man.
Before, I really liked to draw women because of their beauty and delicacy, but now I think that not all women are beautiful in a delicate way, and that male beauty is also interesting. I don't know; I'm just talking about how I like to admire the facial features of the human being from an artistic perspective. And most of all, I love the diversity of features.
But, without so much beating around the bush, I invite you to see the process of this drawing; let's go there!
 |  |
|---|
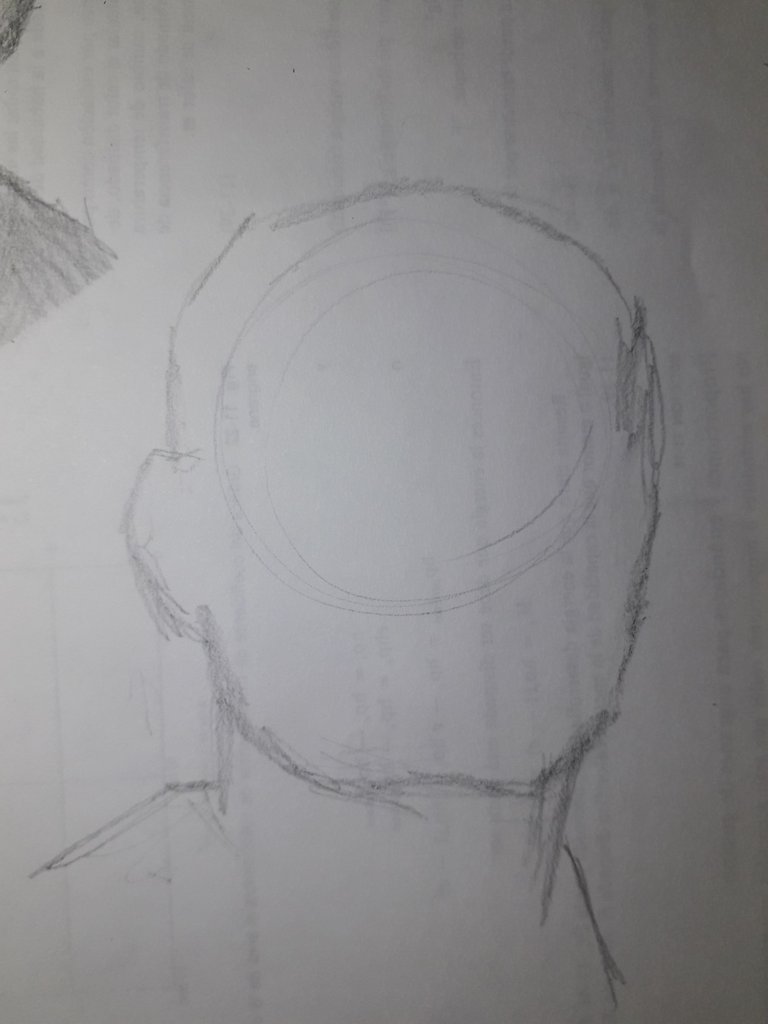
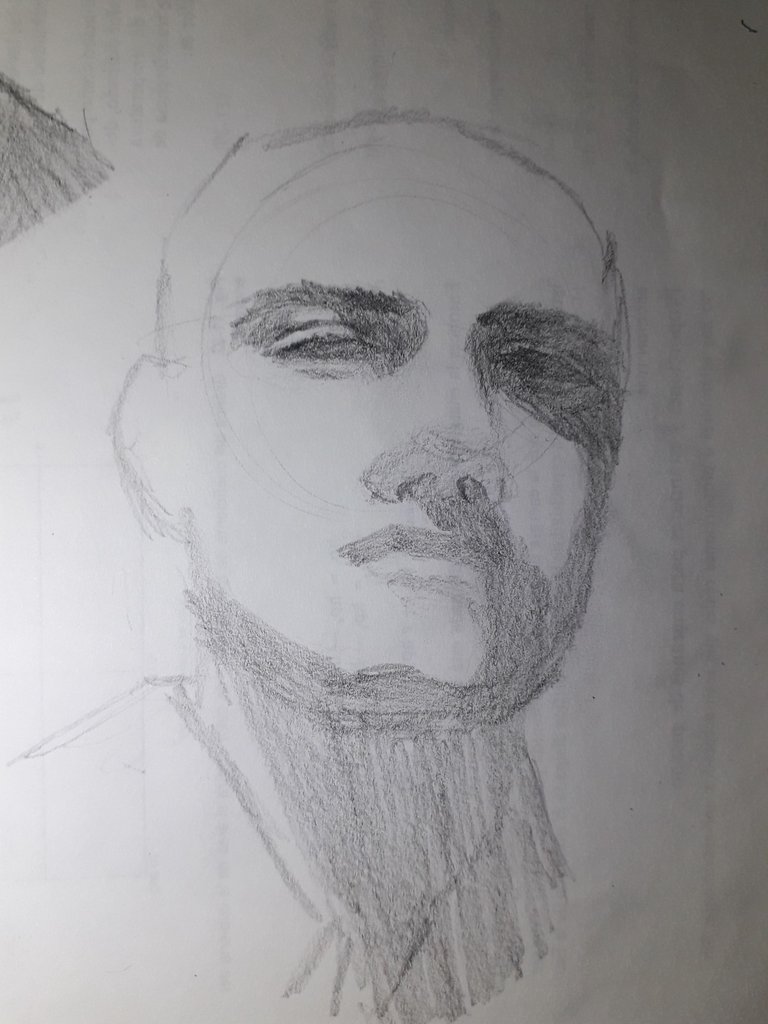
Comencé por hacer un contorno general: cabeza y cuello. Lo fui trazando con líneas rectas y cortas, de manera que al juntarlas todas, crearán una idea de línea curva. Esto lo hice de esta manera para poder mantener la esencia y no perder la orientación del contorno de la referencia.
Esta técnica la vi en un video de YouTube y realmente me ha servido a la hora de hacer dibujos con mucho contraste. Aún no lo domino a la perfección, claro que no, pero me ha ayudado a salir de la zona de confort.
Luego de hacer el boceto del contorno general, intento capturar cada línea inclinada de la cuadrada mandíbula. Este ángulo está un poco mirando hacia arriba, el cual yo considero que es uno de los ángulos más difíciles para mí de dibujar, pero, una vez más, estoy saliendo de mi zona de confort.
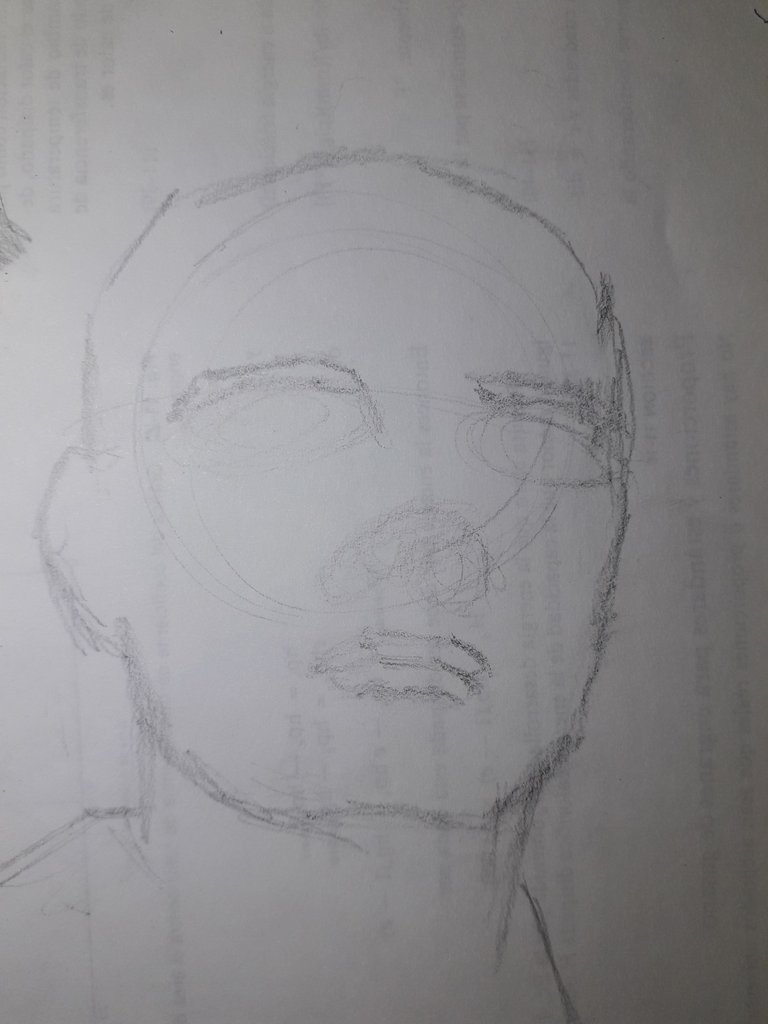
Lo siguiente que hice fue marcar el boceto del grosor de las cejas, las cuencas de los ojos, la base de la nariz y el grosor de los labios. Primero estaba contorneando las zonas donde iba a haber sombra o tonos más oscuros.
Este boceto es solo hasta la frente, el cabello lo añadiré después, ya que siento que es un poco más complicado de manejar en este caso, por el volumen.
I started by making a general outline: head and neck. I traced it with straight and short lines, so that when I put them all together, they would create an idea of a curved line. Furthermore, I did it this way in order to keep the essence and not lose the orientation of the reference outline.
I saw this technique in a YouTube video, and it has really helped me when making drawings with a lot of contrast. I still haven't mastered it to perfection, of course not, but it has helped me to get out of my comfort zone.
After sketching the general outline, I try to capture every slanted line of the square jaw. This angle is a little bit looking up, which I consider to be one of the most difficult angles for me to draw, but again, I'm stepping out of my comfort zone.
The next thing I did was to mark up the sketch of the thickness of the eyebrows, the eye sockets, the base of the nose, and the thickness of the lips. I was first outlining the areas where there were going to be shadows or darker shades.
This sketch is only up to the forehead; the hair I will add later, as I feel it is a bit more complicated to handle in this case, because of the volume.
Aquí comencé a rellenar con grafito las zonas que yo percibí más oscuras (y más importantes): los ojos. Me aseguré de trazar los pliegues de los parpados sobre la marcha e hice trazos que fueran en la misma dirección para mantener la armonía. Dejé una zona en blanco porque eso sería la iluminación.
Here I began to fill in with graphite the areas that I perceived to be the darkest (and most important): the eyes. I made sure to trace the creases of the eyelids as I went along and made strokes that went in the same direction to maintain harmony. I left an area blank because that would be the lighting.
 |  |
|---|
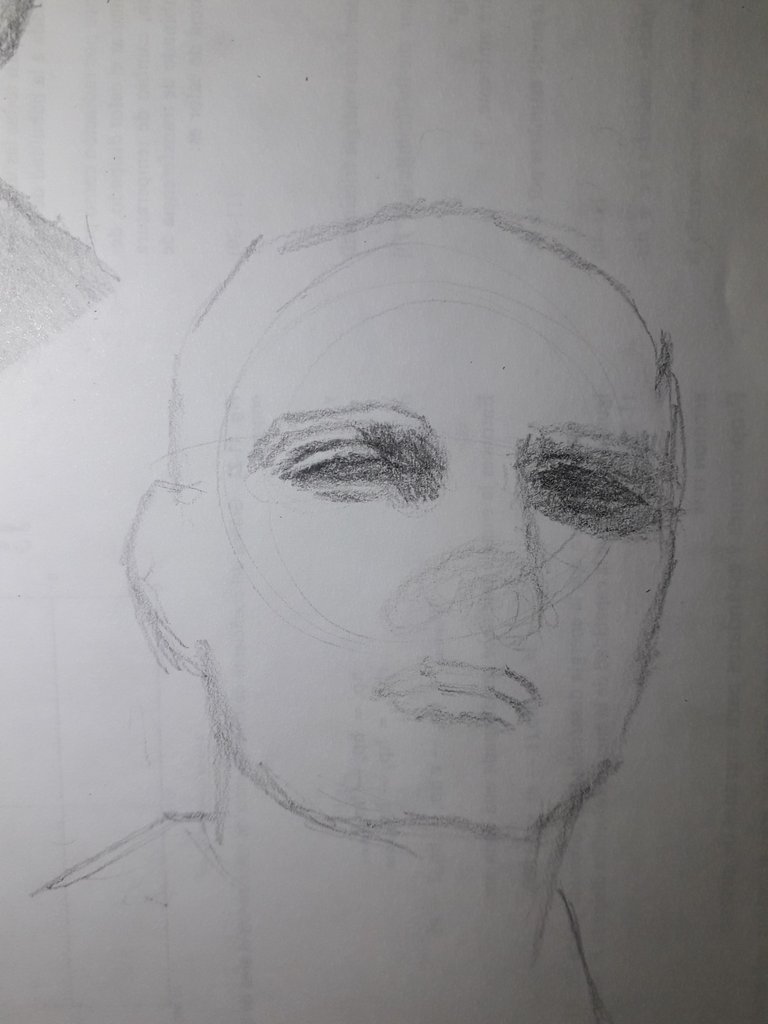
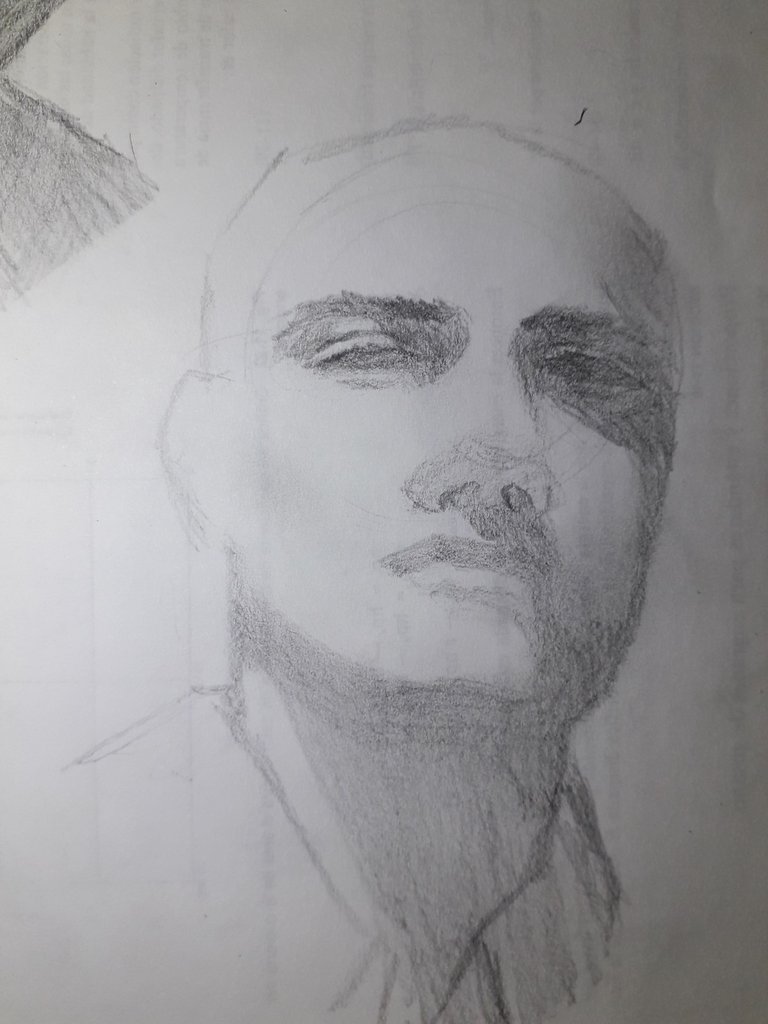
Seguí trazando sombras en la base de la nariz, sin olvidar que las fosas nasales son más oscuras. También marqué suavemente el contorno del tabique de la nariz. El labio superior también tendría una buena cantidad de sombra debido al ángulo y a la iluminación. También dibujé la sombra proyectada por la nariz hacia abajo en el rostro, sobre la boca y el mentón, recordando hacer trazos un poco curvados para denotar el volumen. Por último, dibujé la sombra de la papada.
En la segunda imagen, difuminé y obscurecí algunas zonas del rostro donde fuera competente. Por ejemplo, en las cuencas de los ojos, porque es uno de los lugares donde más se “hace” sombra debido al ángulo e iluminación de este dibujo. Ah, y también añadí las cejas con trazos rápidos, proceso que repetí algunas veces hasta que quedó suficientemente oscuro. Creo que las cejas, junto con los ojos, son de los elementos más oscuros de mi dibujo.
No tengo lápices de dibujo, pero intento hacer lo mejor con lo que tengo. Juego mucho con la presión del lápiz dependiendo de la intensidad del trazo que quiero. El acabado obviamente no es el mismo que si usamos lápices de dibujo, pero lo importante es ser creativos.
También hice la sombra que se proyecta gracias a la cabeza.
I continued to trace shadows at the base of the nose, not forgetting that the nostrils are darker. I also softly marked the outline of the septum of the nose. The upper lip would also have a good amount of shadow due to the angle and lighting. I also drew the shadow cast by the nose down the face, over the mouth, and chin, remembering to make slightly curved strokes to denote volume. Finally, I drew the shadow of the jowls.
In the second image, I blurred and darkened some areas of the face where appropriate. For example, in the eye sockets, because that's one of the places where the most “shadow” is cast due to the angle and lighting of this drawing. Oh, and I also added the eyebrows with quick strokes, a process I repeated a few times until it was dark enough. I think the eyebrows, along with the eyes, are among the darkest elements of my drawing.
I don't have drawing pencils, but I try to do the best with what I have. Furthermore, I play a lot with the pressure of the pencil, depending on the intensity of the stroke I want. The finish is obviously not the same as if we use drawing pencils, but the important thing is to be creative.
I also made the shadow that is projected by the head.
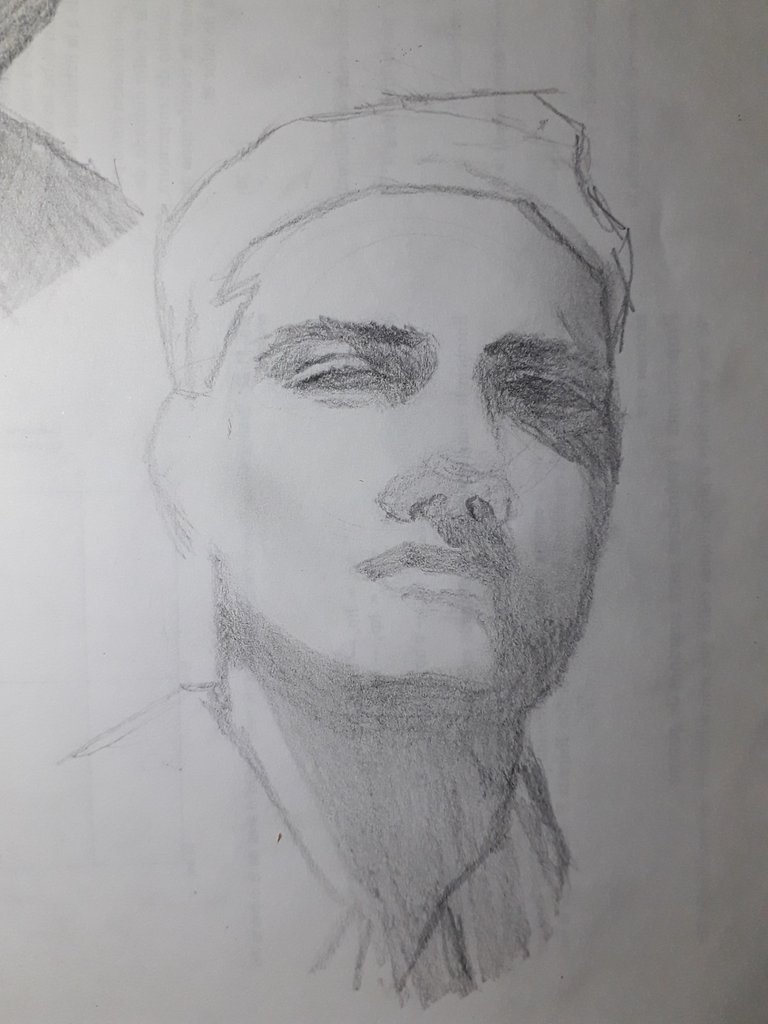
Acá difuminé un poco más para suavizar las sombras y crear una transmisión más armónica.
Con el grafito que se quedaba en mis dedos al difuminar, pasaba suavemente por algunas zonas de la cara para aportar sombras mucho más sutiles. Como en el pómulo izquierdo.
Here I blended a little more to soften the shadows and create a more harmonious transfer.
With the graphite that remained on my fingers as I blended, I gently swept over some areas of the face to create much more subtle shadows. Like on the left cheekbone.
 |  |
|---|
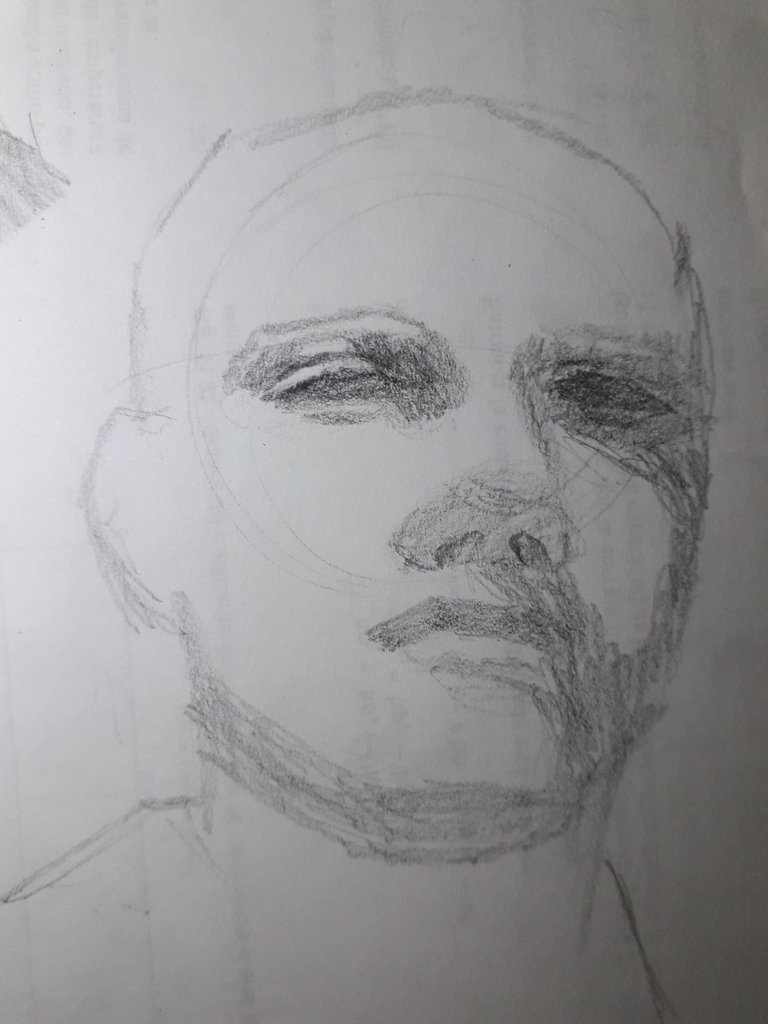
Dibujé el cabello, con trazos rectos. Hay que recordar el volumen del cabello, además de que está peinado hacia arriba, aunque en este ángulo lo intenté dibujar lo más achatado que pude, porque no es tan visible si estamos viendo el rostro desde abajo, ¿me explico?
Después, remarqué ciertos trazos anteriores. Obscurecí las aletas de la nariz, las fosas nasales y el labio superior, también remarcando el borde del labio inferior.
I drew the hair, with straight strokes. You have to remember the volume of the hair, besides the fact that it is combed upwards, although in this angle I tried to draw it as flattened as I could. Because it is not so visible if we are looking at the face from below, do you know what I mean?
Then, I remarked on certain previous strokes. I darkened the nose wings, the nostrils, and the upper lip, also highlighting the edge of the lower lip.
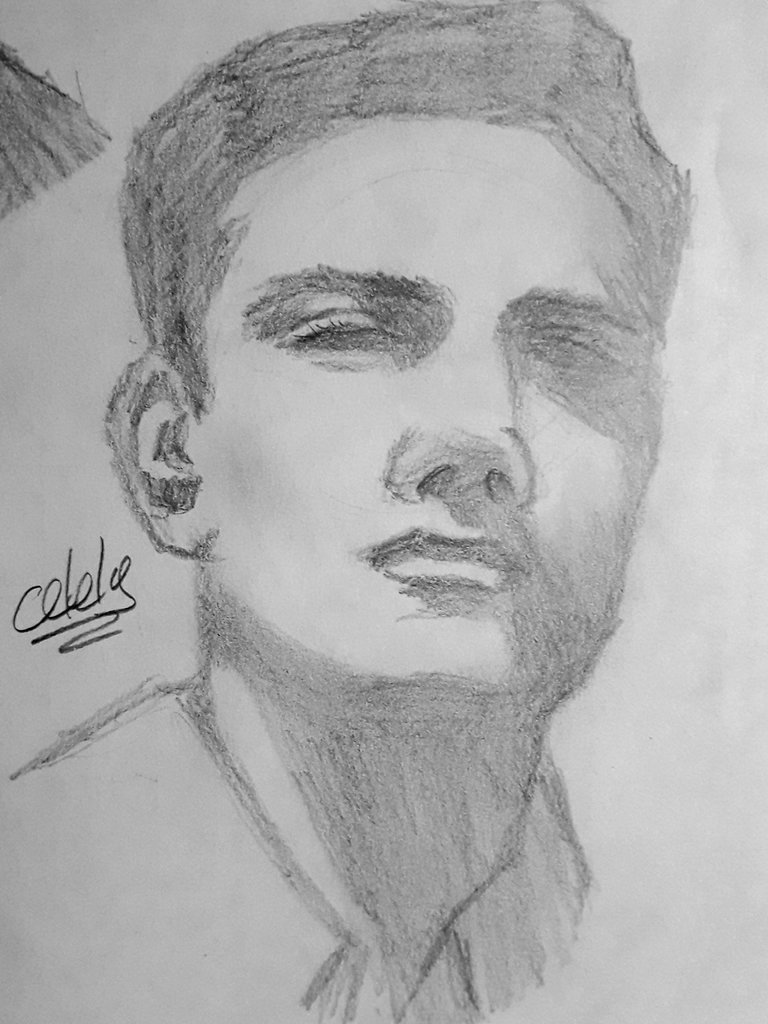
Finalmente, di “color” al cabello, con trazos cortos que seguían la misma dirección horizontal, con el lápiz acostado. Intenté que, de esta forma, diera una idea de cómo estaba peinado el cabello.
También di más obscuridad a algunas zonas del dibujo, pero ya sutilmente como toque final, y remarqué el contorno de otras zonas.
Dibujé la parte dentro de la oreja, que casi lo olvidaba, únicamente dando sombras oscuras en ciertas zonas… Debo admitirlo, aún no sé dibujar orejas.
¿Se dieron cuenta de que añadí estañas apenas perceptibles en el ojo izquierdo?
Y ya estaría.
Nunca he sido buena dibujando hombres, pero ¿adivinen qué? Hay que salir de la zona de confort. Descubrí que, teniendo miedo a equivocarme y que me salieran “feos”, nunca iba a aprender. Y sí, al principio me salieron muy feos, jaja, pero no me rendí. ¿Ustedes creen que este está guapo?
Sin nada más que añadir… Cuídense, tomen agua, y no se olviden de sonreír. ¡Se les quiere! Nos vemos en el próximo post, ¡chau!
Finally, I gave “color” to the hair, with short strokes following the same horizontal direction, with the pencil lying down. I tried to give, in this way, an idea of how the hair was styled.
I also gave more darkness to some areas of the drawing, but now subtly as a final touch, and highlighted the outline of other areas.
Furthermore, I drew the part inside the ear, which I almost forgot, only giving dark shadows in certain areas… I must admit, I still don't know how to draw ears.
Did you notice that I added barely noticeable nails in the left eye?
And that would be it.
I've never been good at drawing men, but guess what? You have to get out of your comfort zone. I discovered that, being afraid of being wrong and getting “ugly,” I was never going to learn. And yes, at first they came out very ugly, haha, but I didn't give up. Do you think this one is handsome?
Without anything else to add… Take care, drink water, and don't forget to smile. Love you! See you in the next post, bye!
Créditos | Credits
- Traducción al inglés DeepL (lo siento por cualquier error, el inglés es mi segundo idioma.)
- English translation DeepL (sorry for any mistakes, English is my second language)
- Banners hechos en Canva
- Banners made in Canva
- Las fotos usadas en el post fueron tomadas por mí, usando un Samsung Galaxy J6.
- Photos used in the post were taken by me, using a Samsung Galaxy J6.
Congratulations @celely! You have completed the following achievement on the Hive blockchain And have been rewarded with New badge(s)
You can view your badges on your board and compare yourself to others in the Ranking
If you no longer want to receive notifications, reply to this comment with the word
STOPSiiii, lo logré. :)
@tipu curate 8
Upvoted 👌 (Mana: 0/65) Liquid rewards.
Te quedó genial, eres muy buena