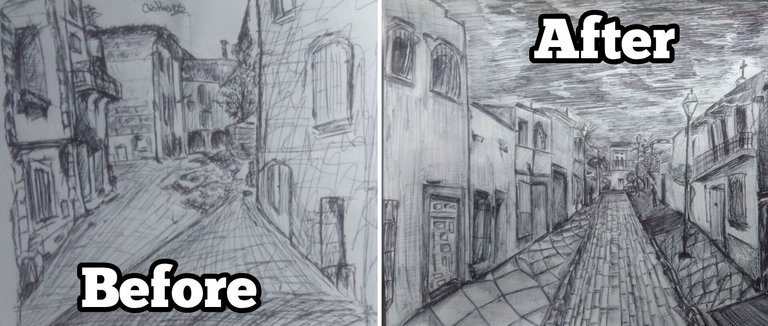
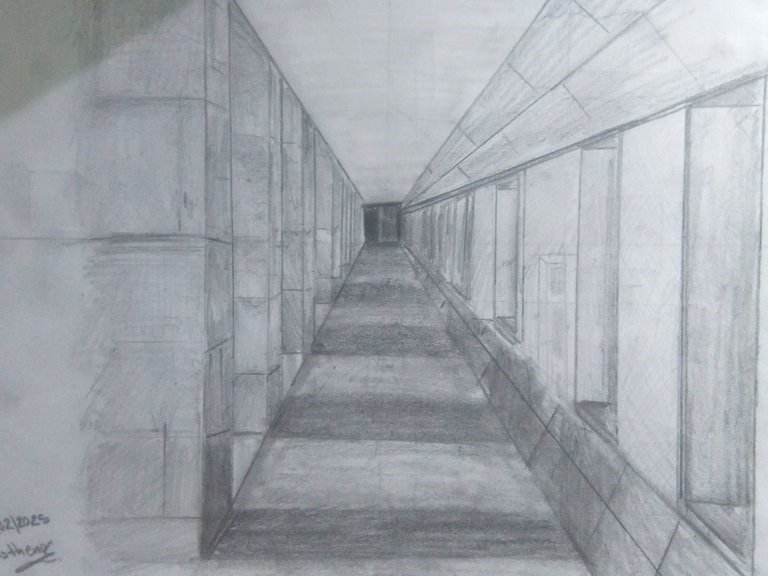
Hello hivearte community I hope you are all very well this weekend which also brings as a gift the beginning of March, I hope you are all very well and I hope you can excuse the inactivity in my blog because it has been a while since my last post on perspective where we cover the four vanishing points that may be present in a drawing, taking into account that there are drawings that may have some more, the case is that I did not have the opportunity to teach you how to develop it in a more elaborate drawing and all this time I dedicated myself to practice the perspective with different buildings, which at first did not fit me very well, I found a way to achieve a drawing which I consider a little professional considering my current level. So, with nothing more to say, I leave you with the rest of the post.
1 hoja blanca convencional
Regla, lapicero y un lápiz H o HB.
Como pueden ver, los materiales no son muy demandantes y lo único que necesitaremos será bastante paciencia, ya que la elaboración de este dibujo tardará aproximadamente 4 días.
For this drawing, we will need the following materials:
1 conventional white sheet
Ruler, pen and an H or HB pencil.
As you can see, the materials are not very demanding and the only thing we will need is a lot of patience, since the elaboration of this drawing will take approximately 4 days.
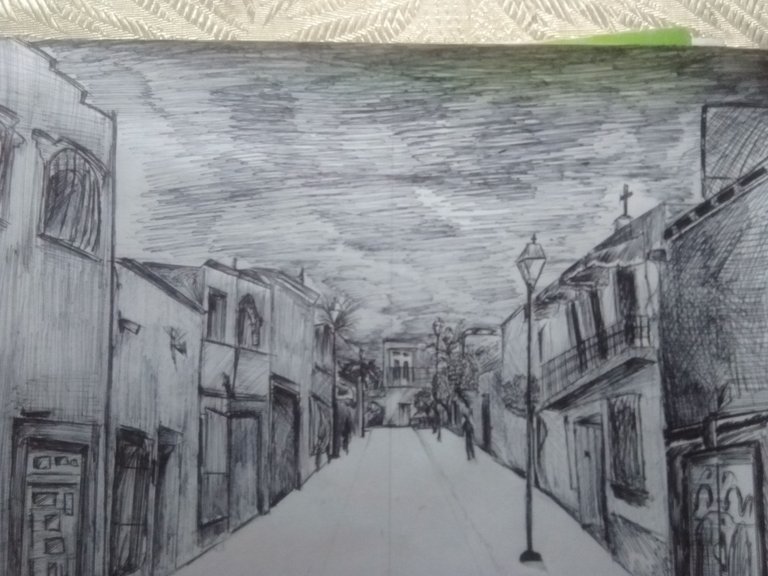
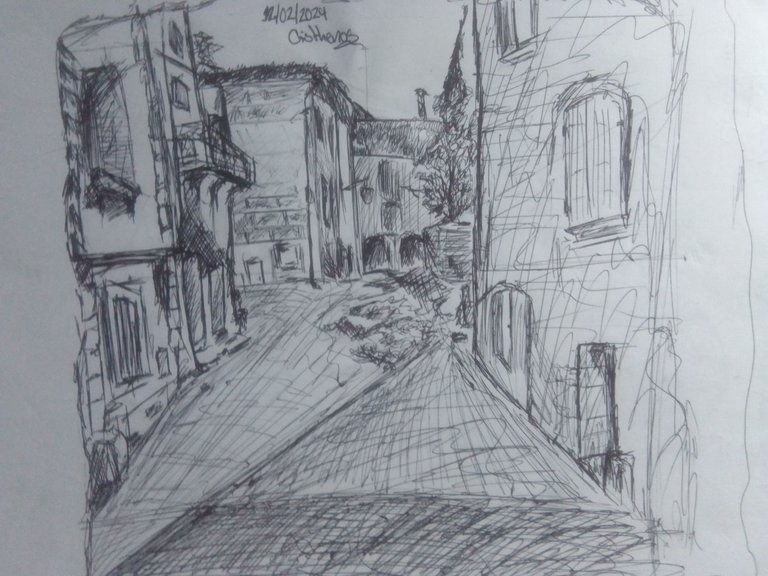
The first thing we will do is to have an image as a reference; in my case I used this one that I found on Pinterest.
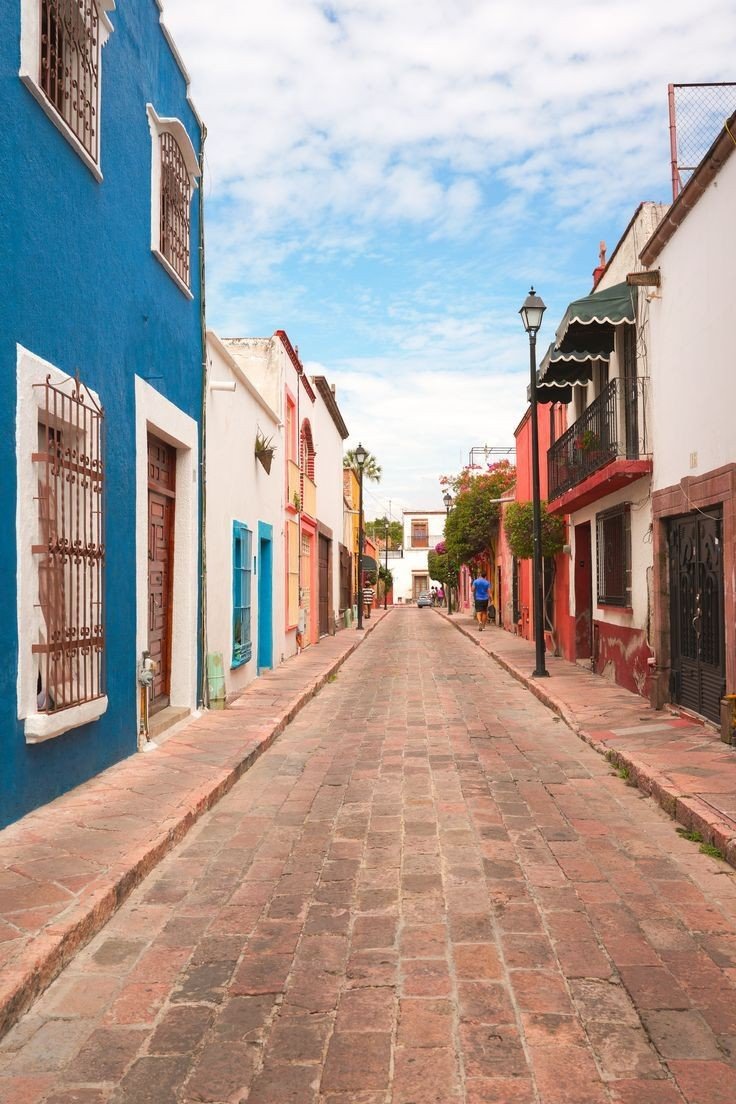
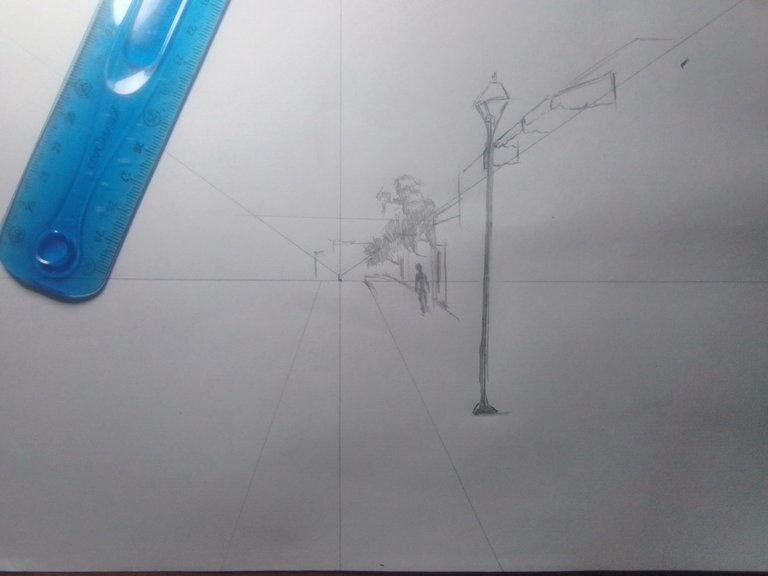
It is a set of houses that, if we analyze the image well, it has only one vanishing point, since everything converges in a single point, and this can be used as a reference when drawing this type of perspective.
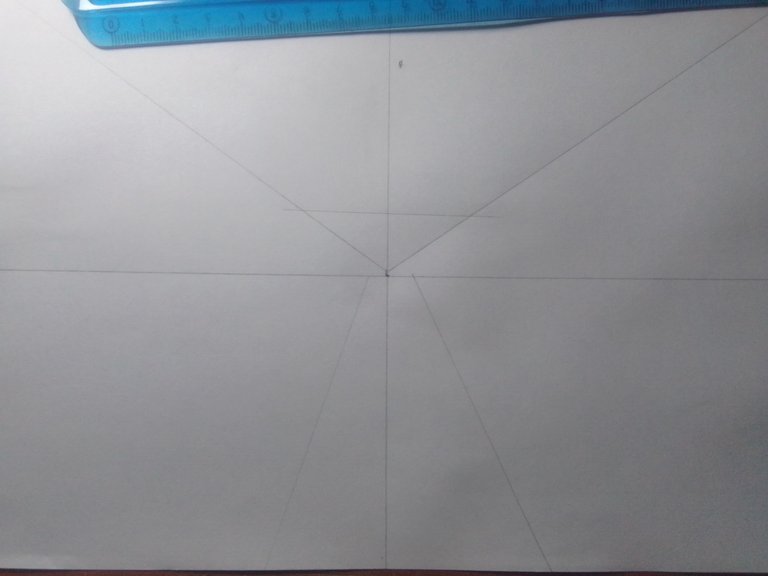
That is why the second thing we will do is to draw the whole structure that we will use as a guide for our drawing. As we can see, we use lines that go from the beginning of the vanishing point and, as they get further away, they get bigger. These will serve as a support point to determine the size of the houses and thus give a sense of depth.
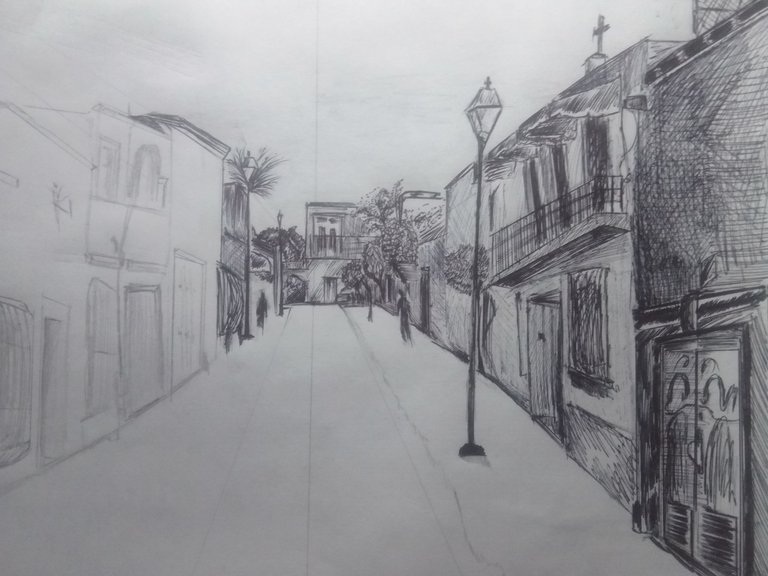
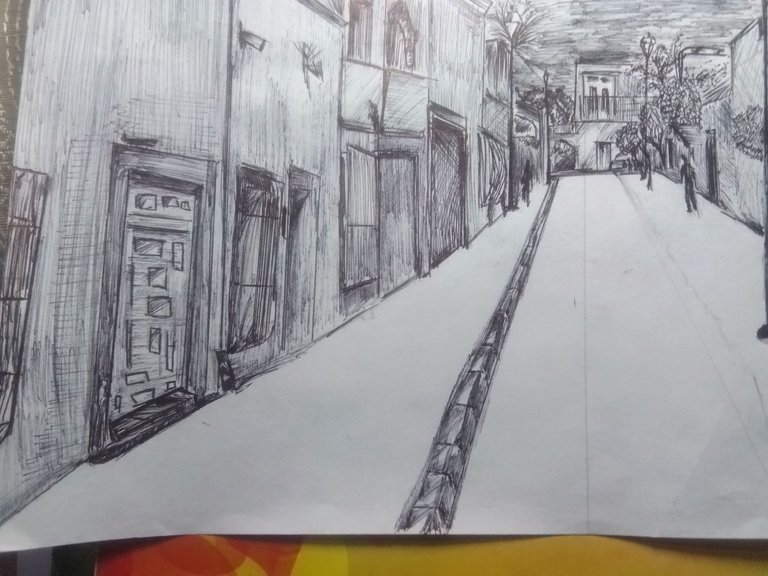
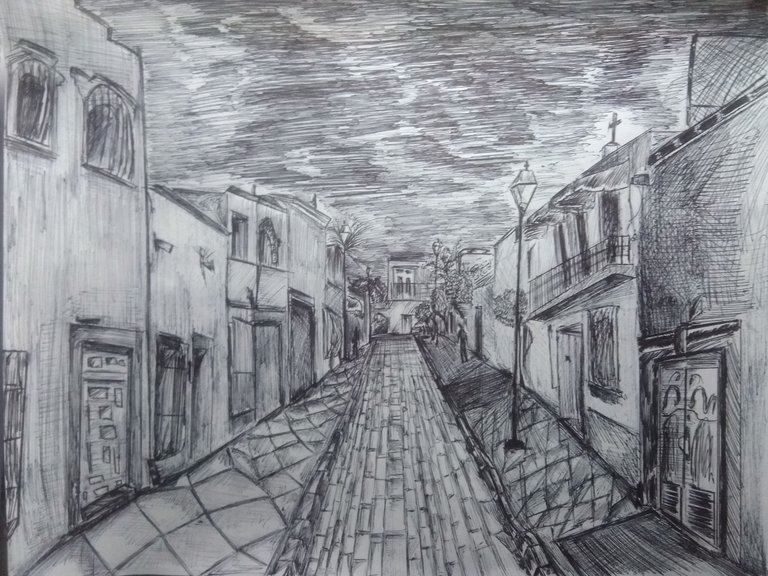
Once we had the whole structure we started to draw. First I started with the right part of the image, where the only thing I focused on was to simulate what I wanted to transmit so as not to go into so much detail.

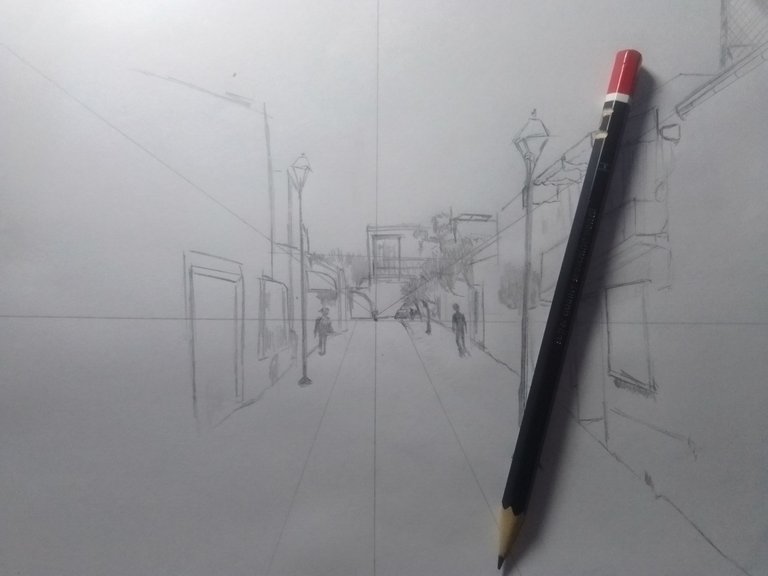
Once the right side is drawn, we move to the left side where we will follow the same logic as the right side; if you want, you can also determine the area of the sidewalk so as not to get lost when marking.
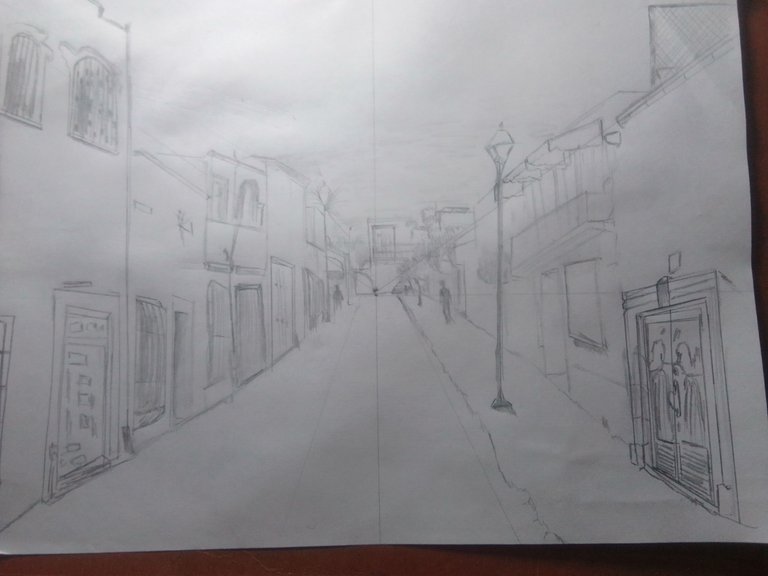
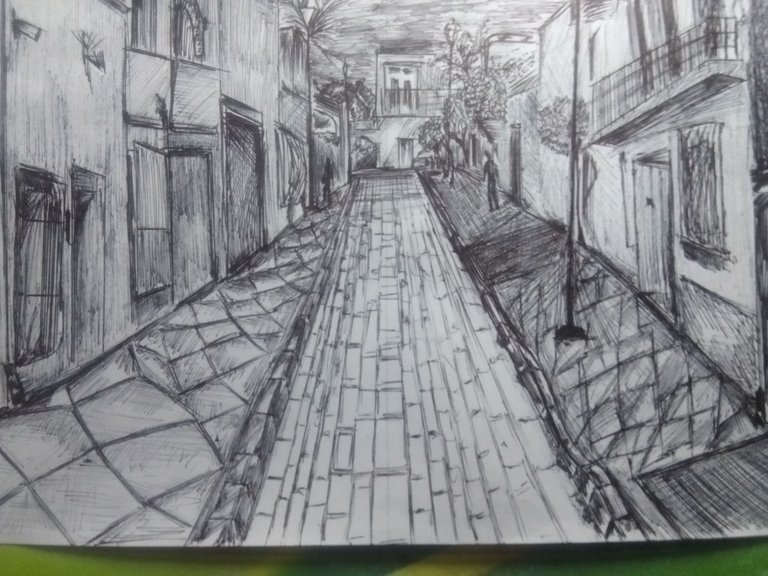
With all our sketch drawn, we move on to the best part and by default the most patient of all: giving texture to our drawing.
For the texture I thought of using a pencil, since I had also made a similar drawing with a pencil and I quite liked the result. The first thing we will do will be to start with the most comfortable part for you; in my case, I started in the same way as with the sketch. Here we will try to imitate everything so that we have an idea of what we want to transmit.

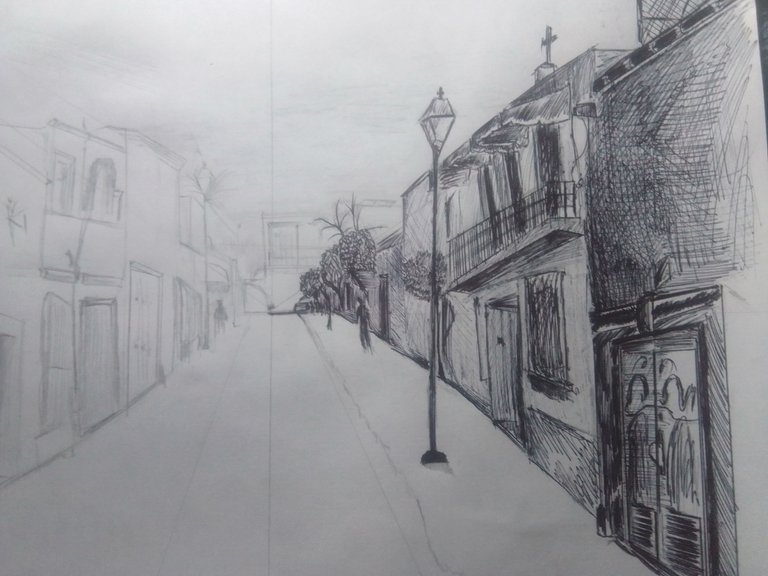
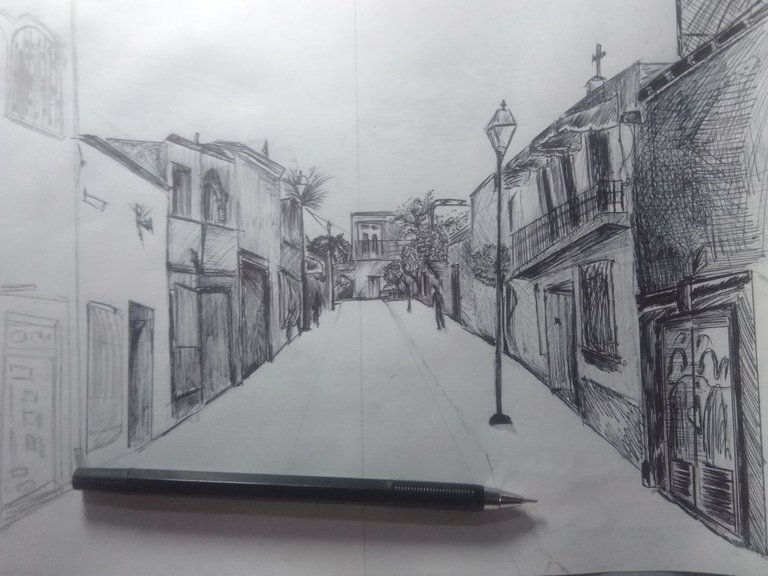
It also occurred to me to use a little bit of flattening to give it texture and a little doodling for those areas that were not too visible. If it takes a long time, it is normal, and thanks to this drawing I came to the conclusion that it requires patience.
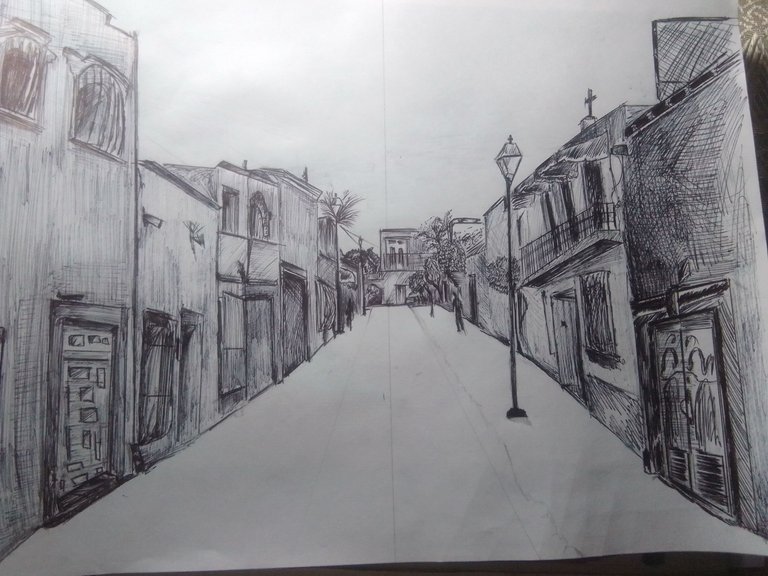
Once I finished giving textures to the house, we moved on to the clouds, which I thought of doing only with lines that were light and some darker to create a visual effect and create a feeling that it is a sky. Here it was also a touch more to my taste because it is quite far from the original image.
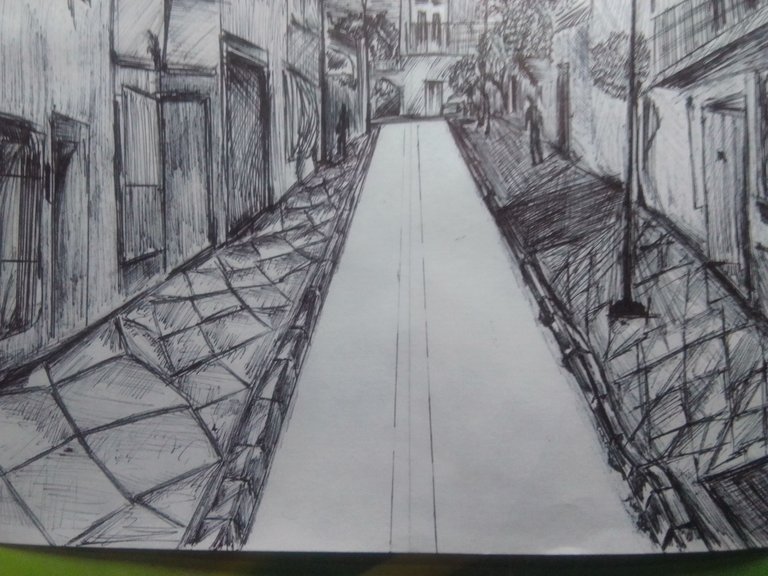
When I started with the sidewalks of the street, the first thing I did was to determine the width they would occupy in order to know how I would set them.
For the floor of the sidewalk I used some rhombuses to simulate some figures on the floor so that it didn't look so empty.
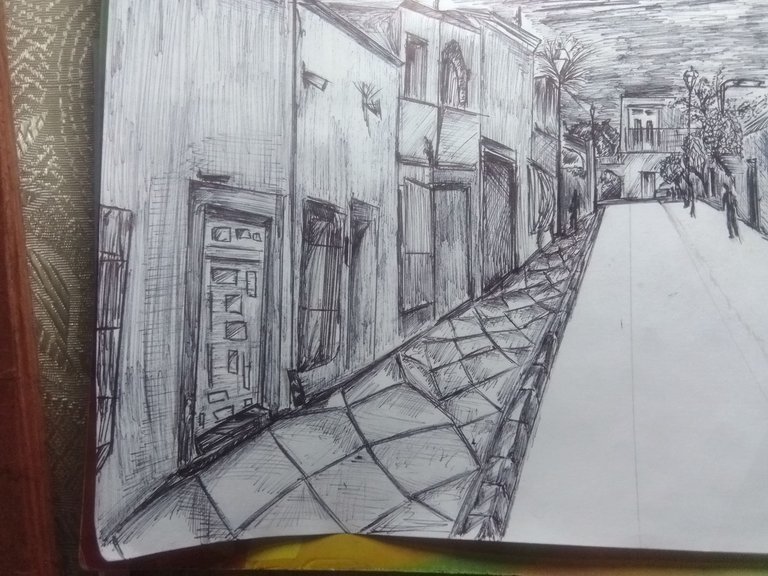
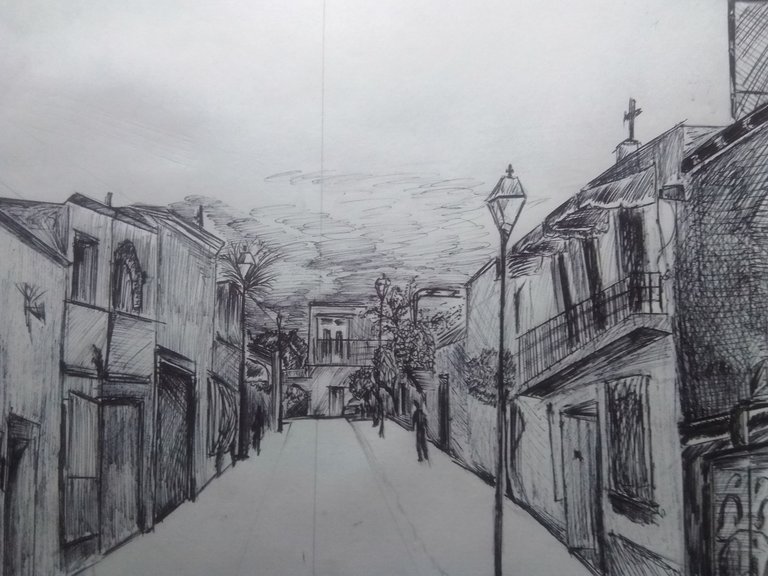
One mistake I made when starting with the other part of the sidewalk was that I didn't take into account the perspective of the rhombuses and they looked a little weird, but with a little time we can use those mistakes and turn them into opportunities or learn from them.
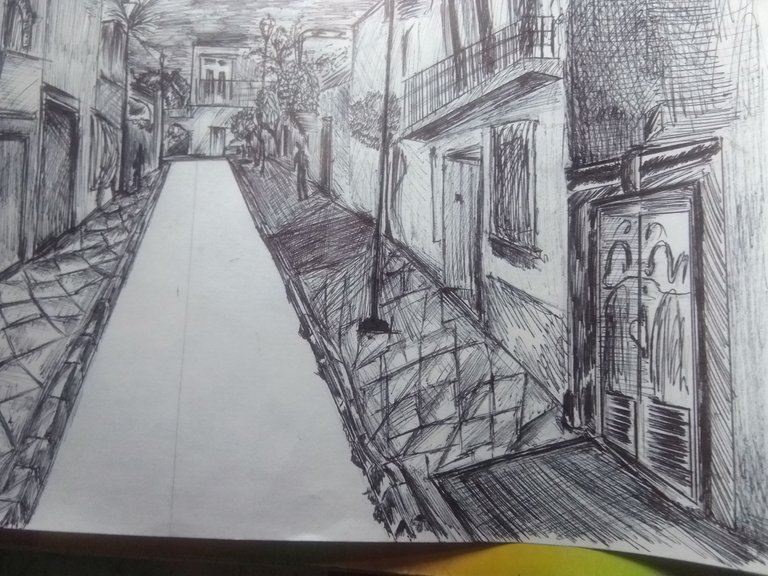
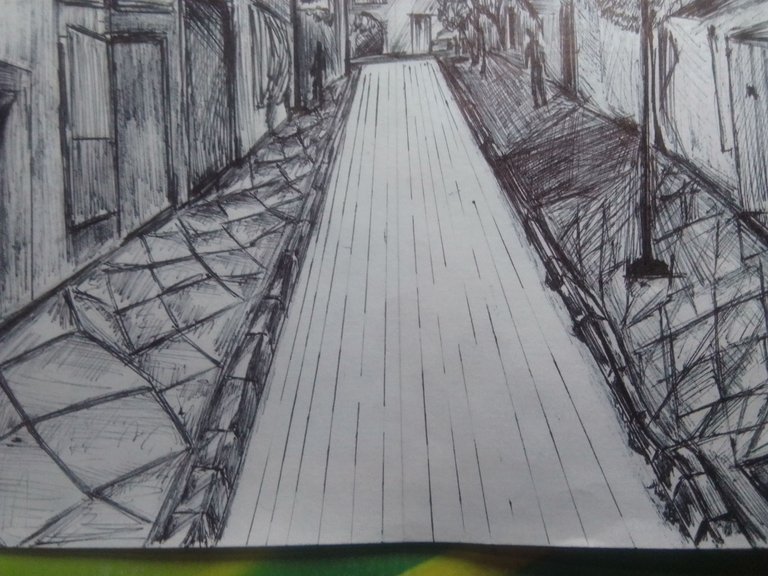
For the street floor I just draw a main line and from there I draw smaller lines to simulate a brick floor and the rest is a matter of practice.
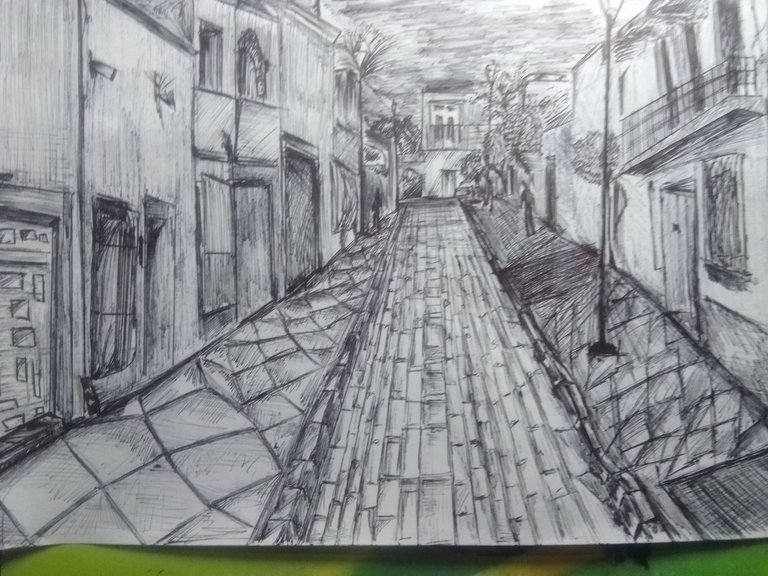
To be honest, I'm quite happy with this drawing. I had already made some attempts at perspective drawings and the truth is that they didn't look very good and it was thanks to these where I could learn from those mistakes and learn from them to achieve this drawing that, to be honest, I was quite surprised that something so elaborate came out of my hand, which shows that if we keep practicing we can achieve what we set out to do.
I hope you liked my post; I bid you farewell until next time.

Congratulations, you received an ecency upvote through the curator @sahi1. Keep spreading love through ecency
@tipu curate 8
Upvoted 👌 (Mana: 0/75) Liquid rewards.
Maravilloso trabajo! 👏🏻👏🏻 A mí eso de los puntos de fuga me da un poco de miedo, se ve bastante complicado y como dices hay que tener mucha paciencia. Me parece que vas exelente. 🥰🫰🏻
Muchas gracias
Hacer perspectiva es de lo más difícil a la hora de dibujar, realmente obtuviste un muy buen resultado 👍
Gracias 🫂