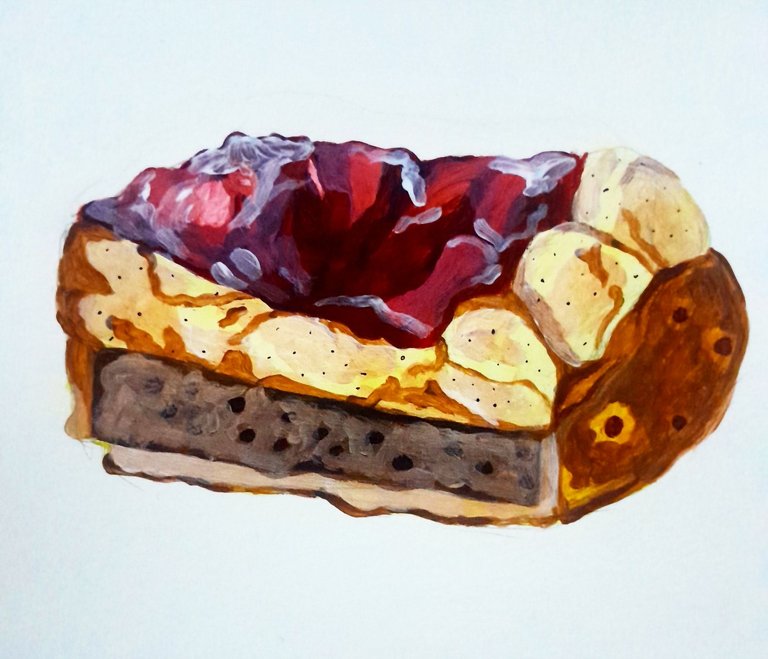
Hola artistas de Hive! El día de hoy traigo un nuevo tutorial para ustedes. En esta ocasión les enseñaré a pintar una tarta realista usando pintura acrílica, marcadores y lápices de colores.
Se que se puede ver algo complicada, pero les aseguro que siguiendo los pasos al pie de la letra les va a quedar igual o aún mas bonita. Aquí los dejo con el tuto.
Hello Hive artists! Today I bring a new tutorial for you. This time I will show you how to paint a realistic cake using acrylic paint, markers and colored pencils.
I know it may look a little complicated, but I assure you that following the steps to the letter it will be just as pretty or even prettier. Here I leave you with the tutorial.
PROCESO // PROCESS
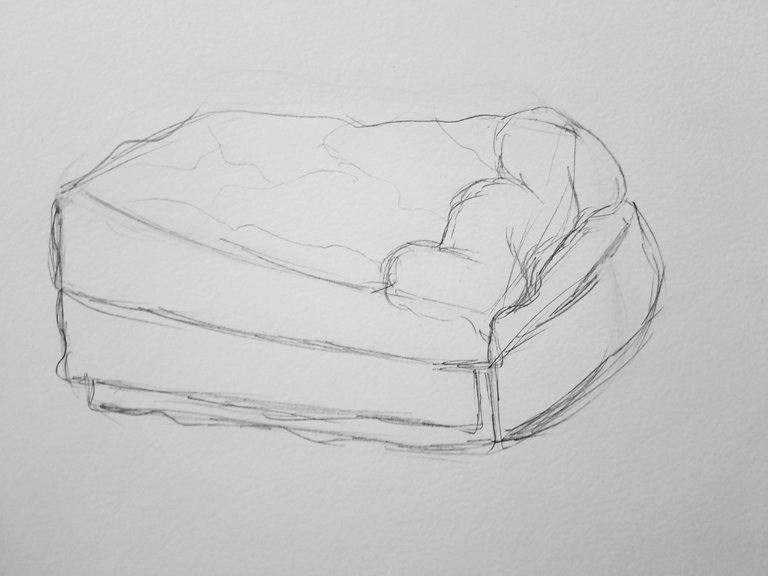
Empezamos haciendo el boceto. En mi caso simplemente me guié de la forma que tenia la imagen de referencia, ustedes pueden buscar una igual y calcar (lo cual no está mal).
We start making the sketch. In my case I simply followed the shape of the reference image, you can look for the same one and trace it (which is not bad).
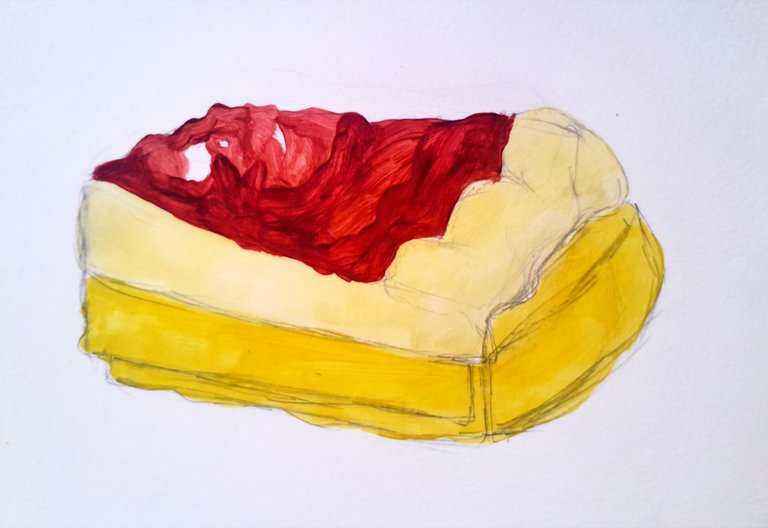
Luego de eso, empezamos a darle la primera capa de pintura al dibujo:
- En la parte de la mermelada o glaseado de la tarta pintaremos levemente con rojo y rosado, dejando algunas partes en blanco las cuales darán esa ilusión de brillo.
- La segunda capa que vendría siendo el ponqué en si la pintaremos con un color beige o naranja muy pálido.
- Para la base del ponqué utilizaremos un color amarillo.
Les debe quedar así:
After that, we begin to give the first coat of paint to the drawing:
- In the part of the jam or icing of the cake we will paint lightly with red and pink, leaving some parts in white which will give that illusion of brightness.
- The second layer, which would be the cake itself, will be painted with a beige or very pale orange color.
- For the base of the cake we will use a yellow color.
It should look like this:
Empezamos a dar sombra y detalle en la base de la tarta con un color café claro.
We start shading and detailing the base of the cake with a light brown color.
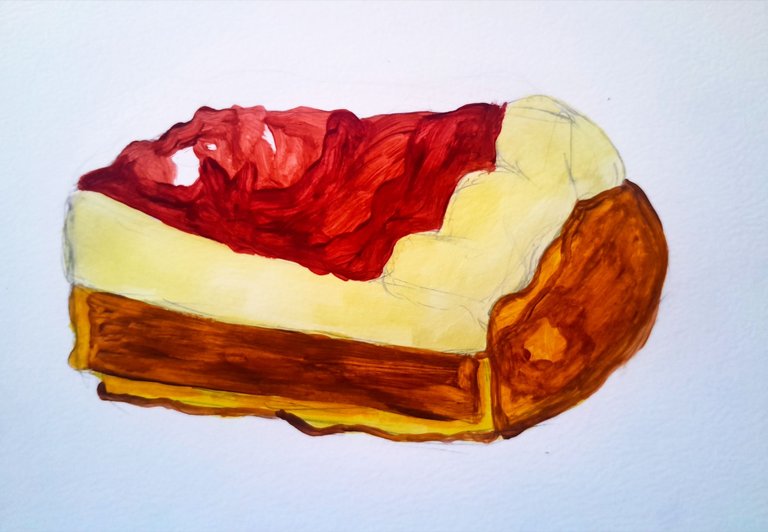
Luego continuamos con la capa del ponqué la cual vamos a oscurecer con un tono beige oscuro; este mismo tono también lo aplicaremos en la base de la tarta para dar luz.
Para la parte superior (la mermelada) usaremos un rojo oscuro para dar sombra, siempre cuidando las zonas de luz.
Then we continue with the layer of the cake, which we will darken with a dark beige tone; this same tone will also be applied to the base of the cake to give light.
For the upper part (the jam) we will use a dark red to give shade, always taking care of the light areas.
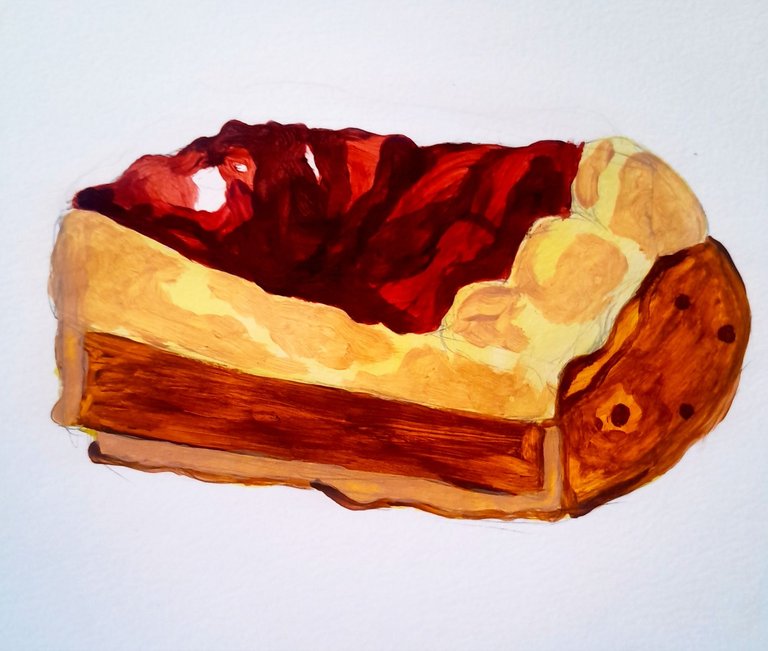
Seguimos dándole forma al dibujo con el café oscuro en la parte de la base y en el ponqué. Para la mermelada usaremos un rojo quemado para seguir dando profundidad a esa zona.
We continue shaping the drawing with the dark brown on the base and on the cake. For the jam we will use a burnt red to continue giving depth to that area.

Agregamos blanco para dar luz en la base, llenamos de puntitos cafés la zona blanca y en la mermelada, agregamos rosa claro.
We add white to give light at the base, we fill the white area with brown dots and in the jam, we add light pink.
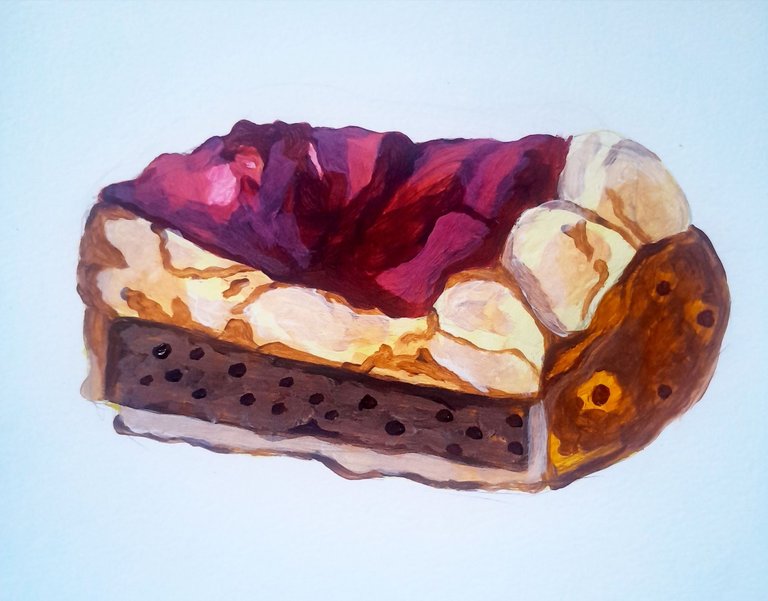
Por ultimo, terminamos de dar luz a la mermelada con blanco y listo!
¿Les gustó?
Finally, we finish the jam with white and that's it!
Did you like it?

Thanks for reading and watching.
@tipu curate 2
Upvoted 👌 (Mana: 35/75) Liquid rewards.
ty so much 😍
Me encanta 😌
Gracias c:
Contáctenos para saber más del proyecto a nuestro servidor de Discord.
Si deseas delegar HP al proyecto: Delegue 5 HP - Delegue 10 HP - Delegue 20 HP - Delegue 30 HP - Delegue 50 HP - Delegue 100 HP.
Muchas gracias c: