FULL ENGLISH VERSION

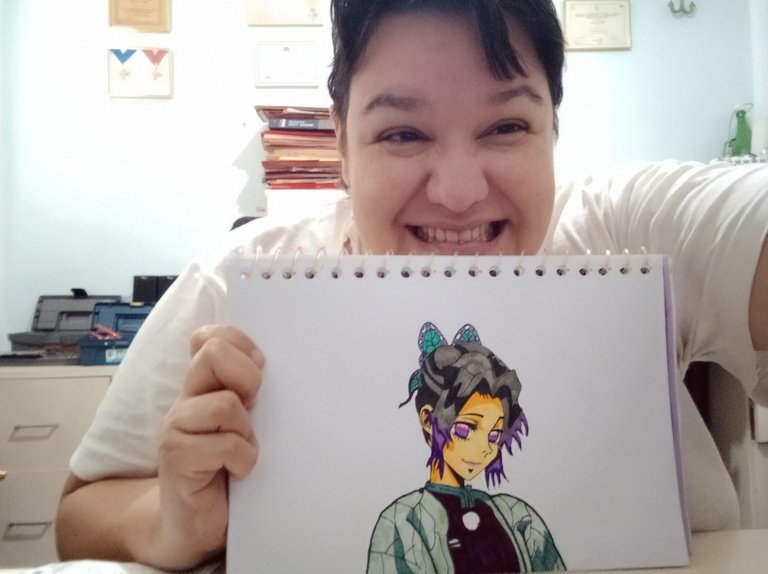
Kimetsu No Yaiba movie is about to be released, I drew Shinobu Kochou, one of my favorite pillars of the series. Greetings dear Hivers of the #HiveArte Community. I'm here with you because I want to share a drawing I made today with much love and enthusiasm. Since the
And well, for me there is nothing better than trying to make one of your favorite anime characters for the first time and it comes out so great following simple steps from people who are dedicated to this professionally. For me, it was a great achievement to get this result, and at the same time, it was complicated for being the first time, but it was worth the effort.

𝐌𝐚𝐭𝐞𝐫𝐢𝐚𝐥𝐬 𝐭𝐨 𝐔𝐬𝐞
- Fine Point Touch Markers, colors: Blender (0), Black (120), Old Red (2), Emerald Green (55), Pastel Pink (17), Azalae Purple (87), Green Gray (GG3), Warm Gray (WG6), Deep Violet (81), Pastel Peach (26) and a Rose Art Brand Lilac.
- Mongol Pencil N° 2.
- Sharpie Rapidograph Black.
- Rule.
- Eraser.
𝐒𝐭𝐞𝐩-𝐛𝐲-𝐒𝐭𝐞𝐩
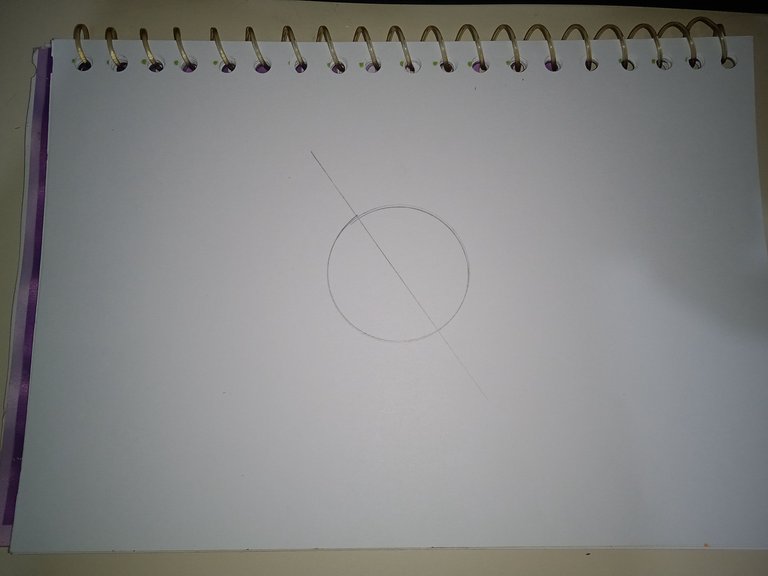
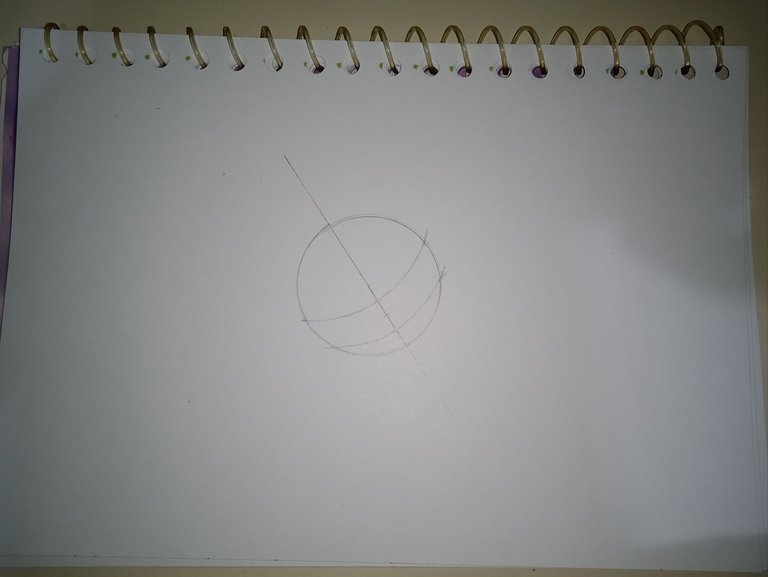
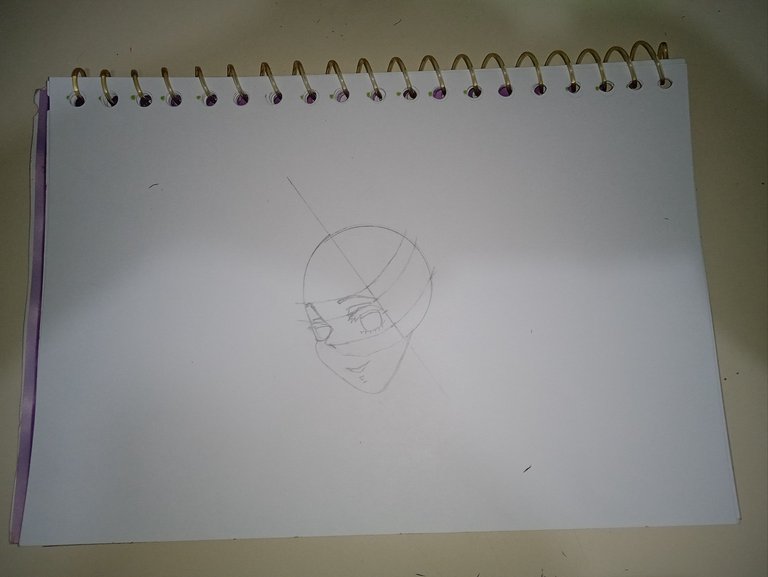
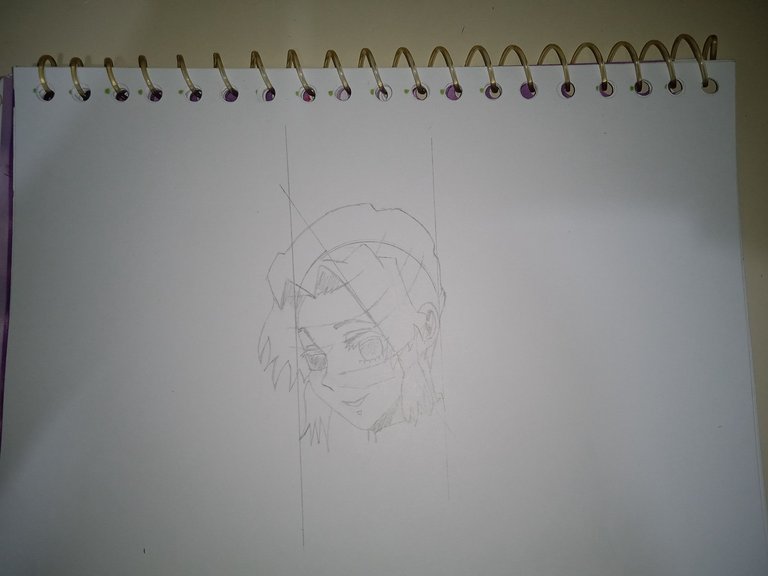
I started by making a 5 cm diameter circle with a slanted guide line going through the middle of it.
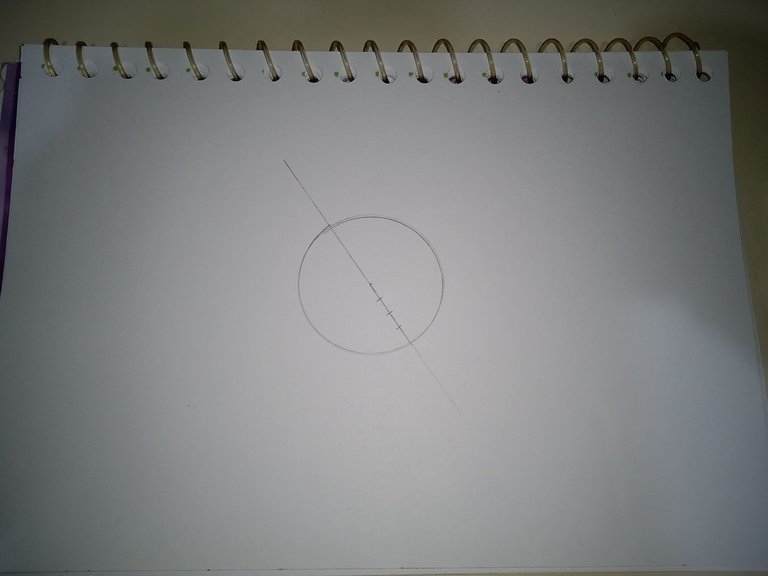
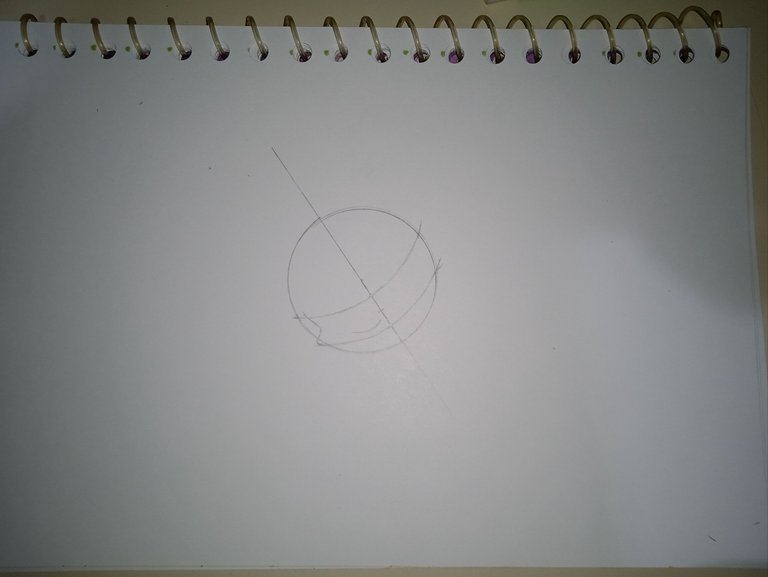
I then divided the lower part of the line (below the center) into four equal parts, to draw more guide lines again.
As you can see, I drew a guide line in the center and in the third division in a semi-horizontal way, or rather semi-circular and inclined. So far so good up to this point.
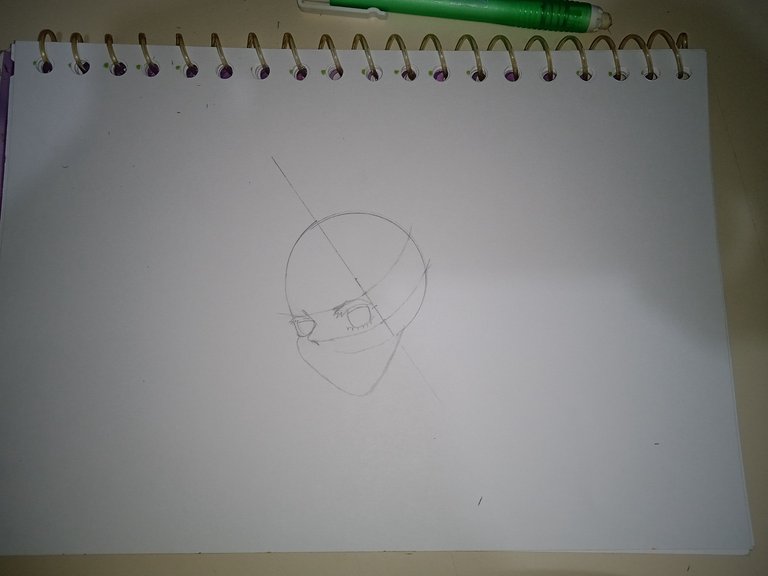
This is where the crux of the matter began. It was quite complicated for me to correctly square the thickness and space of the nose. But here I show how I start drawing the lower line of the eye, note that it does not touch the lower guide line, this detail is extremely important.

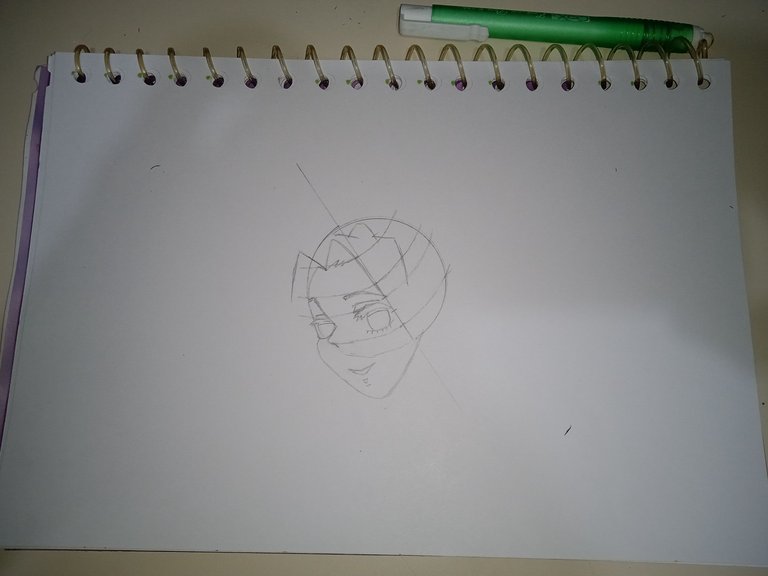
By this step I had the Left eye fully assembled, including its eyelash, which, according to the teacher of my favorite YouTube channel, he insisted should be thicker than normal.
The right eye was the one that gave me the most work, along with the blessed nose of Shinobu. And the separation between the guide lines I made was quite small, so I had to apply a force method, “enlarging” a little bit more the circle on that side. And well, it's the first time I use this method, so it was difficult for me this part. My recommendation is to use a larger circular measure so that it is 5 cm in diameter, maybe 7 cm will be enough to avoid what happened to me, that I could not square well either the eye nor the nose.
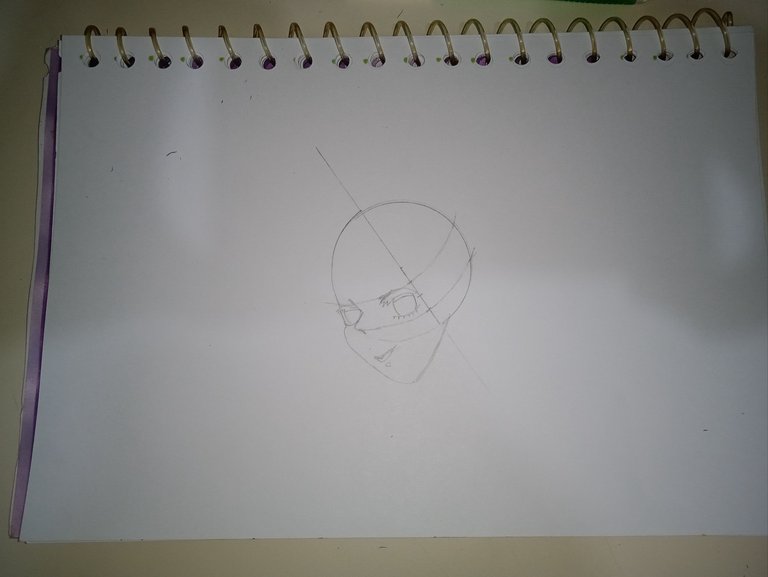
Here I accommodated as best I could the previous part mentioned above and sketched as best I could the silhouette of her lips. This angle, working as an amateur is another level 🤣.
For this part I redrew a guide line to outline Shinobu's eyebrows and part of Shinobu's eyelid.
After that, in the middle of the top guide line, which is diagonal, I divided in two to redraw a guide line of what would be the size of her forehead in a symmetrical way. So that's when I started shaping her hair.
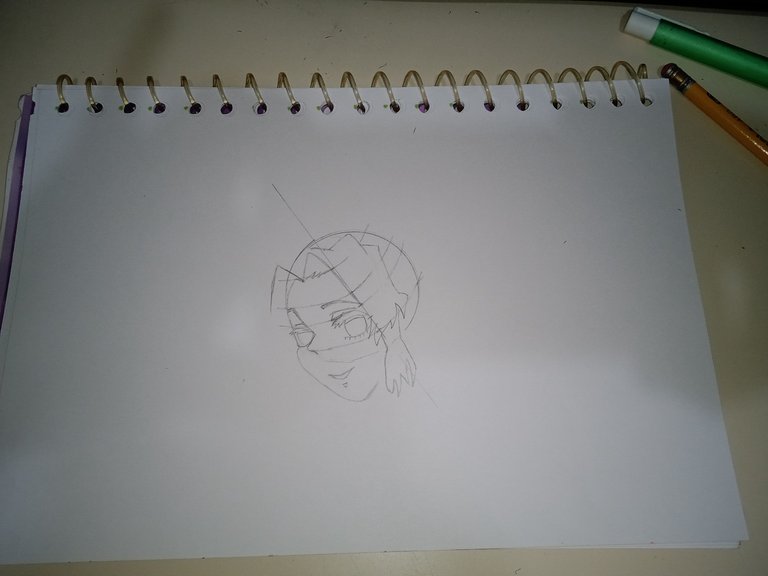
I started by detailing her characteristic side locks and her upturned fringe.
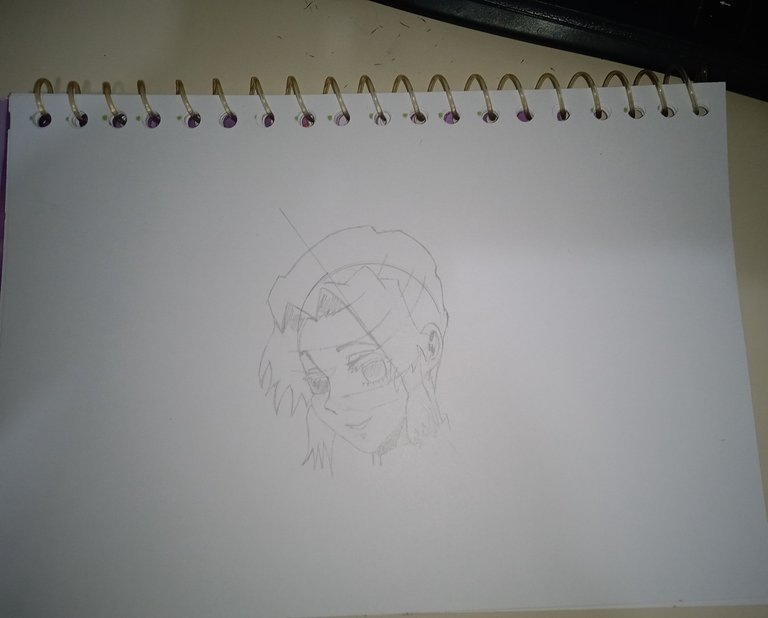
Then what I did was to complete the upper part of what would be her hair volume, which can be taken as a measure about 2 cm wide for this.
Then I drew two vertical lines in a symmetrical manner that would skim the boundary of the base circle. These lines will serve as a guide for me to square the butterfly-shaped bow of our beloved Shinobu.
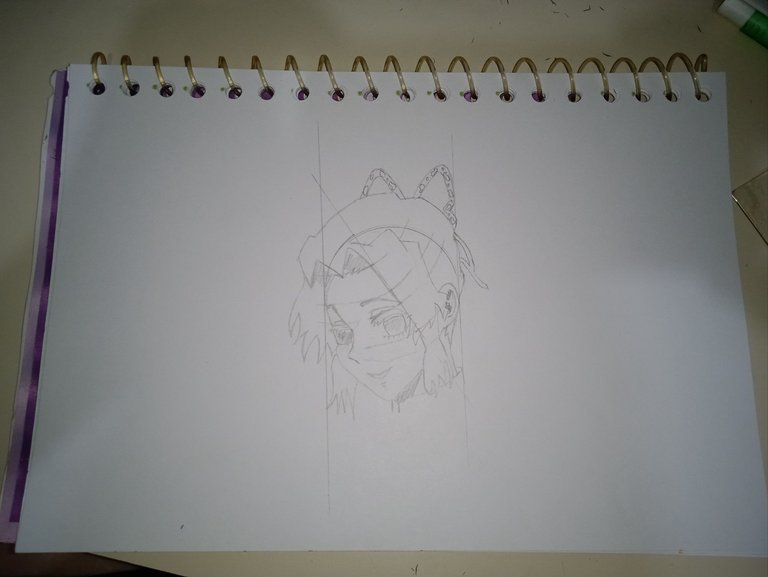
Here you can see how the butterfly bun looks like. Since Shinobu has short hair, the back of her tail is not visible due to the position of her face.
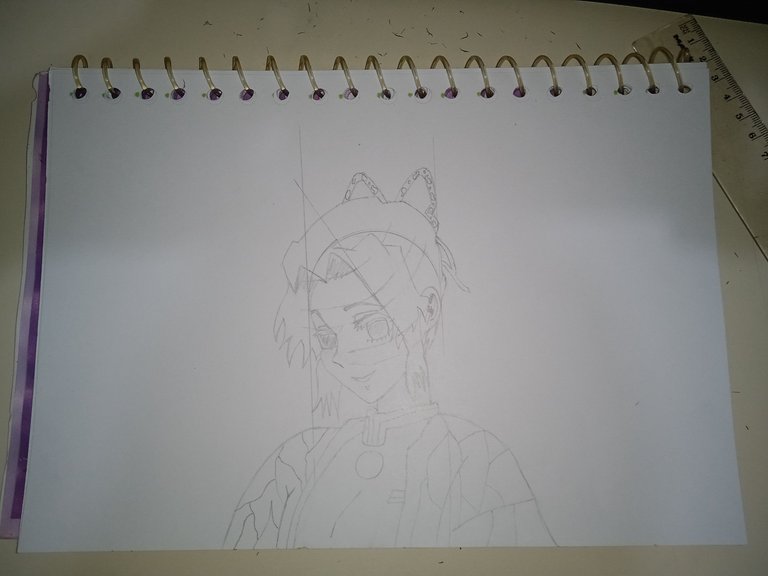
Then I had to assemble her upper torso with her respective Pilar uniform and her characteristic Haori with butterfly design. This way I completed my pencil sketch of my favorite character.

Then what I did was to outline with the Rapidograph and my Touch black fine tip marker.
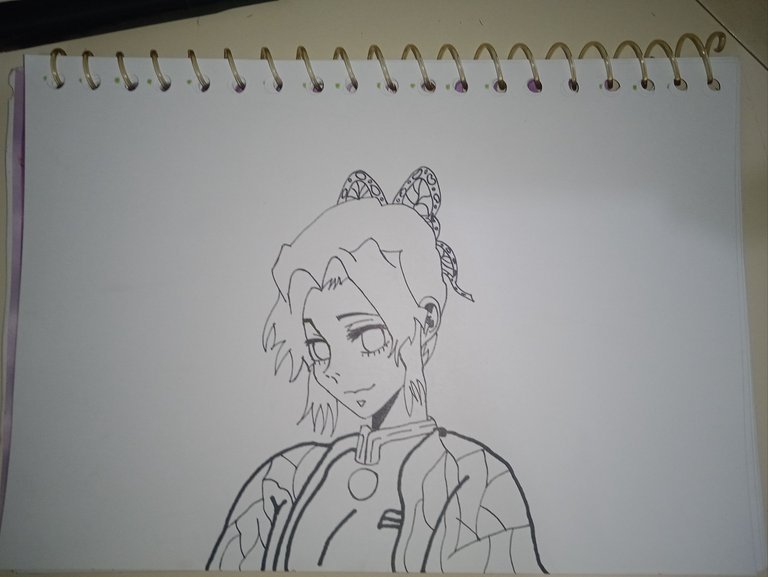
Then I just erased the pencil marks and the result is a freehand sketch of my beloved Shinobu. So far it looks amazing, but it needs a bit of color, don't you think?
𝐂𝐨𝐥𝐨𝐫𝐢𝐧𝐠 𝐒𝐭𝐚𝐠𝐞
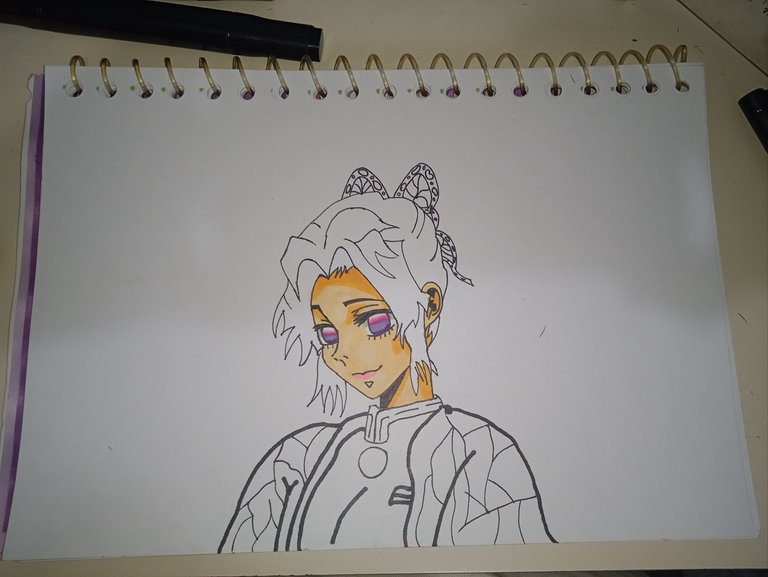
First I drew her eyes, then her face and finally her lips. As you can see, I highlighted the shadows in black and darker colors on certain parts of her face, neck, and ear.
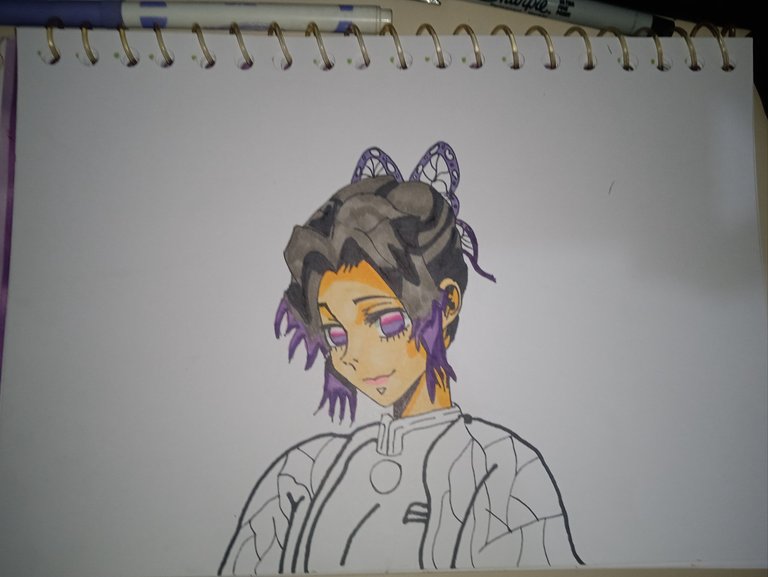
Then I drew her hair, making the shadows with the black and purple color on her ends. For the lighter tones, I used the lighter gray that I had as a marker and the lilac color Rose Art that I had hidden there. At the end, I highlighted with the pink color all the purple part of the hair to give it a touch of gradient, leaving as a final result the following:
𝐅𝐢𝐧𝐚𝐥 𝐑𝐞𝐬𝐮𝐥𝐭
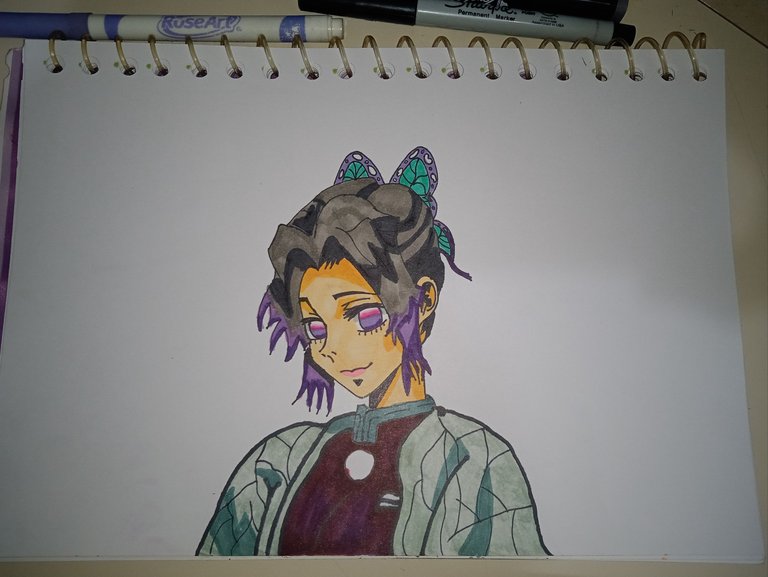
For this drawing I used two video guides that I found very useful. Although I wanted to opt for the first option from my master YouTuber Gamo Art, who explains very simply his step-by-step. This time he went a step beyond my amateur level by adding the Shinobu sword.
And although it wasn't complicated to draw his hand, his arm, and the sword, it was difficult to make the Japanese letters with that sophisticated effect that he made it so sophisticated. That's why I went for the simple, taking the idea of another super talented YouTuber who draws in pencil without color, his name is SS Art1 and I liked his style so I recommend both of them if you want to learn how to draw like me.
Mixing the best of both artists I managed to elaborate Shinobu Kochou in a sublime way. Next time I'm still looking forward to bringing you more characters from Kimetsu No Yaiba. See you soon! 🧡
At the end of the post you can see the Complete Video Tutorial from which I was guided to make this drawing. click on HERE to go there
Español
Kimetsu No Yaiba, en esta ocasión dibujé a Shinobu Kochou, uno de mis pilares favoritos de la serie. Saludos apreciados Hivers de la Comunidad #HiveArte. Estoy por aquí con ustedes porque deseo compartir un dibujo que elaboré hoy con muchísimo cariño y entusiasmo. Ya que está próximo el estreno de la película de
Y bueno, para mí no existe nada mejor que intentar elaborar uno de tus personajes favoritos de animé por primera vez y te salga tan genial siguiendo pasos sencillos de personas que realmente se dedican a esto profesionalmente. Para mí fue una nota conseguir este resultado y a su vez fue complicado por ser la primera vez pero valió la pena el esfuerzo.
𝐌𝐚𝐭𝐞𝐫𝐢𝐚𝐥𝐞𝐬 𝐚 𝐔𝐭𝐢𝐥𝐢𝐳𝐚𝐫
- Marcadores Touch Punta Fina, colores: Blender (0), Black (120), Old Red (2), Emerald Green (55), Pastel Pink (17), Azalae Purple (87), Green Grey (GG3), Warm Grey (WG6), Deep Violet (81), Pastel Peach (26) y un Lila Marca Rose Art.
- Lápiz Mongol N° 2.
- Rapidograph Sharpie Negro.
- Regla.
- Borrador.
𝐏𝐚𝐬𝐨 𝐚 𝐏𝐚𝐬𝐨
Comencé haciendo un círculo de 5 cm de diámetro con una línea guía inclinada que pasara por el medio del mismo.
Luego dividí la parte inferior de la línea (por debajo del centro) en cuatro partes iguales, para trazar nuevamente más líneas guías.
Como pueden ver, tracé una línea guía en el centro y en la tercera división de manera semi horizontal, o más bien semi circular e inclinada. Hasta ahora todo iba bien hasta este momento.
Aquí empezó el meollo del asunto. Se me hizo bastante complicado cuadrar correctamente el grosor y espacio de la nariz. Pero aquí muestro cómo empiezo a dibujar la línea inferior del ojo, nótese que no toca la línea guía inferior, este detalle es sumamente importante.
Para este paso ya tenía el ojo Izquierdo armado completamente, incluyendo su pestaña, que según el profesor de mi canal favorito de YouTube, insistió en que debía ser más grueso de lo normal.
El ojo derecho fue el que me dio más trabajo, junto con la bendita nariz de Shinobu. Y es que la separación entre las líneas guías que hice fue bastante pequeña, así que tuve que aplicar un método force, "agrandando" un poquito más el círculo en ese lado. Y bueno, es la primera vez que uso este método, así que fue difícil para mí esta parte. Mi recomendación es que usen una medida circular más grande para que de 5 cm de diámetro, tal vez de 7 cm será suficiente para evitar lo que me sucedió a mí, que no podía cuadrar bien ni el ojo ni la nariz.
Aquí acomodé lo mejor que pude la parte anterior antes mencionada y esbocé lo mejor que pude la silueta de sus labios. Definitivamente este ángulo, trabajar siendo amateur es otro nivel 🤣
Para esta parte volví a dibujar una línea guía para esbozar las cejas y parte del párpado de Shinobu.
Luego de eso, en el medio de la línea guía superior que está diagonal, dividí en dos para volver a trazar una línea guía de lo que sería el tamaño de su frente de manera simétrica. Así que fue entonces que empecé a darle forma a su cabello.
Empecé detallando sus característicos mechones laterales y su pollina levantada.
Ya luego lo que hice fue completar la parte superior de lo que sería su volumen de cabello, que se puede tomar como medida unos 2 cm de ancho para este.
Luego tracé dos líneas verticales de manera simétrica que rozaran el límite del círculo base. Estas líneas me servirán de guía para cuadrar el lazo en forma de mariposa de nuestra querida Shinobu.
Acá pueden ver cómo quedó el moño en forma de mariposa. Ya que Shinobu tiene su cabello corto, la parte trasera de su cola no se logra distinguir por la posición de su cara.
Ya luego tuve que armar su torso superior con su respectivo uniforme de Pilar y su característico Haori con diseño de mariposa. De esta manera culminé exitosamente mi boceto a lápiz de mi personaje favorito.
Ya luego lo que hice fue delinear con el Rapidograph y mi marcador punta fina negro Touch.
Ya después sólo borré las marcas del lápiz quedando como resultado un bosquejo a mano alzada de mi querida Shinobu. Hasta este momento se ve increíble, pero le hace falta un poco de color, ¿no lo creen?
𝐄𝐭𝐚𝐩𝐚 𝐝𝐞 𝐂𝐨𝐥𝐨𝐫𝐞𝐚𝐝𝐨
Primero dibujé sus ojos, luego su rostro y por último sus labios. Como pueden ver, resalté las sombras en negro y color más oscuros en ciertas partes de su cara, cuello y oreja.
Luego dibujé su cabello, haciendo las sombras con el color negro y púrpura en sus puntas. Para los tonos más claros usé el gris más claro que tenía como marcador y el color lila Rose Art que tenía escondido por allí. Al final, remarqué con el color rosado toda la parte morada del cabello para darle un toque de degradado, quedando como resultado final el siguiente:
𝐑𝐞𝐬𝐮𝐥𝐭𝐚𝐝𝐨 𝐅𝐢𝐧𝐚𝐥
Para este dibujo usé dos videos guías que me resultaron muy útiles. Aunque quise optar por la primera opción de mi maestro YouTuber Gamo Art, quien explica muy sencillo su paso a paso. En esta ocasión él se fue un paso más allá de mi nivel amateur agregando la espada de Shinobu.
Y aunque lo complicado no se me hacía en dibujar ni su mano, con su brazo y la espada, si se me hacía difícil hacer las letras japonesas y con ese efecto que él lo hizo tan sofisticado. Fue por eso que me fui por lo sencillo tomando la idea de otro Youtuber super talentoso pero que dibuja a lápiz sin color, su nombre es SS Art1 y me gustó su estilo así que recomiendo a ambos si desean aprender como yo a dibujar.
Mezclando lo mejor de ambos artistas logré elaborar de manera sublime a Shinobu Kochou. Para la próxima sigo con ganas de traerles más personajes de Kimetsu No Yaiba. Hasta luego! 🧡
𝐕𝐢𝐝𝐞𝐨𝐬 𝐓𝐮𝐭𝐨𝐫𝐢𝐚𝐥𝐞𝐬 𝐆𝐮í𝐚

| 𝐄𝐥𝐞𝐦𝐞𝐧𝐭𝐨𝐬 (𝐄𝐥𝐞𝐦𝐞𝐧𝐭𝐬) | 𝐇𝐞𝐫𝐫𝐚𝐦𝐢𝐞𝐧𝐭𝐚𝐬 (𝐓𝐨𝐨𝐥𝐬) |
|---|---|
| Las Fotos Utilizadas a lo largo del Post son de mi galería (Photos used throughout the post are from my gallery) | Cámara del Teléfono Redmi Note 9A (Redmi Note 9A Phone Camera) |
| Contenido y Texto Original de mi Autoría (Content and Original Text of my Authorship) | DeepL |
| CANVA | |
| Grammarly |
Posted Using INLEO
¡Felicitaciones!
Estás participando para optar a la mención especial que se efectuará el domingo 9 de marzo del 2025 a las 8:00 pm (hora de Venezuela), gracias a la cual el autor del artículo seleccionado recibirá la cantidad de 1 HIVE transferida a su cuenta.
¡También has recibido 1 ENTROKEN! El token del PROYECTO ENTROPÍA impulsado por la plataforma Steem-Engine.
1. Invierte en el PROYECTO ENTROPÍA y recibe ganancias semanalmente. Entra aquí para más información.
2. Contáctanos en Discord: https://discord.gg/hkCjFeb
3. Suscríbete a nuestra COMUNIDADEntra aquí para más información sobre nuestro trail. y apoya al trail de @Entropia y así podrás ganar recompensas de curación de forma automática.
4. Visita nuestro canal de Youtube.
Atentamente
El equipo de curación del PROYECTO ENTROPÍA
Muchisimas gracias! lo aprecio mucho! son los mejores!
Loved the Shinobu art!
Thank you so much! I appreciate that you liked my drawing!
Wow quedé impresionada con el dibujo
Wow que increíble te quedó esta bellísima 😍
Congratulations @pannavi! You have completed the following achievement on the Hive blockchain And have been rewarded with New badge(s)
Your next target is to reach 6000 comments.
Your next payout target is 5000 HP.
The unit is Hive Power equivalent because post and comment rewards can be split into HP and HBD
You can view your badges on your board and compare yourself to others in the Ranking
If you no longer want to receive notifications, reply to this comment with the word
STOPCheck out our last posts: