FULL ENGLISH VERSION

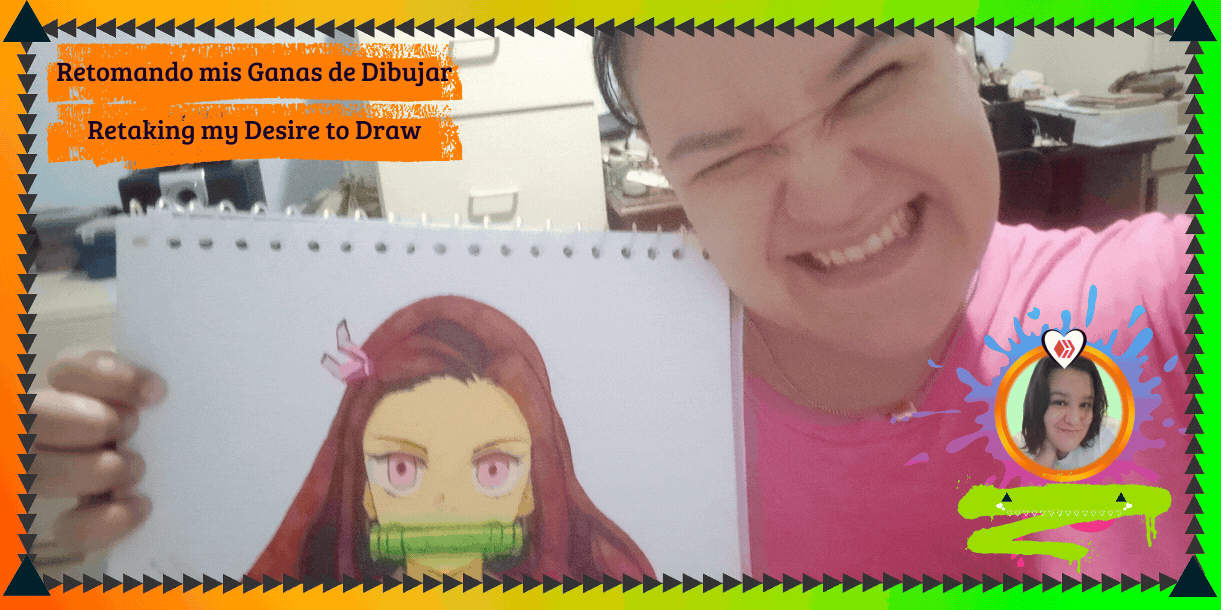
Greetings artistic beauties that bring life to the amazing #HiveArte community. I wish you all a great Saturday. Today I want to share with you one of my latest artistic creations that I had stopped making due to a lack of colors, markers, and other tools that I was missing.
For this occasion I wanted to use my new markers (a gift I received in December), drawing one of my favorite characters from Kimetsu No Yaiba. This time it was Nezuko's turn, so join me to see the step-by-step.

𝐌𝐚𝐭𝐞𝐫𝐢𝐚𝐥𝐬 𝐭𝐨 𝐔𝐬𝐞
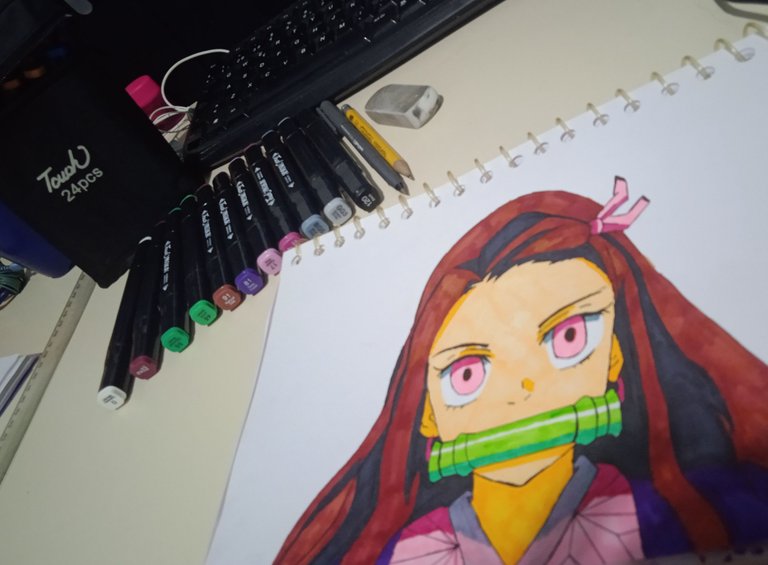
- Fine Point Touch Markers, colors: Blender (0), Black (120), Old Red (2), Emerald Green (55), Vivid Green (46), Pastel Pink (17), Azalae Purple (87), Grayish Gray (GG3), Warm Gray (WG6), Deep Violet (81), Pastel Peach (26), Peach Yellow (33), Natural Oak (91) and Yellow Ochre (101).
- Mongol pencil N° 2.
- Uniball II Black ballpoint pen.
- Ruler.
- Eraser.
𝐒𝐭𝐞𝐩-𝐛𝐲-𝐒𝐭𝐞𝐩
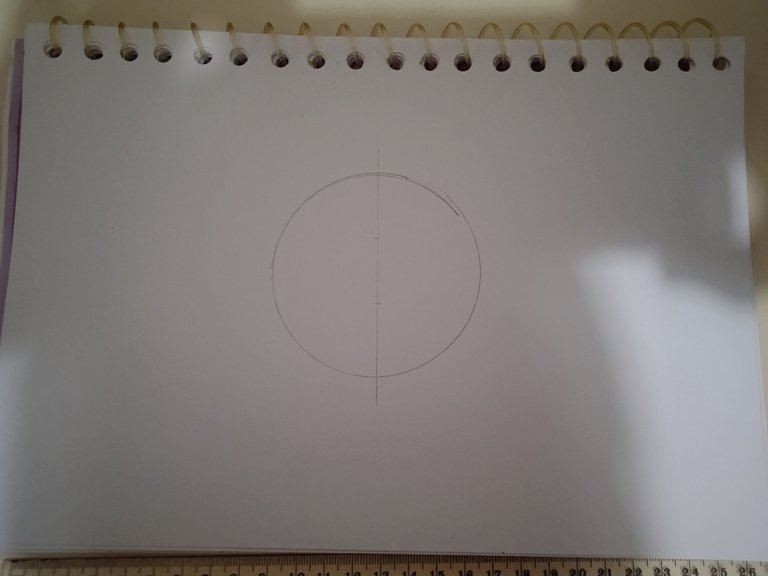 | I started my drawing by making a small circle that would be the base for drawing Nezuko's face. I didn't want to make it too big so this one measures approximately 7.5 cm in diameter. | |
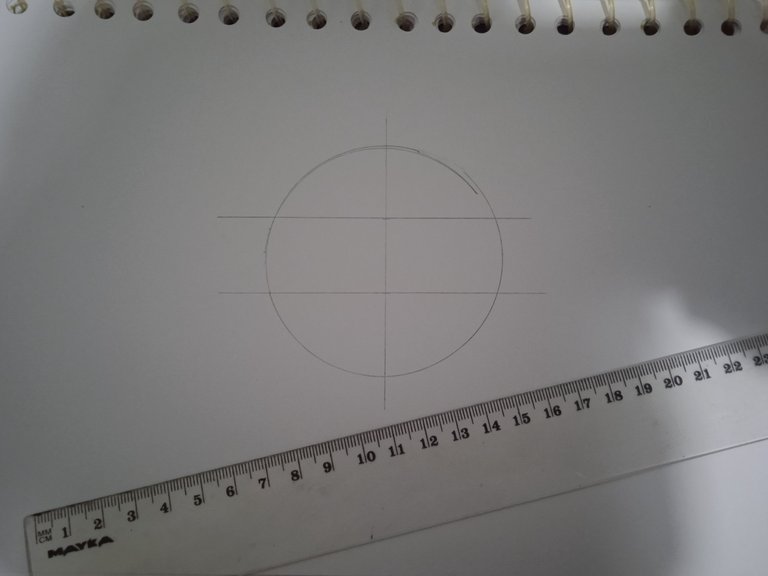 | Then I drew guidelines, dividing the circle into 3 parts. This was to get an idea of where the eyes would go and where the head would end. I also drew a vertical line down the middle to let me know exactly where the center was so I could put the face together in a more symmetrical way. | |
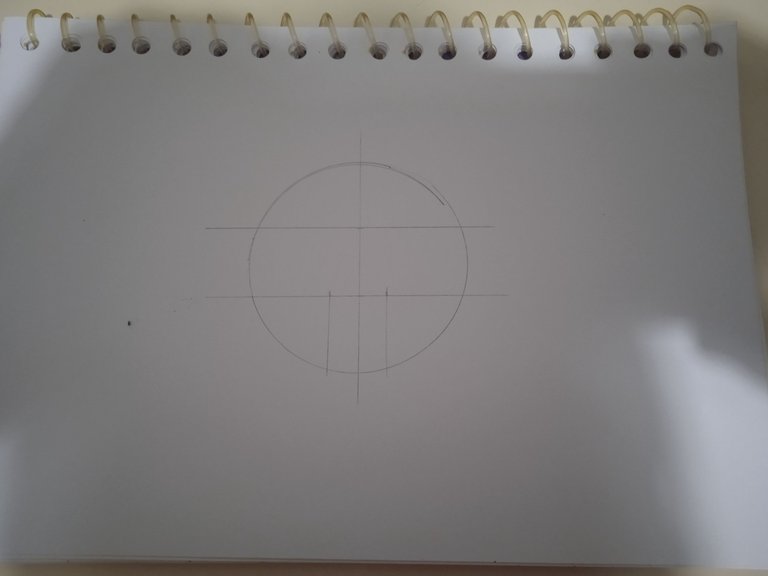 | Then I drew 2 guidelines vertically 1 cm away from the middle line to know where the tear trough of each eye of Nezuko would start. | |
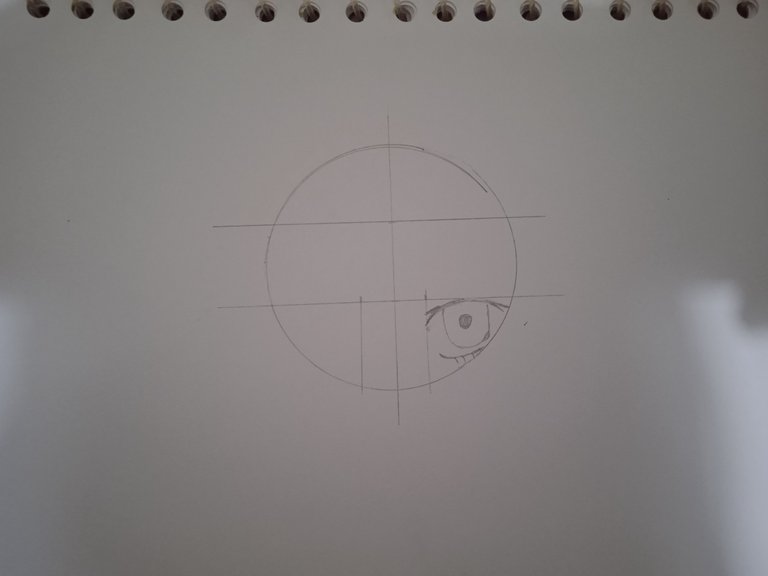 | Now that I had the sketch ready, I set out to draw as best I could the right eye of my dear Nezuko. | |
 | After several attempts and taking into consideration not to make the same mistakes I made when I drew Tanjiro, Only when I was relatively satisfied with the result, I moved on to the next step. | |
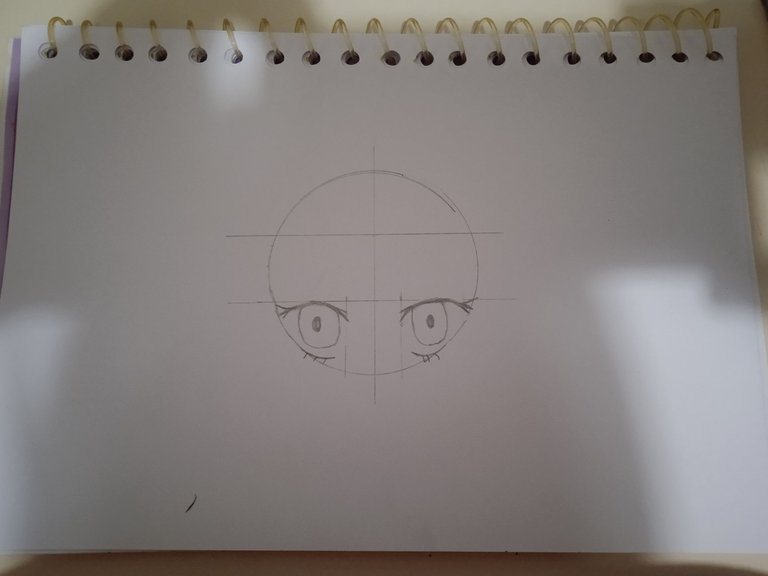
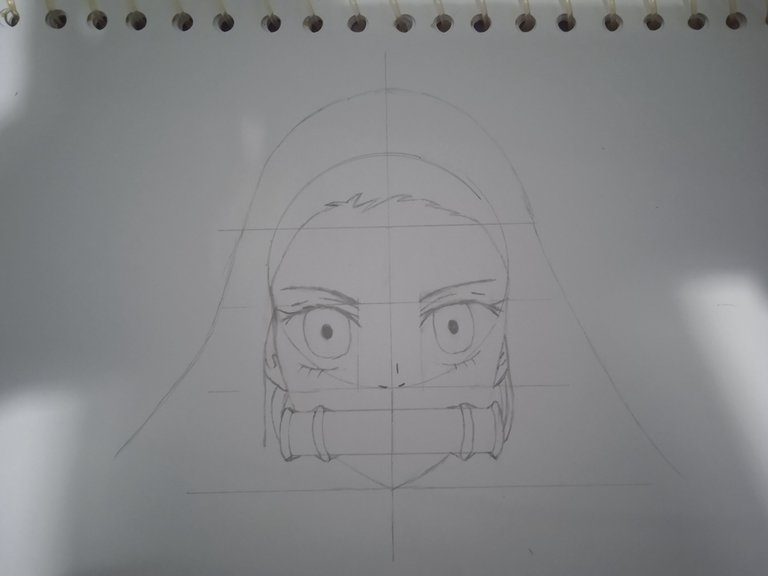
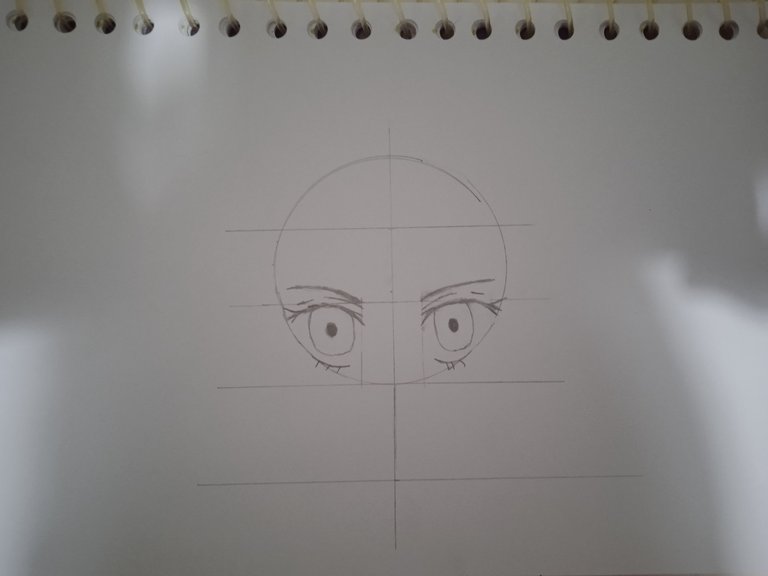 | Here I detailed what are the eyebrows and other details of the eyelid. The part of the lower eyelashes still didn't convince me how they were, and the shape of the eye neither, one was bigger than the other 🤣. I also lengthened the guidelines, adding others horizontally to place the nose and mouth respectively. | |
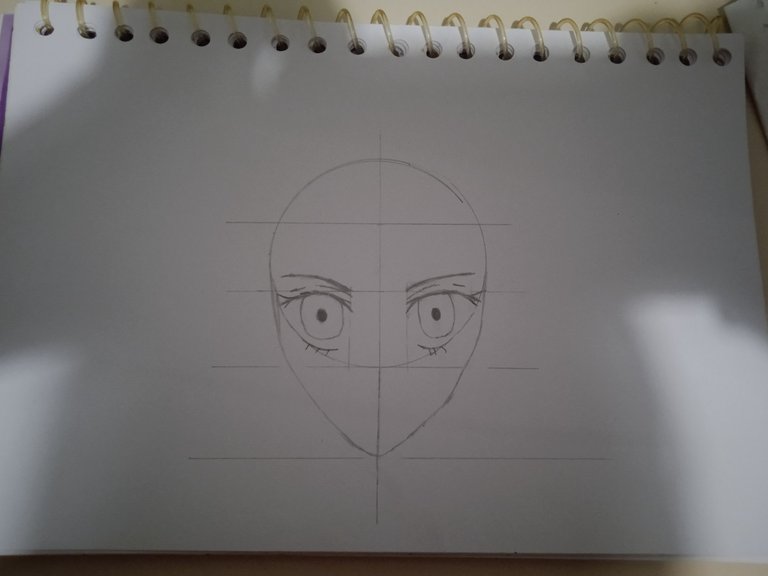 | Here I started to format the whole face of Nezuko. I had inadvertently made it too thin, so I deleted it and did it again until I was satisfied. | |
 | Then I did the outlining of the forehead, what would be the fringe for Nezuko, much like her brother Tanjiro. | |
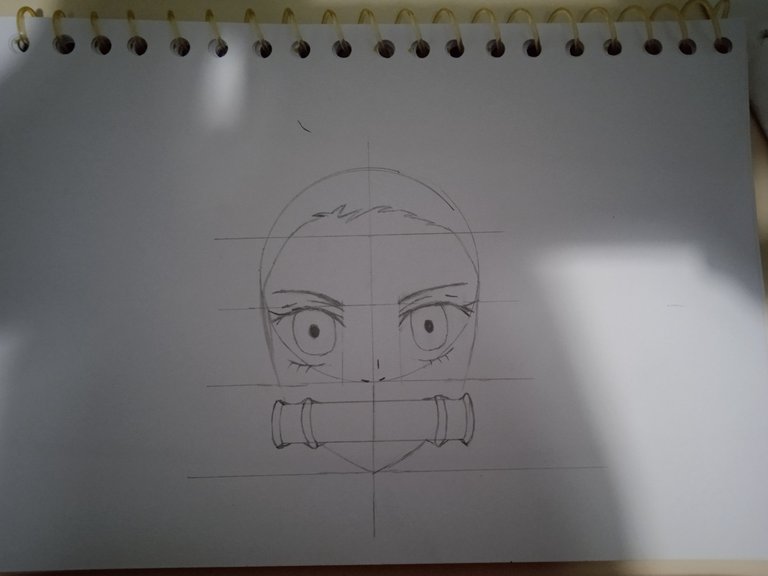 | At this stage I set out to detail its characteristic Bambo. In this part, I used the ruler to make a more symmetrical finish. | |
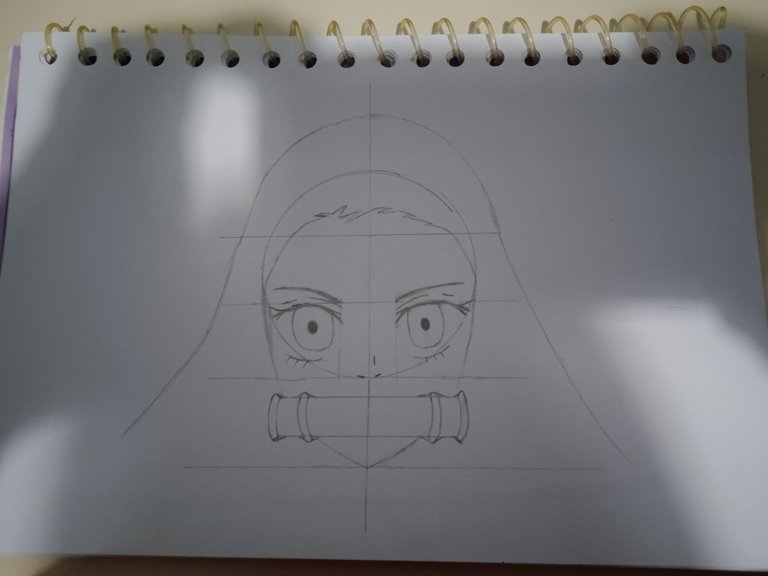 | Then I started making the base or guidelines for the shape of the hair. | |
 | Since Nezuko's hair is usually loose and long, it covers part of her face, which allowed me not to make her full ears but a small part of them. I also drew the ribbon that holds the bamboo. | |
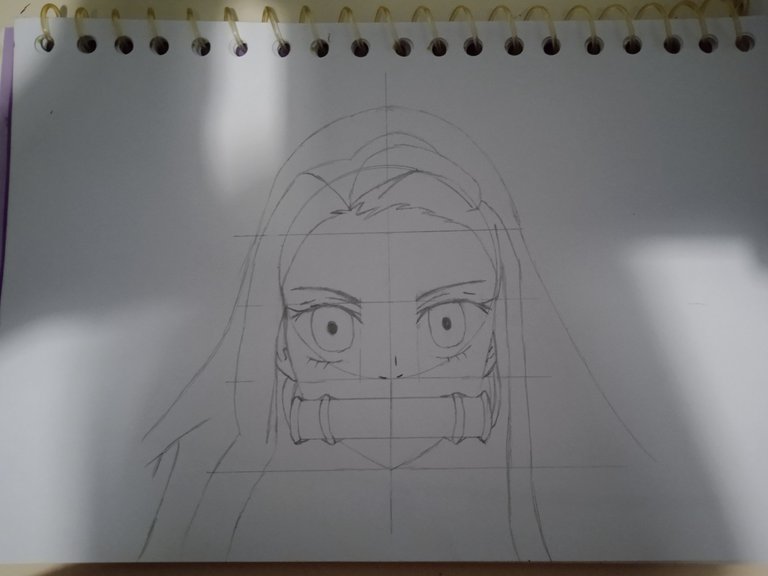 | Here I made other details in the hair, taking into account some lines to make the shadows and lights in it when it was my turn to color. | |
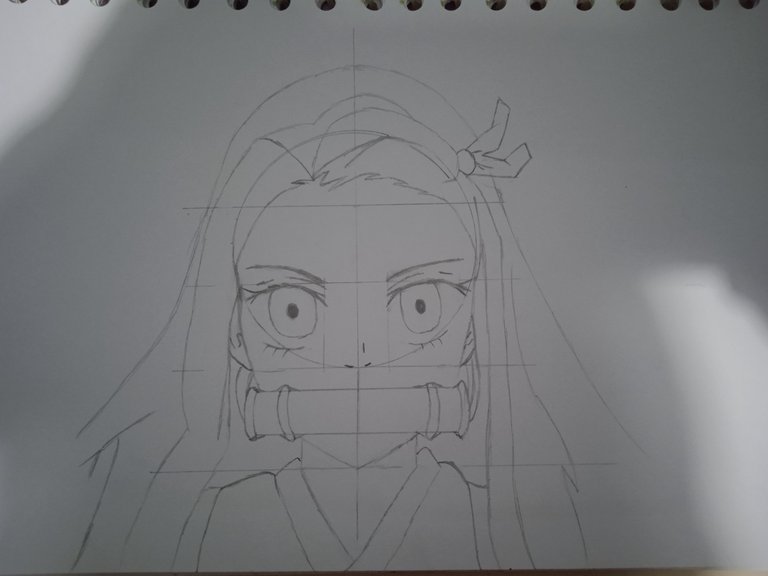 | In this part I made her bow on the top of her head and also drew part of her torso. | |
 | At this stage the pencil sketch is almost ready. What I did here was to give it the final details of Nezuko's Kimono with its characteristic star pattern. | |
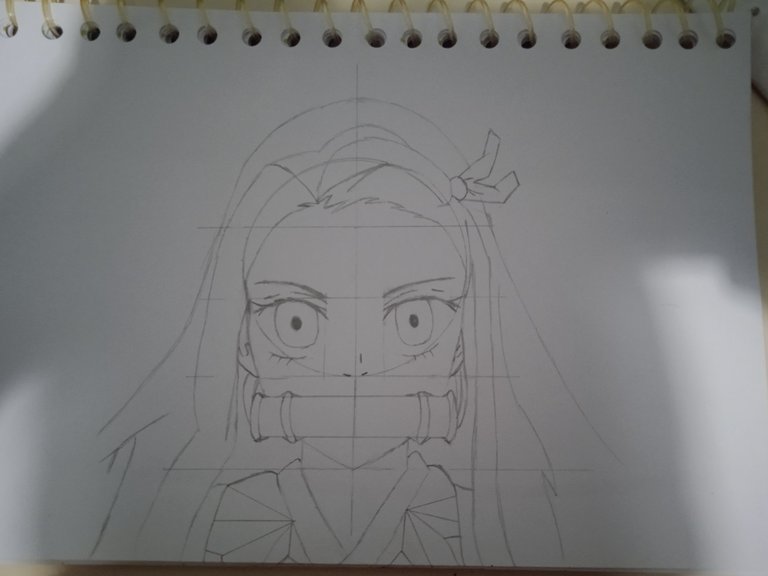
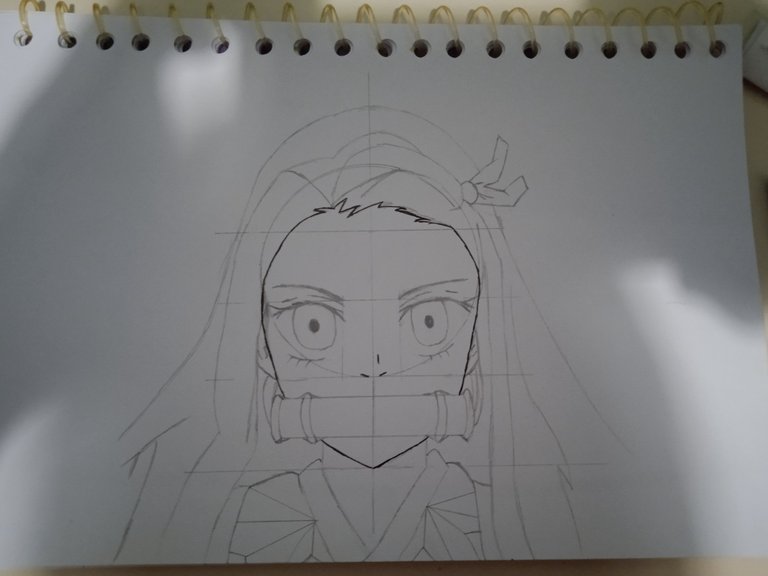 | Once the base drawing was ready in pencil, all that remained was to highlight the lines with a black fine tip marker and then start coloring it. |
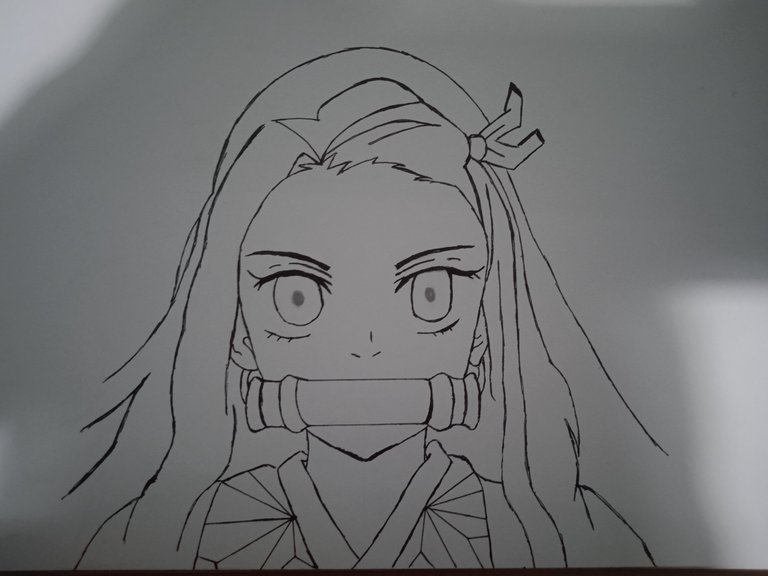 𝐏𝐚𝐬𝐨 𝟏𝟔
Here you can see the finished drawing after highlighting the lines with the black fine-tip marker. I also erased the guidelines that I had made in pencil, except for the iris, to calculate more or less where the center of Nezuko's eye was. Then I only had to color it all, and the final result was the following photo:

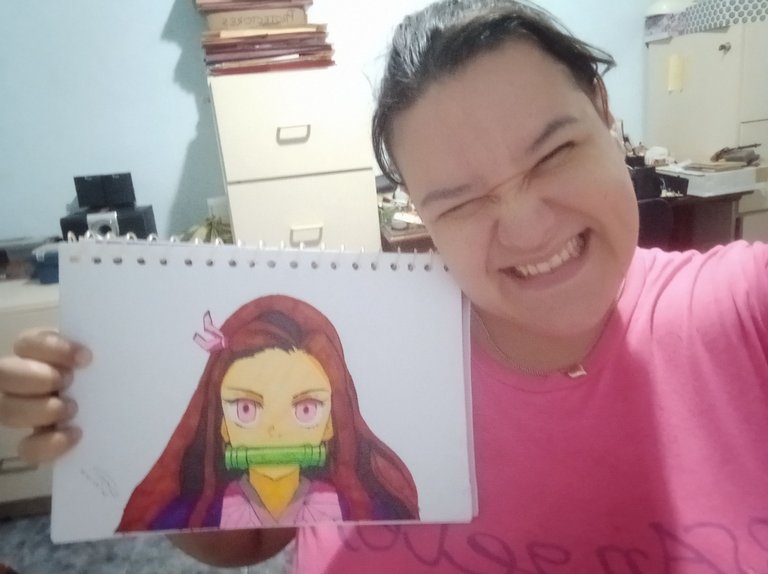
𝐅𝐢𝐧𝐚𝐥 𝐑𝐞𝐬𝐮𝐥𝐭

It should be noted that I am learning to draw, I am not an expert and to make this kind of drawing I usually guide myself by watching a very good YouTube channel that allows me to put it together step by step, as well as to do the coloring process. If you want to learn more, here is the video I used as a guide.
At the end of the post you can see the Complete Video Tutorial from which I was guided to make this drawing. click on HERE to go there
With your guidance and help I managed to draw Rengoku and also Tanjiro although the latter didn't look the same. I will probably try it again. I hope this post has been to your liking and will help you to continue building your goals to learn how to draw, I liked the process and the finish. Next time I hope to bring you another Kimetsu No Yaiba character. See you next time! 🧡
Español
Saludos bellezas artísticas que dan vida a la increíble comunidad de #HiveArte. Les deseo a todos un grandioso sábado. Hoy quiero compartir con ustedes una de mis últimas creaciones artísticas que había dejado de realizar por falta de colores, marcadores y otras herramientas que me hacían falta.
Para esta ocasión quise estrenar mis nuevos marcadores (regalo recibido en diciembre), dibujando a uno de mis tantos personajes favoritos de Kimetsu No Yaiba. Esta vez fue el turno de Nezuko, así que acompáñenme a ver el paso a paso.
𝐌𝐚𝐭𝐞𝐫𝐢𝐚𝐥𝐞𝐬 𝐚 𝐔𝐭𝐢𝐥𝐢𝐳𝐚𝐫
- Marcadores Touch Punta Fina, colores: Blender (0), Black (120), Old Red (2), Emerald Green (55), Vivid Green (46), Pastel Pink (17), Azalae Purple (87), Grey Grey (GG3), Warm Grey (WG6), Deep Violet (81), Pastel Peach (26), Melon Yellow (33), Natural Oak (91) y Yellow Ochre (101).
- Lápiz Mongol N° 2.
- Bolígrafo Uniball II Negro.
- Regla.
- Borrador.
𝐏𝐚𝐬𝐨 𝐚 𝐏𝐚𝐬𝐨
| Inicié mi dibujo haciendo un pequeño círculo que sería la base para dibujar el rostro de Nezuko. No quise hacerlo muy grande así que este mide aproximadamente 7,5 cm de diámetro. | |
| Luego tracé líneas guía, dividiendo el círculo en 3 partes. Esto para tener una idea de dónde irían los ojos y terminaría la cabeza. También tracé una línea vertical en todo el medio que me permitía saber exactamente dónde estaba el centro y así poder armar el rostro de manera más simétrica. | |
| Luego tracé 2 líneas guía de manera vertical a 1 cm de distancia de la línea del medio para saber dónde iniciaría el lagrimal de cada ojo de Nezuko. | |
| Ya teniendo el bosquejo armado, me dispuse a dibujar lo mejor que pude el ojo derecho de mi querida Nezuko. | |
| Luego de varios intentos y tomando en cuenta no cometer los mismos errores que tuve cuando dibujé a Tanjiro, sólo cuando estuve relativamente conforme con el resultado, pasé al siguiente paso. | |
| Aquí detallé lo que son las Cejas y otros detalles del párpado. La parte de las pestañas inferiores seguían sin convencerme cómo quedaron, y la forma del ojo tampoco, uno estaba más grande que otro 🤣. También alargué las líneas guía, agregando otras de manera horizontal para ubicar la nariz y la boca respectivamente. | |
| Ya aquí empecé a formato el rostro completo de Nezuko. Sin darme cuenta lo había dejado muy delgado, así que lo borré y lo hice de nuevo hasta que quedé conforme. | |
| Luego hice el delineado de la frente, lo que sería la pollina para Nezuko, muy parecido al de su hermano Tanjiro. | |
| En esta etapa me dispuse a detallar su característico Bambo. En esta parte utilicé la regla para hacer un acabado más simétrico. | |
| Luego empecé a hacer la base o las líneas guías para la forma del cabello. | |
| Ya que el cabello de Nezuko suele estar suelto y es largo, éste cubre parte de su rostro, lo que me permitió no tener que hacerle sus orejas completas sino una pequeña parte de ellas. También le dibujé la cinta que sostiene al Bambo. | |
| Aquí le hice otros detalles en el cabello, tomando en cuenta algunas líneas para hacer las sombras y las luces en el mismo cuando me tocara colorear. | |
| En esta parte le hice su lacito en la parte superior de su cabeza y también le dibujé parte de su torso. | |
| En esta etapa el bosquejo a lápiz ya está casi listo. Lo que hice aquí fue darle los detalles finales del Kimono de Nezuko con su característico patrón de estrellas. | |
| Una vez el dibujo base listo a lápiz, sólo quedaba resaltar las líneas con marcador negro punta fina y luego empezar a colorearlo. |
𝐏𝐚𝐬𝐨 𝟏𝟔Aquí se puede apreciar todo el dibujo terminado luego de resaltar las líneas con el marcador negro punta fina. También borré las líneas guías que había hecho a lápiz, menos las del iris, para calcular más o menos dónde estaba el centro del ojo de Nezuko. Ya luego sólo me restó colorearlo todo, quedando como resultado final la siguiente foto:
𝐑𝐞𝐬𝐮𝐥𝐭𝐚𝐝𝐨 𝐅𝐢𝐧𝐚𝐥
𝐓𝐮𝐭𝐨𝐫𝐢𝐚𝐥
Cabe destacar que yo estoy aprendiendo a dibujar, no soy experta y para hacer este tipo de dibujos suelo guiarme viendo un canal de YouTube muy bueno que me permite armarlo paso a paso, al igual que hacer el proceso de coloreado. Si deseas aprender más, a continuación te dejo el video que usé de guía.
Con su guía y ayuda es que logré dibujar a Rengoku y también a Tanjiro aunque éste último no me quedó igual. Lo más seguro es que lo intente de nuevo. Espero que este post haya sido de tu agrado y te ayude a seguir construyendo tus metas para aprender a dibujar, a mí me gustó mucho el proceso y el acabado. Para la próxima espero traerles otro personaje de Kimetsu No Yaiba. Hasta la próxima! 🧡

| 𝐄𝐥𝐞𝐦𝐞𝐧𝐭𝐨𝐬 (𝐄𝐥𝐞𝐦𝐞𝐧𝐭𝐬) | 𝐇𝐞𝐫𝐫𝐚𝐦𝐢𝐞𝐧𝐭𝐚𝐬 (𝐓𝐨𝐨𝐥𝐬) |
|---|---|
| Las Fotos Utilizadas a lo largo del Post son de mi galería (Photos used throughout the post are from my gallery) | Cámara del Teléfono Redmi Note 9A (Redmi Note 9A Phone Camera) |
| Contenido y Texto Original de mi Autoría (Content and Original Text of my Authorship) | DeepL |
| CANVA | |
| Grammarly |

Te quedo muy bonito el dibujo!! 👍🏽