Heeeyho Readers! Do you know how to service your bicycle?
Learning how to handle tools and fix stuff is crucial.
I've been posting bicycle maintenance articles for a while, though that kind of content feels a little orphan in terms of community. The Exhaust community seem more directed to exercising. On the other hand, Hive DIY leans more towards handicrafts.
Bicycle maintenance — along with general equipment servicing — fits in between. Anyone into outdoor activities should have basic knowledge to fix their own equipment. For that reason, I believe today's post is better-suited for the Outdoors and more community.
Today I'll show you how to check and replace brake pads on a hydraulic-equipped bicycles. Keep in mind that cable-operated brakes are different, thus the methods might not apply in that case.
If you are using Shimano or any brand other than Sram, the method here presented is almost the same. Pad formats may change; so do pads fixing pins. The idea is to provide a general guideline for beginners wanting to service their own bikes.
Step 1
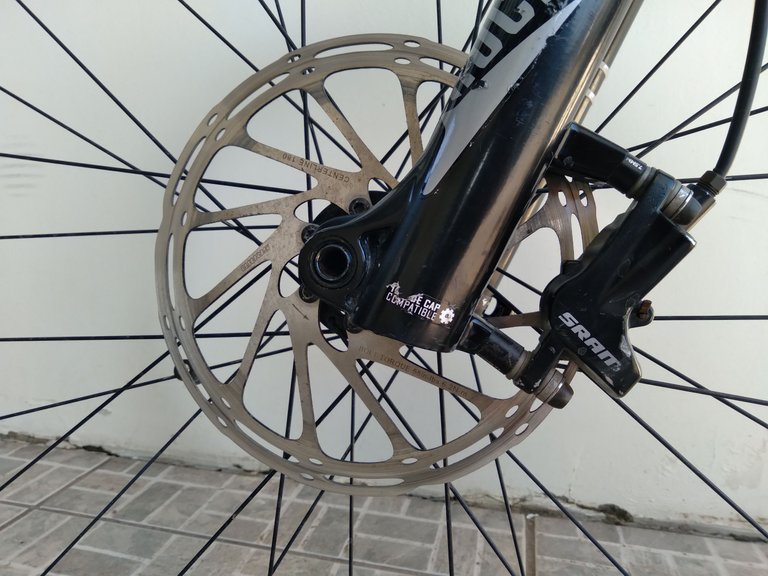
You have identified that your hydraulic brakes are not as potent; brake levers are "moving too far"; in extreme cases, you hear metal-to-metal noises. All that indicates that your brake pads are gone.
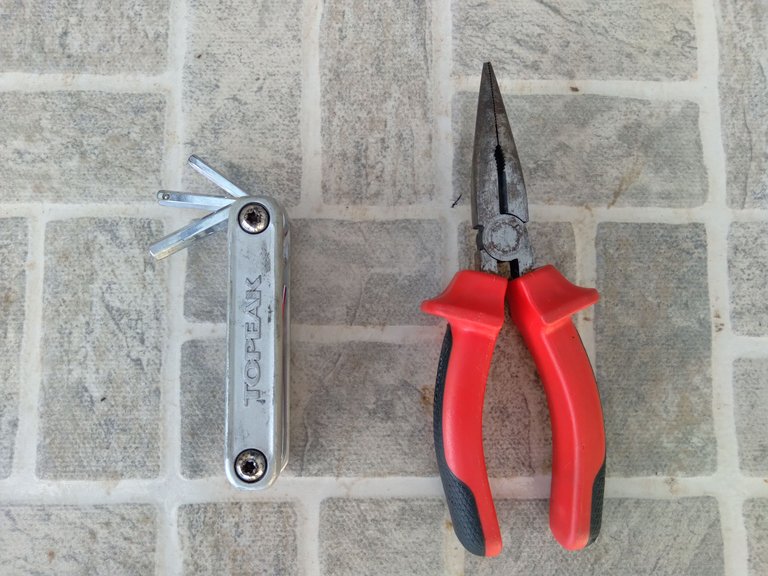
First of all you need some basic tools:
- Multi-tool with various Allen keys
- Pliers
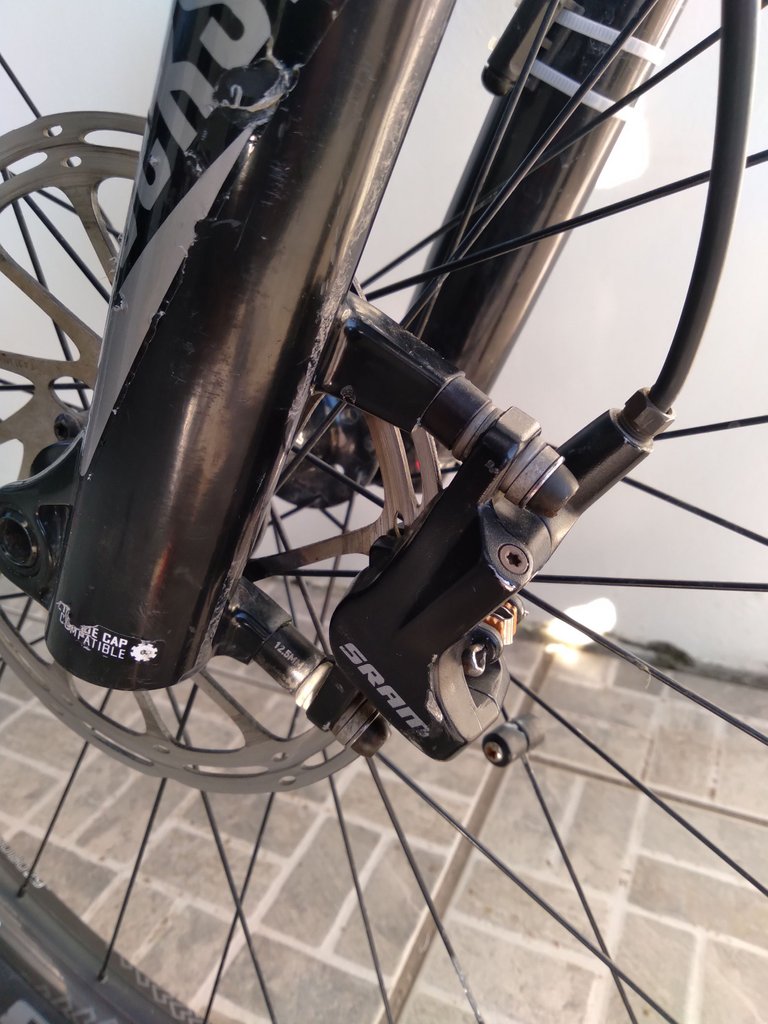
Step 2
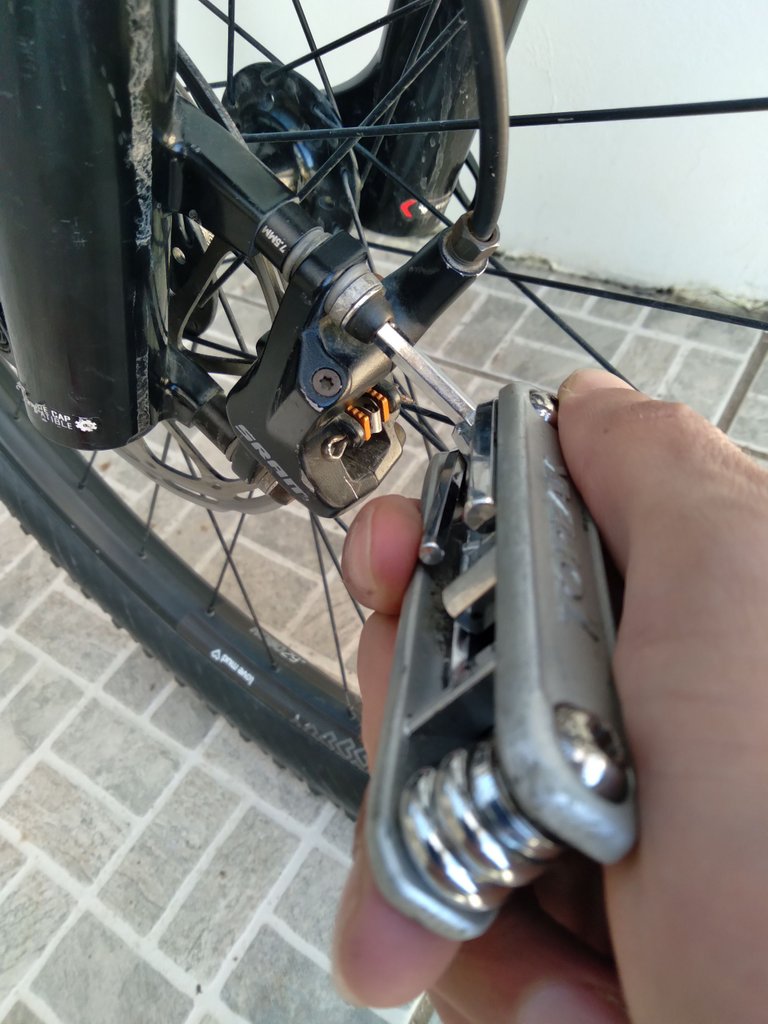
Let's proceed to remove the brake caliper. It is advisable to perform this step after removing the wheel. Two allen screws hold the caliper in place — remove them.
Tip: It's common to drop the washers and spaces into the ground when removing the caliper. I highly advise that you take a picture before removing the caliper, just in case you forgot the order when assembling it back.

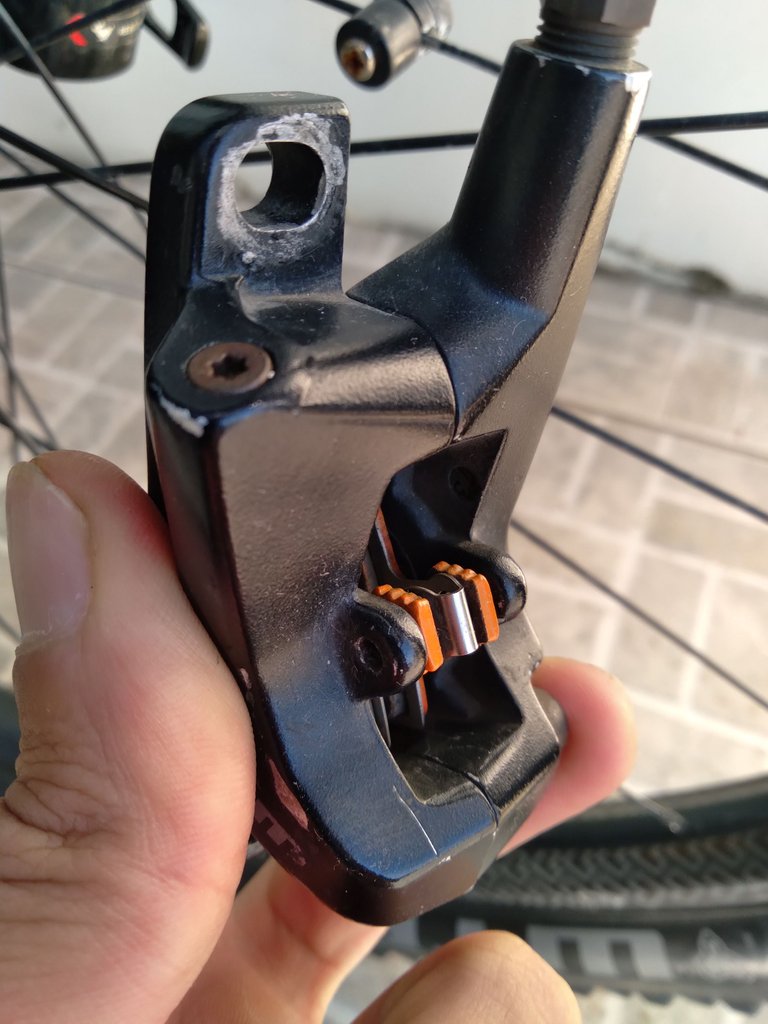
Step 3
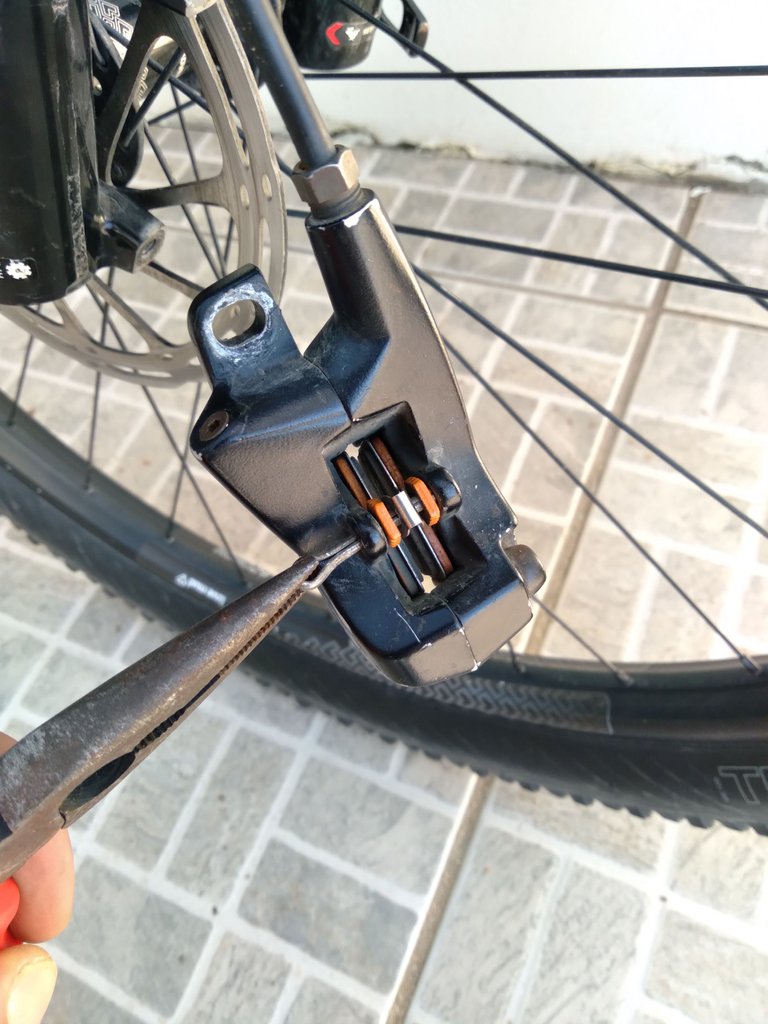
Next step is to remove the split pin that holds the pads in place. Keep in mind: some Sram brakes — or other brands — use a screwed pin instead of a split pin. There's no mystery. Unscrew or remove the pin to access the pads.
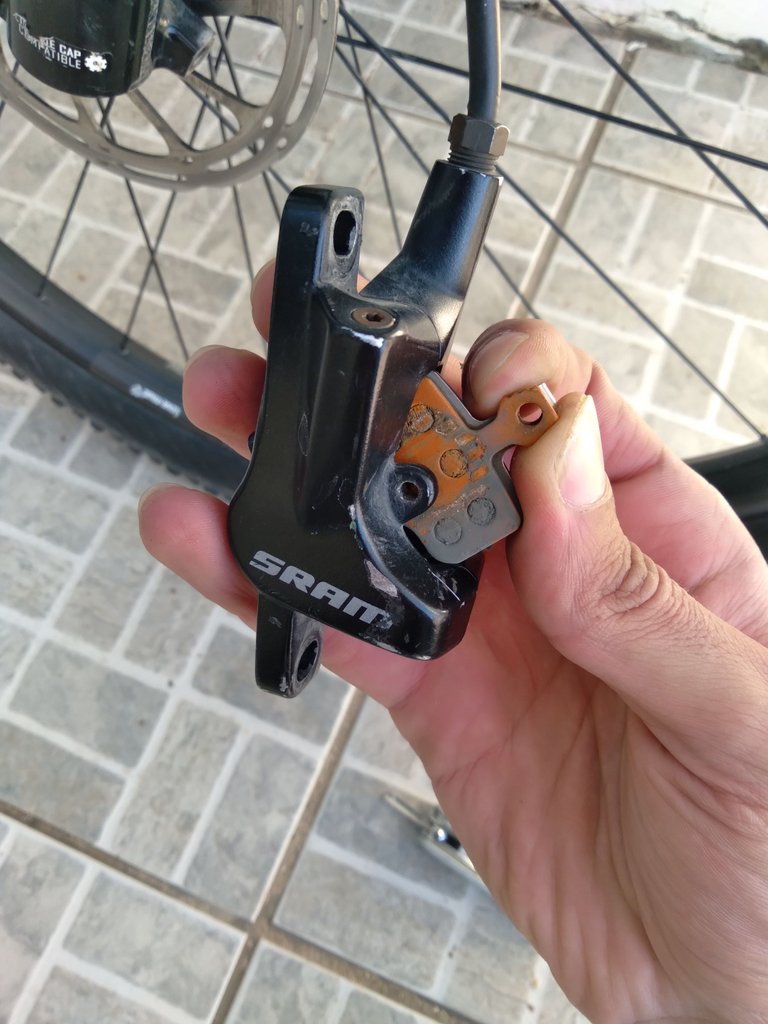
Step 4
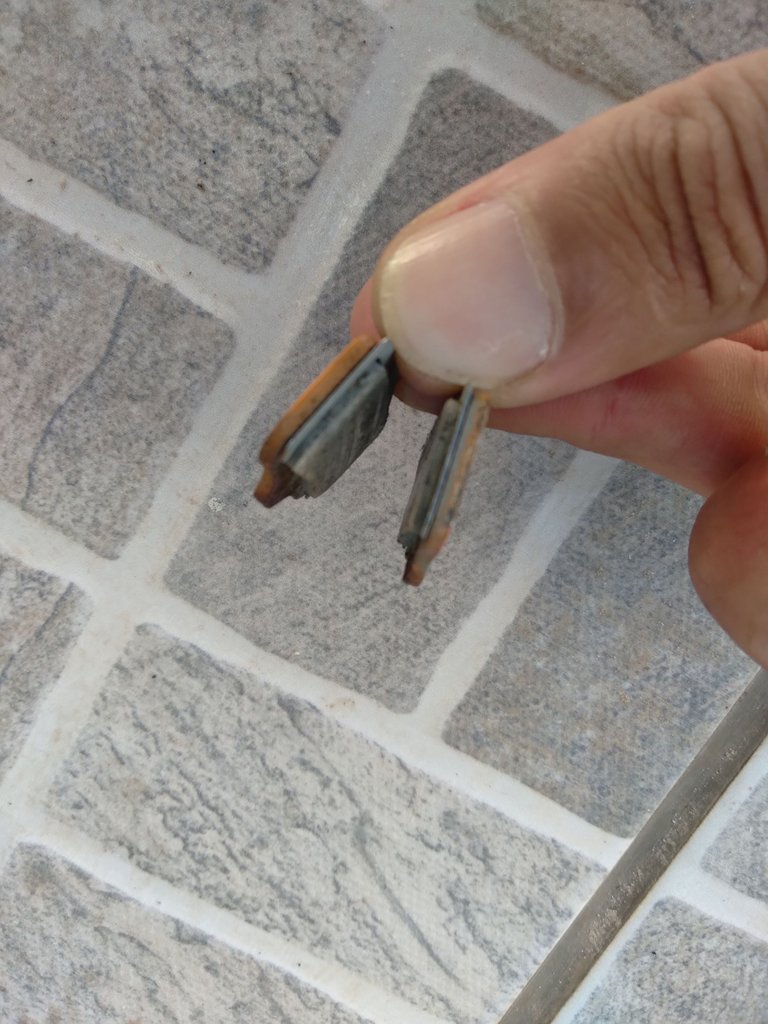
Now you can check your pads. On my inspection I discovered my front brake didn't need pad replacement. Important: if you are going to keep the same used pads, make sure to assemble them on the same side; pay attention when you remove them.
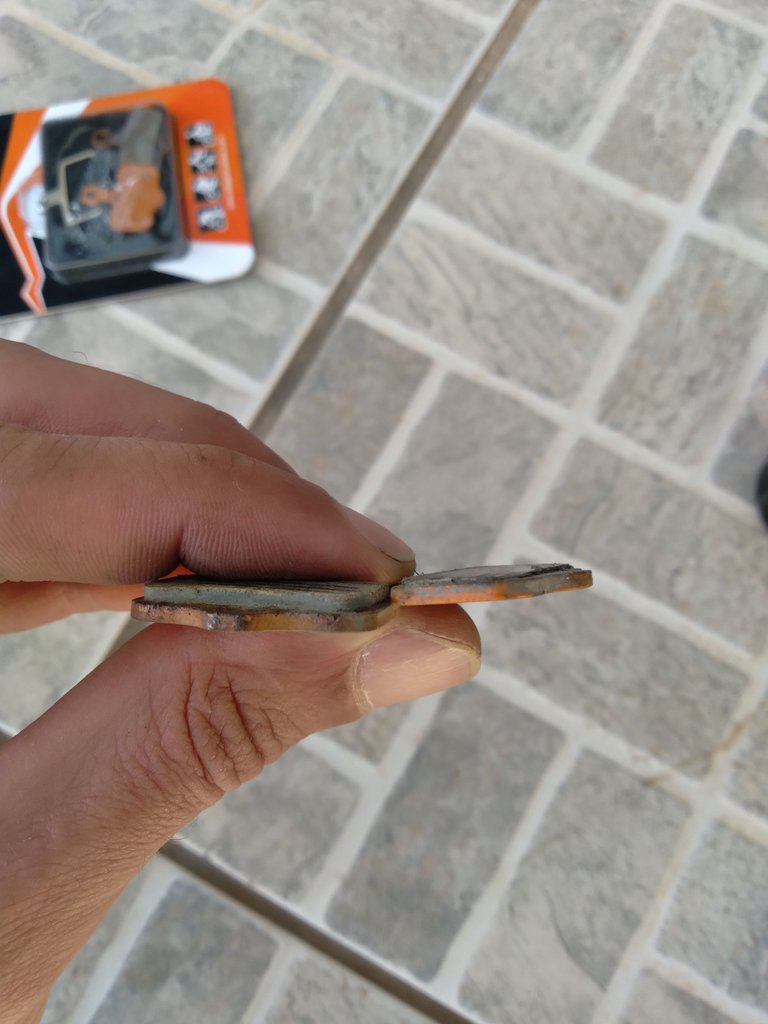
The picture on the left illustrates a pair of used pads that are still usable. The picture on the right you can see a usable pad (left) against a worn out one (right). If your brake pads are that thin, a replacement is long due.
Step 5
Let's say you need new brake pads, so you have to shop for the correct part for your brake brand/model. I generally use Alligator on my Sram Level brakes.
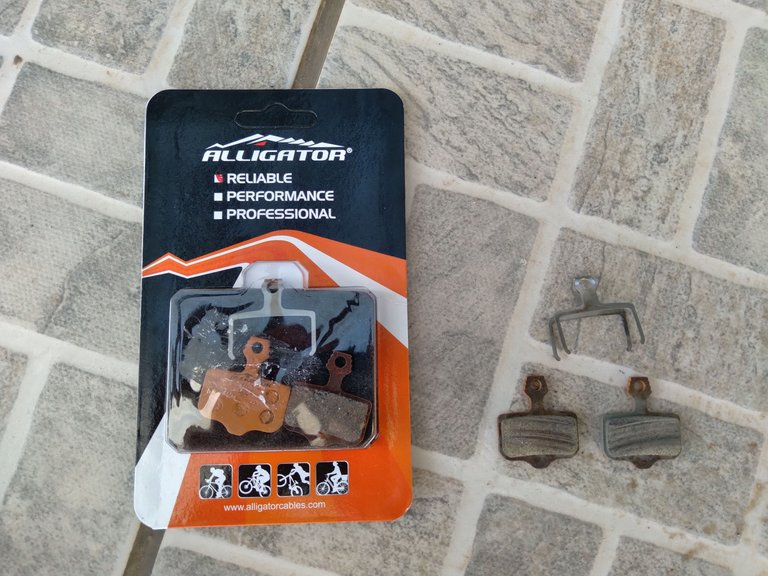
Important note: Make sure to clean your hands before handling new brake pads. Any oil/grease residue can contaminate the ceramic materials, trashing your new pads. Also, take the time to clean your brake rotors with isopropyl alcohol to make sure there's no residue left on rotor's surface.
Step 6
Last step is to insert the new pads, insert and lock the pin in place, and assemble the caliper back onto the bicycle.

Professional mechanics will use a torquemeter to correctly torque the caliper back in place. If you don't have one, just remember your bicycle's screws are not a semi-truck wheel — there's not need to overly tighten the screws. Apply a gentle amount of grease onto the screw threads before assembly.
Conclusion
As you can see, checking and servicing your bicycle brake pads is easy. Learning these simple tricks may save you some bucks along the way. Once used to the basic bicycle mechanics, one can step up the game and start collecting more professional tools.
I hope you've learned something different today. And, as always, don't forget to have fun cycling out there.
Peace.
Did you know that I have a book out? Check this!
Access Link: https://www.amazon.com/dp/6500272773?

If you enjoyed this post consider leaving your upvote for a hot coffee.
Find me on Twitter: https://twitter.com/mrprofessor_
~Love ya all,

Disclaimer: The author of this post is a convict broke backpacker, who has travelled more than 10.000 km hitchhiking and more than 5.000 km cycling. Following him may cause severe problems of wanderlust and inquietud. You've been warned.

That's awesome. I learnt alot here. Thanks alot for sharing!
Thanks for commenting!
You're welcome Sir
Woooho! Thank you. Oh, by the way, your comment didn't show up on my notifications.
You're welcome, it was a nice post.
The rewards earned on this comment will go directly to the people( @mrprofessor ) sharing the post on Twitter as long as they are registered with @poshtoken. Sign up at https://hiveposh.com.
Congratulations @mrprofessor! You have completed the following achievement on the Hive blockchain and have been rewarded with new badge(s):
Your next target is to reach 550 posts.
You can view your badges on your board and compare yourself to others in the Ranking
If you no longer want to receive notifications, reply to this comment with the word
STOPTo support your work, I also upvoted your post!
Support the HiveBuzz project. Vote for our proposal!