Saludos comunidad de Womentribu, es un gusto compartir por aquí, soy edittas86 y me encontré con esta maravillosa iniciativa de @chacald.dcymt junto a la maravillosa comunidad de jewelry y por supuesto me dije que tenía que participar, ya que la elaboración de bisutería es una de mis pasiones.
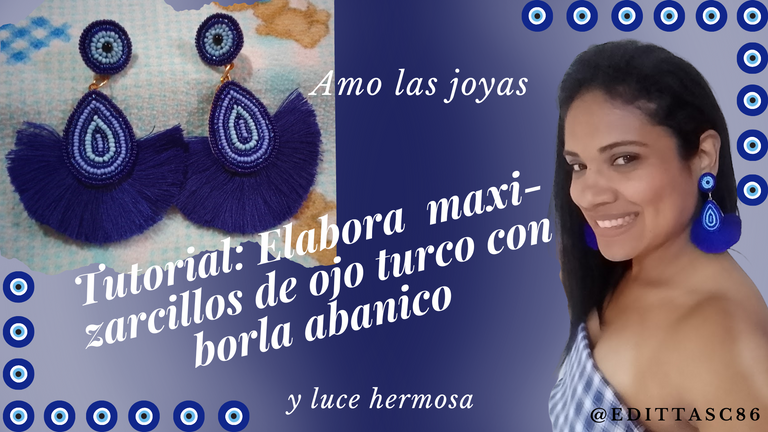
Tengo una especial debilidad por los zarcillos, por lo que para esta iniciativa realice unos espectaculares zarcillos, me encanta el ojo turco 🧿y las borlas, y recién comencé con la técnica del bordado y me ha encantado por ello los zarcillos los realizare con la técnica del bordado de unos hermosos ojos turcos.
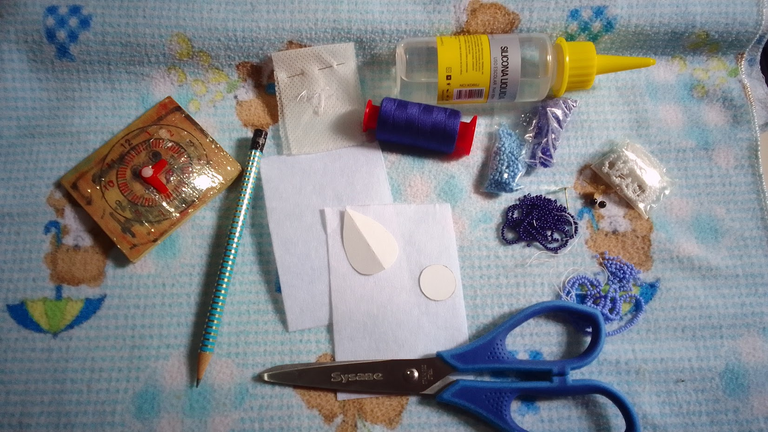
Para ello utilice los siguientes materiales.
- Mostacillas varios tonos azules
- Jade
- Hilo de costura azul, aguja mostacillera
- Entretela o pelón
- Semicuero o tela de gamuza
- Molde de cartón en forma de gota y circular
- Tijera, lápiz.
- Silicona liquida
- Cuadrito de cartón o de madera
- Herramientas de bisutería
- Aritos, tapa nudos
Paso a Paso Bordado 🧿
1- Comenzamos tomando una base previamente realizada en cartón en forma de gota y una más pequeña circular, lo dibujamos en la entretela o pelón para iniciar el bordado.

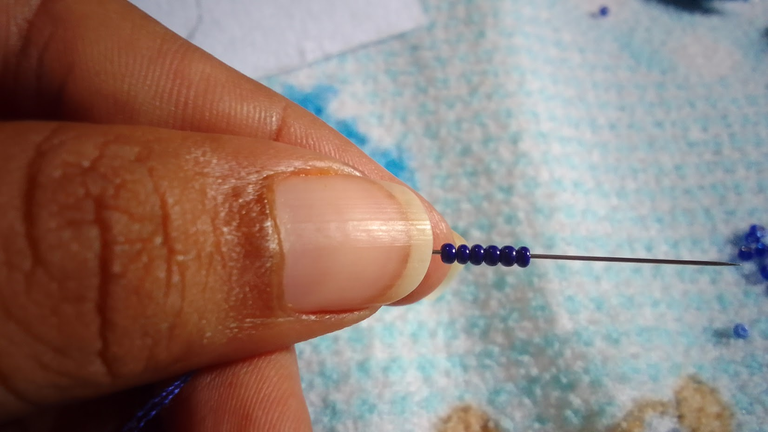
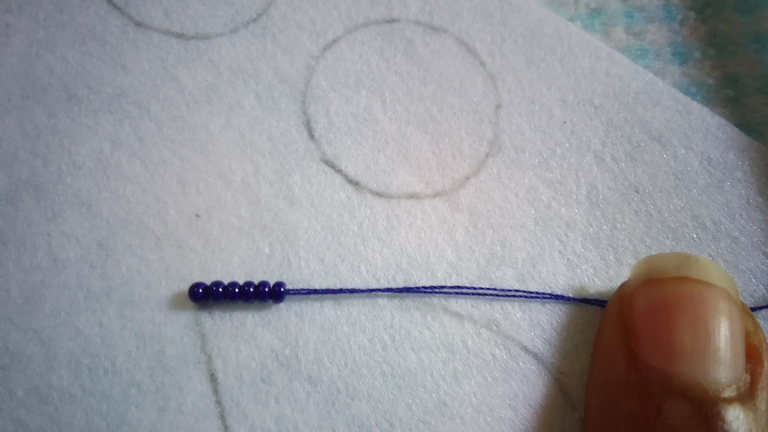
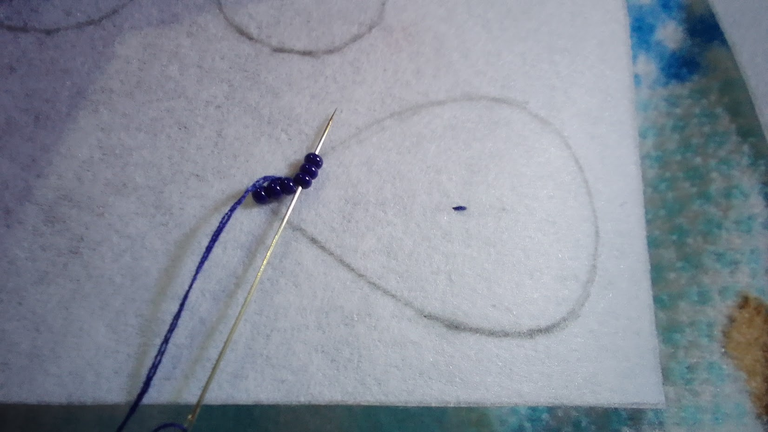
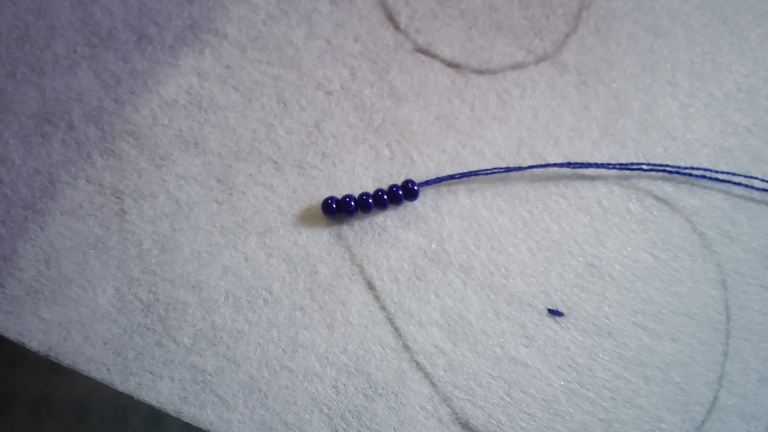
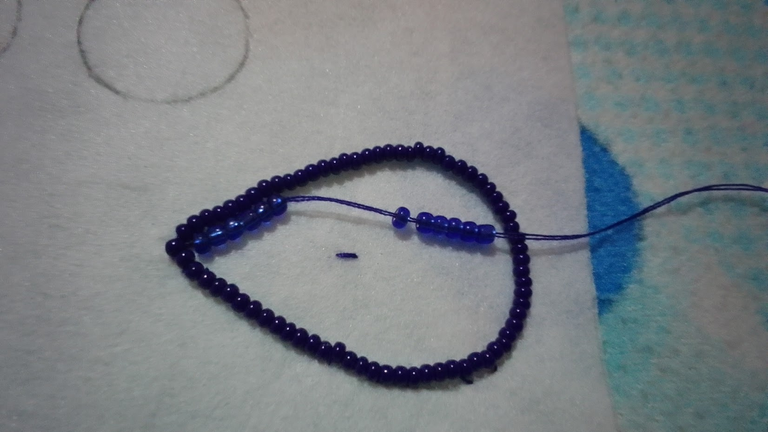
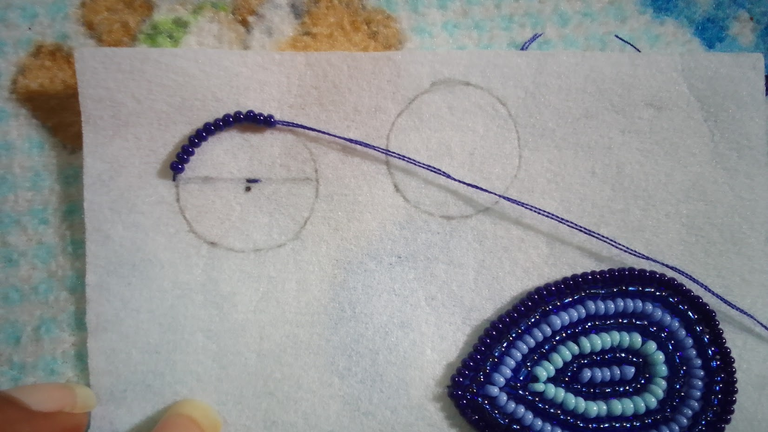
2- Tomamos 6 mostacillas estas son número 11/0 y las enfilamos en la aguja, iniciamos el bordado colocando las mostacillas encima de la línea que dibujamos en la tela.
 |  |
|---|
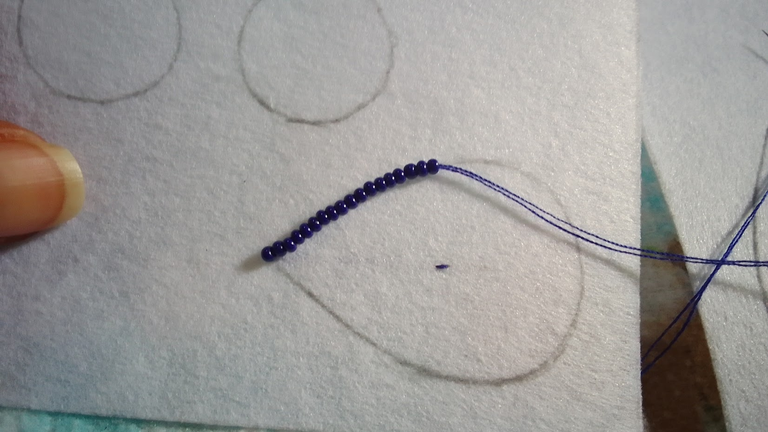
3- Luego de ello pasamos la aguja delante de la última mostacilla hacia abajo, para fijarla nos devolvemos, pasamos la aguja de abajo hacia arriba, pero esta vez en el medio de las 6 mostacillas, ósea, luego de las 3 primeras mostacillas, después la aguja la pasamos por las siguientes 3 y seguimos con el bordado. Se repite el paso anterior hasta completar la gota.
 |  |
|---|---|
 | 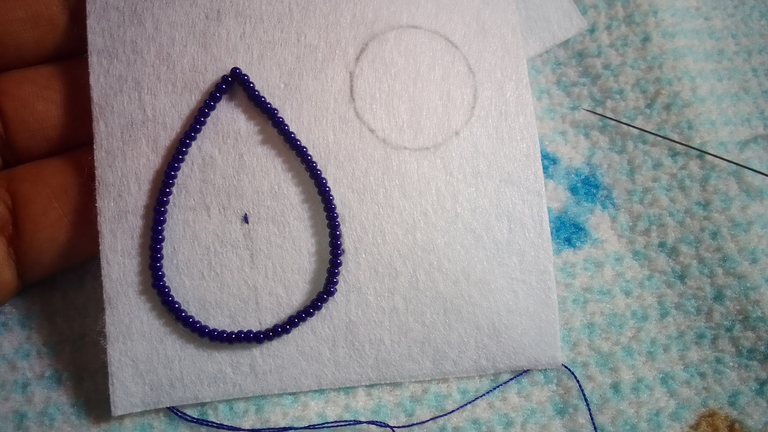 |
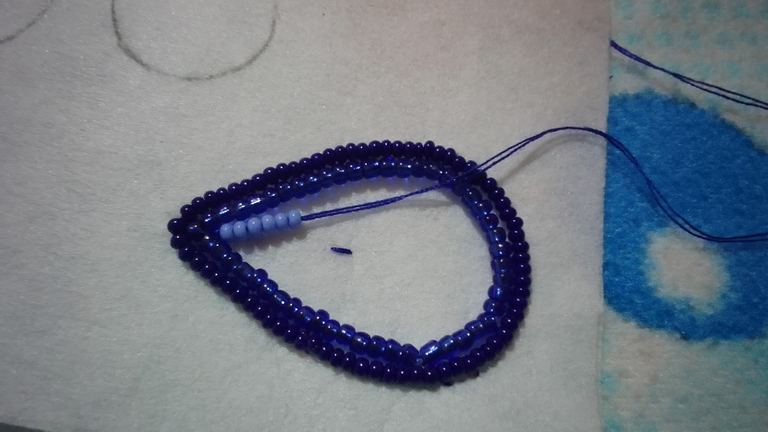
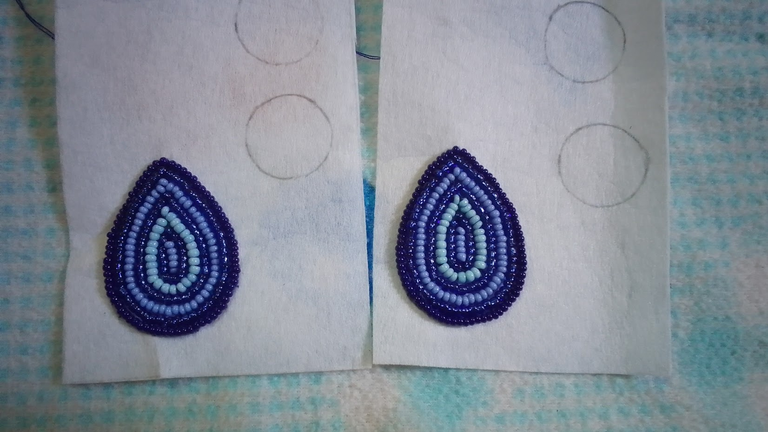
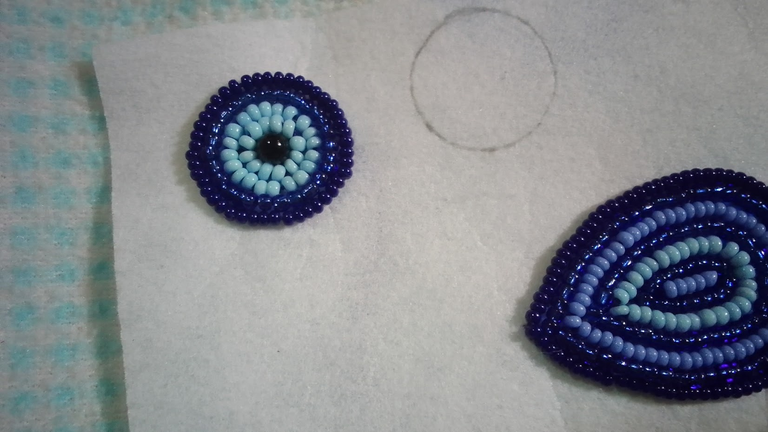
4- Una vez terminado el borde seguimos con el relleno de la gota, que se hará siguiendo la misma forma del borde, para ello volvemos a enfilar 6 mostacillas y la colocamos cerca de la punta de la gota y repetimos el paso 2 y 3 hasta rellenar toda la gota.
 |  |
|---|---|
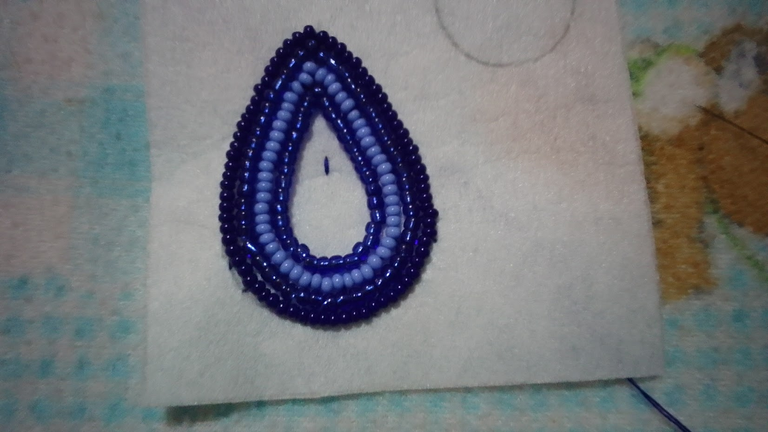 | 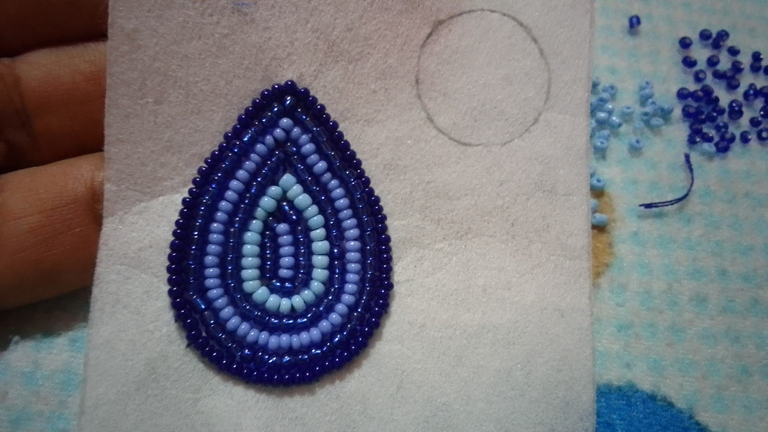 |
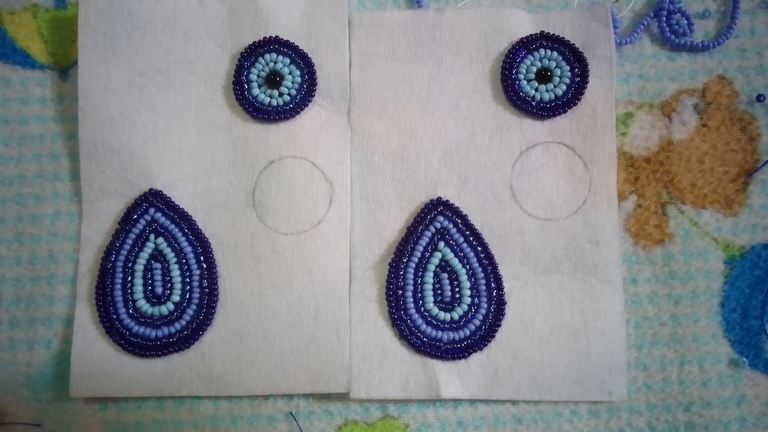
5- Repito todos los pasos anteriores para realizar la otra gota del otro zarcillo.
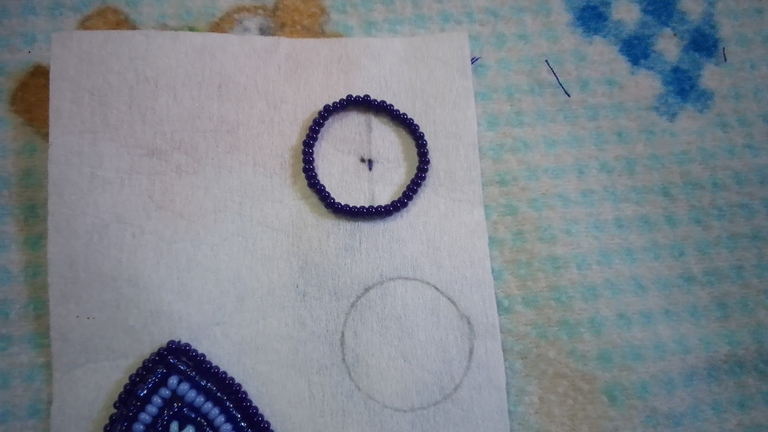
6- Para bordar el circulo, realizamos el paso 2 y 3 hasta completar el circulo, básicamente es la misma norma de borbado.
 |  |
|---|
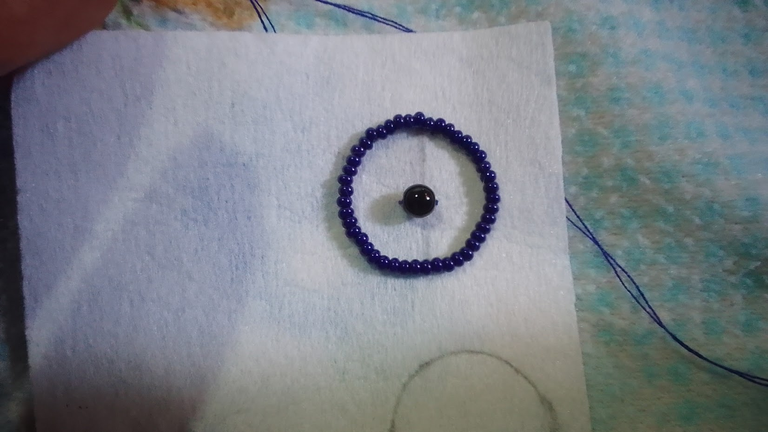
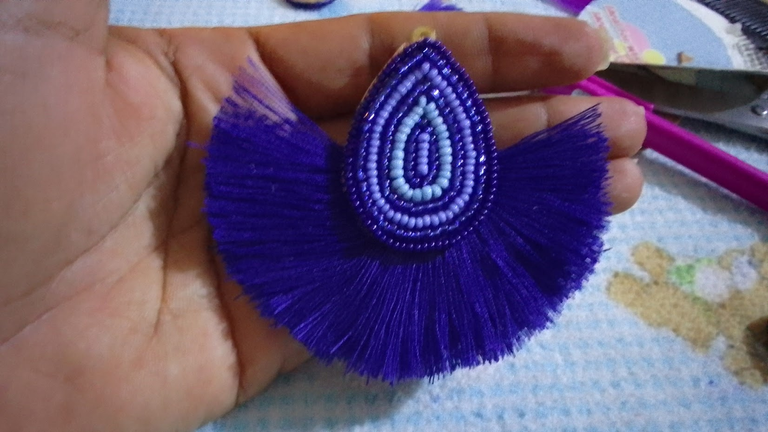
7- Al completar el borde, previamente había medido y colocado un puntito en el centro donde coloque una piedra de jade de 4mm aproximadamente, esta parte del zarcillo tendrá un ojo turco.
8- Luego continúe con el bordado repitiendo los pasos 2,3,4 hasta completar el ojo turco.
Este tipo de bordado por lo general se necesita uno o dos pasos pero que se repiten varias veces hasta completar el diseño. Y se repite el paso hasta tener el otro zarcillo.
 |  |
|---|
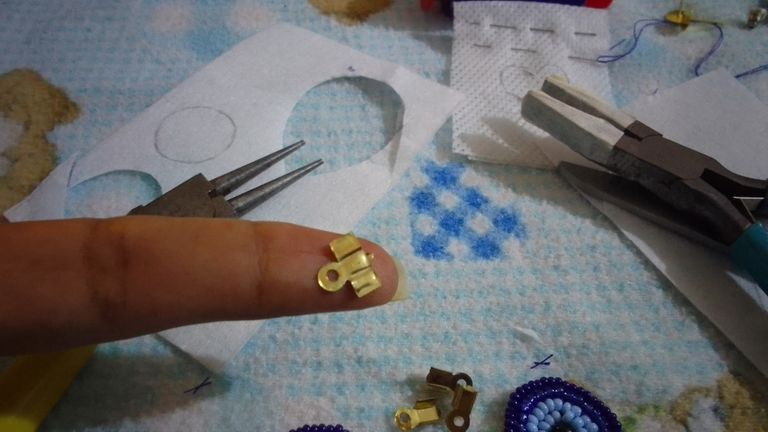
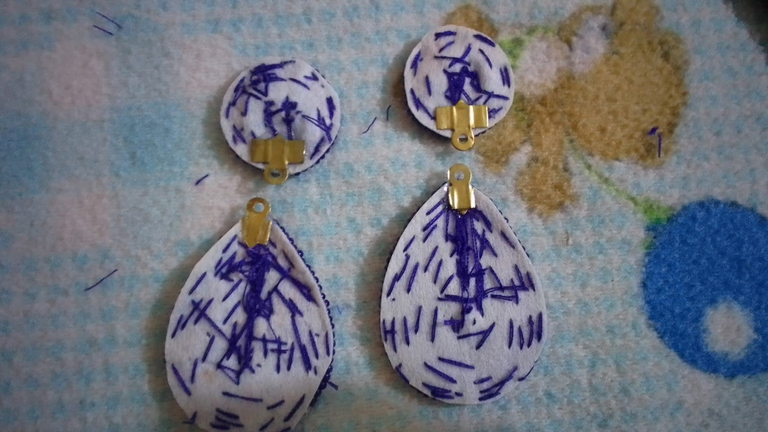
9- Continuamos, una vez listos recortamos las gotas y los círculos, le vamos a colocar unos tapa nudos, nos interesa la parte de los aritos para el ensamblaje, estos son cuadrados y con unas especies de aletas las cuales las desdoble con la pinza plana, le quite las “aletas” a dos que coloque en la parte de la gota y las otras dos las deje completas y las pegue con la silicona fría en la parte del círculo.
 |  |
|---|---|
 |  |
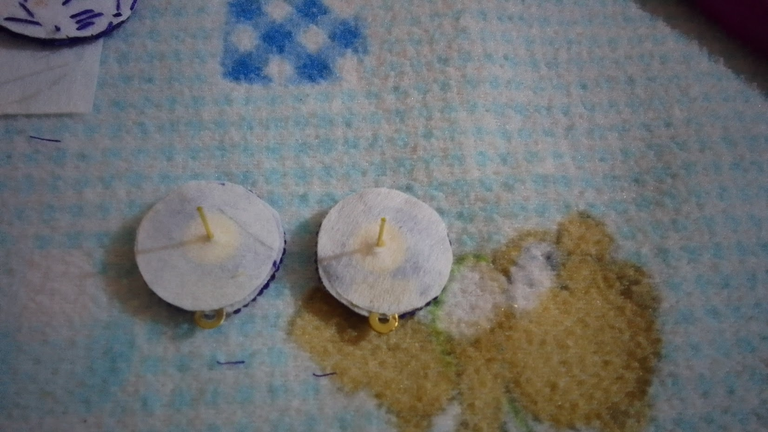
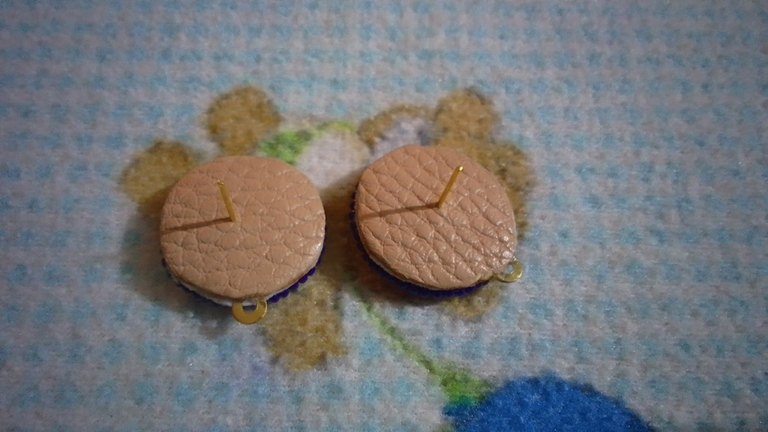
10- Una vez que se secó el tapanudo, pegue el pin del zarcillo, para ello coloque un pedacito de pelón en forma de circulo, con un poquito de presión uní el pelón con el pin y luego con la silicona fría pegue al bordado de ojo turco por la parte de atrás. Para finalizar le pego el semicuero, paso el yesquero por los bordes con cuidado de no quemarme ni dañar el trabajo para sellar.
 |  |
|---|
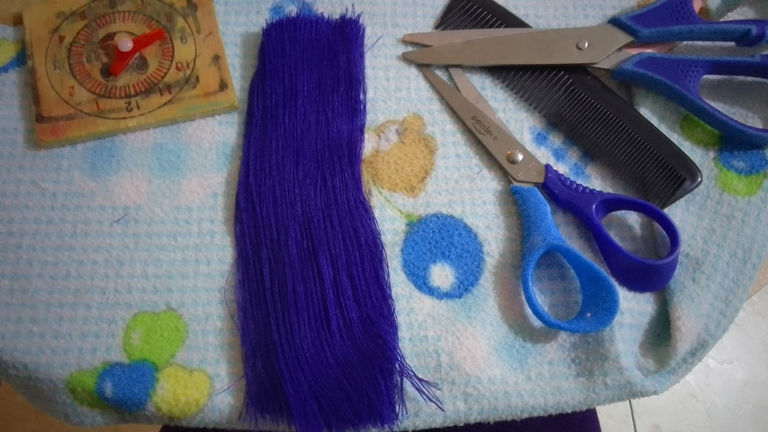
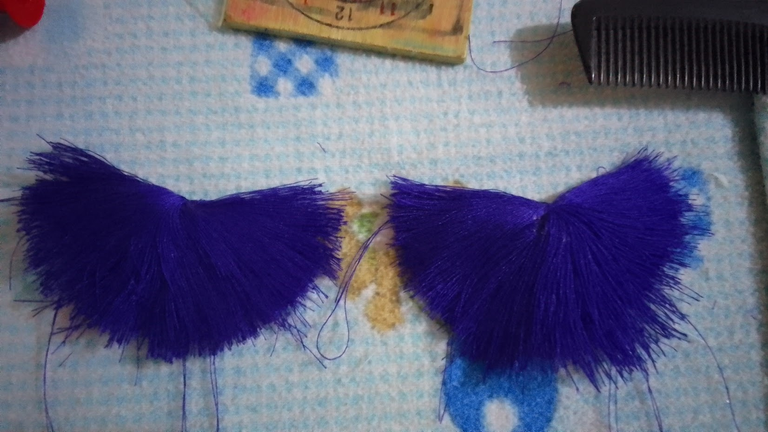
11- Con el hilo de costura azul haremos una bola tipo abanico, empleamos el cuadrito y comenzamos a dar vueltas alrededor del cuadrito tantas veces sea necesaria hasta obtener una cantidad considerable, separamos el hilo del cuadrito con la tijera cortando por uno de los extremos.
 |  |
|---|
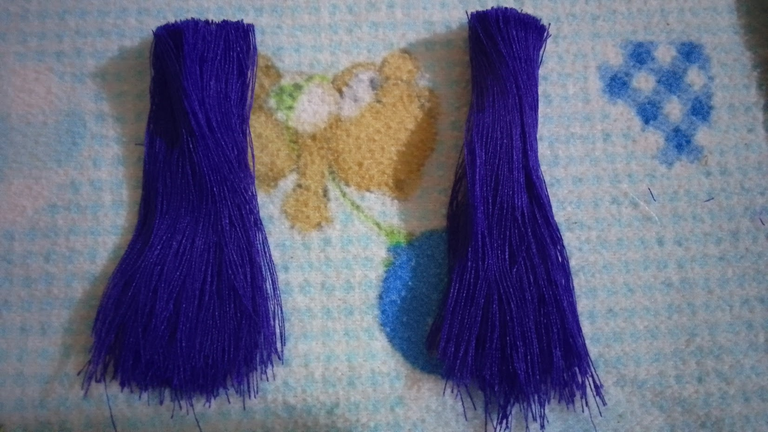
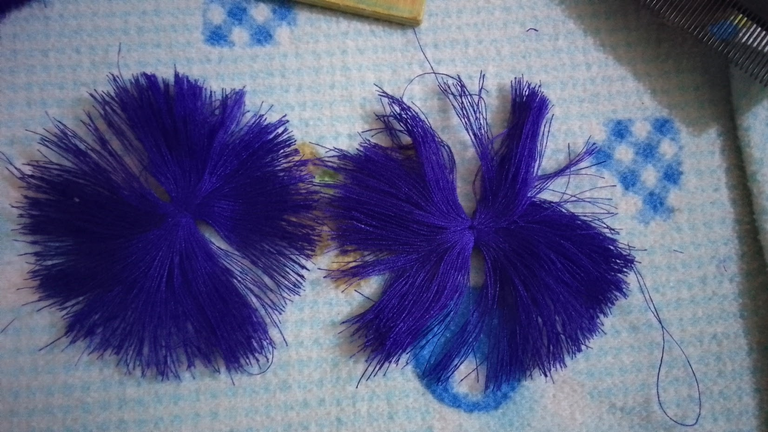
12- Con un peine especial para realizar este tipo de trabajo, peinamos los hilos y separamos en dos partes, estas partes yo la tomo con el dedo doblo a la mitad y con la tijera corto por la mitad, así mismo, con hilo las amarro en el medio y con el peine abro dado una forma circular, cada una.
 |  |
|---|
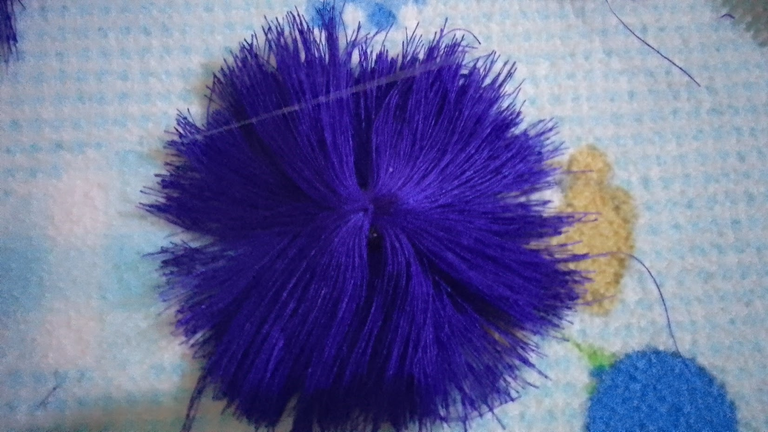
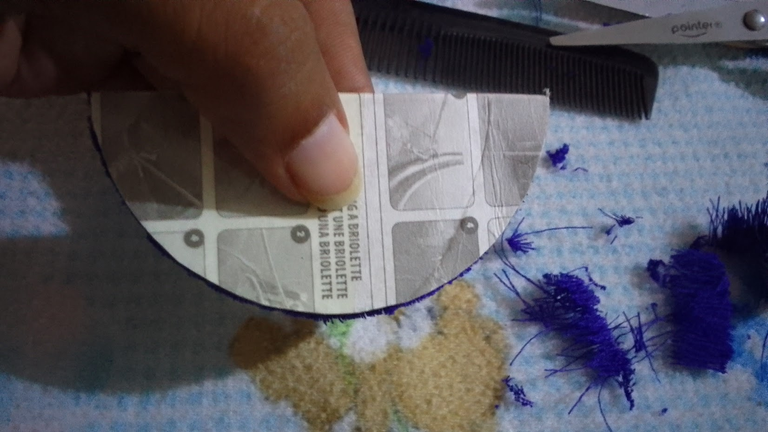
13- Luego las pego una encima de la otra, dejo unos minutos y luego doblo para formar el abanico. Y con un cartoncito quito el exceso de hilo.
 |  |
|---|---|
 |  |
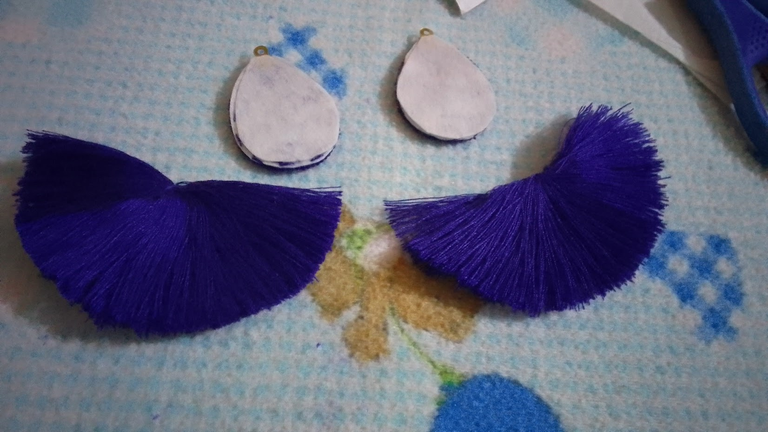
14- Luego a la parte de las gotas le coloque entretela y pegue la borla tipo abanico, y luego el semicuero para finalizar la parte de la gota.
 |  |
|---|
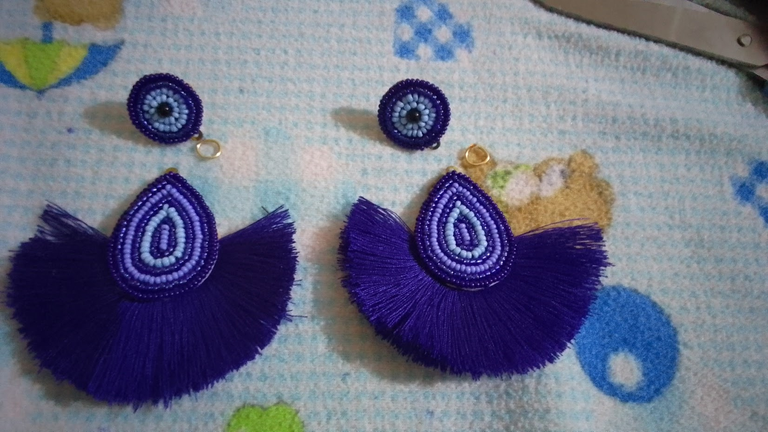
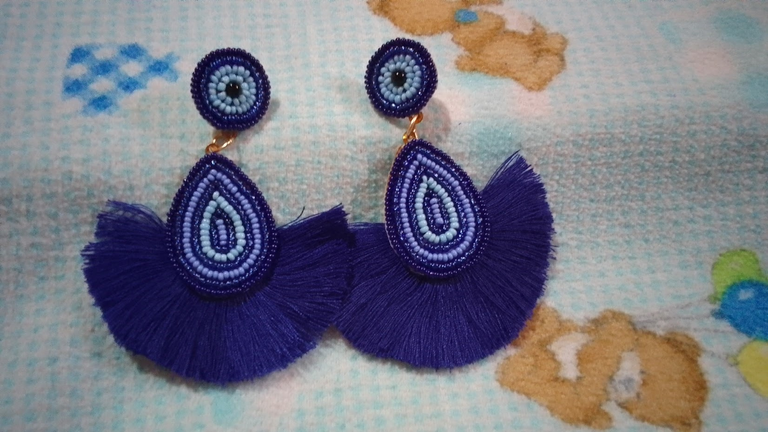
15- Después de tener todas las piezas listas ensamble las piezas, con un arito uní la parte del ojo turco con la gota y este es el resultado. Hermosos zarcillos de ojo turco con abanico.
 |  |
|---|
Así se ven estas bellezas 🧿
 |  |
|---|
Espero les guste el resultado, gracias por leer mi tutorial un fuerte abrazo tribu. 🧿

Greetings Womentribu community, it's a pleasure to share here, I'm edittas86 and I found this wonderful initiative @chacald.dcymt with the wonderful jewelry community and of course I said I had to participate, since jewelry making is one of my passions.
I have a special weakness for tendrils, so for this initiative I made some spectacular tendrils, I love the Turkish eye 🧿and tassels, and I just started with the technique of embroidery and I have loved it so the tendrils will be made with the technique of embroidery of beautiful Turkish eyes.
For this I used the following materials.
- Beads in various shades of blue
- Jade
- Blue stitching thread, needle
- Interlining or fur
- Semi leather or suede cloth
- Cardboard mold in the shape of a drop and a circle.
- Scissors, pencil.
- Liquid silicone
- Cardboard or wooden square
- Costume jewelry tools
- Earrings, knot cover
Embroidery Step by Step 🧿
1- We start by taking a base previously made in cardboard in the shape of a drop and a smaller circular one, we draw it on the interlining to start the embroidery.
2- We take 6 beads these are number 11/0 and we thread them on the needle, we start the embroidery by placing the beads on top of the line we drew on the fabric.
| |
|---|
3- After that we pass the needle in front of the last bead downwards, to fix it we go back, we pass the needle from bottom to top, but this time in the middle of the 6 beads, that is, after the first 3 beads, then we pass the needle through the following 3 beads and continue with the embroidery. Repeat the previous step until the drop is completed.
| |
|---|---|
| |
4- Once the border is finished we continue with the filling of the drop, which will be done following the same shape of the border, for this we return to bead 6 beads and place it near the tip of the drop and repeat step 2 and 3 to fill the entire drop.
| |
|---|---|
| |
5- Repeat all the previous steps to make the other drop of the other tendril.
6- To embroider the circle, we do step 2 and 3 until we complete the circle, basically it is the same beading rule.
| |
|---|
7- When completing the border, I had previously measured and placed a small dot in the center where I placed a jade stone of 4mm approximately, this part of the tendril will have a Turkish eye.
8- Then continue with the embroidery repeating steps 2,3,4 until the Turkish eye is completed.
This type of embroidery usually takes one or two steps but repeat them several times until the design is complete. And repeat the steps until you have the other tendril.
| |
|---|
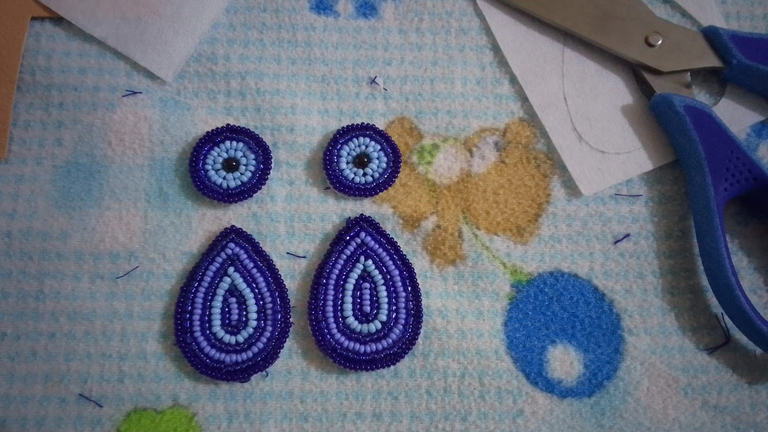
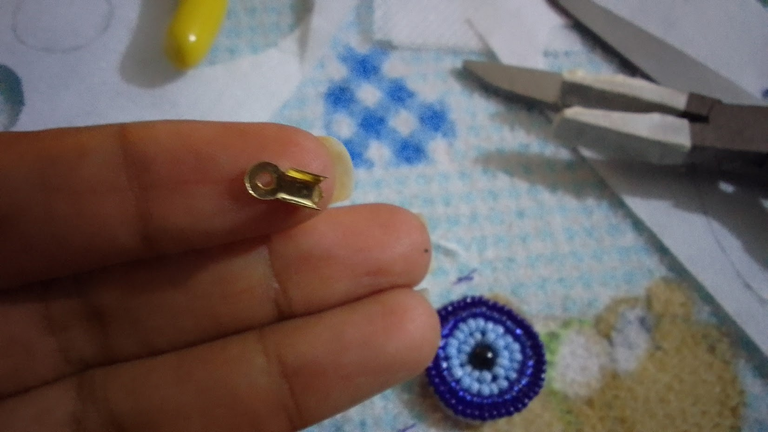
9- We continue, once ready we cut out the drops and the circles, we are going to place some knot covers, we are interested in the part of the rings for the assembly, these are square and with some kind of fins which I unfold with the flat tweezers, I remove the "fins" to two that I place in the part of the drop and the other two I leave them complete and glue them with cold silicone in the part of the circle.
| |
|---|---|
| |
10- Once the tapanudo is dry, glue the pin of the tendril, for it I put a little piece of fur in the shape of a circle, with a little pressure I joined the fur with the pin and then with the cold silicone I glued the embroidery of the Turkish eye on the back. To finish I glue the semi leather, I pass the tinder along the edges being careful not to burn myself or damage the work to seal.
| |
|---|
11- With the blue sewing thread we will make a fan type ball, we use the square and we begin to go around the square as many times as necessary until we obtain a considerable quantity, we separate the thread of the square with the scissors cutting by one of the ends.
| |
|---|
12- With a special comb to make this type of work, we comb the threads and separate them in two parts, these parts I take them with my finger, fold them in half and with the scissors cut them in half, likewise, with thread I tie them in the middle and with the comb I open them in a circular shape, each one.
| |
|---|
13- Then I glue them one on top of the other, leave them for a few minutes and then fold them to form the fan. And with a cardboard I remove the excess thread.
| |
|---|---|
| |
14- Then to the part of the drops I put interlining and glue the tassel type fan, and then the semi leather to finish the part of the drop.
| |
|---|
15- After having all the pieces ready I assembled the pieces, with a hoop I joined the part of the Turkish eye with the drop and this is the result. Beautiful Turkish eye tendrils with fan.
| |
|---|
This is how these beauties look like 🧿
| |
|---|
I hope you like the result, thanks for reading my tutorial a big hug tribe. 🧿

Cover and Banner made in canva
Own pictures
Realme c11 mobile device
Separator made in PowerPoint
Una belleza de zarcillos @edittasc86 te han quedado fabulosos, Gracias por participar en la iniciativa 🤗
Hola muchas gracias ❤️
Esto es una belleza, me encantaron estos zarcillos. El paso a paso bien explicado y detallado. Te felicito
Me alegra te haya gustado ❤️❤️ Muchas gracias ❤️
Felicitaciones!
Gracias por deleitarnos con tan magnífica publicación, la cual fue valorada por @Womentribe una comunidad para destacar el valioso potencial del ser humano.
*Sigue nuestras cuentas:
@Womentribe
suscribete aquí @colmena-139925
twitter
Instagram
Muchas gracias ❤️
Ay chama te quedaron lindos! yo quiero unos jejeje 😍 ver el paso a paso me recuerda a mi abuelita cuando ella hacía manualidades, todo tan detallado y pulcro, me encanta tu trabajo e imaginación, esos zarcillos quedaron espectaculares!
Hola amiga gracias.. me encanta que a través de mi trabajo hicieras ese reconocimiento a tu abuela.. un fuerte abrazo ❤️
Hola..
Bellos estos zarcillos me encantaron.
Hola hermosa gracias ❤️
Wao!
Que belleza de trabajo. Amé esta técnica, el resultado es tan elegante hermoso 🥰.
Muchas gracias por participar en nuestra iniciativa. Un abrazo infinito y bendeciones para tus manos creadoras 😘💜
!discovery 50
Holaa muchas gracias por tu apreciación .. me alegra mucho te haya gustado.. Amen 🙏❤️
Están súper hermosos me encantaron 😍 tengo mucha suerte que tan elegantes piezas sean azules el color que amo.
Muchas gracias ❤️ me alegra te haya gustado los zarcillos realmente son hermosos y elegantes 💙
This post was shared and voted inside the discord by the curators team of discovery-it
Join our Community and follow our Curation Trail
Discovery-it is also a Witness, vote for us here
Delegate to us for passive income. Check our 80% fee-back Program
Gracias
Que trabajo tan hermoso, gran diseño, detalles y creatividad. Me encanto la técnica, en lo personal me gustan mucho los ojos turcos y este par de zarcillos te quedo espectacular. Te felicito. Suerte en el concurso @edittasc86 ✨
!DIY
Holaa muchas gracias.. aprecio tu comentario.. también me encantan los ojos turcos.. gracias Amen ❤️
Beautiful work full of details. Thanks for sharing great content. Congratulations.
Thank you very much ❤️
Congratulations @edittasc86! You have completed the following achievement on the Hive blockchain And have been rewarded with New badge(s)
Your next target is to reach 700 comments.
You can view your badges on your board and compare yourself to others in the Ranking
If you no longer want to receive notifications, reply to this comment with the word
STOPTo support your work, I also upvoted your post!
Check out our last posts:
thank you very much🙏
Awesome job @edittasc86! Keep pushing yourself and you'll reach your Hive goals before you know it.
Dios mío están espectaculares, te quedaron bellísimos amiga, me encantooooooo💙💙💙💙
Hola amiga, muchas gracias.. me alegra te haya gustado.. 💙💙💙
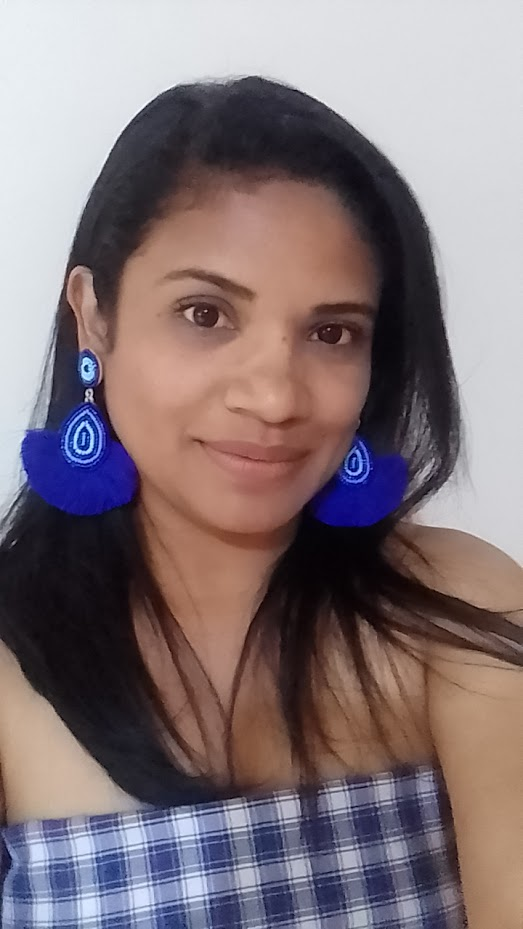
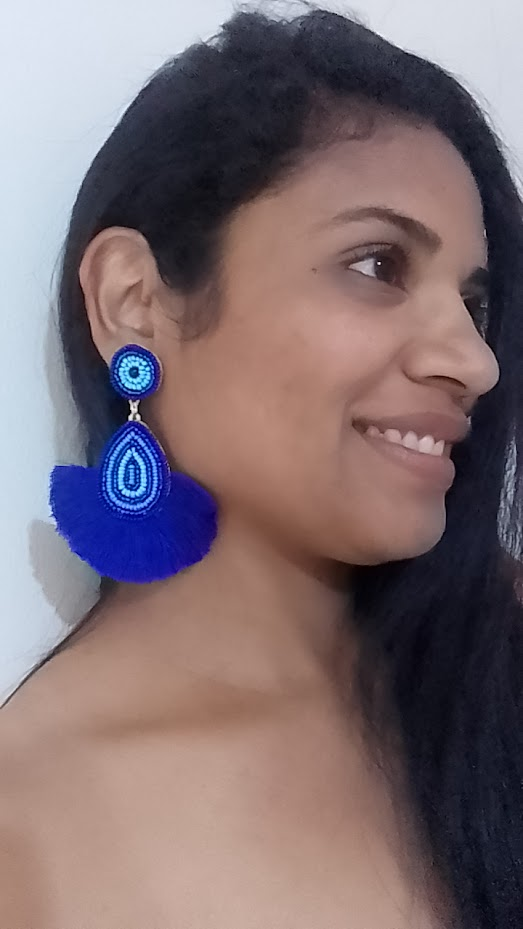
Este modelo me fascinó por la combinación de sus colores y su versatilidad.
Puede usarse con ropa casual y lucir encantador, y también con un atuendo elegante, y lucir igual de hermoso.
Gracias por compartirlo.
muchas gracias me alegra ke haya gustado, gracias por su review ❤️❤️
Muy lindos estos aretes. Me encanta esta técnica de bordado. El color azul se ve muy lindo 😊 gracias por compartir.
Hola muchas gracias.. me alegra te haya gustado ❤️.. a ti por leer 🥰
Hola muchas gracias.. me alegra te haya gustado ❤️.. a ti por leer 🥰
Hermosos y originales zarcillos, me gustaron demasiado. Se pueden montar sobre una base de fieltro? Saludos 🌺🌷💐
Hola muchas gracias ❤️.. me alegra le haya gustado ❤️❤️ si puede hacer el bordado en fieltro también en tela pop .. saludos 🌹
Ajá ok. Están bellos los zarcillos. 🌺🌷🌹💐❤️
Hermoso diseño amigo, tú eres una experta creando estos zarcillos llamativos, te queda genial como siempre, te felicito por tan hermosa creación, un abrazo.
Gracias amiga.. me alegra te haya gustado.. 💖
You can query your personal balance by
!DIYSTATSoh thank you very much, thank you for pointing me in the right direction ❤️❤️