
This is a very funny one. I don't know why but for some strange reason, this drawing of Kelan Gaines took me 3 whole days. If I were complaining on the Lily Shieldpaw drawing before, this took as long as that although it will not show in the timelapse.
I think I did a lot of mistakes for this one and I had to redo it a lot of times and that is why it took me longer than it should. The silver lining is this drawing looked really good in the end so even though the journey was tough, it's the end that matters.
Guides and Line art

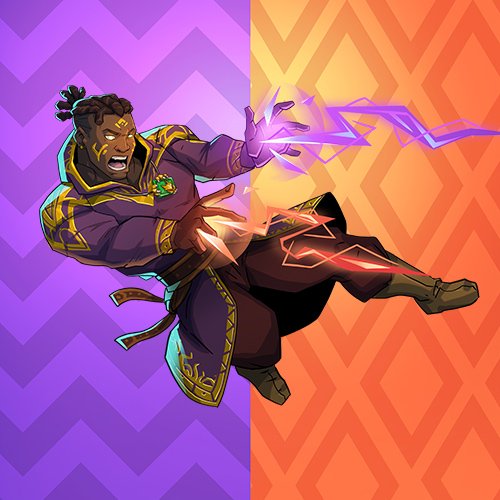
For the guide and concept, I think it's because Kelan Gaines reminded me of Lucian from League of Legends because of his pose, I thought he always uses a gun. I did like the idea so I went with it and made something where he would be doing a finger gun pose.
One biggest mistake that I did and I don't know why I did this was during the Line art part, the markings on Kelan Gaines' body and clothes, I added it to the Line art layer. This is a big problem and difference between Krita and Photoshop. For Photoshop, you can quickly cut this area using Lasso Tool and create a new layer with it. With Krita, you can also do this but since I am drawing while animating, I can't. So, I just had to live with it until the end.
Long story short, DON'T BE ME! SEPARATE YOUR LAYERS PROPERLY!
Add Base Color
I found a better way to organize the color guides. I think this is a lot better than before. That's an improvement on this step.
I also added the eye color guide somewhere in this step. That's why you suddenly see the eyes color guide pop out of nowhere.
Add Details
Since I already had the markings drawn on the line art, that's less things to say here. I did added more shadows on the markings where it is needed by redoing the lineart layer in the frame needed.
For those who haven't seen Krita, let me give you a sneak peek.
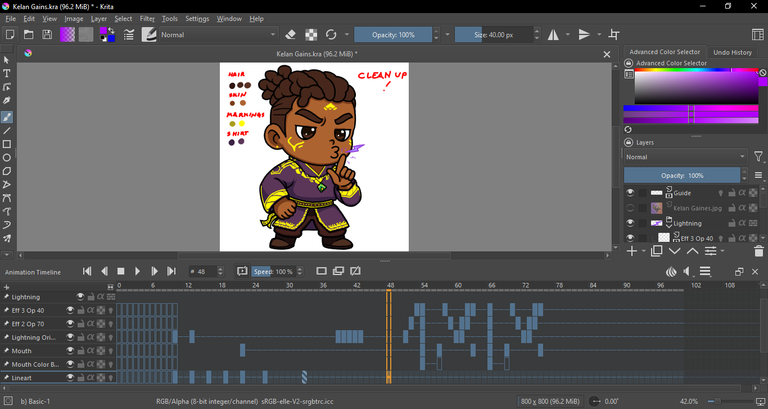
Unlike Photoshop where you need to click on the layer you want to work with, since the animation and layers are integrated, whenever you need to do something, you need to select the layer and which frame you are working on. So, if I edit something on Lineart Frame 10, I need to redo everything on lineart frames 12, 15, 18, 21, 27. That is probably why it took me longer. I had to backtrack a lot of things which compounded. Krita is better than Photoshop on a lot of things. That is why I like using it more than Photoshop but it takes a higher skill ceiling to use this properly.
Extras
I spent a lot of time but achieved quite little. That is what I think after looking at this. So, instead, I did a little bit of animation after everything else. It's very basic but I hope you liked it as much as I did.
Original Art
Timelapse

Hi, y'all. Slimey here, your jolly and gullible little blue slime. I got reincarnated to this world to better my art and join community challenges to get more practice and improve my skill.
Know more about me by checking out my introduction post
See funny vtuber clips and animations by checking out my youtube channel.
Support me by joining Splinterlands using my referral code.
Images are taken from Splinterlands, Drawn in Krita, Animated in Photoshop and Edited in Canva.
Congratulations @slimeyph! You have completed the following achievement on the Hive blockchain And have been rewarded with New badge(s)
Your next target is to reach 1250 upvotes.
You can view your badges on your board and compare yourself to others in the Ranking
If you no longer want to receive notifications, reply to this comment with the word
STOPThanks for sharing! - @isaria
