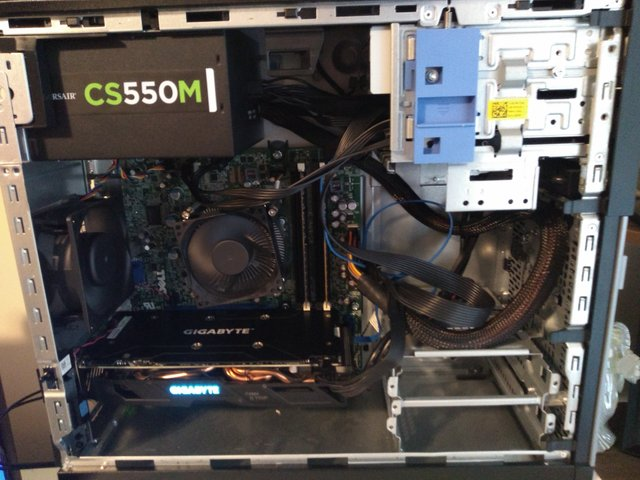
I've written many articles before about my budget gaming PC that I built that started life as a used Dell Optiplex 7010. I've talked a bit before about the pros to buying used as well as some of the challenges that I've faced with building a good gaming PC on such a tight budget. One thing that I've never done is give a detailed price comparison to see just how much money I saved by buying used parts over new.
Right now, money is tight for many people due to the current Coronavirus pandemic that's going on. Many people have been laid off from their jobs and some people are struggling to get by month to month. With quarantines happening all over the world and especially here in the US right now, many people are turning to gaming as a means of entertainment to pass the time while they wait for life to somewhat go back to normal. For those on a tight budget right now, building a gaming PC from used parts may be the only way that they could afford to get into PC gaming.
Let's get into it!
Firstly, I'm going to break down a list of what everything in my current PC to this point has cost me. Then, I'm going to give you a list of new parts and prices that would be the cheapest that you could currently get that would be similar in performance to what my current budget gaming PC has. For this comparison, I'm not going to be including my upcoming RAM upgrade that will be happening to my system or the SSD upgrade that I plan on doing later this year. While having 16GB of RAM or an SSD in a system is really awesome, you don't NEED them to have a decent gaming PC that will play modern games. Also, I won't be including the price of my WiFi adapter here as many people won't need one as many people have home internet. In my particular case, I needed one because I use my neighbor's WiFi.
Here's a list of what everything for my current budget gaming PC has cost me:
Optiplex 7010 case w/ i5-3570, CPU cooler (with thermal paste already on it), and 8GB DDR3-1600MHz RAM - $100
Gigabyte RX 480 4GB G1 Graphics Card - $75
500GB 7200 RPM HDD - $8
550W PSU - Technically I got mine for free but until recently you could pick up a similar PSU on EVGA B-Stock's website for around $20
That brings the total cost of my current gaming PC (if you shopped around for the best prices like I did and got an EVGA B-Stock PSU for $20) to $203. It's a really good budget gaming PC for the price.
Now let's break down what a similar budget gaming PC would cost you if you decided to go with all new parts. For this build, I'll be going with a Ryzen system because it's the most budget friendly option if you're wanting to build a decent gaming PC from new parts.
Let's start with the CPU.
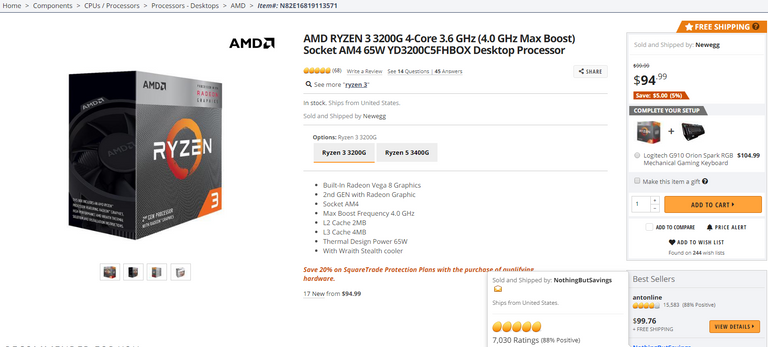
For our CPU I decided on the Ryzen 3 3200G. This is a four core/four thread CPU with a base clock of 3.6Ghz and a boost clock of 4GHz. This CPU is just a little bit faster than the one in my used budget gaming PC, but it's the closest thing in comparison that's a new Ryzen CPU. There's also the option of the Ryzen 3 1200, but it only has a 3.1GHz base clock and a 3.4GHz boost clock. I went with the Ryzen 3 3200G for several reasons over it. The first is that it's a faster CPU and is most similar performace wise to my current CPU. The second is that it has built-in Vega 8 Graphics which while this build will have a dedicated GPU, is still nice to have if you have any troubleshooting issues down the line. Lastly, it only cost $1 more than the Ryzen 3 1200. It's a no-brainer as to why I chose the Ryzen 3 3200G over the Ryzen 3 1200. As a final note, this CPU also comes with a CPU cooler and thermal paste which saves us a bit of money from having get those separately later on.
Cost: $95
Next, let's pick out a GPU.
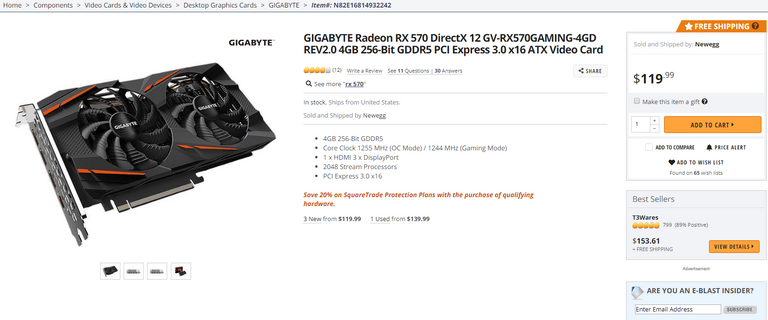
For this one, the RX 570 4GB was an easy choice. It has similar performance to my current GPU as well as the fact that they don't make new RX 480s anymore. This is well known GPU among PC gamers on a budget for a good reason, it's a great GPU for the price. If you're looking to play most modern PC games and you're looking to buy a new budget-friendly GPU, this is always my top recommendation.
Cost: $120
Next, let's get ourselves a motherboard.
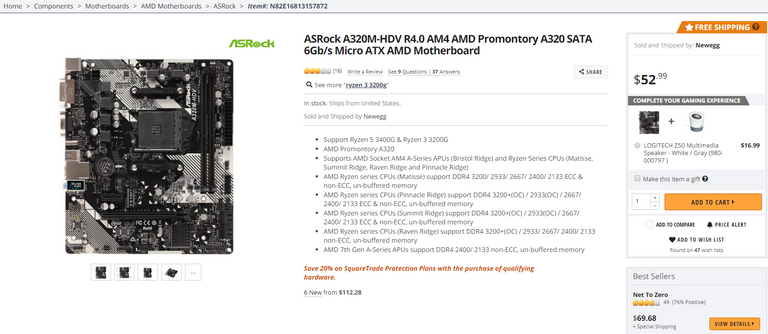
For our motherboard, I just went with the cheapest motherboard that works for our build. More expensive motherboards offer more features, but can cost a lot more. For the cheapest motherboard for our build I went with the ASRock A320M. It seems like earlier releases of it received some negative feedback, but all the newest reviews of it were 5 stars. It's an mATX board that supports our CPU out of the box, has two DDR4 RAM slots, has a PCI Express 3.0 x16 Slot, and has enough USB3 and USB2 ports to satisfy what most people will need. It's positive reviews talk about how beginner friendly this board is due to it's simplicity and simple BIOS interface. Honestly for what we need, it's a great motherboard for the price.
Cost: $53
Let's get ourselves some RAM now.
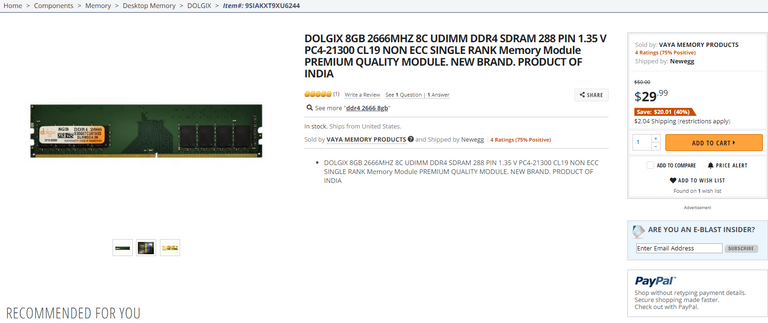
Just like our motherboard, I went with the cheapest RAM that was 8GB. This is a single stick of 8GB DDR4 2666MHz RAM. Normally I'd recommend going with two sticks of 4GB RAM for an 8GB configuration, but our motherboard only has two RAM slots and there's a good chance that someone building a system like this would want to add more RAM later down the line and with that in mind it only makes sense to want to go with a single stick of 8GB RAM. At 2666MHz, it's not the fastest RAM by far, but it's also not the slowest. From the single review that this has, if you're tech savvy and know how to overclock, you can push this RAM to 3000MHz which is more in line with a mid-range Ryzen build. Even if you don't overclock it, 2666MHz RAM ain't bad at all for someone on a budget. 8GB of RAM is also the minimum that you need for a modern gaming PC. You'd be able to add an additional 8GB later on down the road if you wanted to.
Total cost: $30
Now we need some storage, so let's get a HDD.
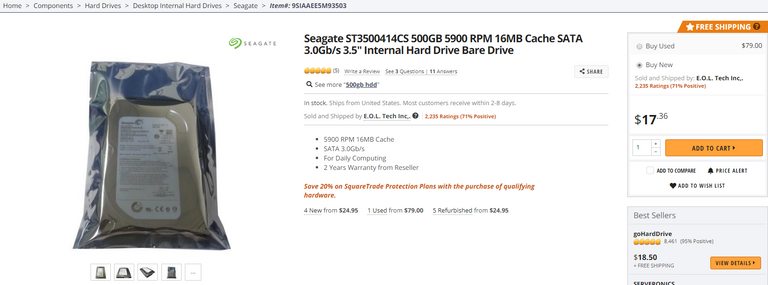
Since we're price comparing a new build to my used budget build, we're of course going with a 500GB HDD. This one is a bit slower at 5900RPM compared to my 7200RPM HDD. Seagate is a well-known HDD manufacturer though. There's not much else to be said about this. It's just a decent and cheap option for storage. If you can afford to spend a few extra dollars, I'd definitely recommend getting a 7200RPM HDD over a 5900RPM HDD. It'll feel a bit faster and until you can get yourself an SSD, it'll be well worth the few extra dollars.
Cost: $18
Next, we need something to put everything in for our build so let's get a case.
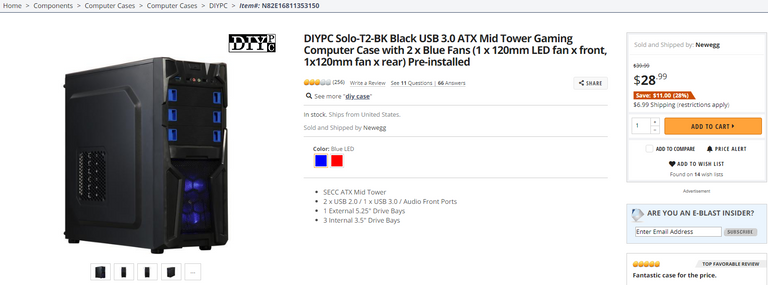
Just like with many things in this build, we're just going with what's cheap. This case is only $29, is an mATX case which would be big enough to fit our motherboard, and even has a couple fans included with it. It's a cheap no-frills case and that's really all we need.
Cost: $29
Our final component would of course be a power supply so let's get one and wrap this build up.
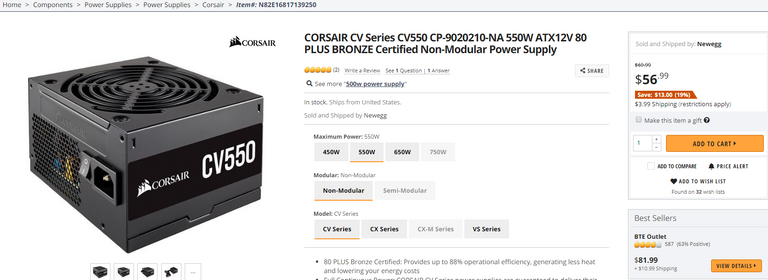
Unlike pretty much everything else in this build, when it comes to picking out a power supply you don't want to go with the cheapest power supply out there. The reason for this is that really cheap power supplies have been known to either just give out or in a worst case scenario can catch fire. By going with at least a power supply from a manufacturer that's well-known, we can breathe a sigh of relief on that note at least. You just don't want to skimp out here and regret it later. Plus, a good power supply will last you a long time and save you money in the long run. For this, I chose a 550W Corsair PSU. Like my own PSU, it's 550W and from a well-known manufacturer.
Cost: $57
We're finally done with our build for getting the cheapest gaming PC that's comparable spec-wise to my current budget gaming PC.
Our total cost for our budget gaming PC from new parts is...
drumroll
$402!
For comparison, my used budget gaming PC with similar specs to this new one that we just built cost $203 which is nearly half the cost of building one from new parts.
I could build 2 used budget gaming PCs for almost the same price as 1 new one. Additionally with going used, most of the building has already been done for you with an Optiplex build. All you'd need to do is install a PSU, HDD, and a graphics card. It's much easier especially if you're new to PC building.
One final note is that buying used office PCs to build a gaming PC out of is eco-friendly because you're taking something that otherwise might get thrown away and turning into a very usable gaming PC to play modern PC games on. Even my $203 ultra-budget used gaming PC hasn't given me any issues with playing newer titles including the graphically intensive game, Final Fantasy 15.
Do yourself a favor and buy used to save yourself a lot of money... or don't. The choice is yours.
I'm going to have to do this. So cheap!
If you're wanting to build a cheap modern gaming PC from used parts like I did, I just published an in-depth article talking about everything you'd ever need to know. I took the months of research that I had to do and things that I learned from first hand experience and compiled it all into one article! :)
Nice post Fearless! Looking forward to more!