How are you friends of @hivegaming today we continue part 4 of the Resident Evil 4 Remake guide
Yes, the end of Chapter 3 of Resident Evil 4 Remake confirms that chapter endings are cliffhangers or something. We have nothing against it, but it's a shame, we know the blond guy is going to survive, so don't put us in such a tight spot all the time. When you regain control of Leon you won't be able to use the boat, which sinks. Go through the only possible path.
Cross over to the next room (where there will be resources and a police cap to examine) and follow the path. Believe it or not, there are no threats, explore a bit to collect resources and continue through the tunnel to the south.
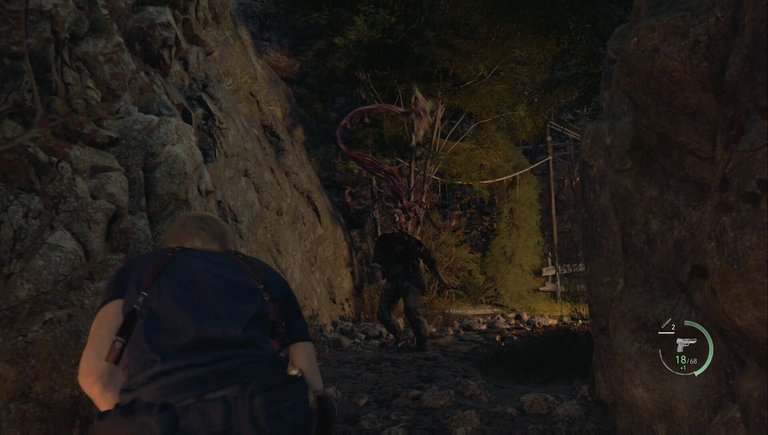
Right after that you'll have your first encounter with a mutant cattle, a cattle with the plague that controls it coming out of its head.

As you'll see, it has a fairly wide range with that tentacle with a blade at the end, it moves fast and doesn't stagger if you shoot at the "human" body, only when attacking the parasite. You need something powerful and aimed at the parasite, like the shotgun or the rifle. One trick that's still present from the original is that a flash grenade kills any pest instantly. Keep that in mind if you see a lot of them, you have one and don't want to take any chances. There will be another one right after the first one, so be careful
As you move forward, you'll come to a cave where the key you're looking for is, but you can't pick it up. There will be two stone hands on either side, where we obviously need to place something we don't have yet. Keep track of the location.
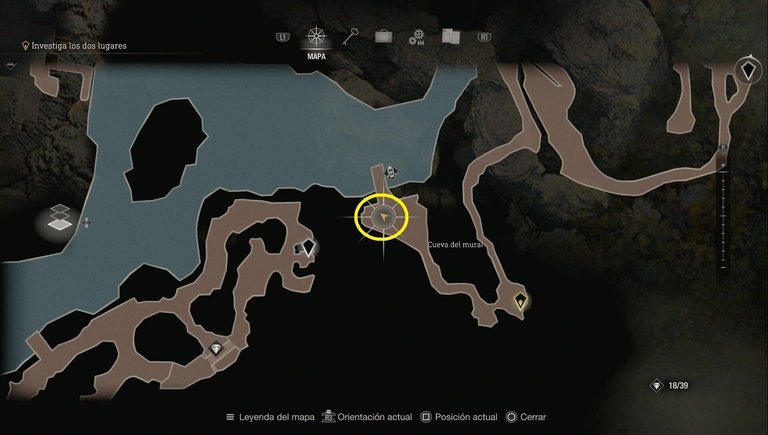
In the next room, when you examine the mural, you'll be marked with two locations, which will be our new objective. Continue until you exit the cave, not forgetting to pick up, next to the shore, the Sanctuary Key, which allows you to open those special wooden chests with a strange lock. Don't worry, we'll tell you where they all are as we go.
Make sure you activate the Egg Hunt Request, we'll complete it as we explore.
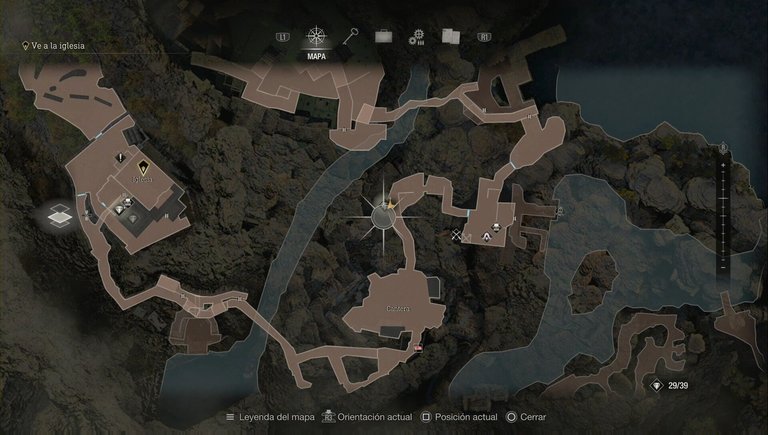
We're going to start by going west to where the Peddler is, and from there, south to the pier that allows us to access the southwest area.
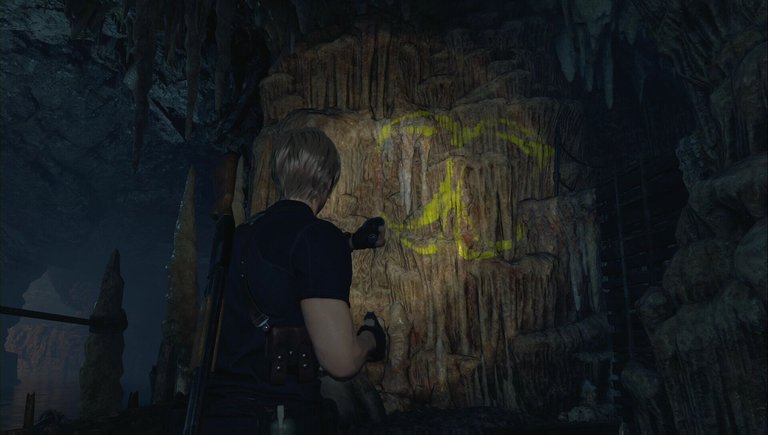
Here you will find a few objects, enemies, and on some columns you will see yellow paint. You must pay attention to the symbols they represent.
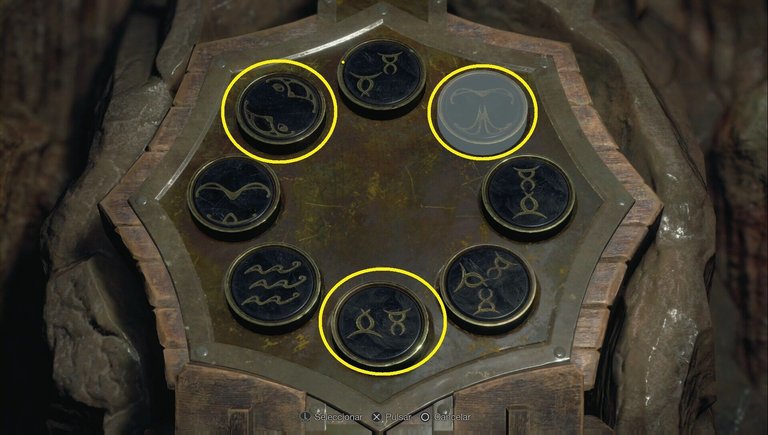
When you reach the highest point in the eastern area, you will see a closed door and an artifact with several discs. Here you must press the buttons with the symbols you have seen on the walls in any order. If you do not want to complicate your life, the solution is the following (look at the symbols in case the distribution of buttons is different)
• Top right button.
• Top left button.
• Bottom button.
Inside you will get the key object Apostate's Head. Don't forget to shoot the lantern marked as the treasure of the area to get an Indigo Tear before returning to the boat. Now, with it, go west along the river, to the westernmost end, where there is another pier.
In this area the treasure map shows you two objects: one is an Alexandrite, a new type of jewel. The other is the first shrine that requires the special key collected a while ago and contains a Splendid Bracelet.
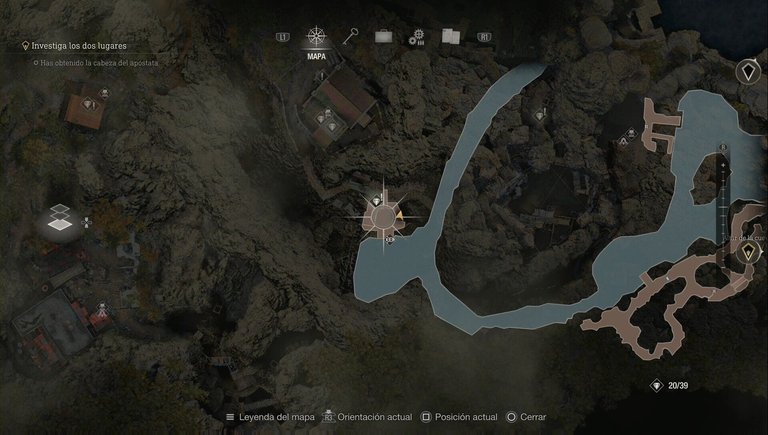
Return to the Lake and use the map to locate the treasures in the center of the lake. They will be on a wrecked boat, so approach the side to disembark and grab another Alexandrite. Go out the other door and go to the bow to find a large chest with the Red9 pistol (or a Gold Bar (G) if you already have it). Return to the boat and go to the eastern end, where you can see a patch of land and the map should mark the location of a treasure.
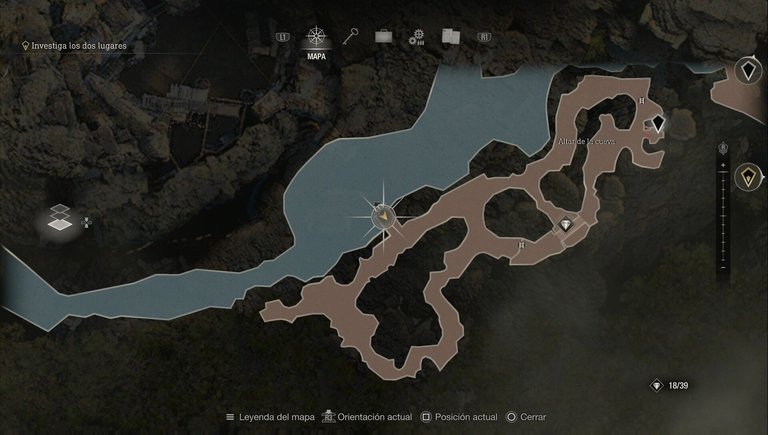
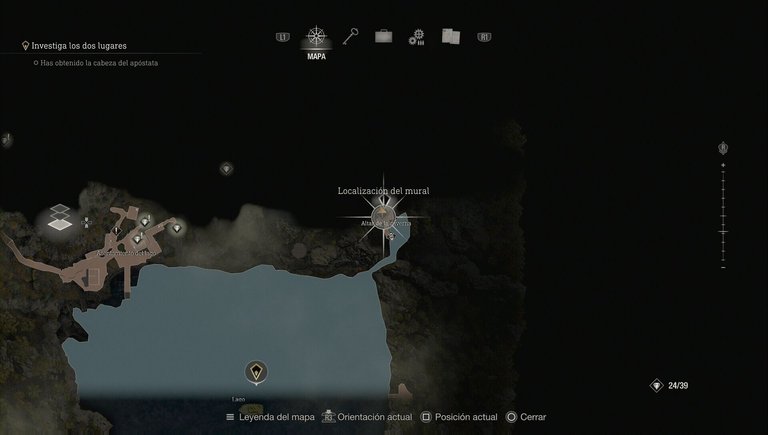
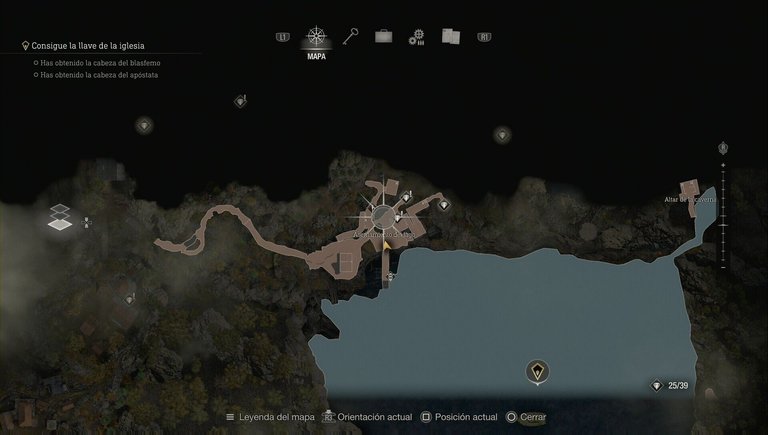
It is an area with several chickens. If you look at the easternmost point, behind a rock, you should find the Golden Egg from the request you have pending. Also grab the Indigo Tear. Now go to the northeast corner of the lake, where you will discover the Cavern Altar.
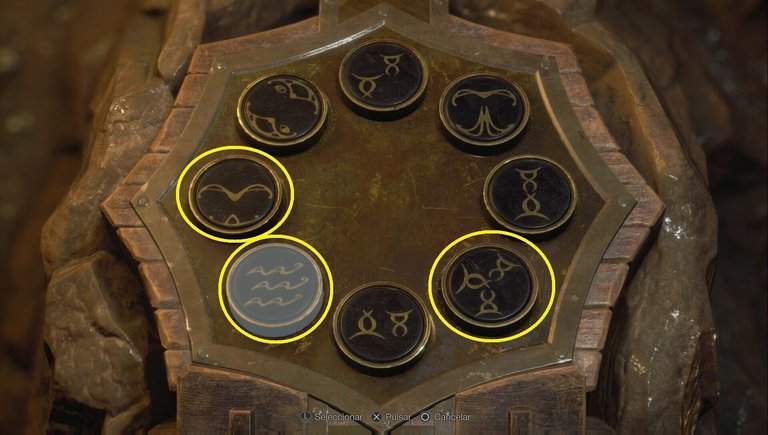
Here you will find another disc puzzle. This time you have to stand at specific points to find the solutions, having to go up the stairs to the left of the house and look at the stalactite, from the window to the left of them and next to the stairs to see them. If you don't want to complicate things, this is the solution:
• Bottom left button.
• Bottom right button.
• Left button.
Inside you will find a briefcase with the Hexagonal Piece C and the Blasphemer's Head. If you go up the stairs, you will find a lantern that you can shoot to find a Ruby (5). Now you can technically advance in the story, but don't do it. We are going to take a walk to get a scream of objects and treasures.
Start by going to the northwest coast. You will reach the house where Luis was, but now you can collect a couple of treasures: the Ring with a red gem from the basement where the character was and the second shrine with a Pearl Bracelet.
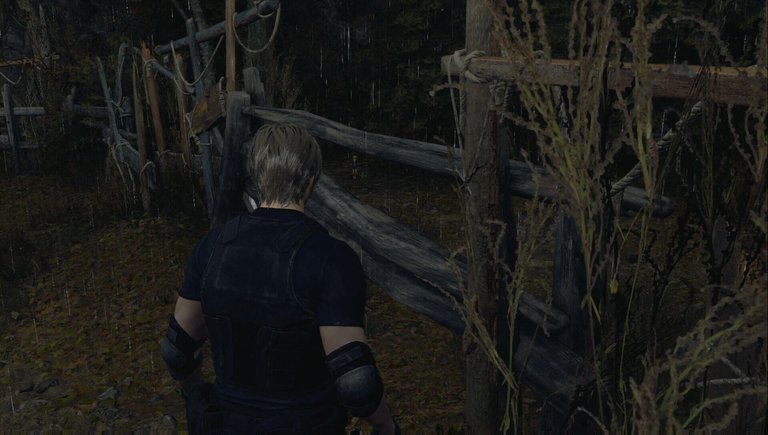
The door to the north, which you can open with the Insignia Key, takes you to a small detour. Go northwest to activate the Good Catch Request. Now open the other door, examine the body, collect resources and go up the stairs. You will reach the Forest Altar, where there are some more items. On the cart on the west side is a Small Key. Destroy Mechanical Castellan #04 as well.
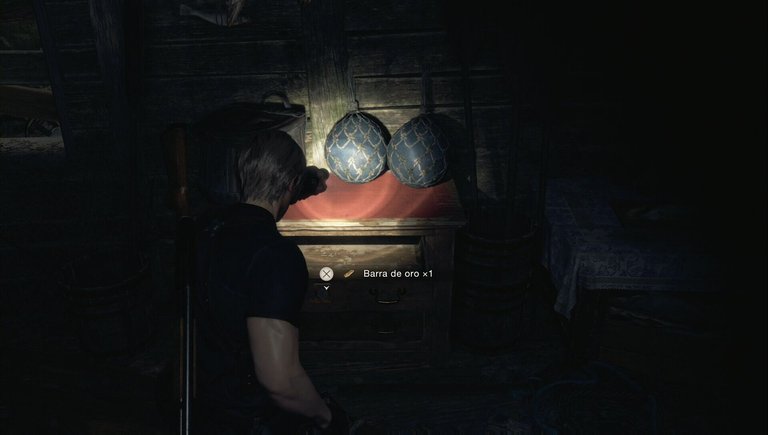
You can now go around to the house where Luis was to open the locked drawer. Be careful, because as you approach, dogs with mutated parasites will appear. In the drawer in the house you will find a Gold Bar.
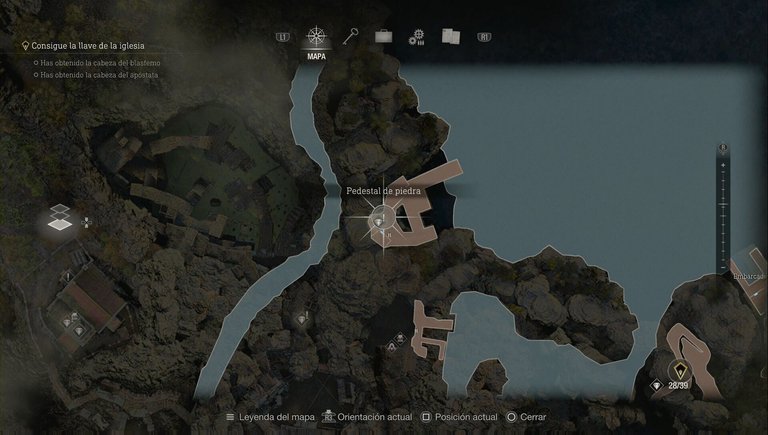
Now that you have the three hexagonal pieces, go to the area southwest of the Lake, where you got the boat the first time. You can use the three pieces on the plate on the west side.
If you are following this guide you can see the solution to the puzzle here. If you have already moved any pieces, bad luck, buddy. Once you've formed the circle, you'll get the Depraved Idol. Back at the Peddler, make sure to catch the Giant Bass to deliver a few requests in one go. The vendor has another space upgrade and several more items, so grab whatever you're interested in.
Now you can return to the main marker, place the two heads, and get the Church Insignia. Now it's time to retrace your steps through the Quarry. Along the way, you can open the third shrine, which contains a Butterfly Lantern.
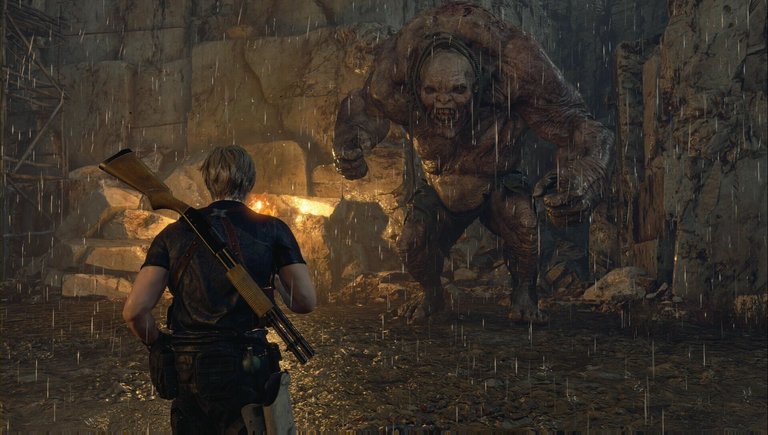
Go a little further, and as you probably remember if you played the original, it's time to face the Giant.

Simply keep your distance and shoot him in the head. If he jumps at you, watch out for the Dodge button, and if he charges, run to the side. When you do enough damage, a plague will appear on his back. You should shoot at this point to do as much damage as possible. At first, you won't be able to get on his back when he kneels, so just shoot with whatever powerful weapon you have. Throughout the fight you will receive help and there will be a couple of sequences, take advantage when the bug is immobilized to attack
When it kneels, if you get close to it, you will be able to see the Finisher button, which allows you to climb its body and stab the pest for extra damage. At this point, it does not have much health left and will easily fall, leaving behind a Yellow Diamond
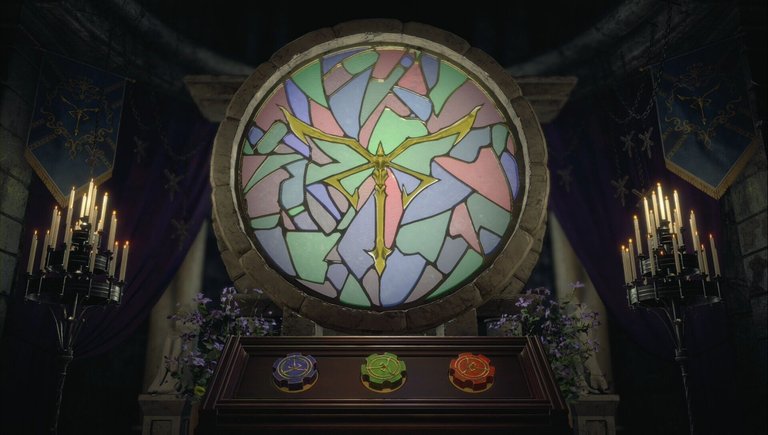
Make sure to collect the resources in the area. Back in the church, place the badge on the door to open the gate and enter. On the ground floor, next to the altar, there is a Small Key. If you want, leave and go to the basement area to open the drawer and get a Yellow Diamond. Back on the ground floor of the church, collect a couple of objects and the Blue Dial from the south corner. Activate the lever next to the altar to reveal a mechanism to place the dial.
Now, to solve the puzzle, you must turn the dials until they are in this position:
You can now go up the stairs on the side. When you reach the room above, you will see a cutscene and you will go to Chapter 5.

The images were taken from my PS4 pro
The gif was created on the blog gif page