

Hello friends of @hivegaming, here we are with part 3 of the Resident Evil 4 Remake guide, I hope you enjoy it and find it useful, a hug
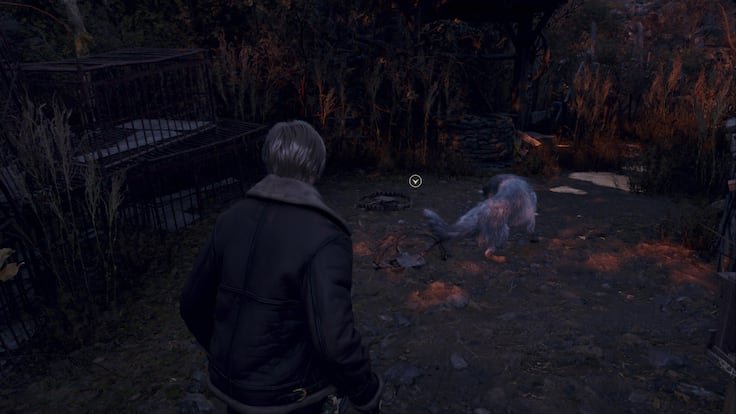
Chapter 3 begins in the same place where the second ended, in the Mayor's House. If you touch the painting on the wall you can activate a lever to open the attic, but you can't go up yet since you need Ashley's help (upstairs you'll find mechanical castle 3). So go down, go out the door and first of all, go around the house on the right and you'll see a friendly white wolf trapped in a trap; help him escape and in the future you'll thank him.
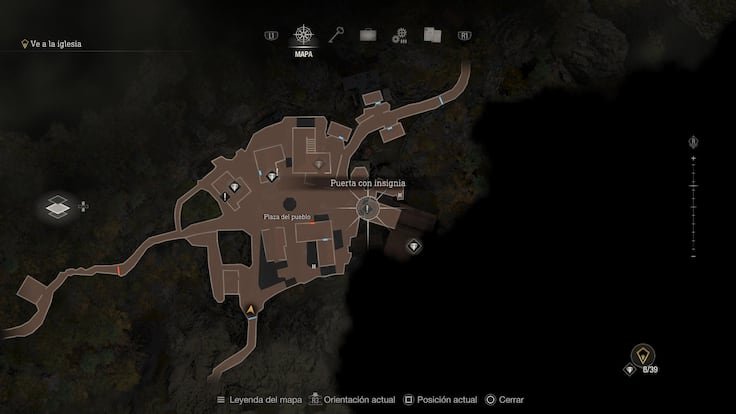
Now, you have to go through the double door in front of the house and use your Insignia Key to continue. It will have opened a shortcut to the Town Square and your objective is the door in the next image, where you must also use the key. The problem is that when you get close, several things will happen: the first is that the tower will fall and leave part of the area inaccessible, and the second is that 4 dogs and a couple of normal enemies will appear. Kill them all and locate a house with a lit lantern at the door, go through it and open the chapel with the Insignia Key.
Go through the house and on the next path you will see the note with the request from Peddler 3. Go forward along the only path you can take and soon you will see the cemetery with the church in the background. There are a couple of enemies in the area: one in the cabin on the right and another one next to the tombstones. When you finish with them, go up to the church, although as you can imagine you cannot enter yet. What you should do is go down the corridor to the right and enter through a door, take a look at the map on the wall and open the trapdoor on the floor to drop down and create a shortcut to the cemetery. Also, if you go around the church you have the request from the peddler 4
If you turn around you will see a single path made up of bridges next to the gorge (don't worry, you can't fall). A little further on there is a kind of settlement full of enemies, so watch out for those who throw Molotov cocktails. Our advice is to attack one from a distance to alert the others and have them slowly come towards you, so you can kill them without being surrounded. In any case, with them out of the game, continue forward until you enter a tunnel.
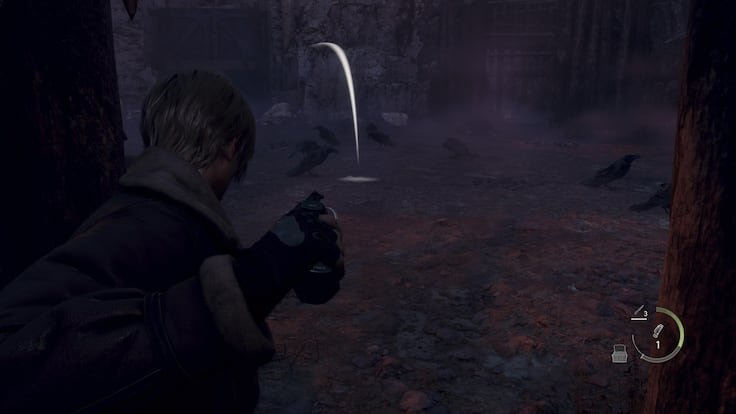
Inside it, turn left, defeat a couple of enemies and deactivate the tripwire. Although you will see two paths, one is blocked by a fence, so go down the one on the right to look out at the Quarry and pick up the request note from the peddler 5. Do you see all those crows? Well, if you have a flash grenade, throw it in front of them and they will all fall at once, leaving several objects on their corpses. Other than that, be careful of the dogs patrolling the area and continue straight ahead as there is only one exit.
Go through the door and you'll soon see the Peddler (and an elevator that takes you to the shooting gallery, which you can participate in to get charms for the briefcase). There's not much you can do in this area for now - you'll come back later - so to the left of the Peddler, check out the chest next to the exit you need to take, as it contains the first Hexagon Piece A, an item you'll use to get treasure in the future. Also, here you'll find the Mechanical Castellan 3. Continue through the door next to the chest and you'll reach the Pier.
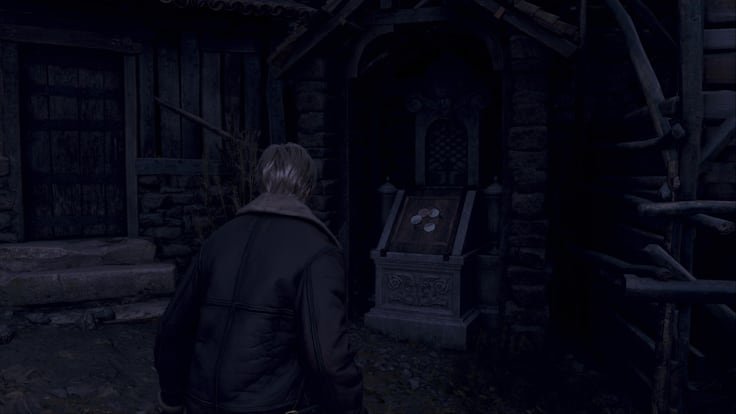
Drop down and run to the boat, though it's out of gas! Anyway, do you see that cave behind you? You have to climb the ladder, but first look at that kind of shrine next to it. It's the Stone Altar and inside there is a treasure worth 15,000 pesetas (it would be 90 euros if the game was set in 2023). Place the piece you already have for now, we will let you know when you can get the others soon and now, go up and go through the tunnel.
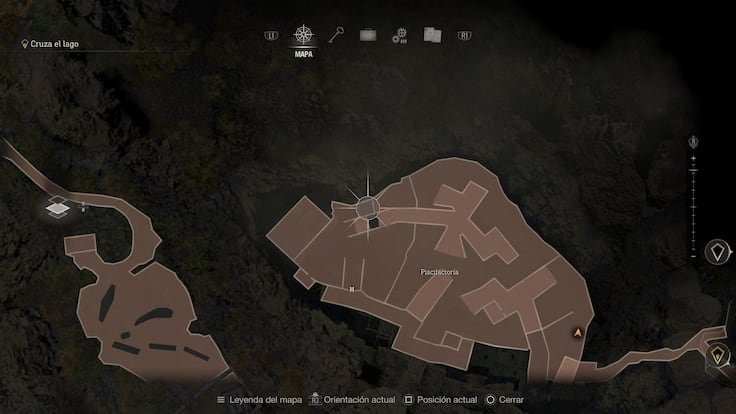
You are in the Fish Farm and as soon as you look out the bridge will break and you will fall into the water. It is an area that seems large, but it really has no exit and you will only need a few minutes here. It is, however, full of enemies (all normal ones) and the occasional tripwire. The important thing is that once you've cleaned up the place a bit, there are a couple of things you need to do here. First, pay attention to the following map, where you'll see the location of a chest with the second Hexagon Piece B by passing under a wooden bridge while walking on water. Then, enter the house at the back to get the Fuel Can.
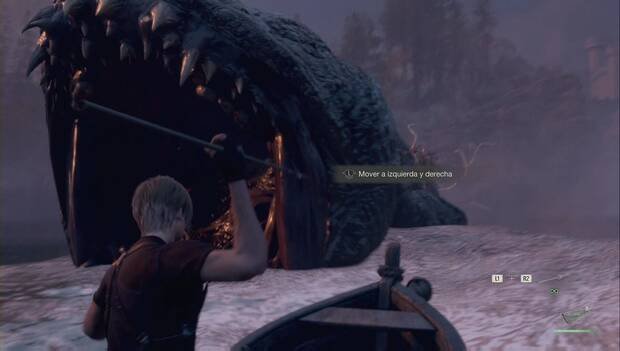
With both of these things in your possession, go up the ladders on the right to be able to retrace your steps and end up back at the Pier. Place the other Hexagon Piece you picked up earlier (only one left, which is in the next chapter) and interact with the boat to fill the tank. At this point, if you are injured, heal yourself, because as soon as you get on, a scene will take place that will lead to the fight against the Lake Monster.
Well friends, here concludes chapter two of the Resident Evil story. I hope you liked it and if so, support it and leave your opinion of what you thought of it

The game was played on PC with a PS4 controller installed
The images were taken from the game.
I created the GIFs on a page called GIF BLOG
The cover photo was taken from Google
The translation into English was from Google Translate

Q tal amigos de @hivegaming estamos con la parte 3 de la guía de Resident evil 4 Remake, espero que la disfruten y les sea de utilidad, un abrazo
El capítulo 3 comienza en el mismo lugar en el que terminaba el segundo, en la Casa del Alcalde. Si tocas el cuadro de la pared puedes accionar una palanca para abrir el ático, pero no puedes subir aún ya que necesitas la ayuda de Ashley (arriba se encuentra el castellano mecánico 3). Así que baja, sal por la puerta y antes de nada, rodea la casa por la derecha y verás a un simpático lobo blanco atrapado en una trampa; ayúdale a escapar y en el futuro lo agradecerás.
Ahora sí, tienes que ir por la puerta doble frente a la casa y estrenar tu Llave Insignia para continuar. Habrá abierto un atajo hacia la Plaza del Pueblo y tu objetivo es la puerta de la siguiente imagen, en la que también debes usar la llave. El problema es que cuando te acerques pasarán varias cosas: la primera es que la torre caerá y dejará inaccesible parte de la zona, y la segunda es que aparecerán 4 perros y un par de enemigos normales. Mátalos a todos y localiza una casa con un farol encendido en la puerta, cruza por ella y abre la capilla con la Llave Insignia.
Atraviesa la casa y en el siguiente camino verás la nota con la petición del Buhonero 3. Avanza por el único camino por el que puedes ir y pronto verás el cementerio con la iglesia de fondo. Hay un par de enemigos en la zona: uno en la cabaña de la derecha y otro junto a las lápidas. Cuando acabes con ellos sube hacia la iglesia, aunque como te imaginas no puedes entrar aún. Lo que debes hacer es ir por el pasillo a su derecha y entrar por una puerta, echar un vistazo al mapa de la pared y abrir la trampilla del suelo para dejarte caer y crear un atajo hacia el cementerio. Además, si rodeas la iglesia tienes la petición del buhonero 4
Si te das la vuelta verás un camino único formado por puentes junto al desfiladero (tranquilo que no te puedes caer). Un poco más adelante hay una especie de asentamiento repleto de enemigos, así que cuidado con los que lanzan cócteles molotov. Nuestro consejo es que ataques a uno a distancia para alertar a los demás y que poco a poco vayan hacia ti, así los puedes matar sin verte rodeado. En cualquier caso, con ellos fuera de juego, sigue hacia adelante hasta entrar en un túnel.
Dentro del mismo, gira a la izquierda, derrota a un par de enemigos y desactiva el cable trampa. Aunque verás dos caminos, uno está bloqueado por una verja, así que ve por el de la derecha para asomarte a la Cantera y recoger la nota de la petición del buhonero 5. ¿Ves todos esos cuervos? Pues si tienes una granada cegadora lánzala al frente y caerán todos a la vez, dejando en sus cadáveres varios objetos. Aparte de eso, ten cuidado con los perros que patrullan la zona y sigue de frente, ya que solo hay una salida.
Entra por la puerta y pronto verás al Buhonero (y un ascensor que te lleva a la galería de tiro, en la que puedes participar para conseguir amuletos para el maletín). En esta zona no puedes hacer mucho por ahora -volverás más adelante-, así que a la izquierda del Buhonero, fíjate en el cofre que hay junto a la salida que debes tomar, ya que contiene la primera Pieza de Hexágono A, un objeto que usarás para conseguir un tesoro en el futuro. Además, aquí también tienes el castellano mecánico 3. Sigue por la puerta junto al cofre y llegarás al Embarcadero.
Déjate caer y corre hacia la barca, aunque ¡No tiene gasolina! En fin, ¿ves esa cueva a tu espalda? Tienes que subir la escalera de mano, pero antes fíjate en esa especie de santuario a su lado. Es el Altar de Piedra y dentro hay un tesoro valorado en 15.000 pesetas (serían 90 euros si el juego se ambientase en 2023). Coloca la pieza que ya tienes por ahora, que próximamente te avisaremos cuando puedas conseguir las demás y ahora sí, sube y atraviesa el túnel.
Estás en la Piscifactoría y en cuanto te asomes se romperá el puente y caerás al agua. Es una zona que parece grande, pero realmente no tiene salida y apenas vas a necesitar unos minutos aquí. Eso sí, está repleta de enemigos (todos normales) y algún que otro cable trampa. Lo importante es que cuando limpies un poco el lugar, hay un par de cosas que debes hacer aquí. Lo primero es prestar atención al siguiente mapa, en el que verás la localización de un cofre con la segunda Pieza de Hexágono B pasando por debajo de un puente de madera al caminar sobre el agua. Y acto seguido, entrar en la casa del fondo para hacerte con el Bidón de Combustible.
Con ambas cosas en tu poder, sube por las escaleras de mano de la derecha para poder volver sobre tus pasos y acabar de vuelta en el Embarcadero. Coloca la otra Pieza de Hexágono que has recogido anteriormente (ya solo falta una que está en el siguiente capítulo) e interactúa con la barca para llenar el depósito. En este momento, si estás herido cúrate, porque en cuanto te subas tendrá lugar una escena que dará paso al combate contra el Monstruo del Lago.
Bueno amigos y aquí concluye el capítulo dos de la historia de resident evil,espero que les haiga gustado y si es así apoyen y dejen su opinión de que les parecio

El juego fue jugado en PC con un mando de Ps4 instalado
Las imágenes las e sacado del juegos.
Los GIF los e creado en una página llamada BLOG GIF
La foto de portada fue tomada de Google
La traducción al inglés fue Desde traductor de Google