Todas las imágenes utilizadas en este articulo son de mi propia creación y diseño - All images used in this article are of my own creation and design.

Saludos abejas y abejorros de la comunidad Hive.blog, bienvenidos a este artículo. Quienes aún no son parte de esta Blockchain, sean igualmente bienvenidos y les invito a unirse, para que comiencen a recibir recompensas por sus publicaciones.

Greetings bees and bumblebees from the Hive.blog community, welcome to this article. Those who are not yet part of this Blockchain, are equally welcome and I invite you to join, so that they start receiving rewards for their publications.

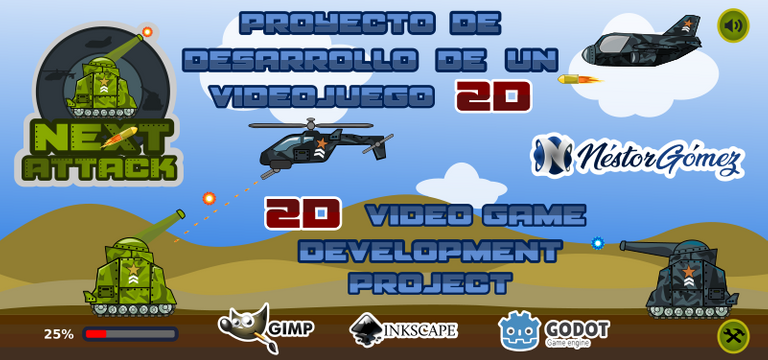
Como ya lo expliqué en un artículo anterior, el proyecto Next Attack es una iniciativa personal que he decidido emprender, a la vez que compartir con la comunidad de Hive.blog, y que tiene como propósito desarrollar desde cero un videojuego 2D relativamente sencillo, que me permita poner en práctica los conocimientos básicos que poseo en esta área del diseño y la programación de software. Esto con el fin, de ampliar mi experiencia e incrementar gradualmente mi dominio sobre esta disciplina informática.
El juego consiste en un pequeño tanque de guerra que representa al jugador y que debe defenderse mediante disparos, de los ataques que realizarán hacia él los demás tanques, helicópteros y aviones que continuamente aparecerán desde el lado derecho de la pantalla. La puntuación obtenida por el jugador será mayor conforme más enemigos elimine.
Pretendo progresivamente ir agregando características al programa, proceso que compartiré con ustedes por medio de otros artículos similares a este, hasta completar una versión Alfa del juego, que se encuentre ya funcional y que pueda empaquetar en un archivo ejecutable. Así poder ponerlo a la disposición de la comunidad y que ustedes puedan probarlo, de modo que tengan la oportunidad de proporcionarme sus opiniones y sugerencias sobre el videojuego, para ayudarme a corregir errores y mejorar sus funciones.
El desarrollo de este proyecto se realizará mediante software libre, principalmente mediante el uso del motor de videojuegos Godot para el desarrollo del software, mientras que el diseño de los elementos gráficos se realizará usando GIMP e Inkscape.
As I explained in a previous article, the Next Attack project is a personal initiative that I have decided to undertake, as well as share with the Hive.blog community, and whose purpose is to develop a relatively simple 2D video game from scratch, which allows me to put into practice the basic knowledge that I have in this area of software design and programming. This in order to broaden my experience and gradually increase my mastery of this computer science discipline.
The game consists of a small war tank that represents the player and that must defend himself by shooting, from the attacks that other tanks, helicopters and planes will carry out towards him that will continuously appear from the right side of the screen. The score obtained by the player will be higher as more enemies eliminate.
I intend to progressively add features to the program, a process that I will share with you through other articles similar to this, until I complete an Alpha version of the game, which is already functional and which can be packaged in an executable file. So we can make it available to the community and that you can test it, so that you have the opportunity to provide me with your opinions and suggestions about the video game, to help me correct errors and improve its functions.
The development of this project will be carried out using free software, mainly through the use of the Godot video game engine for the development of the software, while the design of the graphic elements will be carried out using GIMP and Inkscape.
![]()
Logo
Una de las primeras cosas que hice al iniciar este proyecto, fue definir un nombre y realizar un logo, para ello tuve que diseñar el tanque correspondiente al jugador, ya que quise incluirlo en el logo. Este tanque presenta un aspecto caricaturesco y un estampado tipo camuflaje con diferentes tonos de color verde.
El tanque se ubica en el centro del logo, sobre un par de círculos de color gris que asemejan el campo de fuerza que se activara sobre el tanque durante el juego, cuando el jugador haya eliminado varios enemigos y haya alcanzado un nivel de vida elevado, de modo que momentáneamente los disparos de los enemigos no le afectaran.
Sobre esos círculos se observan a modo de sombra las siluetas de un tanque, un helicóptero y un avión enemigo. En la parte inferior del logo, se ubican las letras con el nombre del juego, con un aspecto que simula laminas metálicas con remaches en los bordes y en la letra X se posiciona un obús de cañón con fuego en su extremo trasero.
La palabra Alfa en color blanco que se encuentra dentro de un rectángulo rojo, se debe a que la primera versión del juego será la versión Alfa, luego cuando se pase a una fase de pruebas y de corrección de errores entonces tendremos una versión Beta.
Logo
One of the first things I did when starting this project was to define a name and make a logo, for this I had to design the tank corresponding to the player, since I wanted to include it in the logo. This tank features a cartoonish look and a camouflage print with different shades of green.
The tank is located in the center of the logo, on a pair of gray circles that resemble the force field that will be activated on the tank during the game, when the player has eliminated several enemies and has reached a high level of life, so that enemy shots will momentarily not affect him.
On these circles the silhouettes of a tank, a helicopter and an enemy plane are observed as a shadow. In the lower part of the logo, the letters with the name of the game are located, with an appearance that simulates metallic sheets with rivets on the edges and in the letter X a cannon howitzer with fire at its rear end is positioned.
The word Alpha in white that is inside a red rectangle, is because the first version of the game will be the Alpha version, then when it goes to a testing and error correction phase then we will have a Beta version.
Godot Game Engine
Este motor de videojuegos establece una filosofía de trabajo en la que se divide a los elementos que intervienen en la codificación en dos bloques o tipos, uno de ellos son las Escenas y el otro los Nodos. Para iniciar la programación del proyecto, es necesario tener claro como estructurar sus elementos con base en esta filosofía.
Los nodos son elementos básicos, podría decirse que indivisibles, es decir los que se ocupan de una tarea en particular, mientras que las escenas no son más que agrupaciones de nodos que se empaquetan en una unidad coherente. Cabe resaltar, que toda escena debe poseer un nodo principal y luego este puede contener cuantos otros nodos sean necesarios.
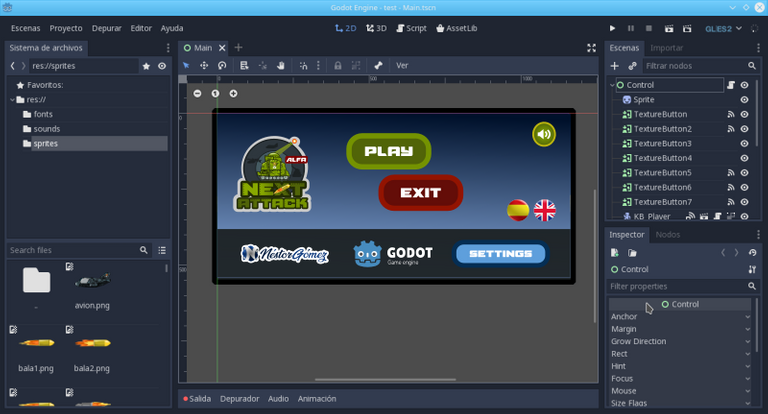
Para este proyecto he decidido crear una escena principal, es decir la que se ejecutara al iniciar el programa, que será la encargada de mostrar en pantalla una ventana inicial que contendrá un botón para iniciar el juego, otro para salir del programa, uno que conduzca a un área de configuración y algunos otros como los correspondientes a elección del idioma de la interfaz y el conmutador de sonido.
Esta primera escena contendrá como nodo principal uno del tipo Control, ya que este es el indicado para la creación de formularios e interfaces de control, es decir pantallas en las que se muestran controles (botones, cuadros de texto, menús desplegables...) con los que el usuario debe interactuar antes de ingresar a la interfaz del juego como tal, donde los controles son más gráficos y dinámicos.
Godot Game Engine
This video game engine establishes a working philosophy in which the elements involved in the coding are divided into two blocks or types, one of which is the Scenes and the other the Nodes. To start the project programming, it is necessary to be clear about how to structure its elements based on this philosophy.
The nodes are basic elements, it could be said that they are indivisible, that is, those that take care of a particular task, while the scenes are nothing more than groupings of nodes that are packed into a coherent unit. It should be noted that every scene must have a main node and then this can contain as many other nodes as necessary.
For this project I have decided to create a main scene, that is, the one that will be executed when the program starts, which will be in charge of displaying on the screen an initial window that will contain a button to start the game, another to exit the program, one that leads to a configuration area and some others such as those corresponding to the choice of the interface language and the sound switch.
This first scene will contain as main node one of the Control type, since this is the one indicated for the creation of forms and control interfaces, that is, screens in which controls are shown (buttons, text boxes, drop-down menus ...) with which the user must interact before entering the game interface as such, where the controls are more graphic and dynamic.
Entre los controles que he utilizado dentro de esta escena, destaca el llamado TextureButton, ya que este nos permite crear botones con texturas (imágenes) diseñadas previamente en otro software, eso es precisamente lo que hice, realicé las imágenes de los botones en formato vectorial con Inkscape, para darles una mejor apariencia y luego con este control los convertí en botones propiamente dichos dentro del juego.
El programa Godot nos permite separar el desarrollo de la parte visual del juego de la parte que corresponde al código de programación, como este es un proyecto 2D estoy usando el ambiente 2D de la interfaz, para ello se selecciona en la parte central superior el vínculo correspondiente, allí mismo está otro enlace para ingresar a la interfaz de trabajo 3D, la cual en este caso no usare y luego está el que corresponde a la parte destinada a la codificación, este lleva el texto “Script”.
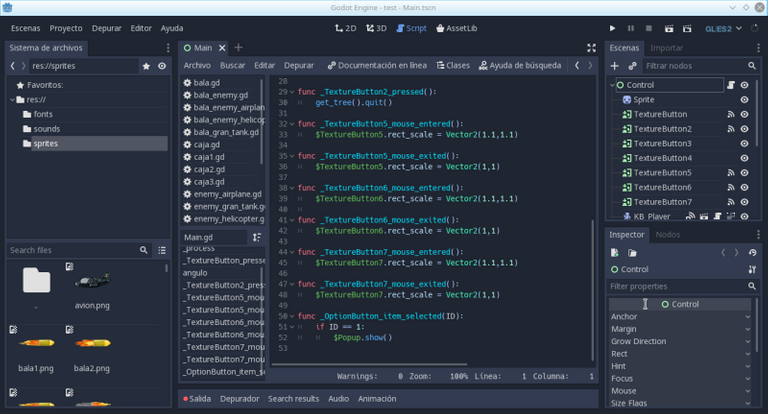
Ingresando al apartado de Script, que hace referencia a la programación del código fuente, accedemos a un editor de texto en el que podemos escribir las líneas que conformaran el código que dará funcionalidad a los elementos gráficos. El lenguaje con el que estaré programando es GDScript, aunque se puede elegir trabajar en C++, pero en este proyecto no lo hare, quizá en otro más adelante.
Among the controls that I have used within this scene, the one called TextureButton stands out, since it allows us to create buttons with textures (images) previously designed in other software, that is precisely what I did, I made the images of the buttons in vector format with Inkscape, to give them a better appearance and then with this control I turned them into proper buttons within the game.
The Godot program allows us to separate the development of the visual part of the game from the part that corresponds to the programming code, as this is a 2D project I am using the 2D environment of the interface, for this the link is selected in the upper central part corresponding, right there is another link to enter the 3D work interface, which in this case I will not use and then there is the one that corresponds to the part destined to the coding, this one has the text "Script".
Entering the Script section, which refers to the programming of the source code, we access a text editor in which we can write the lines that will make up the code that will give functionality to the graphic elements. The language with which I will be programming is GDScript, although you can choose to work in C ++, but in this project I will not do it, perhaps in another later.
Programación
El lenguaje GDScript es una variación de Python con solo unas leves modificaciones que lo hacen encajar perfectamente con las capacidades de este motor de videojuegos. Se trata de un lenguaje acorde con el paradigma de programación orientada a objetos, de modo que cada uno de los elementos que desde el punto de vista grafico se les llama nodos, desde la perspectiva de la programación son objetos a los que se puede instanciar.
Por lo tanto, cuando se emplea el nodo TextureButton, desde el lado de la programación se está haciendo uso de una instancia de ese objeto, así que se puede acceder a sus métodos, atributos y eventos. Por ejemplo, el siguiente código muestra cómo se establece que cuando ocurra el evento “pressed” del objeto “TextureButton1”, se ejecute el método get_tree().quit() cuyo propósito es cerrar el programa.
Programming
The GDScript language is a variation of Python with only slight modifications that make it fit perfectly with the capabilities of this game engine. It is a language in accordance with the object-oriented programming paradigm, so that each of the elements that from the graphical point of view are called nodes, from the programming perspective are objects that can be instantiated.
Therefore, when the TextureButton node is used, from the programming side an instance of that object is being used, so its methods, attributes and events can be accessed. For example, the following code shows how to establish that when the “pressed” event of the “TextureButton1” object occurs, the get_tree (). Quit () method is executed, the purpose of which is to close the program.
func _TextureButton2_pressed():
get_tree().quit()
Algo muy importante al comenzar a programar con Godot, es tomar en cuenta dos funciones que se utilizan casi en todas las escenas, la primera de ellas es _ready() que tiene como propósito establecer configuraciones iniciales, las cuales solo se ejecutaran una vez que inicie la escena. Esto es útil para establecer valores iniciales de variables y estados por defecto del juego.
En segundo lugar, está la función _process(delta) que se ejecuta recurrentemente durante toda la vida del juego, por lo que se emplea para realizar acciones repetitivas que deben continuar ejecutándose sin parar, como por ejemplo la detección de la posición del cursor, que generalmente es útil durante todo el juego.
Podría exponer muchos más detalles técnicos sobre lo que he realizado hasta el momento en el desarrollo de este proyecto, pero mi intención con esta serie de artículos no es crear tutoriales detallados del proceso, sino más bien informar sobre los logros alcanzados y describir a grandes rasgos la forma en que lo he conseguido. Por lo tanto, dejare hasta aquí esta publicación.
Something very important when starting to program with Godot, is to take into account two functions that are used almost in all scenes, the first of them is _ready () whose purpose is to establish initial configurations, which will only be executed once it starts. the scene. This is useful for setting initial values of variables and default states of the game.
Secondly, there is the _process (delta) function that runs recurrently throughout the life of the game, so it is used to perform repetitive actions that must continue running without stopping, such as detecting the position of the cursor, which it is generally useful throughout the game.
I could expose many more technical details about what I have done so far in the development of this project, but my intention with this series of articles is not to create detailed tutorials of the process, but rather to report on the achievements and describe in broad strokes the way i've got it. Therefore, I will leave this publication here.
Muchas gracias por leer esta publicación, espero haya sido de su agrado y me apoyen en la realización de este proyecto, les invito a dejarme sus opiniones en los comentarios, saludos y hasta pronto.
Thank you very much for reading this publication, I hope it has been to your liking and support me in the realization of this project, I invite you to leave me your opinions in the comments, greetings and see you soon.