
In the last chapter we rescued Zee, the friendly droid that had been kidnapped by Gera and the space pirates. After rescuing her, Zee told us that Gera kept talking about how the compass could be in one of the antennas of the destroyed moon we went to in previous chapters. Let's remember that we need one of these compasses to get to Tanalorr, that mysterious planet that can mark a before and after in the fight against the empire. We will go directly to the moon to continue our search.

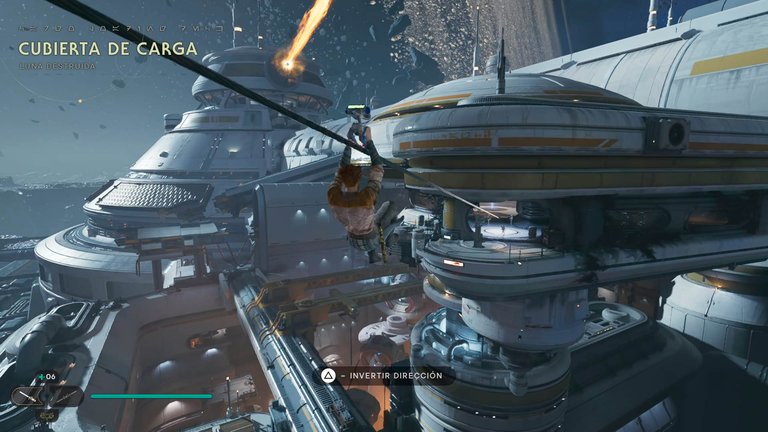
The good thing is that as it is an area that we have already explored before, we will have several shortcuts unlocked that will allow us to move quickly without having to take so many detours.
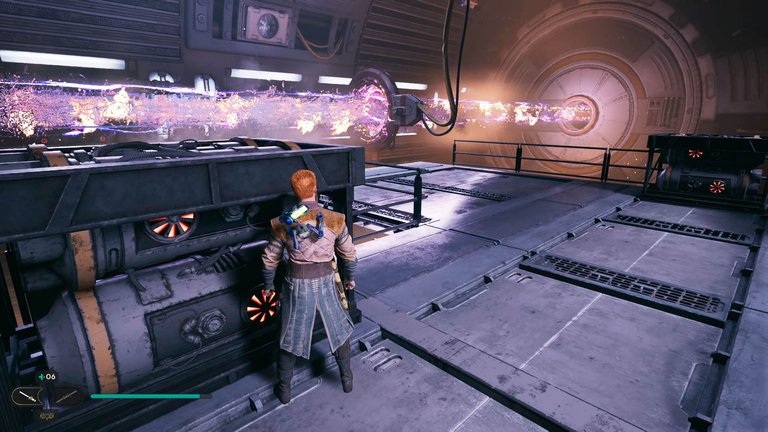
Our goal will be to reach the tip of the antenna, there is Rayvis, one of the leaders of the space pirates and something like Gera's right hand. While we are exploring we will realize that the only way to continue advancing is passing through the firing chamber, which Rayvis will activate to complicate things even more. We will have to calculate well when to advance so that the laser does not disintegrate us.
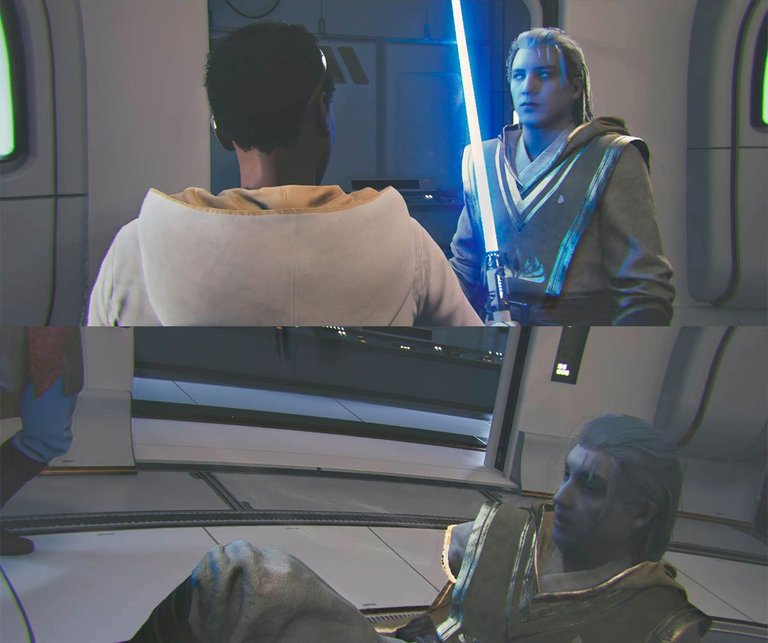
We will end up arriving at a work table where we will be able to see a memory of Gera and Santari, Zee's former teacher. We will see how Santari started to notice that Gera was changing and he didn't like that, to the point that she will be the one to cut one of his arms to stop him. We will see that the cut knocked Gera unconscious and it was at this point that Santari decided to put him in a water tank. And although they don't show it, I understand that this tank is the same one where we meet him the first time, when we free him and see how he goes to the dark side.
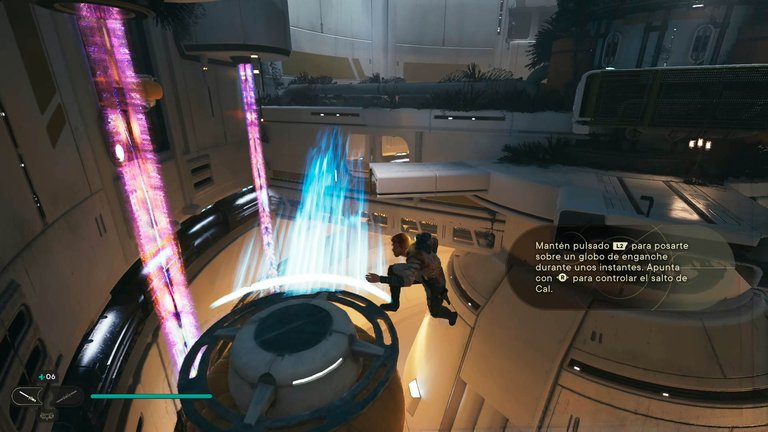
At the end of the memory, Cal will see an interesting artifact on the workbench and adapt it to his equipment. This will give us a new movement ability, we will now be able to hook onto some balloons that will be all over the area and propel ourselves on them.
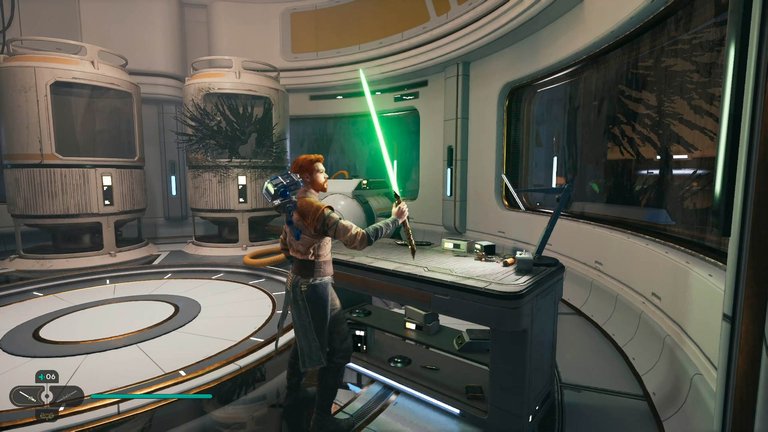
Also, taking advantage of the workbench I decided to change the color of the lightsaber again. I have never tried green, so I chose it to use it for a while to see if I'm convinced.
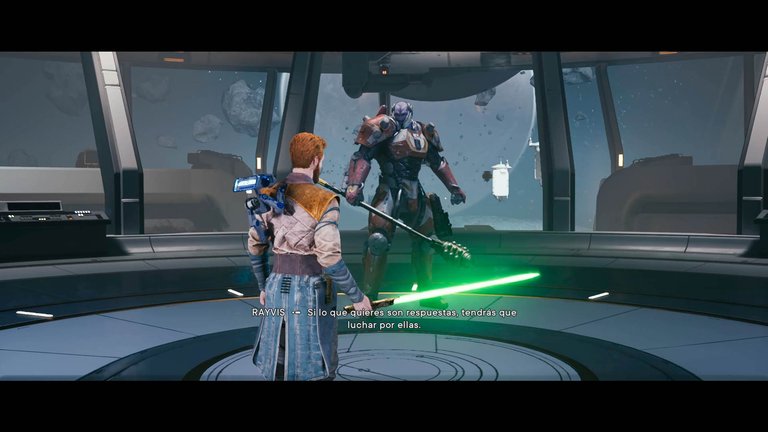
Thanks to our new ability we can quickly climb to the top of the antenna, until we reach the main cabin. We will see that Rayvis will be inside waiting for us, we will have a conversation with him where he will tell us that a long time ago Gera defeated him in combat. Because of that he won her loyalty and they decided to work together. However, when the jedi order decided to confront Gera, they ended up defeating them both. He will tell us that he holds a grudge against the jedi because when they defeated him, they refused to give him a death worthy of a warrior and preferred to put him in prison for centuries. It wasn't until the jedi order fell that Rayvis was able to escape, and that is why now, if we want to get answers, we must take him down.
The combat will start being quite classic. Rayvis will have attacks that we must evade and attacks that we must parry. Sometimes he will backtrack to launch a flurry of rockets and shots at us. But this will only be the first phase.
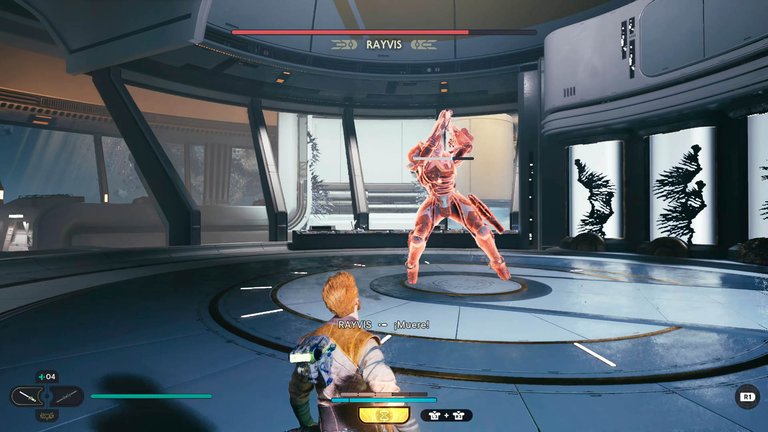
When we manage to reduce his life, we will see how he unleashes his potential, removing part of his armor. The second phase is, for the moment, the best combat I've had. Rayvis will become a psychopath, very aggressive, to the point that he won't let us breathe and will be attacking us all the time. Here it will be practically mandatory to parry him, he killed me several times before I learned his attack pattern. I quite enjoyed this fight.

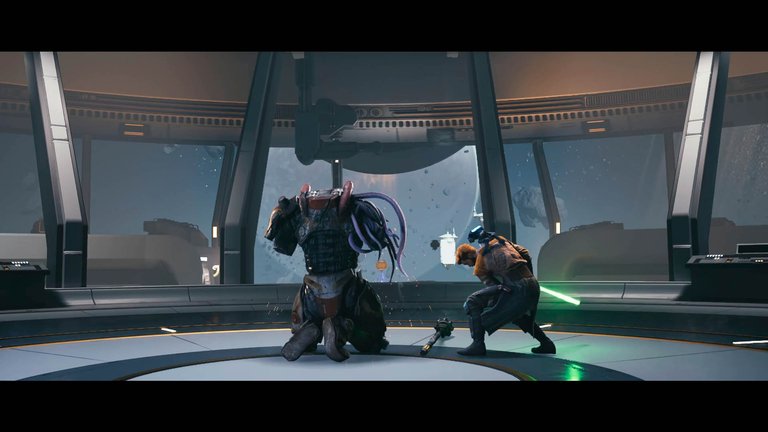
When I finally manage to defeat him, we will have one last conversation. He will tell us that the compass we need is in the Santari observatory and that Gera is on his way there. When we finish talking, Rayvis will ask Cal to grant him the death worthy of a warrior and Cal will fulfill his wish, ending his life. I really liked this part of the story, I even found Rayvis more interesting as a character than Gera himself, who is supposed to be the main villain.
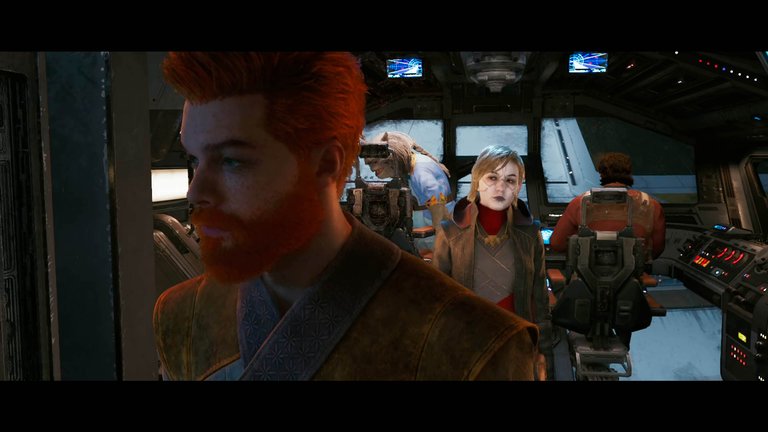
With the information obtained and Rayvis defeated, we will return to the ship to tell everything to our crew. In doing so, we will see Cal acting strangely, the only one of the crew that will notice it will be Merrin, but she will just look at us and not say anything. Our objective now is the Santari observatory, it is assumed that the compass to get to Tanalorr is there and that Gera is already on her way, so we will surely meet again.

All images/gifs shown in this publication have been taken and created by me

En el último capítulo rescatamos a Zee, la droide amigable que habia sido secuestrada por Gera y los piratas espaciales. Luego de rescatarla, Zee nos contó que Gera no paraba de hablar sobre que la brújula podría estar en una de las antenas de la luna destruida a la que fuimos en capítulos anteriores. Recordemos que necesitamos una de estas brújulas para llegar hasta Tanalorr, ese misterioso planeta que puede marcar un antes y un despues en la lucha contra el imperio. Nos dirigiremos directamente a la luna para continuar nuestra búsqueda.
Lo bueno es que como es una zona que ya exploramos anteriormente, tendremos varios atajos desbloqueados que nos permitirán movernos rápidamente sin tener que dar tantos rodeos.
Nuestro objetivo será llegar a punta de la antena, ahí se encuentra Rayvis, uno de los lideres de los piratas espaciales y algo así como la mano derecha de Gera. Mientras estamos explorando nos daremos cuenta que la única forma de seguir avanzando es pasando a través de la cámara de disparo, la cual Rayvis activará para complicarnos más las cosas. Habrá que calcular bien cuando avanzar para que el láser no nos desintegre.
Terminaremos llegando a una mesa de trabajo en la podremos ver un recuerdo de Gera y Santari, la antigua maestra de Zee. Veremos como Santari empezó a notar que Gera estaba cambiando y eso no le gustó, al punto de que será ella quien le cortará uno de sus brazos para detenerlo. Veremos que el corte dejó inconsciente a Gera y fue en este momento cuando Santari decidió meterlo en un tanque de agua. Y aunque no lo muestran, entiendo que dicho tanque es el mismo donde nos encontramos con él la primera vez, cuando lo liberamos y vemos como pasa al lado oscuro.
Al terminar el recuerdo, Cal verá un artefacto interesante en la mesa de trabajo y lo adaptará a su equipo. Esto nos dará una nueva habilidad de movimiento, ahora podremos engancharnos a unos globos que estarán por toda la zona e impulsarnos en ellos.
También, aprovechando la mesa de trabajo decidí volver a cambiar el color del sable laser. Nunca he probado el verde, así que lo elegí para usarlo un rato a ver si me convence.
Gracias a nuestra nueva habilidad podremos subir rápidamente a lo alto de la antena, hasta llegar a la cabina principal. Veremos que Rayvis estará dentro esperándonos, tendremos una conversación con él donde nos contará que hace mucho tiempo Gera lo venció en combate. Debido a eso se ganó su lealtad y decidieron trabajar juntos. Sin embargo, cuando la orden jedi decidió enfrentar a Gera, terminaron derrotándolos a ambos. Nos dirá que le guarda rencor a los jedi debido a que cuando lo derrotaron, se negaron a darle una muerte digna de un guerrero y prefirieron meterlo en prisión durante siglos. No fue hasta que la orden jedi cayó que Rayvis pudo escapar, y por eso es que ahora, si queremos obtener respuestas, debemos acabar con él.
El combate comenzará siendo bastante clásico. Rayvis tendrá ataques que deberemos evadir y ataques a los que debemos hacer parry. Algunas veces retrocederá para lanzarnos una ráfaga de cohetes y disparos. Pero esto solo será la primera fase.
Cuando logramos reducirle la vida, veremos como libera su potencial, quitándose parte de su armadura. La segunda fase es, de momento, el mejor combate que he tenido. Rayvis se volverá un psicópata, muy agresivo, al punto de que no nos dejará respirar y estará todo el rato atacándonos. Aquí sí que será prácticamente obligatorio hacerle parry, me mató varias veces antes de que me aprendí su patrón de ataque. Disfruté bastante este combate.
Cuando por fin logré vencerlo, tendremos una última conversación. Nos dirá que la brújula que necesitamos se encuentra en el observatorio de Santari y que Gera va de camino a ese lugar. Al terminar de hablar, Rayvis le pedirá a Cal que le conceda la muerte digna de un guerrero y Cal cumplirá su deseo, acabando con su vida. Me gustó mucho esta parte la historia, incluso me pareció más interesante Rayvis como personaje que el propio Gera, que se supone es el villano principal.
Con la información obtenida y Rayvis derrotado, regresaremos a la nave para contarle todo a nuestra tripulación. Al hacerlo, veremos a Cal actuar de forma extraña, la única del equipo que lo notará será Merrin, pero simplemente nos mirará y no dirá nada. Nuestro objetivo ahora es el observatorio de Santari, se supone que la brújula para llegar a Tanalorr se encuentra ahí y que Gera ya va de camino, por lo que seguramente nos encontremos de nuevo.

!discovery 30
This post was shared and voted inside the discord by the curators team of discovery-it
Join our Community and follow our Curation Trail
Discovery-it is also a Witness, vote for us here
Delegate to us for passive income. Check our 80% fee-back Program
Congratulations @seryi13! You have completed the following achievement on the Hive blockchain And have been rewarded with New badge(s)
Your next target is to reach 74000 upvotes.
You can view your badges on your board and compare yourself to others in the Ranking
If you no longer want to receive notifications, reply to this comment with the word
STOP