
.jpg)
.jpg)
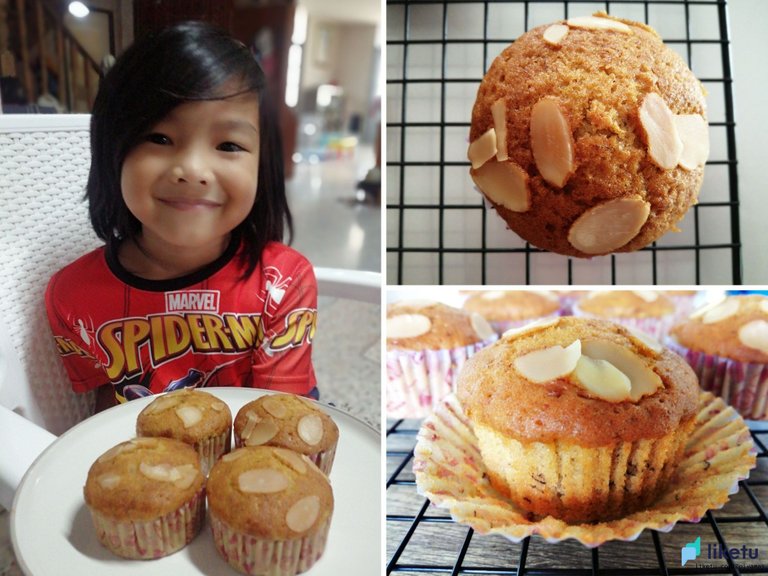
Hi everyone
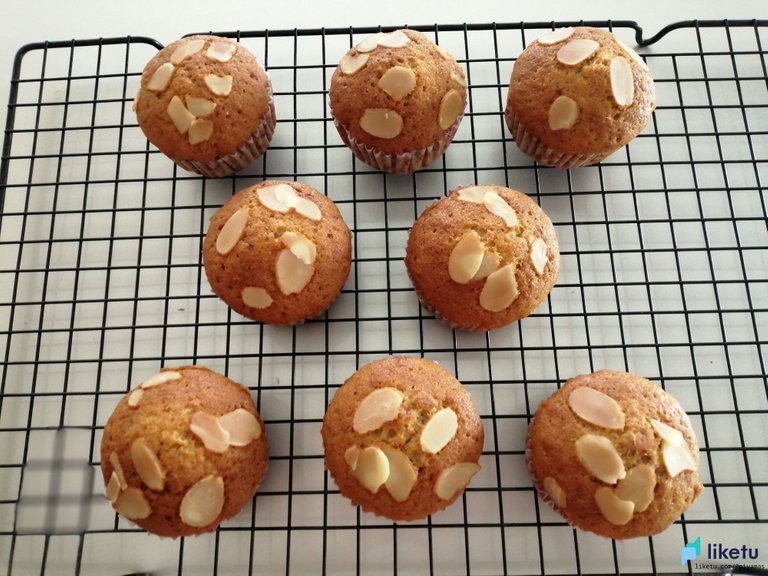
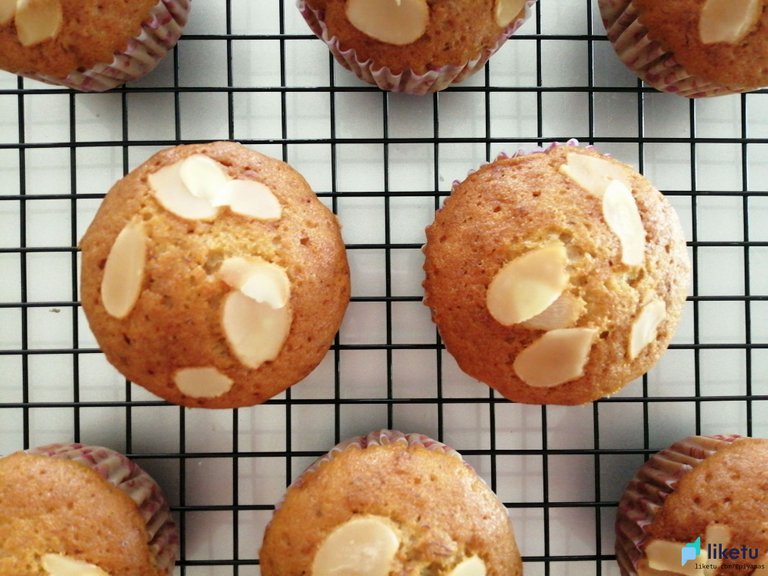
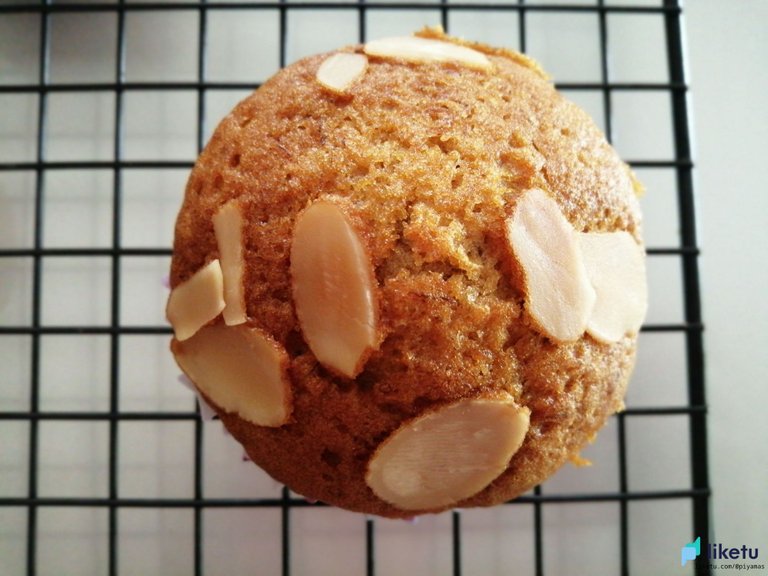
today, I have banana cupcakes topping with almond slices for everyone. A dessert which I make very often, because the process is very simple. Let's go see together.
Ingredients
200 grams of cake flour
200 grams of banana
200 grams of sugar
200 grams of canola oil
1+1/2 teaspoon of baking powder
1 teaspoon of pure vanilla extract
1/2 teaspoon baking soda
1/2 teaspoon of salt
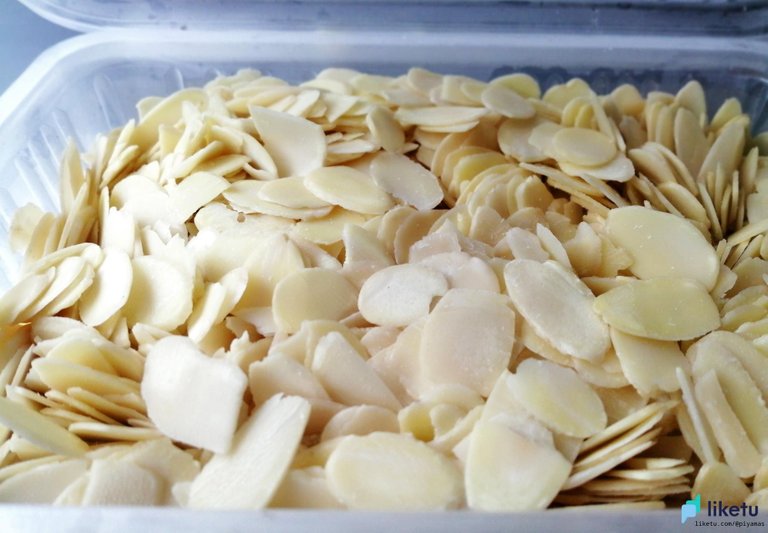
Almond Sliced for topping
Procedure
Step 1.
Dry ingredients are cake flour, baking powder, and baking soda. Sift them together and set aside.
Step 2.
Banana, mashed to the desired resolution. Young bananas are very easy to mash. Just use a spoon to crumble it thoroughly and set aside.
Step 3.
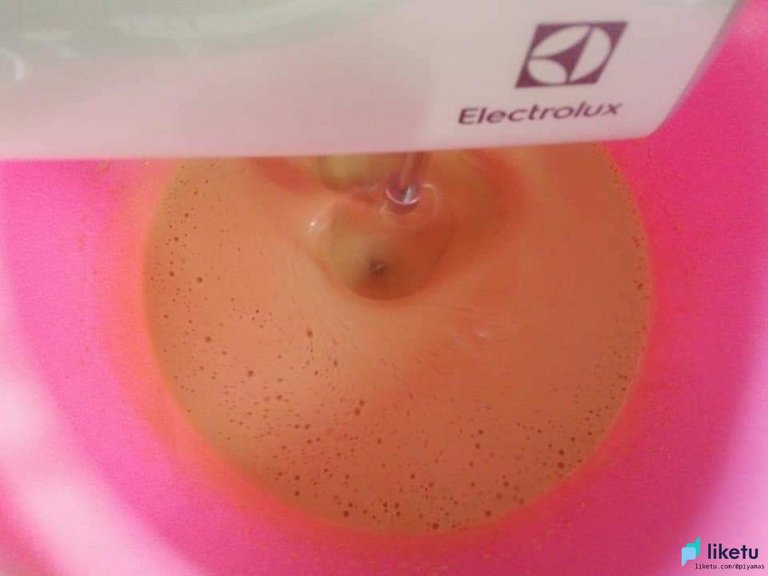
Put the eggs in the bowl Beat on low speed just enough to combine the yolks and whites.
Step 4.
Add granulated sugar Beat on low speed for 2 minutes, medium speed for 2 minutes, then increase to high speed for 2 minutes, finally on low speed for 1 minute to cut bubbles.
Step 5.
Add the sifted salt and dry ingredients in step 1. and beat on low speed for 1 minute or until no granules are visible.
Step 6.
Add mashed banana Then beat on low speed for 1 minute, or until all the ingredients are well combined.
Step 7.
Slowly pour the oil into the line. during the pouring of oil Beat the ingredients on low speed. until the oil is completely drained and continue to beat for 1 minute.
Step 8.
Preheat the oven to 175 degrees Celsius. It depends on the oven of each brand and model as well. May refer to the heat for baking cupcakes from the manual.
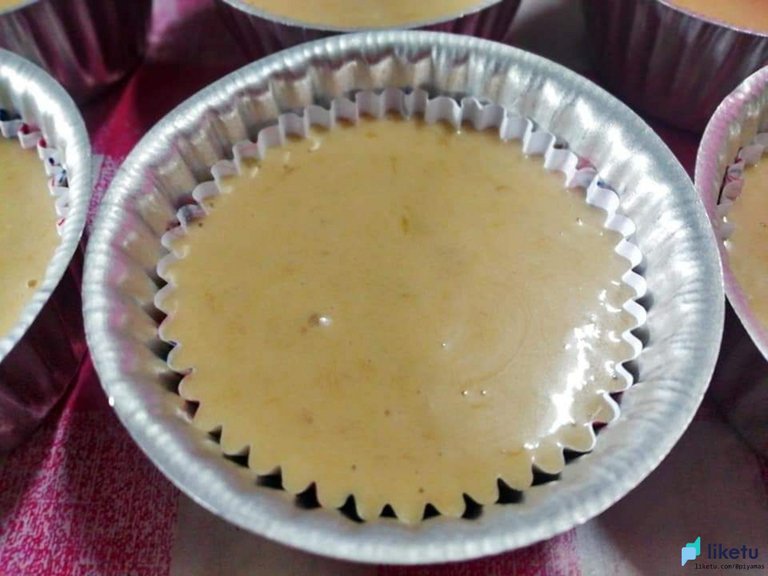
Step 9.
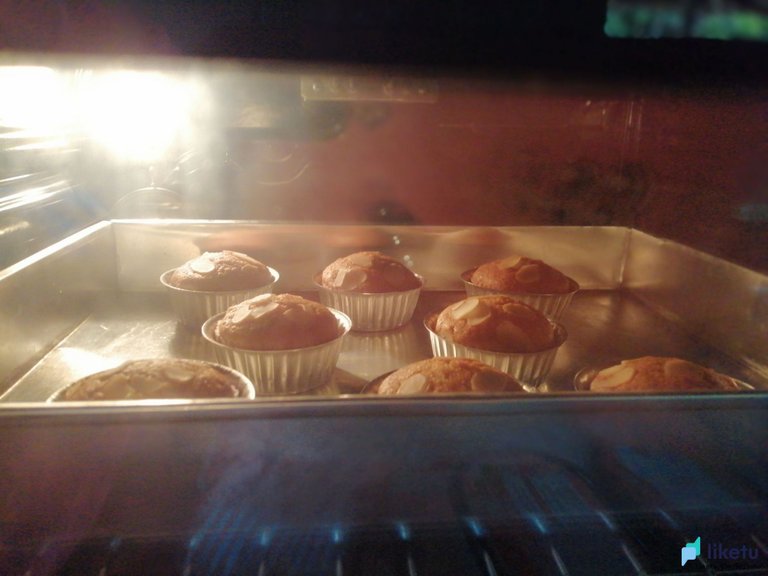
Scoop the batter into the cupcake cups. This recipe does not require resting the dough. I used a thin wax paper cup therefore had to use an aluminum cup under the bottom. Topping with almond slices.
Step 10.
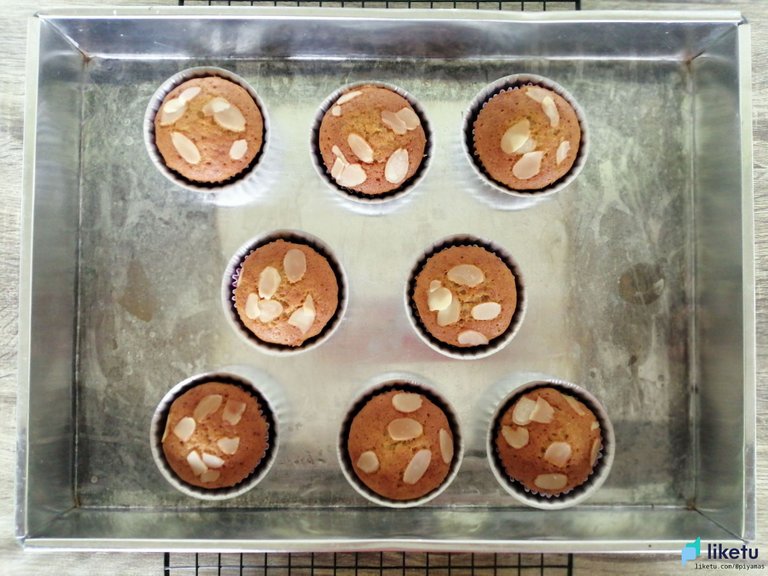
Place them in the oven at 175 degrees Celsius for 15-20 minutes or until the pastry is cooked.
You can check the ripe banana cake. by using a toothpick Poke into the center of the cake. If the cake doesn't come up with a toothpick, the cake is cooked.
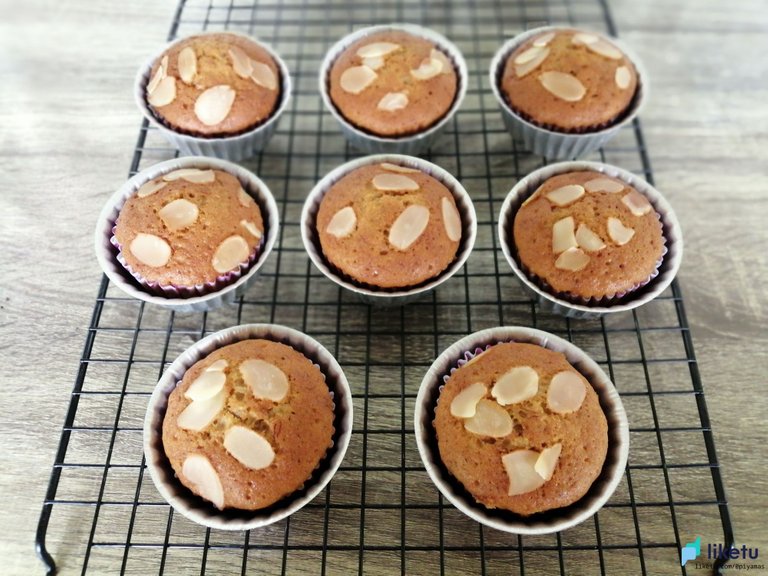
Step 11.
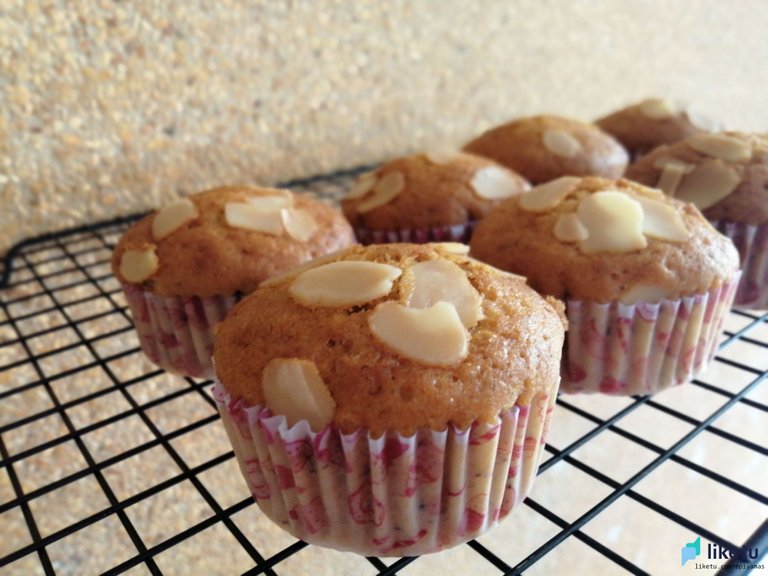
Remove the cooked banana cake from the oven. Set on wire rack to allow cake to cool and then remove from aluminum cup. Then leave it to cool completely before storing it in the package.
Storage
If stored outside the refrigerator for 5-7 days, while keeping in the refrigerator, Put them in a sealed bag Can be stored for a long time.The longest I can keep the cake is 2 weeks and the cake is still soft, fragrant, and the taste has not changed or maybe it can be kept longer.**
สวัสดีค่ะเพื่อนๆทุกคน❤️
วันนี้มีเมนูขนมมาฝากพื่อนๆอีกแล้วค่า นั่นคือ...เค้กกล้วยอัลมอนด์สไลด์ ทำง่ายใช้เวลาไม่นาน และอร่อยมากๆค่ะ
วัตถุดิบ
แป้งเค้ก 200 กรัม
กล้วยหอม 200 กรัม
น้ำตาลทราย 200 กรัม
น้ำมันคาโนล่า 200 กรัม
ผงฟู 1+1/2 ช้อนชา
กลิ่นวนิลา 1 ช้อนชา
เบกกิ้งโซดา1/2 ช้อนชา
เกลือป่น 1/2 ช้อนชา
อัลมอนด์สไลด์ สำหรับทอปปิ้ง
ขั้นตอนทำ
ขั้นตอนที่ 1.
ร่อนของแห้งรวมกัน คือ แป้งเค้ก ผงฟู เบกกิ้งโซดา ตั้งพักไว้
ขั้นตอนที่ 2.
นำกล้วยหอมมาบด ความละเอียดตามต้องการเลยค่ะ กล้วยงอมๆจะบดง่ายมาก แค่ใช้ช้อนบี้ๆก็ละเอียด แล้วตั้งพักไว้
ขั้นตอนที่ 3.
นำไข่ไก่ (ทั้งใบ)ใส่โถ ตีความเร็วต่ำแค่พอไข่แดงไข่ขาวเข้ากัน
ขั้นตอนที่ 4.
ใส่น้ำตาลทราย แล้วตีด้วยความเร็วต่ำ 2 นาที ต่อด้วยความเร็วกลาง 2 นาที แล้วเพิ่มเป็นความเร็วสูง 2 นาที, สุดท้ายใข้ความเร็วต่ำ 1 นาทีเพื่อตัดฟองอากาศ
ขั้นตอนที่ 5.
ใส่เกลือ และของแห้งในข้อ 1.ที่ร่อนไว้ แล้วตีด้วยความเร็วต่ำ 1 นาที หรือจนกว่าไม่เห็นเม็ดแป้ง
ขั้นตอนที่ 6.
ใส่กล้วยหอมบด แล้วตีด้วยความเร็วต่ำ 1 นาที หรือจนกว่าส่วนผสมทั้งหมดจะเข้ากันดี
ขั้นตอนที่ 7.
ค่อยๆเทน้ำมันลงไปให้เป็นสาย ในระหว่างเทน้ำมัน ตีส่วนผสมด้วยความเร็วต่ำ จนกว่าจะเทน้ำมันหมด และตีต่ออีก 1 นาที
ขั้นตอนที่ 8.
วอร์มเตาอบ ไฟ บน ล่าง 175 องศาเซลเซียส จุ๋มใช้เตาเทคโนพลัส 70 ลิตร ทั้งนี้ขึ้นอยู่กับเตาแต่ละยี่ห้อแต่ละรุ่นด้วยนะคะ อาจจะอ้างอิงความร้อนในการอบคัพเค้กจากคู่มือ
ขั้นตอนที่ 9.
ตักแป้งใส่ถ้วยคัพเค้กได้เลยค่ะ สูตรนี้ไม่ต้องพักแป้ง จุ๋มใช้ถ้วยกระดาษไขแบบบาง เลยต้องใช้ถ้วยอะลูมิเนียมรองอีกชั้น โรยหน้าด้วยอัลมอนด์สไลด์
ขั้นตอนที่ 10.
นำเข้าเตาอบได้เลยค่ะ ใช้เวลา 15-20 นาที หรือจนกว่าขนมสุก
วิธีเช็คว่าขนมสุกหรือไม่ โดยการใช้ไม้จิ้มฟัน จิ้มลงไปที่ตรงกลางเค้ก ถ้ายังไม่เนื้อขนมติดไม้ขึ้นมา ก็เป็นอันใช้ได้ค่ะ
ขั้นตอนที่ 11.
นำเค้กกล้วยหอมที่สุกแล้วออกจากเตา ตั้งบนตะแกรงรอให้เค้กคลายความร้อนแล้วนำออกจากถ้วยอะลูมิเนียมได้เลยค่ะ แล้วตั้งทิ้งไว้จนเย็นสนิทค่อยเก็บ
การเก็บรักษา
ถ้าเก็บนอกตู้เย็นได้ 5-7 วัน ส่วนการเก็บในตู้เย็น ให้ใส่ในภาชนะหรือถุงที่ปิดสนิท จะเก็บได้นานประมาณ 2 สัปดาห์ โดยขนมยังนุ่ม หอม และรสชาติไม่เปลี่ยน
Thank you for your support and see you soon.
For the best experience view this post on Liketu
Amazing!
Thank you very much. ❤️❤️
น่ากินมากๆ เลยค่ะคุณจุ๋ม
ขอบคุณค่า สักชิ้นมั้ยค๊ะะ ❤️❤️
ว้าวๆๆ น่าทานมากๆเลยค่ะพี่จุ๋ม ลูกสาวชอบมากค่ะเวลาไป โลตัสซื้อกลับมาทุกครั้งค่ะ
ขอบคุณค่าน้องอ้อม ❤️❤️
เค้กกล้วยหอม เป็นอะไรที่ชอบมากค่ะ แต่ไม่เคยลองทำทานสักที คุณจุ๋มเก่งนะคะ มำขนมเป็นหลายอย่างเลย
ขอบคุณมากๆค่าคุณเมย์ ❤️😊
หลานเอ่ย แบ่งมาให้ลุงกินบ้างครับ 😋😋 แย่งเด็กกินจะบาปไว้นะครับ 😆😆
5555😅😅😅😅
yum
Thank you very much. ❤️😊
ว้าวน่าทานมากๆเลยค่ะ
Congratulations @piyamas! You have completed the following achievement on the Hive blockchain and have been rewarded with new badge(s):
Your next target is to reach 9000 upvotes.
You can view your badges on your board and compare yourself to others in the Ranking
If you no longer want to receive notifications, reply to this comment with the word
STOPTo support your work, I also upvoted your post!
Check out the last post from @hivebuzz:
Support the HiveBuzz project. Vote for our proposal!