Saludos queridas abejas de Hive 💕
Greetings dear Hive bees 💕
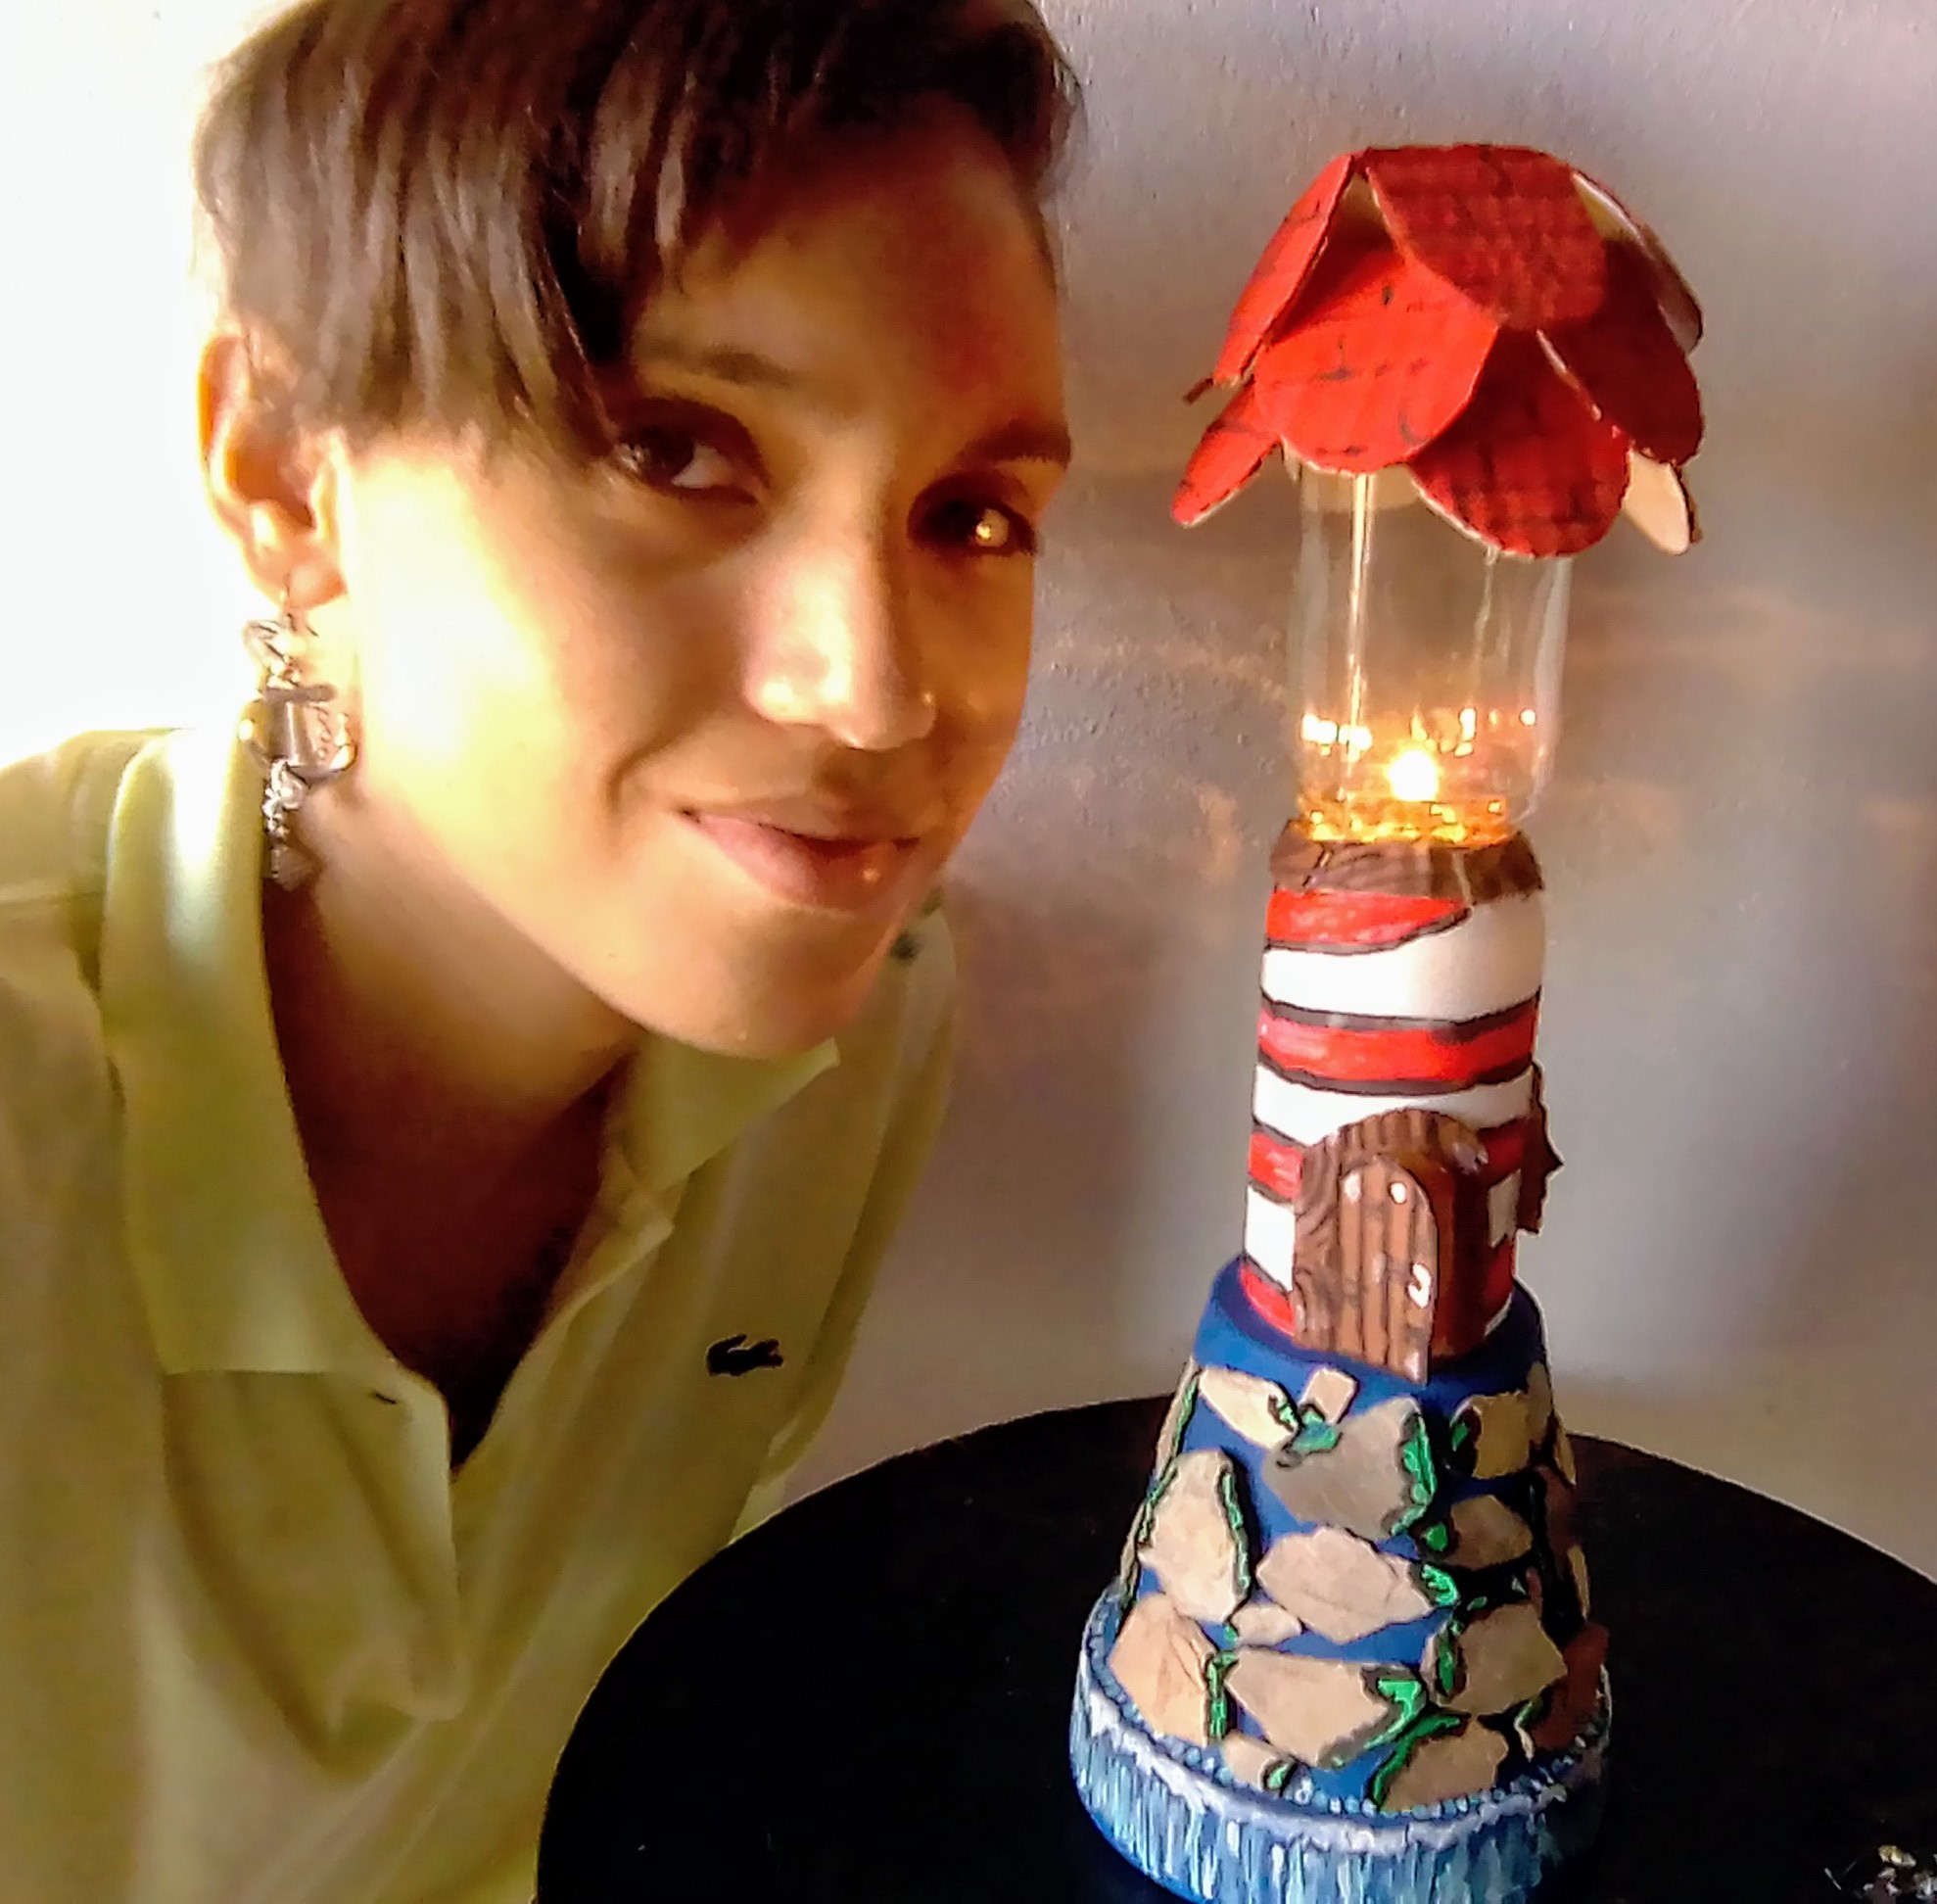
En esta nueva oportunidad les quiero compartir esta increíble idea de cómo realizar este lindo faro utilizando materiales reciclables, un artístico y original detalle para decorar nuestros hogares, iluminados por una colorida y espectacular artesanía ornamental.
In this new opportunity I want to share with you this incredible idea of how to make this beautiful lighthouse using recyclable materials, an artistic and original detail to decorate our homes, illuminated by a colorful and spectacular ornamental crafts.
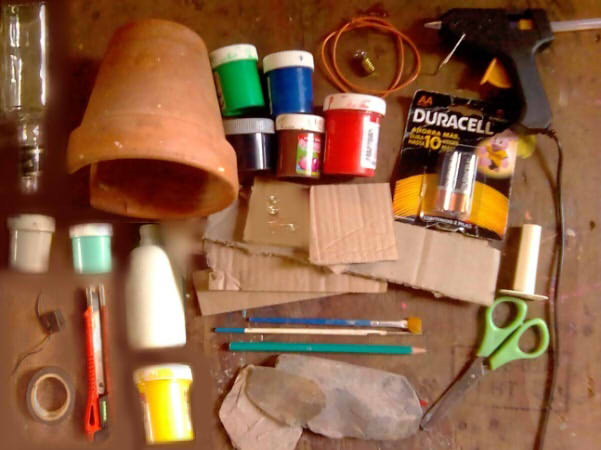
Materiales:
- Botella de vidrio.
- Maceta.
- Pintura al frio verde, azul, negro, marrón, rojo, blanco, turquesa y amarillo.
- Pistola de silicón.
- Cable de electricidad.
- Bombilla.
- Baterías AA,1.5V.
- Tubo de plástico.
- Interruptor.
- Cinta adhesiva.
- Cutter.
- Tijera.
- Lozas.
- Botella de plástico.
- Pinceles.
- Lápiz.
- Cartón.
- Contactos metálicos para baterías.
Materials:
- Glass bottle.
- Flowerpot.
- Cold paint green, blue, black, brown, red, white, turquoise and yellow.
- Silicone gun.
- Electricity cable.
- Light bulb.
- Batteries AA,1.5V.
- Plastic tube.
- Switch.
- Scotch tape.
- Cutter.
- Scissor.
- Crockery.
- Plastic bottle.
- Brushes.
- Pencil.
- Paperboard.
- Metal contacts for batteries.
Proceso:
Process:
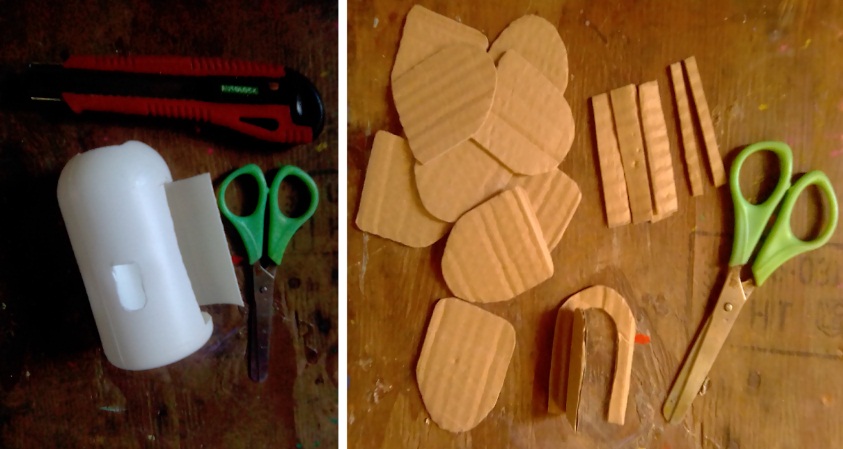
Iniciamos cortando la parte superior de la botella plástica junto con unas aberturas para el interruptor y en donde se colocara las baterías con el resto del sistema eléctrico, en esta ultima dejaremos una “puerta”, a continuación dibujamos y recortamos en el cartón una puerta, algunas tejas y unas tiras que conformaran la ventana de nuestro faro.
We start by cutting the upper part of the plastic bottle together with some openings for the switch and where the batteries will be placed with the rest of the electrical system, in the latter we will leave a "door", then we draw and cut a door on the cardboard, some tiles and some strips that will make up the window of our lighthouse.
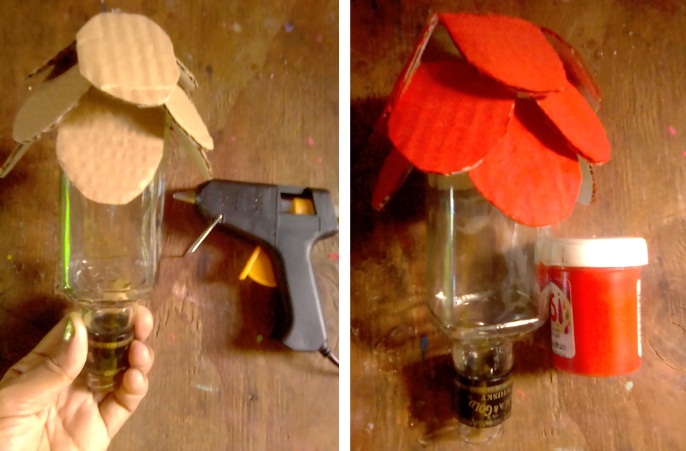
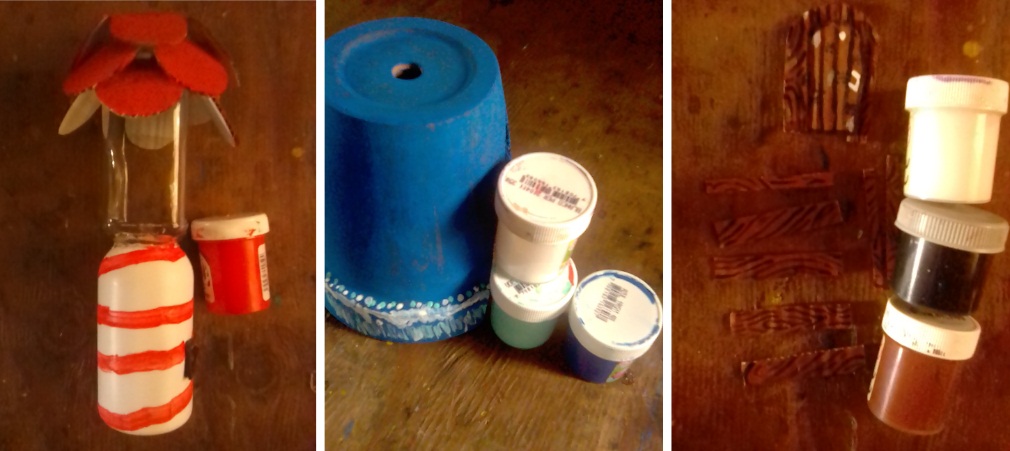
Pegamos las “tejas” en la parte superior de la botella de vidrio, colocando una sobre otra y de esta manera hacerle un tejado, para luego pintarlo de rojo.
We glue the "tiles" on top of the glass bottle, placing one on top of the other and in this way make a roof for it, and then paint it red.
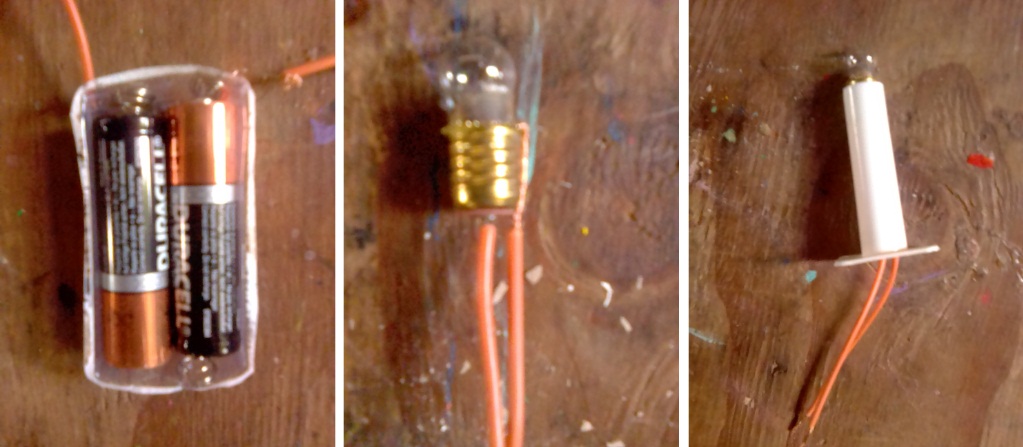
Ahora es momento de armar el sistema eléctrico del faro, para ello utilizamos la cajita plástica donde vienen las baterías y en ella colocamos los contactos metálicos junto con el cable de electricidad en cada extremo de estos, ahora tomamos dos cables y colocamos uno a un extremo de la bombilla y el otro ira en la parte inferior de este, luego introducimos la bombilla en el tubo de plástico de manera que esta encaje.
Now it is time to assemble the electrical system of the lighthouse, for this we use the plastic box where the batteries come and in it we place the metal contacts together with the electricity cable at each end of these, now we take two cables and place one at one end of the bulb and the other will go to the bottom of it, then we introduce the bulb in the plastic tube so that it fits.
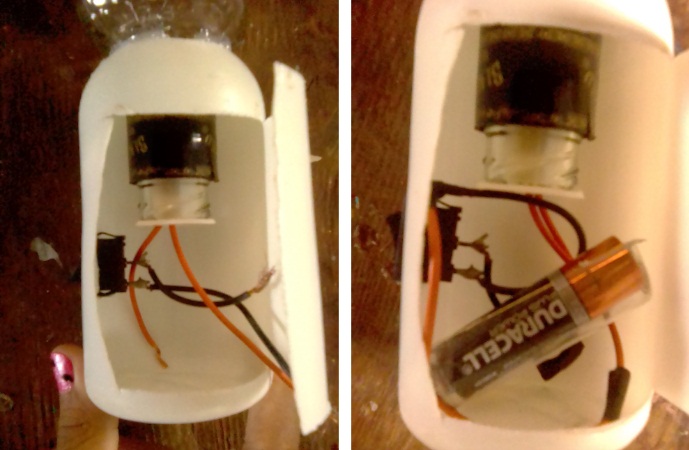
Insertamos el interruptor en el lugar que teníamos reservado para él, en la botella plástica y en la parte superior de esta colocamos la botella de vidrio y dentro de ella ira el tubo de plástico, ahora es momento de conectar las baterías y el interruptor a la bombilla, después cerramos la abertura del faro, es decir, la puerta que teníamos reservada para ello.
We insert the switch in the place that we had reserved for him, in the plastic bottle and on top of it we place the glass bottle and inside it the plastic tube will go, now it is time to connect the batteries and the switch to the light bulb, then we close the opening of the lighthouse, that is, the door that we had reserved for it.
Con la pintura de color rojo haremos unos “espirales” en la parte inferior del faro, utilizamos las pinturas blanco, turquesa y azul para decorar la maceta con tonos relativos al mar, con la pintura marrón le daremos color a las tiras y a la puerta con algunos detalles en los colores negro y blanco, dando la apariencia de que estuvieran hechas en madera.
With the red paint we will make some "spirals" in the lower part of the lighthouse, we use the white, turquoise and blue paints to decorate the pot with tones relative to the sea, with the brown paint we will color the strips and the door with some details in the colors black and white, giving the appearance that they were made of wood.
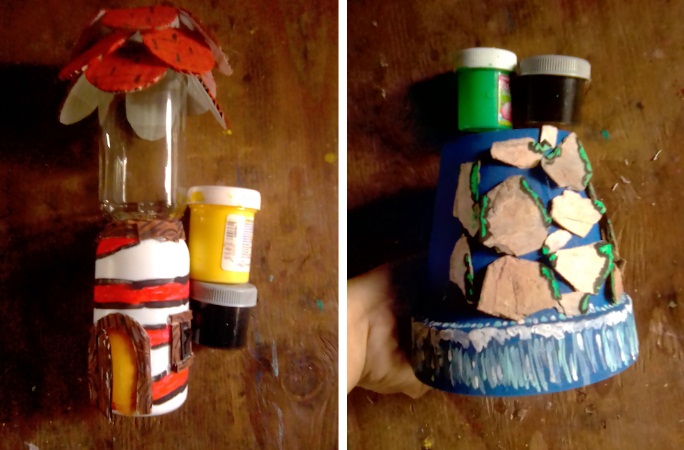
Colocamos las tiras en la unión entre la botella de vidrio y la plástica, ahora ubicamos la puerta en el frente ya que estará entreabierta pintamos el fondo en color amarillo, como si el interior estuviera iluminado, también colocamos algunas tiras en el borde del interruptor como si fuera una ventana, delineamos las espirales del faro en color negro y le haremos unos detalles en el tejado, como si fueran ladrillos, luego pegamos las lozas en la maceta y le haremos unos “musgos” en color verde y delineamos en negro.
We place the strips at the junction between the glass bottle and the plastic one, now we place the door on the front since it will be ajar, we paint the background in yellow, as if the interior were illuminated, we also place some strips on the edge of the switch as If it were a window, we will outline the spirals of the lighthouse in black and we will make some details on the roof, as if they were bricks, then we will glue the tiles in the pot and we will make some “mosses” in green and outline in black.
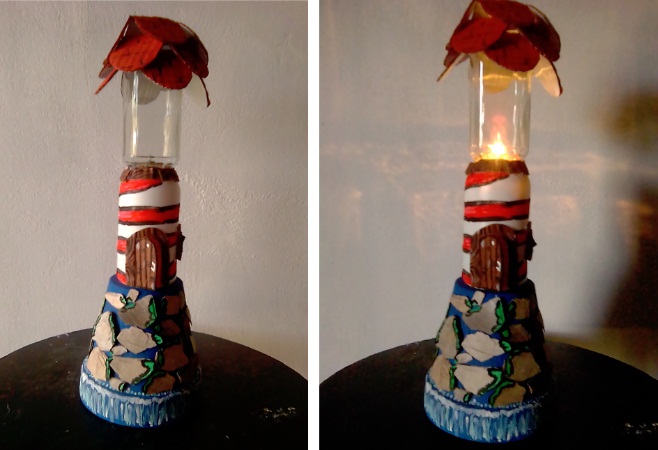
Para finalizar con esta creativa decoración, colocamos nuestro faro encima de la maceta decorada y de esta manera pareciera que estuviera en una montaña de piedras sobre el mar, pulsamos el interruptor y así podemos disfrutar de la iluminación que este lindo faro nos ofrece.
To finish with this creative decoration, we place our lighthouse on top of the decorated pot and in this way it seems that it is on a mountain of stones over the sea, we press the switch and thus we can enjoy the lighting that this beautiful lighthouse offers us.
Les agradezco por visitarnos y darnos su apoyo, espero que este proyecto haya sido de su agrado y les hago la cordial invitación para vernos en una próxima y artística publicación ¡Que pasen feliz día!
I thank you for visiting us and giving us your support, I hope this project has been to your liking and I cordially invite you to see us in an upcoming artistic publication. Have a happy day!

-Las fotografías 📷 son de nuestra autoria y fueron tomadas con un teléfono inteligente (ZTE Blade L130) y editadas en Paint y Paint Tool SAI por @albakriz.
-The photographs 📷 are of our authorship and were taken with a smartphone (ZTE Blade L130) and edited in Paint and Paint Tool SAI by @albakriz.
-Traducción: traductor de Google.
-Translation: translate Google.
Muy creativo 😍 intentaré hacerlo con mis niños
Hola @leslym, que bueno que esta idea haya sido de su agrado ¡gracias! 💜
Buen trabajo! Saludos!
¡Muchas gracias @takie! Me alegra que le haya gustado ¡cordiales saludos!