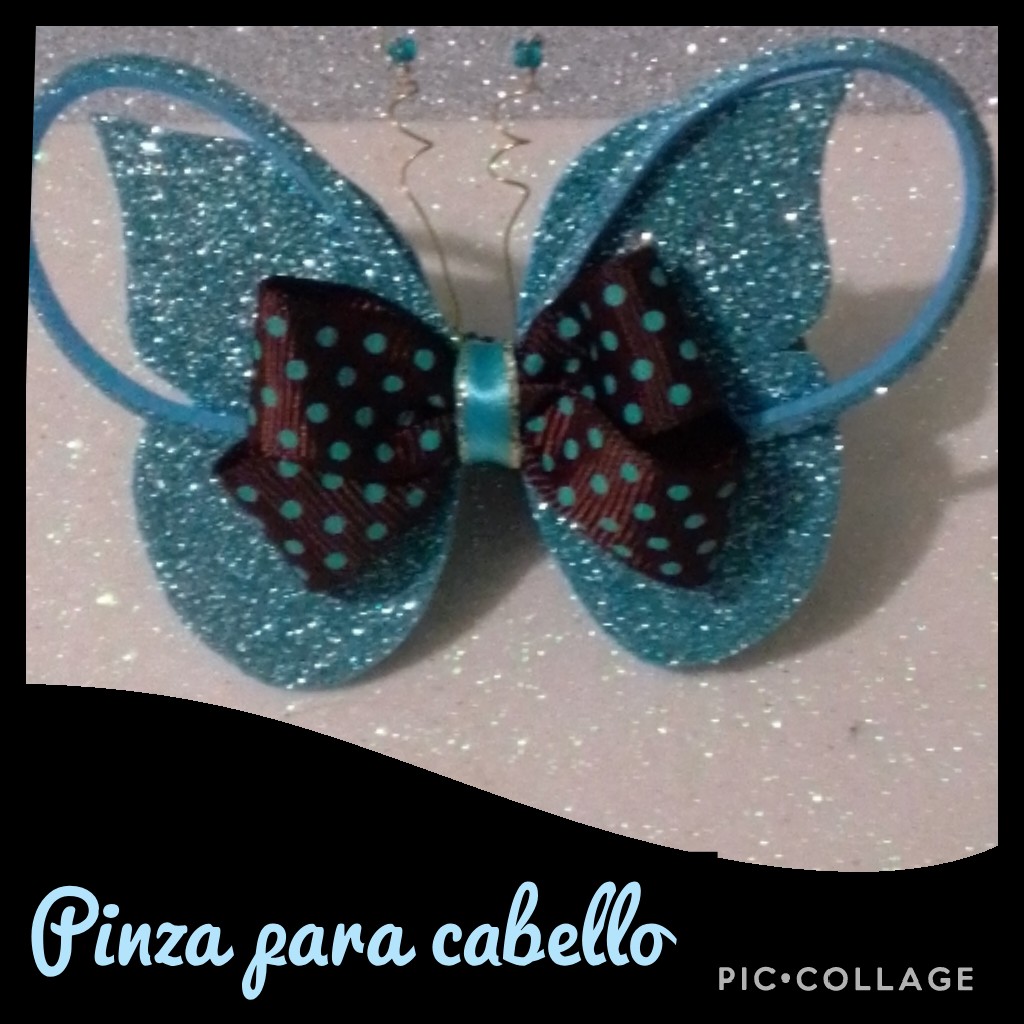
COMO SIEMPRE LES DIGO TODO LO QUE APRENDAMOS A REALIZAR NOS SERVIRÁ EN ALGÚN MOMENTO DE NUESTRAS VIDAS.. Y AHORA QUE ESTAMOS EN CASA POR CAUSA DE LA PANDEMIA, ES BUENO HACER ALGO EN LOS TIEMPOS LIBRES!
AS I ALWAYS TELL YOU EVERYTHING WE LEARN TO DO WILL SERVE US AT SOME TIME IN OUR LIVES ... AND NOW THAT WE ARE AT HOME BECAUSE OF THE PANDEMIC, IT IS GOOD TO DO SOMETHING IN FREE TIMES!
Entonces empecemos a trabajar ubicando los materiales que tengas o puedas adquirir... demás está decirte que puedes hacerlos a tu gusto, este es simplemente una guía.
So let's start to work locating the materials that you have or can acquire ... it is not necessary to tell you that you can make them to your liking, this is simply a guide.
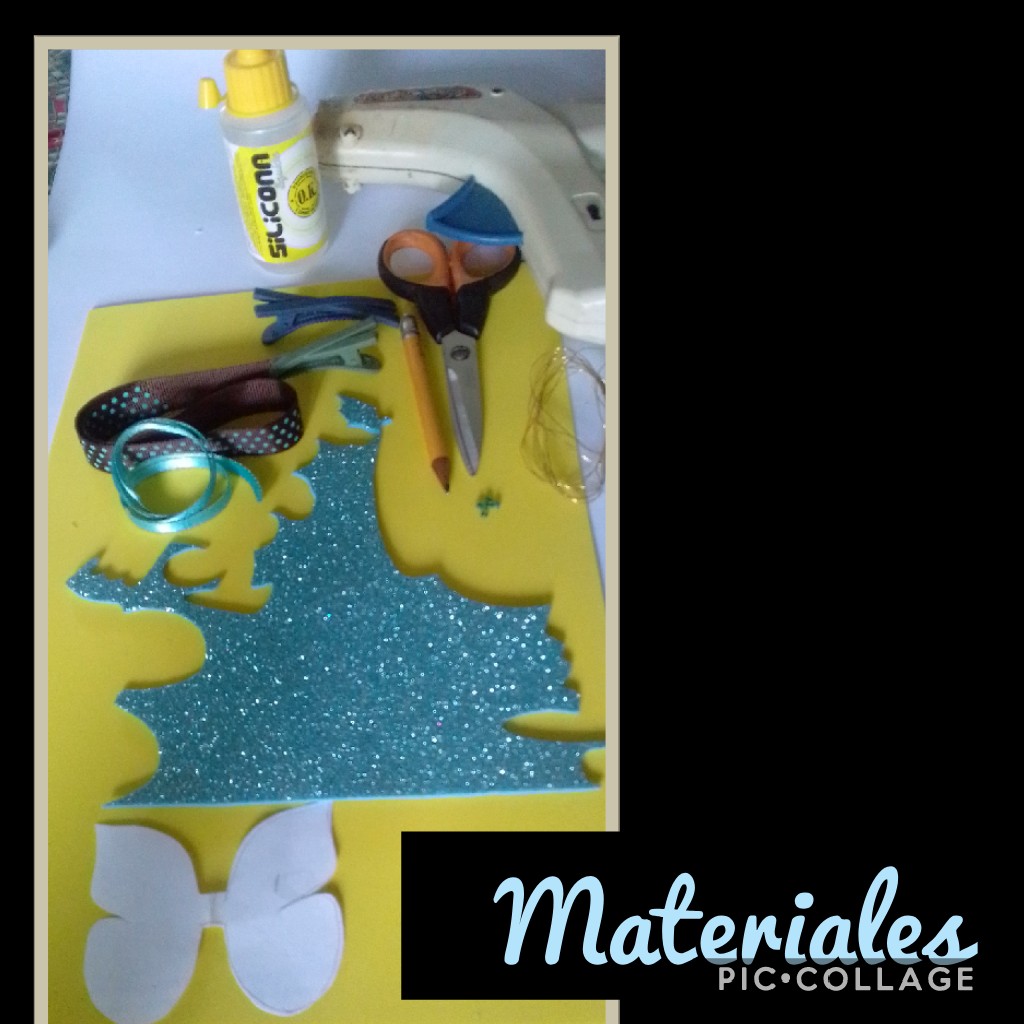
MATERIALES:
MATERIALS:
PROCEDIMIENTO:
PASO 1 Y 2:
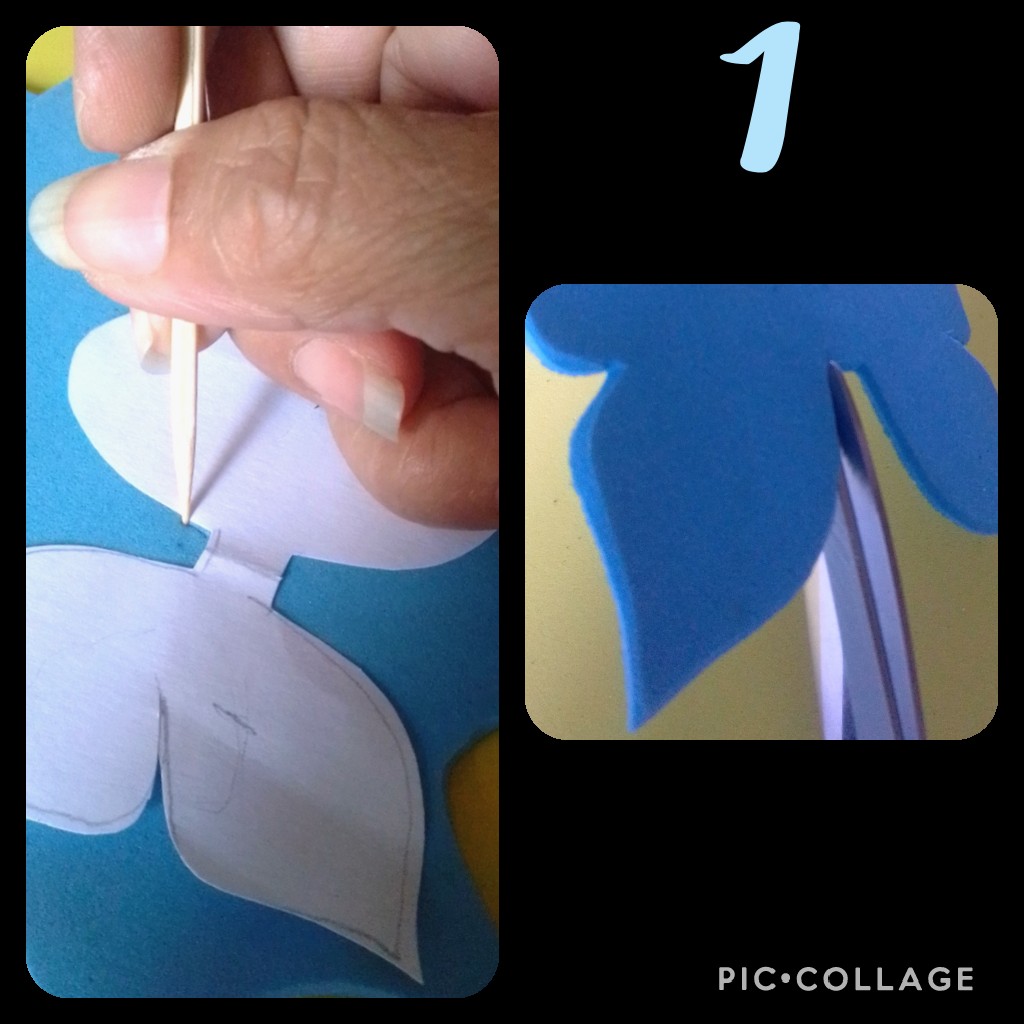
Marcamos con el palito de madera o el lápiz toda la mariposa sobre el foami por el lado revés y recortamos.
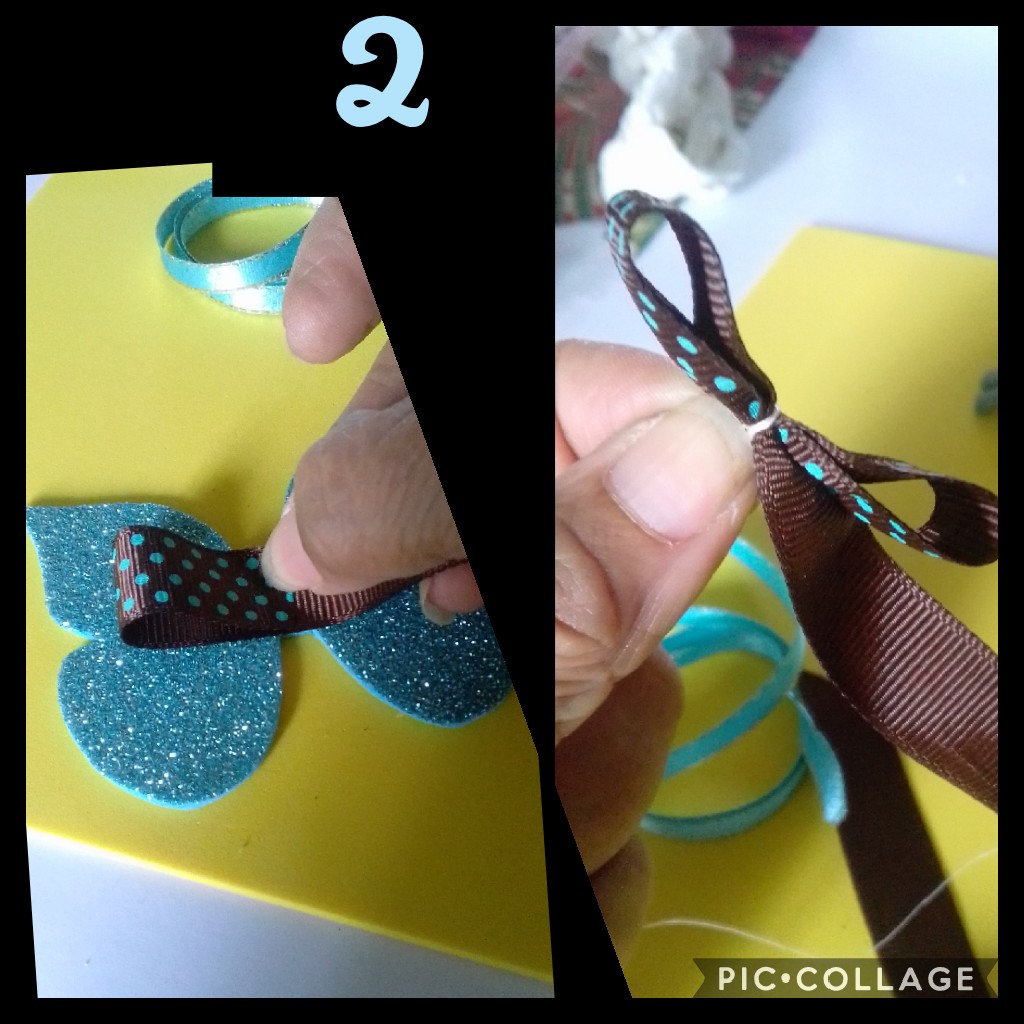
Luego tomamos la cinta y hacemos una lazada del lado izquierdo, midiendo al tamaño que prefieras, seguido haces la otra del lado derecho y amarras en el centro con un hilo.
We mark with the wooden stick or the pencil the entire butterfly on the foami from the wrong side and cut out.
Then we take the ribbon and make a loop on the left side, measuring to the size you prefer, then make the other on the right side and tie in the center with a thread.
PASOS 3, 4 :
STEPS 3 AND 4:
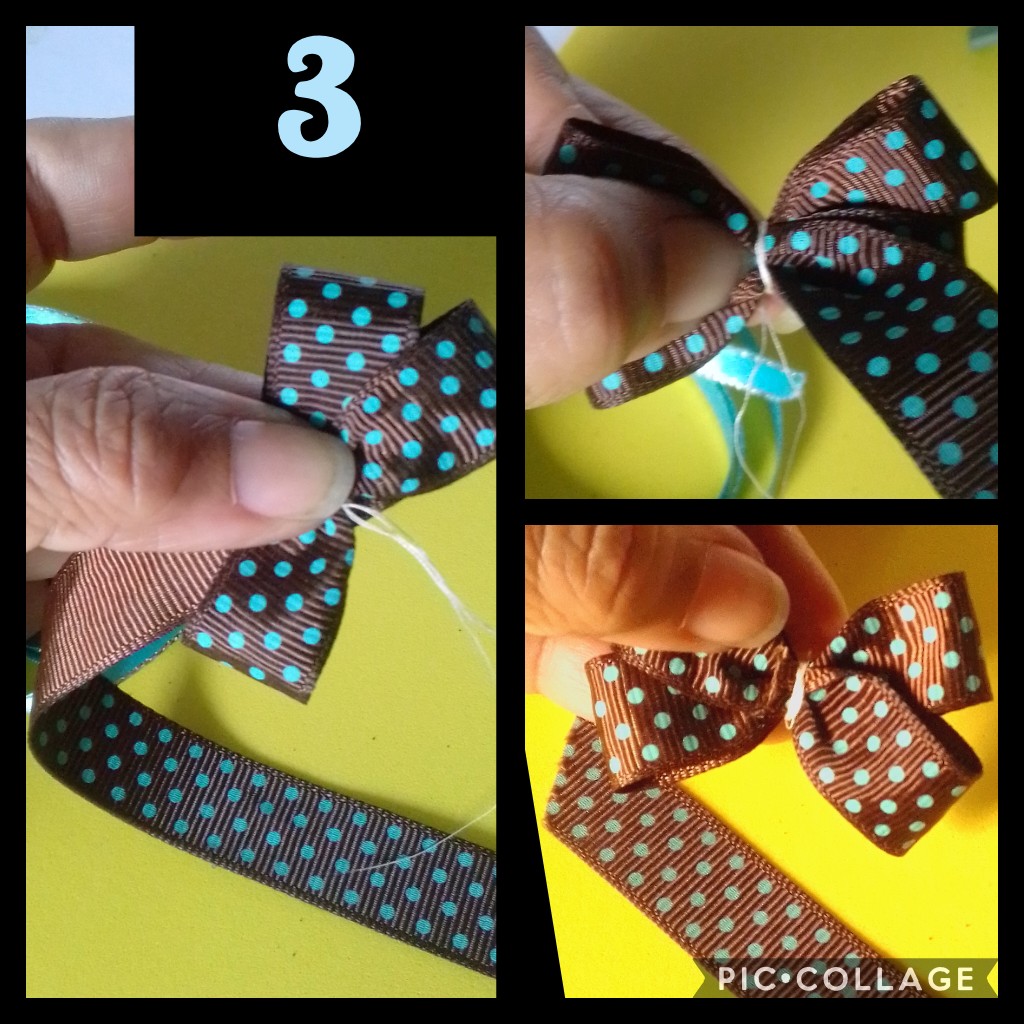
Continuamos repitiendo el mismo paso de las lazadas (2 lazadas más) amarramos en el centro y recortamos lo sobrante de la cinta. Yo escogí la cinta marrón con lunares azules que le hace un contraste hermoso con el azul del foami.
We continue repeating the same step of the loops (2 more loops) we tie in the center and trim the excess of the ribbon. I chose the brown ribbon with blue polka dots that makes it a beautiful contrast with the blue of the foam.
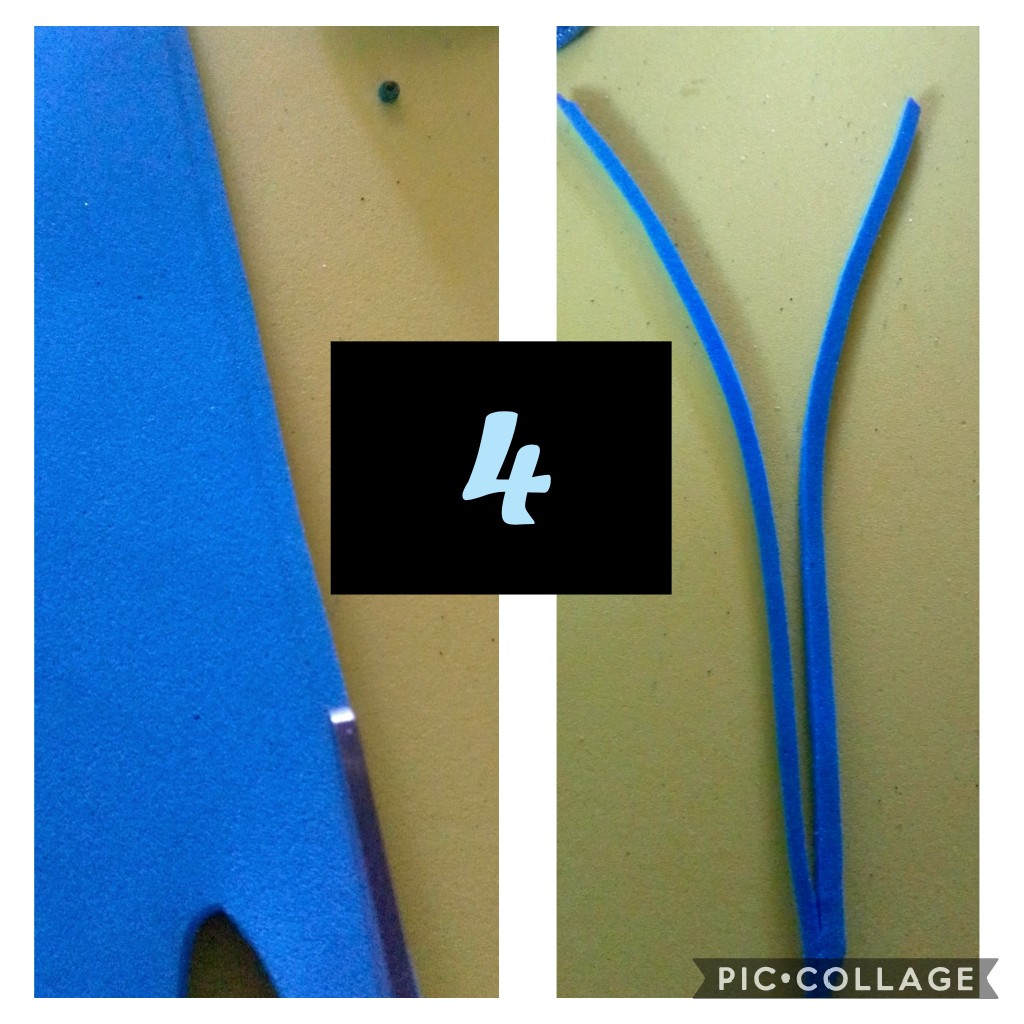
Después marcamos dos tiritas de 12 cms de largo por 2milímetros de ancho dejando unidos en un extremo.
Then we mark two strips 12 cm long by 2 millimeters wide, leaving them together at one end.
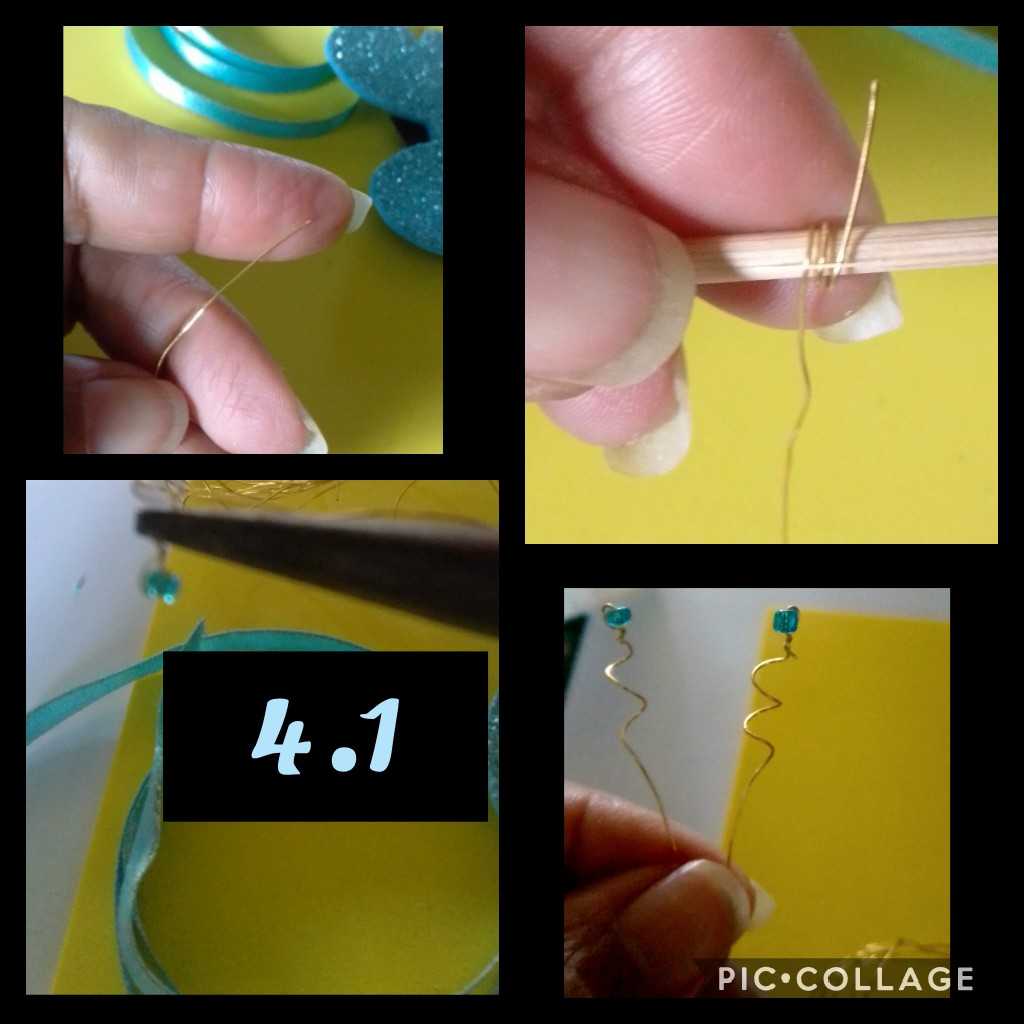
Seguidamente, cortamos un pedazo de alambre de 12 cms de largo, dejamos 1 cm en cada extremo y empezamos a entorchar dando 3 o cuatro vueltas al palillo, luego metemos la mostacilla o piedrita y amarramos con la pinza y repetimos en procedimiento en el otro extremo.. Estas serán las antenas de la mariposa.
Next, we cut a piece of wire 12 cm long, leave 1 cm at each end and begin to twist the toothpick 3 or four times, then put the bead or pebble and tie with the clamp and repeat the procedure at the other end .. These will be the antennae of the butterfly.
PASOS 5 Y 6:
STEPS 5 AND 6:
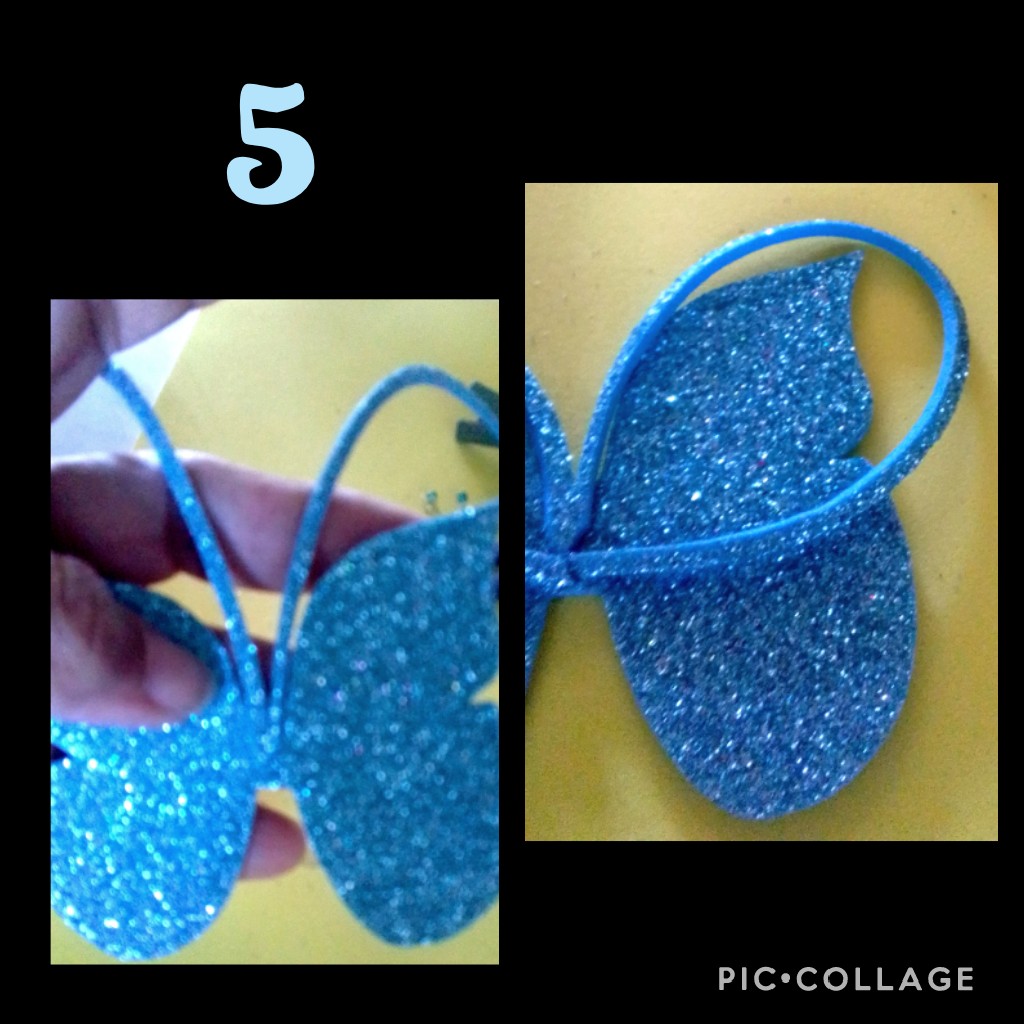
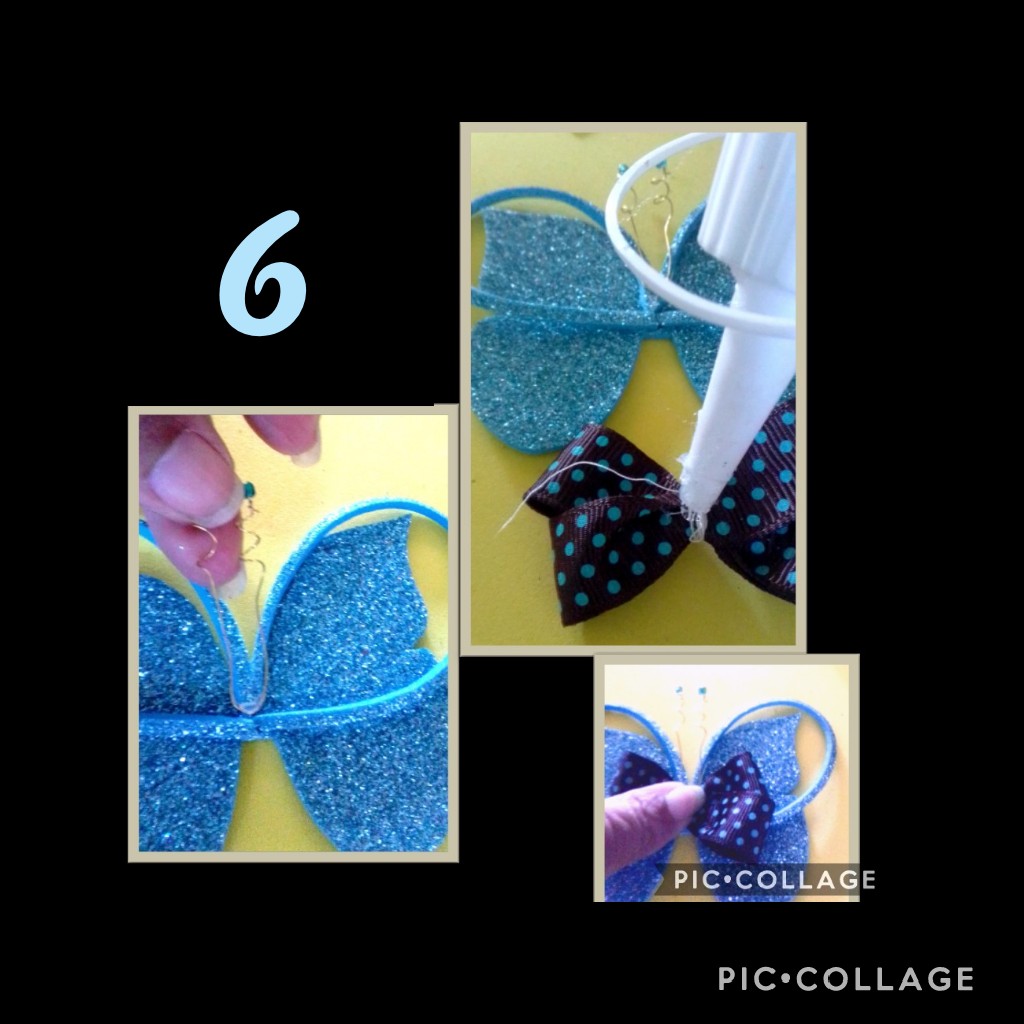
Ahora ponemos un poquito de silicon en el medio o centro de la mariposa y pegamos el extremo unido en la parte de arriba y luego bajamos cada punta y pegamos haciendo una forma de pétalo...(foto5)
Dejamos secar y colocamos nuevamente silicon para pegar las antenas.
Luego le ponemos pegamento a el lazo que hicimos de cinta y pegamos haciendo presión hasta que pegue bien..
Now we put a little bit of silicon in the middle or center of the butterfly and glue the joined end at the top and then we lower each end and glue making a petal shape ... (photo5)
Let it dry and put the silicone back on to glue the antennas.
Then we put glue to the loop that we made of tape and press down until it sticks well.
PASOS 7 Y 8:
STEPS 7 AND 8:
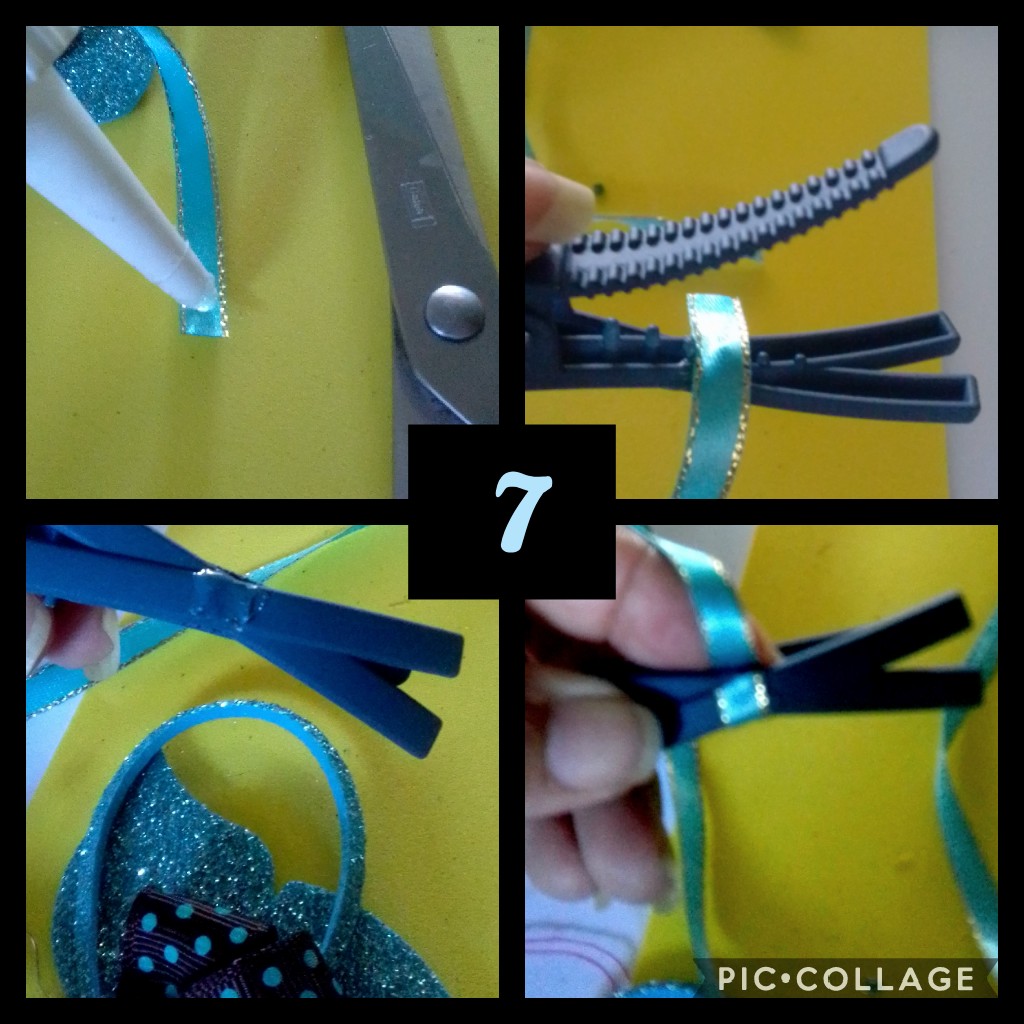
Ya vamos llegando al final del tutorial y pondremos en una cinta de raso delgada un poco de pegamento, abrimos la pinza y pegamos por dentro, damos la vuelta a la pinza y ponemos silicón en la parte de arriba para pegar la cinta (foto7).
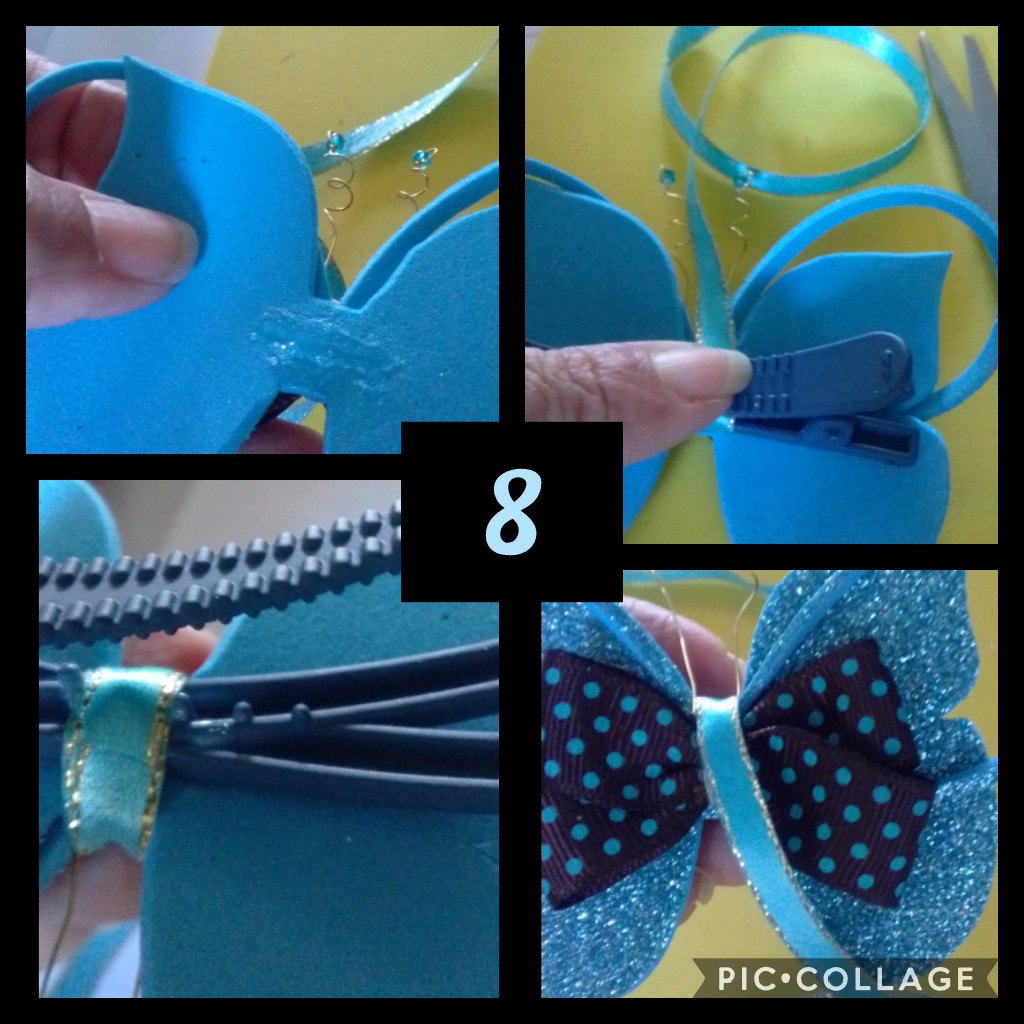
Luego colocamos pegamento en la parte de atrás de la mariposa y fijamos la pinza haciendo presión, después volvemos a abrir la pinza para pasar la cinta por la parte de arriba de la mariposa dando 2 vueltas para luego recortar la cinta sobrante.(foto 8)
We are already reaching the end of the tutorial and we will put a little glue on a thin satin ribbon, open the clamp and glue on the inside, turn the clamp and put silicone on top to stick the ribbon (photo7).
Then we put glue on the back of the butterfly and fix the clamp by pressing, then we open the clamp again to pass the tape over the top of the butterfly, taking 2 turns and then trim the excess tape (photo 8).
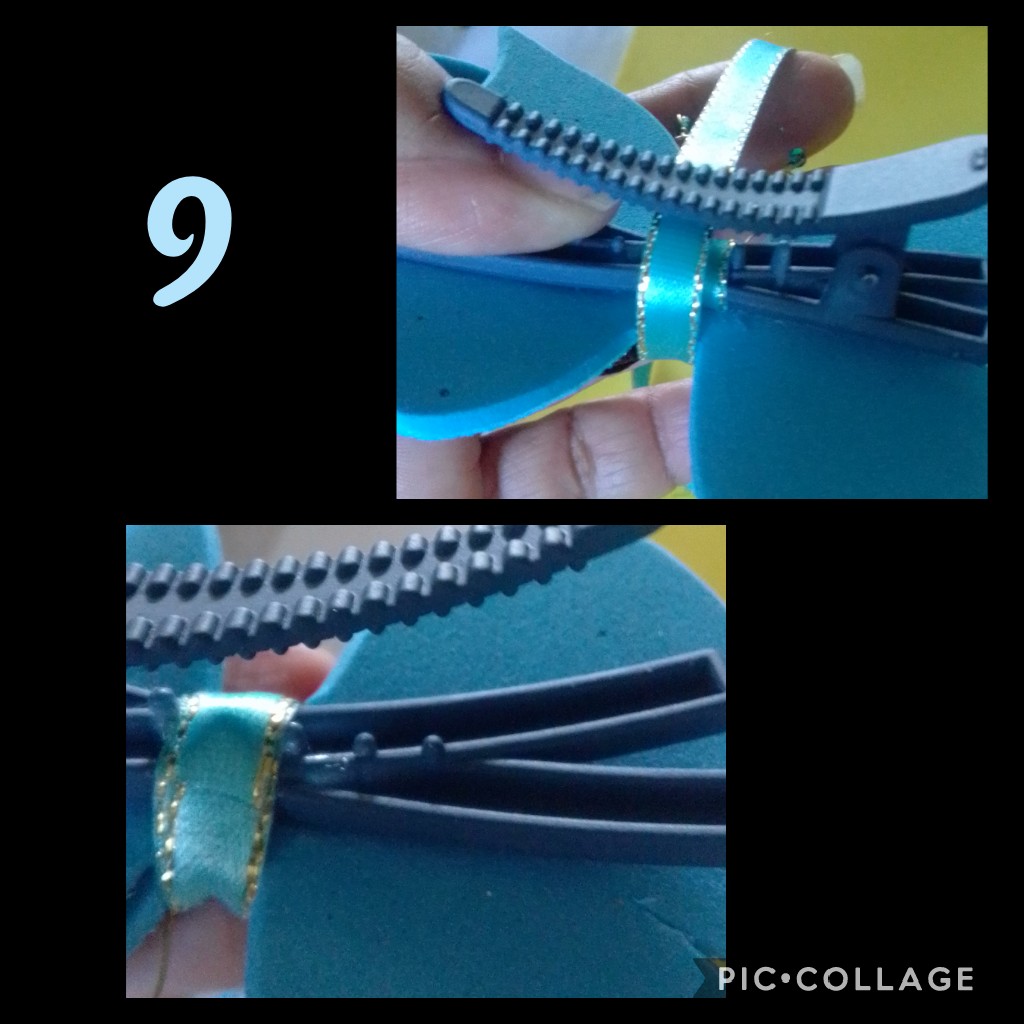
PASO 9:
Aquí apreciamos mejor el paso 8 donde le damos dos vueltas a la cinta fijando la mariposa a la pinza y por último el corte y remate de la cinta...
STEP 9:
Here we better appreciate step 8 where we give the tape two turns, fixing the butterfly to the clamp and finally the cutting and finishing of the tape ...
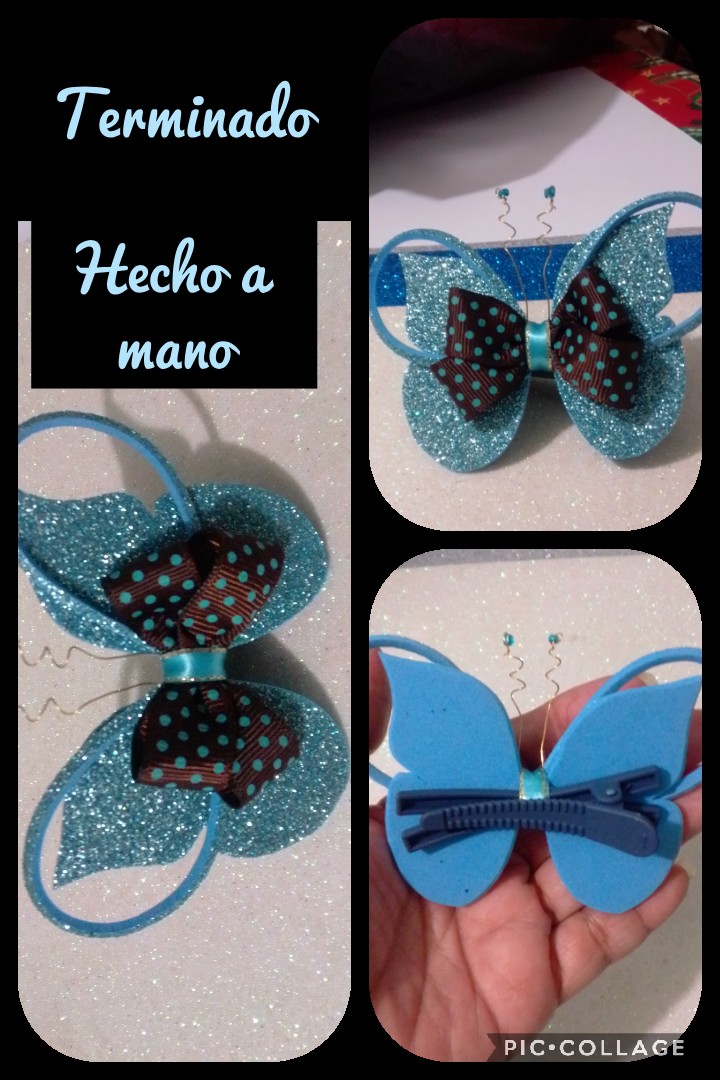
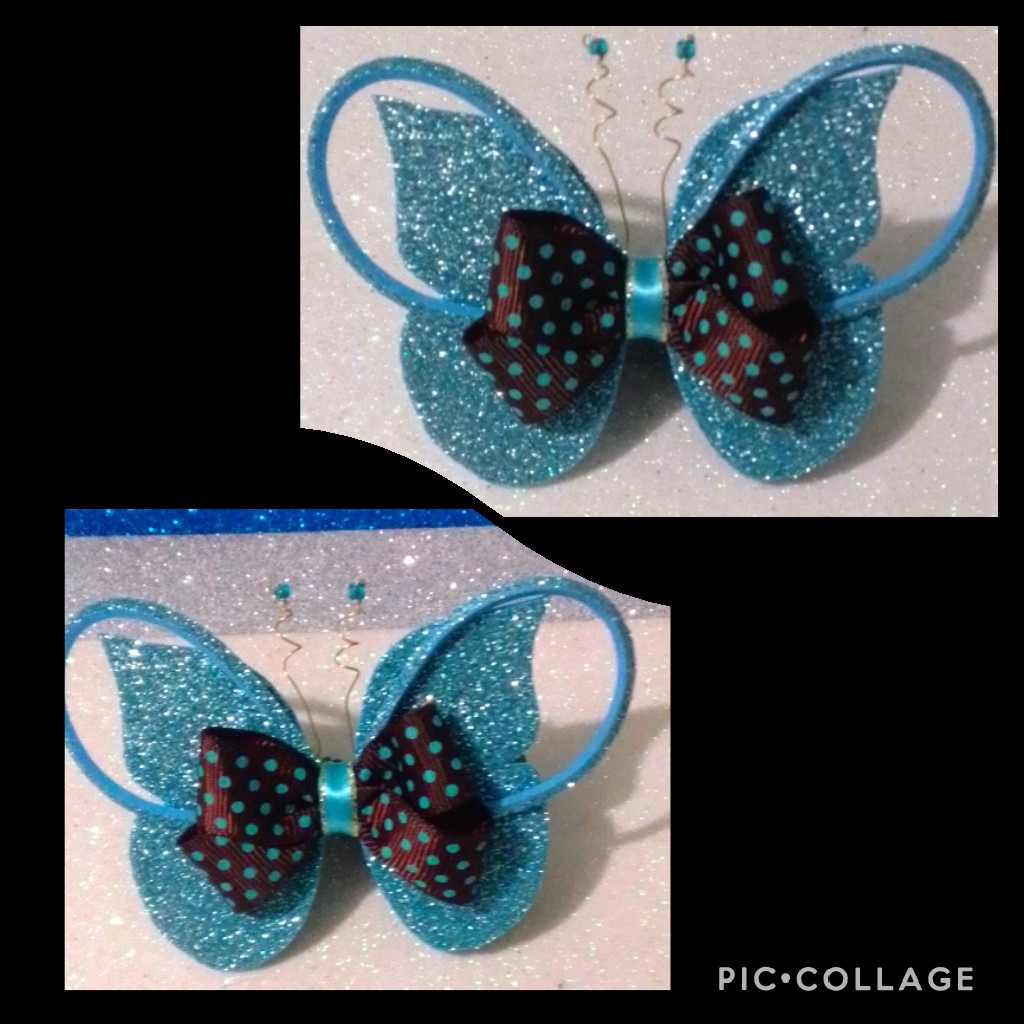
Ahora sí les muestro el hermoso resultado de la pinza ya terminada, espero que les guste y que hayan aprendido a realizar...
Hasta mañana y que Dios los bendiga!
Now I do show you the beautiful result of the finished clamp, I hope you like it and that you have learned to make ...
See you tomorrow and God bless you


This is very beautiful I must say.
Keep it up
Thank you very much for the comment
Muy linda tu mariposa, es una forma de darle una nueva apariencia a las cosas que ya hemos usados. Un nuevo estilo.
Muchas gracias.. Así es!..