
Hola amigos, espero se encuentren bien. Hoy les quiero mostrar este bonito gorro de navidad que elaboré con mucho cariño, ya que será un regalo para un familiar muy querido y decidí hacer este tutorial para compartirles el proceso.
Hello friends, I hope you are well. Today I want to show you this beautiful Christmas hat that I made with much affection, as it will be a gift for a very dear relative and I decided to make this tutorial to share with you the process.

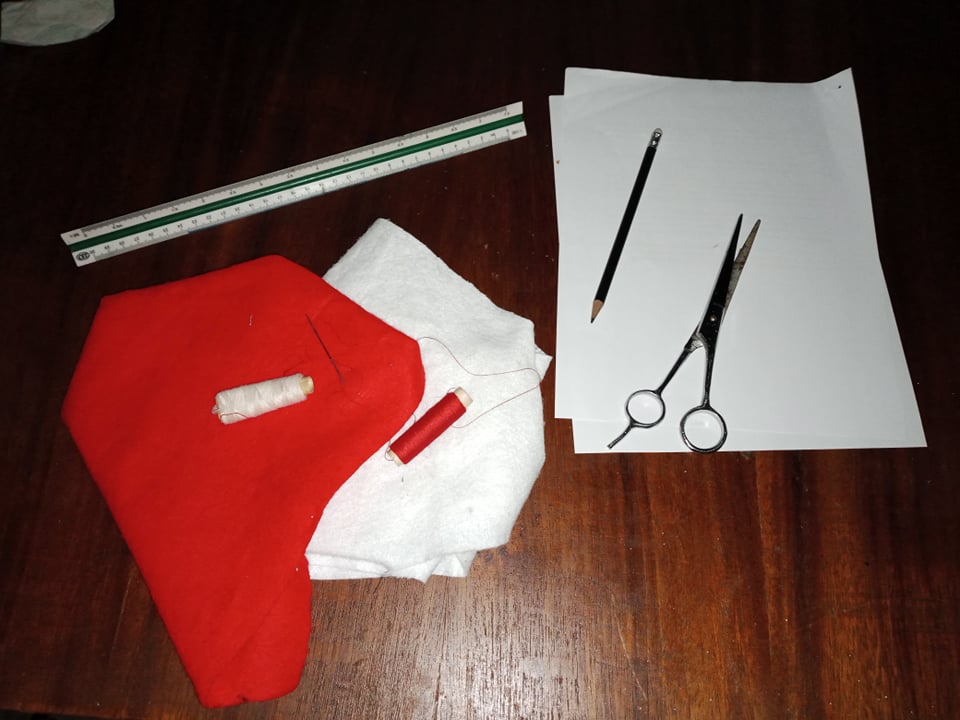
Materiales:
Fieltro Rojo y Blanco
Hilo Rojo y Blanco
Aguja
Tijeras
Papel de Reciclaje
Lápiz
Materials:
Red and White Felt
Red and White Thread
Needle
Scissors
Recycling Paper
Pencil
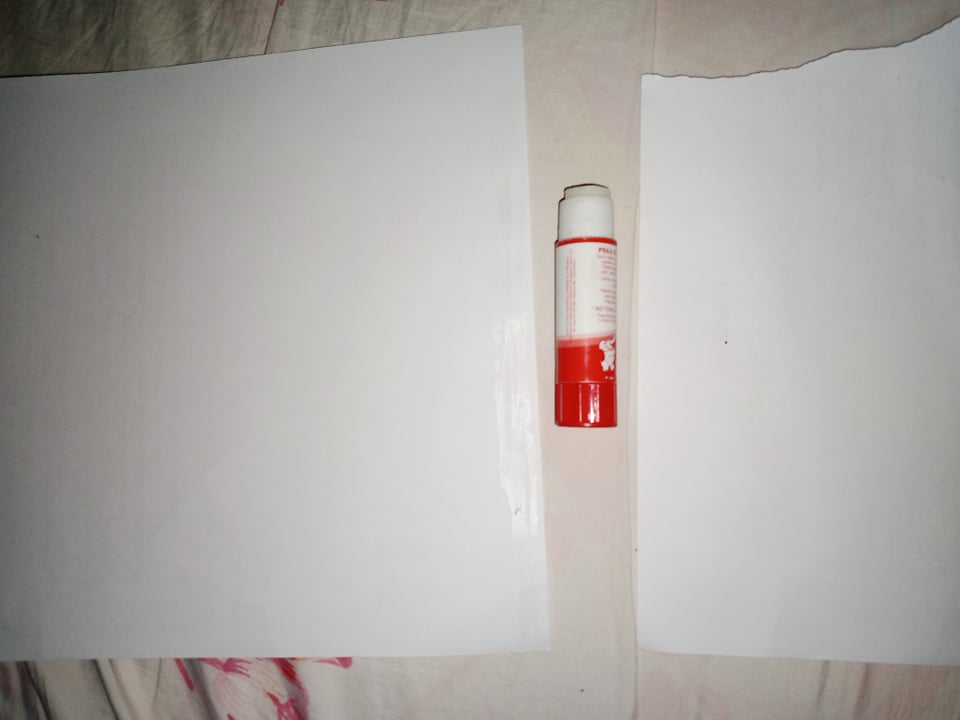
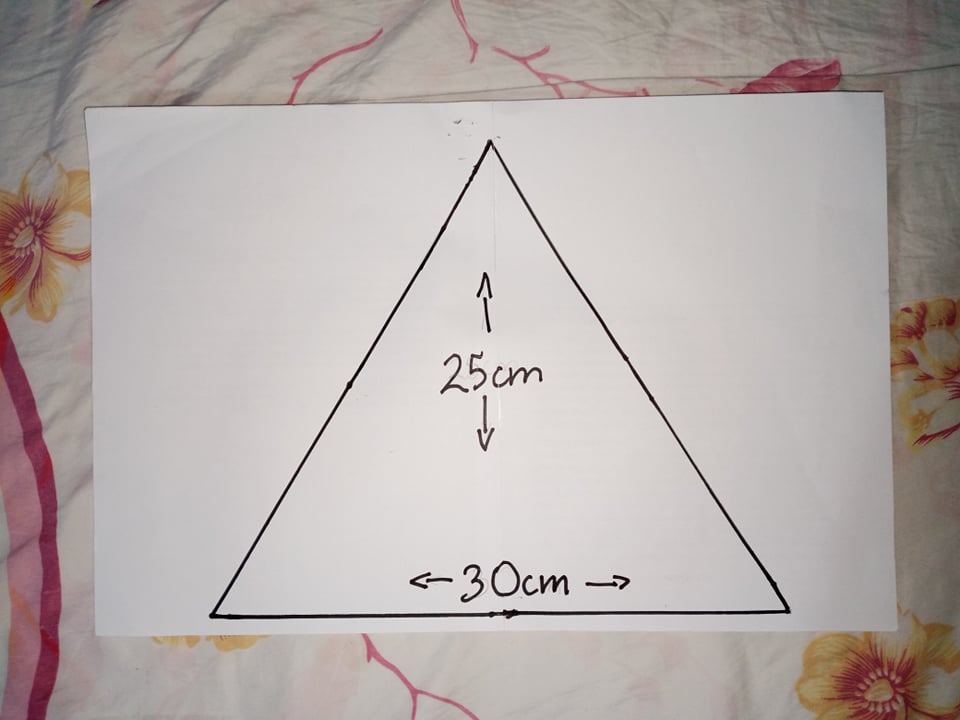
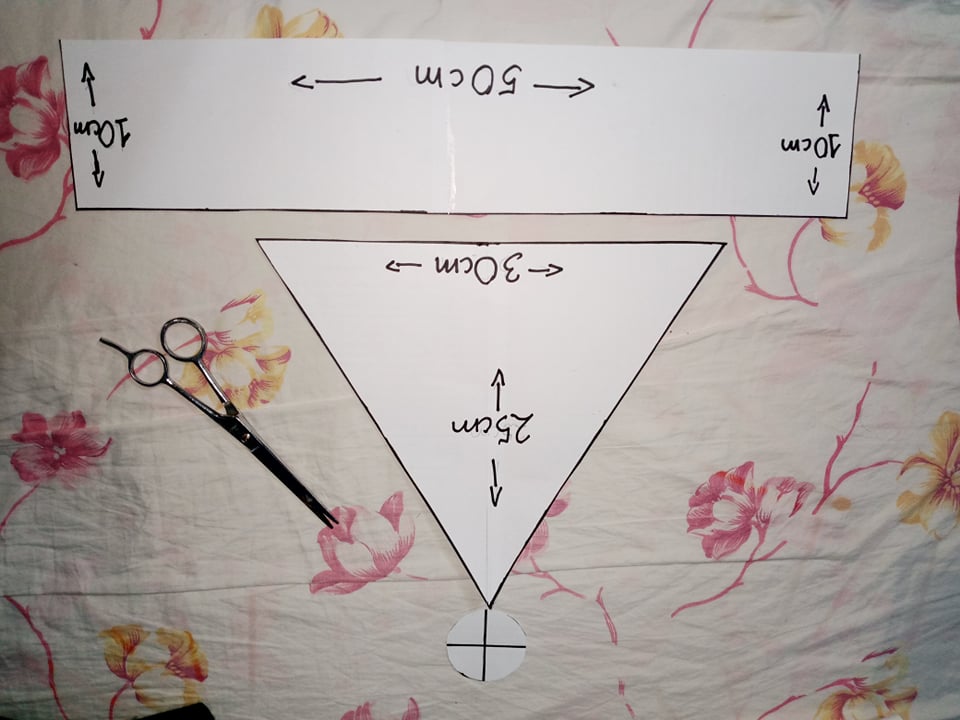
Primero dibujaremos el patrón en las hojas de reciclaje. Para esto uní dos hojas por el borde con pega en barra. Realizaremos un triángulo con las siguientes medidas: 30cm de ancho (base del gorro) y 25cm de largo.
First we will draw the pattern on the recycled sheets. For this I joined two sheets by the edge with glue stick. We will make a triangle with the following measurements: 30cm wide (base of the hat) and 25cm long.
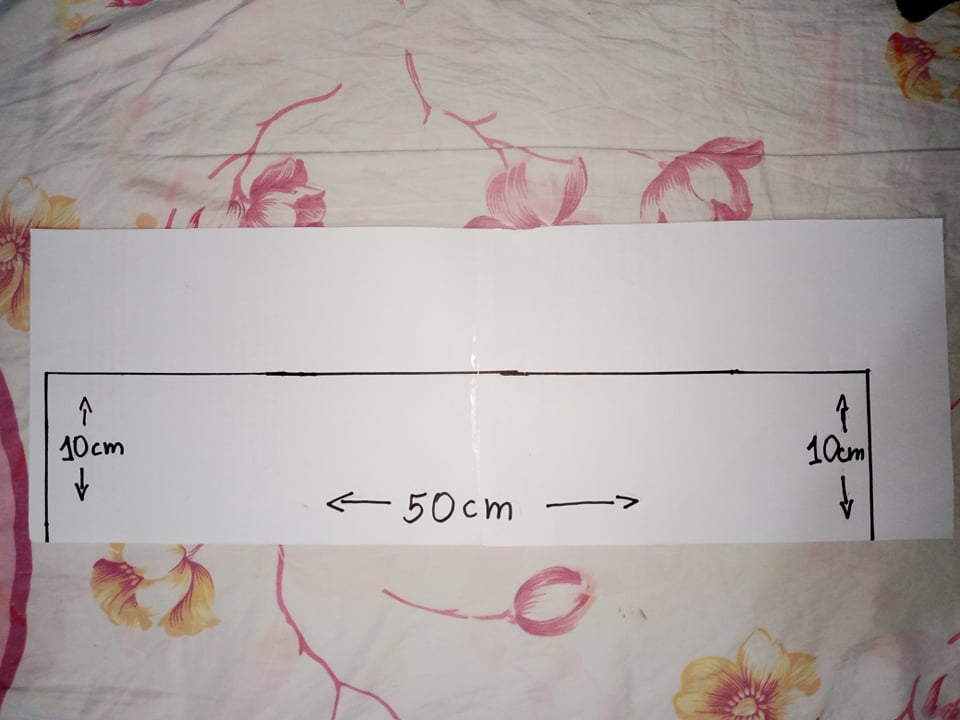
Para la base del gorro dibujaremos un rectángulo con las siguientes medidas: 50cm de largo y 10cm de ancho.
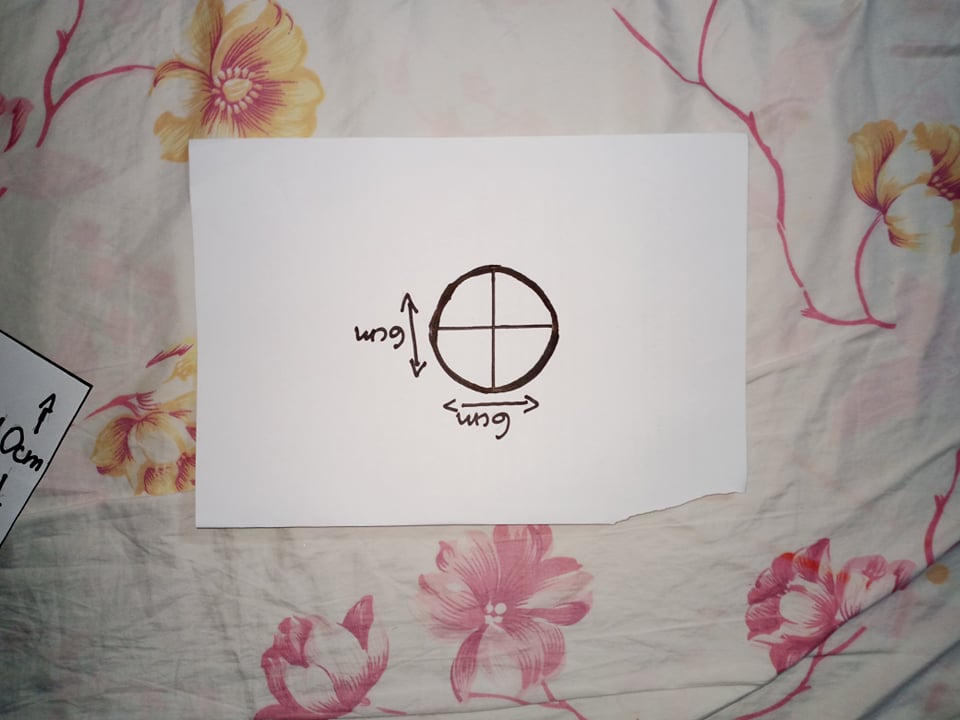
Y a parte también dibujé dos círculos que serán la bolita del gorro. Este es de 6cm x 6cm, así:
For the base of the hat we will draw a rectangle with the following measures: 50cm long and 10cm wide.
And I also drew a circle that will be the ball of the hat. This is 6cm x 6cm, like this:
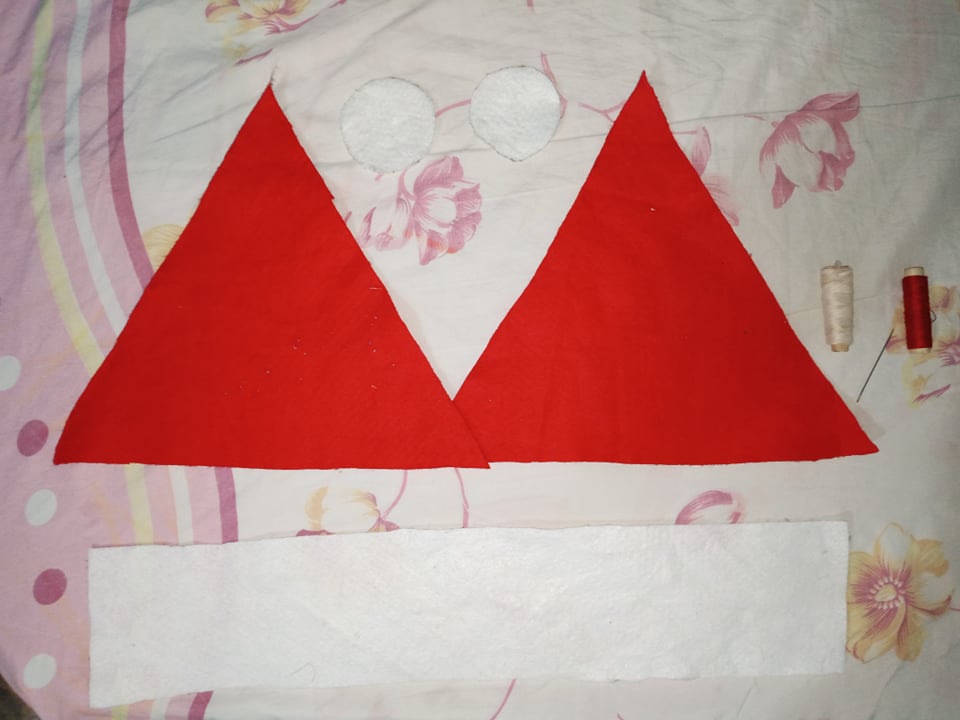
Ya que tenemos estos patrones listos, los usaremos como guía para la tela de fieltro. Entonces, sacaremos dos triángulos en fieltro rojo, un rectángulo y un círculo en fieltro blanco.
Now that we have these patterns ready, we will use them as a guide for the felted fabric. Then, we will draw two triangles in red felt, one rectangle and two circles in white felt.
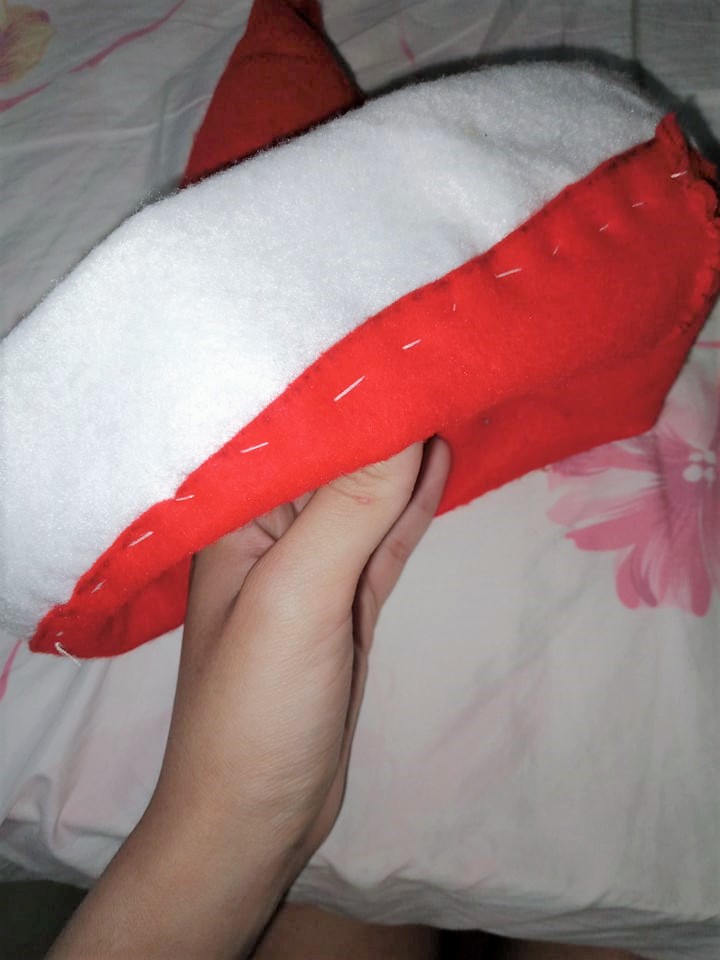
Después, tomamos aguja e hilo y uniremos los dos triángulos. Y para la base, vamos a doblar el rectángulo a la mitad y cosemos el borde. Mientras que los círculos los coseremos dejando un espacio para poder rellenarlo por dentro.
Next, we take needle and thread and join the two triangles together. And for the base, we will fold the rectangle in half and sew the edge. While the circles we will sew them leaving a space to be able to fill it inside.
Ahora, uniremos la base. Y cuando esté listo, lo vamos a voltear para esconder la costura y que está quedé por dentro.
El círculo, lo vamos a rellenar con el fieltro que nos sobre cuando recortamos los patrones, y luego lo terminamos de coser y cerrar para que quede una bolita de tela.
Now, we will join the base. And when it is ready, we are going to flip it over to hide the seam so that it is on the inside.
The circle, we will fill it with the felt that we have left over when we cut out the patterns, and then we will finish sewing it and close it so that it remains a little ball of fabric.
Finalmente unimos la bolita con el cono, yo utilicé silicón en barra, y lo reforce con aguja e hilo.
Finally we join the ball with the cone, I used silicone stick, and reinforce it with needle and thread.

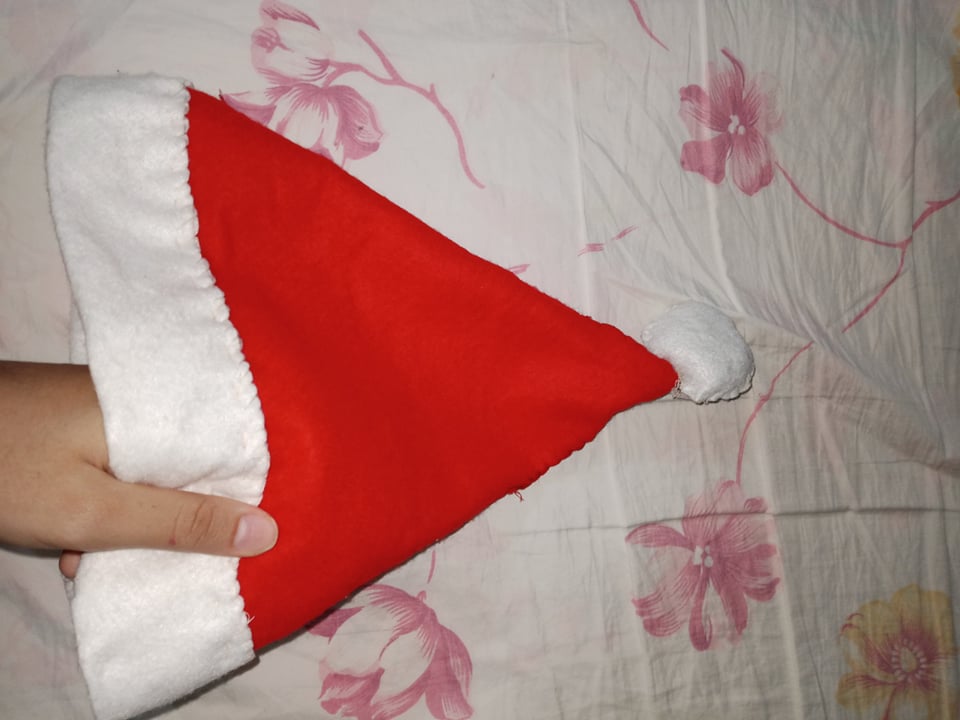
Amigos, estas medidas son específicas para un niño. Esto es una manualidad divertida para hacer entre familia y aprovechando la época navideña se lo podemos obsequiar a alguien, o lo podemos utilizar como adorno en nuestros hogares. Así es como me quedó amigos:
Friends, these measurements are specific for a child. This is a fun craft to do with the family and taking advantage of the Christmas season we can give it as a gift to someone, or we can use it as an ornament in our homes. This is how it looked to my friends

Espero les haya gustado, muchas gracias amigos.
I hope you liked it, thank you very much friends.
Las imágenes son de mi propiedad. Traducido en www.deepl.com
The images are my property. Translated at www.deepl.com