Hola mis colegas de hive y a la comunidad! Buen día, hoy quise hacer una manualidad de flores que quiero compartir con ustedes el paso a paso de como las realicé. En está ocasión son 2 manualidades en 1, la primera serán la realización de las flores, y la segunda será... (Eso deben esperarlo en el siguiente blog que será la continuación de éste, lo siento). Sin más que decir empecemos por los materiales.
Hello my colleagues from Hive and the community! Good day, today I wanted to make a craft of flowers that I want to share with you the step by step as I realized them. On this occasion there are 2 crafts in 1, the first will be the realization of the flowers, and the second will be ... (that should wait for it in the next blog that will be the continuation of this one, I'm sorry). No more to say, start with the materials.

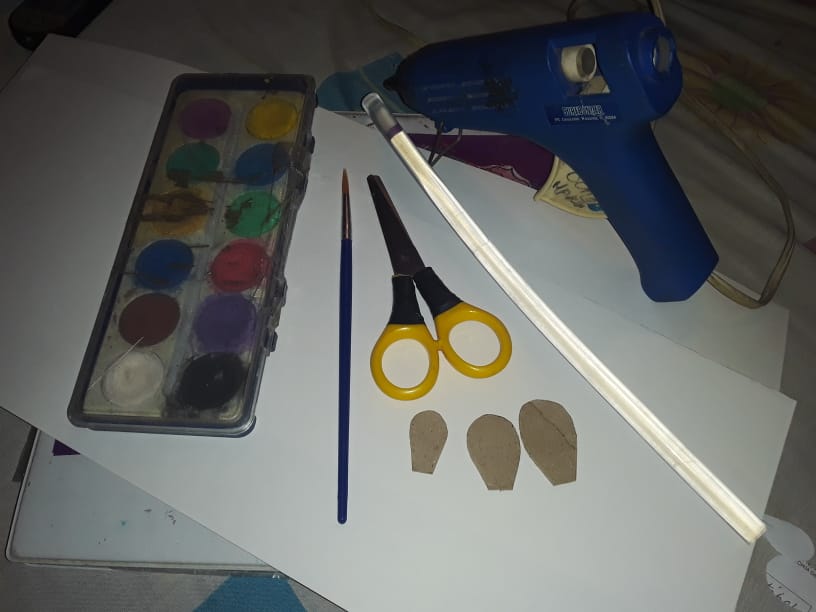
Para hacer las flores se utilizaron los siguientes materiales:
To make the flowers the following materials were used:
- Silicón en barra. / Silicon in bar
- Tijera. / Scissors
- Lápiz. / Pencil
- Pincel. / Brush
- Pintura. (Del color que prefieran) / Painting. (Of the color you prefer)
- Cartulina. / Cardboard
Nota: En está manualidad se utilizó cartulina blanca y se pintó color a gusto porque no se tenía cartulina de color, si ustedes quieren, pueden hacerlo de igual manera o lo hacen con cartulina del color que más les guste.
Note: In this craft, white cardboard was used and color was painted to taste because there was no colored cardboard, if you want, you can do it the same way or do it with cardboard of the color that you like the most.
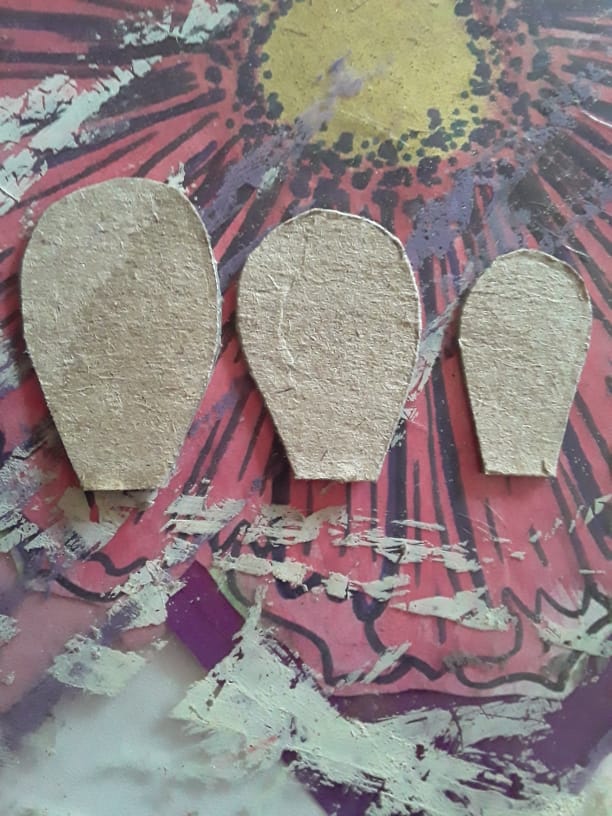
Paso 1: Patrones. / Step 1: Patterns.
Se dibujó 3 pétalos en una cartulina resistente para usarlos de patrón se hicieron pequeños porque las flores que se querían son pequeñas, es uno de tamaño pequeño, uno mediano y uno más grande como se ve en la imagen.
3 petals were drawn on a resistant cardboard to use them as a pattern, they were made small because the flowers that were wanted are small, it is a small size, a medium size and a larger one as seen in the image.
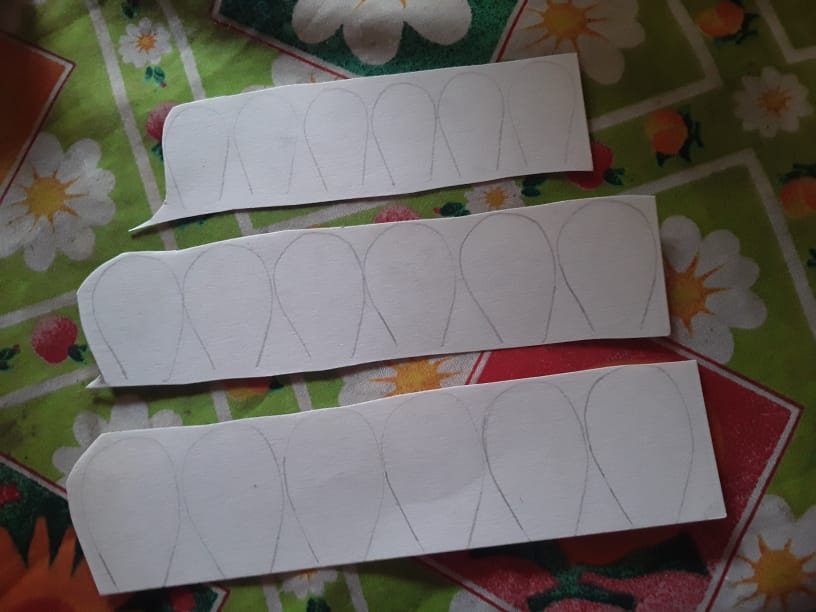
Paso 2: / Step 2:
Luego de cada patrón saque 6 pétalos.
After each pattern remove 6 petals.
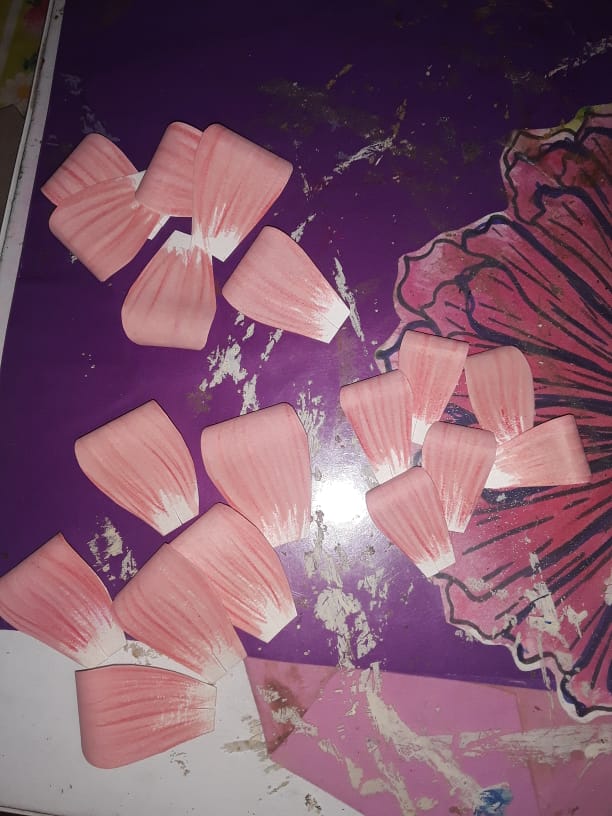
Paso 3: Pintura. / Step 3: Painting.
Se pintaron y se le hicieron detalles para que tuvieran parentezco con las reales.
They were painted and made details so that they had parentezco with the real ones.

Paso 4: Recorta y Dobla / Step 4: Trim and bend
Una vez que están secos se recortan con cuidado y se le hacen pequeños doblez en el borde de arriba para que tenga forma y sea una flor abierta.
Once they are dry, they are cut carefully and they are made small bend on the edge above so that it has shape and be an open flower.
Paso 5: Pega. / Step 5: Paste.
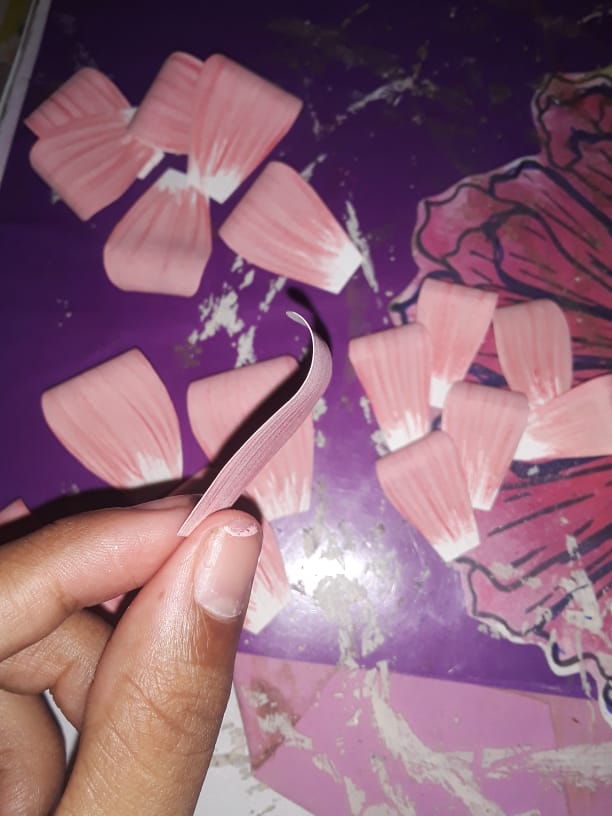
En el borde de abajo justo en el centro del pétalo se le hace un pequeño piquete y luego se pega con el silicón de manera que nos quede como se ve en la imagen.
On the edge below right in the center of the petal is made a small picket and then sticks with the silicone so that it is as seen in the image.
Paso 6: Armado. / Step 6: Armed.
Una vez se hace esto, se va armando la flor, se pega primero todos los pétalos grandes, se continúa con los medianos y luego los pequeños como está en la imagen.
Once this is done, the flower is putting together, all the large petals are pasted first, the little ones are continued and then the little ones as it is in the image.
Paso 7:
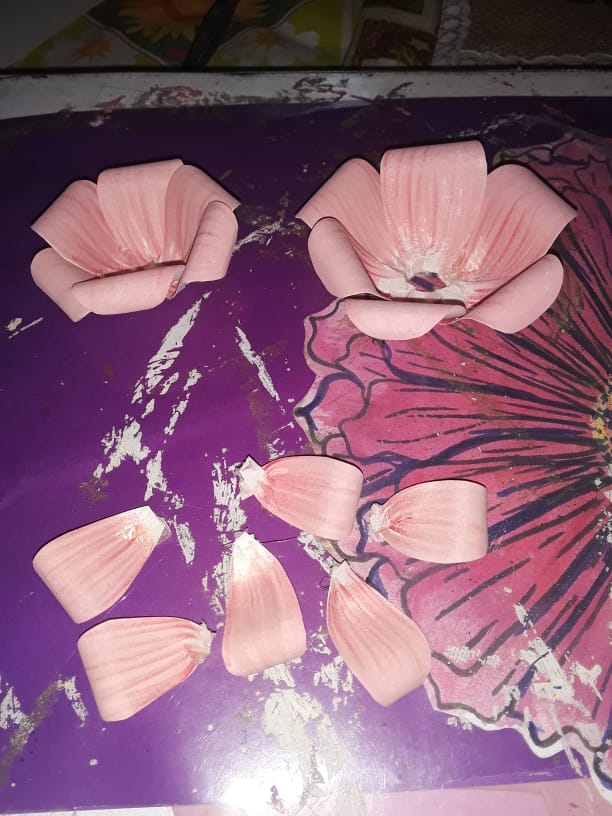
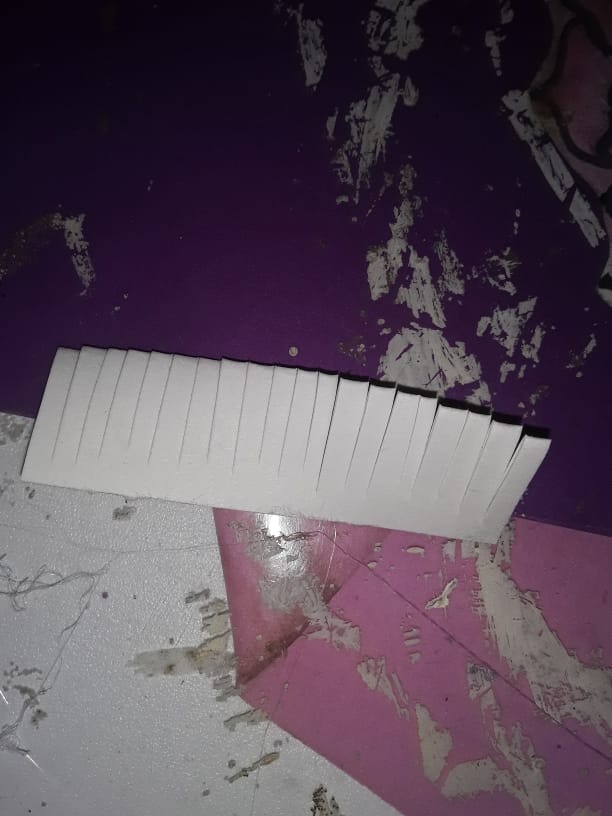
Mientras se pegan bien, para el centro de la flor se va a recortar un pequeño rectángulo en la cartulina en el que se va a doblar a la mitad y se harán pequeños piquetes del lado del doblez, asi como se ve en la imagen.
While they stick well, for the center of the flower a small rectangle will be cut out of the cardboard in which it will be folded in half and small notches will be made on the side of the fold, as seen in the image.
Paso 8: Final. / Step 8: Final.
Una vez terminado de hacer los piquetes se enrrollan y se pegan bien para que no se vaya a soltar, luego para finalizar se pega el circulo de pétalos medianos dentro de los grandes y los pequeños dentro de los medianos. Se pega el centro hecho anteriormente y quedará listo! Se verá así:
Once finished making the pickets they are rolled up and glued well so that they do not come loose, then to finish the circle of medium petals is glued within the large ones and the small ones within the medium ones. Stick the center made previously and it will be ready! It will look like this:
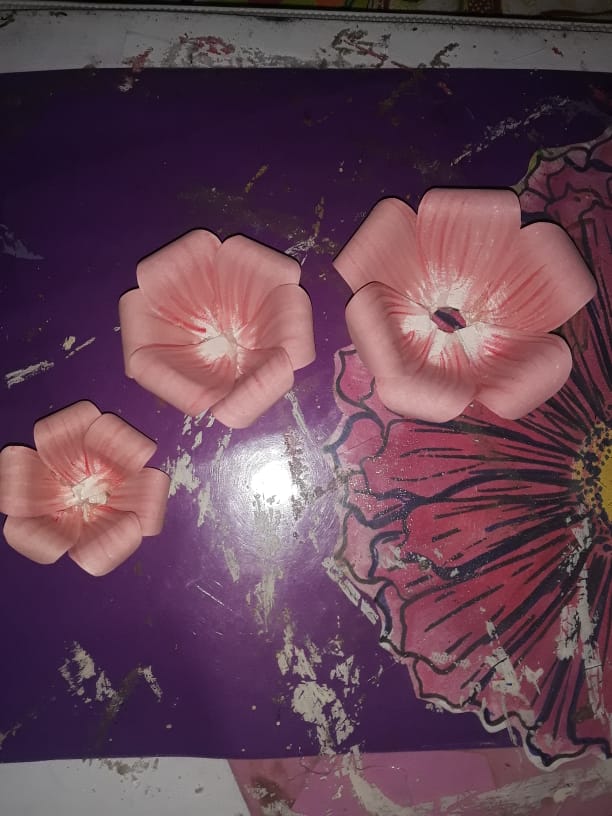
Nota: Espero les haya gustado como quedo, muy pronto sabrán que voy a hacer con esas flores y quizá se animen a hacerlo ustedes, también se pueden hacer esas flores para decorar un cuarto, un regalo, una fiesta de niña, todo es cuestión de creatividad amigos, si quieren hacerlas más grandes pueden sacar sus pétalos más grandes.
Note: I hope you liked how I look, very soon you will know what I am going to do with those flowers and maybe you will dare to do it, you can also make those flowers to decorate a room, a gift, a party of girl, it's all about creativity folks, if you want to make them bigger you can take out their bigger petals.
Thank you for sharing this amazing post on HIVE!
non-profit curation initiative!Your content got selected by our fellow curator @ashikstd & you just received a little thank you via an upvote from our
You will be featured in one of our recurring curation compilations and on our pinterest boards! Both are aiming to offer you a stage to widen your audience within and outside of the DIY scene of hive.
Join the official DIYHub community on HIVE and show us more of your amazing work and feel free to connect with us and other DIYers via our discord server: https://discord.gg/mY5uCfQ !
If you want to support our goal to motivate other DIY/art/music/homesteading/... creators just delegate to us and earn 100% of your curation rewards!
Stay creative & hive on!