Hola queridos amigos de Hive! Como están? Espero que muy bien. Yo estoy bien gracias a Dios! Hace ya mucho tiempo que no venía a compartir con tus ustedes, pero hoy estoy de vuelta. Les traigo un hermoso porta lápices que se puede colgar en la pared y decora un espacio en nuestras paredes. Vamos a ver el tutorial!
Hello dear friends of Hive! How are they? I hope that very good. I'm fine thank God! It's been a long time since I came to share with you, but today I'm back. I bring you a beautiful pencil holder that can be hung on the wall and decorates a space on our walls. Let's see the tutorial!
Materiales // Materials
Cartulina y foami
Par de tijeras
Silicon líquido o en barra
Pistola de silicona
Lápiz y regla
Envase vacío de cualquier tipo.
Cardboard and foam
Pair of scissors
Liquid or stick silicone
Silicone gun
pencil and ruler
Empty container of any kind.
Turorial:
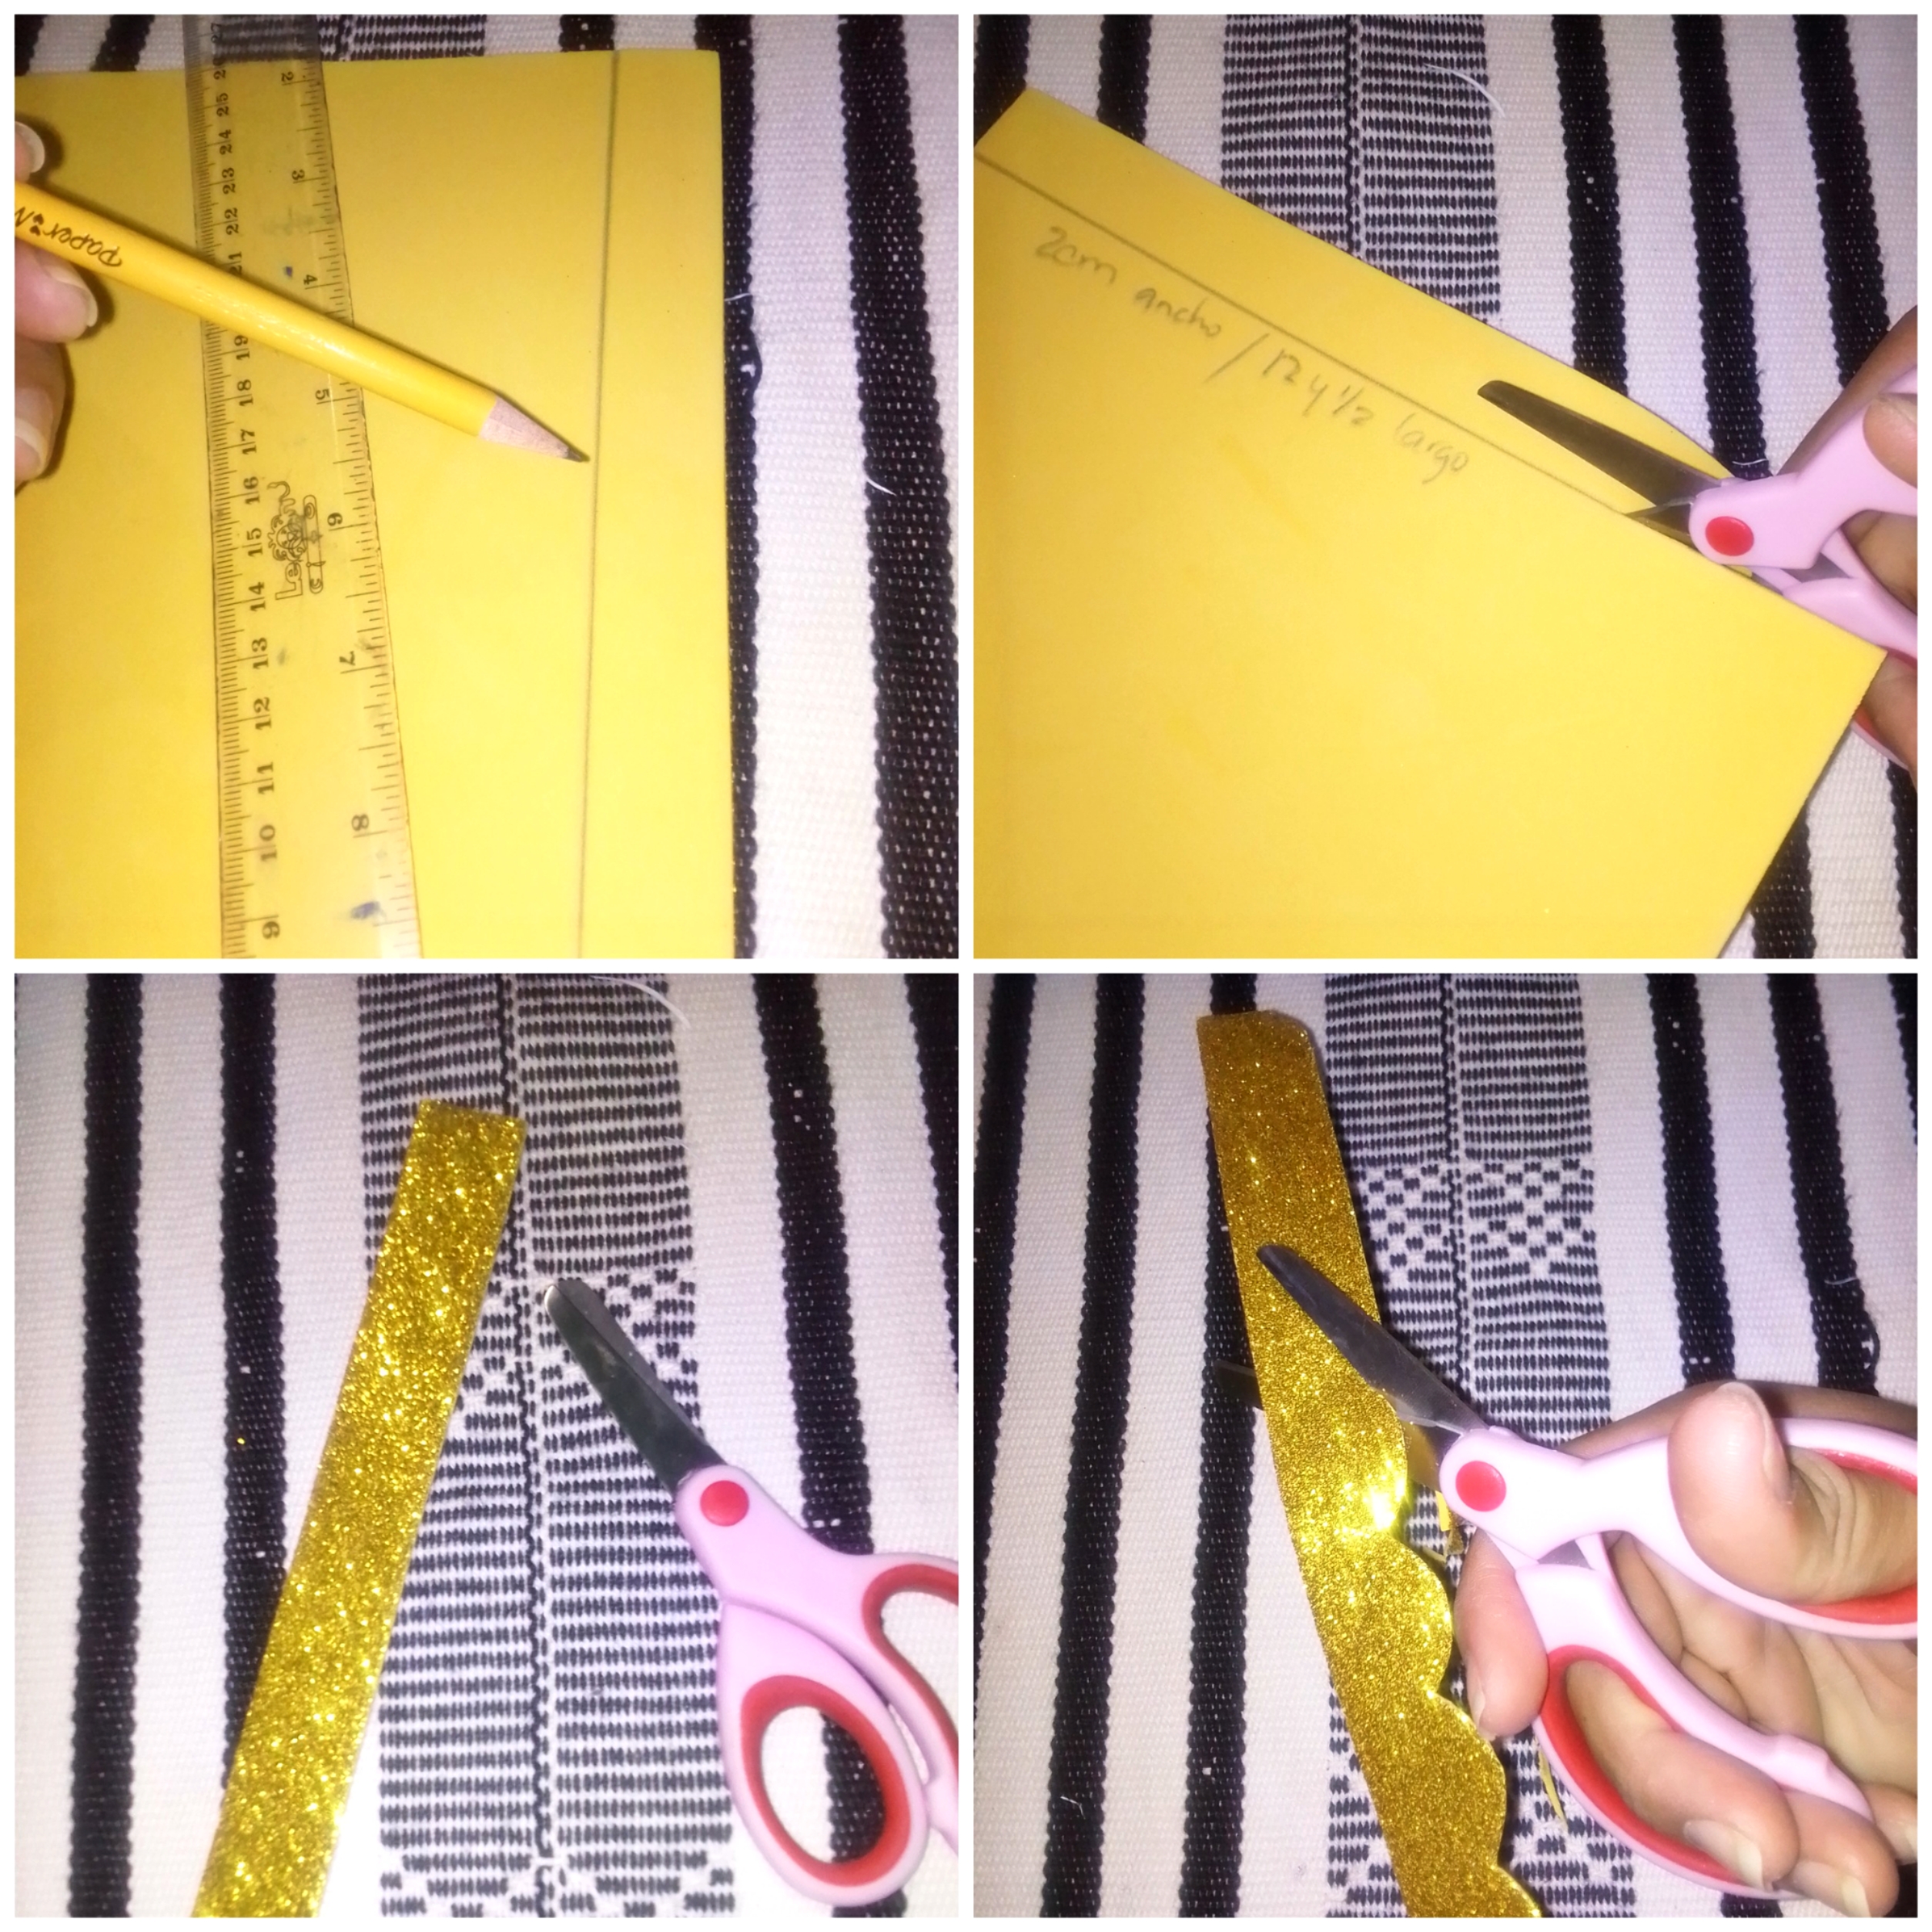
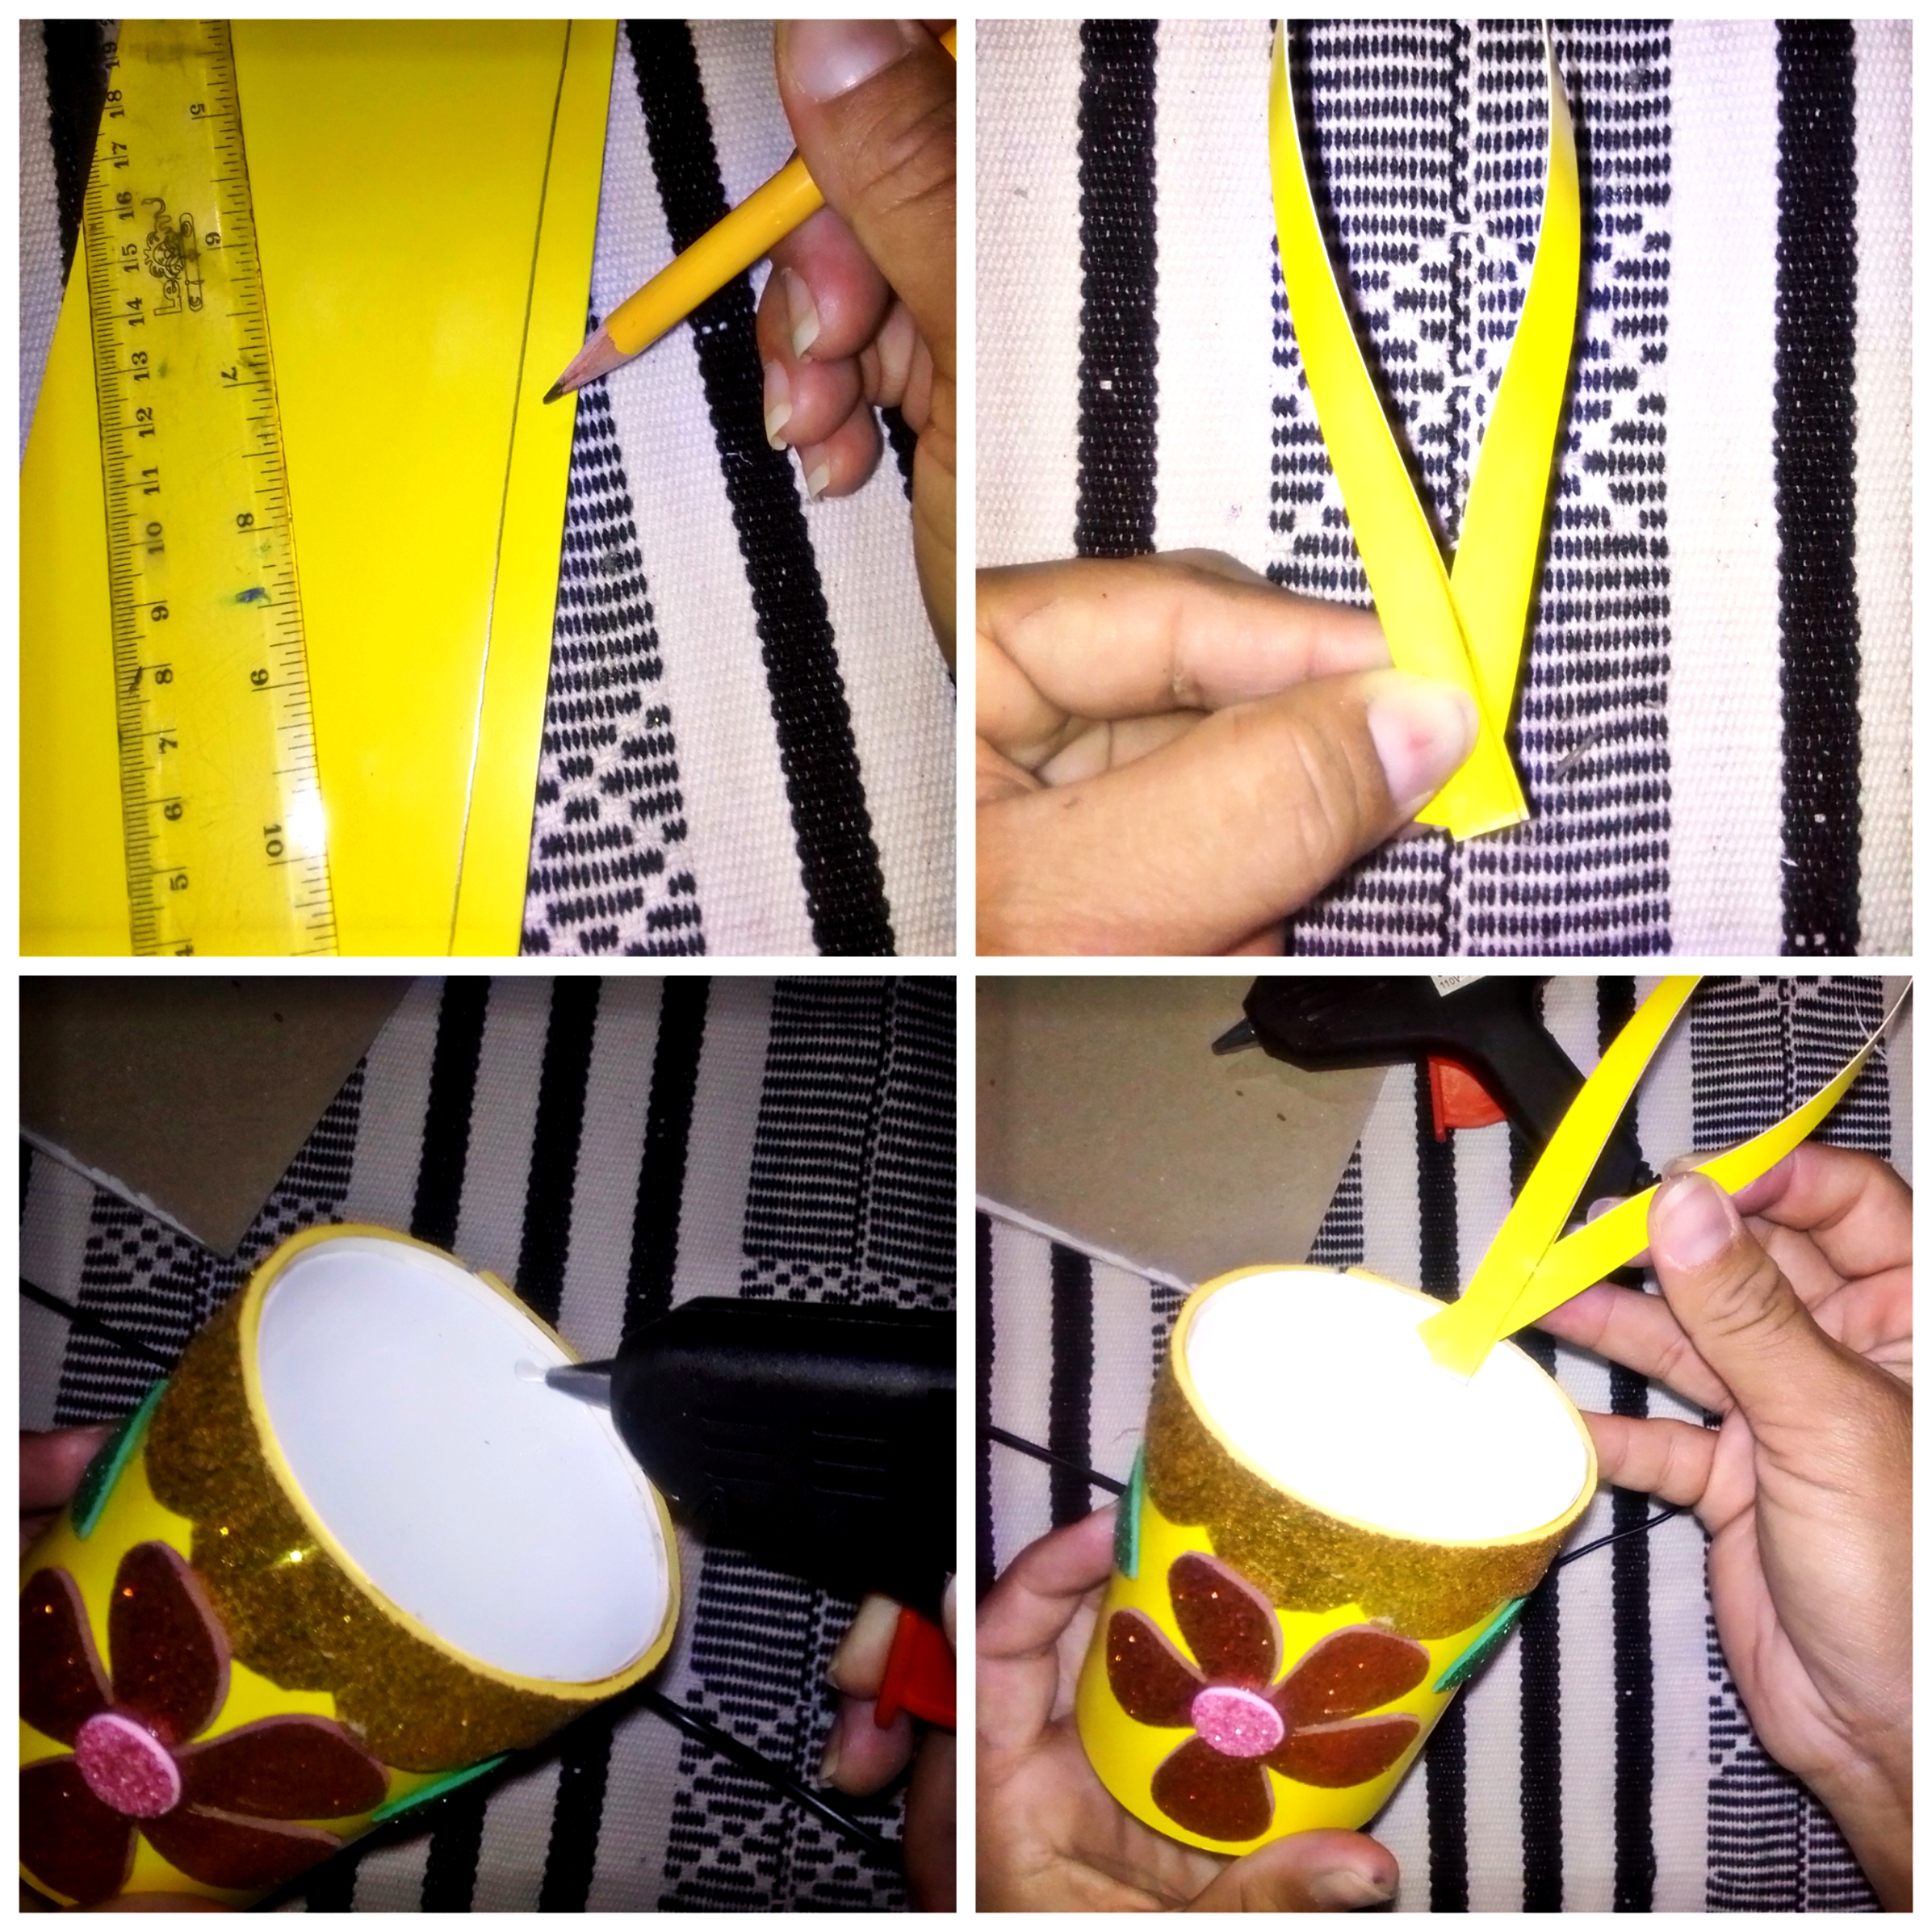
Paso 1: Marcamos con el lápiz la línea por donde vamos a recortar el envase. Luego medimos cuántos centímetros mide.
Step 1: We mark with the pencil the line where we are going to cut the container. Then we measure how many centimeters it is.
Paso 2: Los centímetros que tomamos del envase, lo vamos a marcar en la cartulina que va a forrar el envase. Y recortamos!
Step 2: We are going to mark the centimeters that we take from the container on the cardboard that is going to line the container. And we cut!
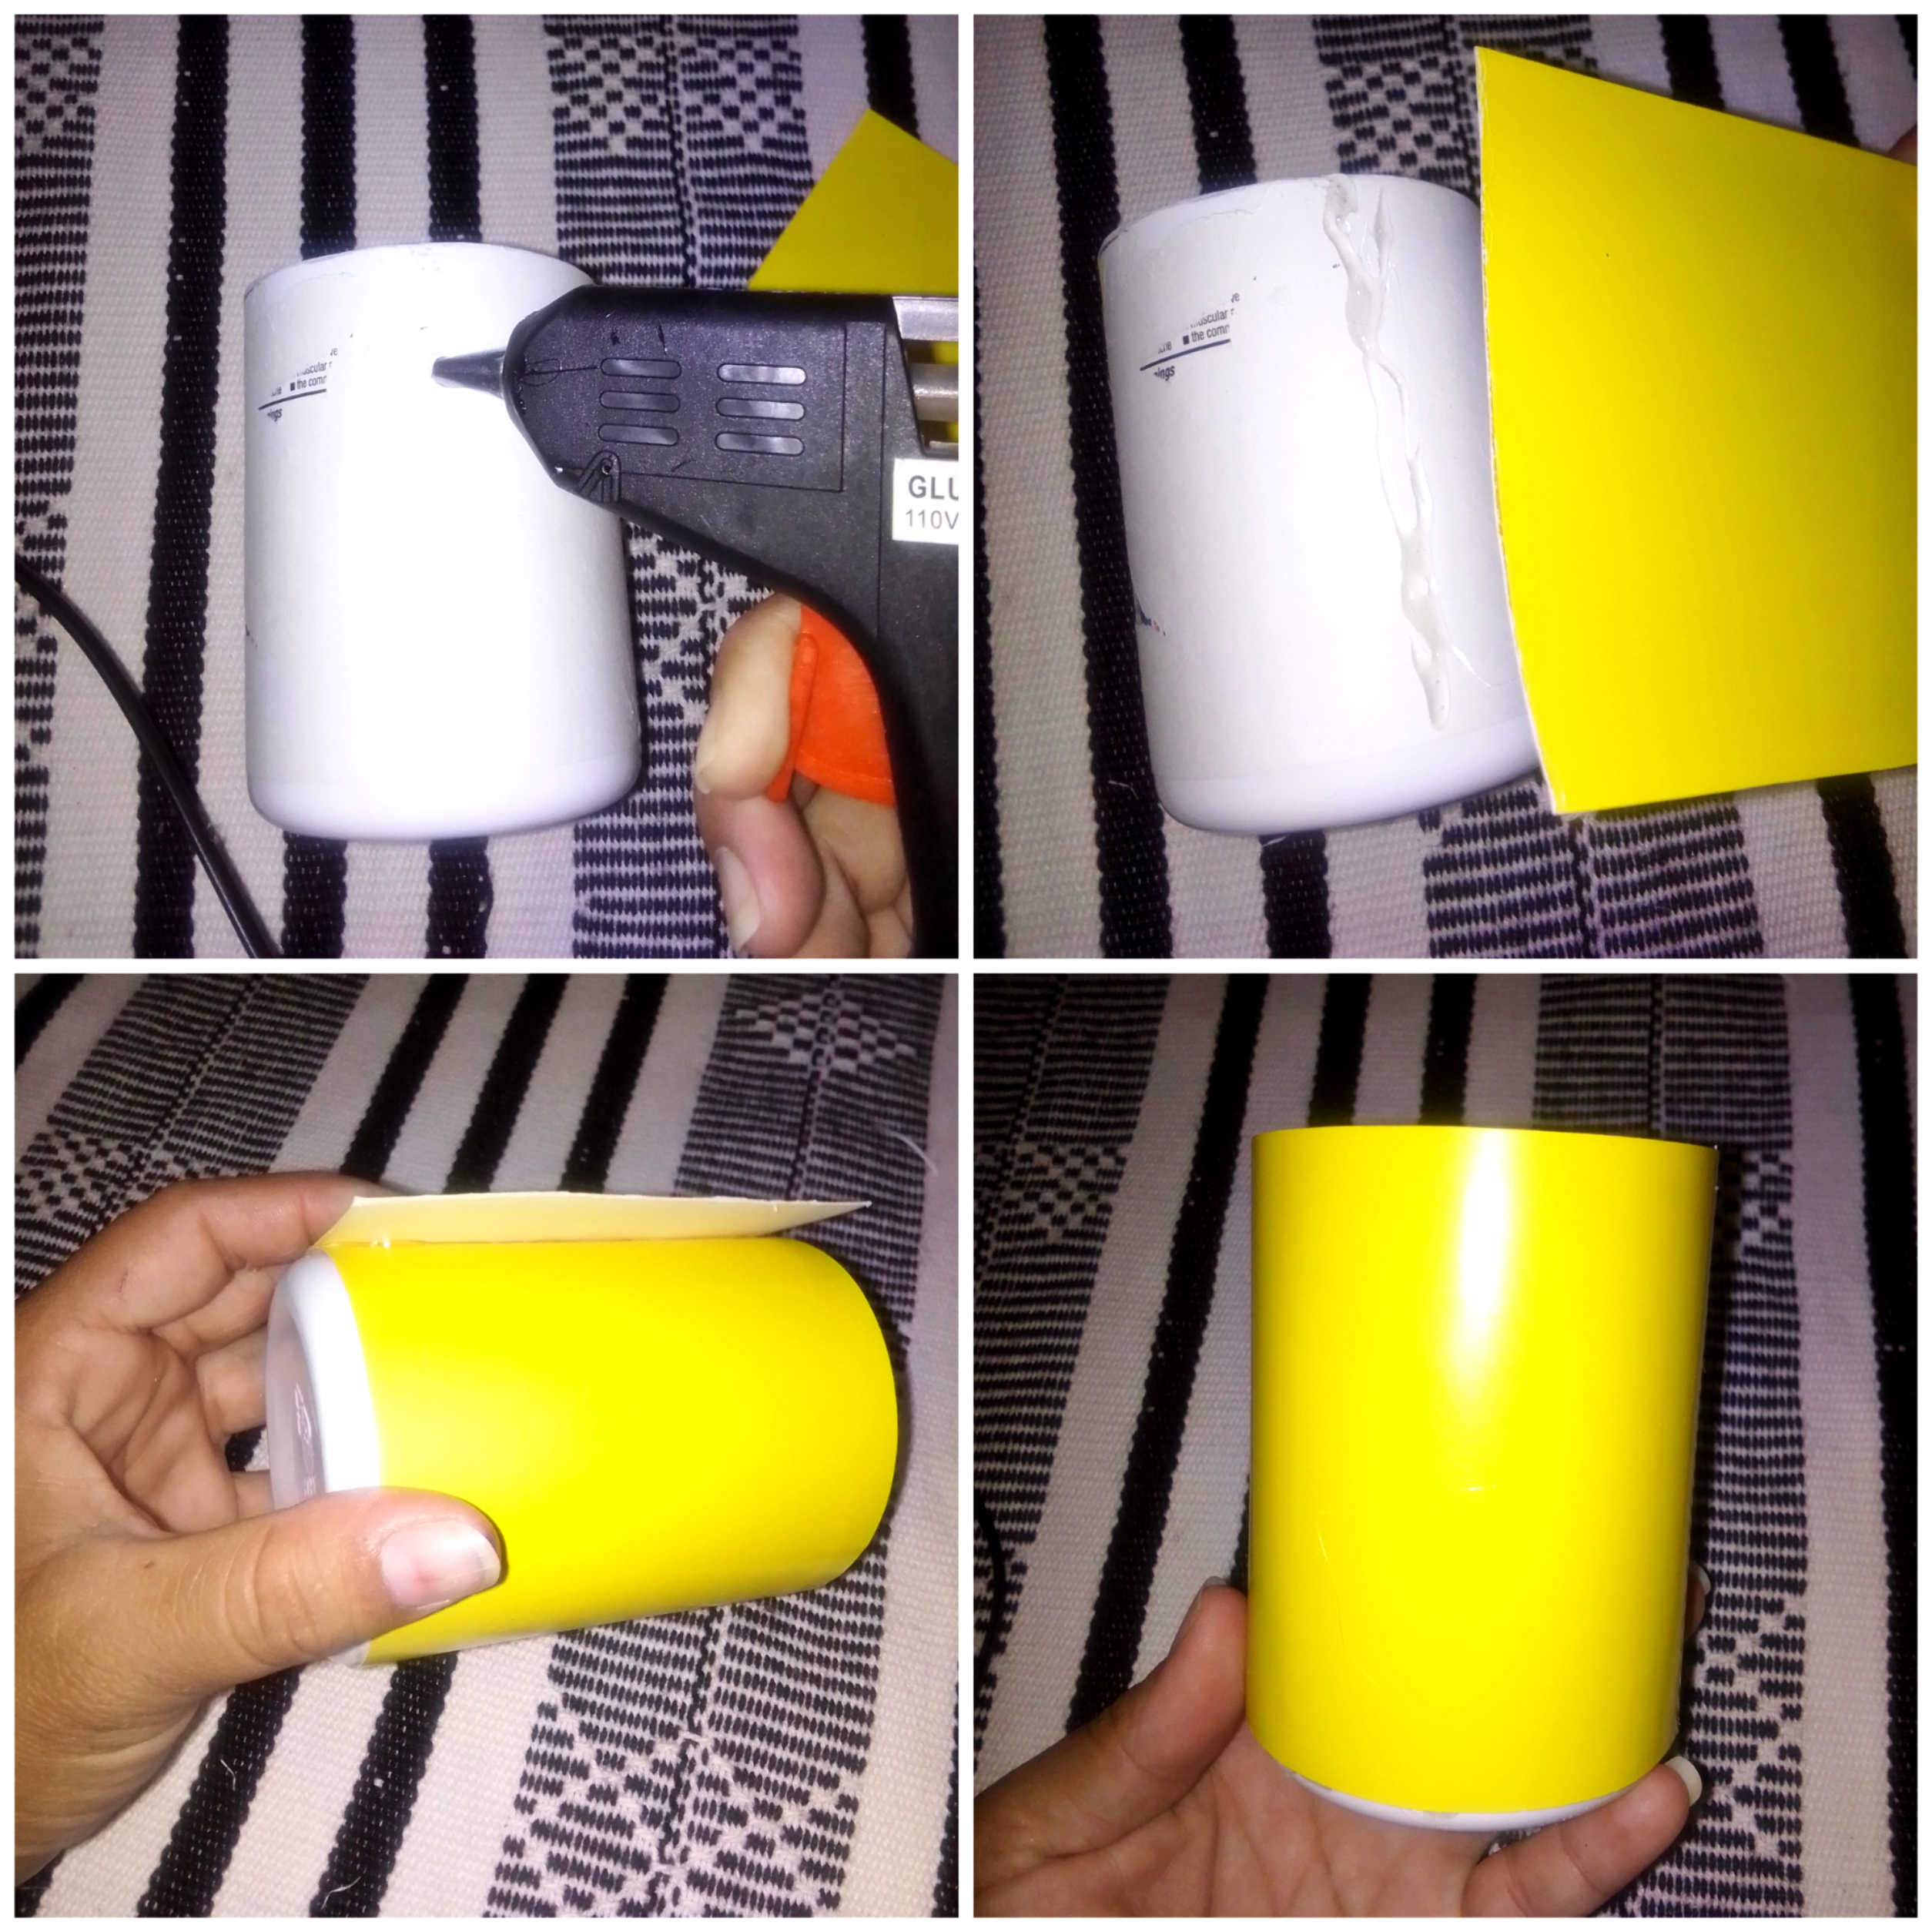
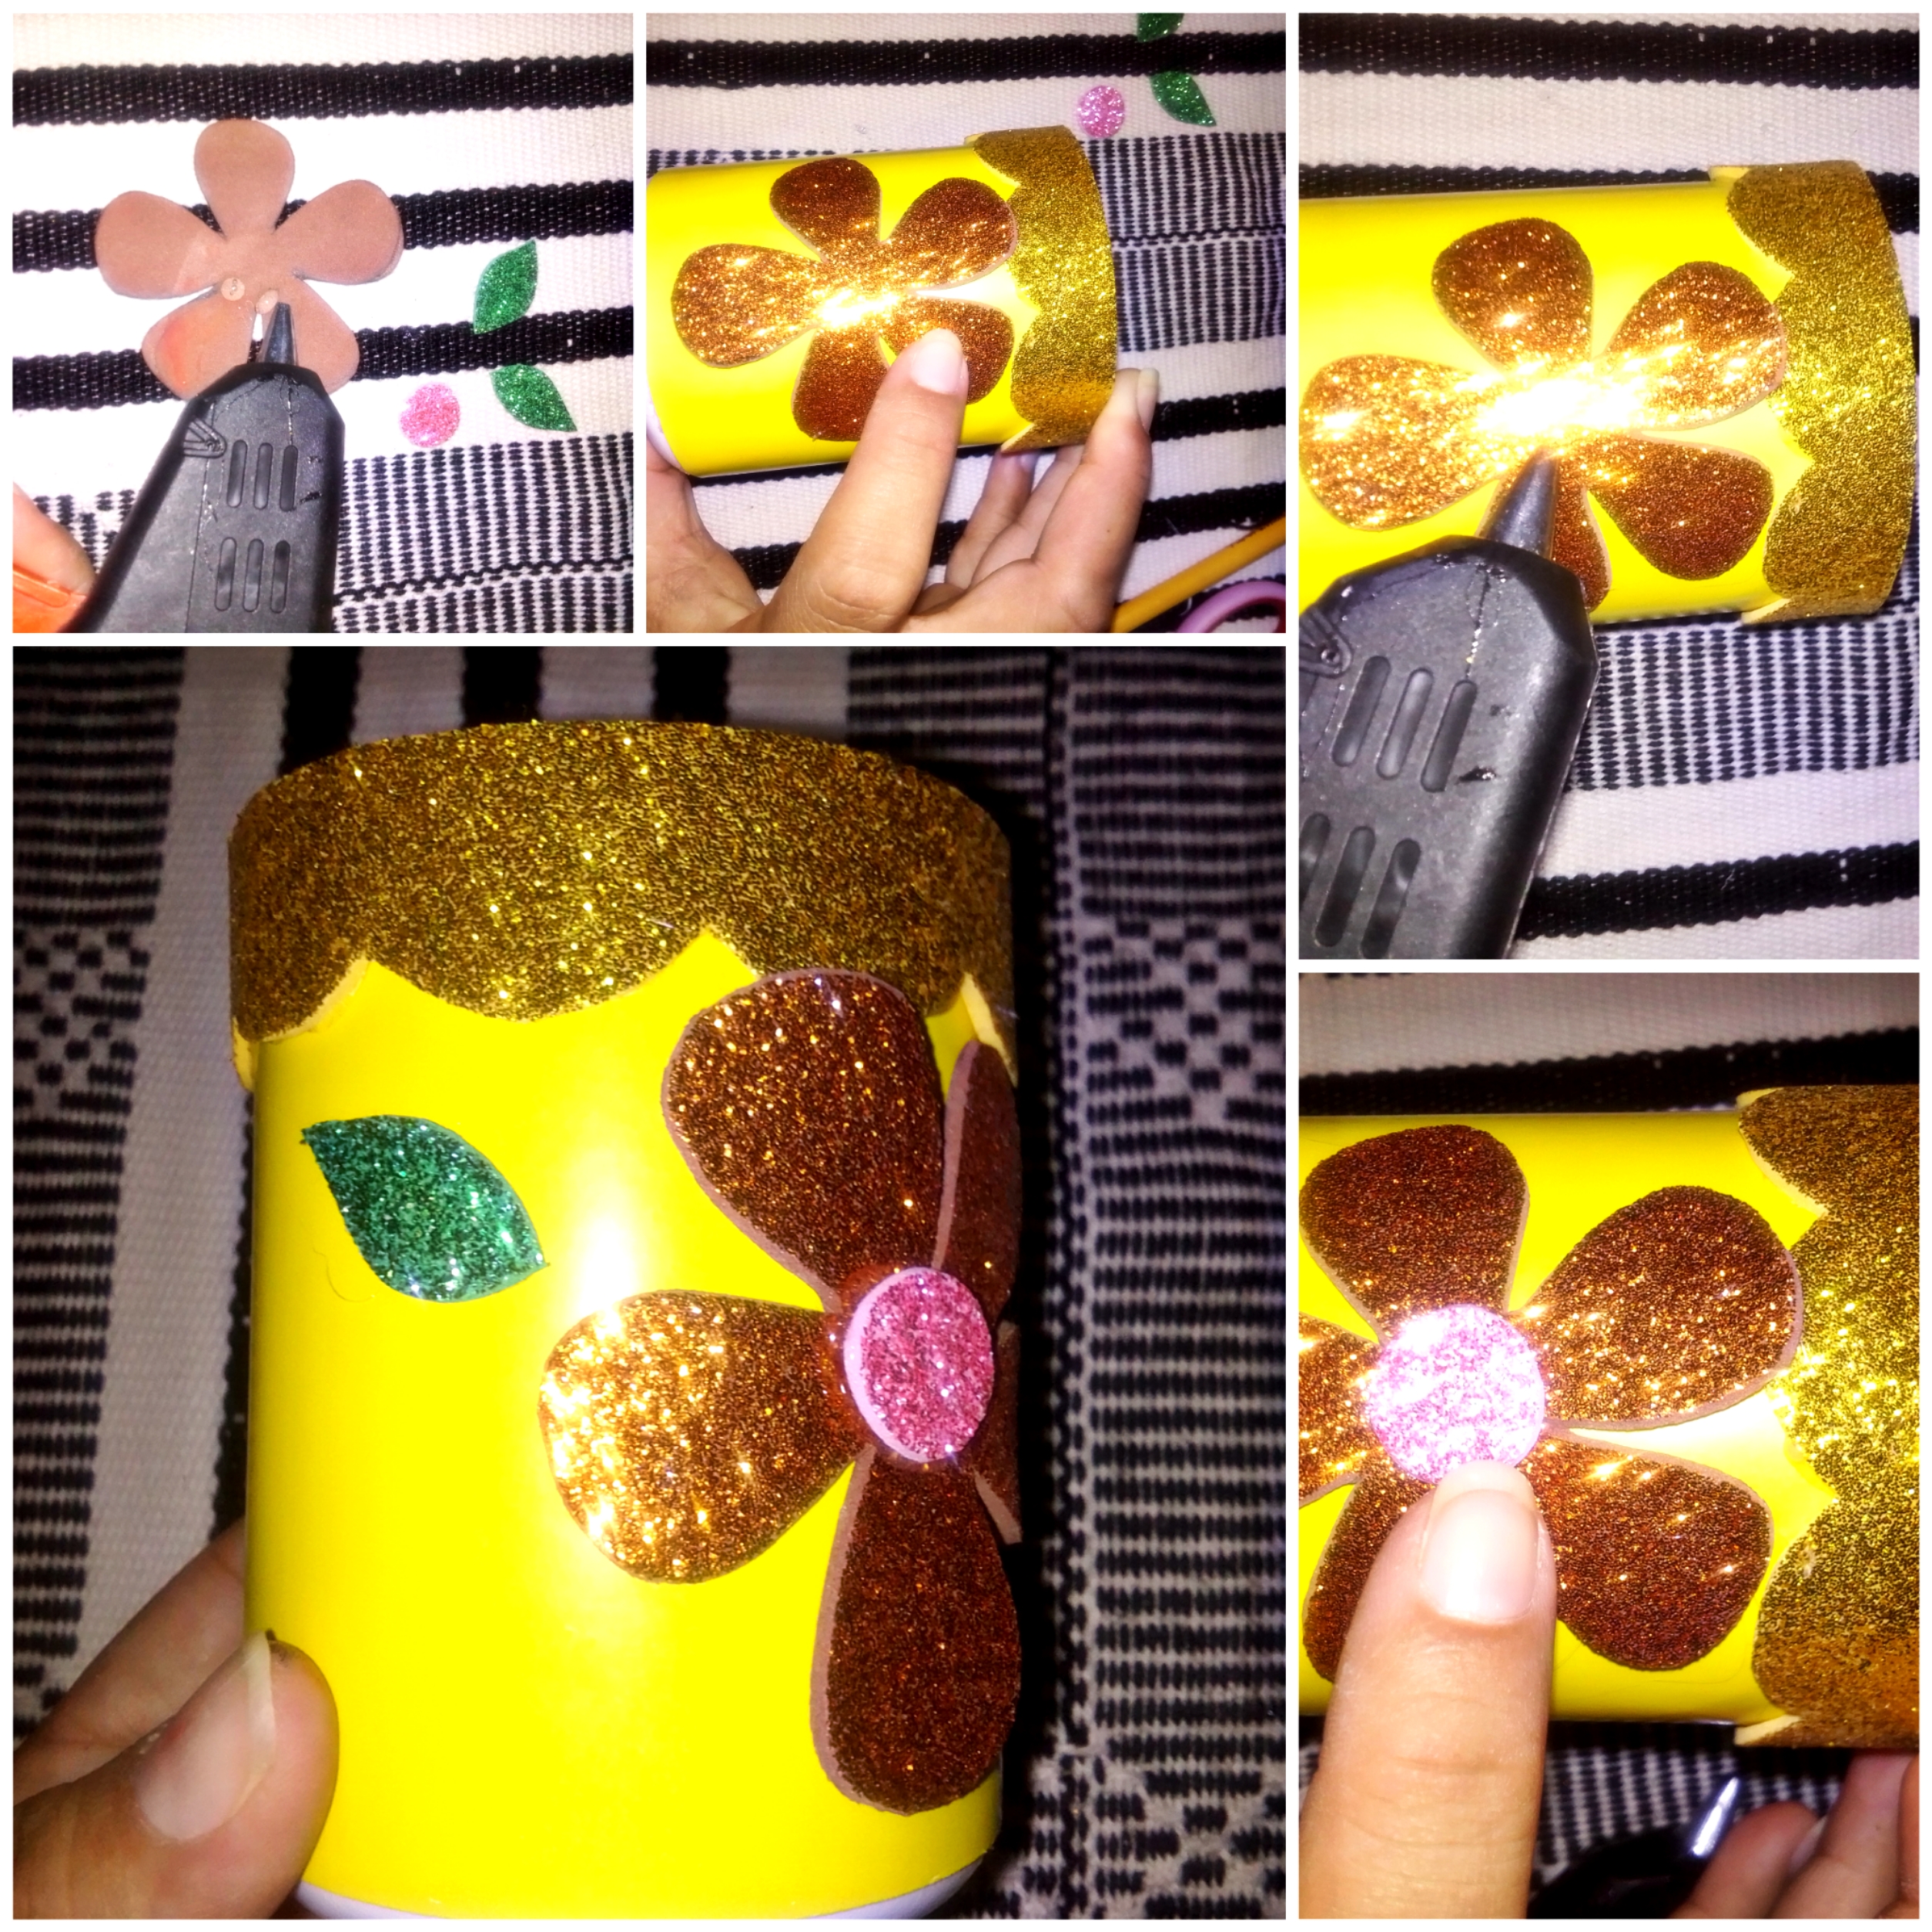
Paso 3: Ponemos Silicon a la mitad del envase y lo pegamos, así forramos por completo el porta lápices.
Step 3: We put Silicon in the middle of the container and glue it, thus completely lining the pencil holder.
Paso 4: Marcamos en un foami 2cm de ancho y 12cm de largo y recortamos.
Step 4: We mark on a foami 2cm wide and 12cm long and cut.
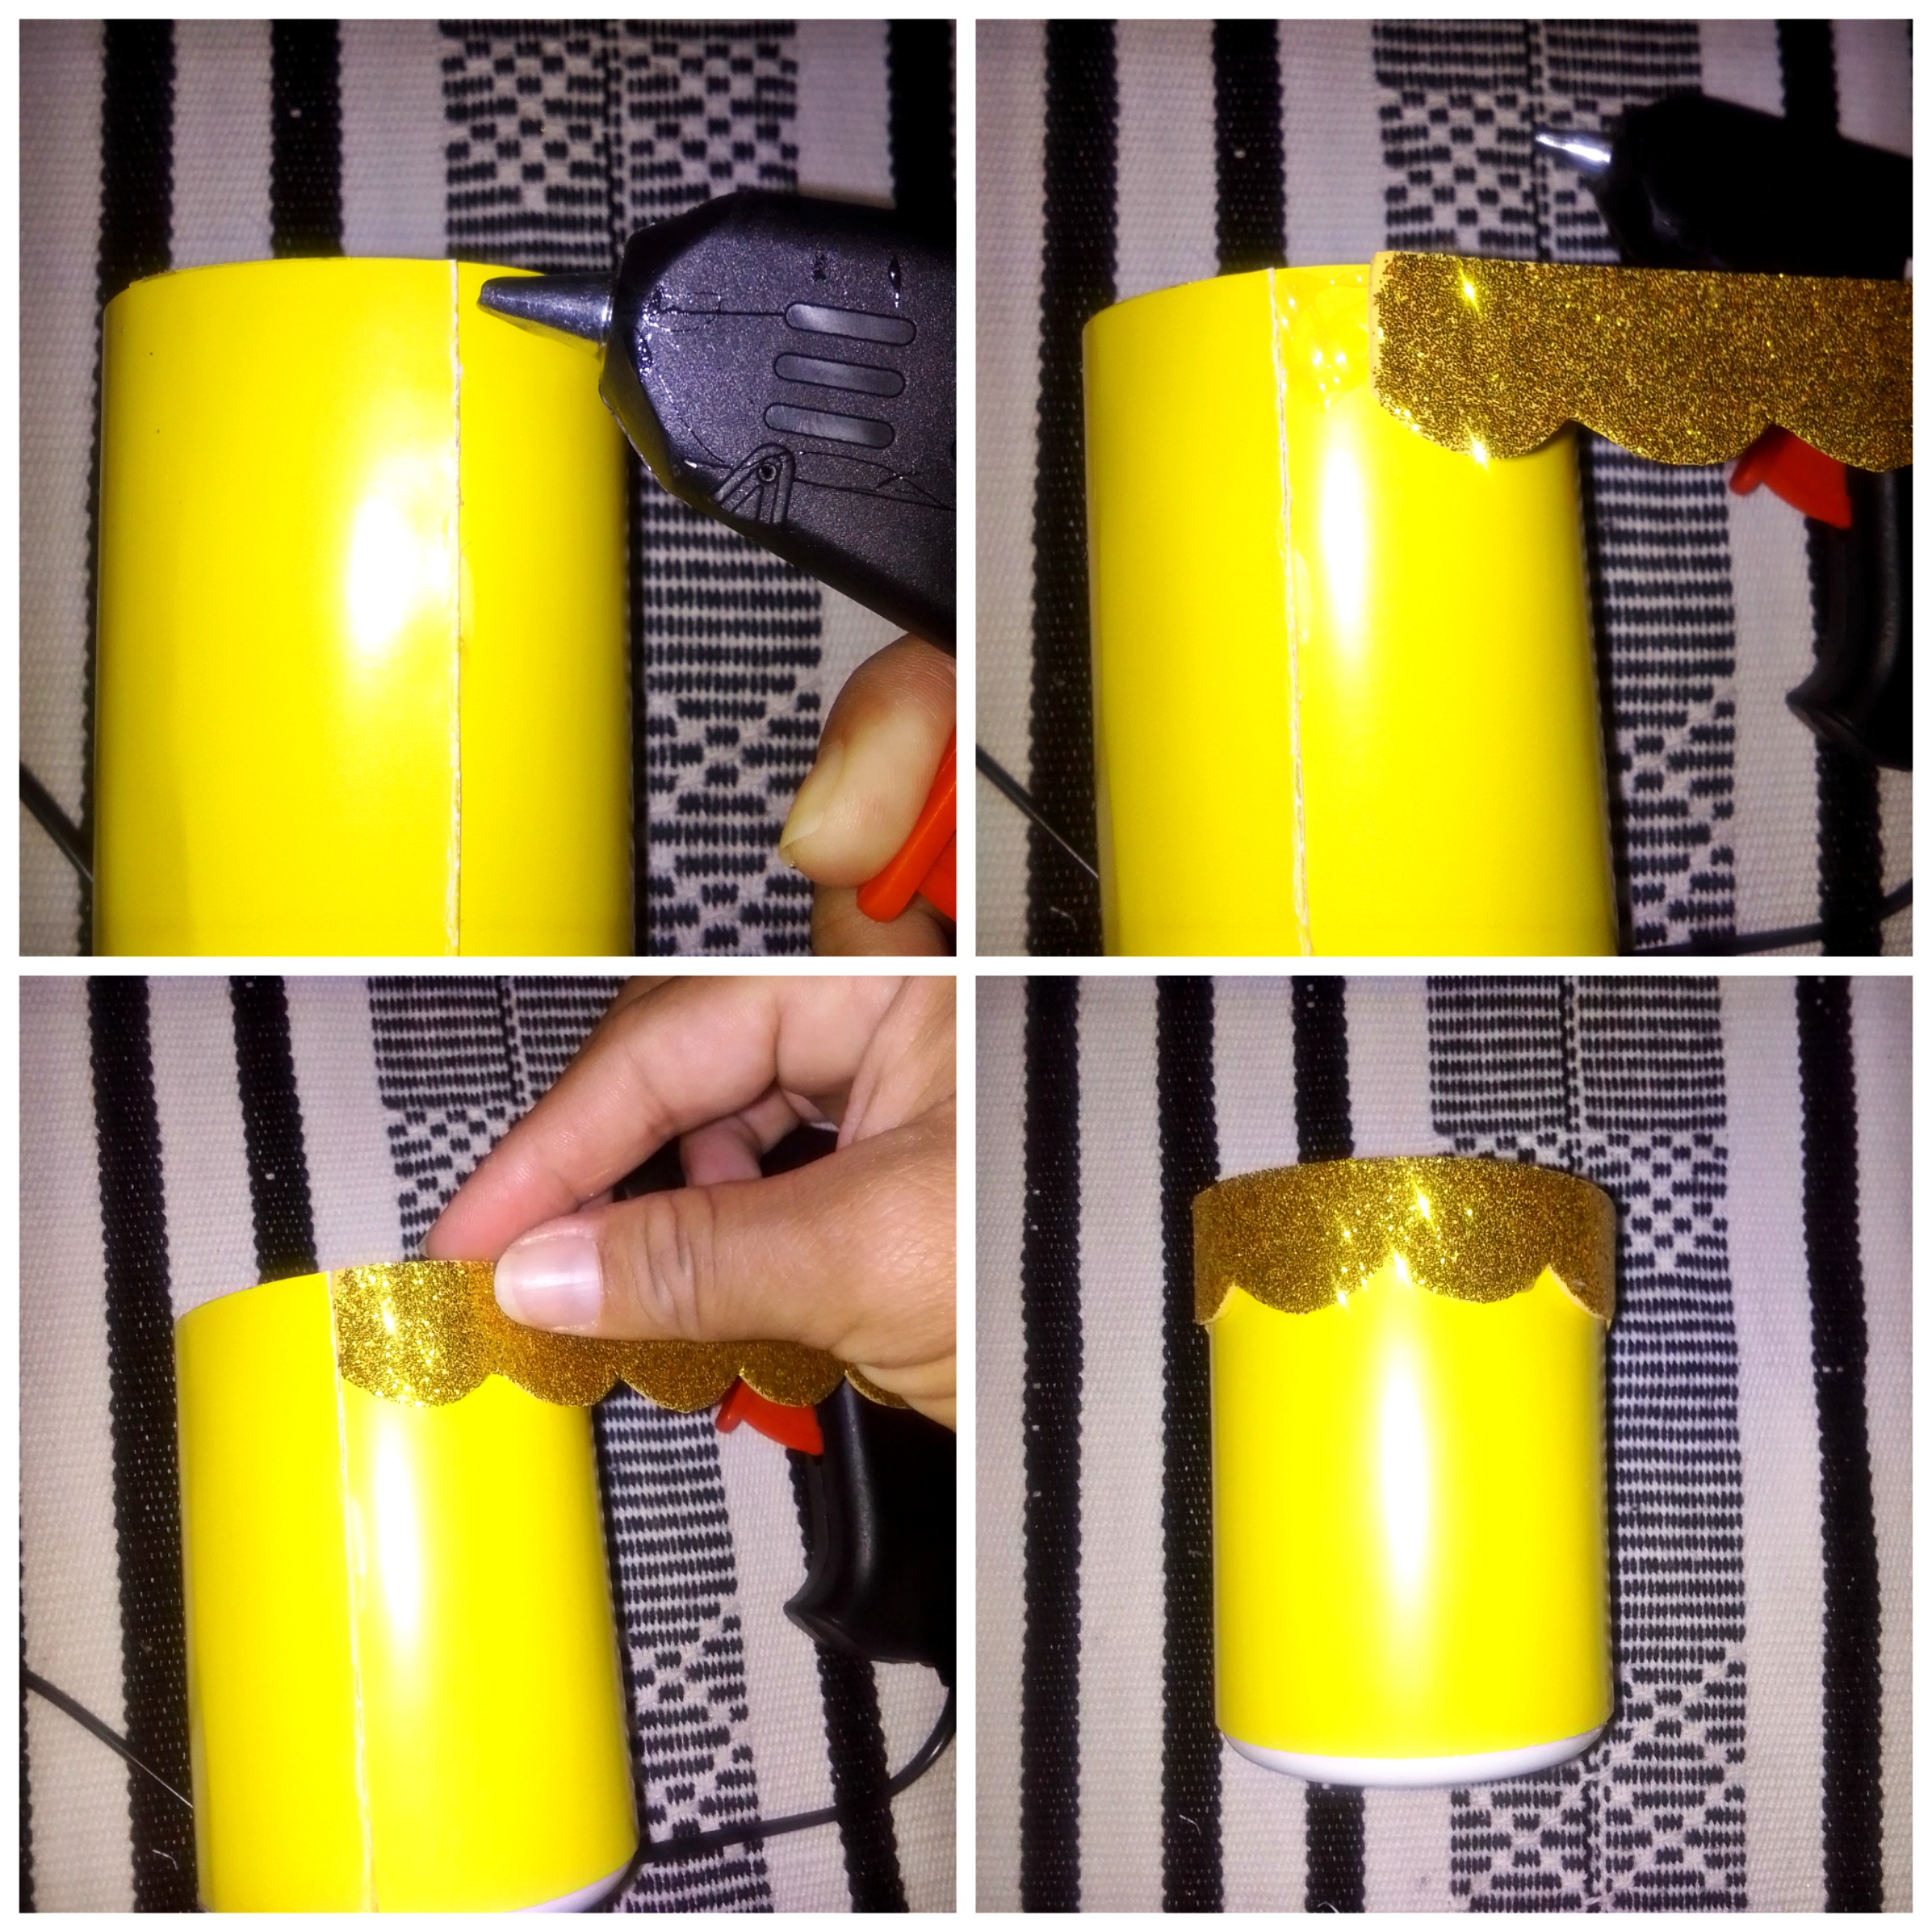
Paso 5: Pegamos el foami cortado por toda la orilla superior del porta lápices y así le da una decoración muy linda a nuestro trabajo.
Step 5: We paste the cut foami along the entire upper edge of the pencil holder and thus it gives a very nice decoration to our work.
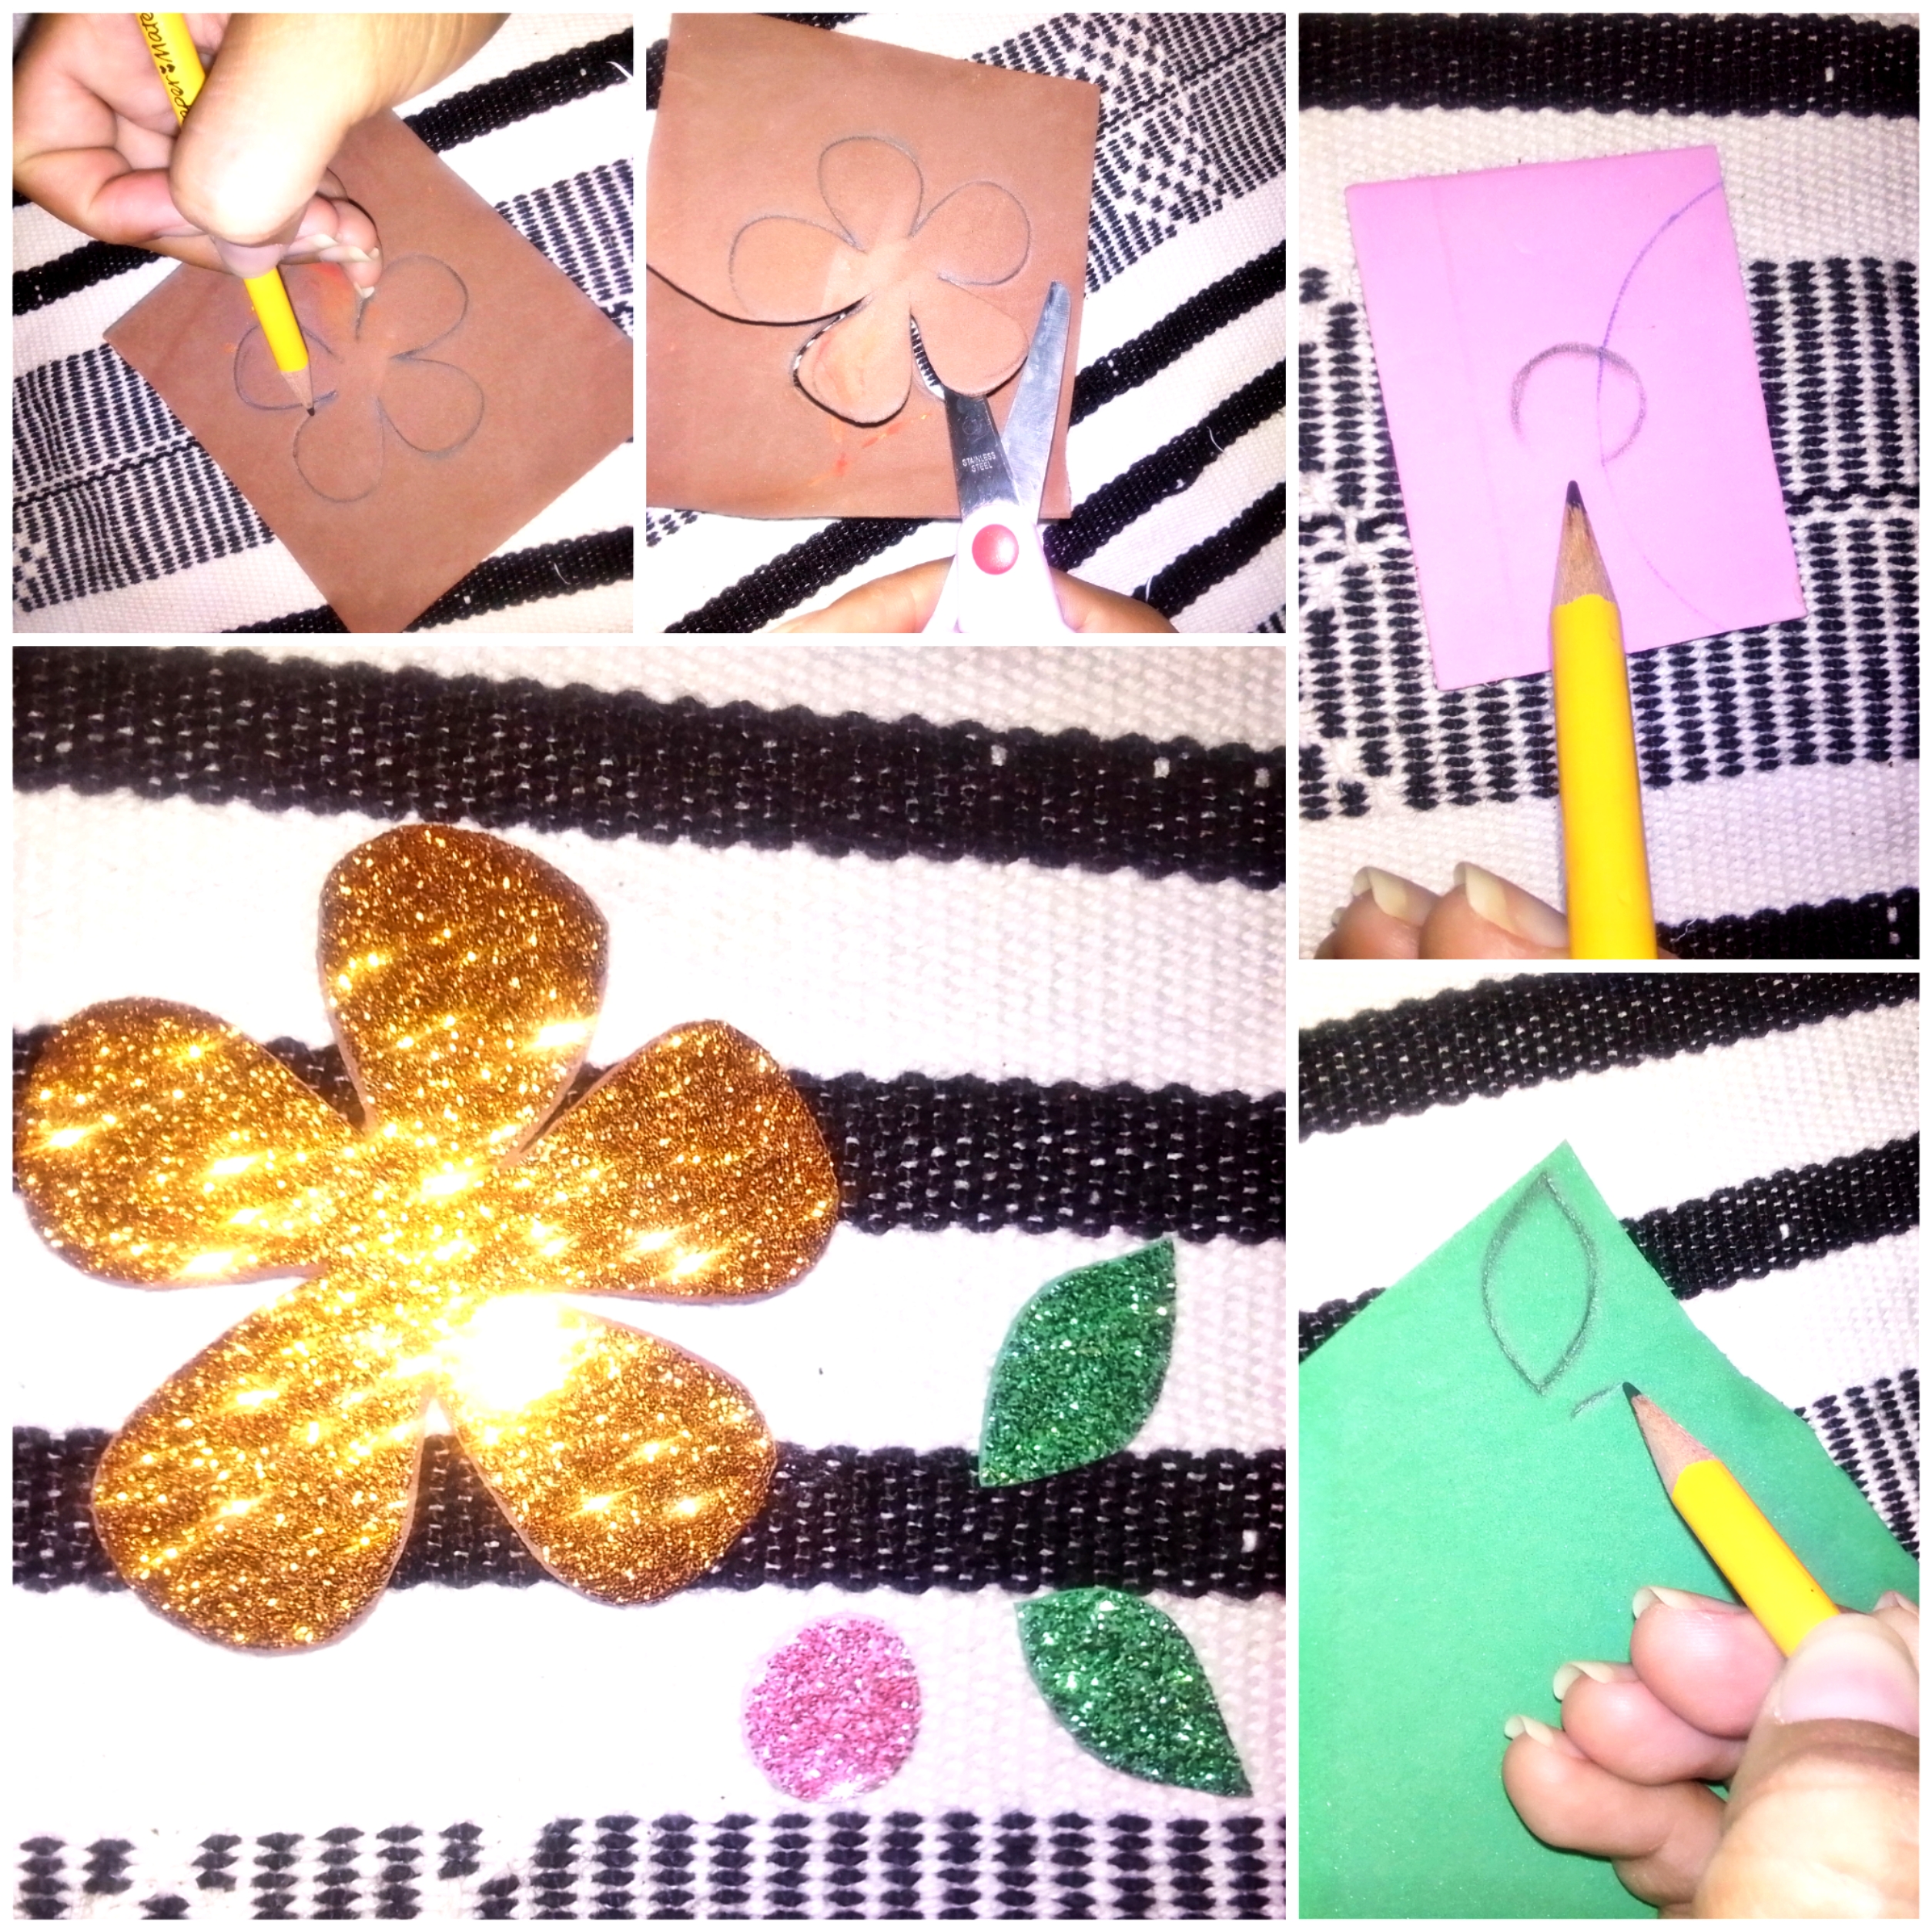
Paso 6: En otros cuadros de foami, marcamos una flor, en otro marcamos el cetro de la flor y en otro unas lindas y sencillas hojas. Y recortamos!
Step 6: In other foami squares, we mark a flower, in another we mark the scepter of the flower and in another some beautiful and simple leaves. And we cut!
Paso 7: Procedemos a pegar cada una de estas piezas como tú desees.
Step 7: We proceed to glue each of these pieces as you wish.
Paso 8: Este es nuestro último paso y aquí lo que haremos es cortar una tira de cartulina de 1cm, para así pegarla en la parte de atrás del porta lápices para que podamos colgarla en la pared.
Step 8: This is our last step and here what we will do is cut a 1cm strip of cardboard, to stick it on the back of the pencil holder so that we can hang it on the wall.
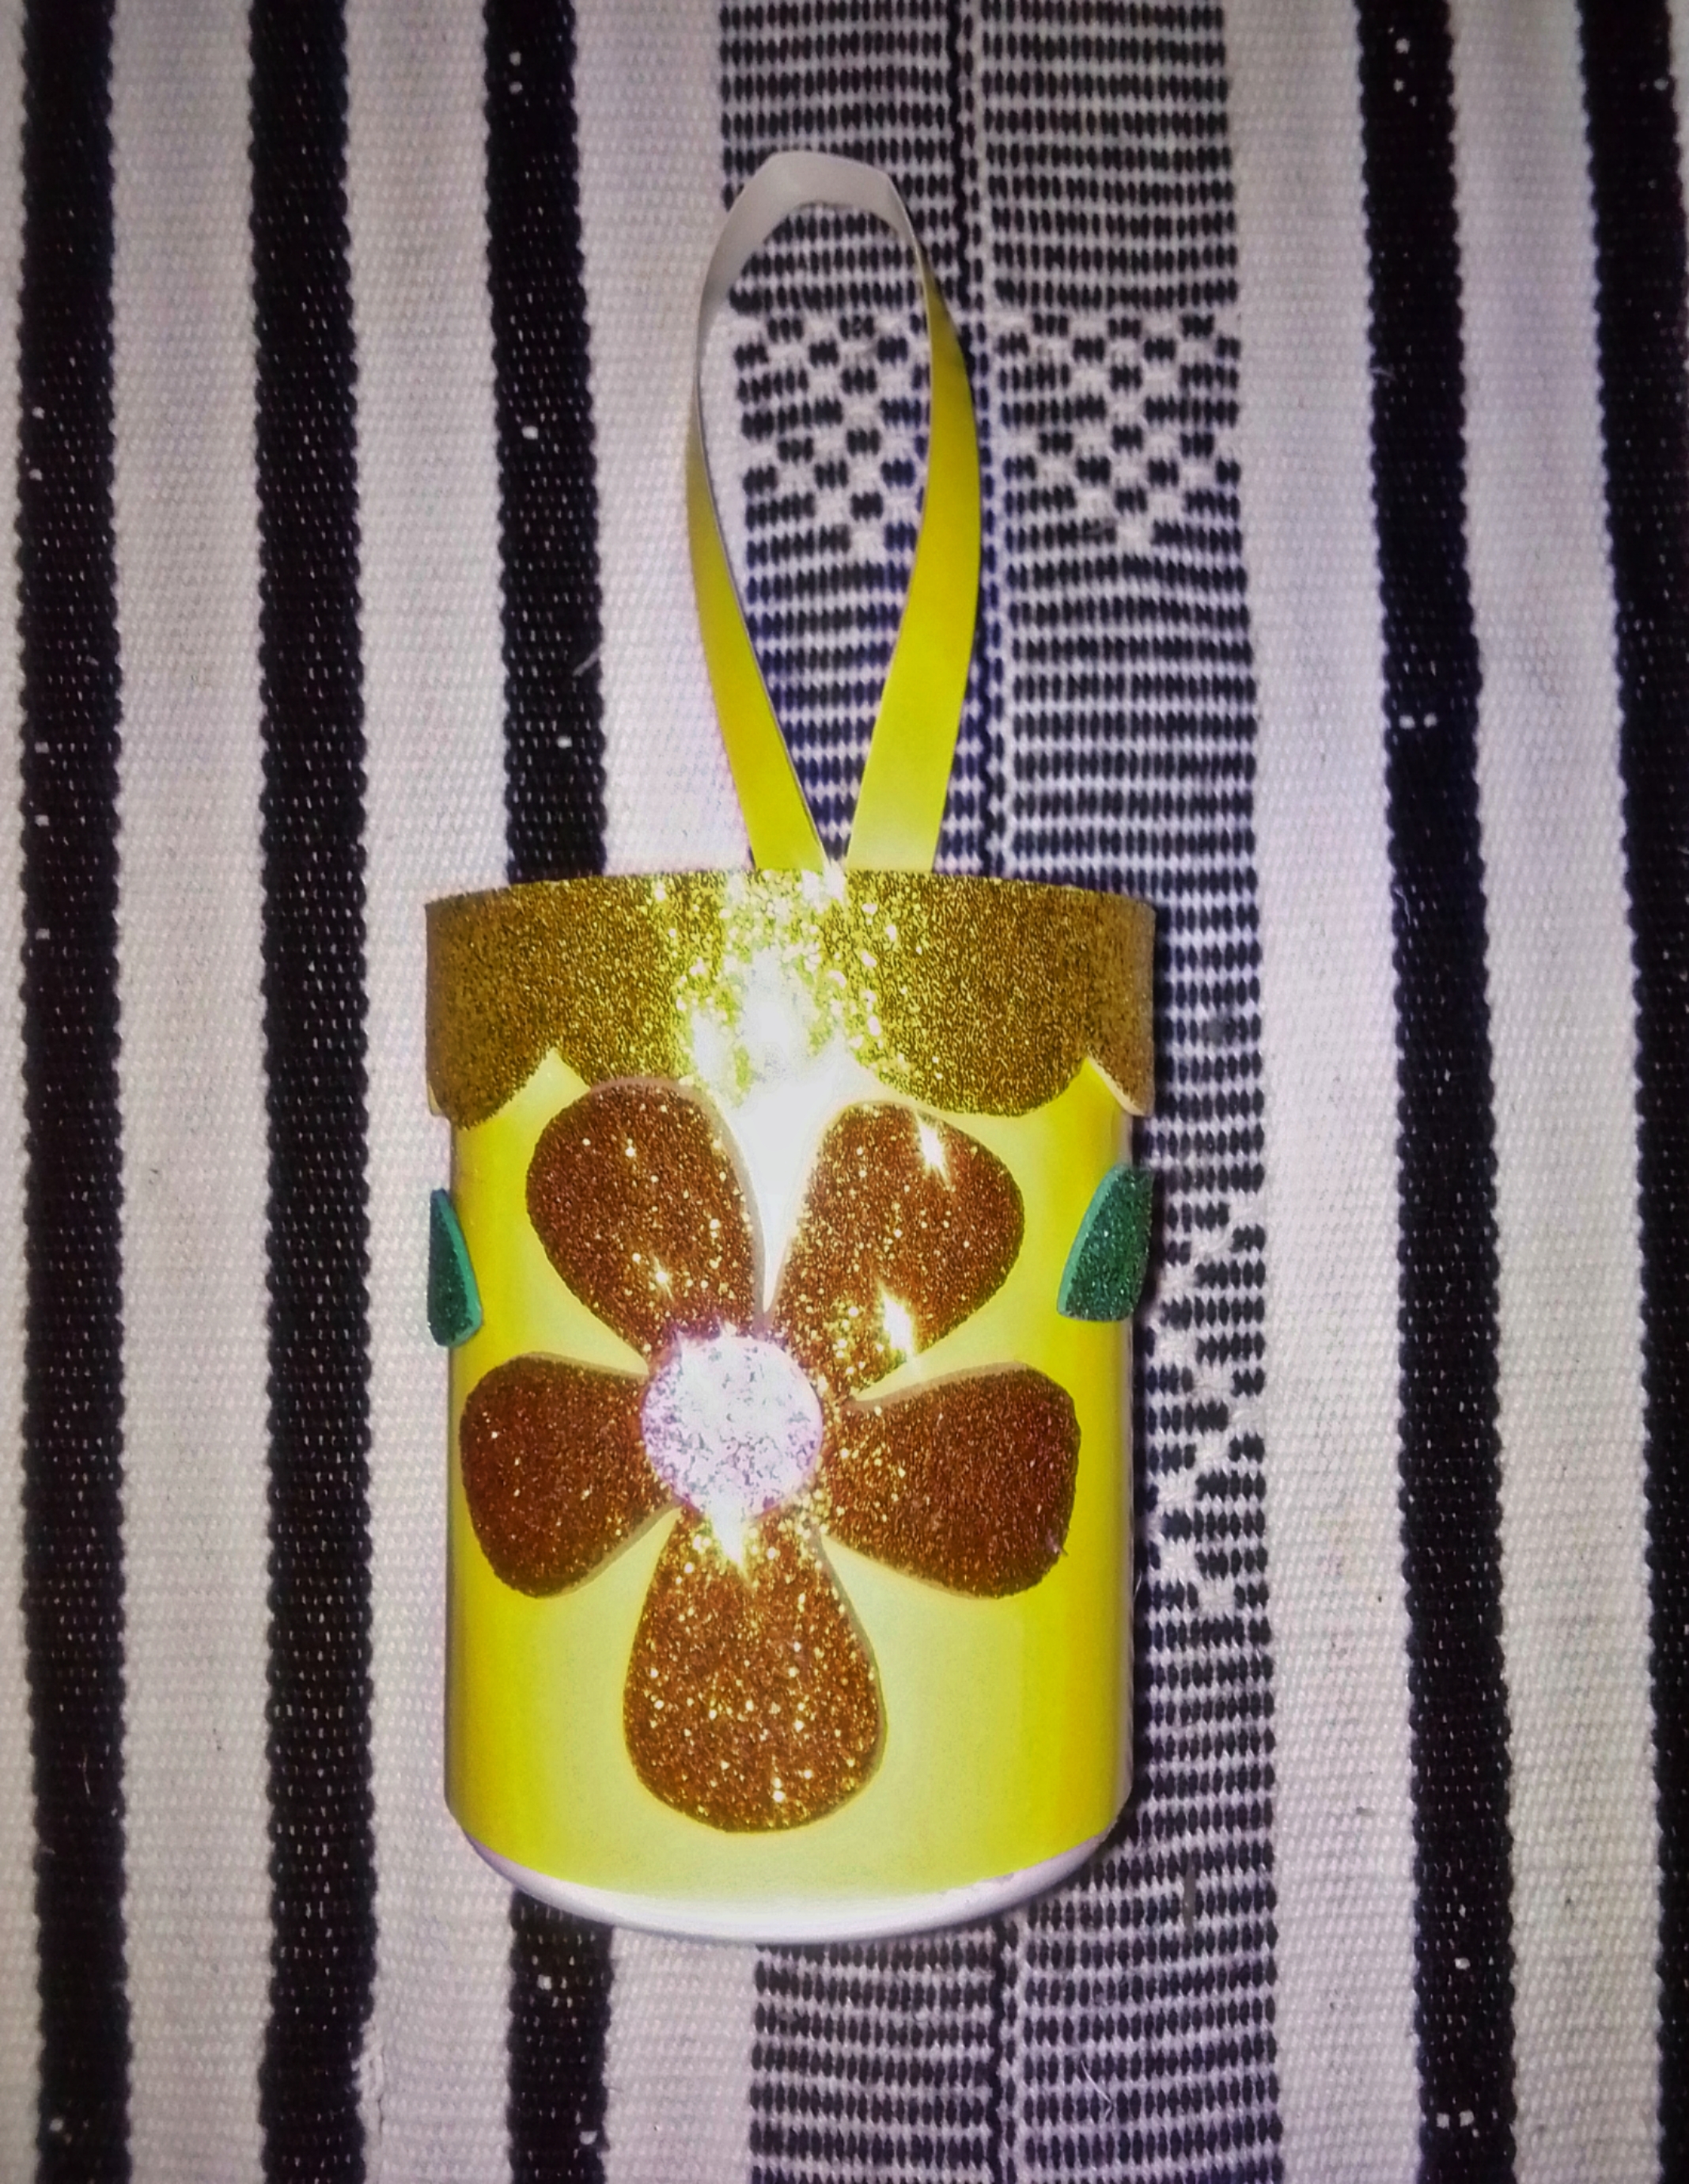
Y listo! Así nos queda esta hermosa idea muy práctica y sencilla de hacer. 🤗
And ready! So we have this beautiful idea very practical and easy to do. 🤗
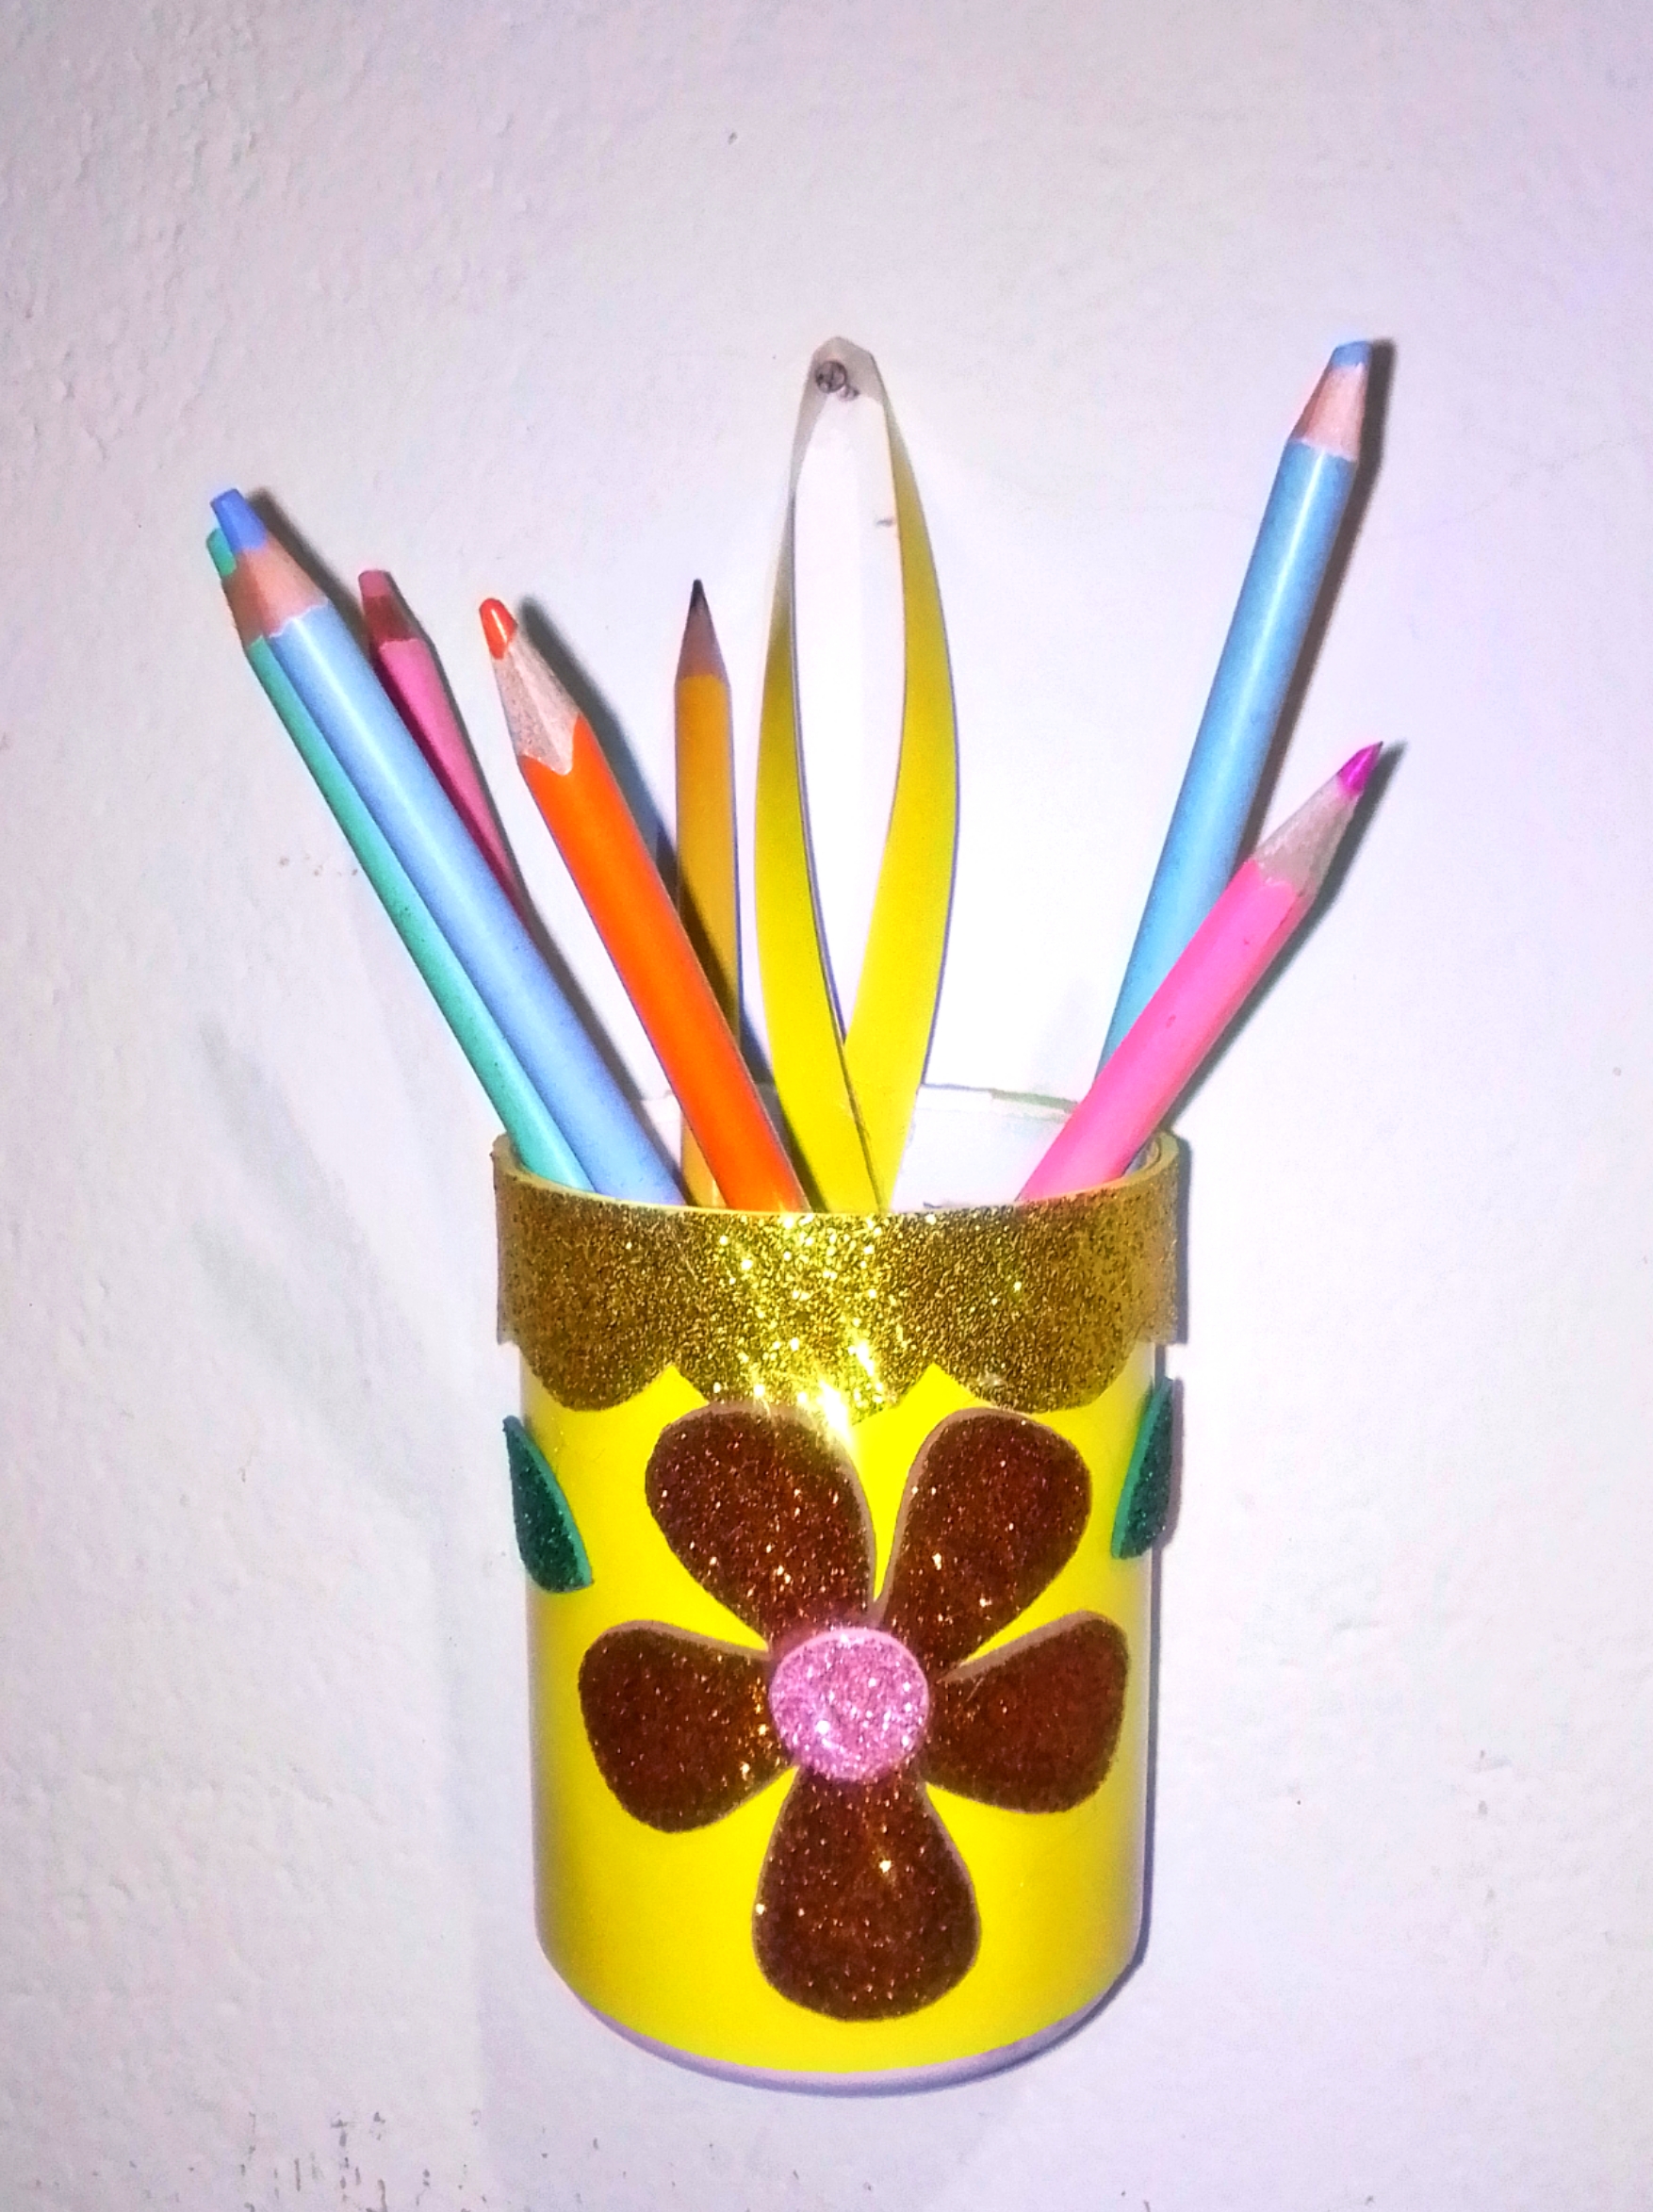
Espero les guste y les sirva de mucho! Me despido de ustedes y nos vemos en el próximo post. 🤗 Hasta luego, amigos!
I hope you like it and it helps you a lot! I say goodbye to you and see you in the next post. 🤗 See you later, friends!
@tipu curate
Upvoted 👌 (Mana: 30/50) Liquid rewards.
Congratulations @dorihann14! You have completed the following achievement on the Hive blockchain and have been rewarded with new badge(s):
Your next target is to reach 40 posts.
You can view your badges on your board and compare yourself to others in the Ranking
If you no longer want to receive notifications, reply to this comment with the word
STOPTo support your work, I also upvoted your post!
Check out the last post from @hivebuzz:
Support the HiveBuzz project. Vote for our proposal!
¡Felicitaciones!
1. Invierte en el PROYECTO ENTROPÍA y recibe ganancias semanalmente. Entra aquí para más información.
3. Suscríbete a nuestra COMUNIDADEntra aquí para más información sobre nuestro trail., apoya al trail de @Entropia y así podrás ganar recompensas de curación de forma automática.
4. Creación de cuentas nuevas de Hive aquí.
5. Visita nuestro canal de Youtube.
Atentamente
El equipo de curación del PROYECTO ENTROPÍA
Thank you for sharing this amazing post on HIVE!
non-profit curation initiative!Your content got selected by our fellow curator @rezoanulvibes & you just received a little thank you via an upvote from our
You will be featured in one of our recurring curation compilations and on our pinterest boards! Both are aiming to offer you a stage to widen your audience within and outside of the DIY scene of hive.
Join the official DIYHub community on HIVE and show us more of your amazing work and feel free to connect with us and other DIYers via our discord server: https://discord.gg/mY5uCfQ !
If you want to support our goal to motivate other DIY/art/music/homesteading/... creators just delegate to us and earn 100% of your curation rewards!
Stay creative & hive on!