Saludos queridos amigos de Gems, espero que todos estén muy bien, yo estoy excelente, por lo que he traído con mucho entusiasmo un dibujo en blanco y negro,
Materiales:
- Lápiz de grafito.
- Pinturas al frío.
- Hoja blanca.
- Borrador.
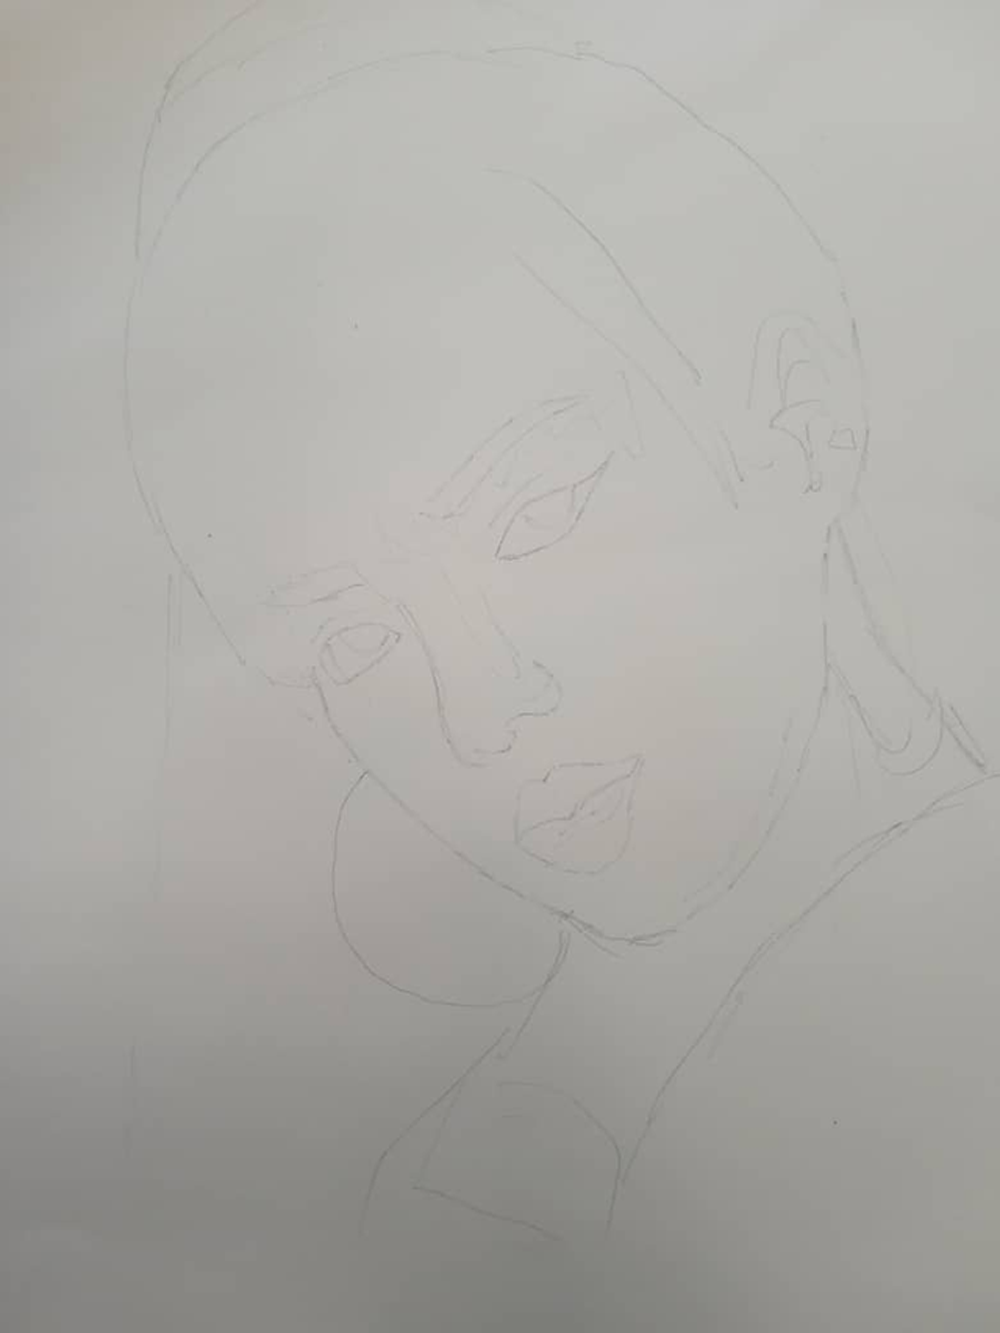
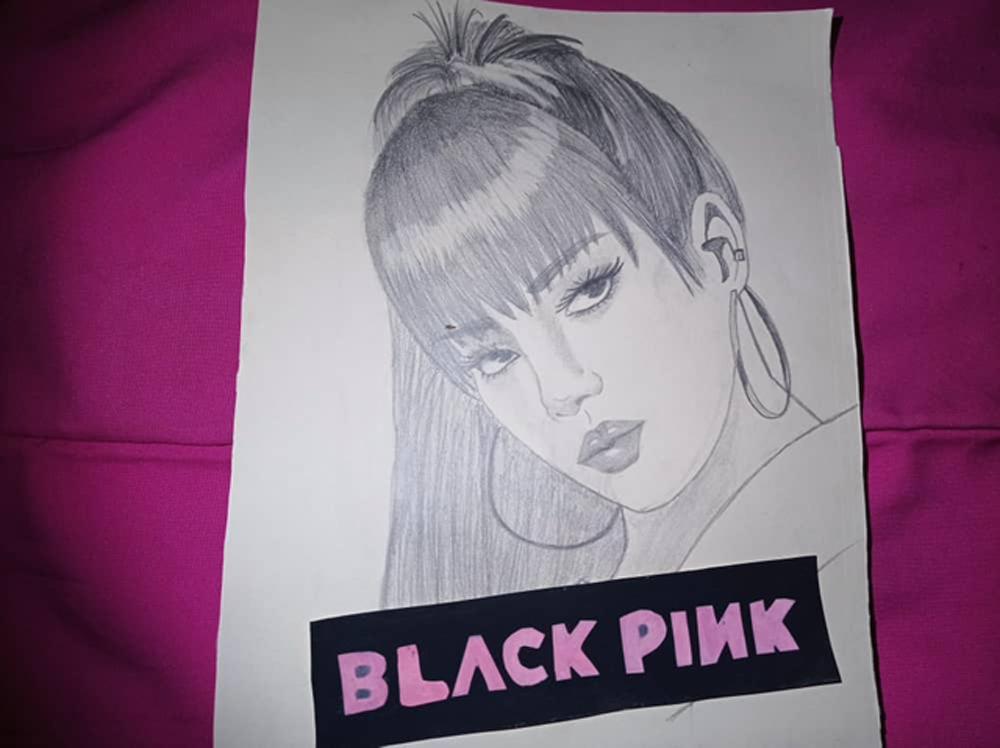
Comencé realizando el boceto a lápiz de grafito.
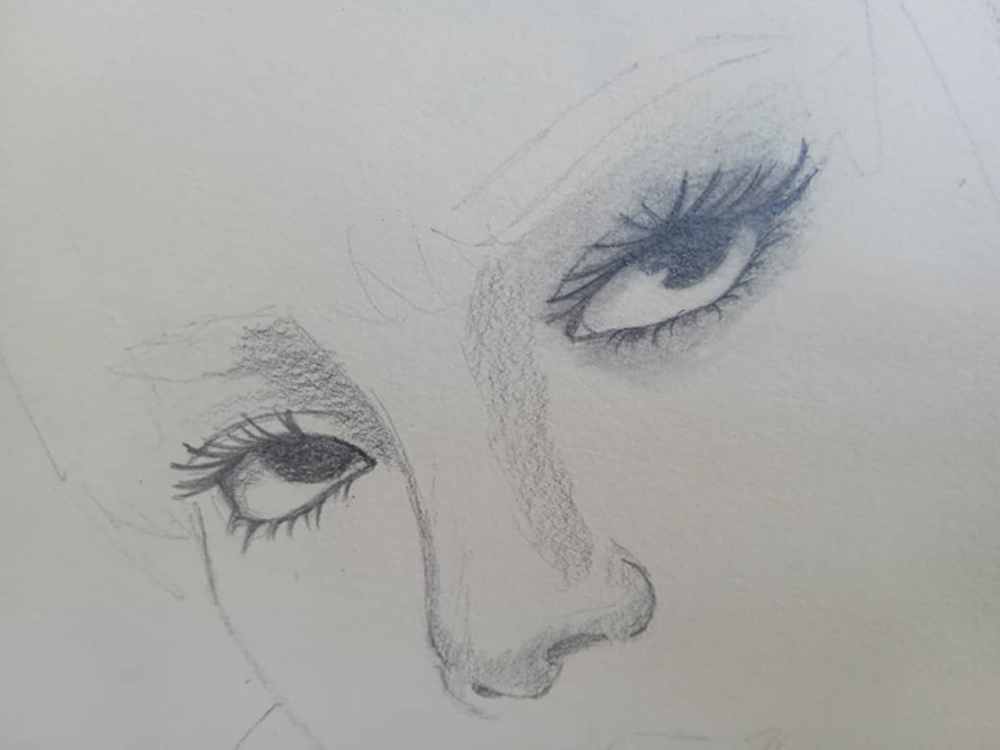
Empece dibujando los ojos y parte de la nariz con mi lápiz de grafito, dejando las sombras.
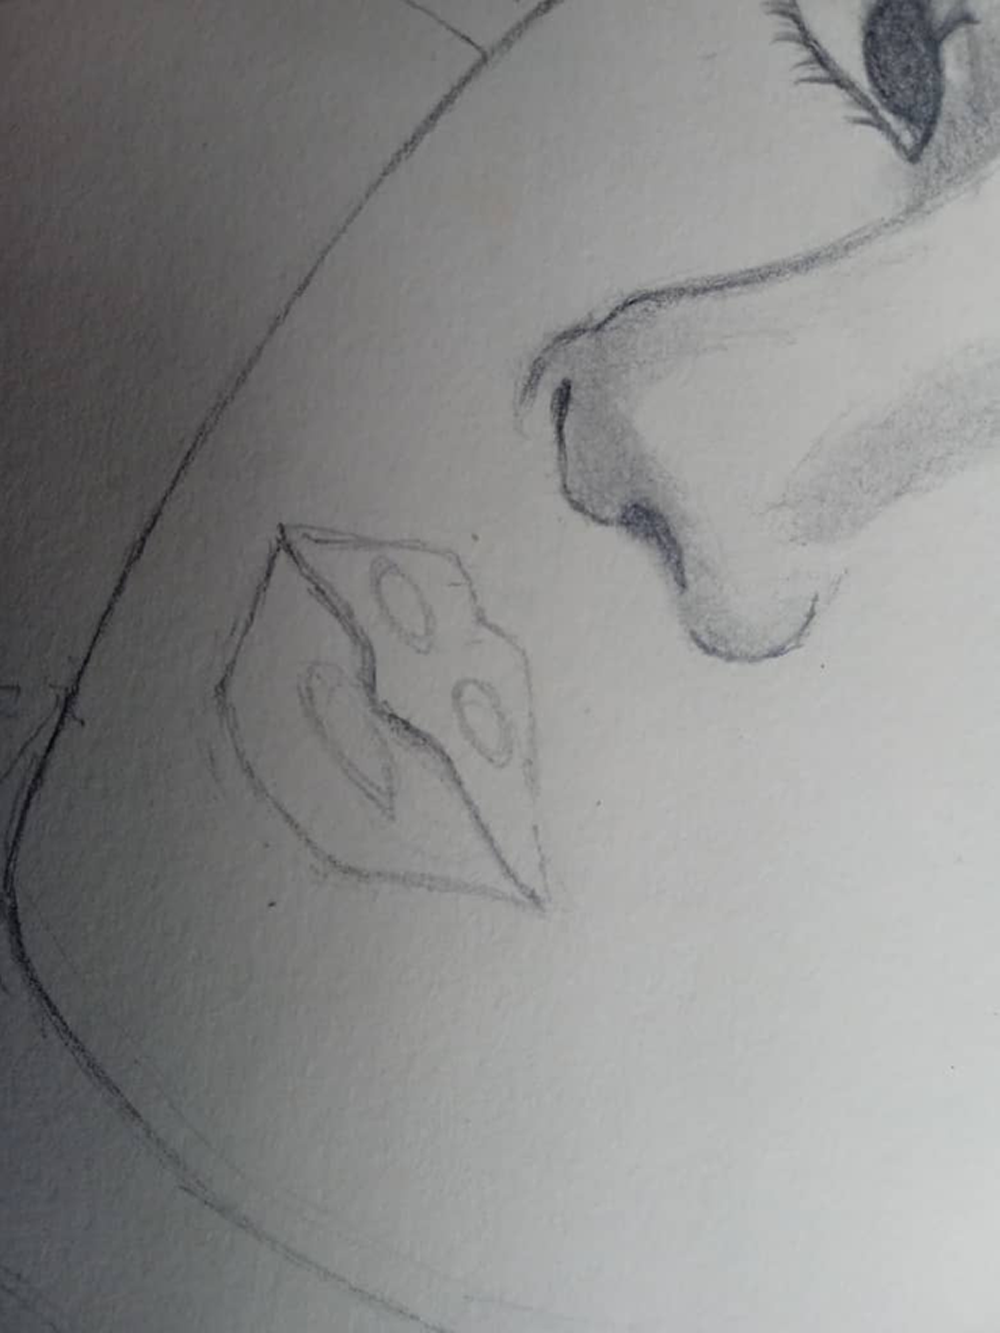
Con los labios los dibuje dejando unas partes en blanco, esto es para que tenga volumen al momento de rellenarlo.
Con el cabello dibuje el cabello en una sola dirección para que tenga un buen efecto de realismo.
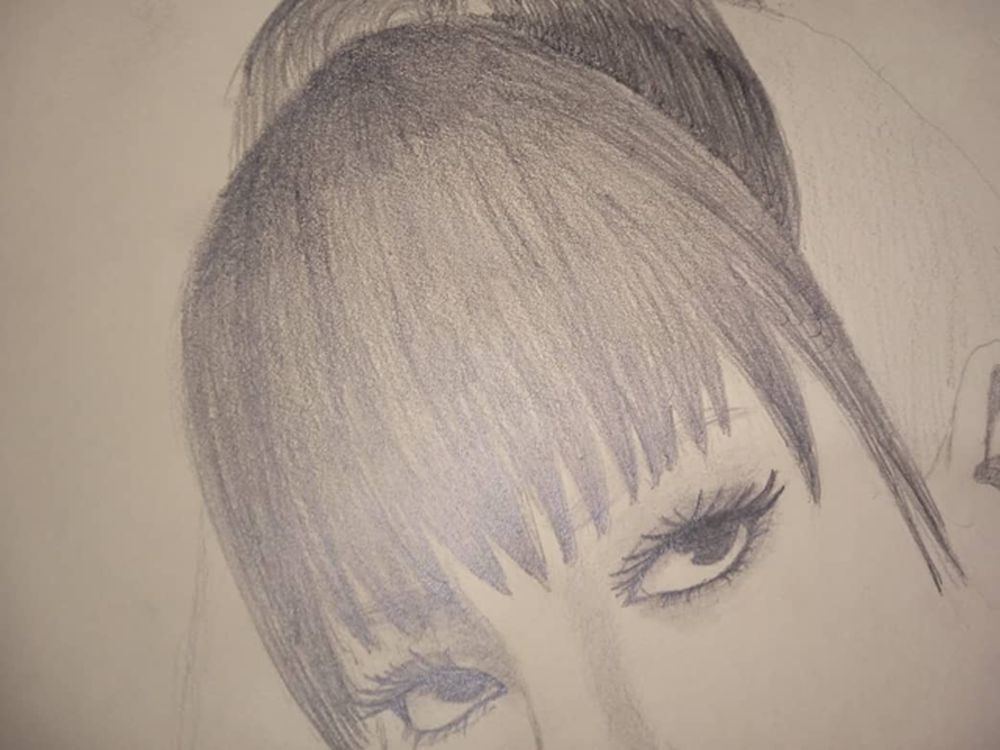
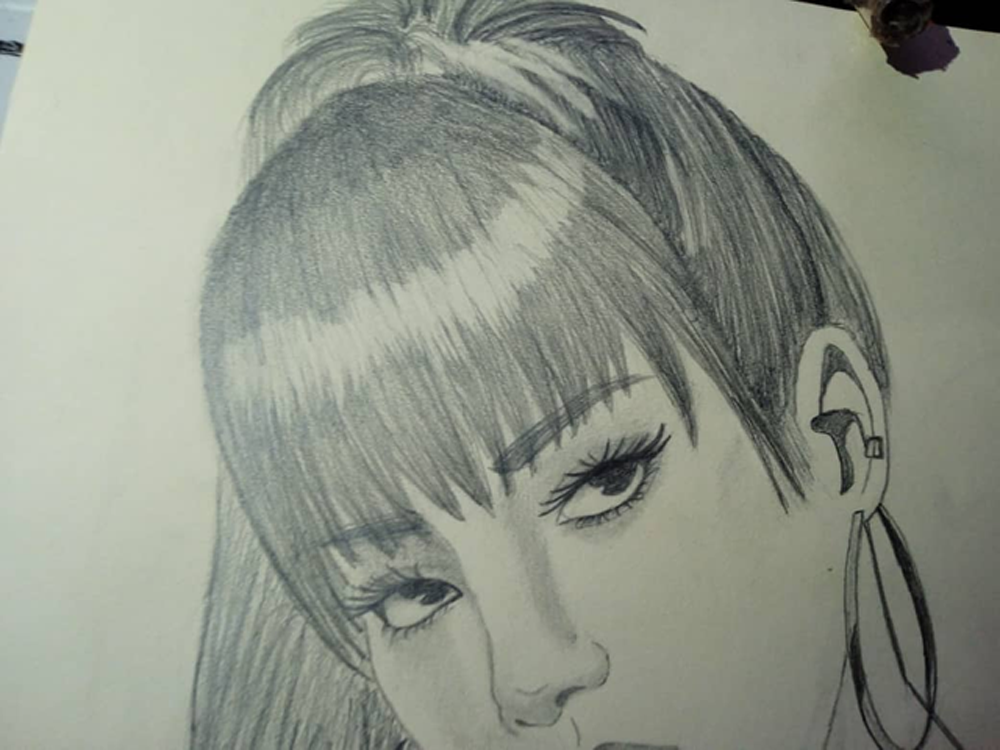
Remarque las cejas y las demás partes del cabello, esta parte fue muy tardada ya que tenia que tener un buen pulso para no equivocarme y dañar el dibujo.
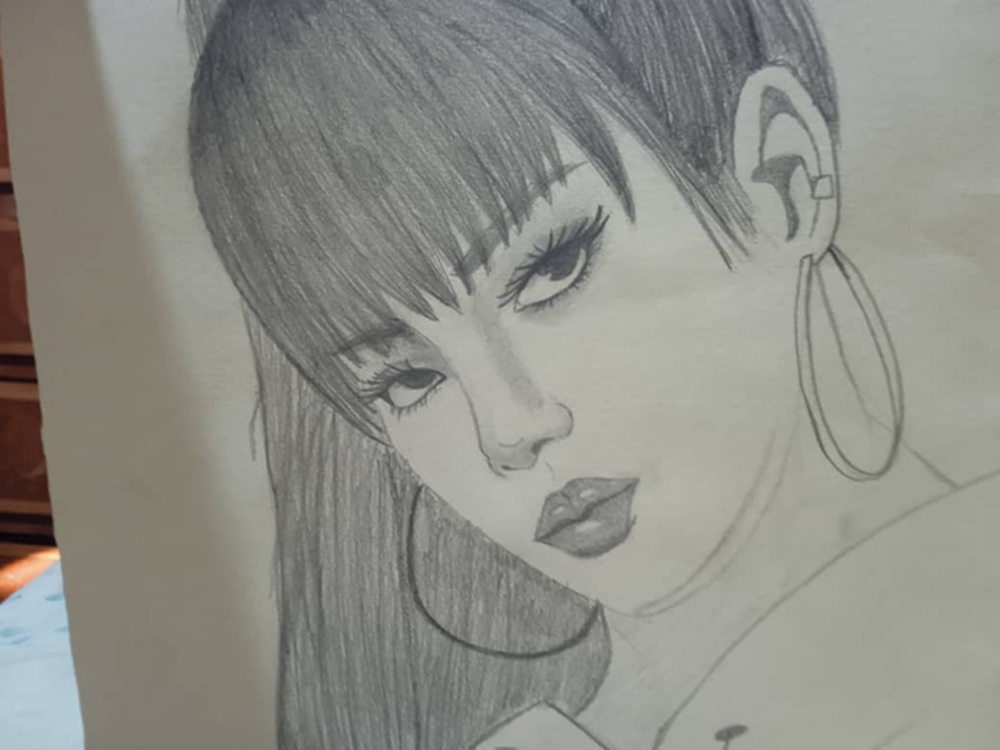
Para finalizar con un borrador le hice unos efectos de luz en el cabello y algunas partes de la cara.
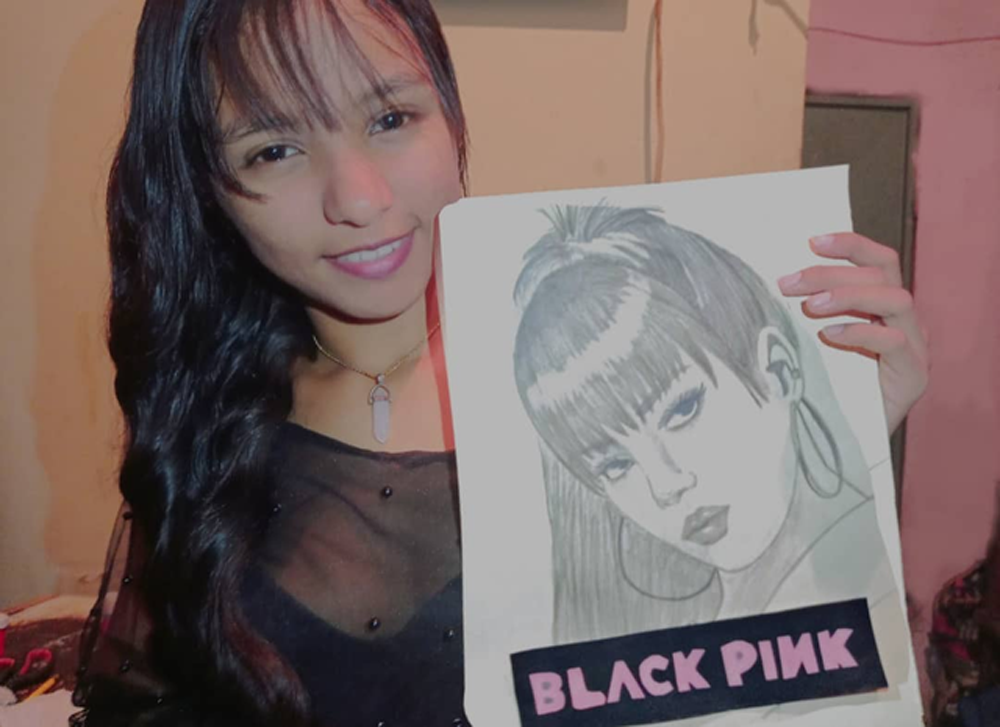
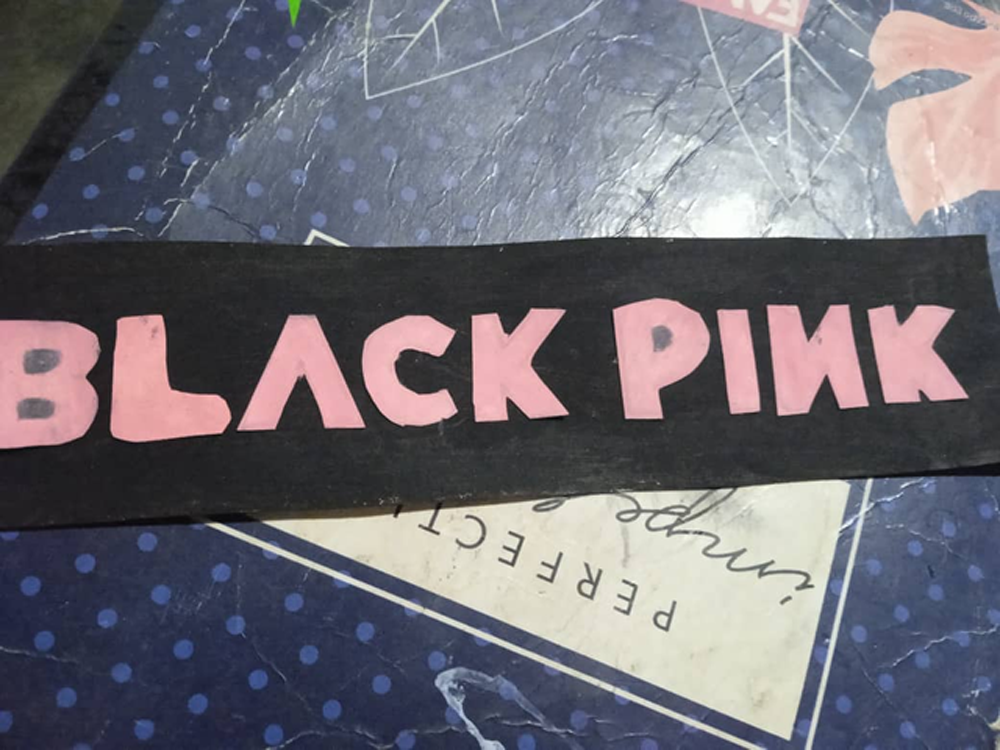
Decidí hacer una tarjeta con el Black Pink.
El resultado me gustó mucho, jamás imaginé que me quedaría tan bien. Estoy muy contenta del resultado, también por participar una vez más en esta linda comunidad, espero que les haya gustado.
English
Greetings dear friends of Gems, I hope you are all very well, I am excellent, so I have enthusiastically brought a black and white drawing,
Materials:
- Graphite pencil.
- cold paints.
- white sheet.
- Eraser.
I started by making the sketch in graphite pencil.
I started drawing the eyes and part of the nose with my graphite pencil, leaving the shadows.
With the lips I draw them leaving some blank parts, this is so that it has volume when filling it.
With the hair, draw the hair in one direction so that it has a good realistic effect.
Highlight the eyebrows and the other parts of the hair, this part was very slow since I had to have a good hand so as not to make mistakes and damage the drawing.
To finish with a draft I made some light effects on the hair and some parts of the face.
I decided to make a card with the name of the Black Pink.
I really liked the result, I never imagined it would look so good on me. I am very happy with the result, also for participating once again in this beautiful community, I hope you liked it.
Congratulations @elinav! You have completed the following achievement on the Hive blockchain and have been rewarded with new badge(s):
Your next target is to reach 100 upvotes.
You can view your badges on your board and compare yourself to others in the Ranking
If you no longer want to receive notifications, reply to this comment with the word
STOPTo support your work, I also upvoted your post!
Check out the last post from @hivebuzz:
Support the HiveBuzz project. Vote for our proposal!