Hola, hola, amigos de esta Gran Comunidad.
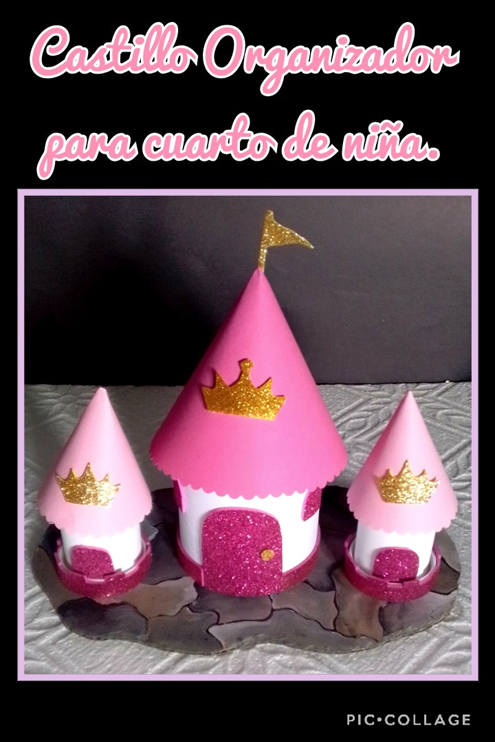
Hoy les traigo un lindo tutorial dedicado a las princesas de la casa, es un lindo castillo, donde podrán organizar sus ganchos, zarcillos, en fin lo que quieran y lo mejor es que lo pueden realizar en el tamaño y colores que prefieras.
¡Estoy segura que a las niñas les encantará tener uno.!
Hello, hello, friends of this great community.
Today I bring you a nice tutorial dedicated to the princesses of the house, it is a nice castle, where they can organize their hooks, tendrils, in short whatever they want and the best thing is that you can make it in the size and colors you prefer.
I'm sure the little girls will love to have one!
Empecemos con los materiales:
| Botella plástica | Envases plásticos de pinturas con tapas |
|---|---|
| Cartulinas | Tijeras |
| Lápiz | Regla |
| Foami (Eva foami) | Silicón líquido |
| Molde de conos | Pinturas |
| Pincel | Cartón |
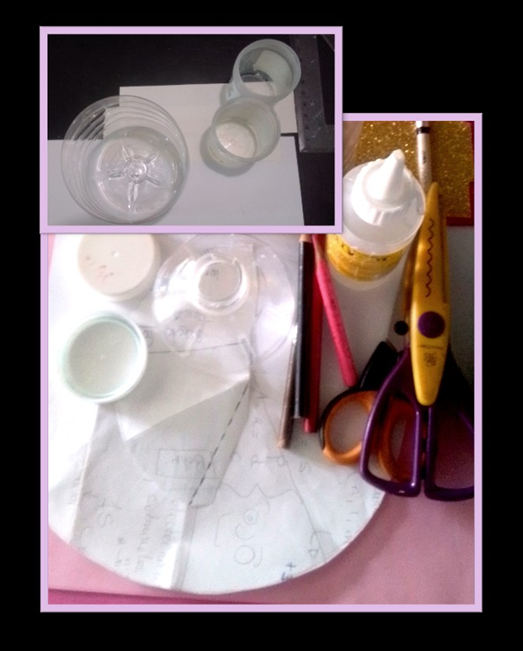
Let's start with the materials:
| Plastic bottle | Plastic paint containers with lids |
|---|---|
| Cardboard | Scissors |
| Pencil | Ruler |
| Foami (Eva foami) | Fluid silicone |
| Brush | Cardboard |
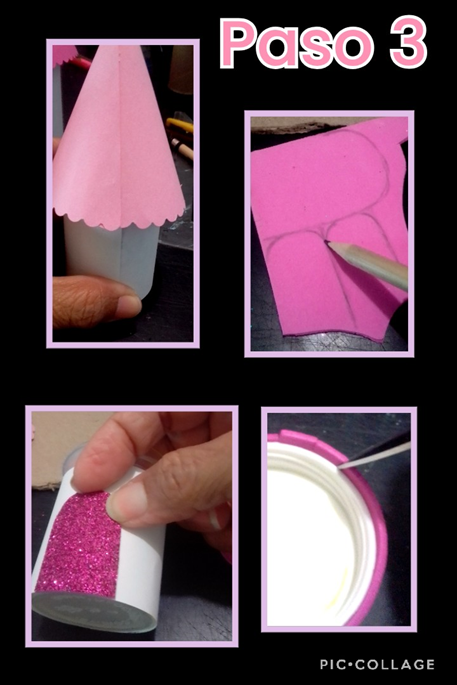
- Marcar los moldes de los conos en cartulina.
- Recortar, aplicar silicón en una de las orillas y cerrar el cono.
- Aplicar silicón en la orilla de la parte de arriba de las tapas de los envases de pintura y pegar al cono.
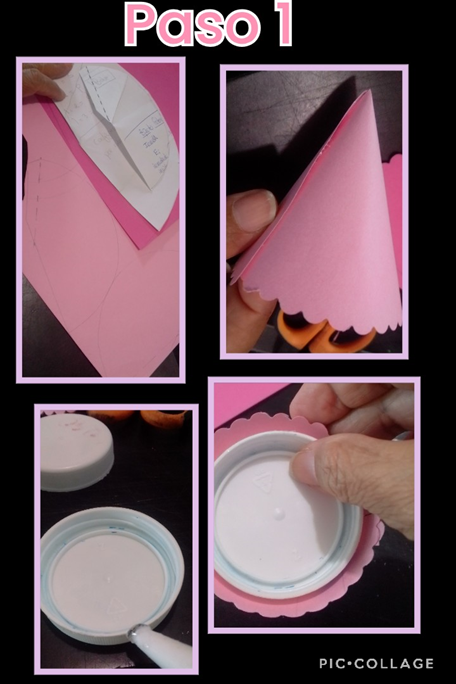
- Mark the cone molds on cardboard.
- Cut out, apply silicone on one of the edges and close the cone.
- Apply silicone to the top edge of the paint container lids and glue to the cone.
- Recortar la botella a la medida deseada.
- Pegar el cono grande a la parte de arriba de la botella.
- Medir el contorno de los envases, marcar y recortar las tiras en cartulina, aplicar silicón y pegar alrededor de cada envase haciendo un poco de presión en la unión.
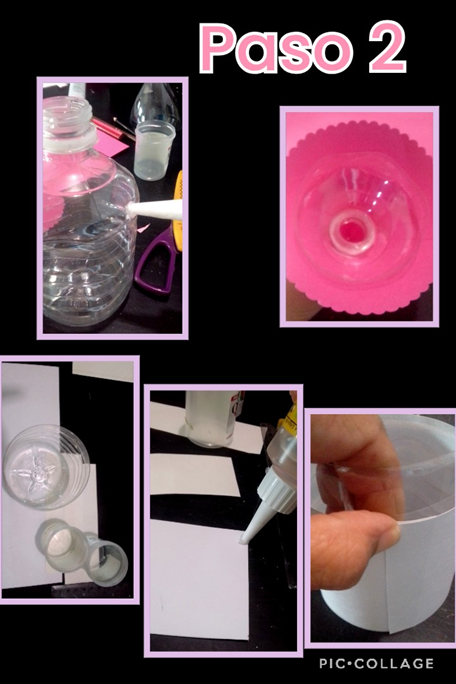
- Cut the bottle to the desired size.
- Glue the large cone to the top of the bottle.
- Measure the contour of the bottles, mark and cut out the strips on cardboard, apply silicone and glue around each bottle, pressing a little pressure on the joint.
- Montar el cono sobre el envase y alinear las uniones.
- Marcar en foami escarchado las puertas, recortamos y pegamos.
- Recortar una tira larga y pegar a la orilla de las tapas y sacar cuadritos para decorar.
- Assemble the cone on the container and align the joints.
- Mark the doors in frosted foami, cut out and glue.
- Cut out a long strip and glue to the edge of the lids and remove squares to decorate.
- Pegar las tiras a los tres (3) envases.
- Recortar un cartón de caja para la base del castillo.
- Marcar el sitio donde se pegarán los envases.
- Dibujar con marcador el cartón simulando piedras y rellenar con pintura.
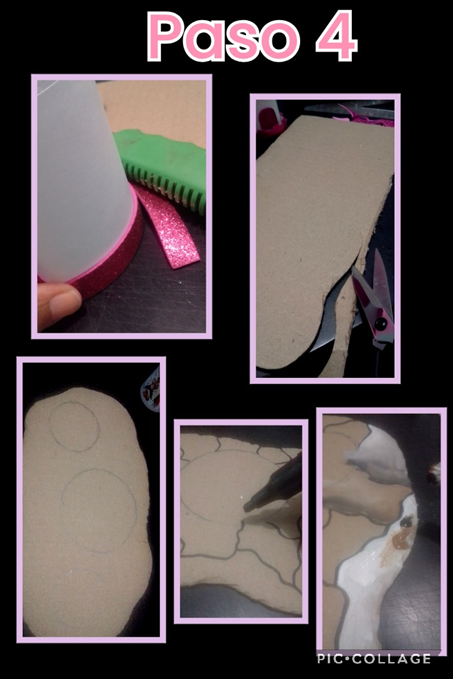
- Glue the strips to the three (3) containers.
- Cut out a cardboard box for the base of the castle.
- Mark the place where the containers will be glued.
- Draw with marker the cardboard simulating stones and fill with paint.
- Recortar un banderín y ventanas en foami escarchado.
- Aplicar silicón en las tapas de los envases forrados y pegar.
- Aplicar también silicón en el cartón marcado.
- Pegar el envase de la botella en el centro del cartón.
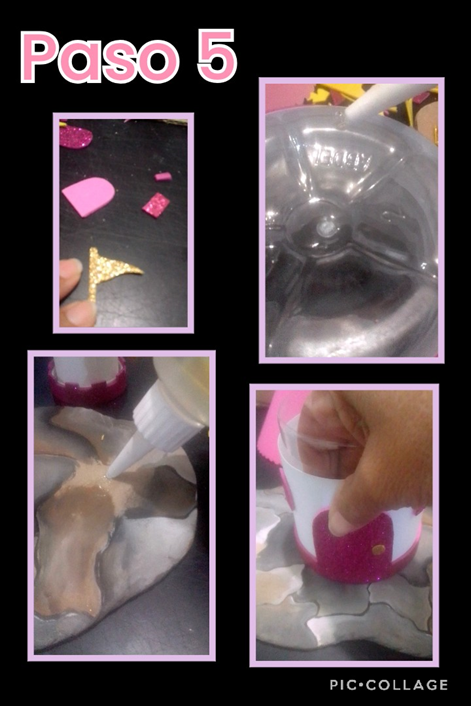
- Cut out a pennant and windows in frosted foami.
- Apply silicone on the lids of the lined containers and glue.
- Also apply silicone to the marked cardboard.
- Glue the bottle container in the center of the cardboard.
- Marcar y recortar en foami dorado 3 coronas.
- Pegar las coronas en los conos.
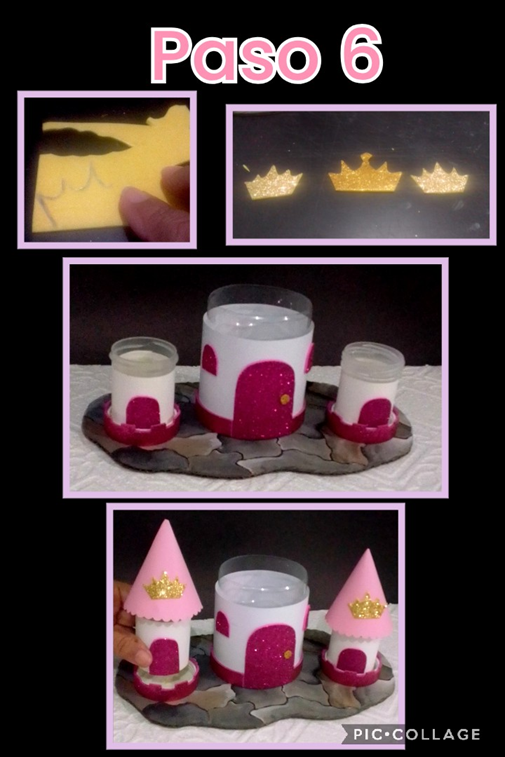
- Mark and cut out 3 crowns in gold foami.
- Glue the crowns on the cones.
- Y para terminar pegar la corona más grande en el centro del cono y el banderín.
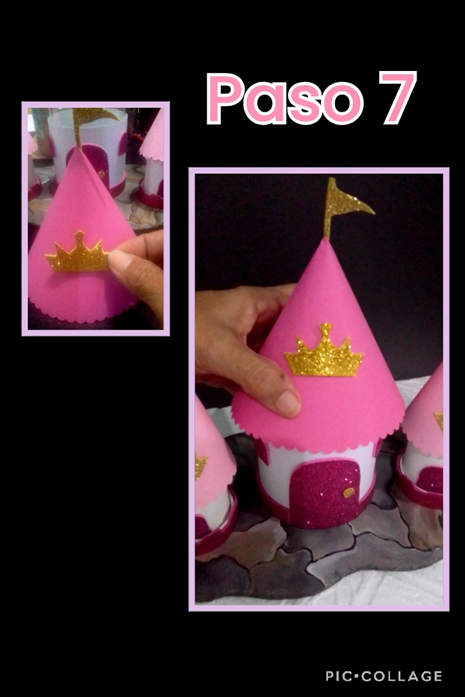
- And finally glue the larger wreath in the center of the cone and the pennant.
Para esta publicación utilicé Traductor de DeepL, las fotos son tomadas por mi Blu G5 y están editadas con Pic Collage, word y etiquetas de HTML.
For this post I used Translator from DeepL, the photos are taken by my Blu G5 and are edited with Pic Collage, word and HTML tags.
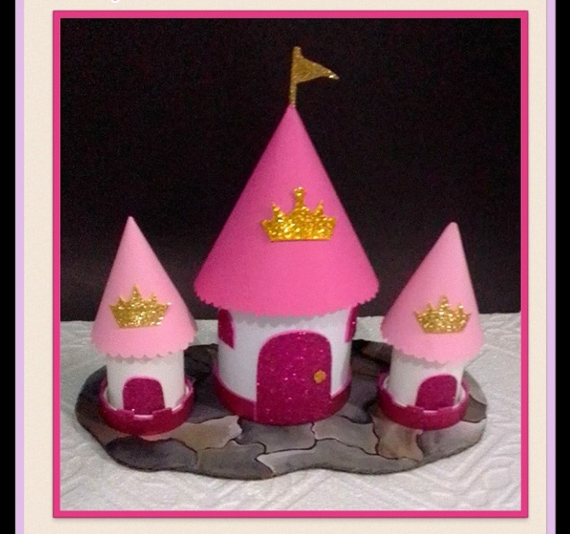
Ahora me despido esperando les guste este lindo tutorial y a la vez deseando se animen a realizarlo con materiales reciclables... De verdad es muy fácil de hacer.
Gracias por la visita, el apoyo y sus comentarios.
Now I say goodbye hoping you like this nice tutorial and at the same time wishing you are encouraged to make it with recyclable materials .... It really is very easy to do.
Thanks for your visit, support and comments.
Pero qué cuchitura <3!!!!
Gracias, gracias!
Si, me encantó que le haya gustado mi trabajo.
Congratulations @elmundodebetty! You have completed the following achievement on the Hive blockchain and have been rewarded with new badge(s) :
Your next target is to reach 1500 upvotes.
You can view your badges on your board and compare yourself to others in the Ranking
If you no longer want to receive notifications, reply to this comment with the word
STOPCheck out the last post from @hivebuzz:
Support the HiveBuzz project. Vote for our proposal!