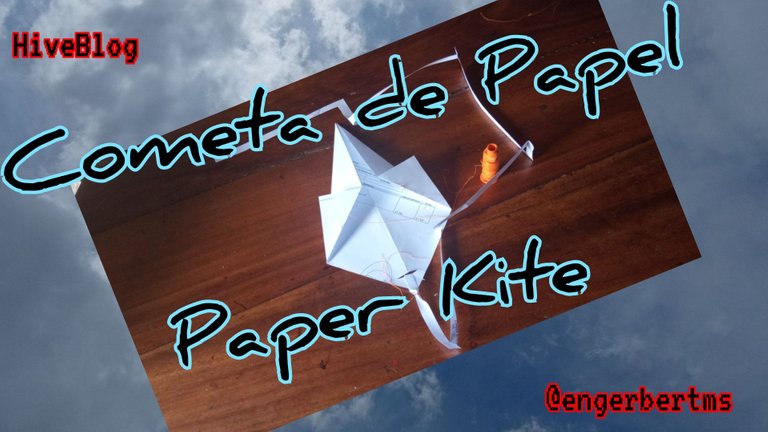
Hola que tal queridos espero que estén muy pero muy bien 👍🏾. El día de hoy les traigo una manualidad bastante sencilla de realizar y dónde solo se necesitarán 3 materiales que fácilmente los pueden tener en casa. Este post lo traigo acá a Hive puesto que los últimos días ha estado haciendo bastante brisa y es una opción bastante divertida para los más pequeños de la casa para que se distraigan con una cometa de papel, así que vamos a ello.
Hello dear, I hope you are very, very well 👍🏾. Today I bring you a fairly simple craft to make and where you will only need 3 materials that you can easily have at home. This post I bring it here to Hive since the last few days has been doing quite breezy and is a fun option for the little ones of the house to be distracted with a paper kite, so let's get to it.
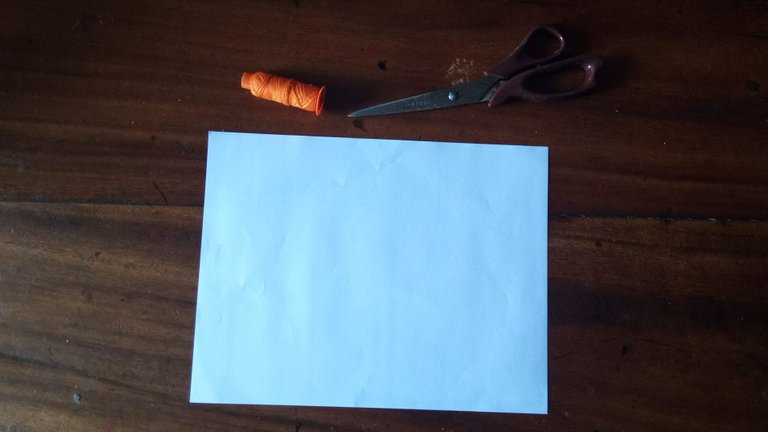
Cometa de Papel - Materiales
Paper Kite - Materials
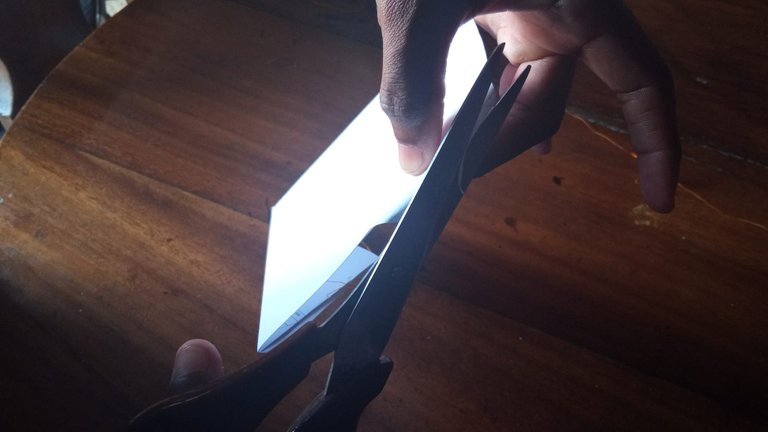
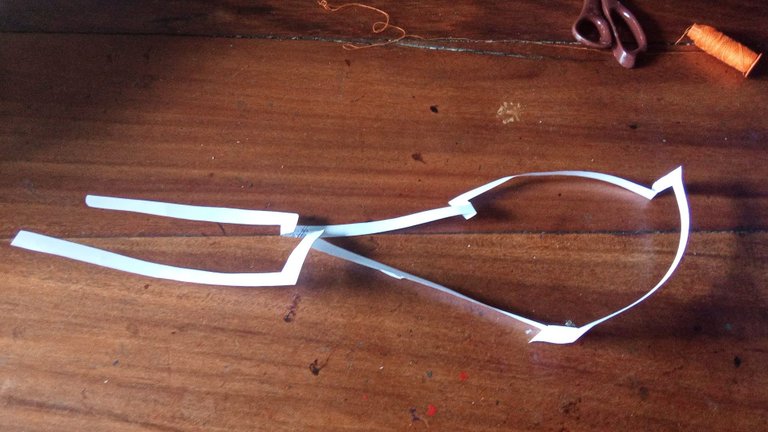
1 Hoja de papel
1 Tijera
1 Hilo
1 Sheet of paper
1 Scissors
1 Thread
Cometa de Papel - Procedimiento
Paper Kite - Procedure
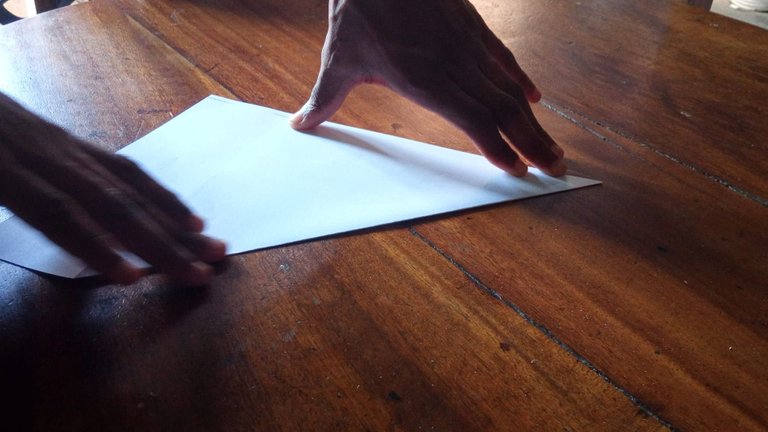
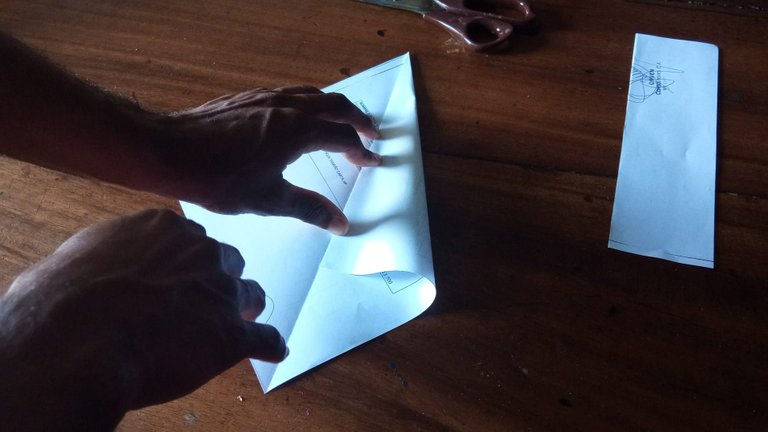
1
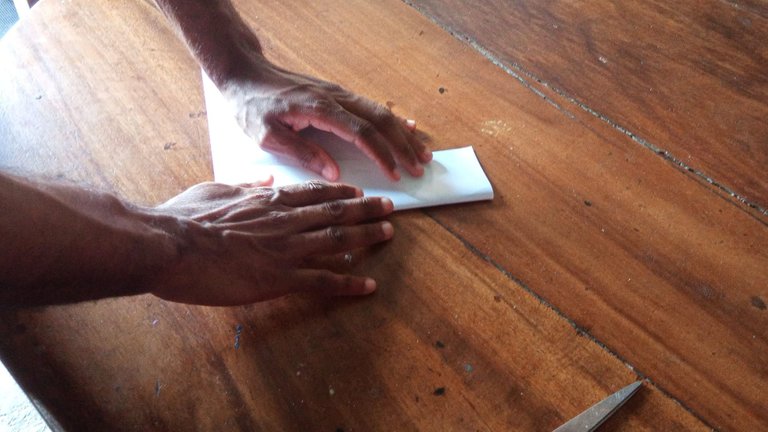
Lo primero que debemos hacer es doblar la hoja por la mitad como se ve en las siguientes imágenes:
The first thing to do is to fold the sheet in half as shown in the following images:
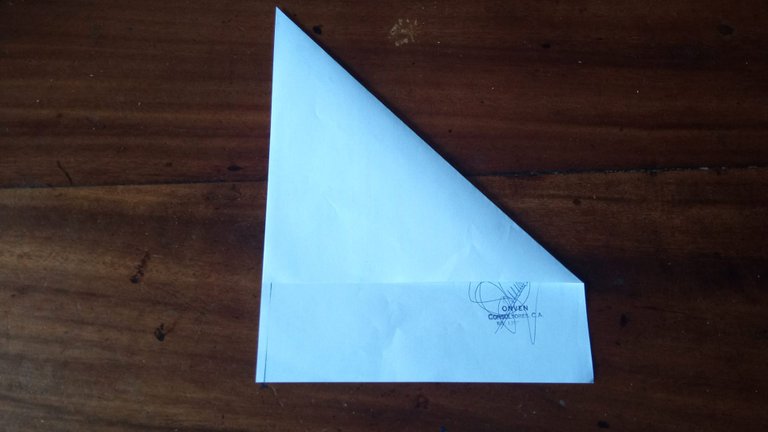
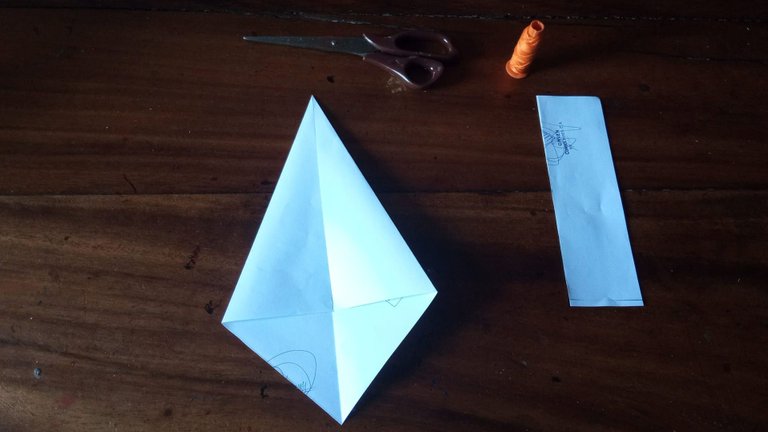
2
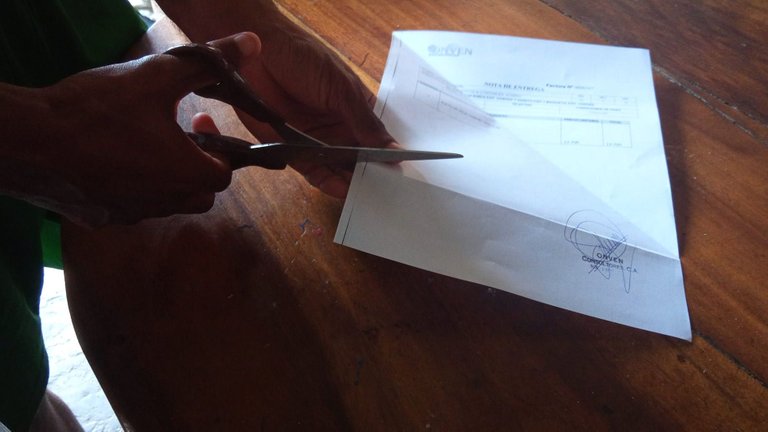
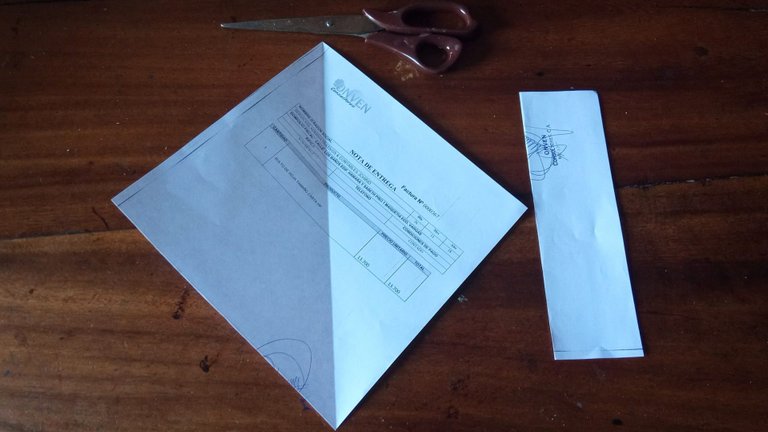
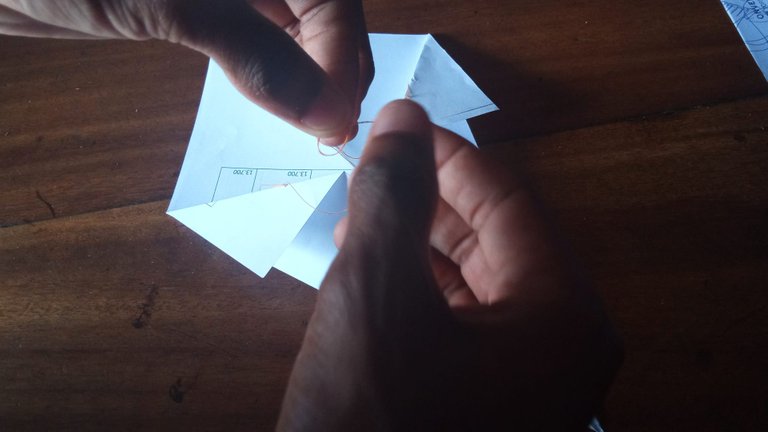
Posteriormente vamos a quitar el sobrante de la hoja para que nos quede un cuadrado perfecto, no debemos botar lo que nos reste ya que lo utilizaremos más adelante:
Then we will remove the excess of the sheet so that we have a perfect square, we should not throw away what is left over since we will use it later:
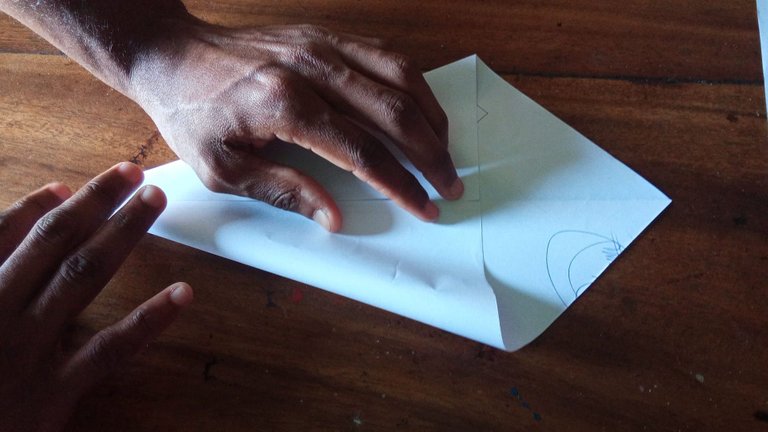
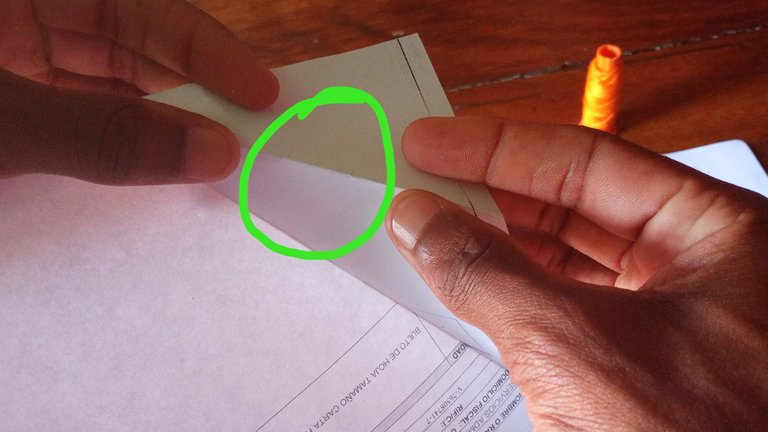
3
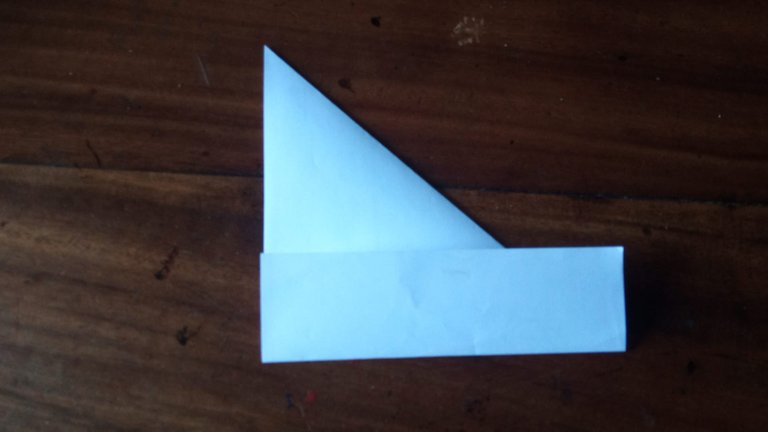
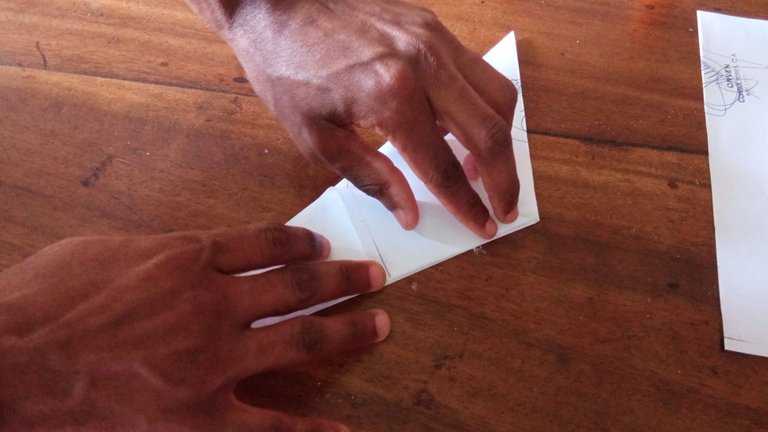
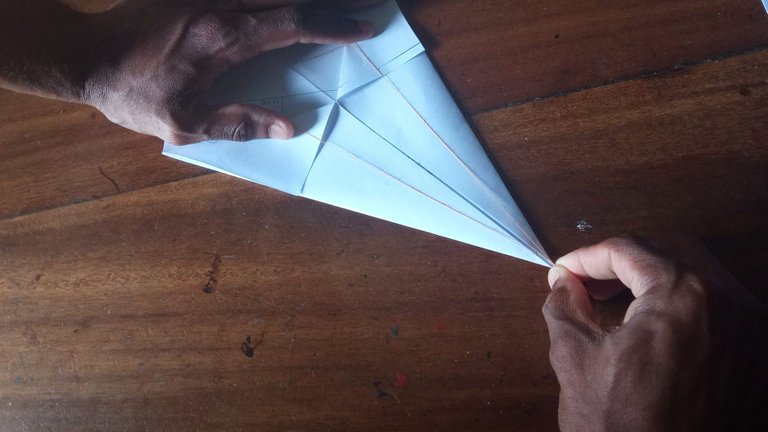
Luego de haber recortado el sobrando, colocamos la parte más grande en forma de rombo y vamos a proceder a doblarlo por la mitad como lo indican las imágenes:
After cutting out the leftover, we place the largest part in the shape of a rhombus and proceed to fold it in half as shown in the images:
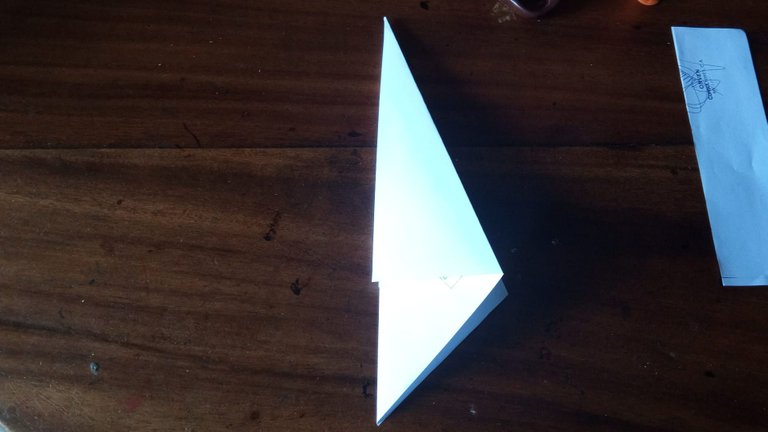
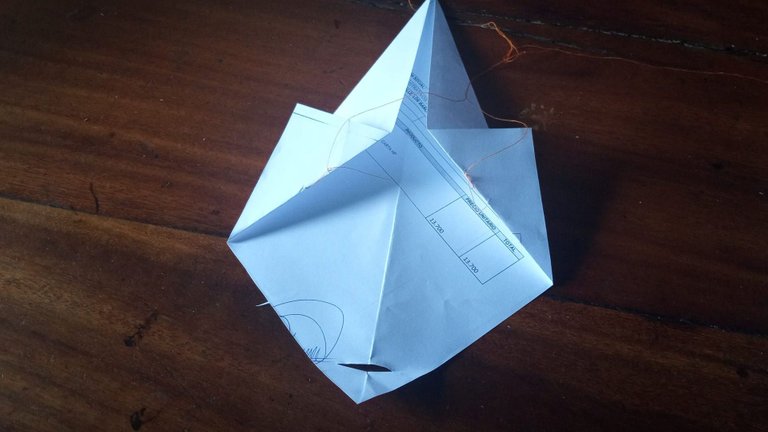
4
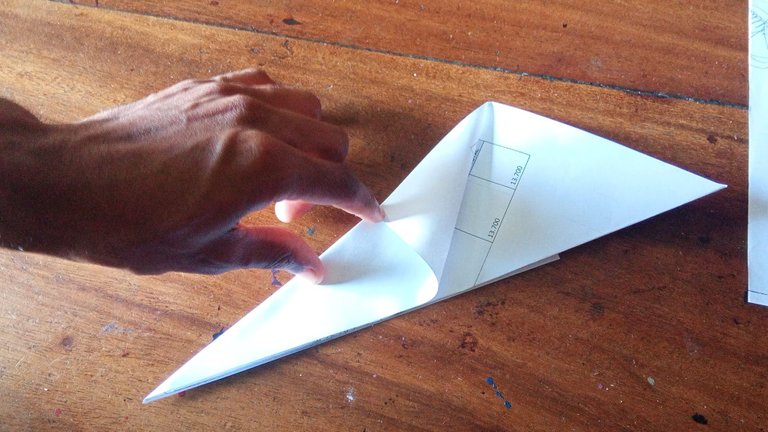
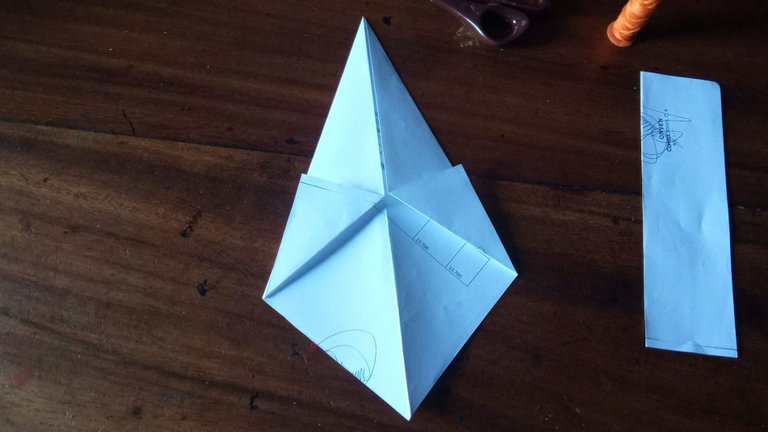
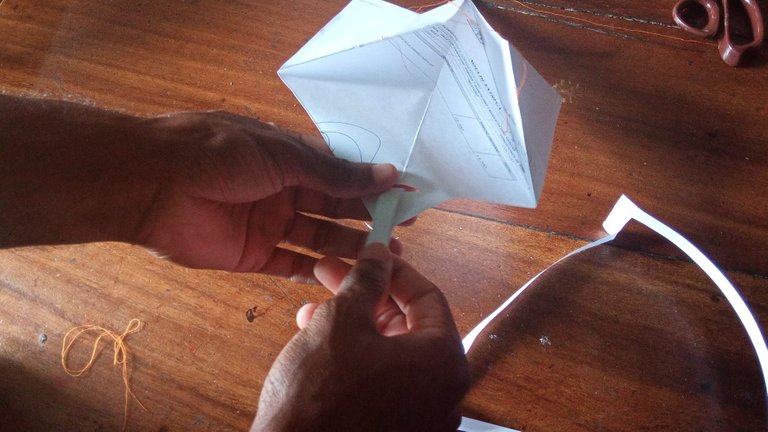
Ya en este punto vamos a doblar nuevamente por la mitad y cada alita la vamos a doblar hacia arriba para que quede de la siguiente manera:
At this point we are going to fold again in half and each wing we are going to fold it upwards so that it looks like this:
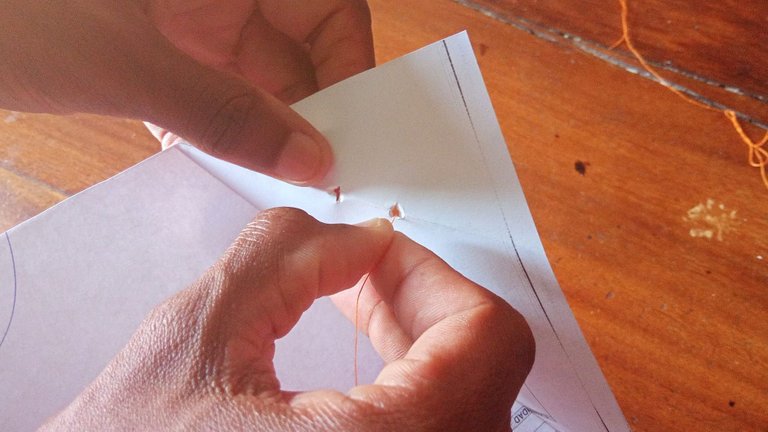
5
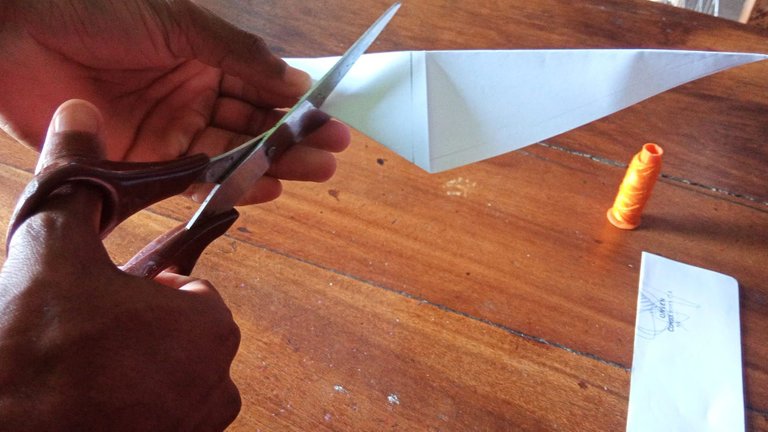
Ahora vamos abrir los huecos en cada ala para poder pasar el hilo y así hacer los frenillos, lo haremos con la ayuda de la tijera:
Now we are going to open the holes in each wing to be able to pass the thread and thus make the braces, we will do it with the help of the scissors:
6
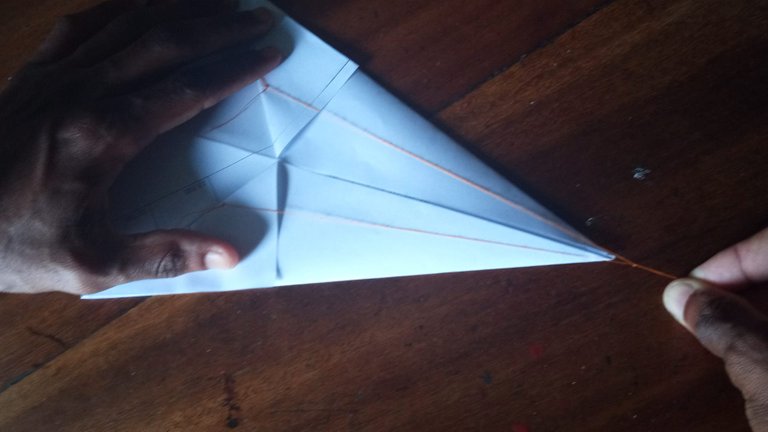
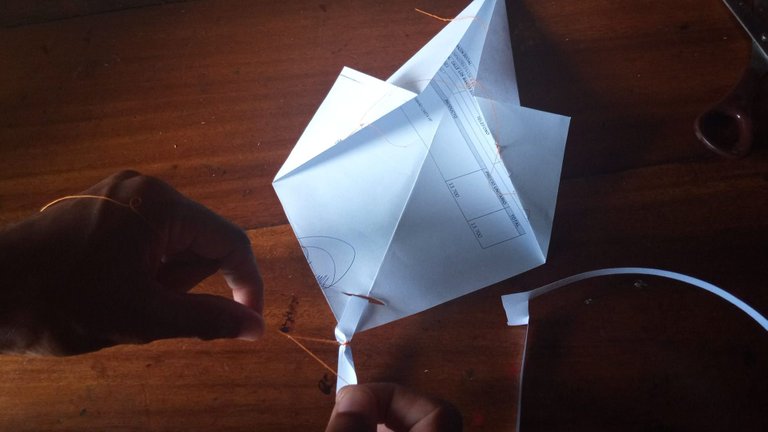
Insertaremos la punta del hilo por cada orificio y haremos un nudo, debemos dejar que al menos sobresalga un centímetro y medio en la parte superior, no debe ser mayor si no la estabilidad de la cometa en el área no será la indicada. Ya teniendo el hilo amarrado en cada ala, hay que realizar un aro que debe quedar en la punta de la cometa:
We will insert the tip of the thread through each hole and tie a knot, we must leave at least one and a half centimeters protruding at the top, it should not be more if not the stability of the kite in the area will not be indicated. Already having the thread tied in each wing, we must make a ring that should be at the tip of the kite:
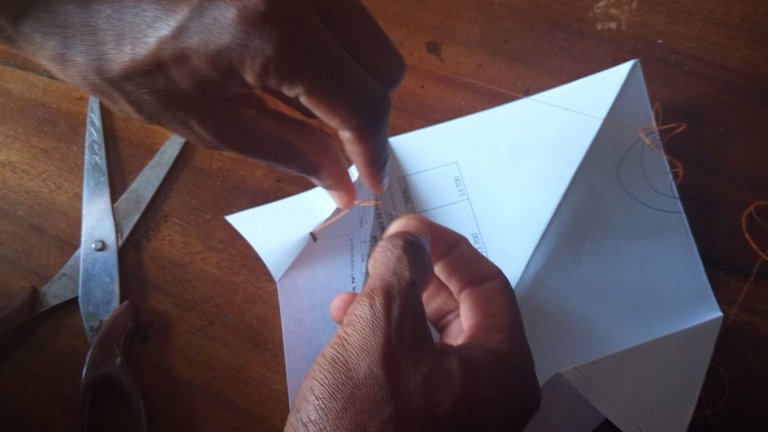

7
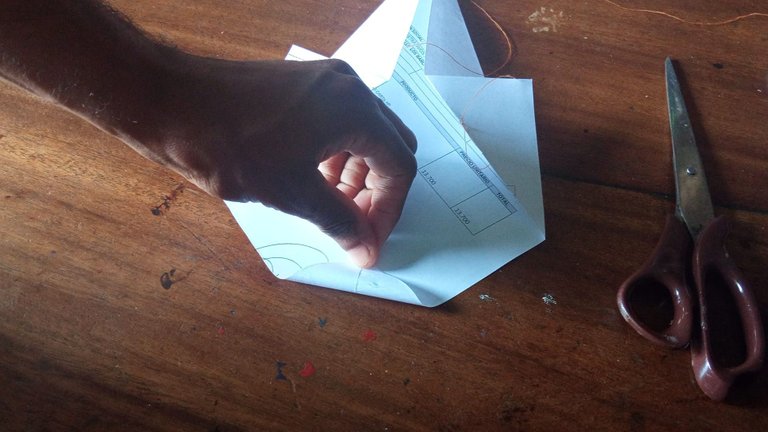
Hasta aquí está lista gran parte del cometa, ahora debemos hacer un pequeño agujero en la parte inferior para poder colocarle la cola y así pueda tener la estabilidad que queremos cuando esté en el aire:
Up to here is ready much of the kite, now we must make a small hole in the bottom to place the tail so it can have the stability we want when it is in the air:
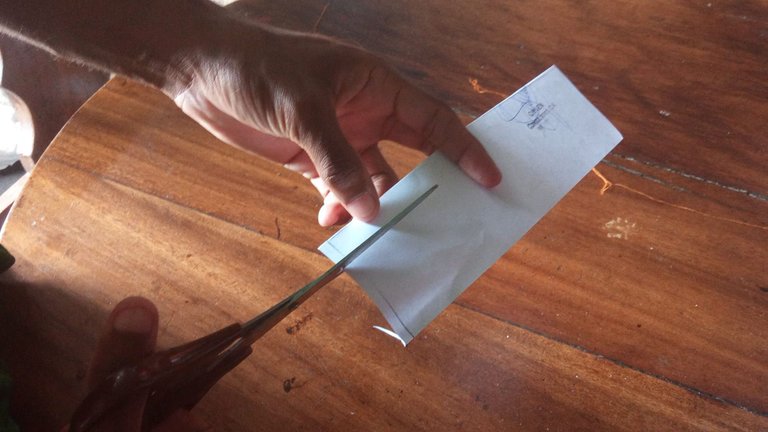
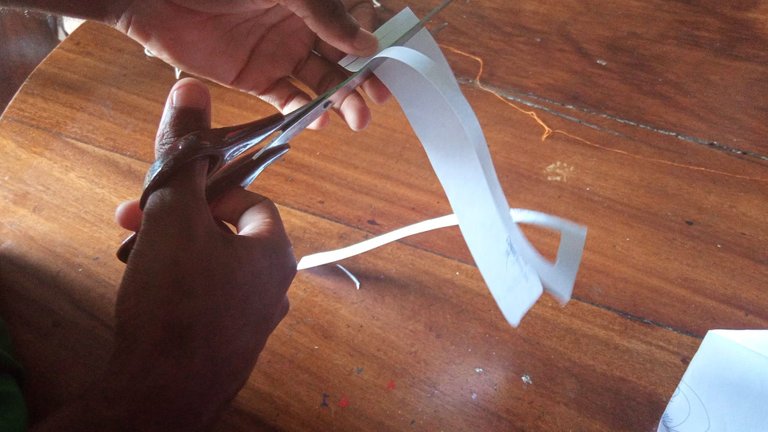
8
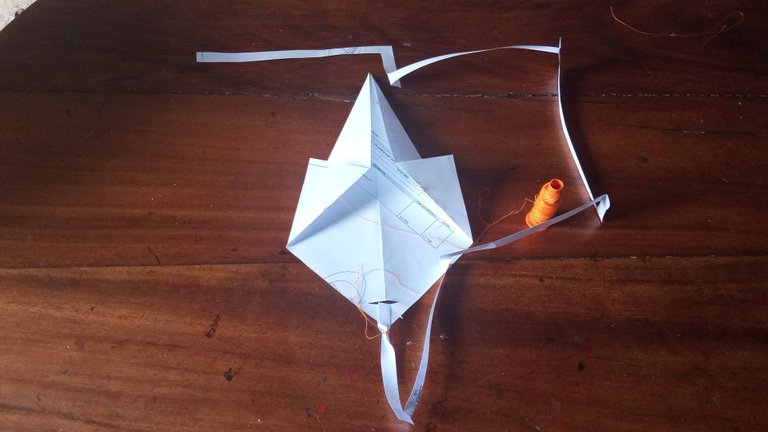
Al principio dije que no debíamos desechar el sobrante de la hoja de papel, y pues es que de ahí vamos a sacar la cola para la cometa por lo que vamos a cortarla en tiras y colocarla en la parte inferior:
At the beginning I said that we should not discard the leftover sheet of paper, and that is where we are going to get the glue for the kite, so we are going to cut it into strips and place it at the bottom:
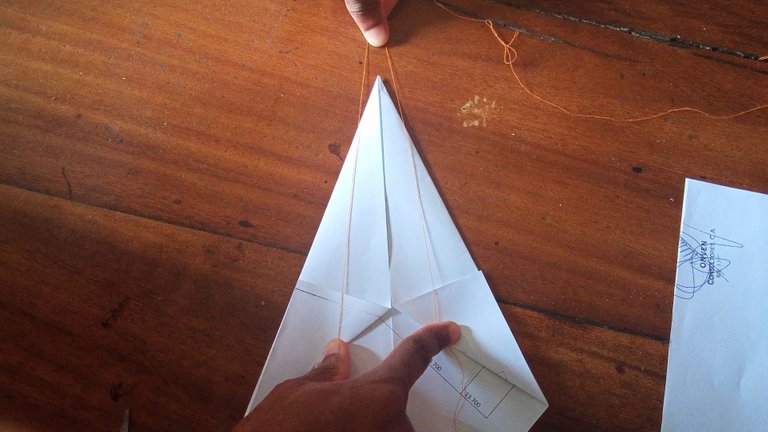
9
Ya solo nos faltaría colocar el rollo del hilo y listo, tenemos una cometa lista para volar:
Now we only need to place the thread roll and that's it, we have a kite ready to fly:
Es muy fácil de ayer una excelente opción para los más pequeños de la casa, así que invito a que les realices una😁. Sigamos promoviendo esta plataforma y creando contenido de calidad.
It is very easy to make yesterday an excellent option for the little ones of the house, so I invite you to make them one😁. Let's keep promoting this platform and creating quality content.
Si llegaste hasta acá gracias por leer el post. Que Dios me los bendiga siempre.
If you made it this far, thank you for reading the post. May God bless you always.

Congratulations @engerbertms! You have completed the following achievement on the Hive blockchain and have been rewarded with new badge(s) :
Your next target is to reach 1500 upvotes.
Your next target is to reach 100 comments.
You can view your badges on your board and compare yourself to others in the Ranking
If you no longer want to receive notifications, reply to this comment with the word
STOPSupport the HiveBuzz project. Vote for our proposal!
Congratulations, your post has been upvoted by @dsc-r2cornell, which is the curating account for @R2cornell's Discord Community. Enhorabuena, su "post" ha sido "up-voted" por @dsc-r2cornell, que es la "cuenta curating" de la Comunidad de la Discordia de @R2cornell.
Hacer figuritas u origami con papel es todo un arte y hay que tener mucha paciencia para lograrlo. De verdad que te quedo muy bonito y bastante pulcro. Felicidades por eso Enger 🤗
Mi mamá me enseñó hacerlas cuando era un niñito, volar papagayos y cometas fueron unos de mis más grandes hobbys cuando era pequeño. Gracias por tu comentario mi @keritroberts ♥️🤗
Excelente publicación, muy bien explicada de paso para que la podamos hacer todos y poder compartir con los pequeños en casa, un cometa que podrán usar para jugar en los días llenos de brisa, te tomaste tu tiempo y empeño para explicar lo mas posible, gracias por compartirnos esta manualidad.
aquí para mantener y mejorar nuestra labor. Únete a nuestra comunidadTu post ha sido votado por @celfmagazine, una iniciativa autónoma en favor del contenido de calidad sobre arte y cultura. Apóyanos con tu voto
here to maintain and improve our work. Join our communityYour post has been upvoted by @celfmagazine, an autonomous initiative in favour of quality content on art and culture. Support us with your vote
Muchísimas gracias por su apoyo