¡Hola amigos de Hive!
Hello friends of Hive!
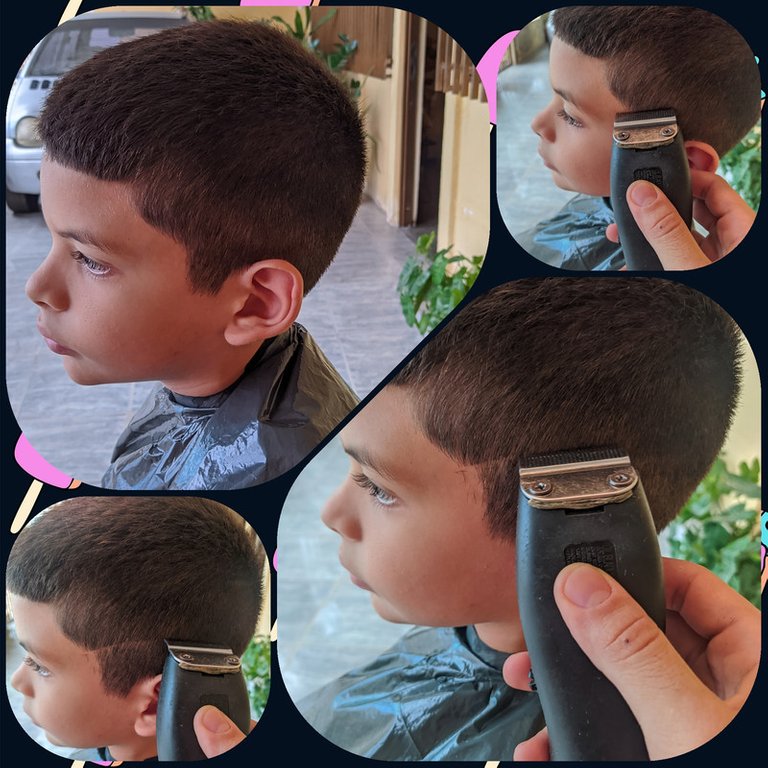
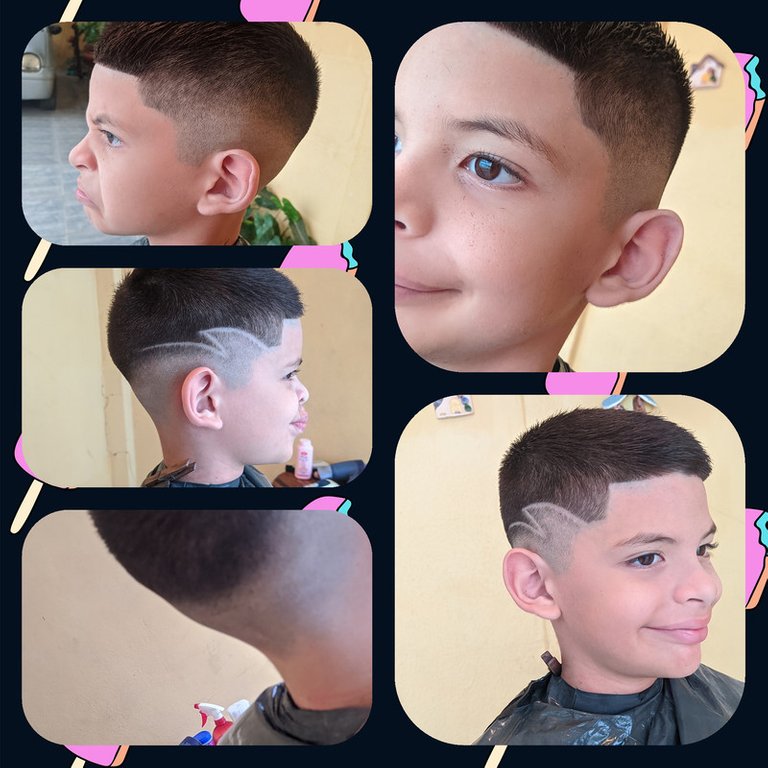
Today I will be showing you a medium gradient cut that I made to a little and loyal customer of years, I would like to tell you a little about his evolution, because the first few times it was difficult due to his young age, he was about 4 years old and he did not like to cut his hair. That's when a barber has to have a lot of patience to be able to have control of the situation, thus calming the child's restlessness.

As the boy's family is very conservative, in the beginning they asked for a haircut with only one comb all over his head which resulted in a total shave. Currently, at 8 years old and after a long time with the same cut, the boy asked for a change according to his age, allowing me to give him a fresh and more modern look.
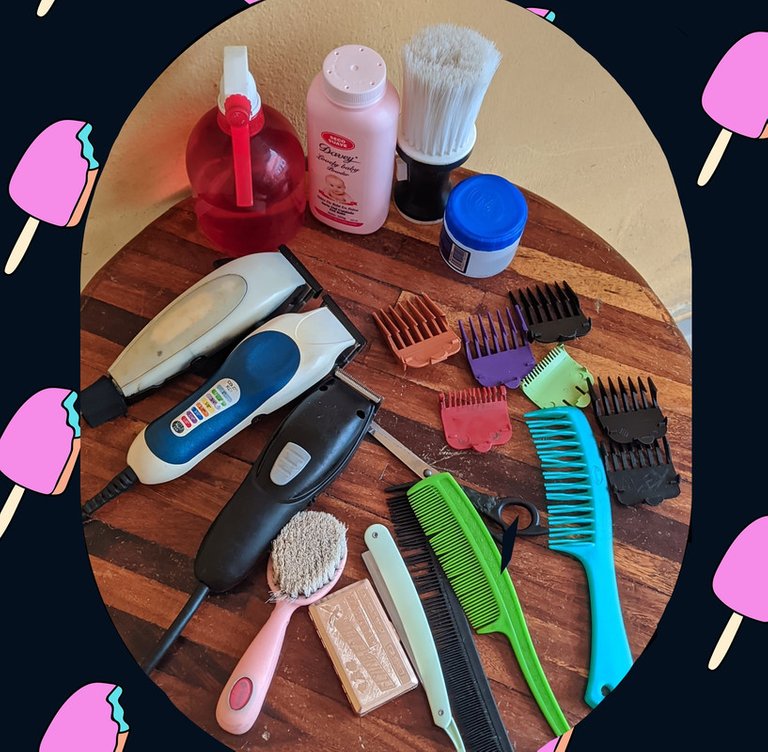
Materiales:
- Maquina Wahl Color Pro.
- Maquina recortadora.
- Capa de barbería.
- Brocha de barbería.
- Navaja de barbería.
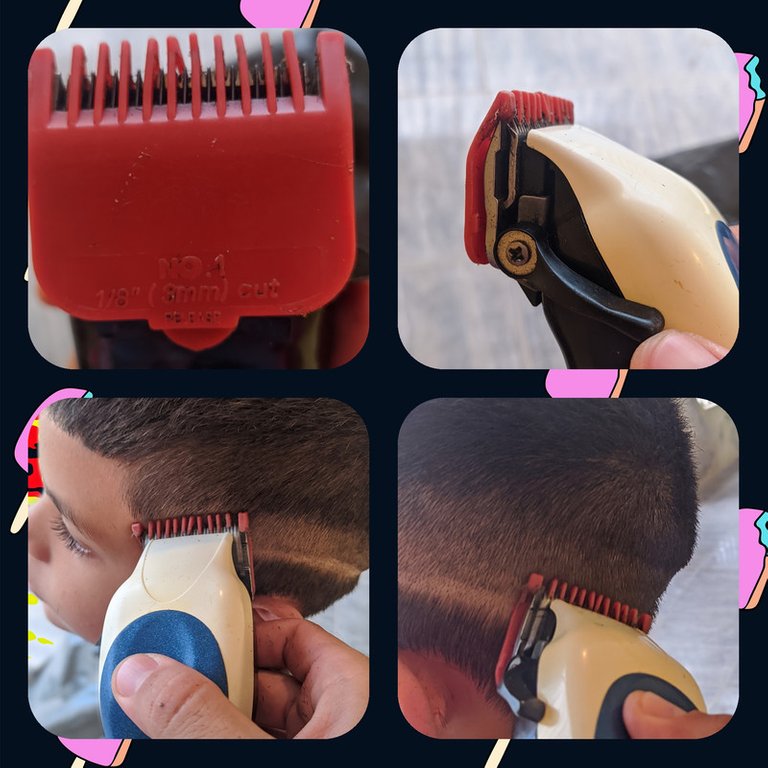
- Peines Wahl #1= 3 mm, #2= 6 mm, #3= 10 mm, #4= 13 mm, # ½= 0,5 mm, # 1 ½= 4,5 mm.
- Peine sencillo.
- Cepillo de limpieza.
- Talco.
- Tijeras.
- Rociador.
Materials:
- Wahl Color Pro machine.
- Trimming machine.
- Barbershop coat.
- Barber brush.
- Barber's razor.
- Wahl combs #1= 3 mm, #2= 6 mm, #3= 10 mm, #4= 13 mm, # ½= 0.5 mm, # 1 ½= 4.5 mm.
- Single comb.
- Cleaning brush.
- Talc.
- Scissors.
- Sprinkler.
Paso a paso - Step by step
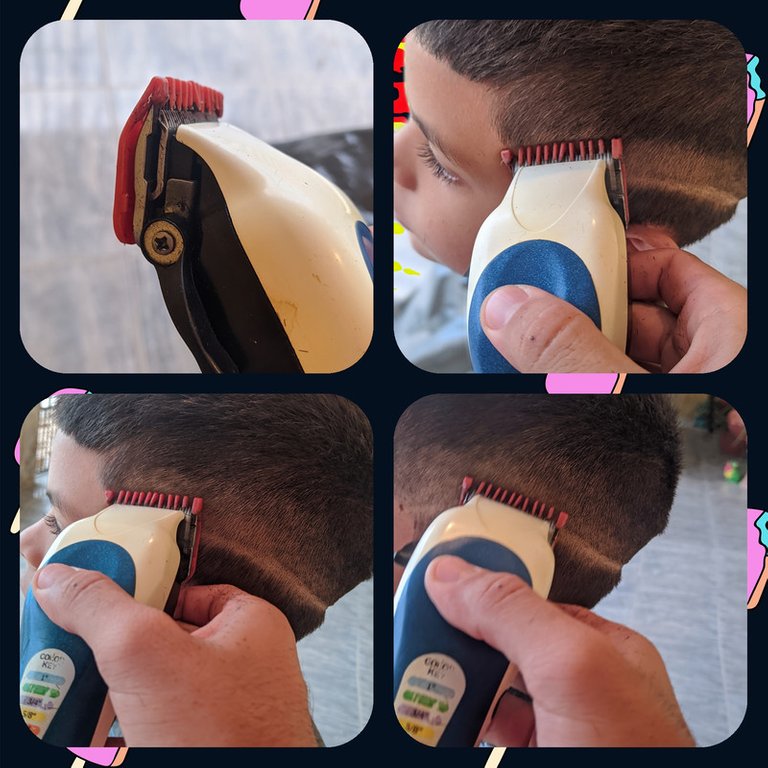
Step #1: The first thing I did was to draw a line with the clippers upside down, from the hundred with a slight curve to about three fingers above the nape of the neck.
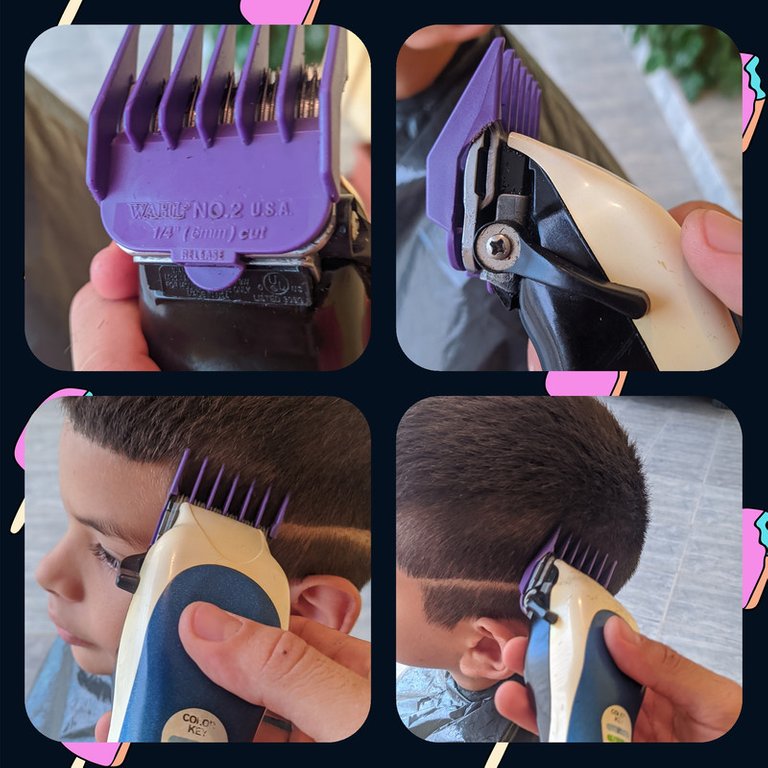
Step #2: we will clean the area to be graded, it is basically to match the gradient area with the highest comb to be used. This time the top comb we will use will be a number #2= 6 mm.
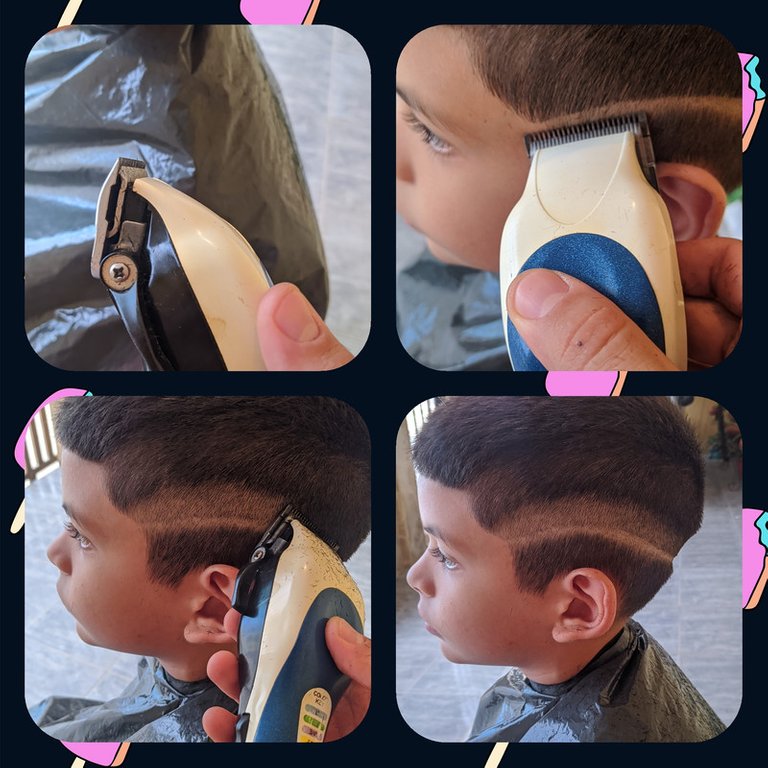
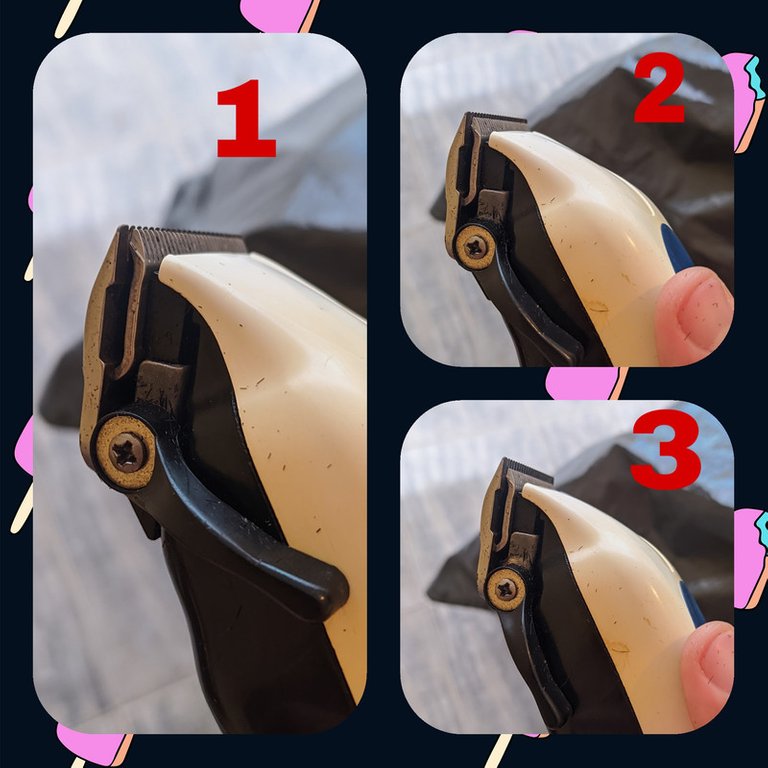
Step #3: We will use the Color Pro machine without comb and the ''0'' open, we will cut starting from the line created due to the cut made with the upside down trimmer ''0'' open and we will follow the same pattern marking a difference or separation of 1.5 cm or 2 cm above the marked line.
Step #4: we will use the comb #1= 3 mm, starting from the line that left the "0" open in the previous step, we will do this with a thickness of approximately 2 cm.
Step #5: we will divide this step into four stages, from here we will start to degrade the dividing lines created between the closed ''0'', open ''0'', comb #1 and #2.
- Etapa #1: degradaremos con la “0” cerrada la marca dejada por la maquina recortadora con movimientos en forma de “C” y jugaremos con la palanquilla para así desvanecer.
- Stage #1: we will degrade with the "0" closed the mark left by the trimming machine with "C" movements and play with the billet to fade.
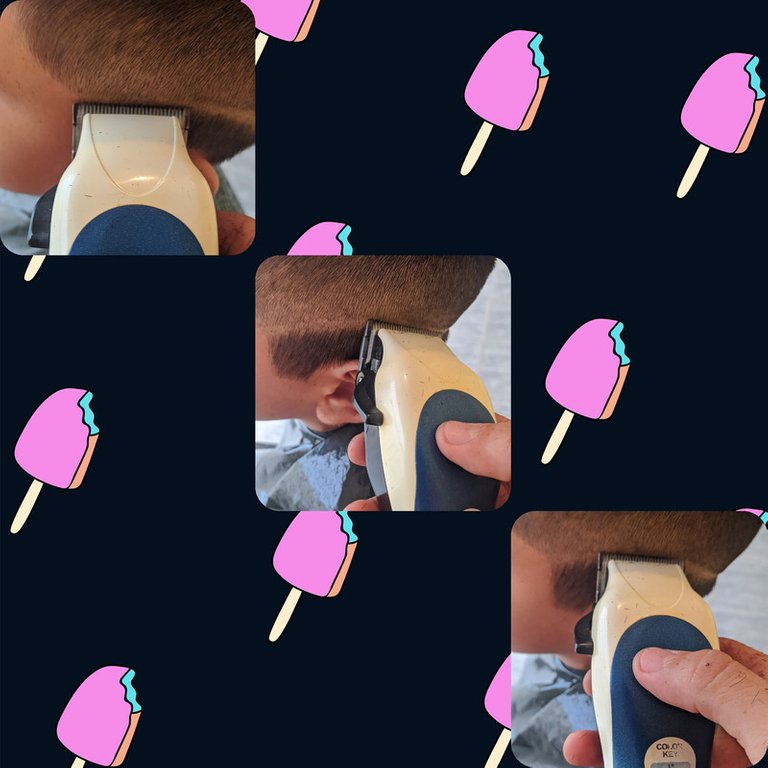
- Etapa #2: usaremos el peine ½ = 0,5 mm y realizaremos movimientos cortos en forma de “C”, al momento de empezar a degradar jugaremos un poco con la palanquilla de la máquina que abre y cierra las cuchillas. Para lograr así, tal efecto de desvanecido, esto lo haremos justo sobre la línea que ve marcada por la “0” abierta
- Stage #2: we will use the comb ½ = 0.5 mm and we will make short movements in the form of "C", at the moment of starting to degrade we will play a little with the lever of the machine that opens and closes the blades. To achieve this fading effect, we will do it just on the line marked by the "0" open.
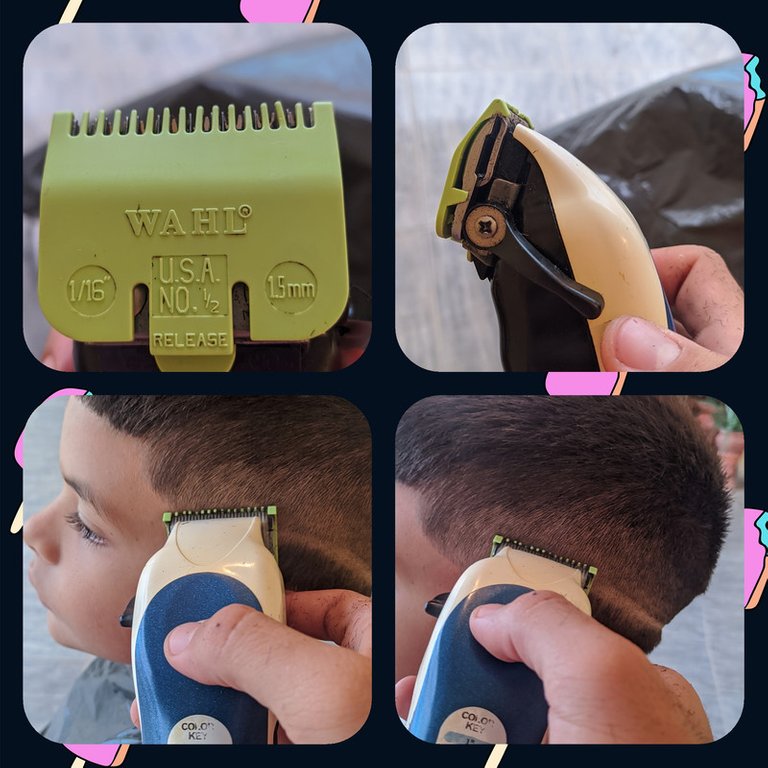
- Etapa #3: con el peine #1= 3 mm con las cuchillas abierta, cuidando mucho el espacio con movimientos ligeros y cortos en forma de “C” degradaremos un poco justo sobre la línea ya marcada por el peine #1 a cuchilla cerrada sin subir tanto la maquina al área del peine #2.
- Stage #3: with comb #1= 3 mm with the blades open, taking care of the space with light and short movements in a "C" shape, we will degrade a little just above the line already marked by comb #1 with a closed blade without raising the machine so much to the area of comb #2.
- Etapa #4: tendremos el peine 1 1/2= 4.5 mm para degradar la línea entre el peine #1 con cuchillas abierta y el #2, aquí realizaremos movimientos medianos en forma de “C” para degradar la última línea. Siempre limpiando el área con nuestro cepillo de limpieza para tener un mejor acabado.
- Stage #4: we will have the comb 1 1/2= 4.5 mm to degrade the line between the comb #1 with open blades and #2, here we will make medium movements in a "C" shape to degrade the last line. Always cleaning the area with our cleaning brush to have a better finish.

Step #6: I decided to give her a simple yet fresh design to enhance her youthful appearance, then I cleaned up the design and proceeded to use the barber's razor to define the haircut.
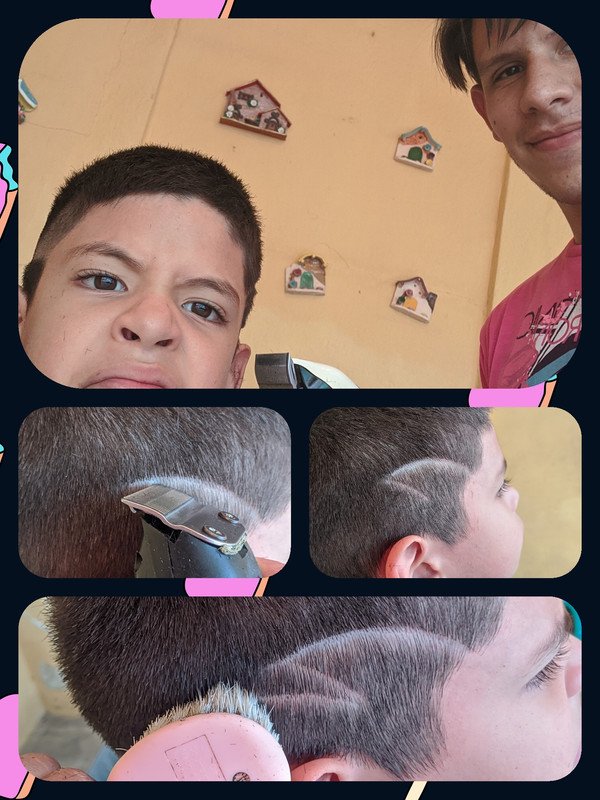
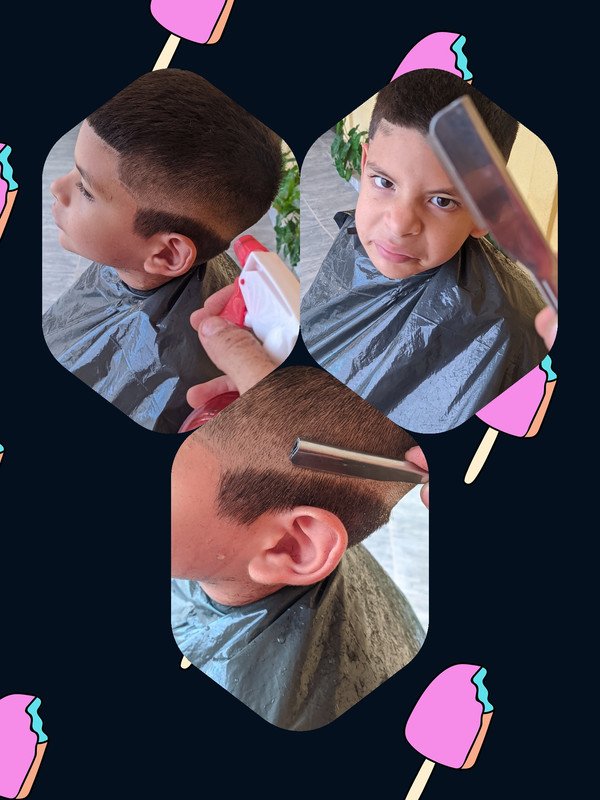
Step #7: finally with the barber brush I cleaned all the excess hair.

¡Gracias por leer mi post! Nos leemos pronto.
Thanks for reading my post! See you soon.

Camera: CellPhone Xiaomi Redmi Note 8
Pictures of my Property
Translated with www.DeepL.com/Translator (free version)

Congratulations @ernesto99! You have completed the following achievement on the Hive blockchain and have been rewarded with new badge(s) :
Your next target is to reach 50 comments.
You can view your badges on your board and compare yourself to others in the Ranking
If you no longer want to receive notifications, reply to this comment with the word
STOPCheck out the last post from @hivebuzz:
Support the HiveBuzz project. Vote for our proposal!
Congratulations, your post has been upvoted by @dsc-r2cornell, which is the curating account for @R2cornell's Discord Community. Enhorabuena, su "post" ha sido "up-voted" por @dsc-r2cornell, que es la "cuenta curating" de la Comunidad de la Discordia de @R2cornell.