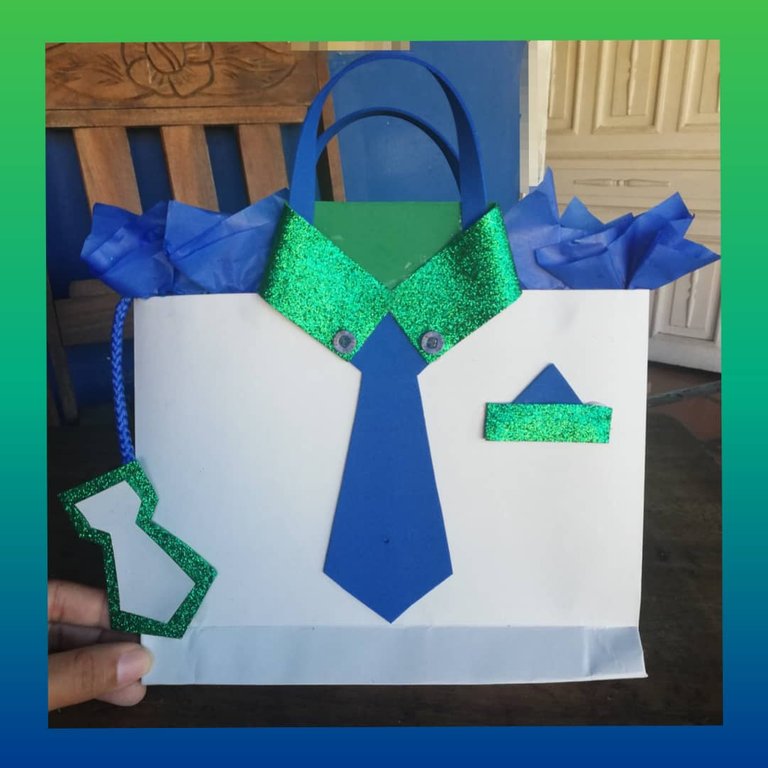
Hello dear friends hive, we are in a special month, the month of parents, so these days I will be publishing how to make several little details for those wonderful parents who also deserve those cute little details made with a lot of love. They are simple details to make with materials that we have in a very cheap house and that are very beautiful, in this first part I am going to make a gift bag, I decided to make the bag myself out of cardboard I like it because it is a stronger material, it can also be make of paper or much better you can buy a bag already made and you would only have to decorate it and surely it will be very beautiful. | Hola queridos amigos hive, estamos en un Mes especial el mes de los padres por eso estos días voy a estar publicando como hacer varios detallitos para esos padres maravillosos que también merecen esos detallitos lindos hechos con mucho amor. Son detalles sencillos de hacer con materiales que tengamos en casita muy económicos y que quedan muy bonitos, en esta primera parte voy hacer una bolsa de regalo, decidí hacer la bolsa yo misma de cartulina me gusta porque es un material mas fuerte, tambien Se puede hacer de papel o mucho mejor puedes comprar una bolsa ya hecha y solo te quedaria decorarla y de seguro que va a quedar muy bonita. |
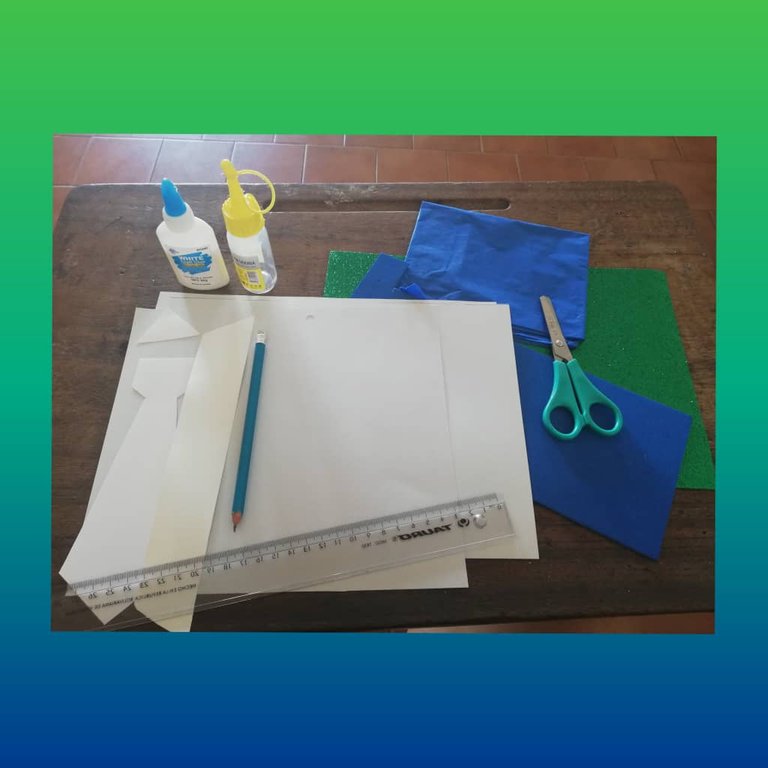
Materials I used:
1.- Cardboard
2.-Frosty green foam, blue foam
3.-Buttons
4.-Paste
5.-Blue tissue paper.
6.-Scissors.
7.-Rule.
8.-Blue shoelace.
Materiales que utilicé:
1.- Cartulina
2.-Foami verde escarchado, foami azul
3.-Botones
4.-Pega
5.-Papel de seda azul.
6.-Tijeras.
7.-Regla.
8.-Cordon de zapato color azul.
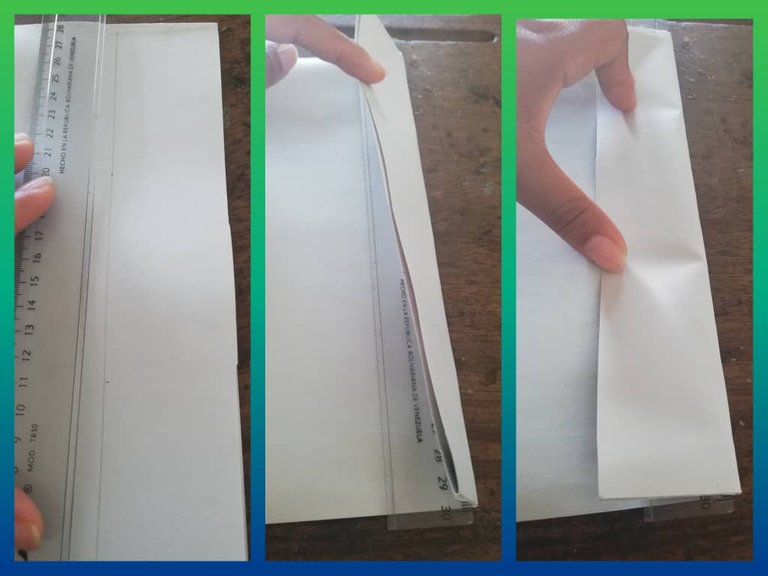
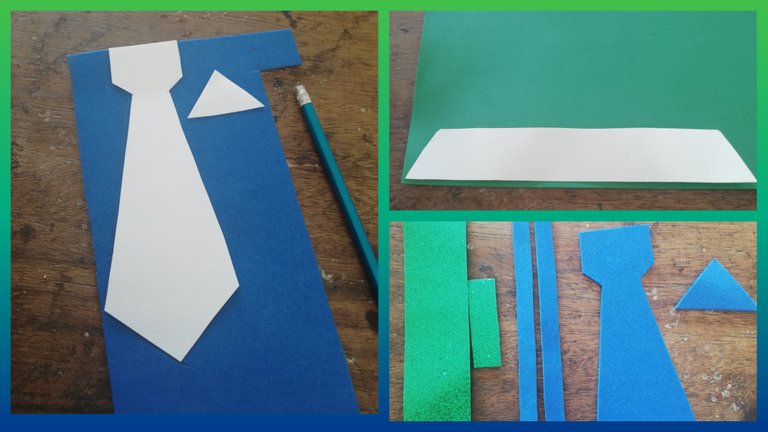
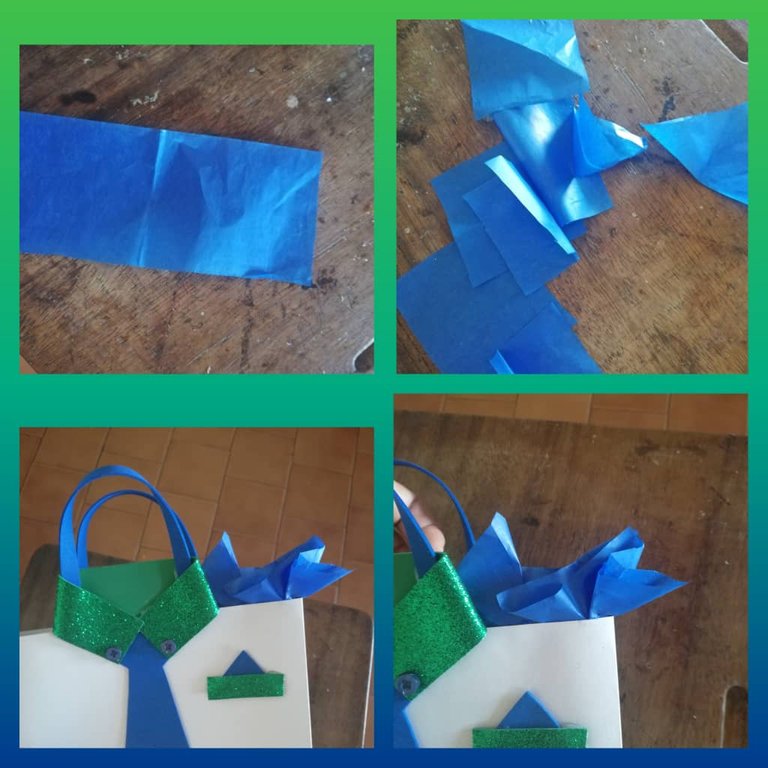
To start, stick the cards, use two letter type if you have a complete card without having to join them, it would be much easier and it would save you this step. | Pará empezar pegue las cartulinas, use dos tipo carta si tienes una cartulina completa sin tener que unirlas seria mucho más sencillo y te ahorraría este paso. |
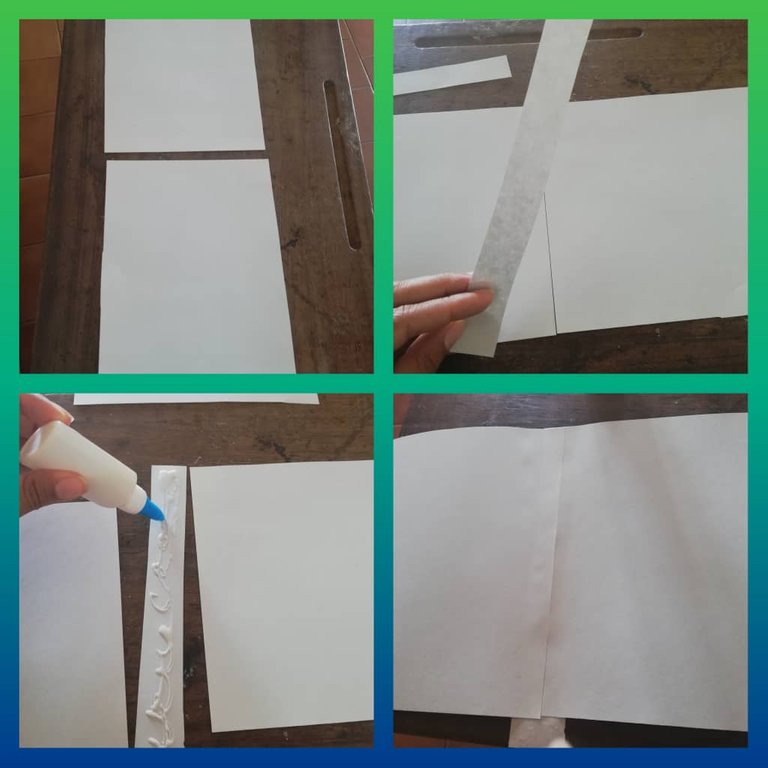
Glue the card stock side to side use a line of the same color card stock to join them together and cut off the excess. | Pegue la cartulina de lado a lado use una línea de cartulina del mismo color para unirlas y corte el sobrante. |
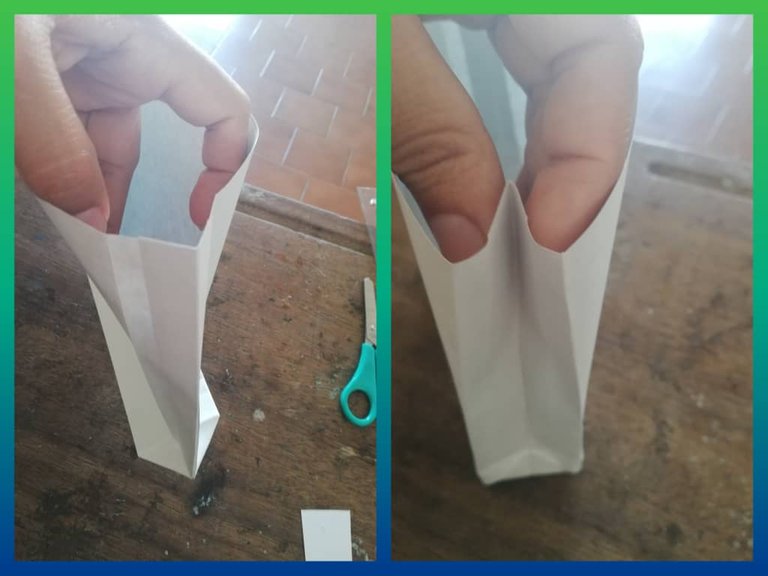
Fold around the center like this, the sides I joined are side to side. | Doble por todo el centro de esta manera, los lados que uní quedan de lado a lado. |

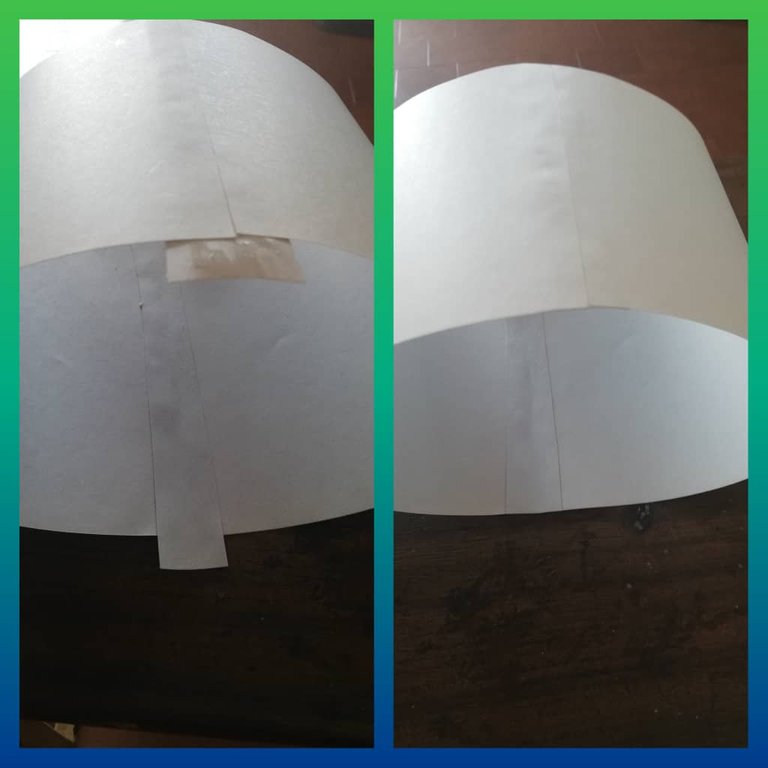
I measured 8 cm from the bottom and with the help of the double ruler. | Medí 8 cm de la parte de abajo y con la ayuda de la regla doble. |
Open and fold the corners inwards and glue, they are like a triangle. | Abri y doble las esquinas hacia dentro y pegue, quedan como un triangulo. |
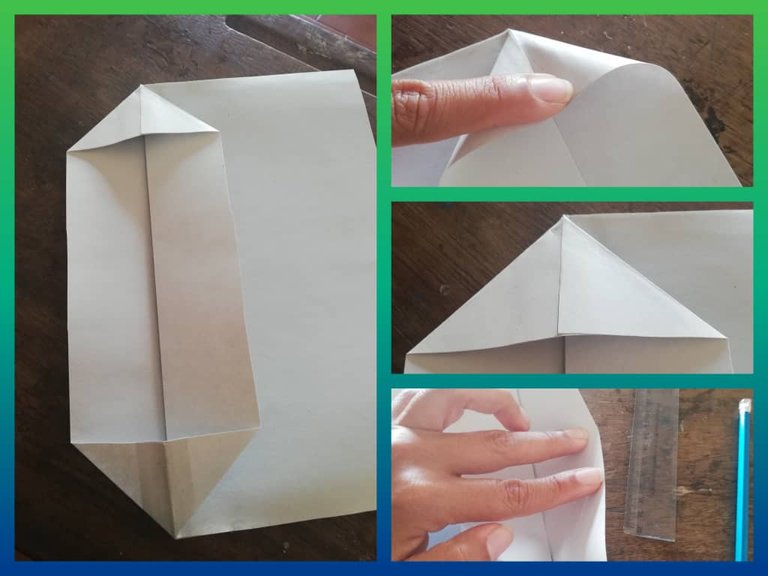
In the next step fold the two wings from outside to inside with the help of the ruler and glue. | En el siguiente paso doble las dos alas de afuera hacia adentro con la ayuda de la regla y pegue. |
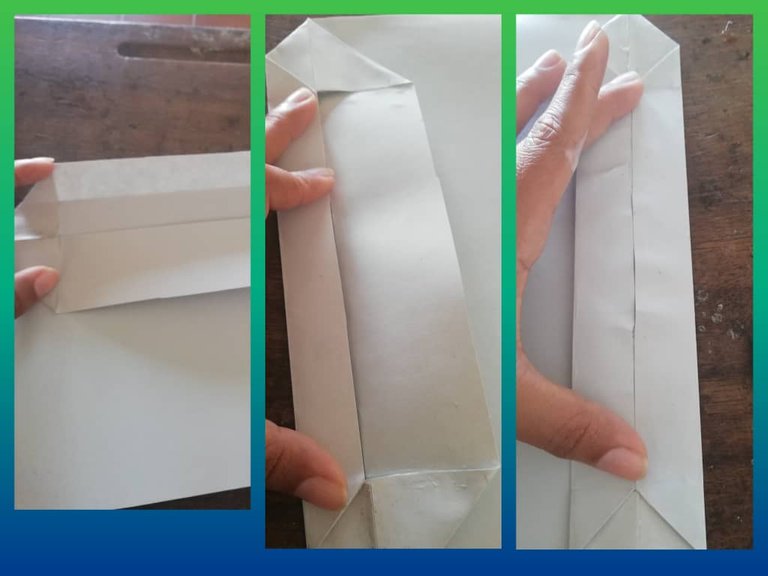
Fold from top to bottom on both sides. | Doble de arriba hasta abajo por los dos lados. |
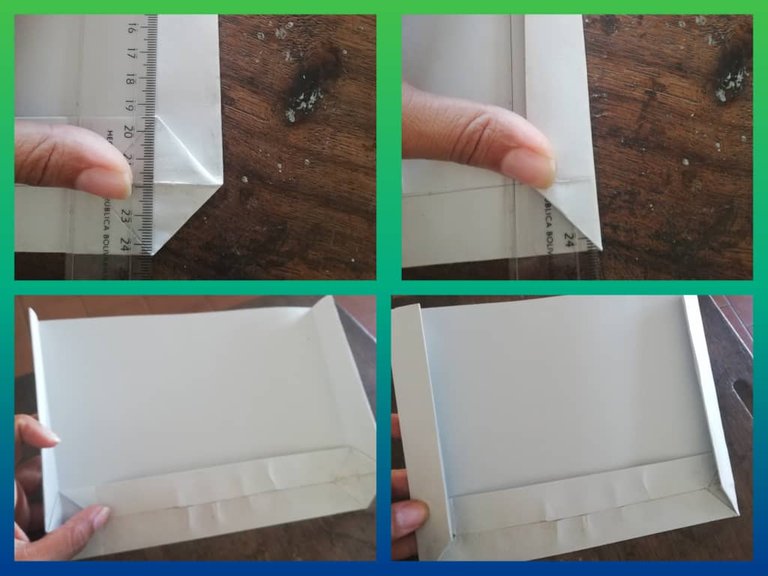
I opened the bag and put the double of the sides in like this: | Abri la bolsa y los dobleses de los lados los metí hacia adentro asi:. |
With a tie pattern, shirt collar, and pocket, mark on the foami and cut out and made two lines of 20 cm for the handles. | Con un patron de corbata, cuello de camisa, y bolsillo marque en el foami y recorte e hice dos líneas de 20 cm para las asas. |
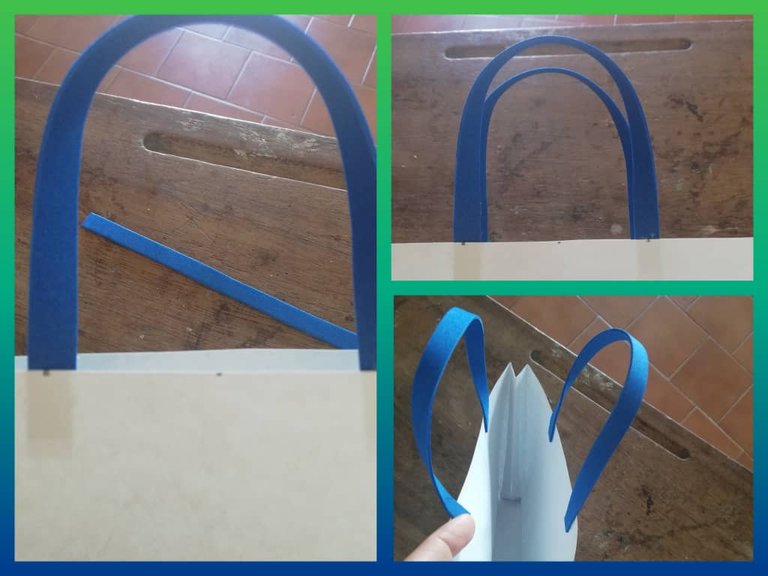
Glue the handles, I measured so they were right in the center. | Pegue las asas, medí para que quedaran justo en el centro. |
Glue the tie, around one of the handles glue the shirt collar, and glue the pocket. | Pegue la corbata, alrededor de una de las asas pegue el cuello de camisa, y pegue el bolsillo. |
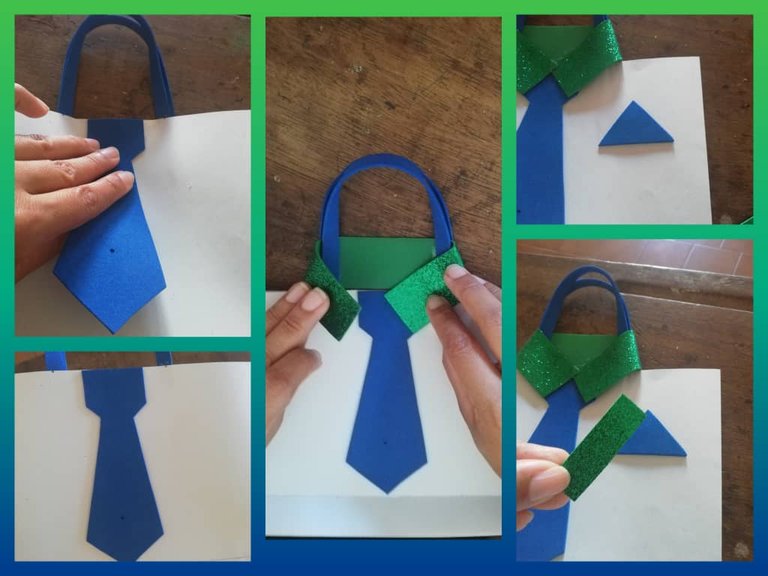
Glue the buttons one on each side of the neck | Pegue los botones uno de cada lado del cuello |

Cut the tissue paper into squares, fold them into a triangle and glue them around the top and inside of the bag. | Corte el papel de seda en cuadros las doble en triangulo y los pegue alrededor de la parte de arriba y adentro de la bolsa |
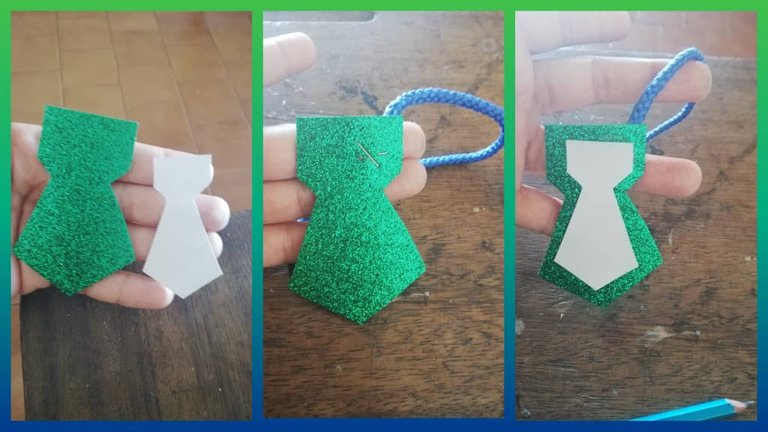
To finish I made a small tie card with foam and cardboard, staple a piece of blue shoelace and glue it to the bag. | Pará terminar hice una tarjeta pequeñita de corbata con foami y cartulina, grape un pedazo de cordon de zapatos de color azul y la pegue a la bolsa. |
The bag was finished, very beautiful and sure the parents will love it and especially when it is made with a lot of love. | Ya quedo terminada la bolsa muy bonita y seguro a los papas les va a encantar y sobretodo cuando es hecha con mucho amor. |
App Collage maker
Traductor google español-Ingles
Photos taken by mobile phone HUAWEI p20
Collage maker app
Google Spanish-English Translator

Congratulations @filejethje! You have completed the following achievement on the Hive blockchain and have been rewarded with new badge(s) :
Your next target is to reach 20 posts.
You can view your badges on your board and compare yourself to others in the Ranking
If you no longer want to receive notifications, reply to this comment with the word
STOPCheck out the last post from @hivebuzz:
Support the HiveBuzz project. Vote for our proposal!
Really so nice 👌👌