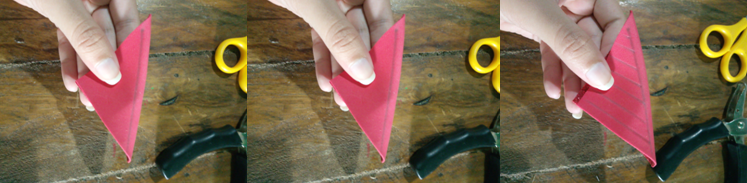
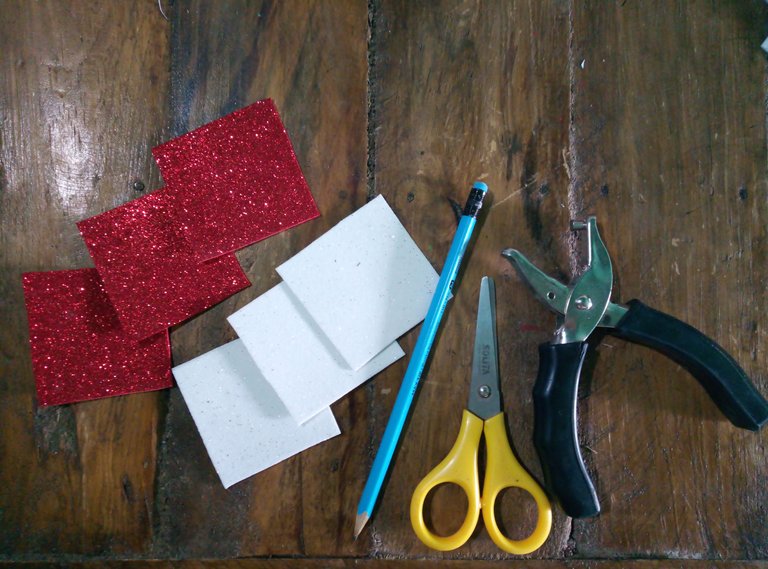
The first thing we are going to do is to cut our foami in squares of the size of your preference, for this occasion I took 7x7 as a measure. Next, we fold our foami, making a triangle. Then, on the longest side we are going to make a line, in order to draw other lines inside it (in the image you can see it better)
Lo primero que vamos hacer es cortar nuestro foami en cuadrados del tamaño de tu preferencia, para esta ocasión tomé como medida 7x7. Seguidamente, doblamos nuestro foami, haciendo un triángulo. Luego, en el lado más largo vamos hacer una línea, para así trazar otras líneas, dentro de la misma (en la imagen lo puedes apreciar mejor)
Once this step is done, we proceed to cut only the lines that are inside, the one we placed first will be our limit. In this way, we will start selecting our first strip and glue it to the one next to it. We leave one unglued, and then glue the next one and so on.
Efectuado este paso, procedemos a cortar solo las líneas que están adentro, la que colocamos de primero será nuestro límite. De esta forma, vamos a empezar a seleccionar nuestra primera tira y la pegamos con la de al lado. Dejamos una sin pegar, y la siguiente la pegamos y así sucesivamente.
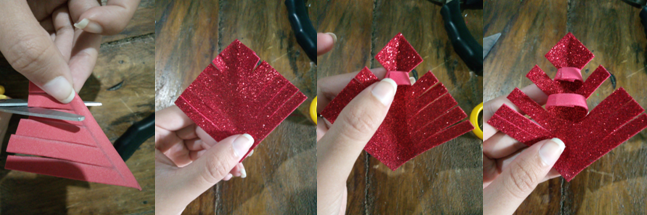
In this way, we turn it over and join the excess strips together, leaving our first part of the flake. Repeating the process five more times.
De esta manera, lo volteamos y las tiras sobrantes las unimos, quedando nuestra primera parte del copo. Repetimos el proceso cinco veces más.
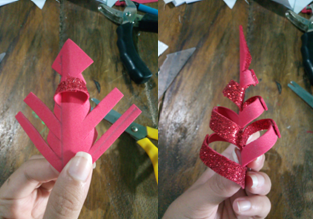
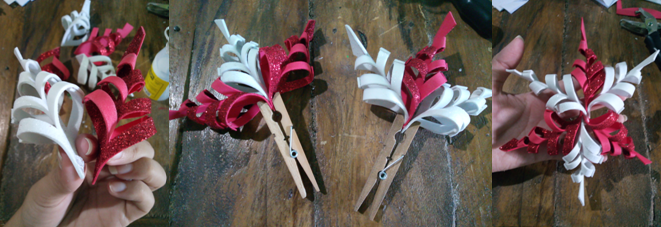
Once finished, we are going to join and glue three of our part of the flake, repeat with the other three, let them dry and join them together, until we obtain the result shown in the image.
Terminado, vamos a unir y pegar tres de nuestra parte del copo, repetimos con los otros tres, dejamos secar y juntamos, hasta obtener el resultado reflejado en la imagen.
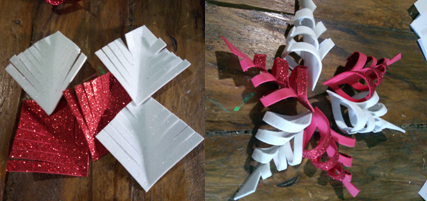
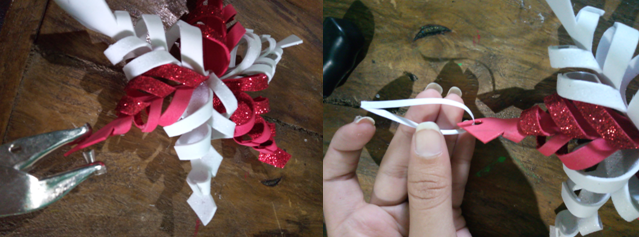
Finally, we open a small hole with a punch in one of the ends of our flake, and to hang it, we cut a strip of paper and ready, we have our tender and cute craft, you can place it on your Christmas tree, or on the door of your house.
Finalmente, abrimos un pequeño agujero con un sacabocado en una de las puntas de nuestro copo, y para poder guindarlo, cortamos un tira de papel y listo, ya tenemos nuestra tierna y linda manualidad, la puedes colocar en tu arbolito navideño, o en la puerta de tu casa.

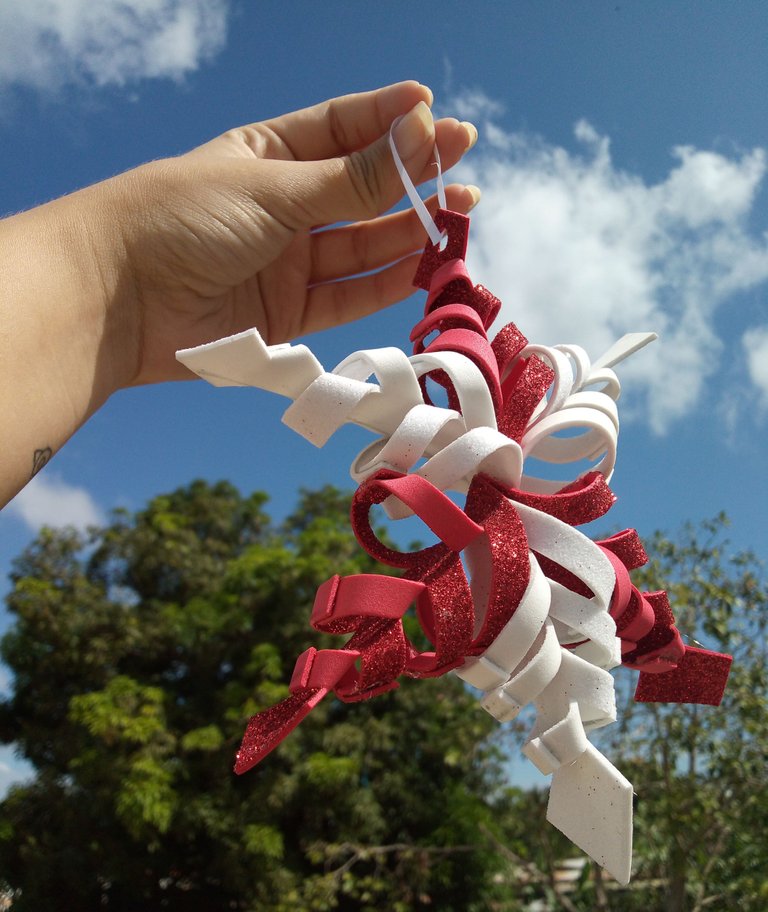
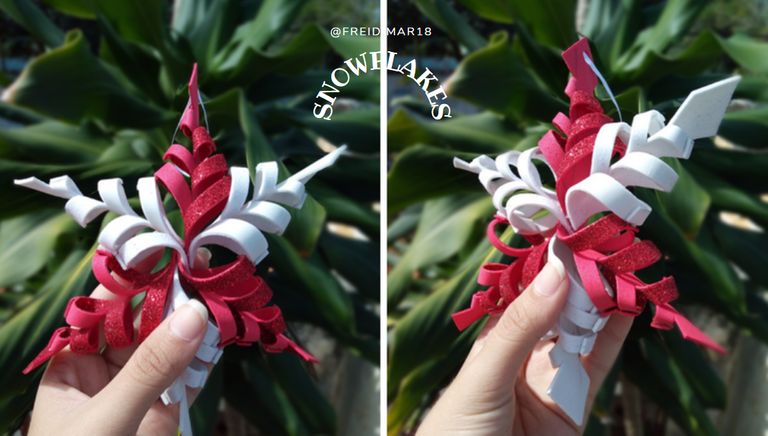
Final result! | ¡Resultado final!
Without further ado, thank you for making it this far, see you next time!/ Sin más que agregar, gracias por llegar hasta aquí, ¡nos vemos en una próxima oportunidad!.


Important sources / Fuentes importantes:
✎ Translator: Deepl ✄Text separators: Visit here |📷 All pictures were taken from my phone|
Amiga pero que belleza de adorno ♥️ me encanta, lo ameeeee gracias por compartir el paso a paso, se ve super fácil de hacer y queda hermoso 😍
Amiga hermosa muchísimas gracias por dejar tu comentario, y siii amiga queda muy lindo. Te invito a que lo realices, viste demasiado y da elegancia <3
Espero y te encuentres muy bien amiga, un abrazo. ¡Saludos!