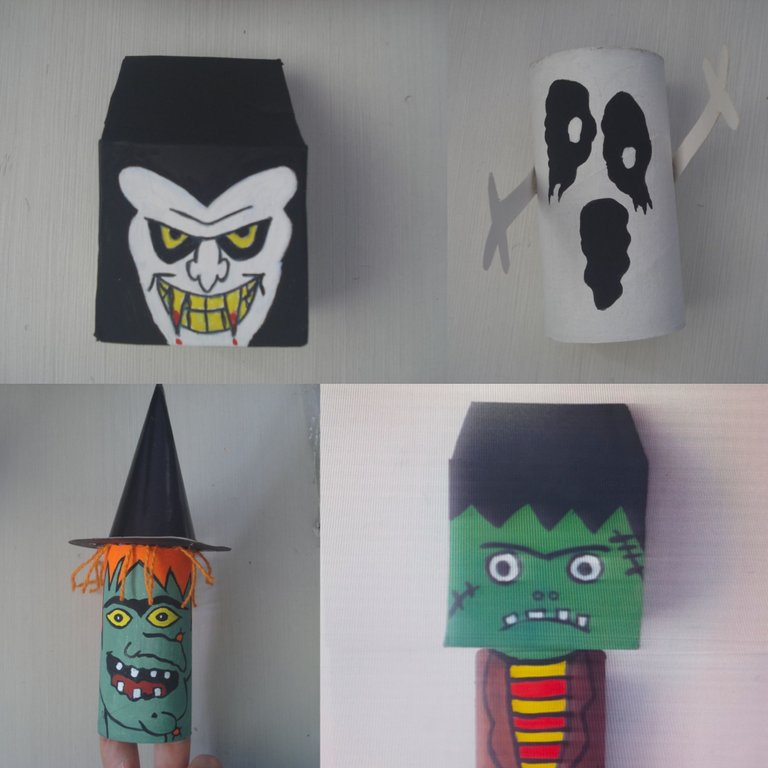
¡Saludos comunidad! Todos activados ya para el día de Halloween. Hoy les enseñaré a hacer unas figuras de terror usando rollos de papel higiénico. Es increíble lo versátil y útil que es este material para hacer diferentes tipos de manualidades y lo mejor de todo es que reciclamos y ayudamos a nuestro planeta, nuestro único hogar.
Greetings community! Everybody ready for Halloween. Today I will show you how to make horror figures using toilet paper rolls. It´s incredible how versatile and useful this material is to make different types of crafts and best of all, we recycle and help our planet, our only home.
Materiales:
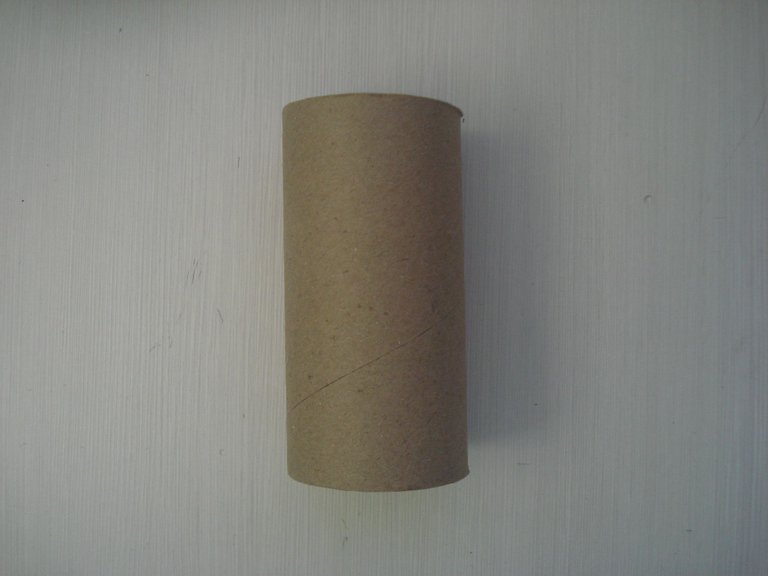
- 4 rollos de papel higiénico
- Cartón
- Papel lustrillo negro y rojo o tela negra y roja
- Pega blanca
- Cinta plástica
- Barra de silicón
- Tijera
- Marcadores o colores
- Pinceles de diferente grosor
- Pintura al frío blanca, negra, verde, marrón, amarilla y roja
- Pabilo
Materials:
- 4 rolls of toilet paper
- Cardboard
- Black and red glossy paper or black and red fabric
- White glue
- Plastic tape
- Silicon bare
- Scissors
- Markers or colored pencils
- Brushes of different thickness
- Paint in colors white, black, green, brown, yellow and red
- Yarn
Estas figuras las hice el año pasado para la fiesta de Halloween que organizamos en nuestro edificio, les puse una bolsita con dulces a cada una y las rifamos entre los niños que estuvieron presentes. Aunque no le tomé fotos a cada paso del proceso de hacerlas es fácil entenderlo porque la mayor parte del trabajo está en dibujar y en la creatividad que ustedes le pongan a cada personaje.
I made these figures last year for the Halloween party that we organized in our building, I put a bag with sweets in each one and we raffled them among the children who were present. Although I didn´t take photos at each step of the process of making them, it´s easy to understand it because most of the work is in drawing and in the creativity that you put to each character.
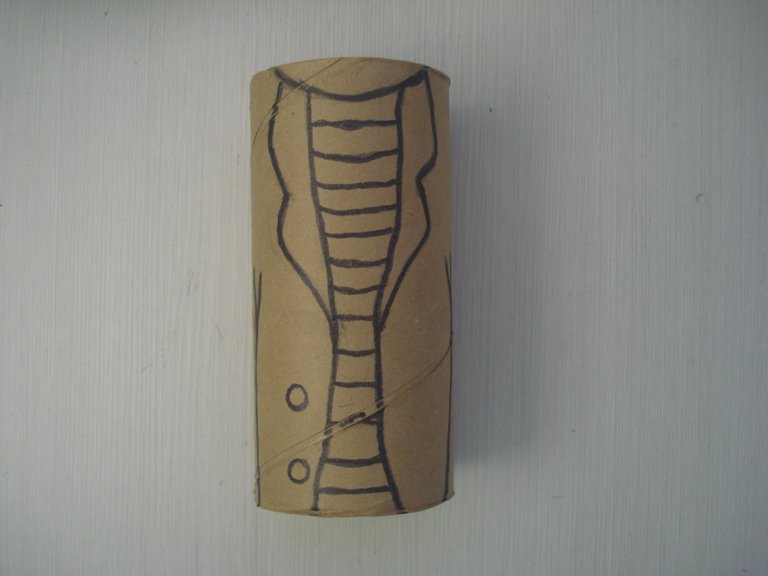
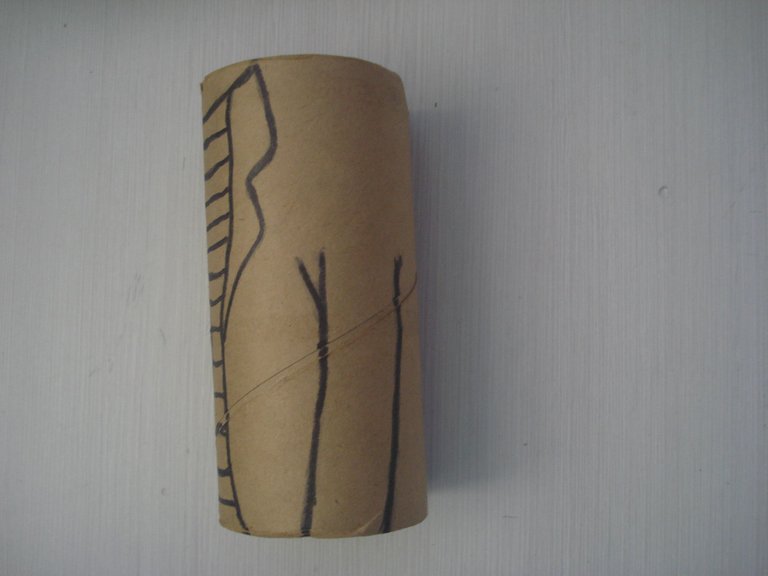
Frankenstein:
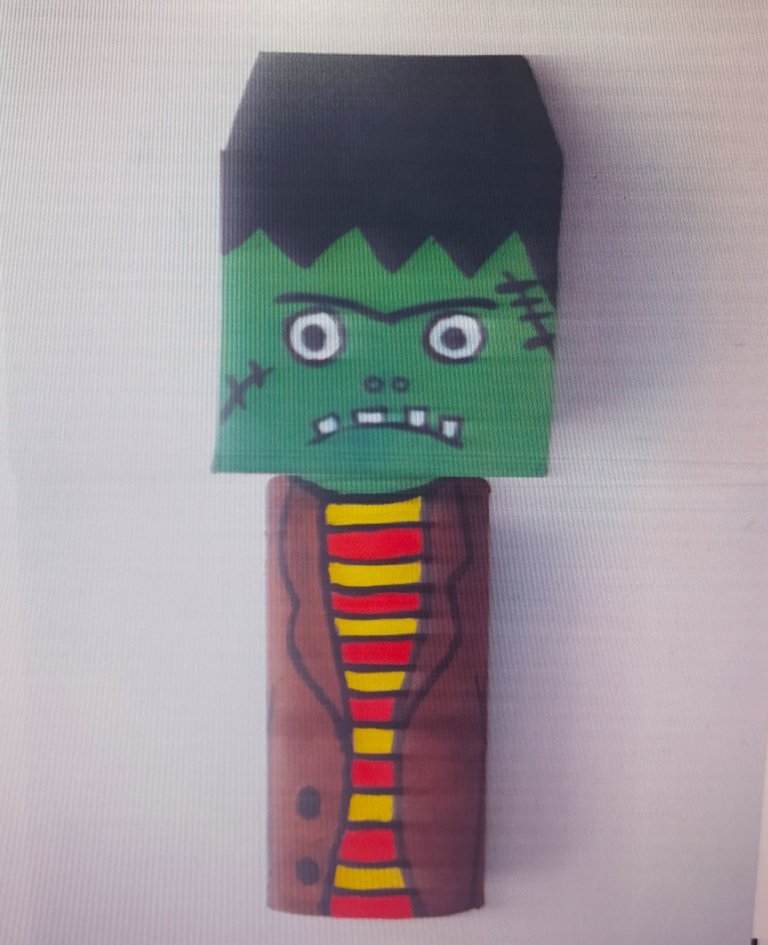
En un rollo de papel y con un marcador, dibujamos el traje y lo pintamos. Seguidamente haremos la cabeza con el cartón.
On a roll of paper and with a marker, we draw the suit and paint it. Next we will make the head with the cardboard.
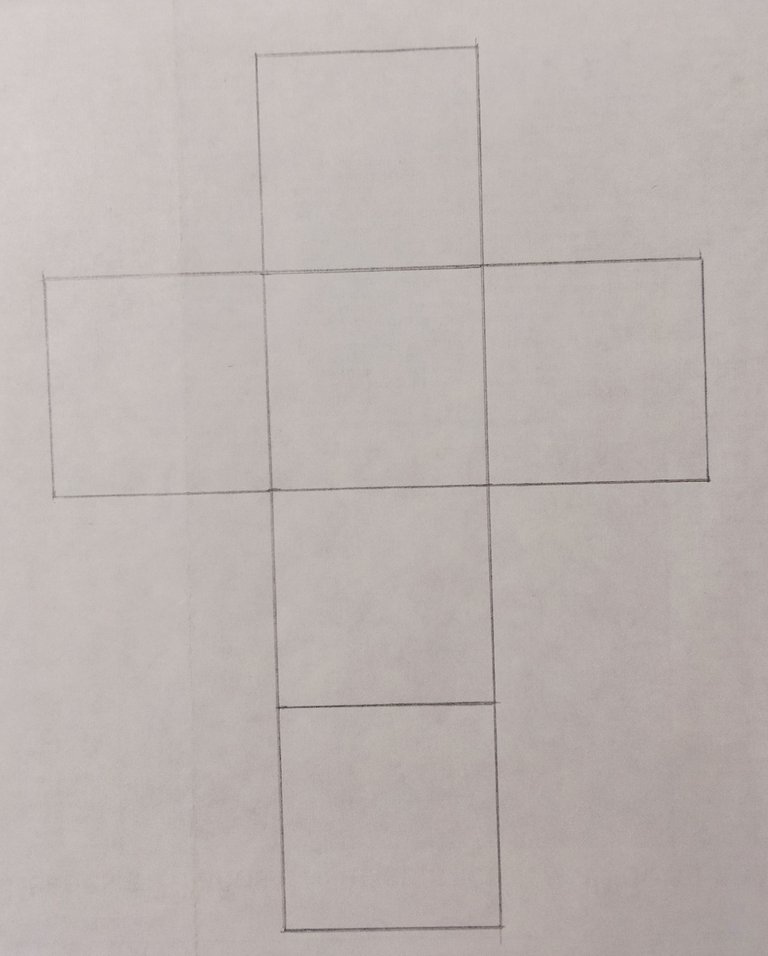
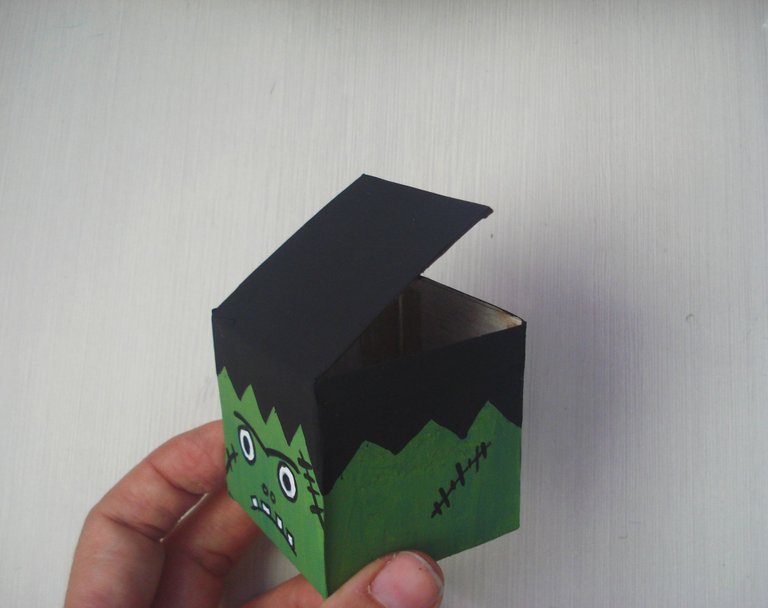
La cabeza va a ser una cajita cuadrada de 6 cms por lado. ¿Cómo se hace? Muy fácil:
1- Toman un pedazo de cartón delgado y v trazan una tira de 24 cms de largo x 6 cms de ancho.
2- Sobre esa tira ponen una regla y marcan una línea en cada 6 cms, es decir, 6, 12, 18 y 24.
3- En la marca de los 6 cms van a trazar una línea de 6 cms a la derecha y otra de 6 cms a la izquierda.
4- En la marca de los 12 cms trazan una línea paralela a la anterior y unen los extremos. Va a quedar como una cruz de 4 cuadrados a la vertical y 3 en horizontal. Recortamos la cruz con una tijera.
5- Poniendo una regla en la línea de cada cuadrado van a hacer un doblez para que cuando vayamos a armar la caja cada parte esté bien marcada.
The head will be a square box measuring 6 cm per side. How is it done? Very easy:
1- Take a piece of thin cardboard and draw a strip 24 cm long x 6 cm wide.
2- On that strip put a ruler and mark a line in every 6 cm, that is, 6, 12, 18 and 24.
3- At the 6 cm mark, we´re going to draw a 6 cm line on the right and another 6 cm on the left.
4- At the 12 cm mark, you´re going to draw a line parallel to the previous one and join the ends. It will be like a cross of 4 squares vertically and 3 horizontally. We cut the cross with the scissors.
5- Putting a ruler on the line of each square you will make a fold so that when we´re going to assemble the box each part will be well marked.
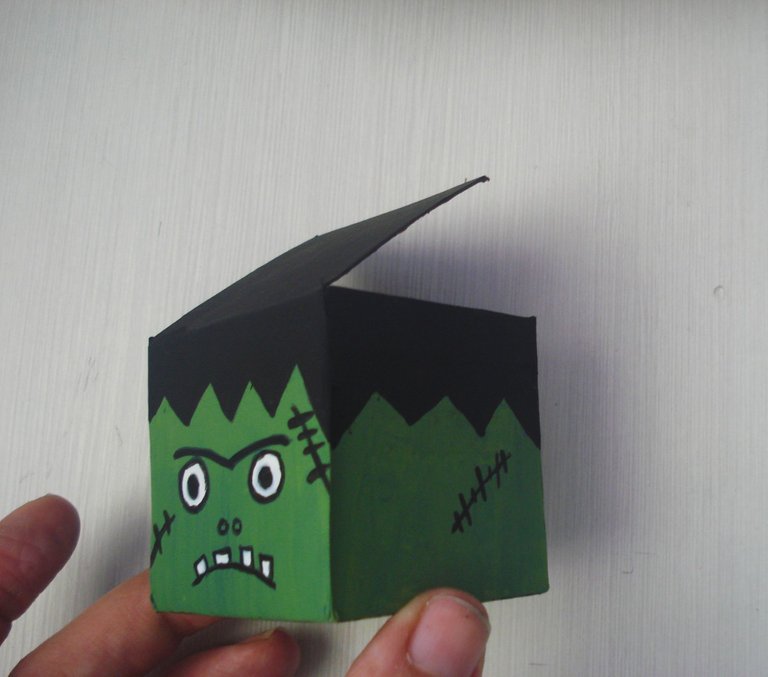
Ahora,vamos a armar la cajita, pegando las partes por dentro con cinta plástica y dejando abierta la parte de arriba. Una vez que hayamos armado la caja, dibujamos la cara de Frankenstein y la pintamos. Por último pegamos la cabeza al rollo con silicón caliente. ¡Nuestro monstruo está listo!
Now we´re going to assemble the box, gluing the parts inside with plastic tape and leaving the top open. Once we have assembled the box, we draw Frankenstein's face and paint it. Finally we glue the head to the roll with hot silicone. Our monster is ready!
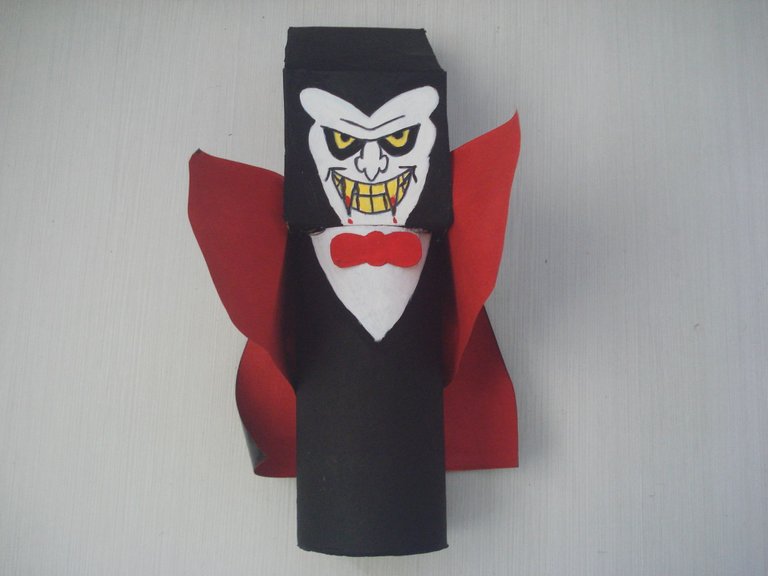
Drácula:
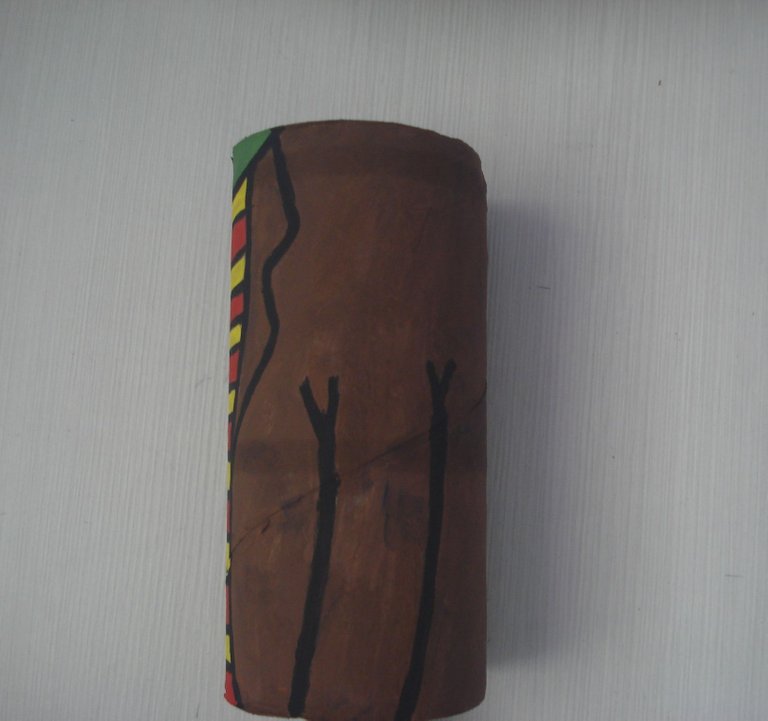
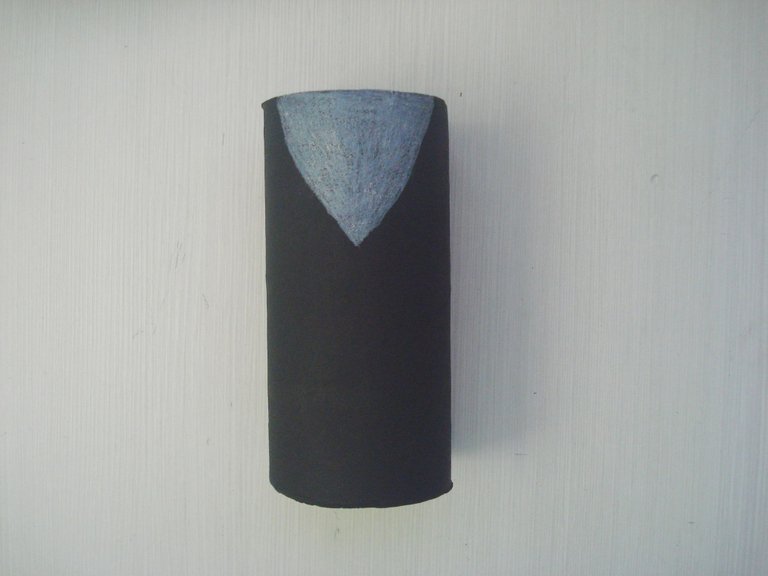
Tomamos un rollo de papel y lo pintamos de negro, dejamos secar y le hacemos una V con pintura blanca, esta será la camisa de Drácula.
We take a roll of paper and paint it black, we let it dry and then make a V with white paint, this will be Dracula's shirt.
Luego, hacemos la cabeza de la misma manera que hicimos la de Frankenstein y la pintamos.
Then we make the head the same way we did Frankenstein's and paint it.
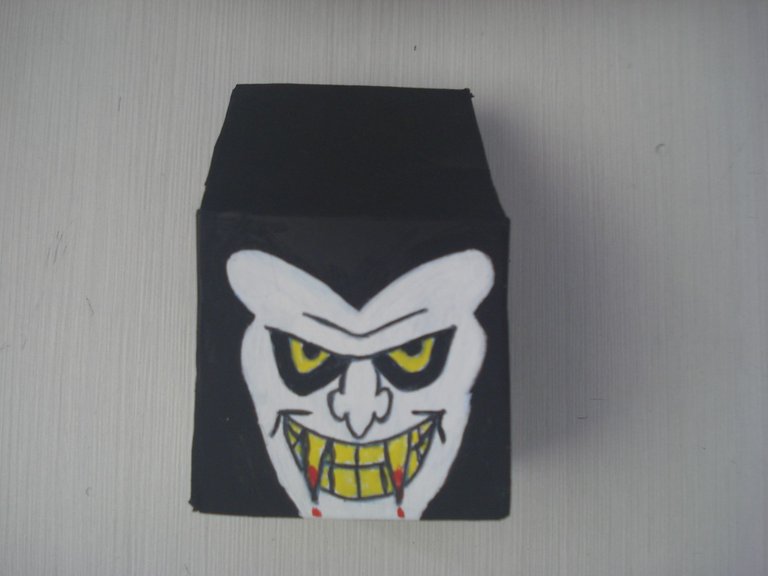
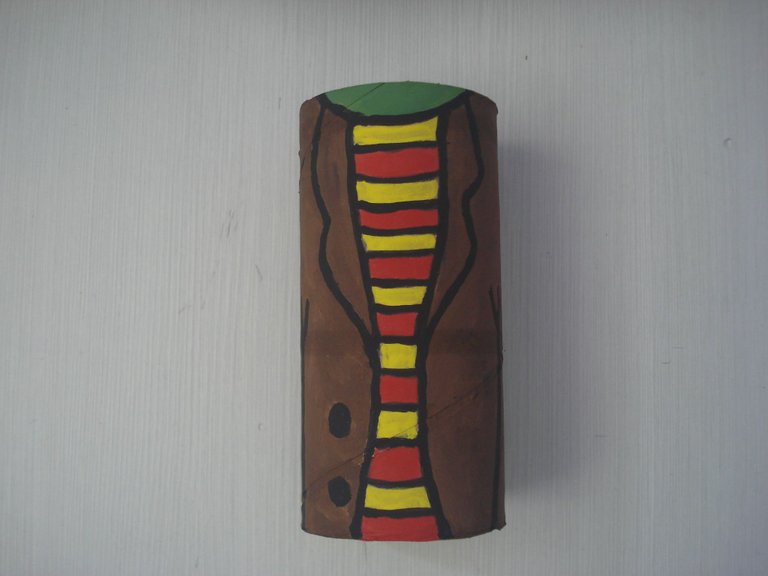
Por último, pegamos la cabeza al rollo con silicón, Cuando haya secado bien, vamos a hacerle la capa al traje de Drácula pegando dos hojas de papel lustrillo, una negra y una roja, la recortamos en forma de capa, que es mas o menos en forma de triángulo y la pegamos de manera que el lado rojo quede hacia adentro y que cubra parte de la cabeza, si tienen tela negra y roja pueden hacer la capa con este material. Como detalle final, le hacemos un corbatín con cartón y lo pintamos de rojo. Ahora Drácula está listo para ir a chupar sangre jajaja.
Finally, we glue the head to the roll with hot silicone, When it has dried well, we´re going to make the cape for the Dracula costume by gluing two sheets of glossy paper, one black and one red, we cut it into a cape, which is more or less in the shape of a triangle and we glue it so that the red side is inwards and that it covers part of the head, if you have black and red fabric you can make the cape with this material. As a final detail we make a bowtie out of cardboard and paint it red. Now Dracula is ready to go suck blood hahaha.
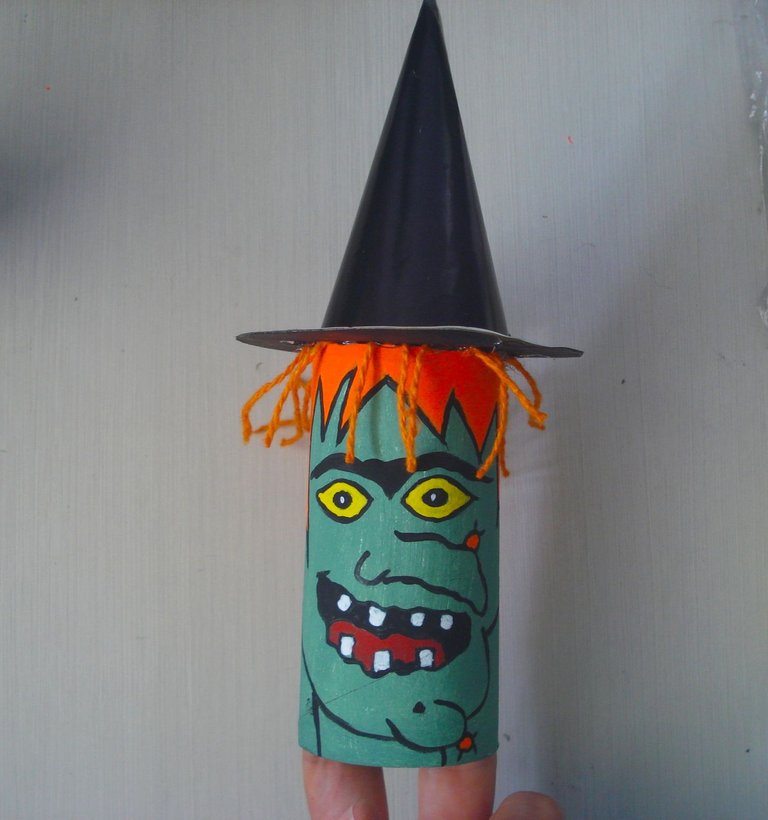
La Bruja / The Witch:
Pintamos de verde un rollo de papel, lo dejamos secar y dibujamos el rostro de la bruja.
We paint green a roll of paper, let it dry and draw the witch's face.

Hacemos la base del sombrero de la bruja con cartón y con papel lustrillo la parte de arriba y los pegamos. Ahora le pondremos cabello a nuestra horrible bruja jajaja, cortando tiras de pabilo del color que más nos guste y las vamos a ir pegando por la parte de adentro con pega blanca. Pueden ponerle mucho o poco cabello, como a ustedes más les guste. Por último, pegamos el sombrero y lista para volar en su escoba ajajajaja.
We make the base of the witch's hat with cardboard and with glossy paper the top part and glue them. Now we will put hair on our horrible witch hahaha, cutting strips of yarn the color we like the most and we´re going to glue them on the inside with white glue. You can put a lot or a little hair on her, as you like best. Finally, we glue the hat and she´s ready to fly on her broom ahahahaha.
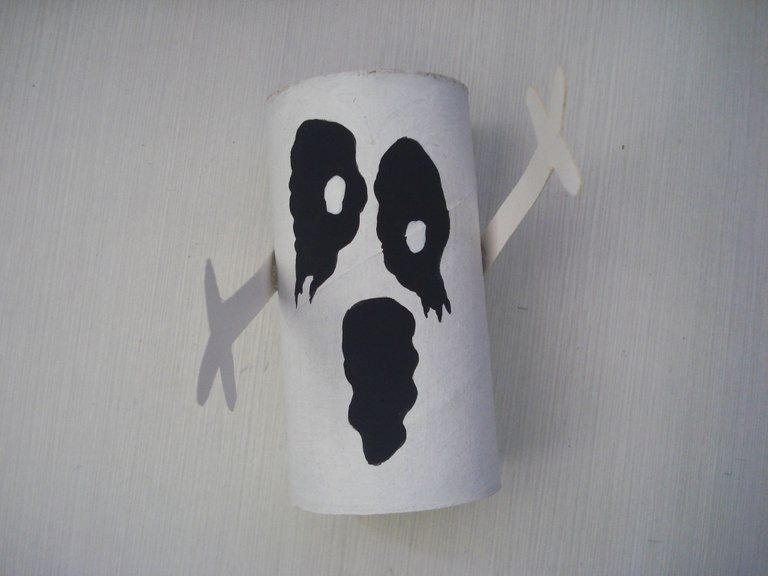
El Fantasma / The Ghost:
Hacer el fantasma es lo más fácil que existe. Toman un rollo y lo pintan de blanco. Mientras se seca, van a dibujar sobre un cartón los brazos del fantasma, de unos 8 cms de largo más o menos y también los pintan de blanco. Luego, le dibujan la cara al fantasma con pintura negra, le pegan los brazos con pega blanca y buuuu, listo.
Making the ghost is the easiest thing in the world. Take a roll and paint it white. While it dries, we´re going to draw on cardboard the arms of the ghost, about 8 cm long more or less and also paint them white. Then, draw the face of the ghost with black paint, stick his arms with white glue and boooo, that's it.
Estas figuras son fáciles de hacer, divertidas, económicas, originales y están hechas con material reciclable. Espero que las hagan y que pasen una espeluznante noche de Halloween ajajajajaja.
These figures are easy to make, fun, cheap, original and made with recyclable material. I hope you make them and have a spooky Halloween night ahahahaha.
Gracias por leer, compartir, apoyar, votar y comentar.
Hasta la próxima.
¡Miau!
Thanks for read, share, vote and comment.
Until next post.
Meow!
Awesome! Very creative, I love it :) My pleasure to feature this fun tutorial in my latest upvote giveaway for better visibility ;) Keep up the good work and Happy Halloween!
@tipu curate
Hey! Ha ha ha, thank you very much for the support, glad you liked them. Happy Halloween for you, too. 🐈🎃🤗🧙👻
Upvoted 👌 (Mana: 66/86) Liquid rewards.
Thanks a lot for the support
Congratulations @gatubela! You have completed the following achievement on the Hive blockchain and have been rewarded with new badge(s) :
Your next target is to reach 40 posts.
You can view your badges on your board and compare yourself to others in the Ranking
If you no longer want to receive notifications, reply to this comment with the word
STOPTo support your work, I also upvoted your post!
Check out the last post from @hivebuzz:
Support the HiveBuzz project. Vote for our proposal!
Thanks 🤗
Hi gatubela,
Join the Curie Discord community to learn more.
Thank you very much for the support, have a great day, too 👻🎃🧙🤗