[English Version]
Hello Hive!
Hello community! How are you doing? I hope very well, today I wanted to bring you another Photoshop tutorial in this case how to make a shape or even a logo with a "3D" style, I say it in quotes because it is not quite 3D, Photoshop already has an option to make 3D images but the way I come to show you is an alternative. I hope this tutorial will be useful for something.
Edited by the author
First method
There are several ways to do this effect, but I am going to show 2 ways to do this, both regularly easy and simple to do.
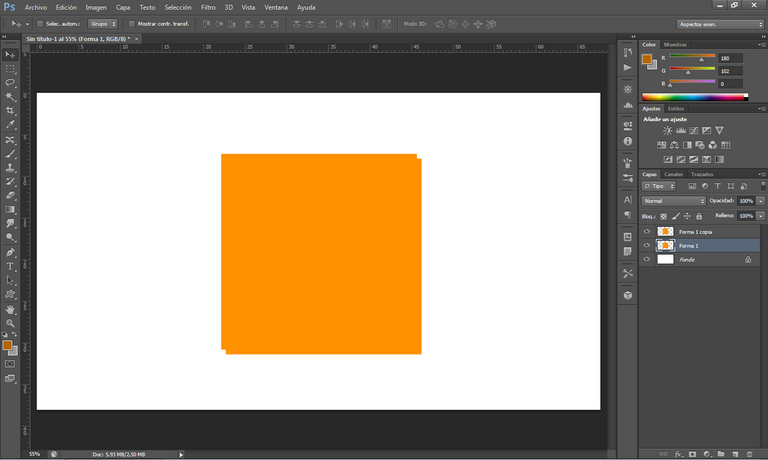
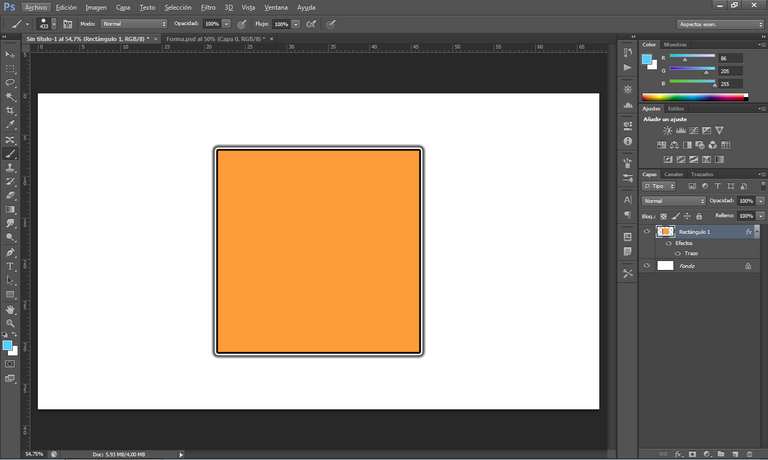
As you all know, the trick is to make the shape appear to have depth, so the first thing we do is to place the shape and duplicate it, followed by moving the shape below it diagonally, preferably with the arrow keys.
Screenshot
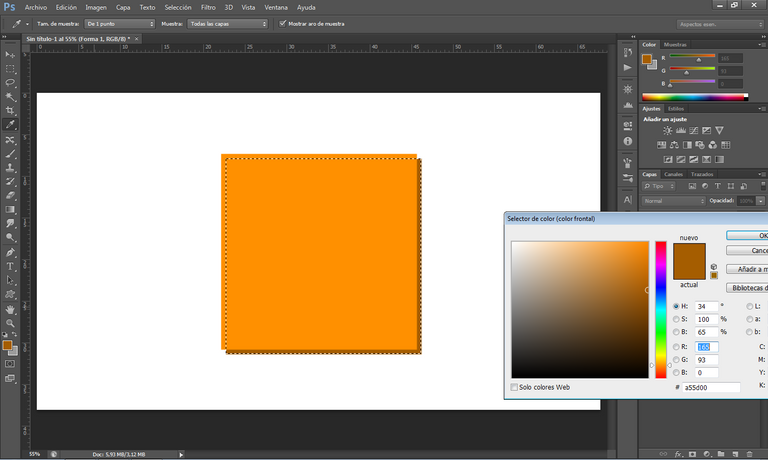
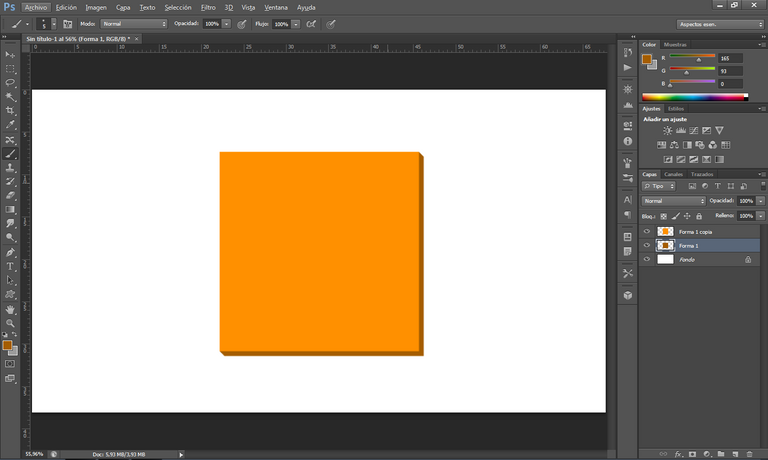
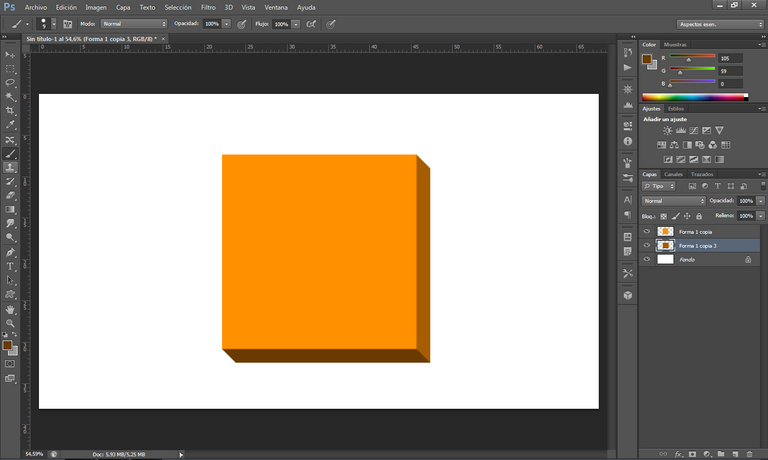
After this we will have to change the color of the shape below, we put the same color as the shape above but with a dark tone. Here we would already have an idea of how it is going to look, but clearly we are not finished.
Screenshot
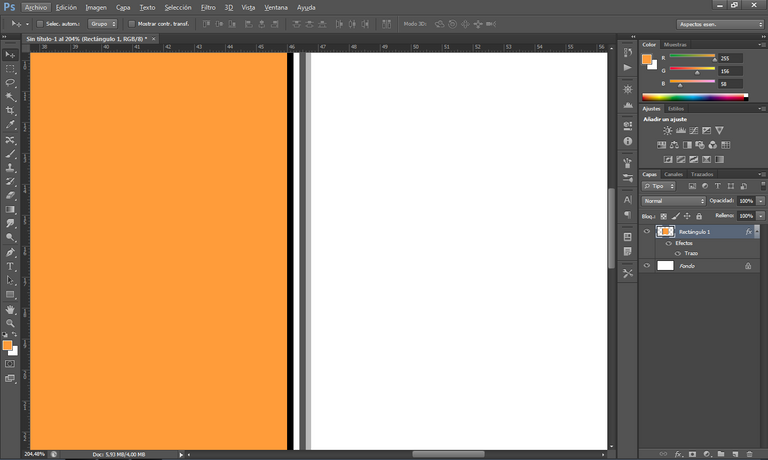
Then, selecting the dark tone shape, we reduce the brush size to one pixel (or more if the white space is too big), then with the same color of the shape below we start to cover the blank corner.
Screenshot
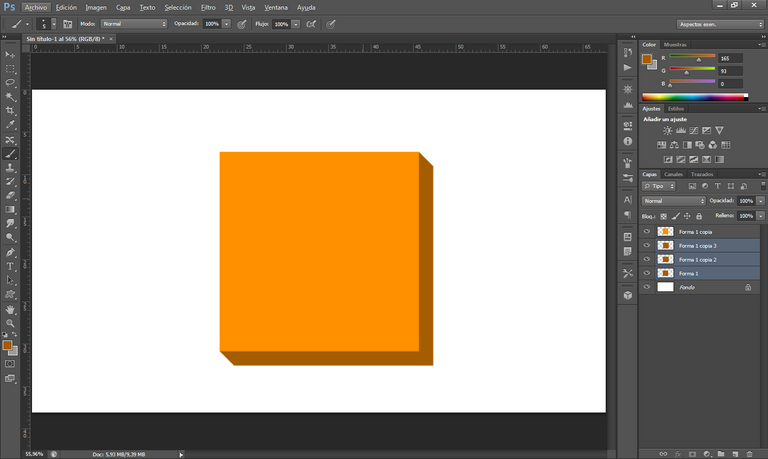
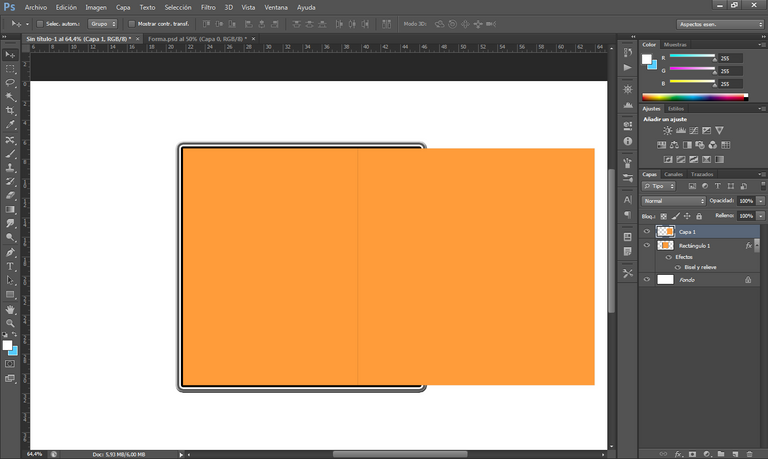
Once this part is finished we can do many things, we can put bevel and relief together with a parallel shadow, we can change the texture of the shape, make the dark part bigger or make this part darker. In my case I enlarged the size of the dark part by doubling it and moving it diagonally.
Screenshot
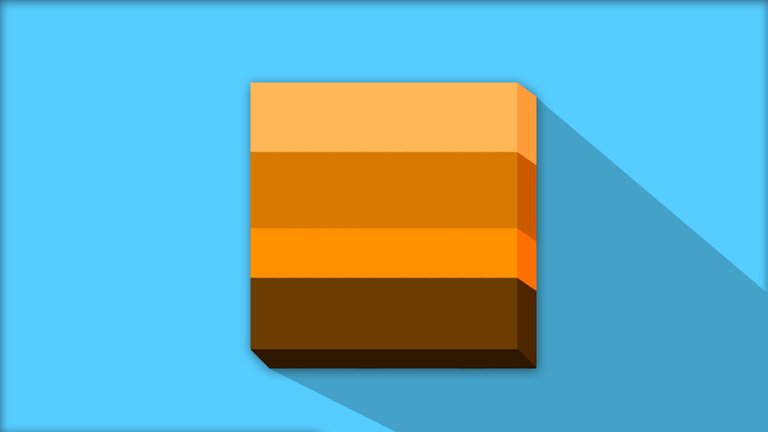
Now to give the effect that the illumination is coming from above we have to make the dark part of the bottom darker so that it looks like a shadow. Here we can finish the first method which I liken to a cartoon style, simple to do and quite nice, from now on we can decorate the shape by changing the color, liquefying the colors, make more shapes like this one etc.
Screenshot
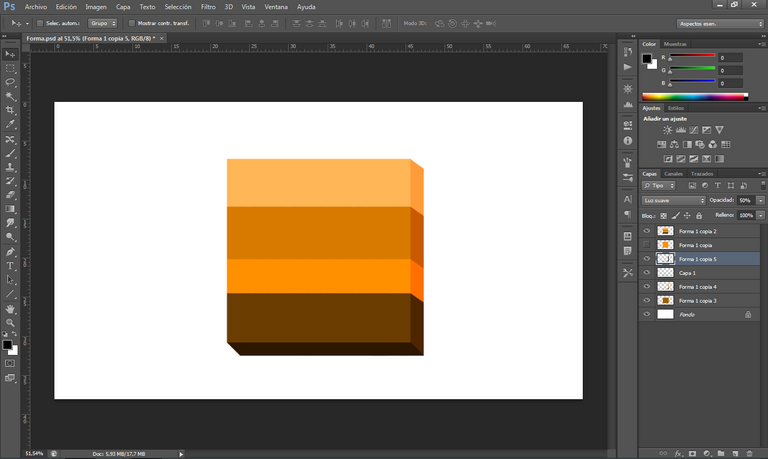
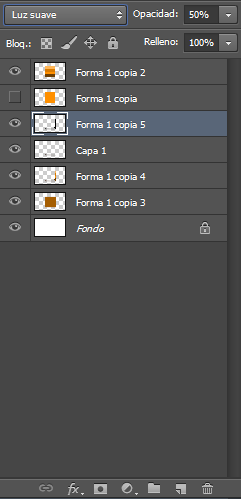
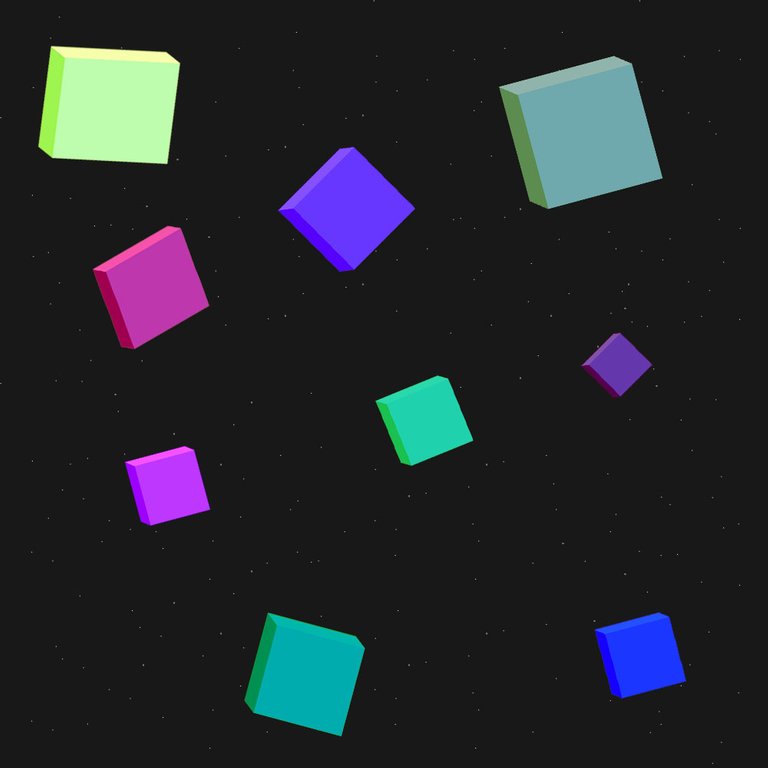
This way I would have the shape already decorated, it should be noted that it came out of my imagination with improvisation, we can see that what I did was to add colors on all sides, on the sides to make it dark what I did was to select that area, create a new layer and (having selected the area with the wand) I covered with black color that area to finally place it in soft light and put it in its respective area.
Finished
Screenshot
Second method
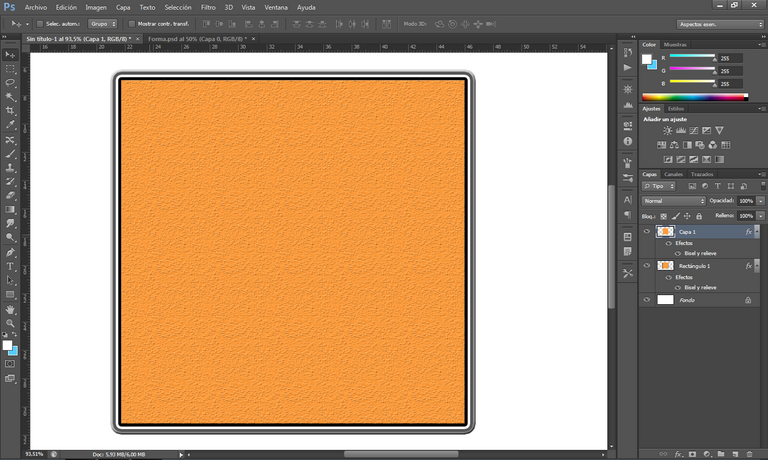
Now with the second way is a little easier but the result personally, I don't like it, but still it can be useful. We start by placing the shape we want, we duplicate it and to the shape underneath we add 1 large stroke (+10) or several strokes with different colors of normal sizes (5 or 6).
Screenshot
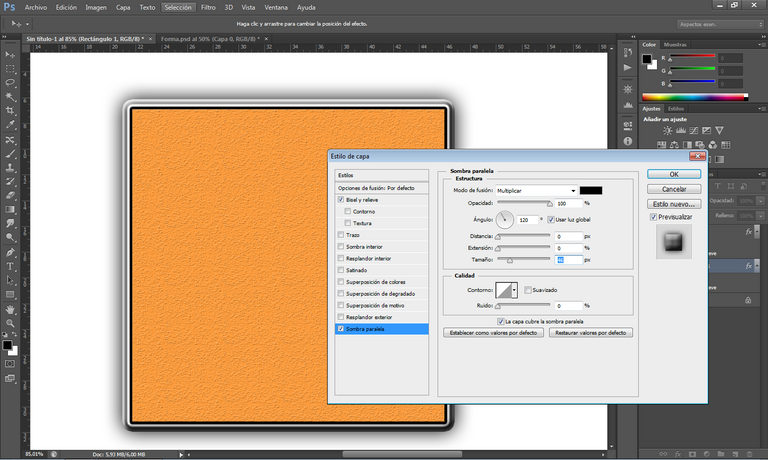
Then we can change the texture or the colors of the layer above, we can basically decorate it. On the other hand to the layer below we will place bevel and relief so that it covers the stroke that we made, after that we will also place a parallel shadow with the opacity at 100, distance at 0, extension 0 and the size we want, preferably a large size.
Finished
Screenshot
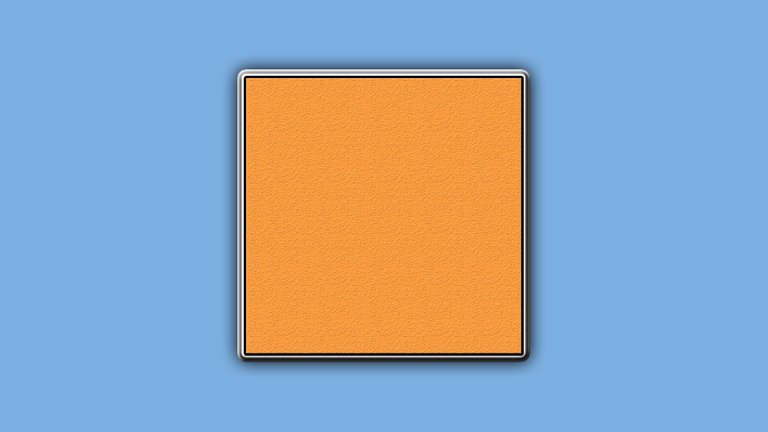
And those are my ways to make a 3D effect to the shapes, it is quite simple and quick to do, here are 2 examples of the 2 methods I showed respectively, the first one just came out of my imagination and the second one was the old logo of this profile.

Until next time!
And well, I hope you liked this tutorial, if you have questions or recommendations you can always comment, I will read any comments. So happy day dear community, see you next time!
 Translated with www.DeepL.com/Translator
[Versión En Español]
¡Hola Hive!
¡Hola comunidad! ¿Como les va? Espero que muy bien, hoy quise traerles otro tutorial de Photoshop en este caso como hacer una forma o incluso un logo con un estilo "3D", lo digo entre comillas debido a que no es del todo 3D, Photoshop ya tiene una opción para hacer imágenes 3D pero la manera que les vengo a mostrar es una alternativa. Espero este tutorial les sirva para algo.
Edited by the author
Primer método
Hay varias maneras de hacer este efecto, pero voy a mostrar 2 maneras de hacer esto, ambas regularmente fáciles y sencillas de hacer.
Como todos saben, el truco esta en hacer parecer que la forma tiene profundidad, así que lo primero que hacemos colocar la forma y duplicarla, seguido de ello, la forma que este debajo la movemos poco a poco de manera diagonal, preferiblemente con las flechas del teclado.
Screenshot
Luego de esto tendremos que cambiar el color de la forma que esta debajo, le ponemos el mismo color que la forma de arriba pero con un tono oscuro. Aquí ya tendríamos una idea de como nos va a quedar, pero claramente no hemos terminado.
Screenshot
Luego, seleccionando la forma de tono oscuro, reducimos el tamaño del pincel a un pixel (o mas si es que el espacio en blanco es muy grande), entonces con el mismo color de la forma de abajo empezamos a cubrir la esquina que nos quedo en blanco.
Screenshot
Terminada esta parte podemos hacer muchas cosas, podemos ponerle bisel y relieve junto a una sombra paralela, podemos cambiar la textura de la forma, hacer mas grande la parte oscura o hacer mas oscura esta parte. En mi caso agrande el tamaño de la parte oscura duplicandola y moviendola en diagonal.
Screenshot
Ahora para dar el efecto de que la iluminación esta dando desde arriba tenemos que hacer mas oscura la parte oscura de abajo de manera que parezca una sombra. Aquí ya podemos dar por terminada el primer método el cual yo lo asemejo con un estilo caricaturesco, sencillo de hacer y bastante bonito, de ahora en adelante podemos decorar la forma cambiándole el color, licuando los colores, hacer mas formas como esta etc.
Screenshot
Así me quedaría la forma ya decorada, cabe destacar que salio de mi imaginación con improvisación, podemos ver que lo que hice fue añadirle colores por todos lados, en los lados para que quedara oscuro lo que hice fue seleccionar esa zona, crear una nueva capa y (teniendo seleccionada la zona con la varita) cubrí de color negro dicha zona para finalmente colocarlo en luz suave y ponerlo en su respectiva zona.
Finalizado
Screenshot
Segundo método
Ahora con la segunda manera es un poco mas fácil pero el resultado en lo personal, no me gusta, pero aun así nos puede servir. Empezamos colocando la forma que queramos, la duplicamos y a la forma que este debajo le añadimos 1 trazo de gran tamaño (+10) o varios trazos con diferentes colores de tamaños normales (5 o 6),
Screenshot
Luego a la capa que esta arriba le podemos cambiar la textura o los colores, podemos decorarla básicamente. Por otro lado a la capa de abajo le colocaremos bisel y relieve de manera que cubra el trazo que le hicimos, luego de ello colocaremos también una sombra paralela con la opacidad a 100, distancia a 0, extensión 0 y el tamaño que queramos, preferiblemente un tamaño grande.
Finalizado
Screenshot
Y esas son mis maneras de hacer un efecto 3D a las formas, es bastante sencillo y rápido de hacer, aquí están 2 ejemplos de los 2 métodos que mostré respectivamente, el primero simplemente salio de mi imaginación y el segundo era el antiguo logo de este perfil.
¡Hasta la próxima!
Y pues bueno, espero que les haya servido y gustado este tutorial, si tienen dudas o recomendaciones siempre pueden comentar, yo leeré cualquier comentario que haya. Así que feliz día querida comunidad ¡Hasta la próxima!