👉Bienvenidos a mi blog!👈
Hola amigos! Que tal? Bendiciones para todos! El dÃa de hoy les traigo el tutorial de cómo elaborar un divertido y creativo organizador de colores utilizando reciclaje. Comencemos!
Hi friends! How's it going? Blessings for all! Today I bring you the tutorial on how to make a fun and creative colored organizer using recycling. Let's get started!
![PicsArt_08-08-02.17.26.jpg](https://images.hive.blog/DQmegqRtBgS95tedFKQXK8LRGLaaVjTPMzR9AKiVBceM4Re/PicsArt_08-08-02.17.26.jpg)
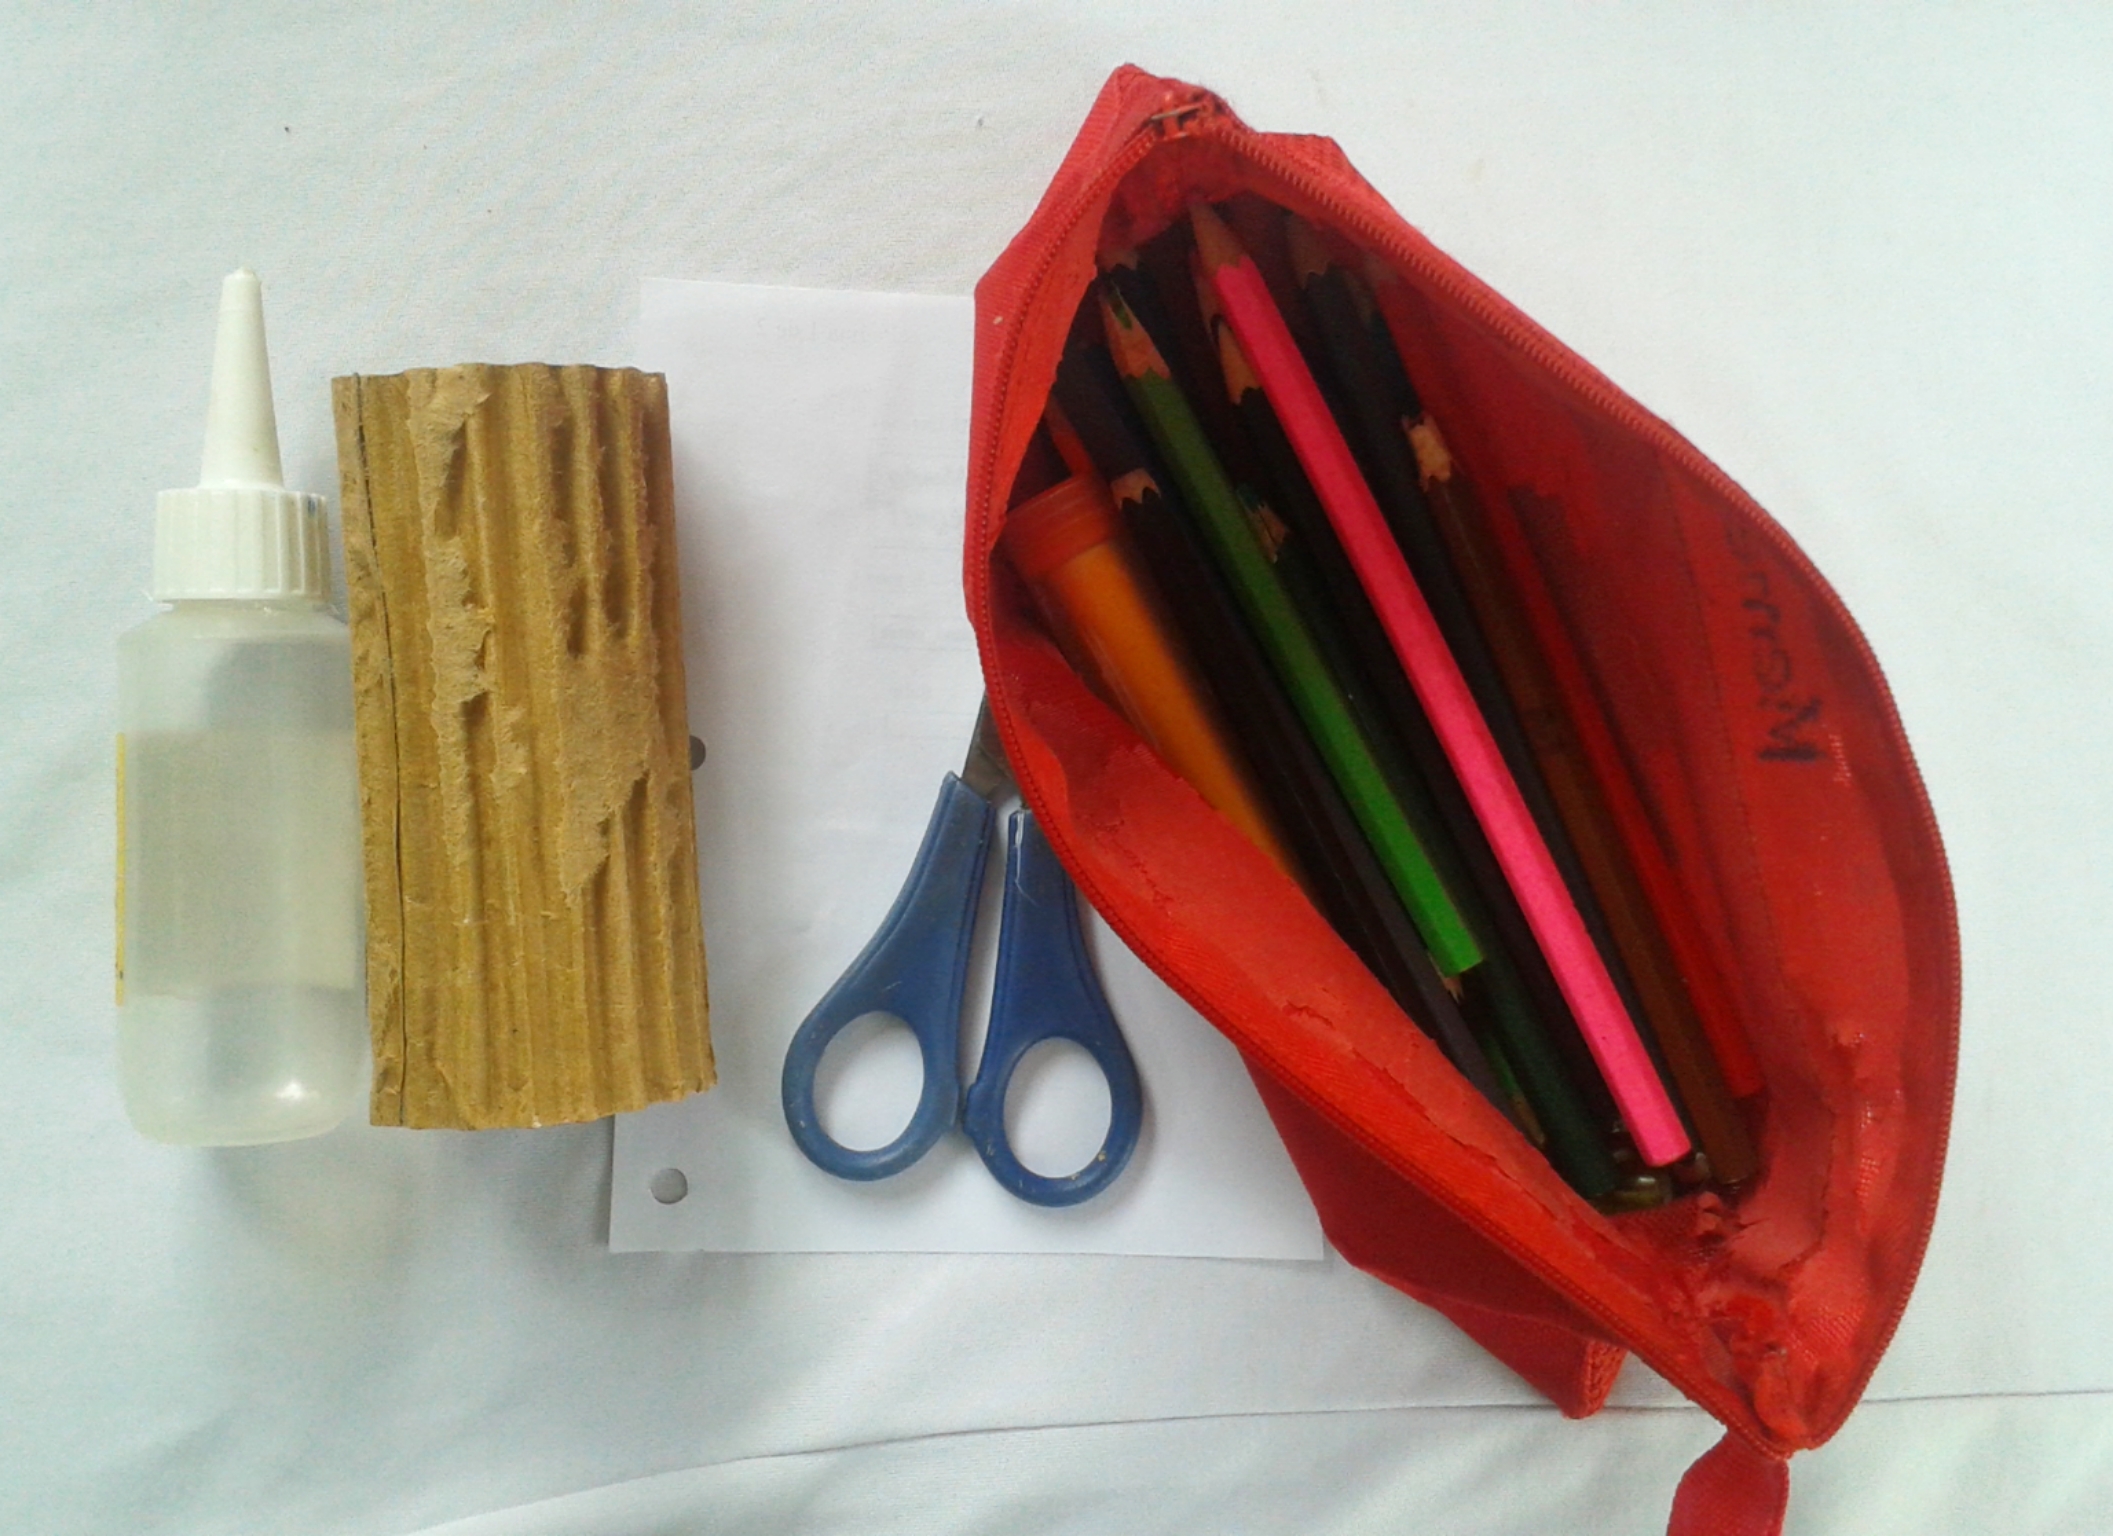
Materiales: // Materials:
- Un tubo de papel
- Hoja blanca
- Colores
- Tijera
- Silicón
- A paper tube
- White sheet
- Colors
- Scissors
- Silicone
![PicsArt_08-08-02.18.14.jpg](https://images.hive.blog/DQmPXZAemb2Gbpoqf8vTqUt4oKd7nSzZjqoJnHcsajEUNba/PicsArt_08-08-02.18.14.jpg)
Manos a la Obra! // Let's do it!
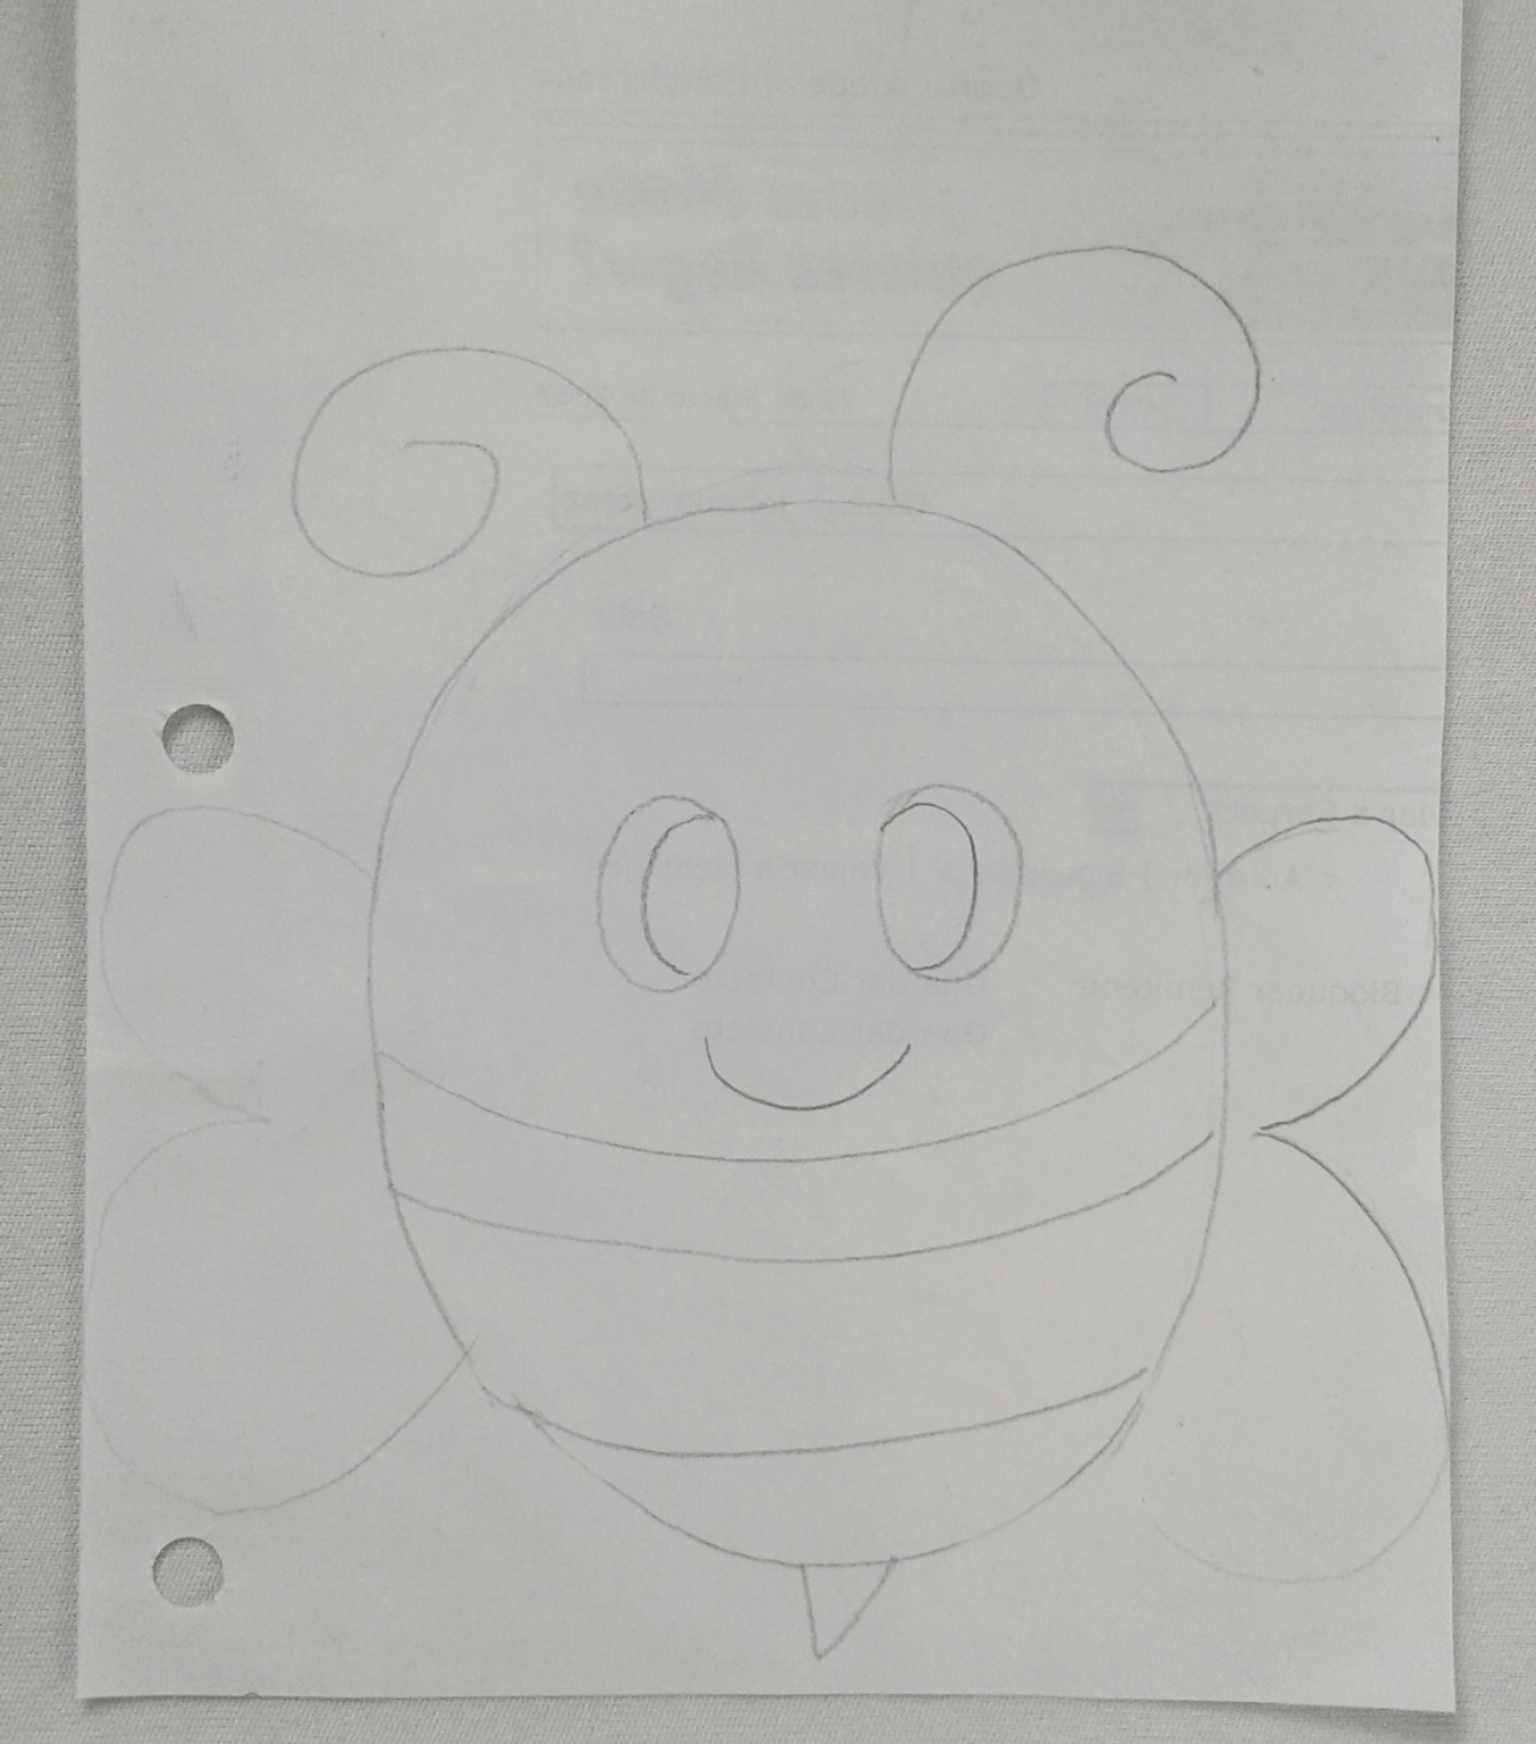
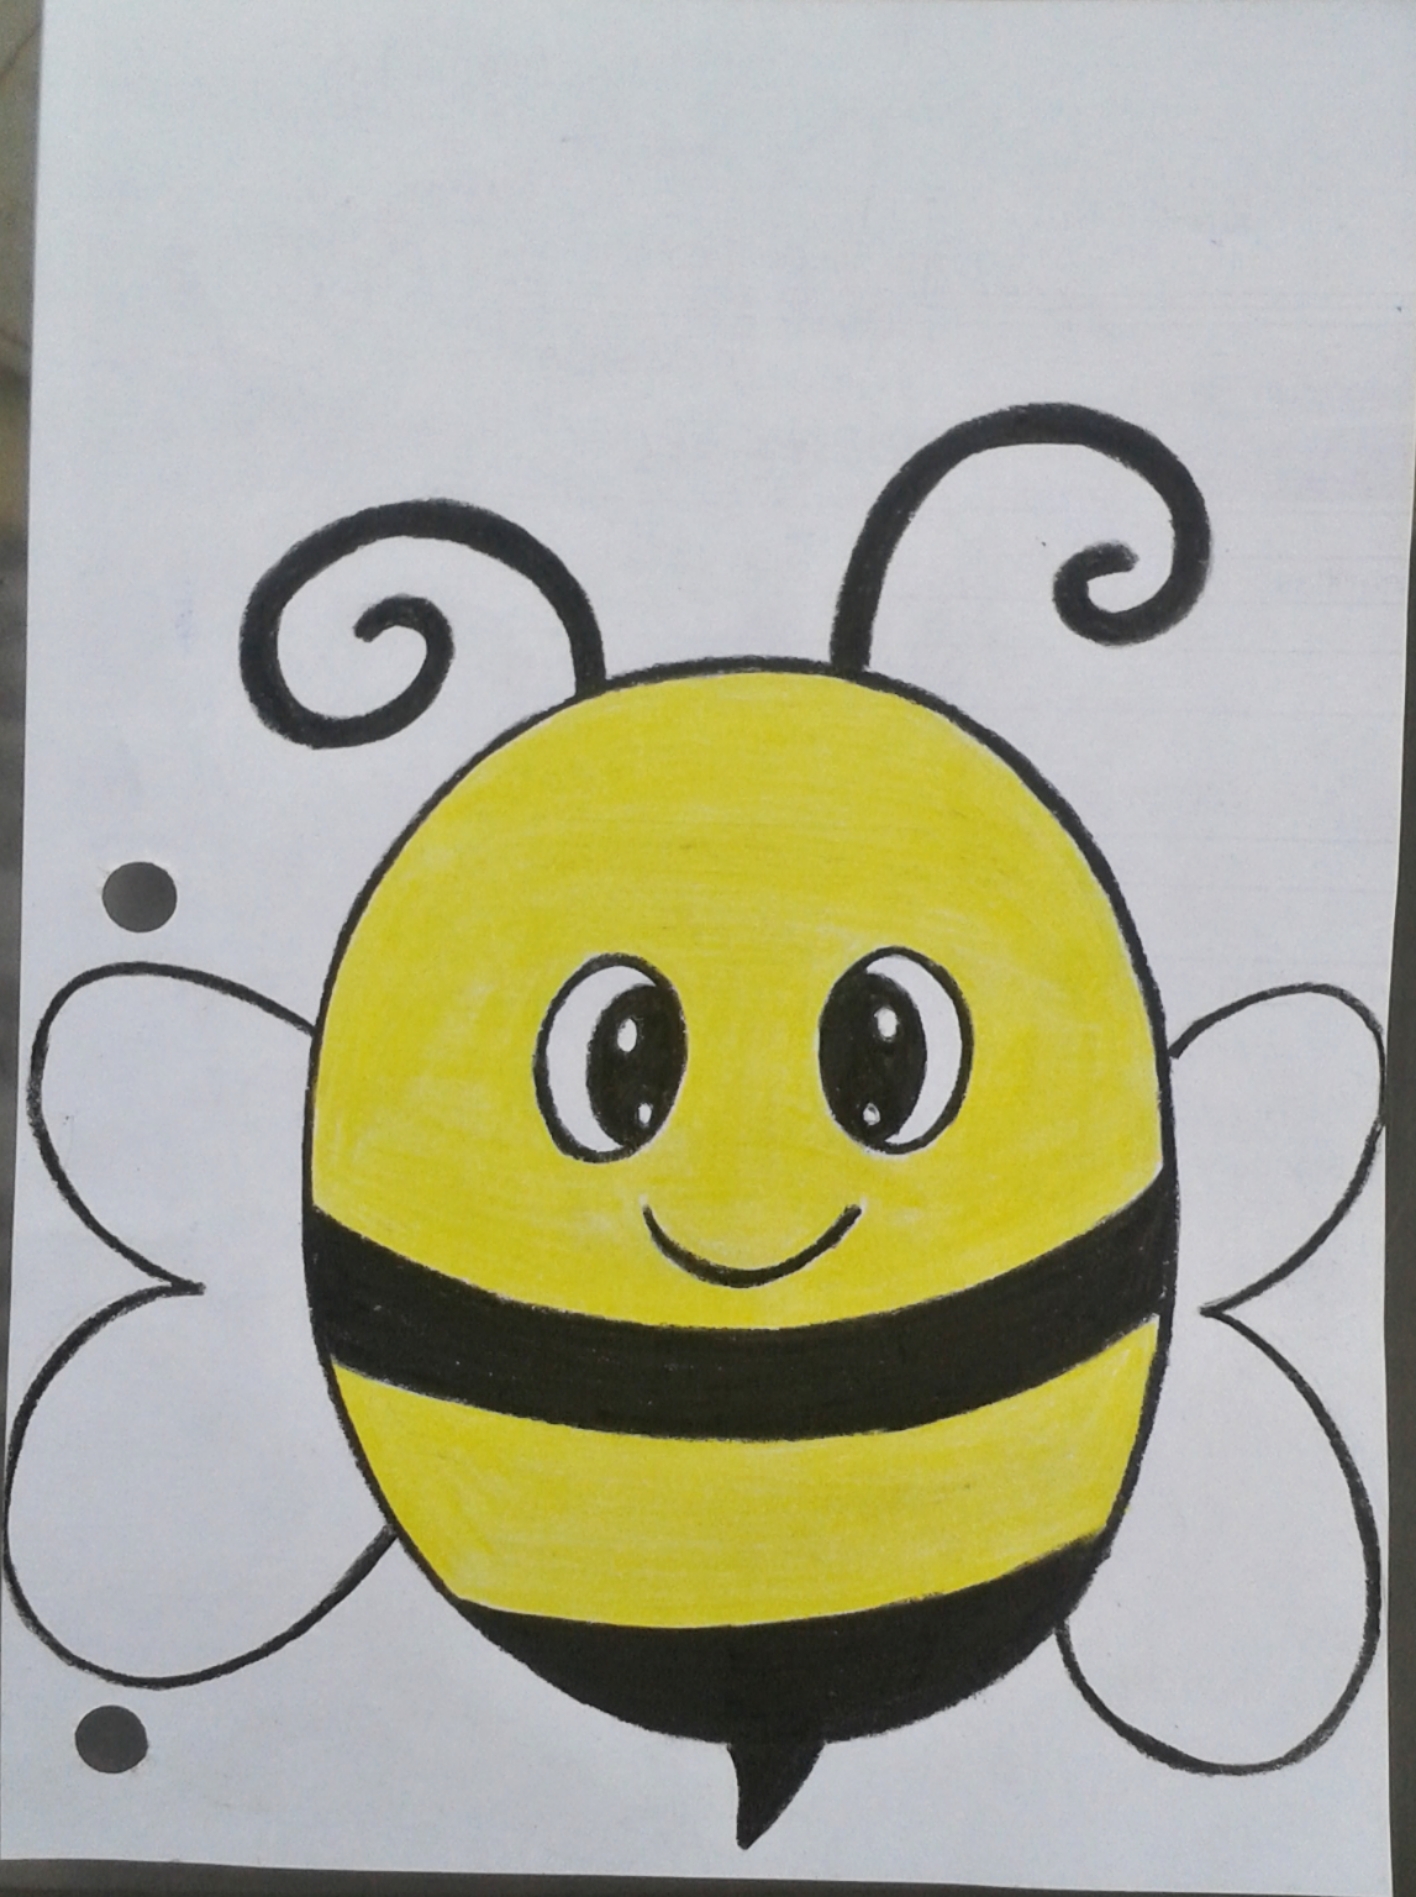
Paso 01: Lo primero que haremos será dibujar una linda abejita en la hoja de papel.
Step 01: The first thing we will do is draw a cute little bee on the sheet of paper.
![PicsArt_08-08-02.18.50.jpg](https://images.hive.blog/DQmPHjKwZTSUVajTb1jUqhYex7WDxtxz6ei9Sp7KbiV7yct/PicsArt_08-08-02.18.50.jpg)
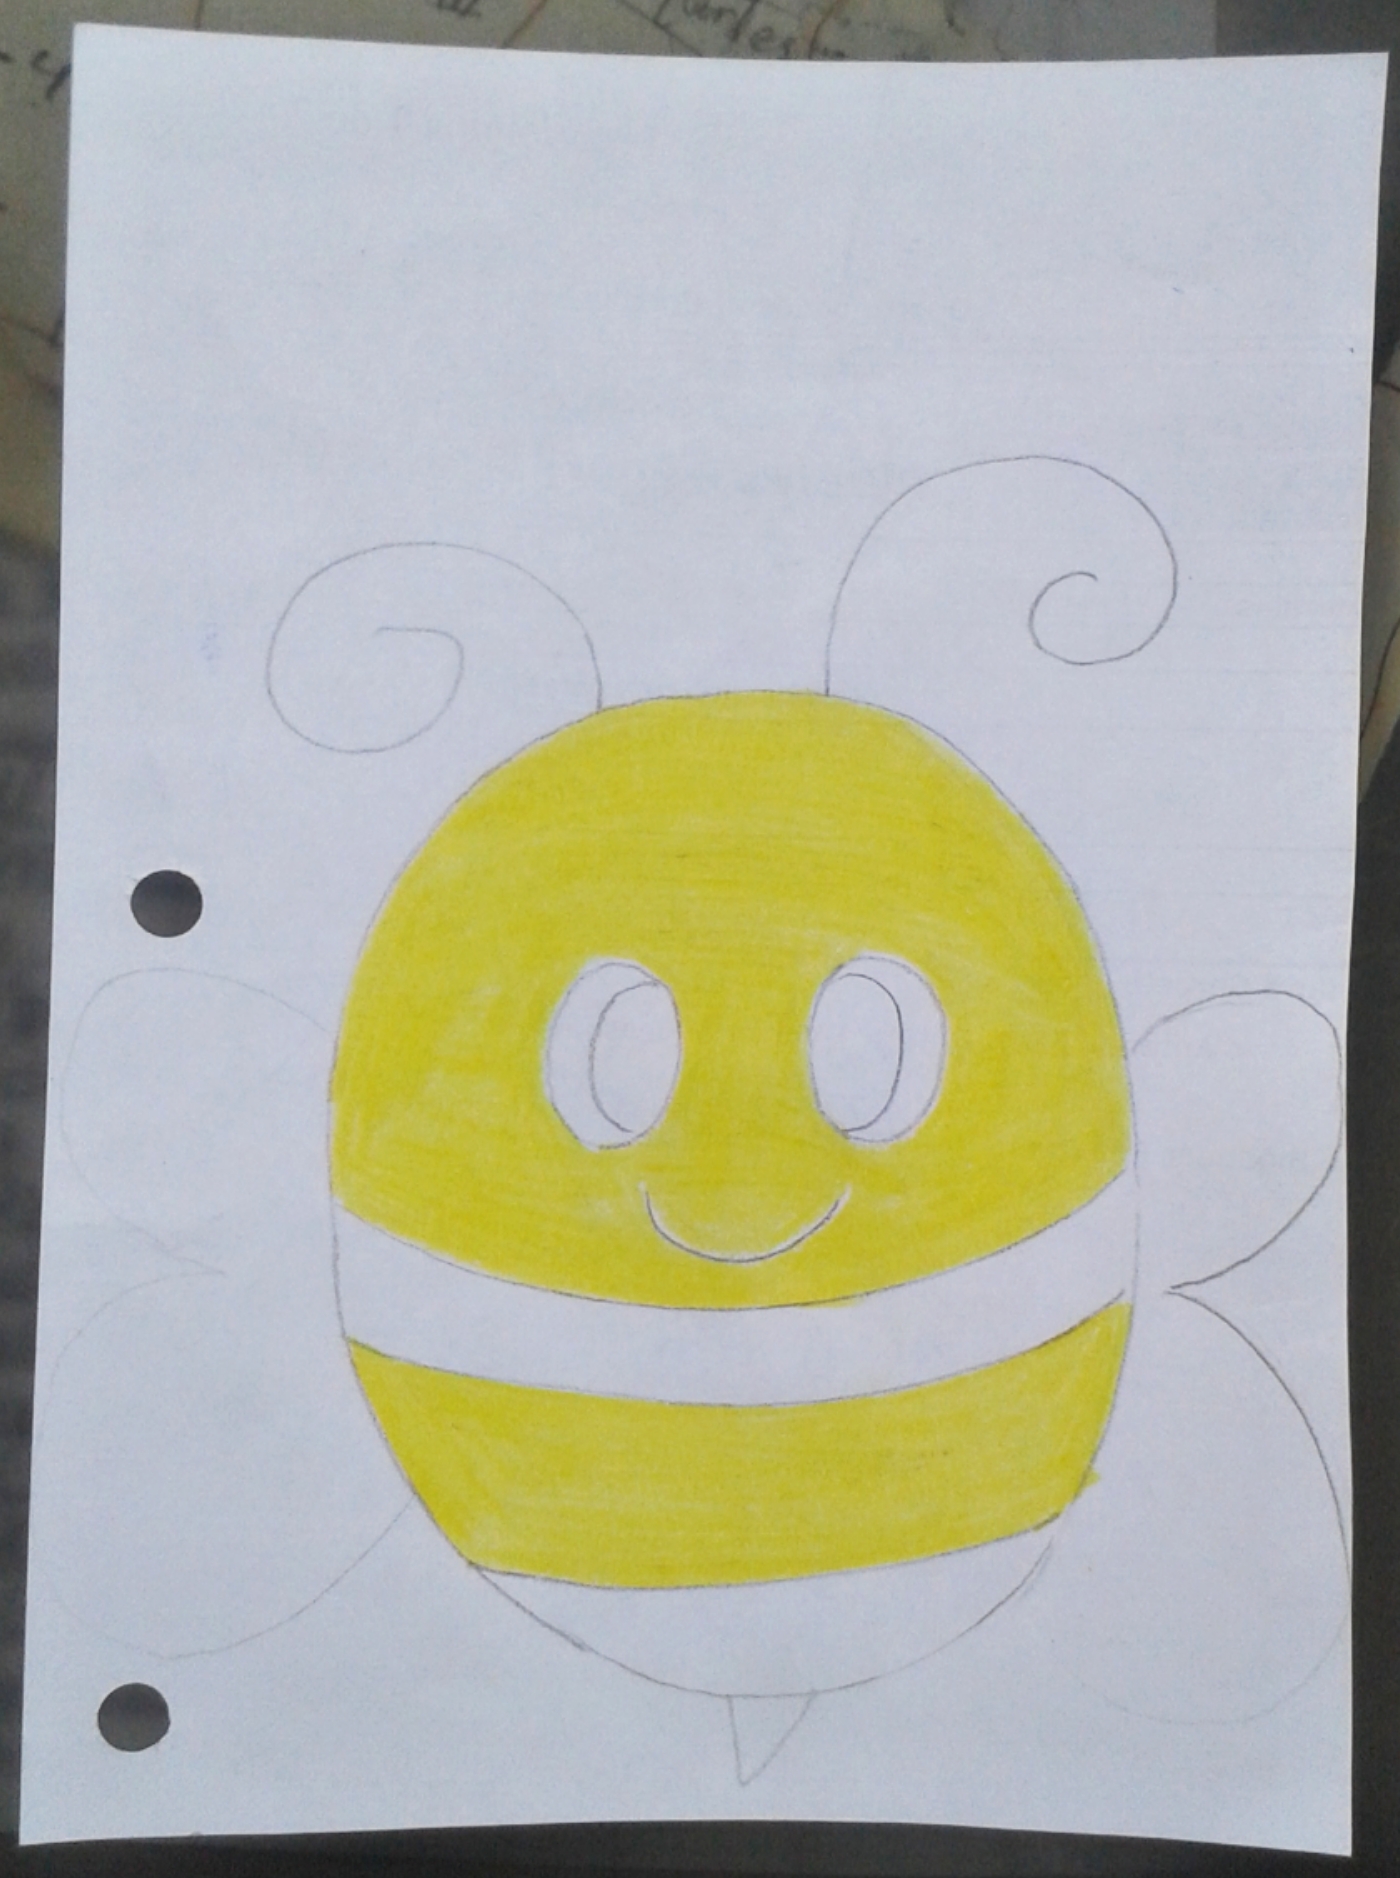
Paso 02: Comenzamos a pintar la abejita de color amarillo.
Step 02: We begin to paint the bee yellow.
![PicsArt_08-08-02.19.31.jpg](https://images.hive.blog/DQmRnDGuL74yur5sqKUM8sXq2NaVKd2PQhkjAkbjpbLBMWT/PicsArt_08-08-02.19.31.jpg)
Procedemos a resaltar con el color negro.
We proceed to highlight with the black color.
![PicsArt_08-08-02.20.18.jpg](https://images.hive.blog/DQmQCJGSAmzyTwGhyrf9BSeLvVsRiEoU7bhU5sUig6y7DxV/PicsArt_08-08-02.20.18.jpg)
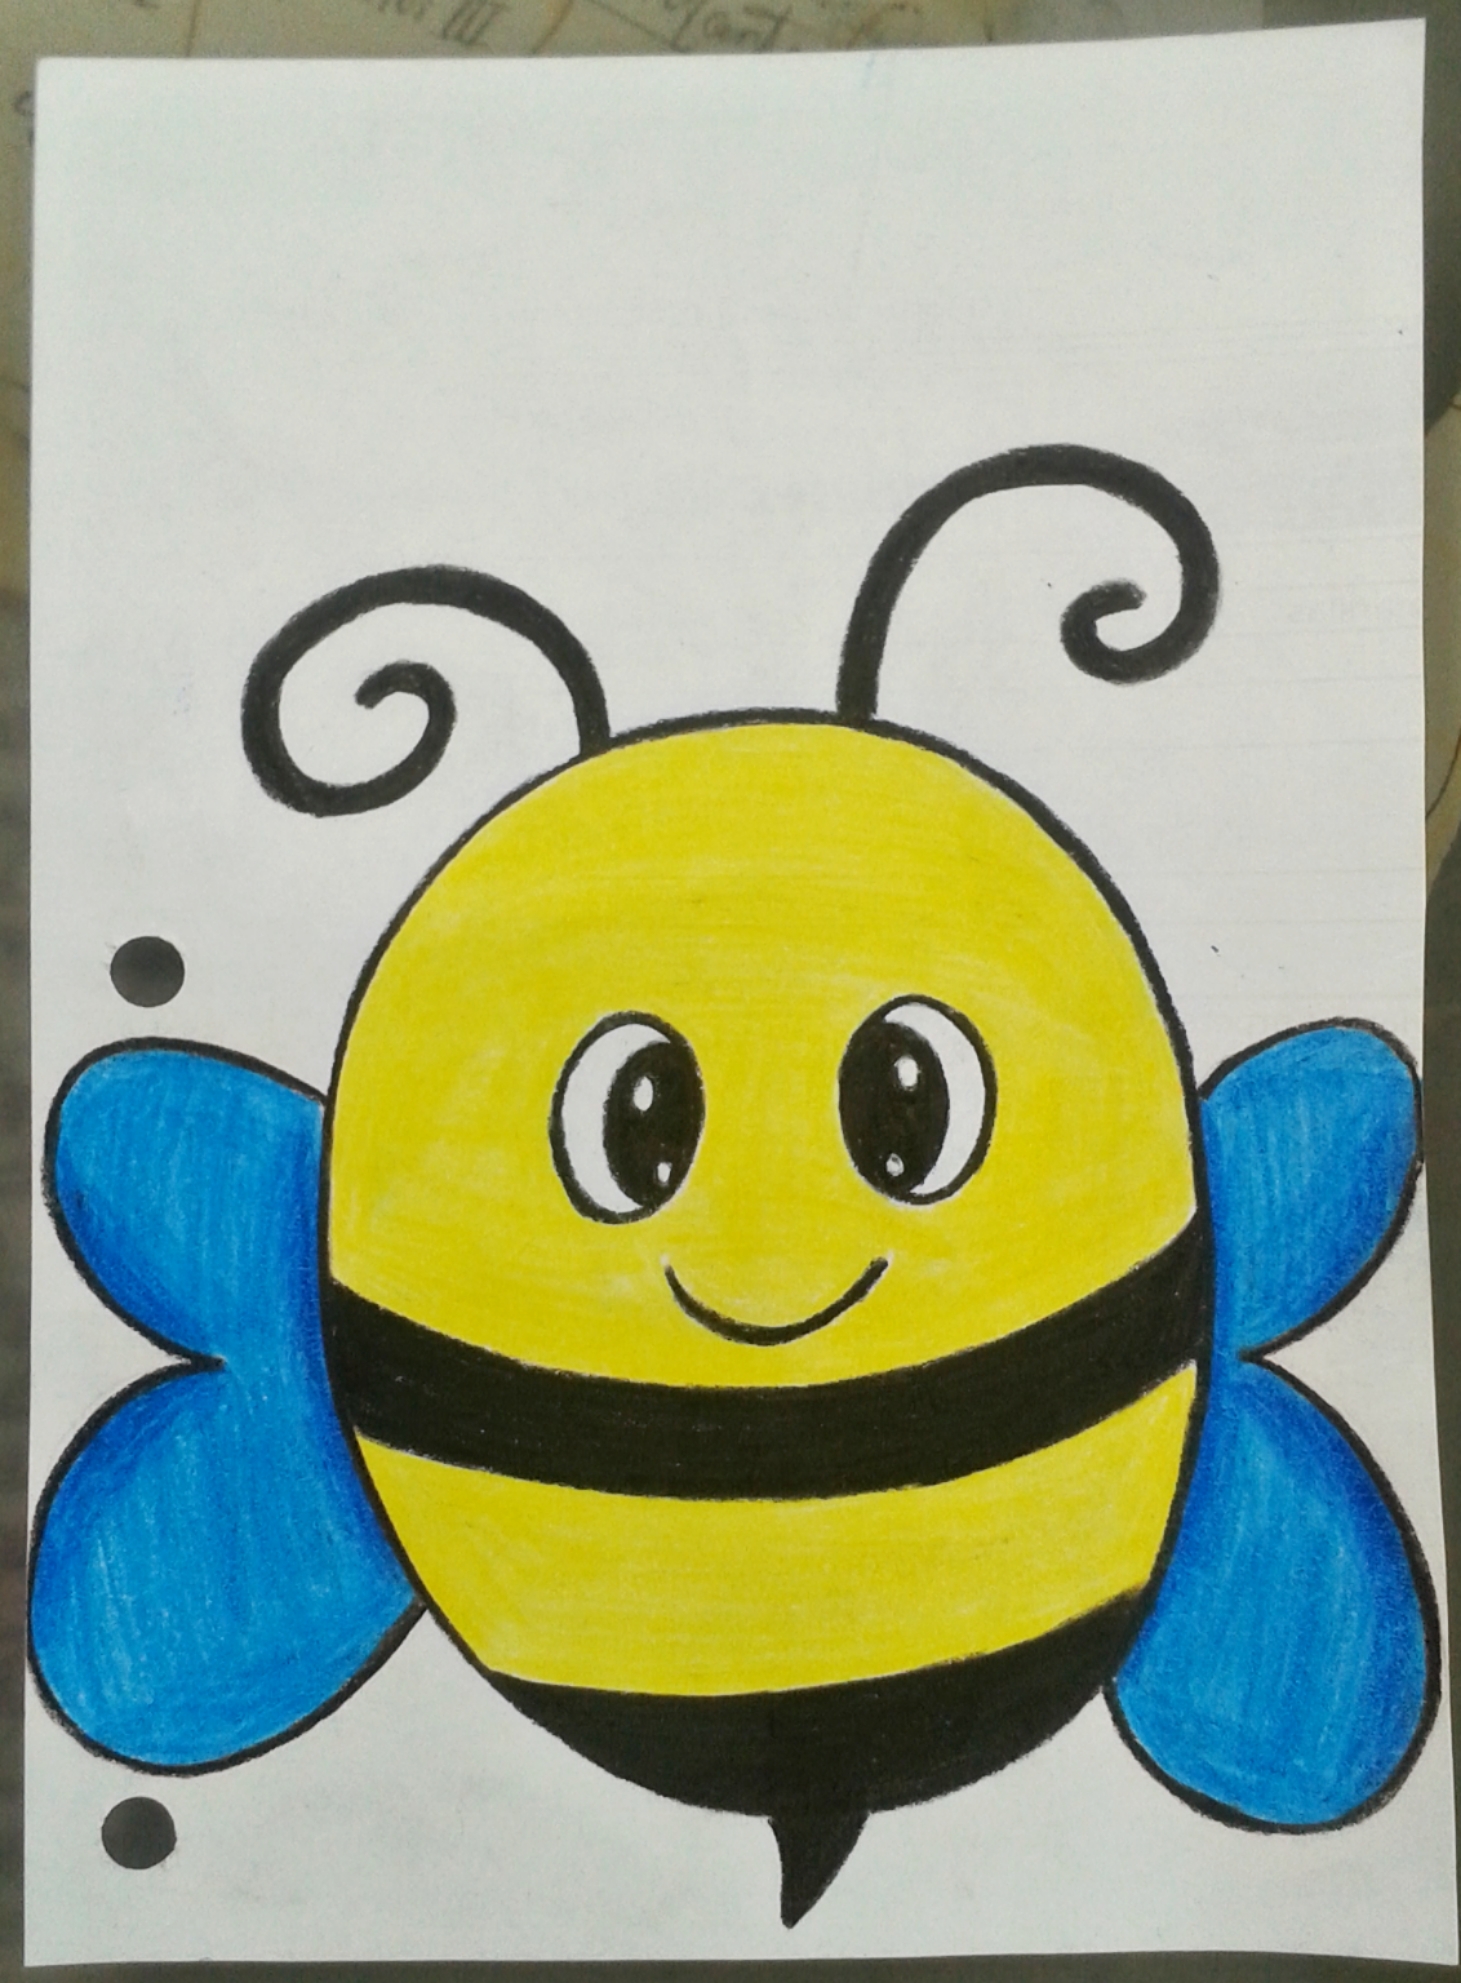
Coloreamos sus lindas alas de color azúl.
We color their cute wings blue.
![PicsArt_08-08-02.21.10.jpg](https://images.hive.blog/DQmTLLXv7cBnimCBfNhJXYTvjYQZhx64P4h8mr6Ywpz2Haq/PicsArt_08-08-02.21.10.jpg)
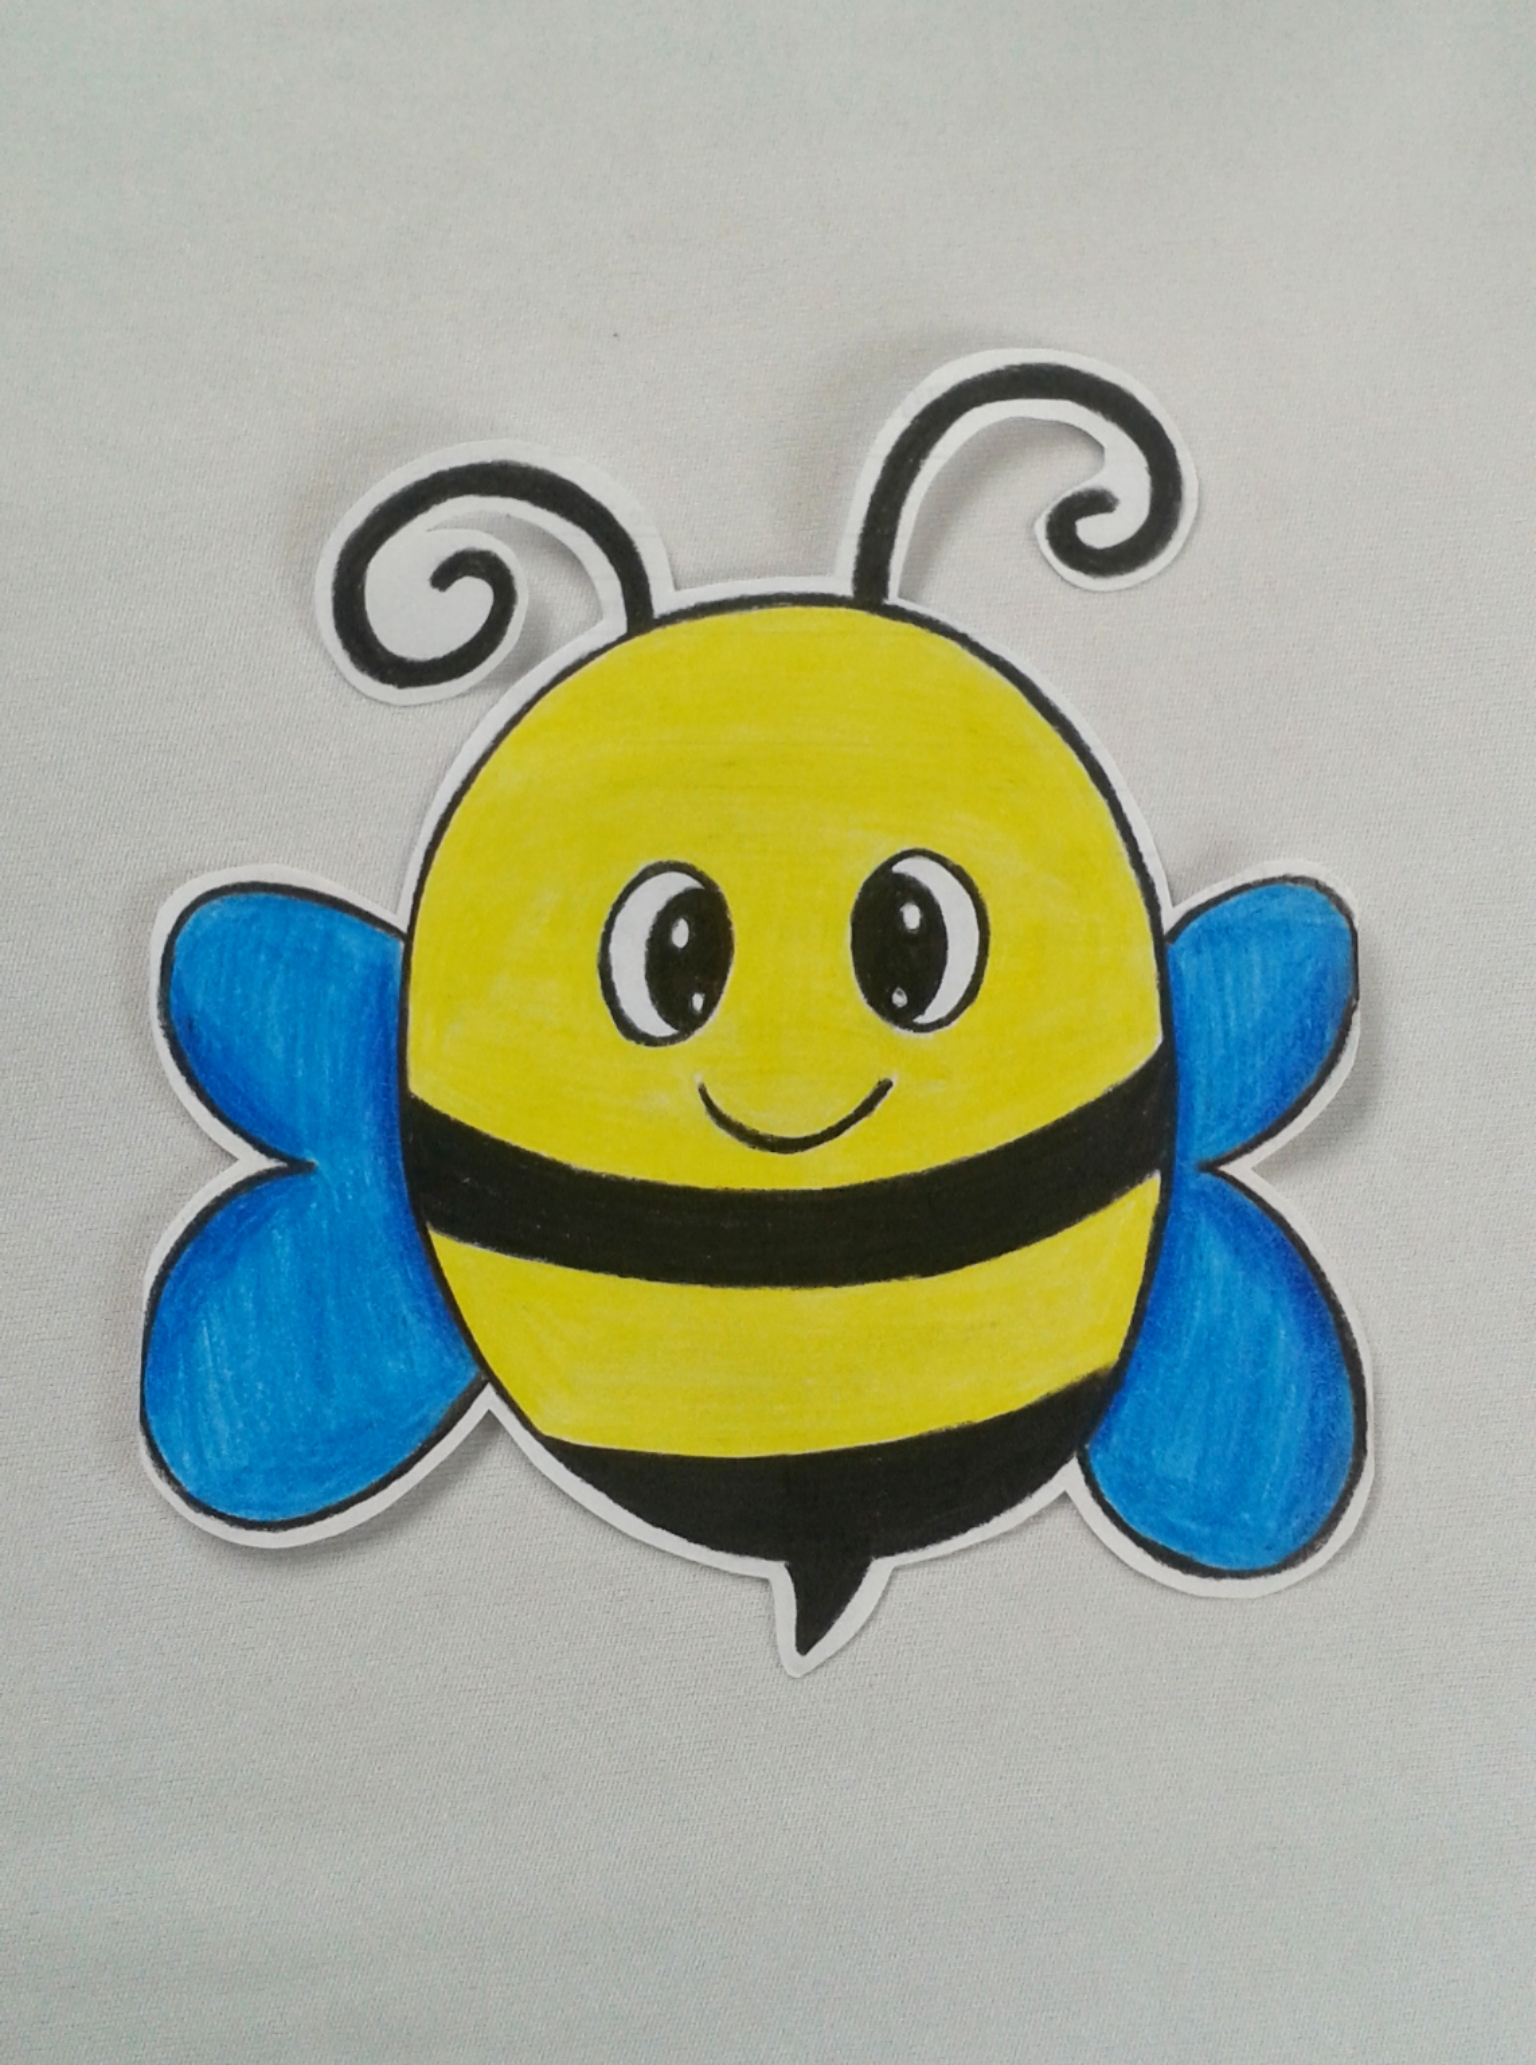
Paso 03: Lista la abejita, la recortamos con la ayuda de la tijera.
Step 03: Ready the bee, we cut it with the help of the scissors.
![PicsArt_08-08-02.21.57.jpg](https://images.hive.blog/DQmPCMdQUCKe8swhUL54deYzYMJQEEF5dZFqwZCshzbfVyE/PicsArt_08-08-02.21.57.jpg)
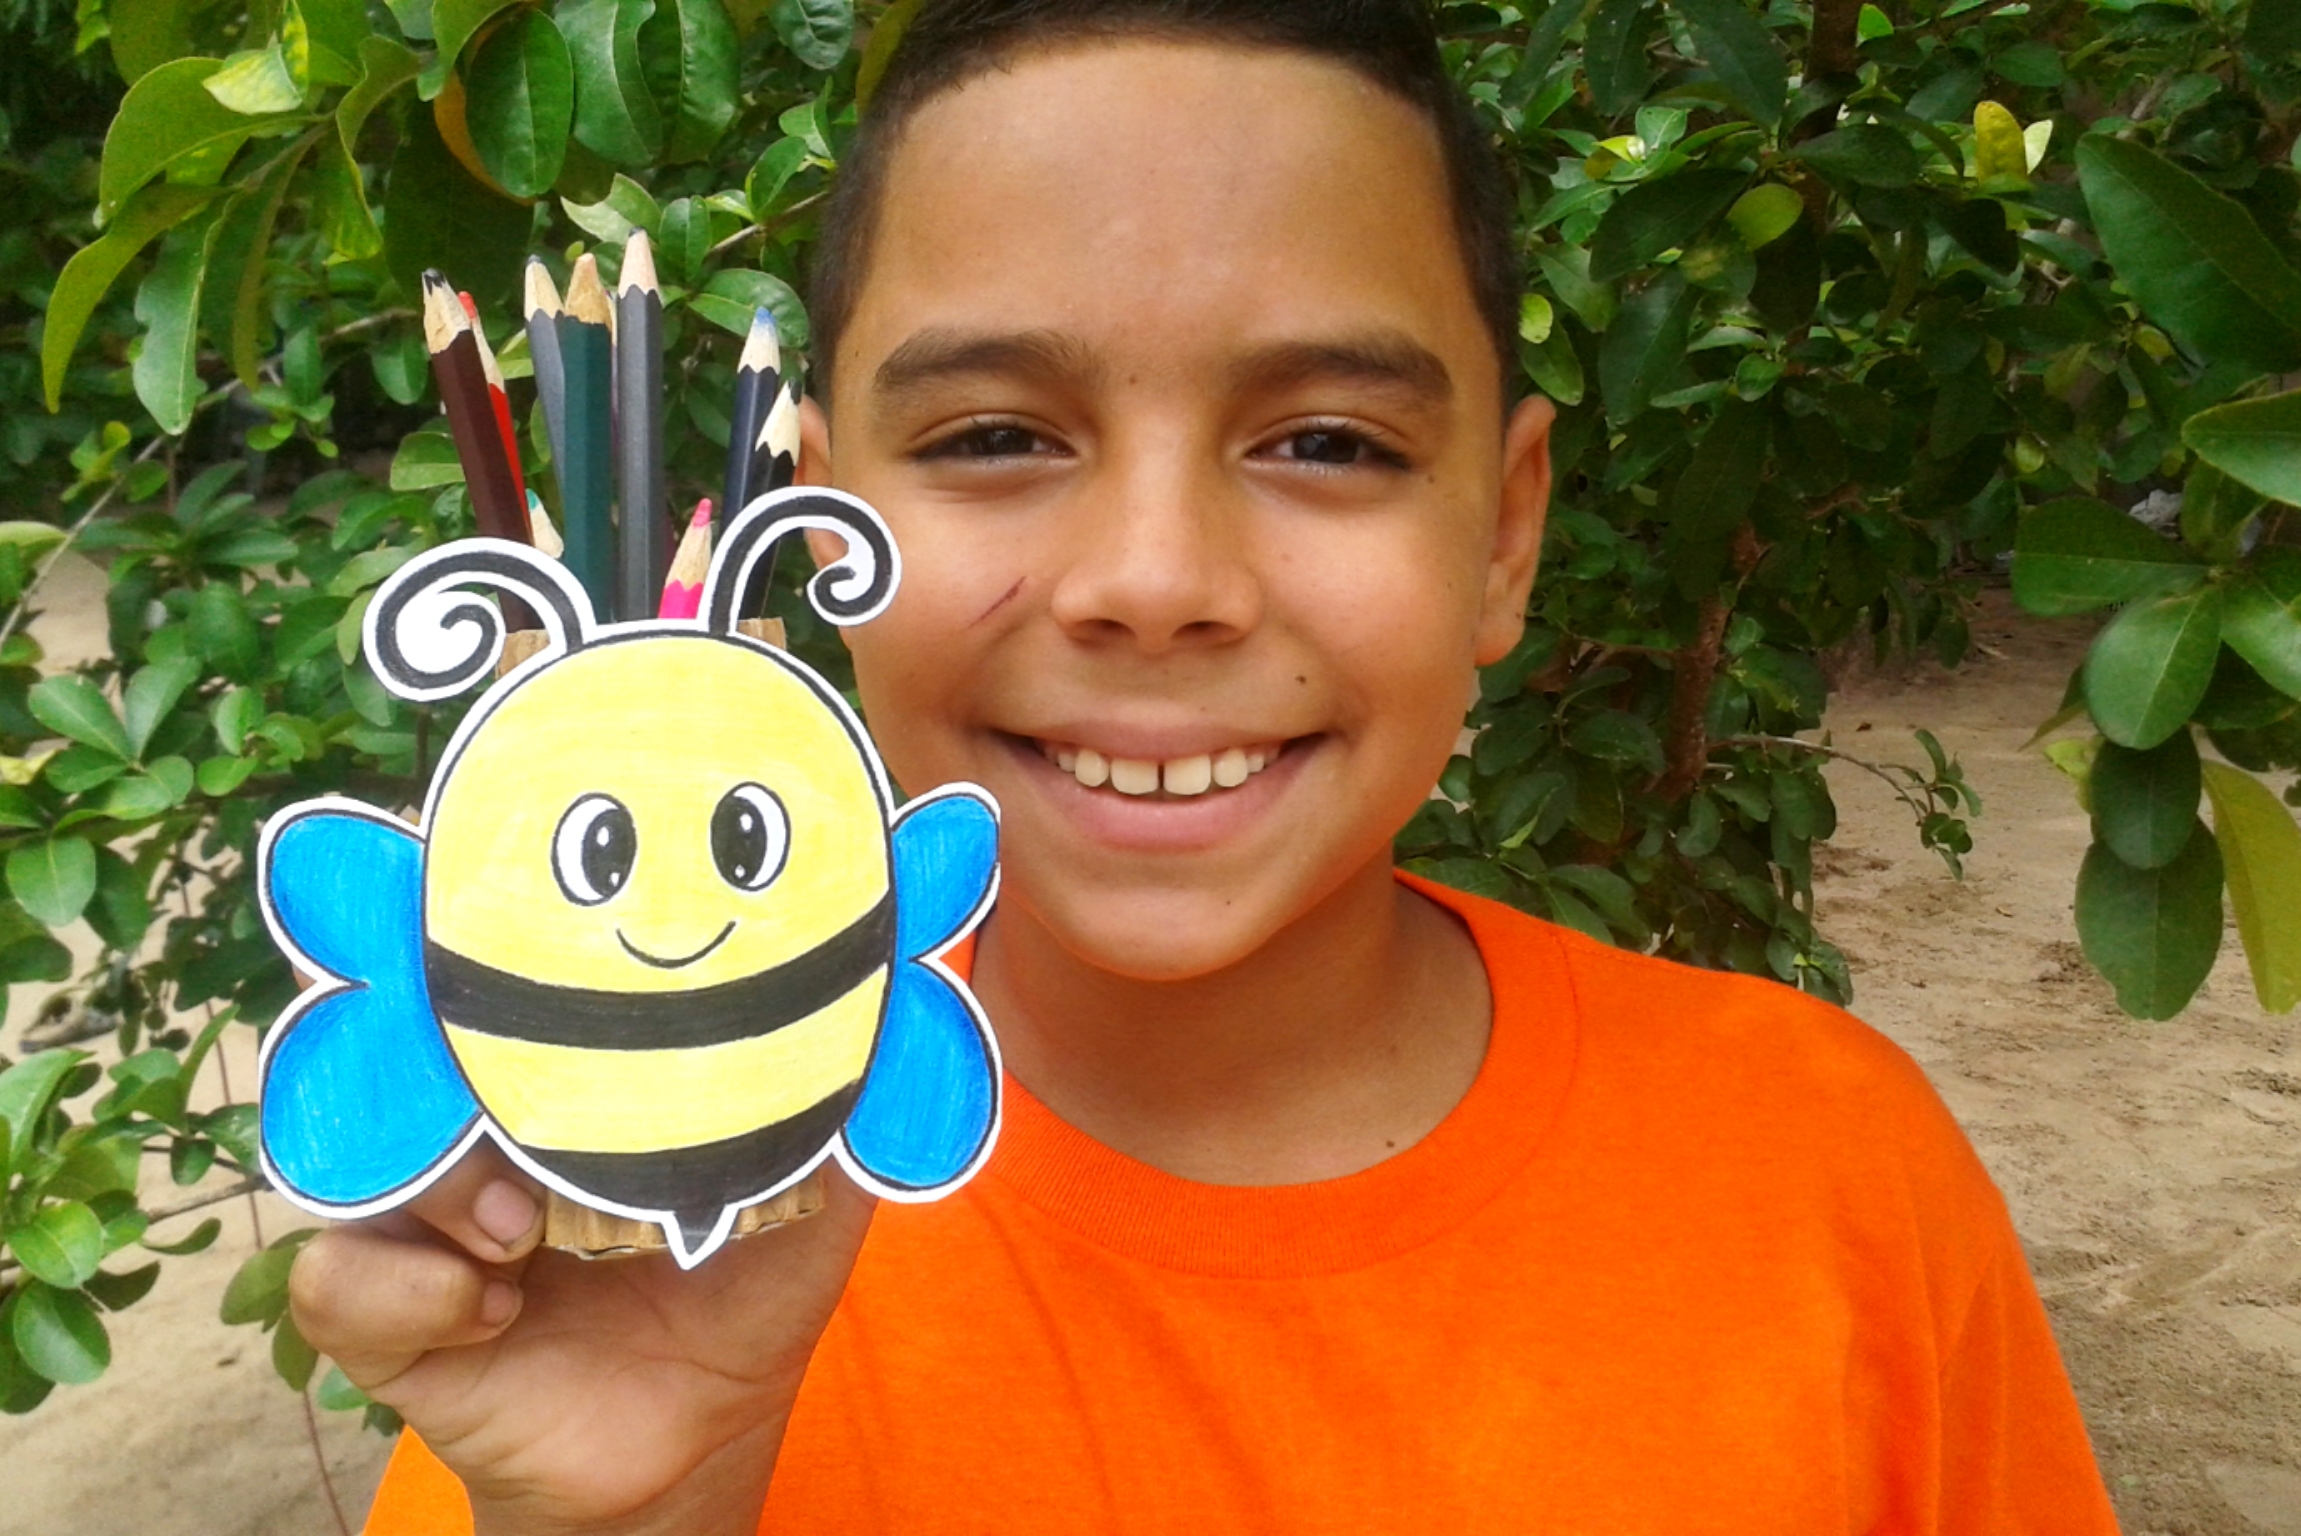
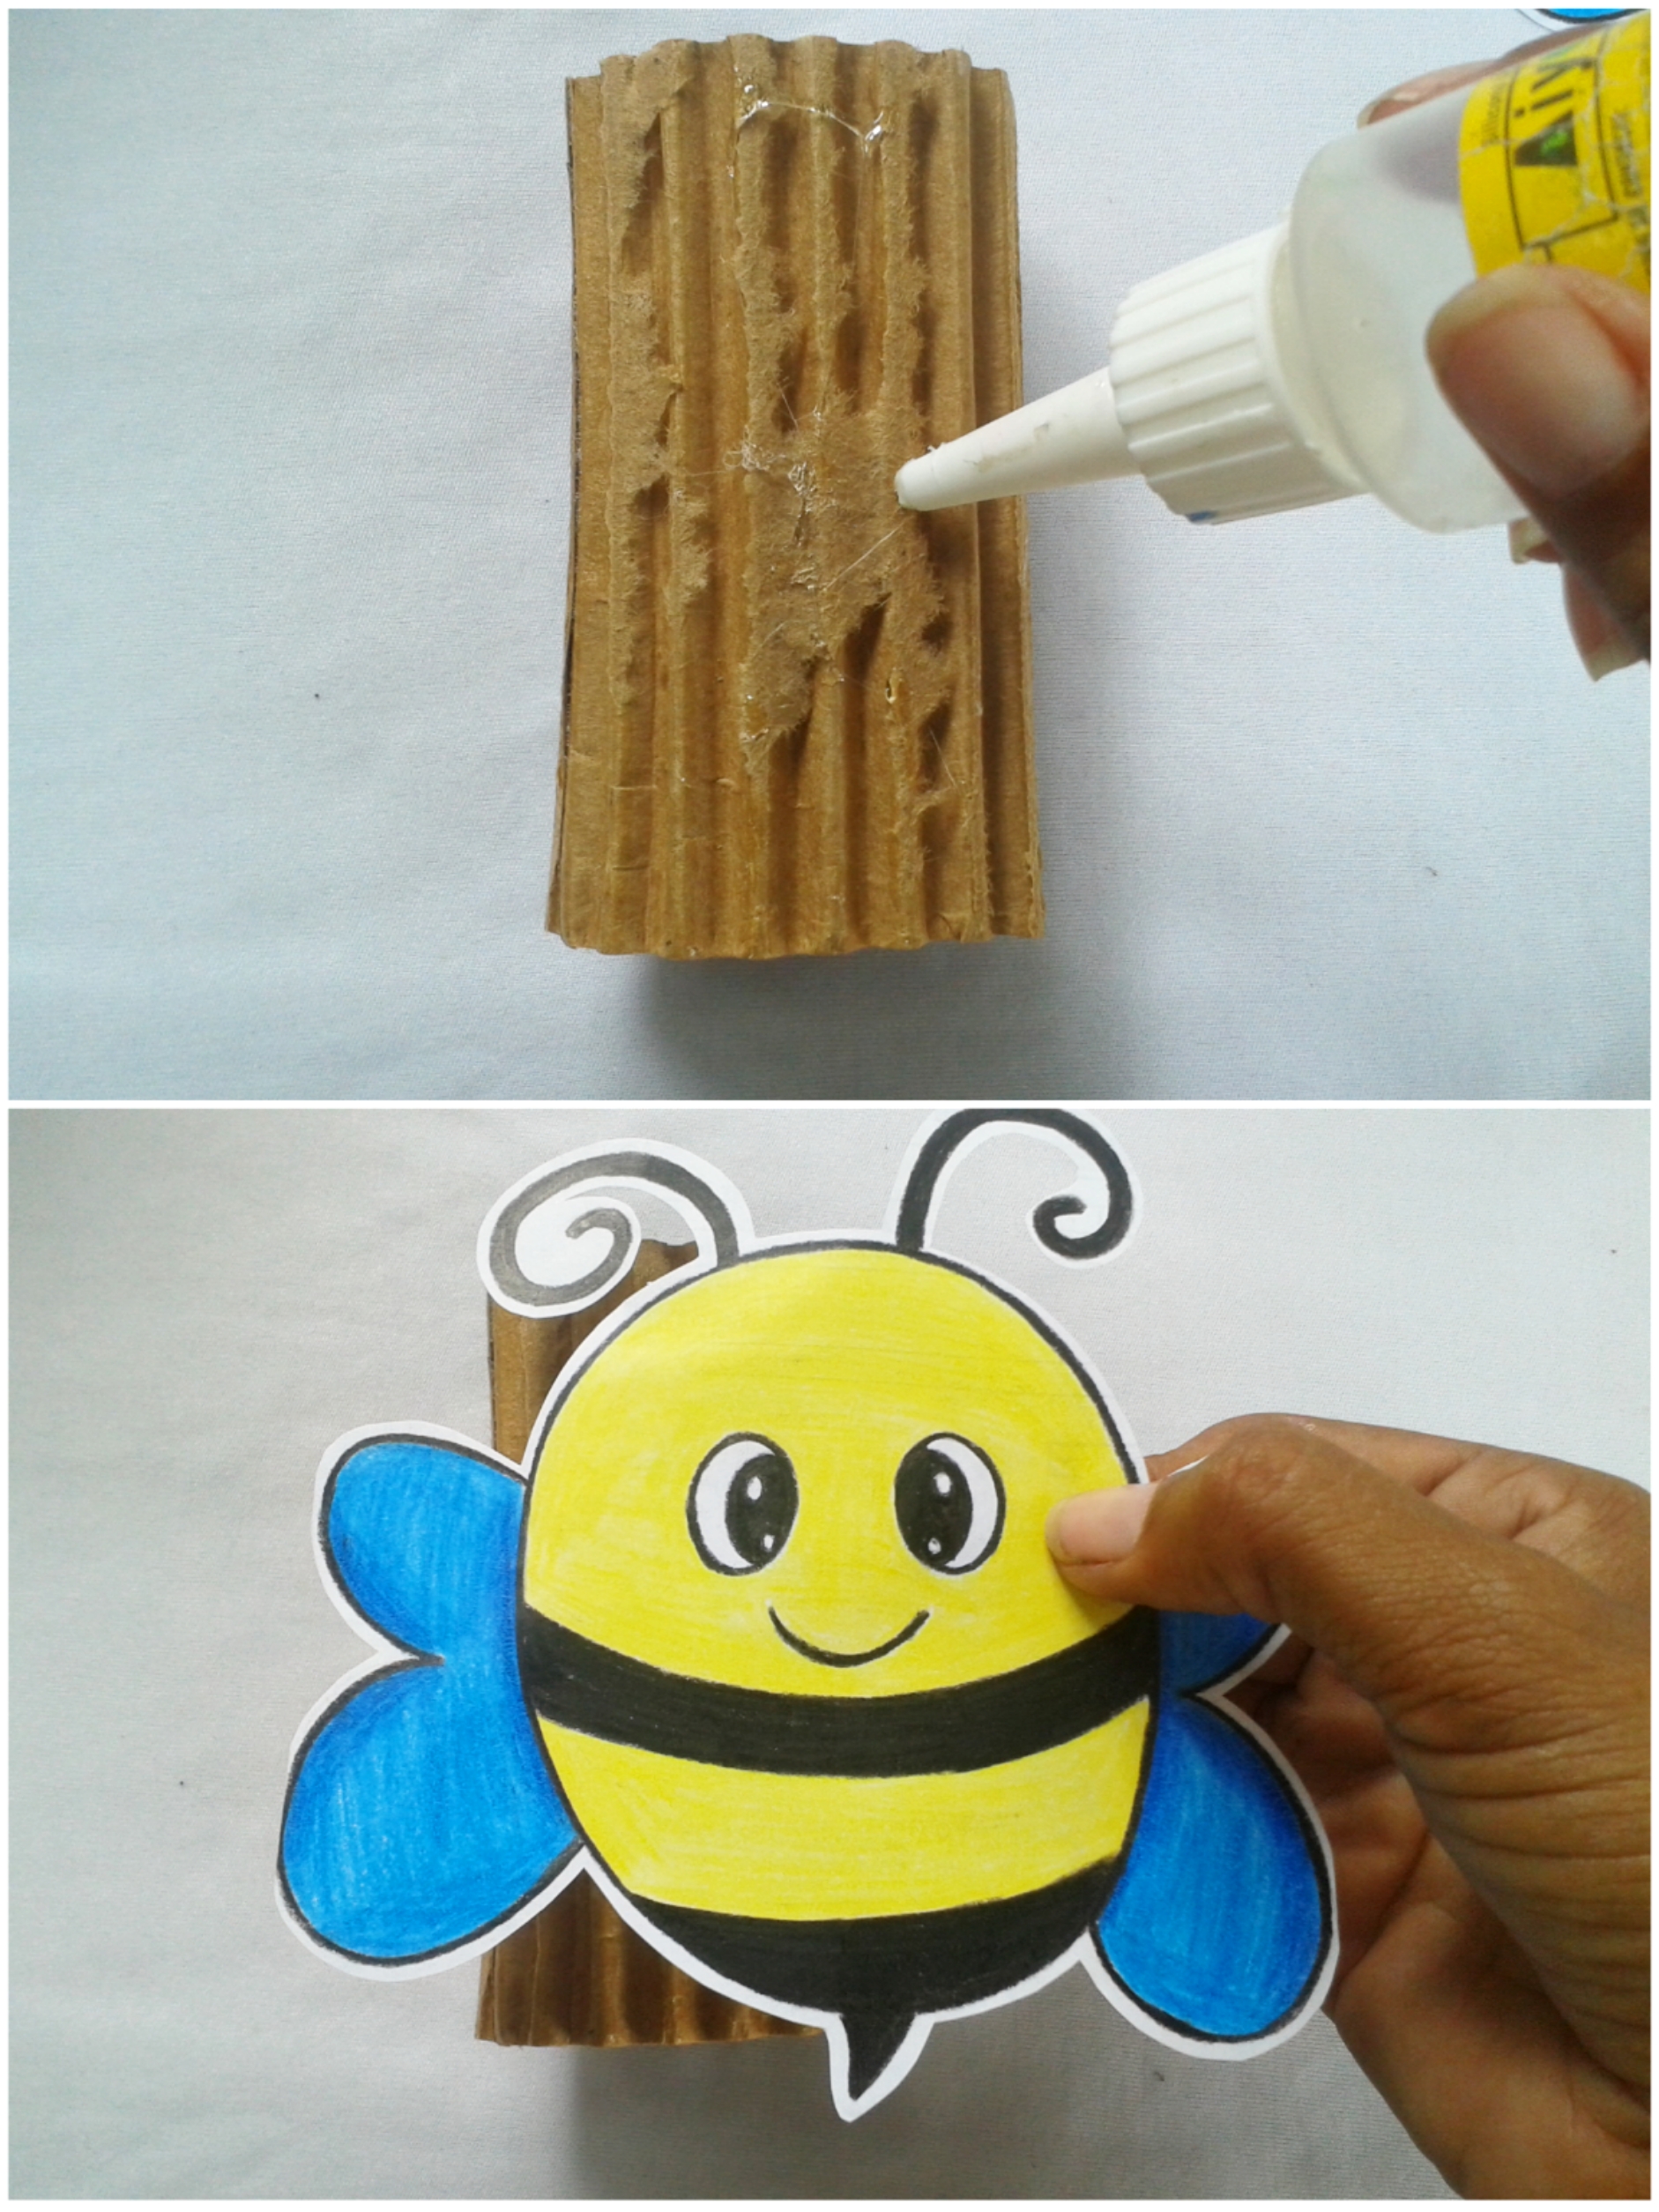
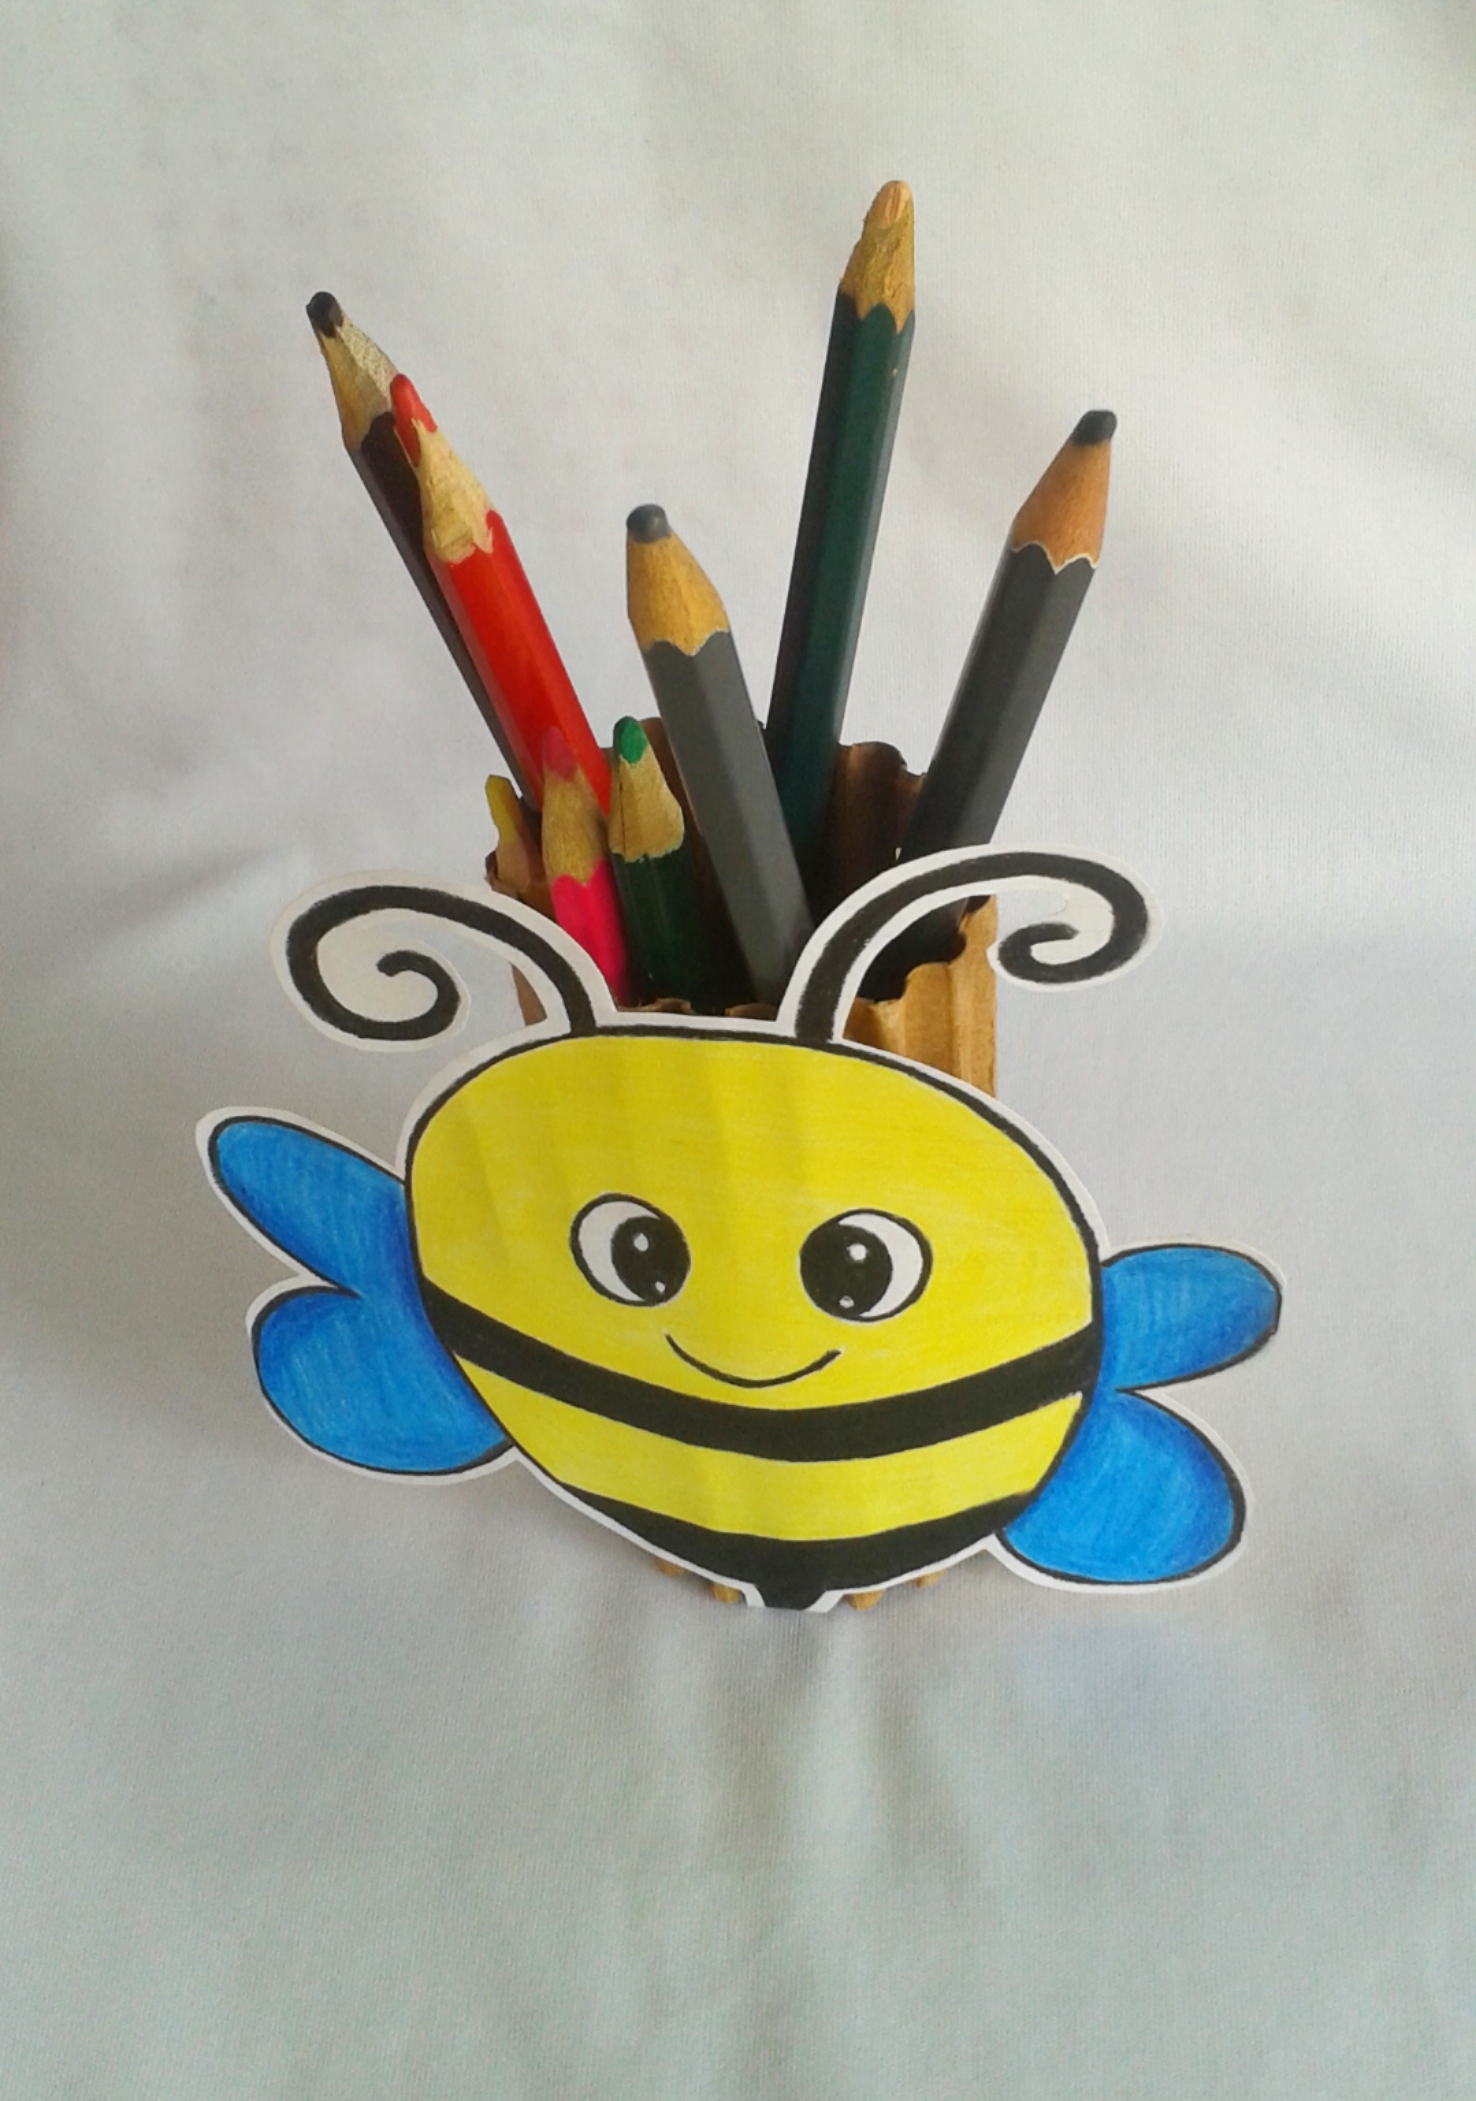
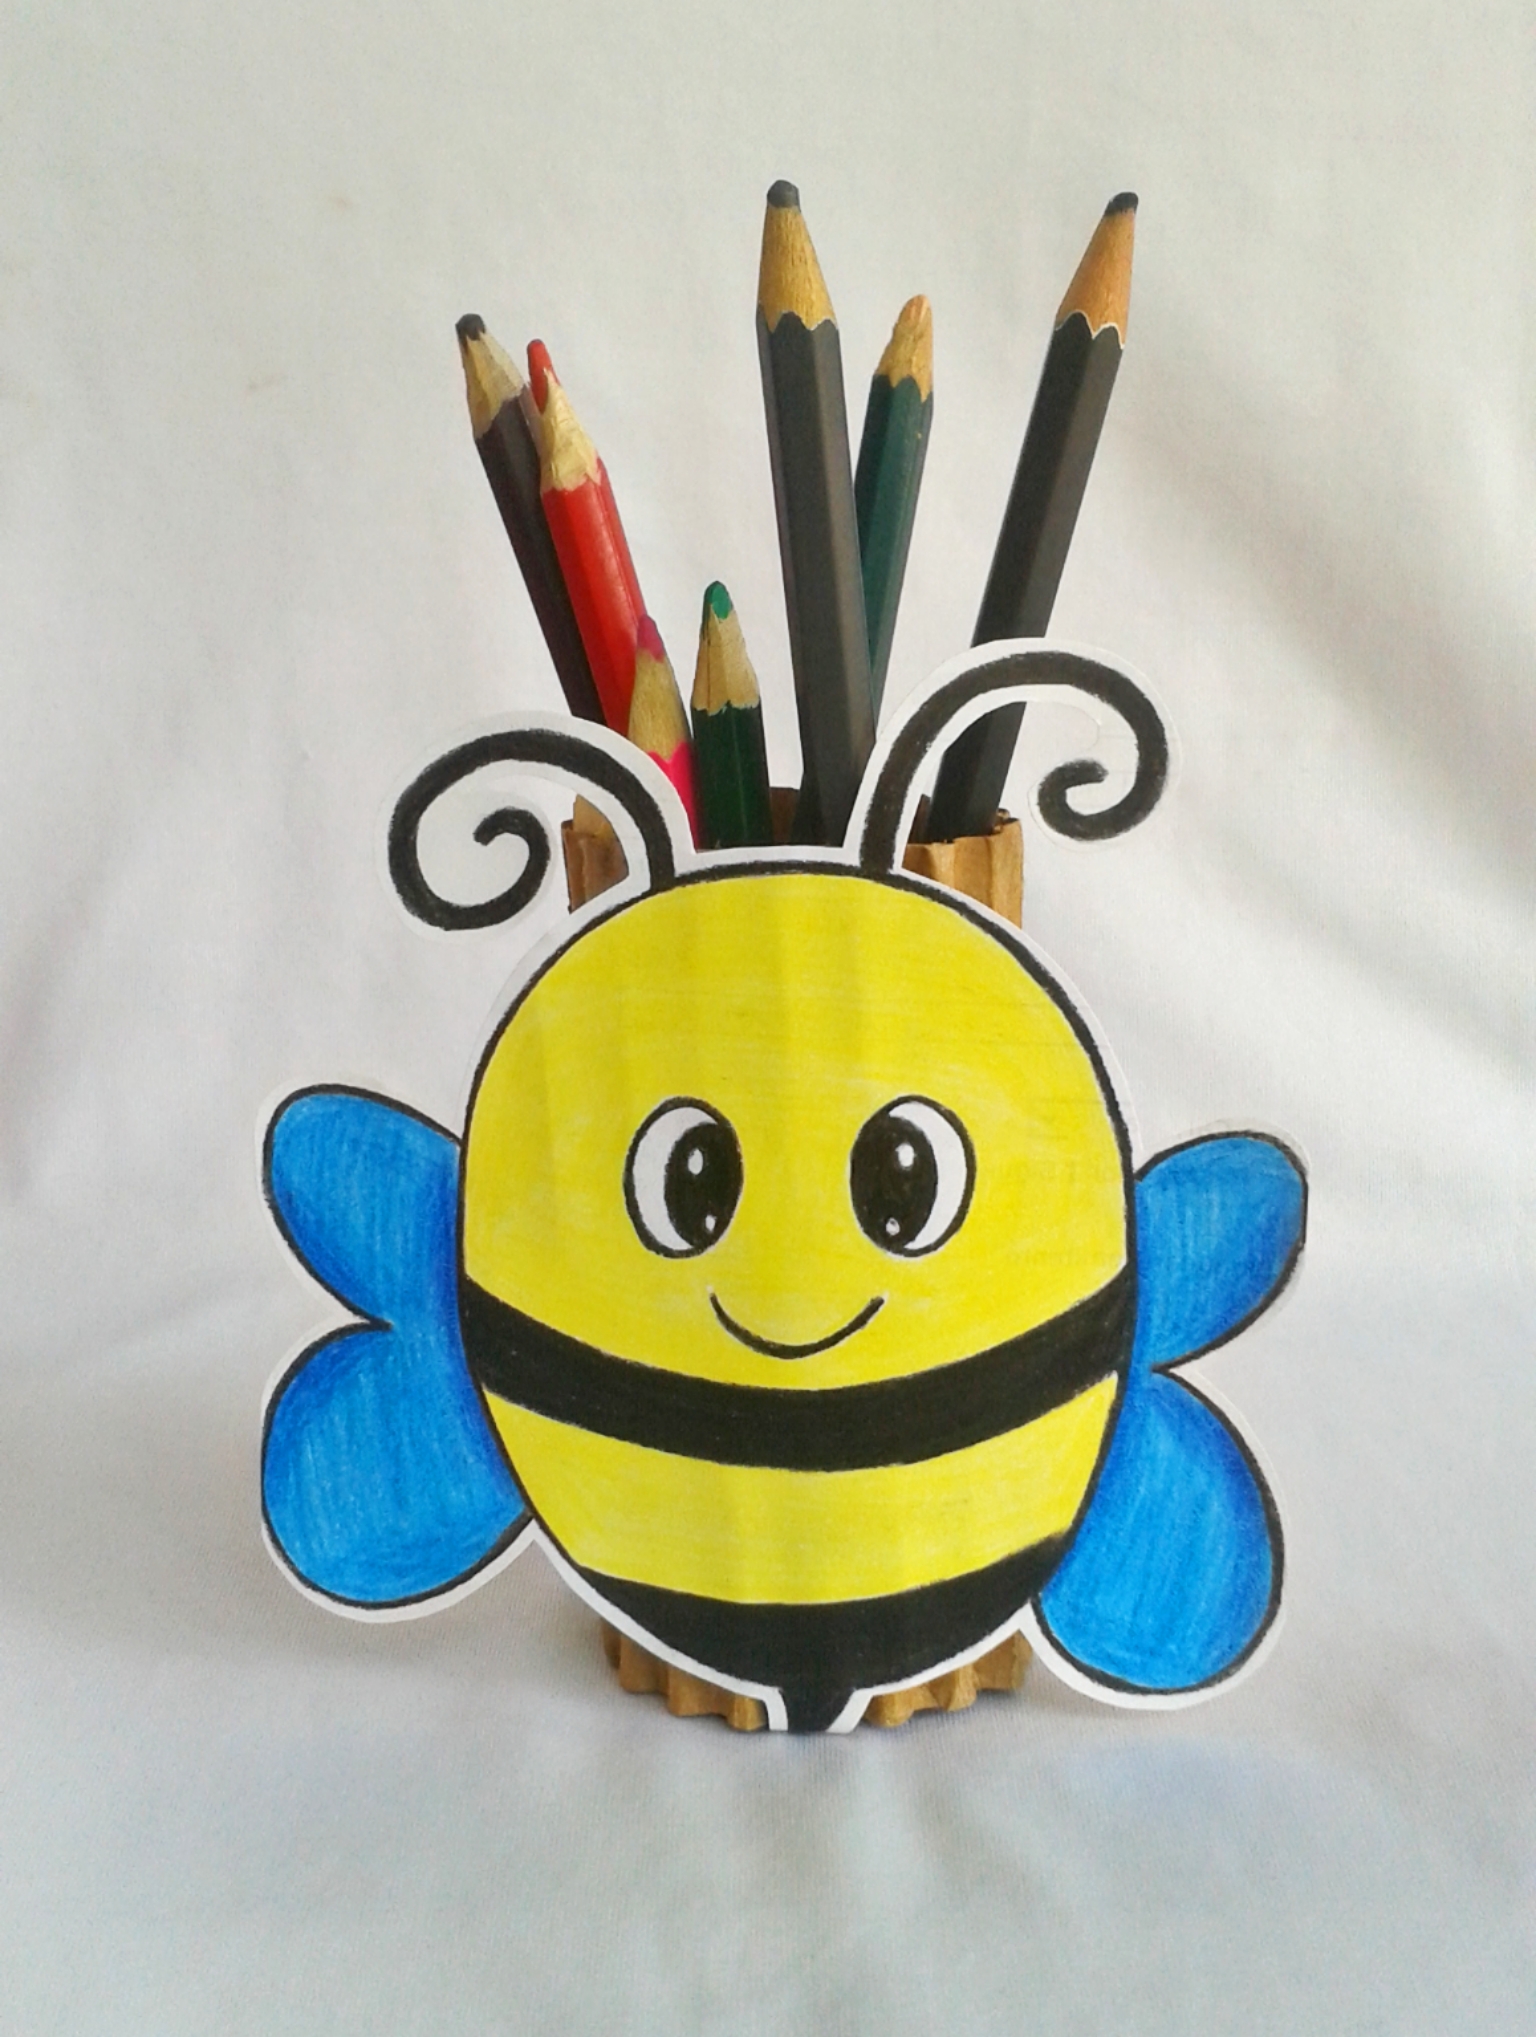
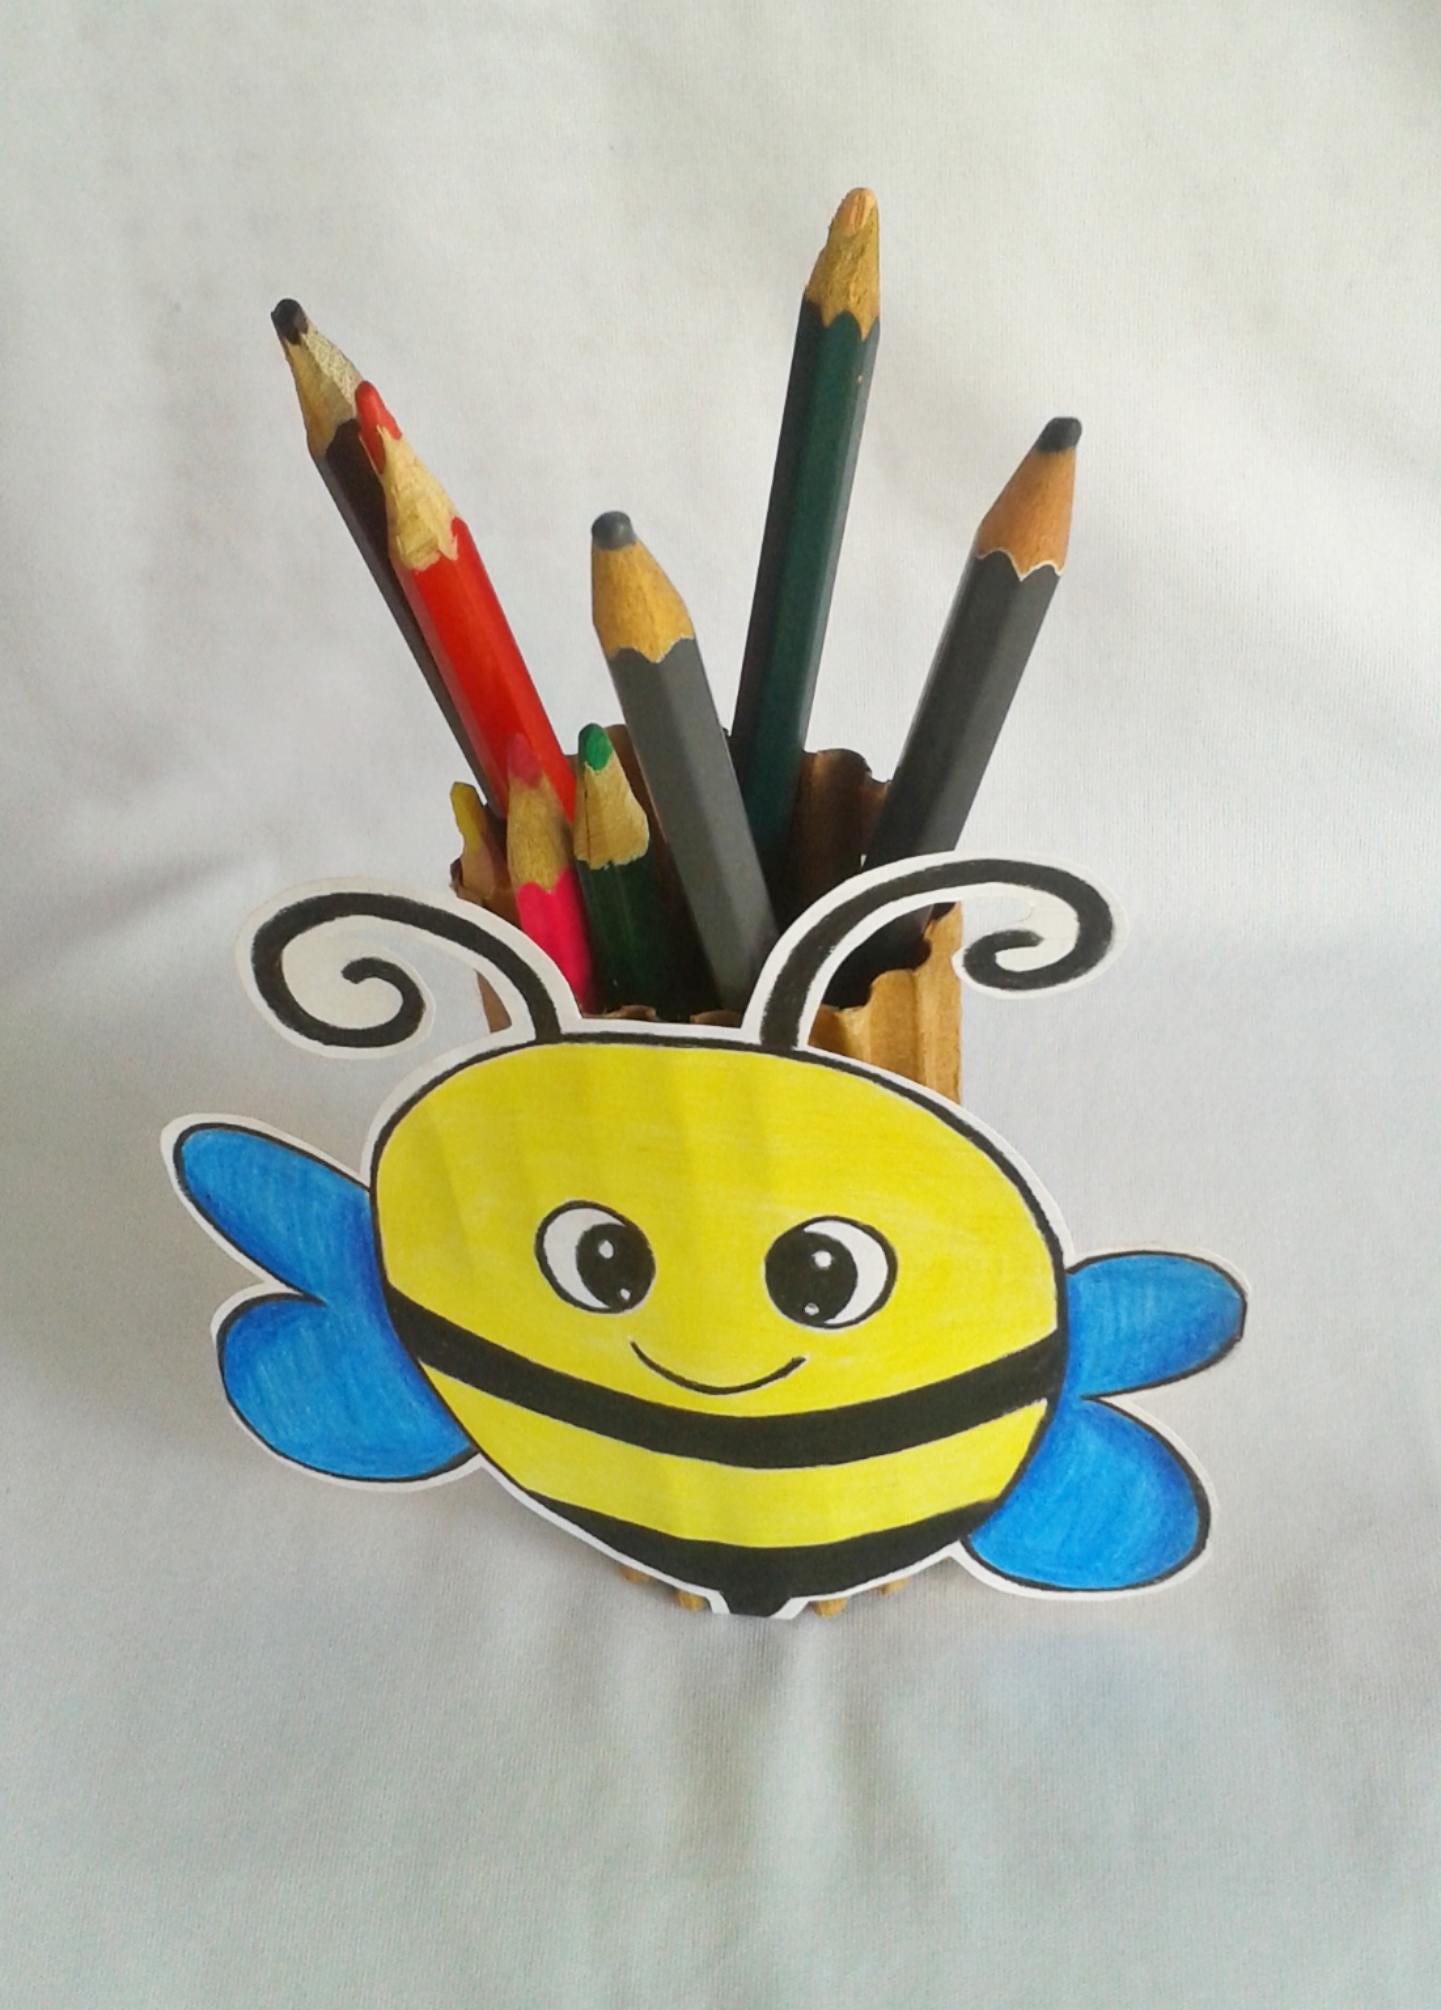
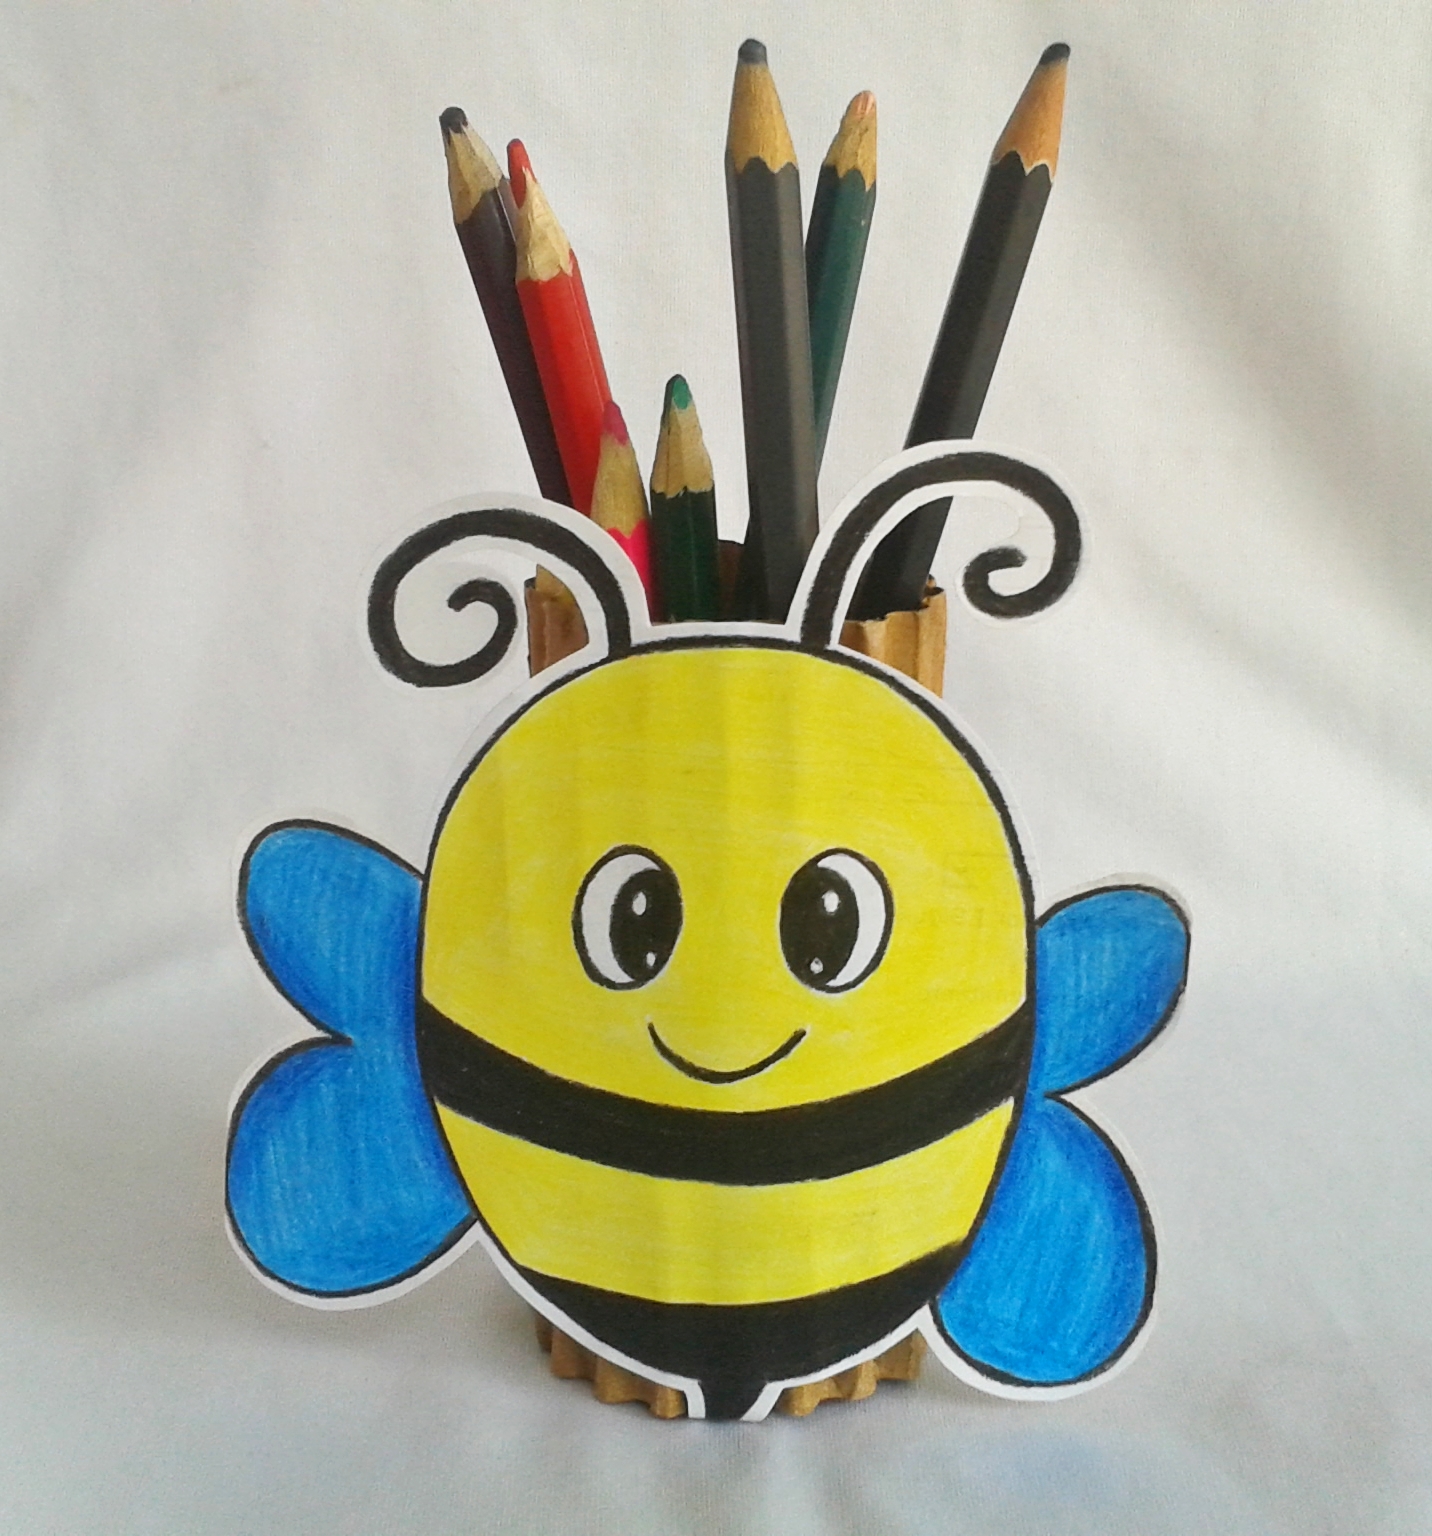
Paso 04: El último paso será pegar la linda abejita al tubo de papel para formar el organizador de colores.
Step 04: The last step will be to glue the cute little bee to the paper tube to form the colored organizer.
![PicsArt_08-08-02.23.34.jpg](https://images.hive.blog/DQmPDZUgYHnDD1yWoARA5d2QWBTpWB6MSBv32BHtdfRaZug/PicsArt_08-08-02.23.34.jpg)
Resultado! // Outcome!
Listo, amigos! Aquà tenemos éste grandioso resultado. Espero te haya gustado!
Ready, friends! Here we have this great result. I hope you liked it!
![PicsArt_08-08-02.25.20.jpg](https://images.hive.blog/DQmdR6AahYsEzwJjT4ji26GVEYSN6jPfhGDP7Yn1Vme6bRe/PicsArt_08-08-02.25.20.jpg)
![PicsArt_08-08-02.24.37.jpg](https://images.hive.blog/DQmRtkPXCFqWtdfFfmS1jbuMZtywKXtdLM7hxKRzg6qwHFZ/PicsArt_08-08-02.24.37.jpg)
![PicsArt_08-08-02.26.42.jpg](https://images.hive.blog/DQmUaHdYViUycSjoDWqkk3t38zERYrJgQLkfQE9scutoKiX/PicsArt_08-08-02.26.42.jpg)
![PicsArt_08-08-02.26.00.jpg](https://images.hive.blog/DQmSRnbd8RsBBemxAdkKeVni73WFhZYMzUiyK4n7EpXUSqh/PicsArt_08-08-02.26.00.jpg)
Gracias por visitar mi Blog!
Saludos para todos! Será hasta el próximo post! @josegregor.
Greetings to all! It will be until the next post! @josegregor.
![IMG_20210618_233257.jpg](https://images.hive.blog/DQmdjsS48vih7KZn4fzhSUqvkLJn1fLQj66C5T2Kev4xntk/IMG_20210618_233257.jpg)