¡Hola! amigos de Hive.
Hello! Hive's friends.
Today I want to show you some easy mouthpieces I made with an aunt. I was telling her a little bit about the things I've done in Hive and she offered to show me two models that I really loved, so I decided to share with you the step by step. Nowadays it is important to use the mouthpiece, to prevent the spread of the virus. Although it is true, its use should be accompanied by other measures such as complying with social distancing, maintaining proper hygiene such as constant hand washing and coughing into the crease of the elbow.
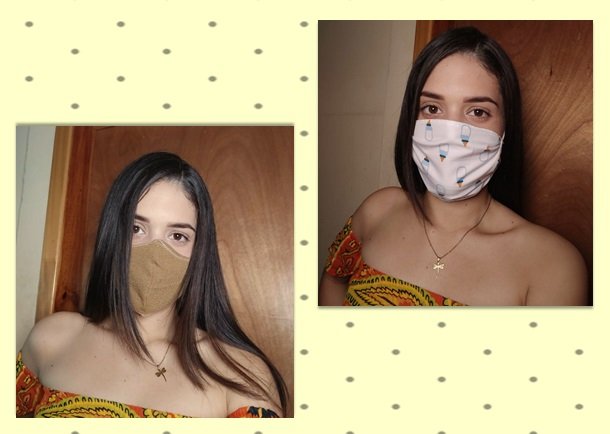
Fabric mouthpieces should be made to cover the nose, mouth, cheeks and chin. Being held around the ears by elastic. As they are made of fabric, you can play with the colors and style to make them safe and why not also pretty, since we must use them daily if we are going out. Also, we must remember to wash them constantly.

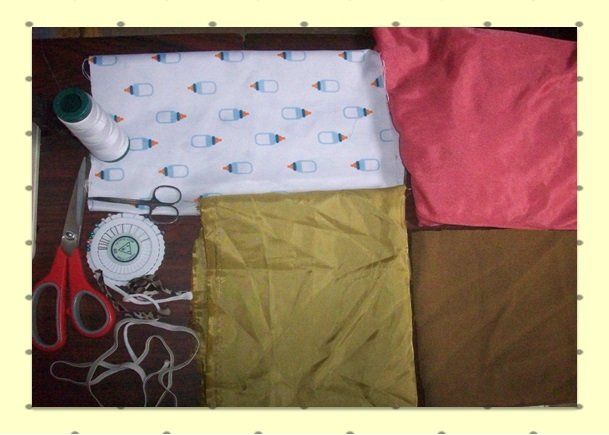
Materiales:
- Telas.
- Hilo.
- Tijera.
- Alfileres.
- Elástica.
Materials:
- Fabrics.
- Thread.
- Scissors.
- Pins.
- Elastic.
Primer modelo paso a paso // First step-by-step model
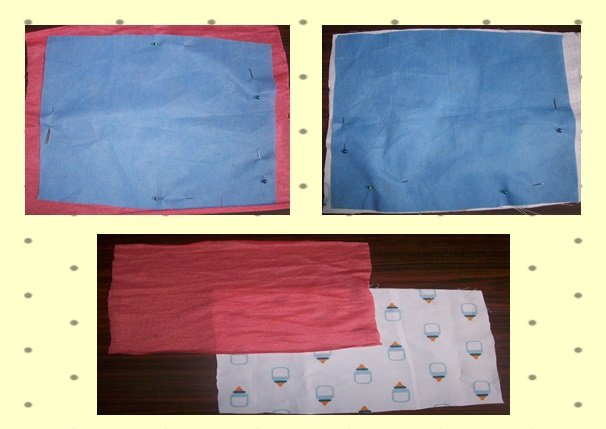
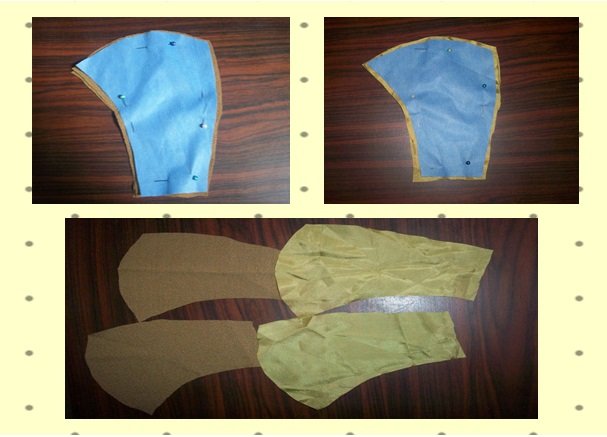
- Lo primero que vamos a hacer es dibujar en una hoja de papel el molde del tapaboca, este será de acuerdo al tamaño de nuestro rostro. Usaremos dos telas para el tapabocas, estás las doblaremos para luego colocar el molde y lo sostendremos con alfileres.
- The first thing we are going to do is to draw on a sheet of paper the mold of the mouthpiece, this will be according to the size of our face. We will use two fabrics for the mask, we will fold them and then place the mold and hold it with pins.
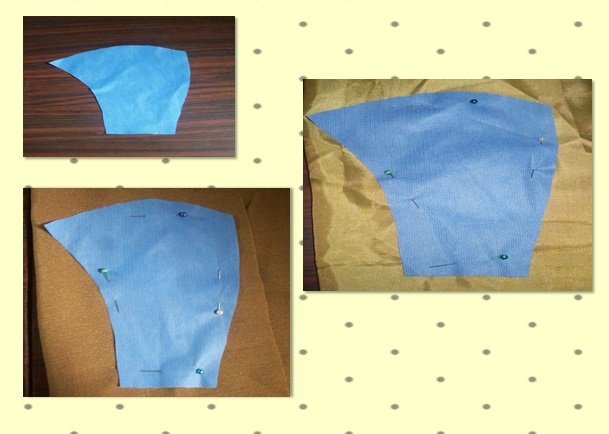
- Luego cortaremos la tela siguiendo el molde, los alfileres nos ayudarán a sostener la tela y de esta manera será mucho más fácil. Debemos obtener cuatro formas iguales.
- Then we will cut the fabric following the mold, the pins will help us to hold the fabric and in this way it will be much easier. We should get four equal shapes.
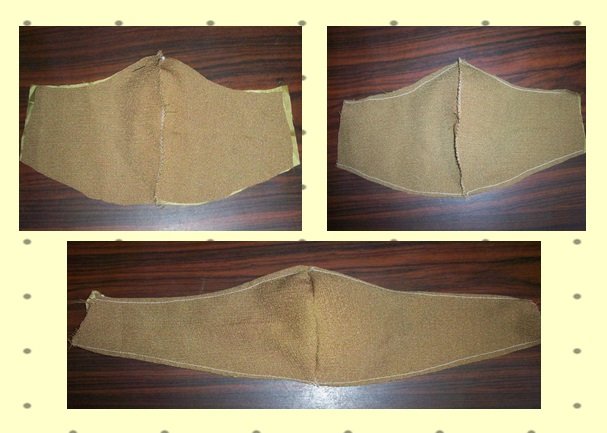
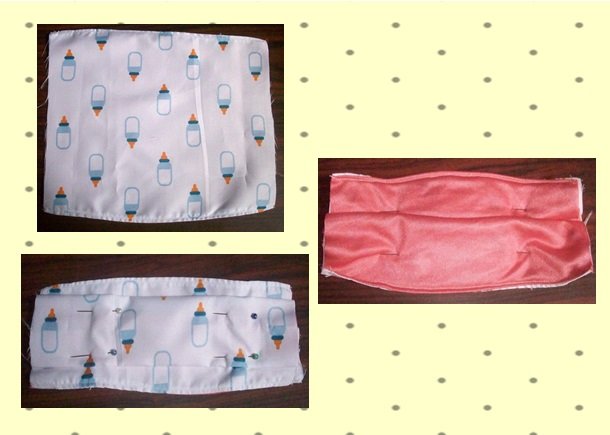
- Lo siguiente que haremos, es coser la tela en donde está la forma ovalada, juntando de esta manera las dos telas iguales. Así, nuestro tapaboca irá adoptando una forma alargada.
- The next thing we will do is sew the fabric where the oval shape is, thus joining the two equal fabrics. Thus, our mouthpiece will adopt an elongated shape.
- Ahora, colocaremos nuestras dos partes cara con cara, si alguna sobresale la podemos cortar con la tijera. Luego coseremos la parte superior y la parte inferior, pero esto lo haremos al revés para luego voltearlo y también hacerle una costura recta arriba y abajo.
- Now, we will place our two parts face to face, if one of them protrudes we can cut it with the scissors. Then we will sew the top and bottom, but this will be done upside down and then turn it over and also make a straight seam at the top and bottom.
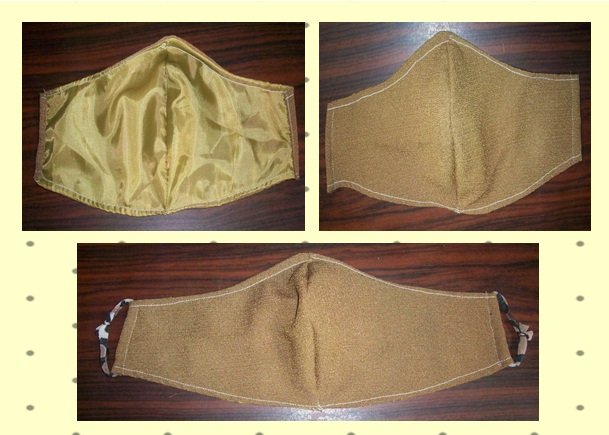
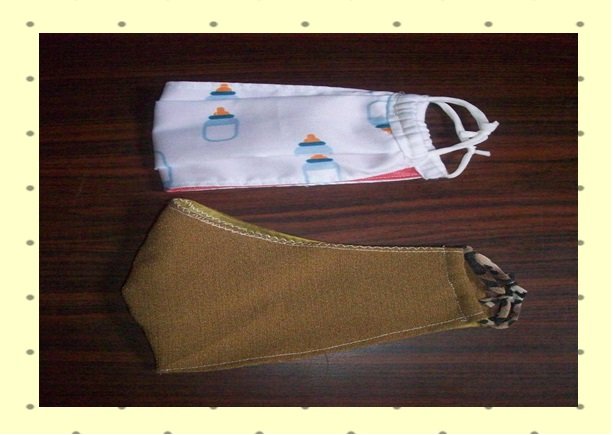
- Como paso final, vamos a doblar las esquinas de los tapabocas para coserlas, pero hay que dejar un pequeño espacio ya que por allí introduciremos la elástica. Si no tienen elástica, pueden usar un cordón o como en mi caso que corté una tira de una tela que estira. Además introduje la tira, con la ayuda de un palillo de altura.
- As a final step, we are going to bend the corners of the mouthpieces to sew them, but we must leave a small space since we will introduce the elastic there. If you don't have elastic, you can use a string or as in my case I cut a strip of fabric that stretches. I also introduced the strip, with the help of a height stick.
Segundo modelo paso a paso // Second step-by-step model
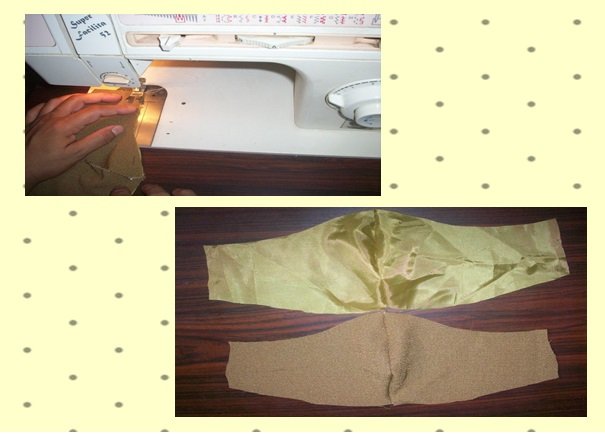
- Para este modelo, lo primero que haremos es hacer un molde en forma de cuadrado que tendrá 18 de largo por 21 de ancho. De igual manera, colocaremos el molde encima de dos telas diferentes, pero en este caso no la doblaremos.
- For this model, the first thing we will do is make a square mold that will be 18 long by 21 wide. In the same way, we will place the mold on top of two different fabrics, but in this case we will not fold it.
- Luego, colocaremos las telas cara con cara y las coseremos al derecho y al revés. Después, haremos dos pinzas y la sostendremos con alfileres.
- Then, we will place the fabrics face to face and sew them upright and backwards. Then, we will make two pincers and hold it with pins.
- Los alfileres nos ayudarán a mantener la forma del doblez. Ahora trabajaremos con las esquinas del tapabocas, para ello cortaremos dos tiras que coseremos alrededor de la tela para tapar el doblez. De igual manera, dejamos un pequeño espacio.
- The pins will help us keep the shape of the fold. Now we will work with the corners of the mouthpiece, to do this we will cut two strips that we will sew around the fabric to cover the fold. In the same way, we leave a small space.

- Finalmente, introducimos la elástica por el pequeño espacio que dejamos y listo. Nuestro segundo tapaboca estará terminado.
- Finally, we introduce the elastic for the small space we left and that's it. Our second mouthpiece will be finished.

Thanks for reading my post!
Pictures of my property.

Discord Server.This post has been manually curated by @steemflow from Indiaunited community. Join us on our
Do you know that you can earn a passive income by delegating to @indiaunited. We share 80 % of the curation rewards with the delegators.
Here are some handy links for delegations: 100HP, 250HP, 500HP, 1000HP.
Read our latest announcement post to get more information.
Please contribute to the community by upvoting this comment and posts made by @indiaunited.