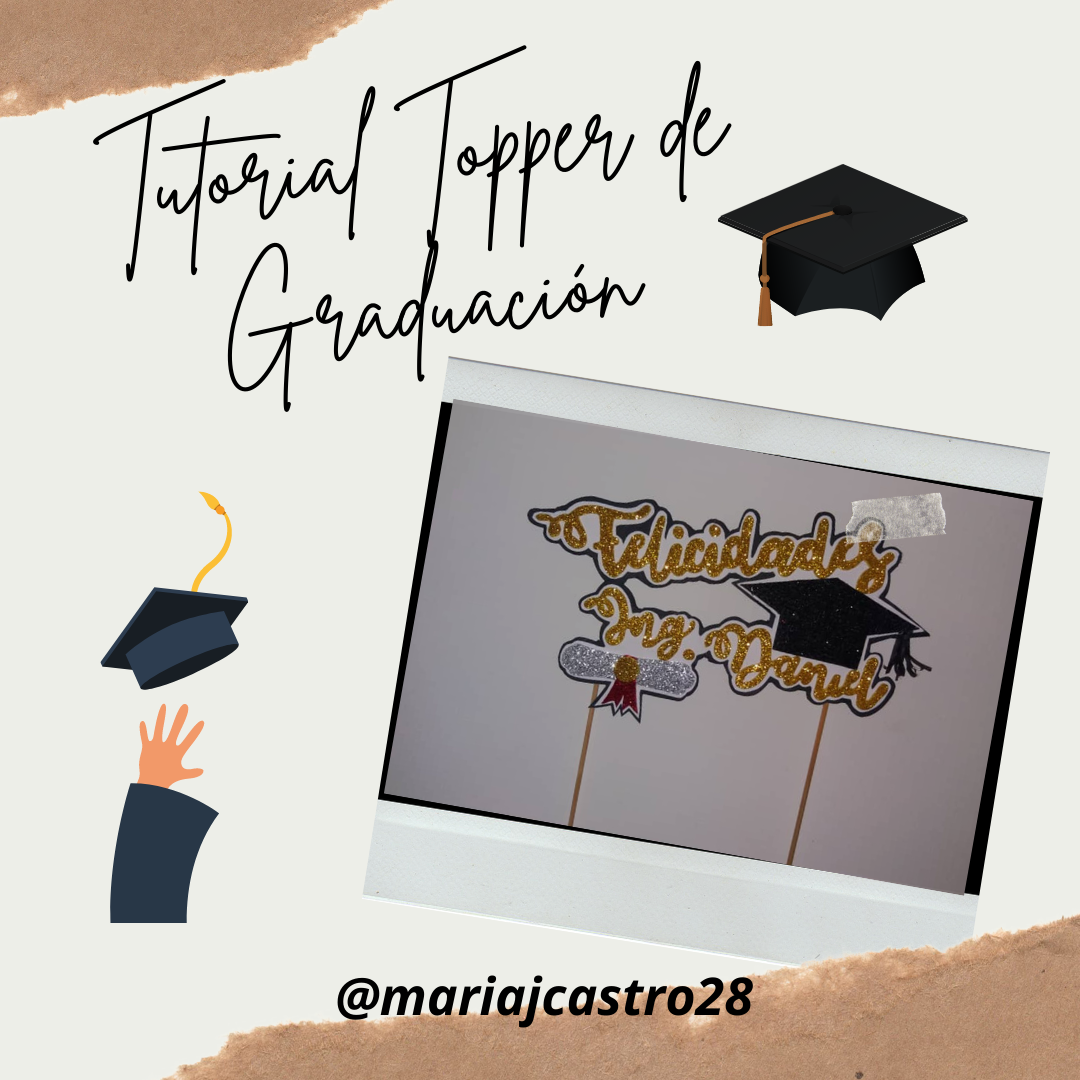
El día de hoy les vengo a compartir un tutorial para elaborar un topper con motivo de graduación, el cual hice para celebrar la graduación de mi pareja, luego de buscar tantas ideas en internet terminé haciéndolo a mi manera agregando elementos como birrete y diploma para personalizar el topper, aquí les muestro el paso a paso, espero que les guste.
Today I come to share a tutorial to make a graduation topper, which I made to celebrate my partner's graduation, after looking for so many ideas on the internet I ended up doing it my way by adding elements such as a cap and diploma to personalize the topper, here I show you the step by step, I hope you like it.


Materiales || Materials

- Foami dorado escarchado.
- Foami negro escarchado.
- Foami plateado escarchado.
- Foami rojo escarchado.
- Cartulina escolar blanca.
- Cartulina escolar negra.
- Papel de seda negro.
- Tijeras.
- Silicón.
- Lápiz.
- Hoja de papel.
- Palitos de altura.
- Frosted golden foam.
- Frosty black foam.
- Frosted silver foam.
- Frosty red foam.
- White school cardboard.
- Black school cardboard.
- Black tissue paper.
- Pair of scissors.
- Silicone.
- Pencil.
- Paper sheet.
- Height sticks.

Procedimiento || Process

✦PASO 1. Lo primero que haremos es un birrete, un diploma y la frase que queremos que diga el topper en una hoja de papel y recortamos, luego hacemos la frase en foami dorado escarchado, el birrete en foami negro escarchado y el diploma en foami plateado escarchado, rojo escarchado y dorado escarchado y recortamos.
✦ STEP 1. The first thing we will do is a cap, a diploma and the phrase we want the topper to say on a sheet of paper and cut out, then we make the phrase in frosted gold foami, the cap in frosted black foami and the diploma in frosty silver, frosty red and frosty gold foami and cut.


✦PASO 2. Armamos el diploma pegando justo en el centro el listón de foami escarchado rojo y sobre este el circulo de foami escarchado dorado.
✦ STEP 2. We put together the diploma by sticking the red frosted foam ribbon right in the center and on this the golden frosted foam circle.


✦PASO 3. Recortamos dos tiras delgadas de papel de seda negro, los unimos y doblamos a la mitad y hacemos ligeros cortes verticalmente sin llegar hasta el final y luego lo pegamos en una de las puntas del birrete de foami simulando así la borla que estos tienen.
✦ STEP 3. We cut two thin strips of black tissue paper, we join them and fold them in half and make light cuts vertically without reaching the end and then we glue it on one of the tips of the foami mortarboard, simulating like this the tassel that these have.


✦PASO 4. Comenzamos a armar el topper sobre la cartulina escolar blanca pegando la frase, el birrete y el diploma en el orden que más nos guste.
✦ STEP 4. We begin to assemble the topper on the white school cardboard by gluing the phrase, the cap and the diploma in the order that we like the most.


✦PASO 5. Recortamos los bordes de cartulina escolar y dejamos una delgada línea de este en las orillas del topper, luego pegamos sobre cartulina escolar negra y volvemos a recortar el exceso, quedando el topper con borde blanco y negro.
✦ STEP 5. We cut the edges of school cardboard and leave a thin line of this on the edges of the topper, then we glue on black school cardboard and we trim the excess again, leaving the topper with a black and white border.


✦PASO 6. Por ultimo aplicamos silicon en la parte trasera de la cartulina y pegamos uno o dos palitos de altura, todo depende de cómo nos guste más, y listo, ya nuestro hermoso topper de graduación está listo para usarse.
✦ STEP 6. Finally, we apply silicone to the back of the cardboard and glue one or two sticks high, it all depends on how we like it the most, and voila, our beautiful graduation topper is ready to use.


Como ven es muy fácil de hacer, solo es cuestión de agregar los detalles de nuestra preferencia y armar el topper a nuestro gusto, espero que les haya gustado este tutorial y el resultado final tanto como a mi
As you can see, it is very easy to do, it is just a matter of adding the details of our preference and assembling the topper to our liking, I hope you liked this tutorial and the final result as much as I do.


Todas las fotografías son de mi propiedad.
Fotografías capturadas con mi Samsung Galaxy A12
Nos vemos en mi próxima publicación.
¡Tengan un feliz día!
All photographs are my property.
Photos captured with my Samsung Galaxy A12
See you in my next post.
¡Have a happy day!
Te quedó genial y bonito amiga!
Muchas gracias amiga, a mi también me encantó 💟
ESRA ES LA EPOCA APROPIADA
Correcto, por eso mismo me puse manos a la obra, gracias por pasar por mi post y comentar, saludos!