¡Hola, amigos de Hive! Las mejores vibras y deseos para todos
Hello Hive friends! Best vibes and wishes to all
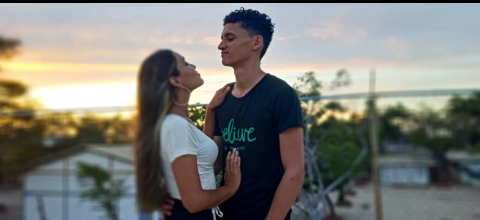
En esta oportunidad les voy a mostrar algo que ha estado muy en tendencia desde el inicio del año, lo cual es este fondo de planeta que se ha virilizado en Tiktok, que como sabemos, es una de las plataformas más influyentes hoy en día. Todo consiste en tomar una foto con tu pareja, amig@, familiar, a la que de verdad le tengas mucho cariño y crear su propio planeta juntos.
A mí me parece algo muy hermoso, y un perfecto detalle para regalar a los que más queremos, siempre dejándoles el mensaje de lo especiales que son para nosotros. Así que les mostrare el paso a paso de cómo hacer este fondo, de una manera súper fácil con la App de PicsArt.
This time I am going to show you something that has been very much in trend since the beginning of the year, which is this background of the planet that has become virilized in Tiktok, which, as we know, is one of the most influential platforms today. Everything consists of taking a photo with your partner, friend, family member, whom you really care about and create your own planet together.
It seems to me something very beautiful, and a perfect detail to give to those we love the most, always leaving them the message of how special they are to us. So I will show you step by step how to make this background, in a super easy way with the PicsArt App.

1✨
Ingresamos a la App de Picsart, seleccionamos la foto que deseamos, empezamos con la edición.
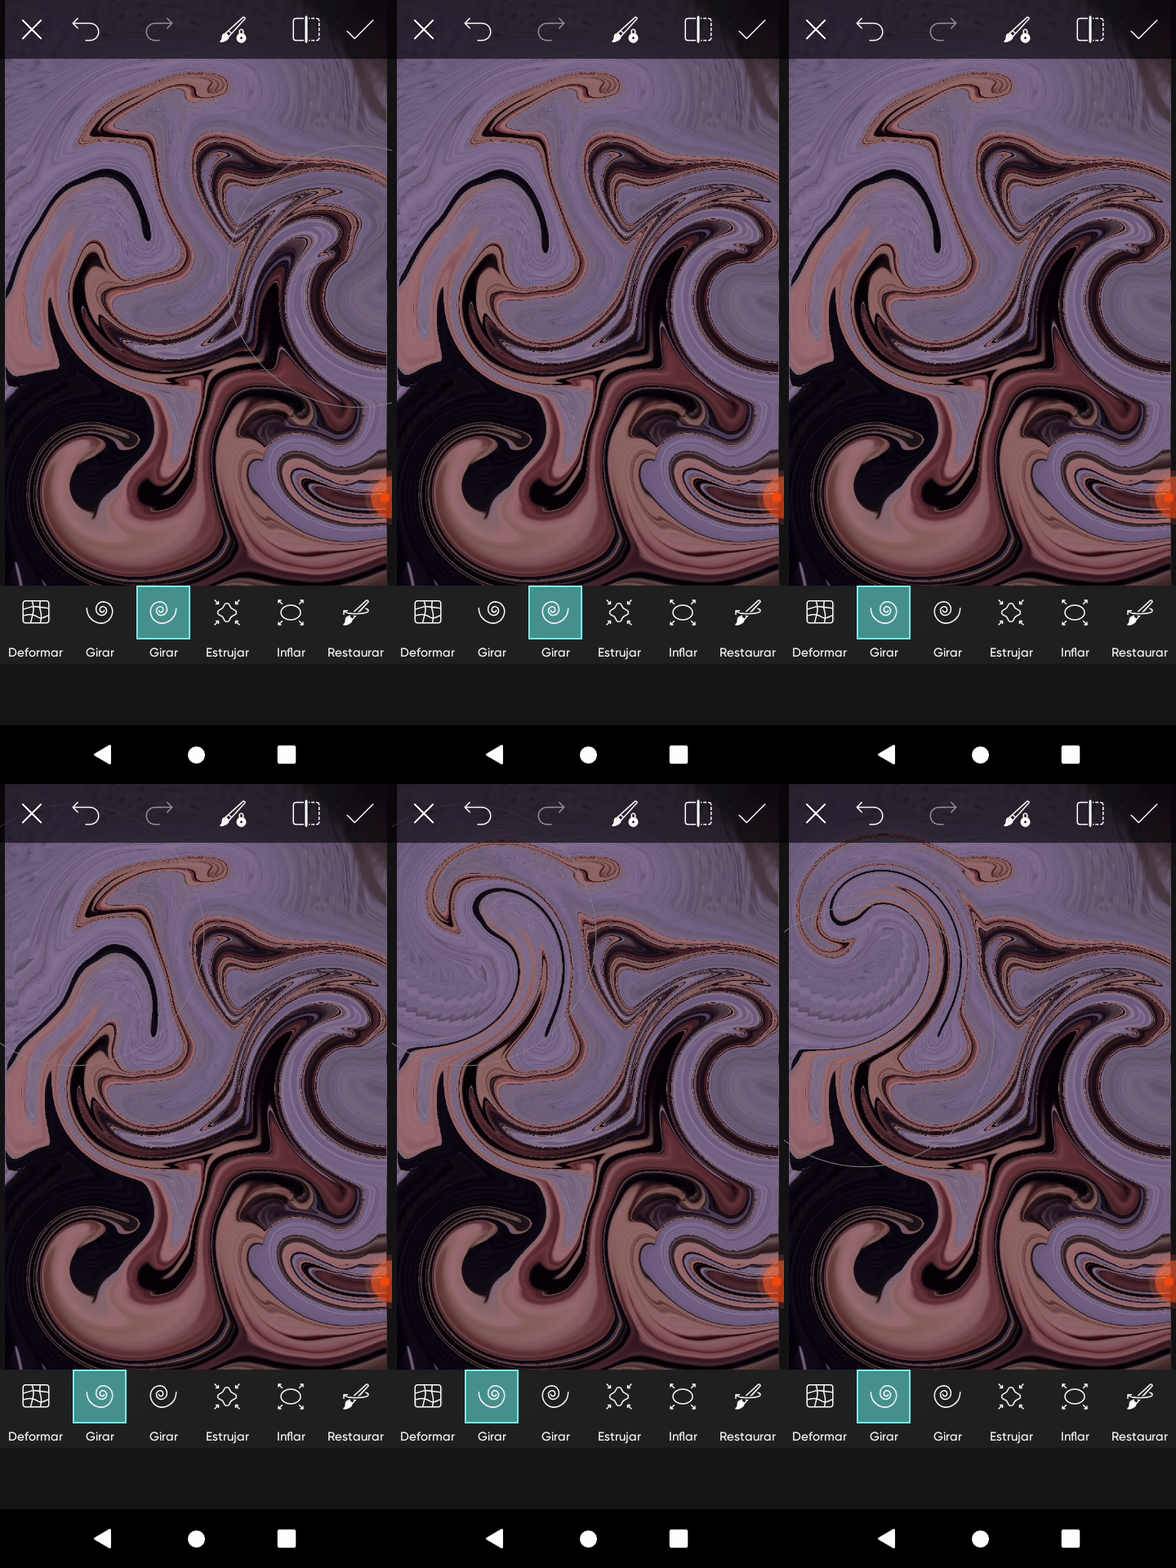
Buscamos en la barra y pulsamos donde dice herramientas, donde nos aparecerán varias materiales para la edición, de las cuales seleccionaremos la opción de deformar. Lo que necesitamos para que la imagen logre ese efecto marmoleado, es pulsar donde dice girar, en este caso empezamos con girar a la derecha, y deformamos.
También puedes alternar el efecto girando hacia la izquierda. Hay diversas opciones para deformar, así que pueden experimentar con las otras funciones.
.gif)
.gif)
We enter the Picsart App, we select the photo we want, we start with the edition.
We look in the bar and click where it says tools, where several materials for editing will appear, from which we will select the option to deform. What we need for the image to achieve that marbled effect is to press where it says to turn, in this case we start by turning to the right, and we deform.
You can also toggle the effect by turning to the left. There are several options for warping, so feel free to experiment with the other features.
2✨
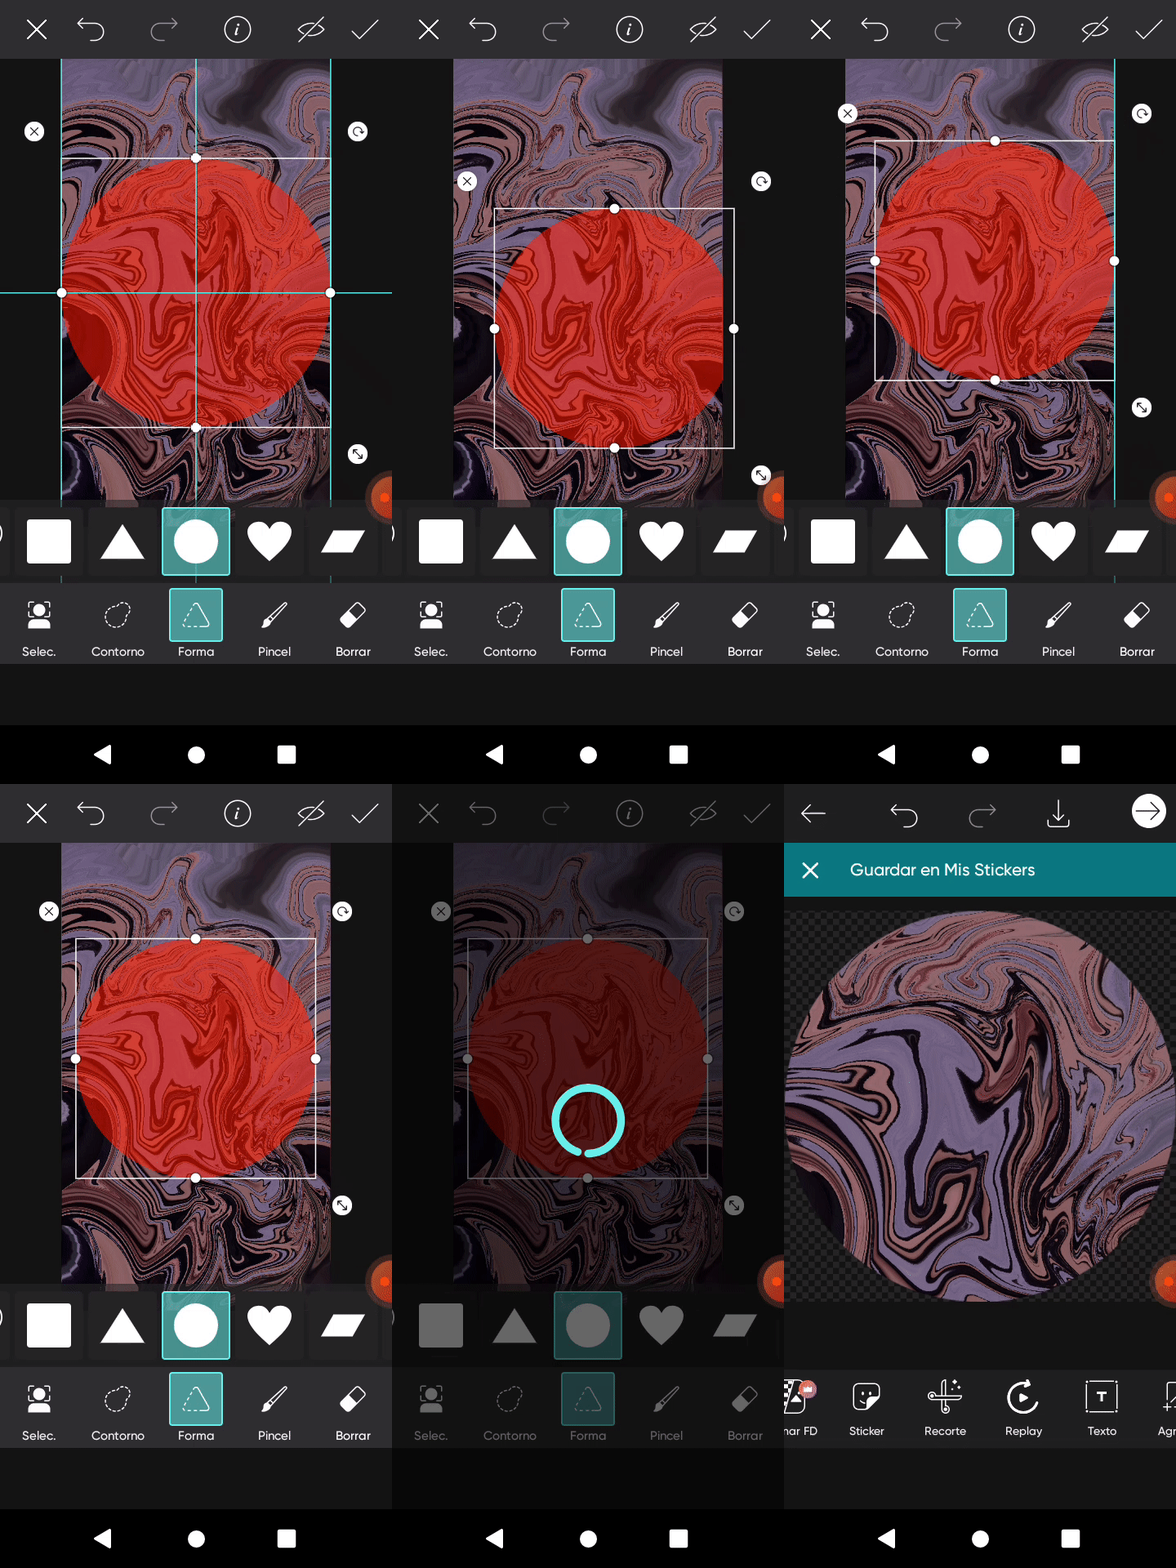
Ya que hayamos deformado por completo la imagen y tenga el efecto deseado, volvemos a la barra, pero esta vez entramos en la opción de recorte. Seleccionamos una forma que corte, que en nuestro caso necesitaremos un circulo, para simular un planeta. Posicionamos el círculo en el área que deseamos recortar, y le damos en la esquina superior para aceptar el corte.
.gif)
Once we have completely deformed the image and it has the desired effect, we return to the bar, but this time we enter the cropping option. We select a shape that cuts, which in our case we will need a circle, to simulate a planet. We position the circle in the area that we want to cut, and we click on the upper corner to accept the cut.
3✨
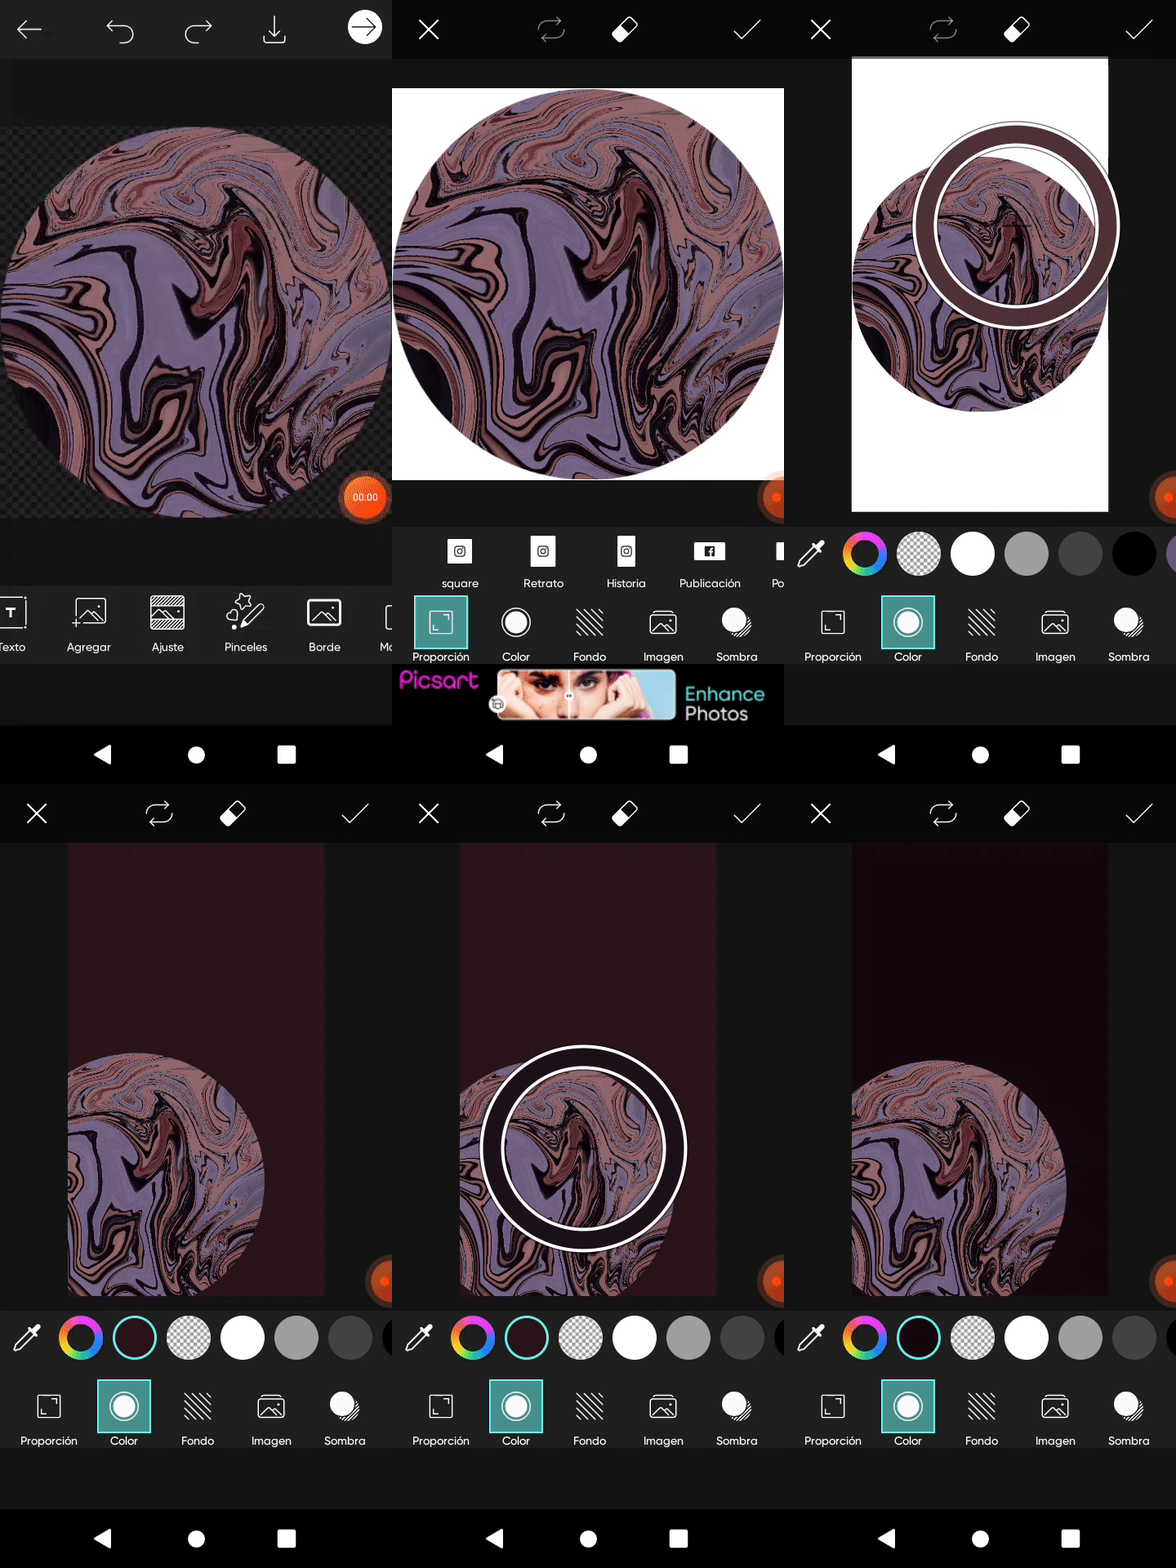
Para el siguiente paso, nos vamos a ajustes, y seleccionamos la opción de historia de instragram, el cual será el formato de nuestra portada. Luego, guiamos el puntero por el planeta para ajustar el color del fondo. Esa es la opción que más me gusta, ya que ayuda a combinar mejor los colores, pero ustedes pueden seleccionar el color que mejor deseen.
.gif)
.gif)
.gif)
.gif)
.gif)
.gif)


🪐🪐🪐🪐🪐🪐🪐🪐🪐
Del mismo modo, posicionamos la imagen en la esquina inferior. Y le damos en la esquina para guardar lo que hemos hecho hasta el momento.
.gif)
For the next step, we go to settings, and select the instagram story option, which will be the format of our cover. Then, we guide the pointer over the planet to adjust the background color. That is the option that I like the most, since it helps to combine the colors better, but you can select the color that you want best.
Similarly, we position the image in the bottom corner. And we hit the corner to save what we've done so far.
4✨
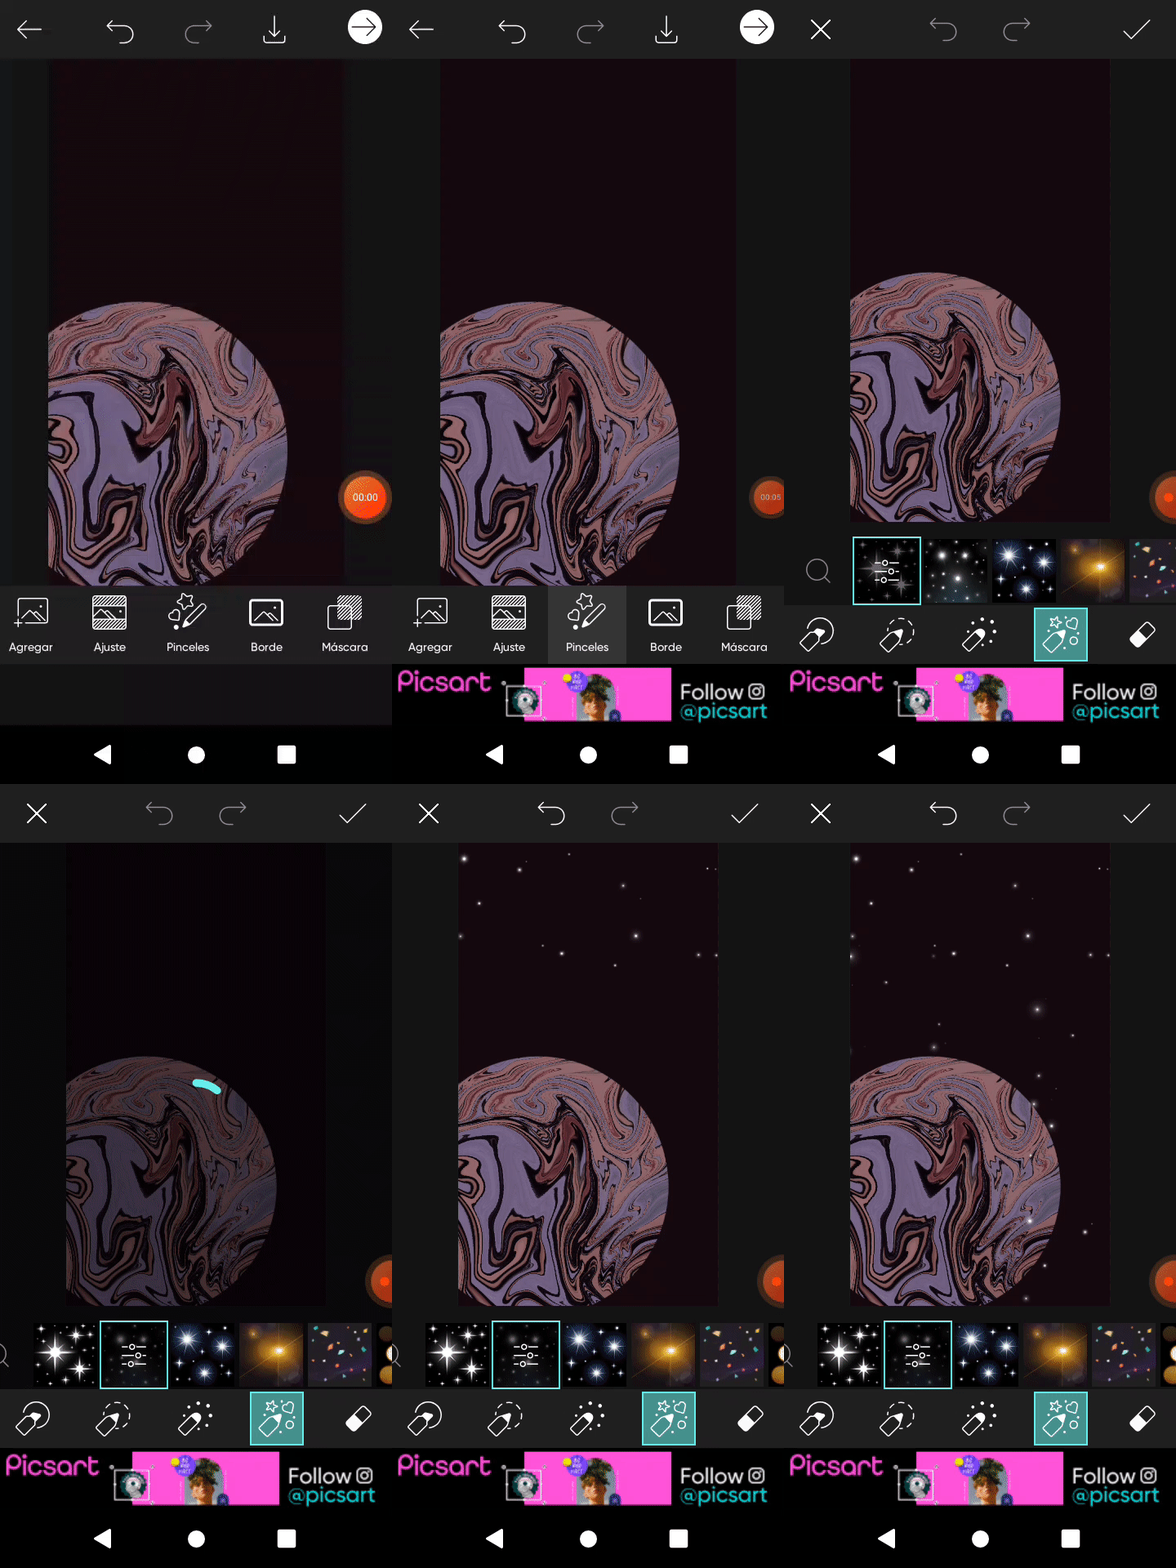
Para las estrellas, pulsamos la opción de pinceles y en el buscar introducimos el estilo de estrella que más nos guste. Estas que estoy usando son “Estrellas aesthetic ”. Podemos jugar con los diversos modelos de estrellas y así hacer una galaxia más llamativa.
.gif)
.gif)
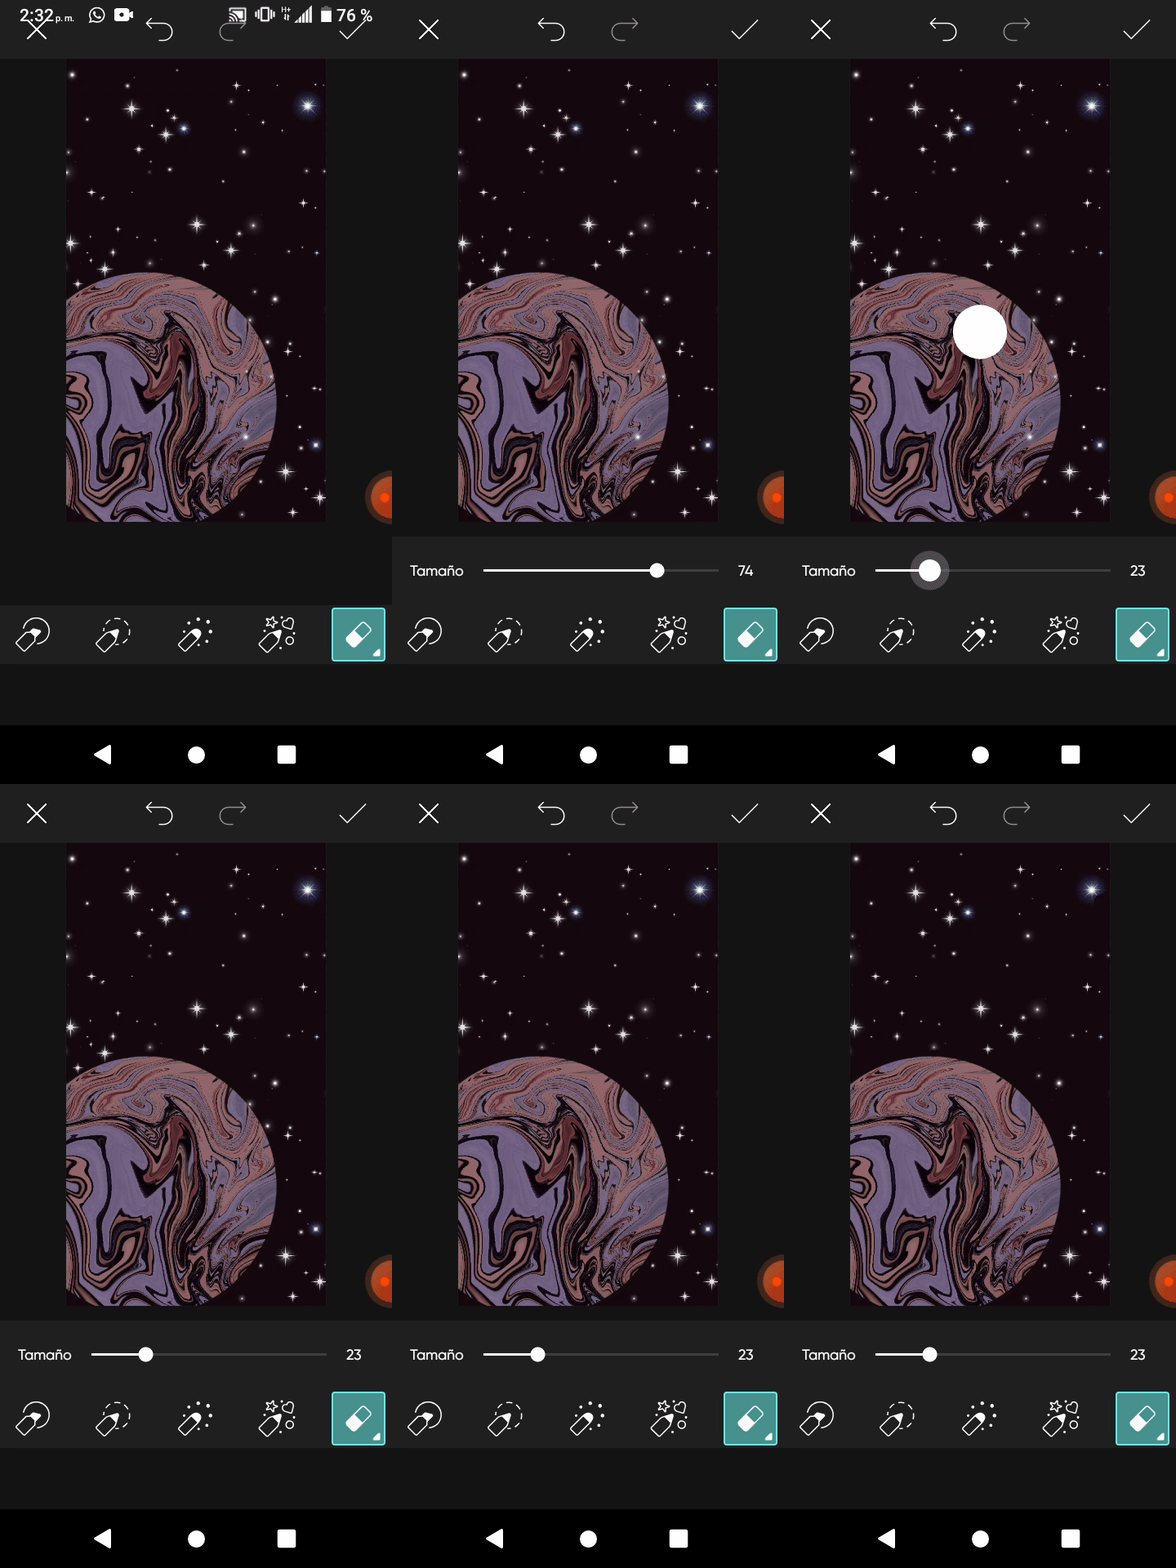
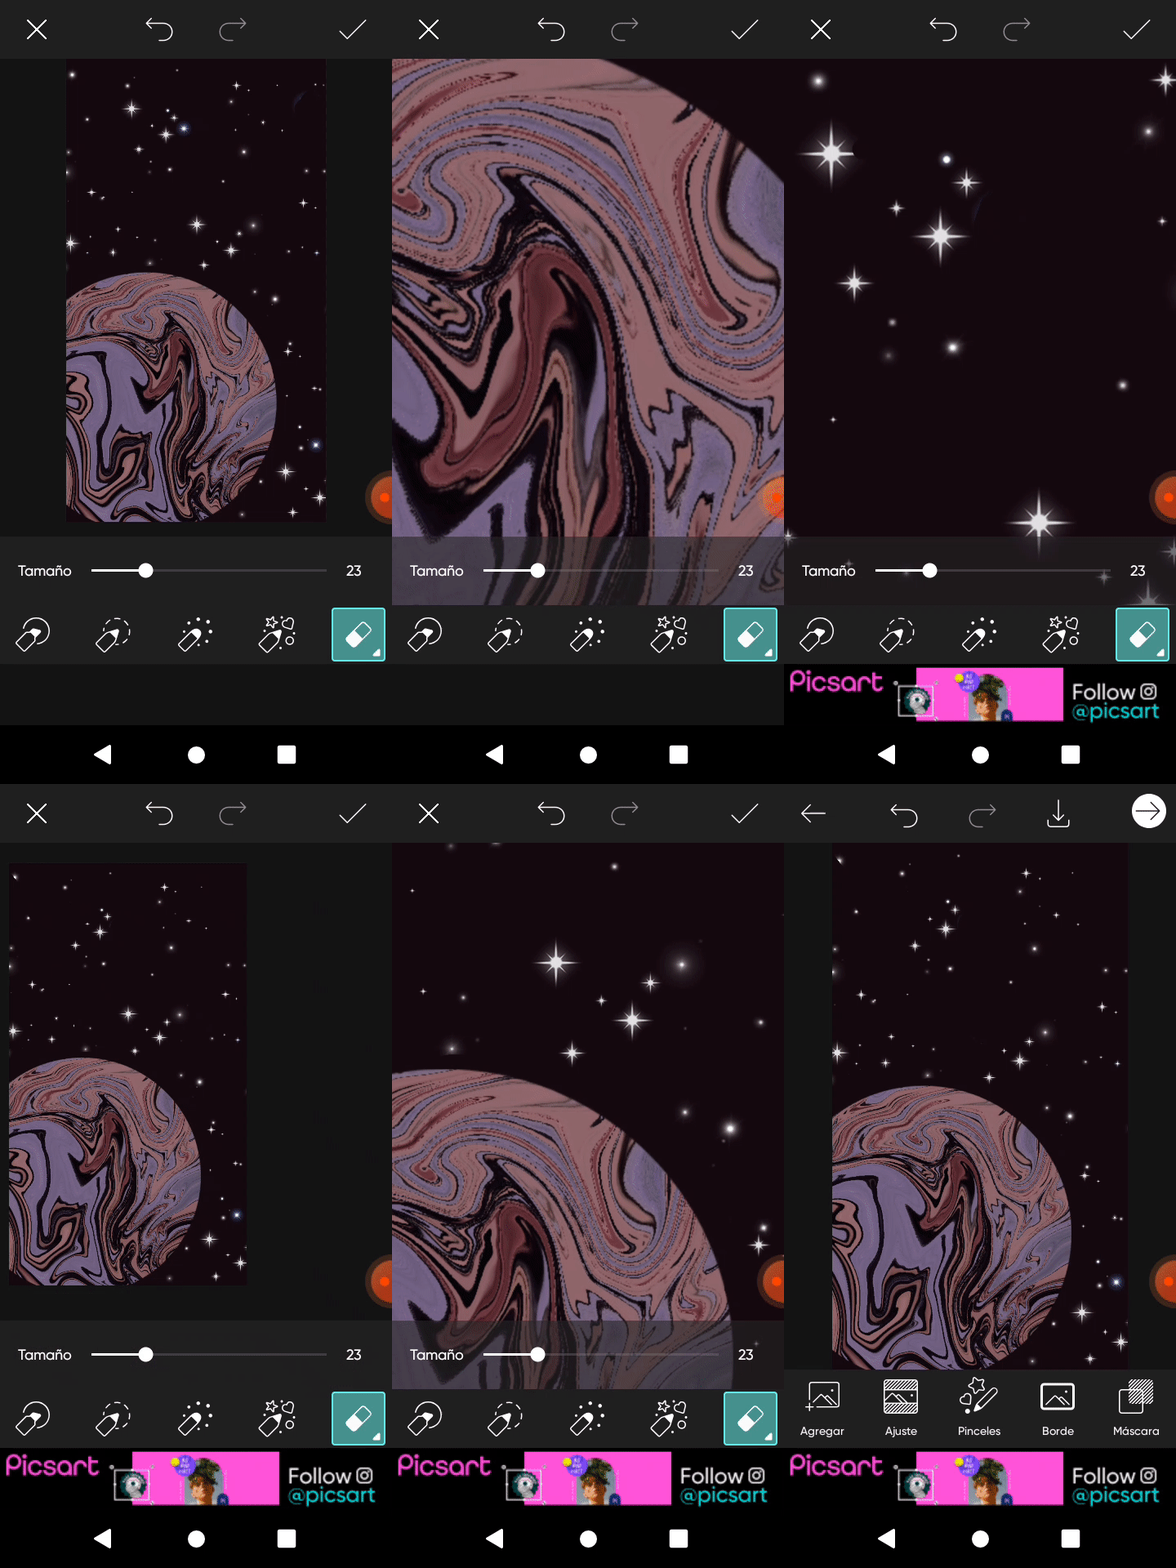
No tengan miedo de pulsar estrellas donde aparece el planeta, ya que al final podemos eliminar de poco si sobran estrellas o están en una mala posición.
.gif)
.gif)
For the stars, we press the option of brushes and in the search we introduce the star style that we like the most. These that I am using are “aesthetic Stars”. We can play with the various star models and thus make a more striking galaxy.
Don't be afraid to click stars where the planet appears, because in the end we can eliminate little if there are too many stars or they are in a bad position.
5✨
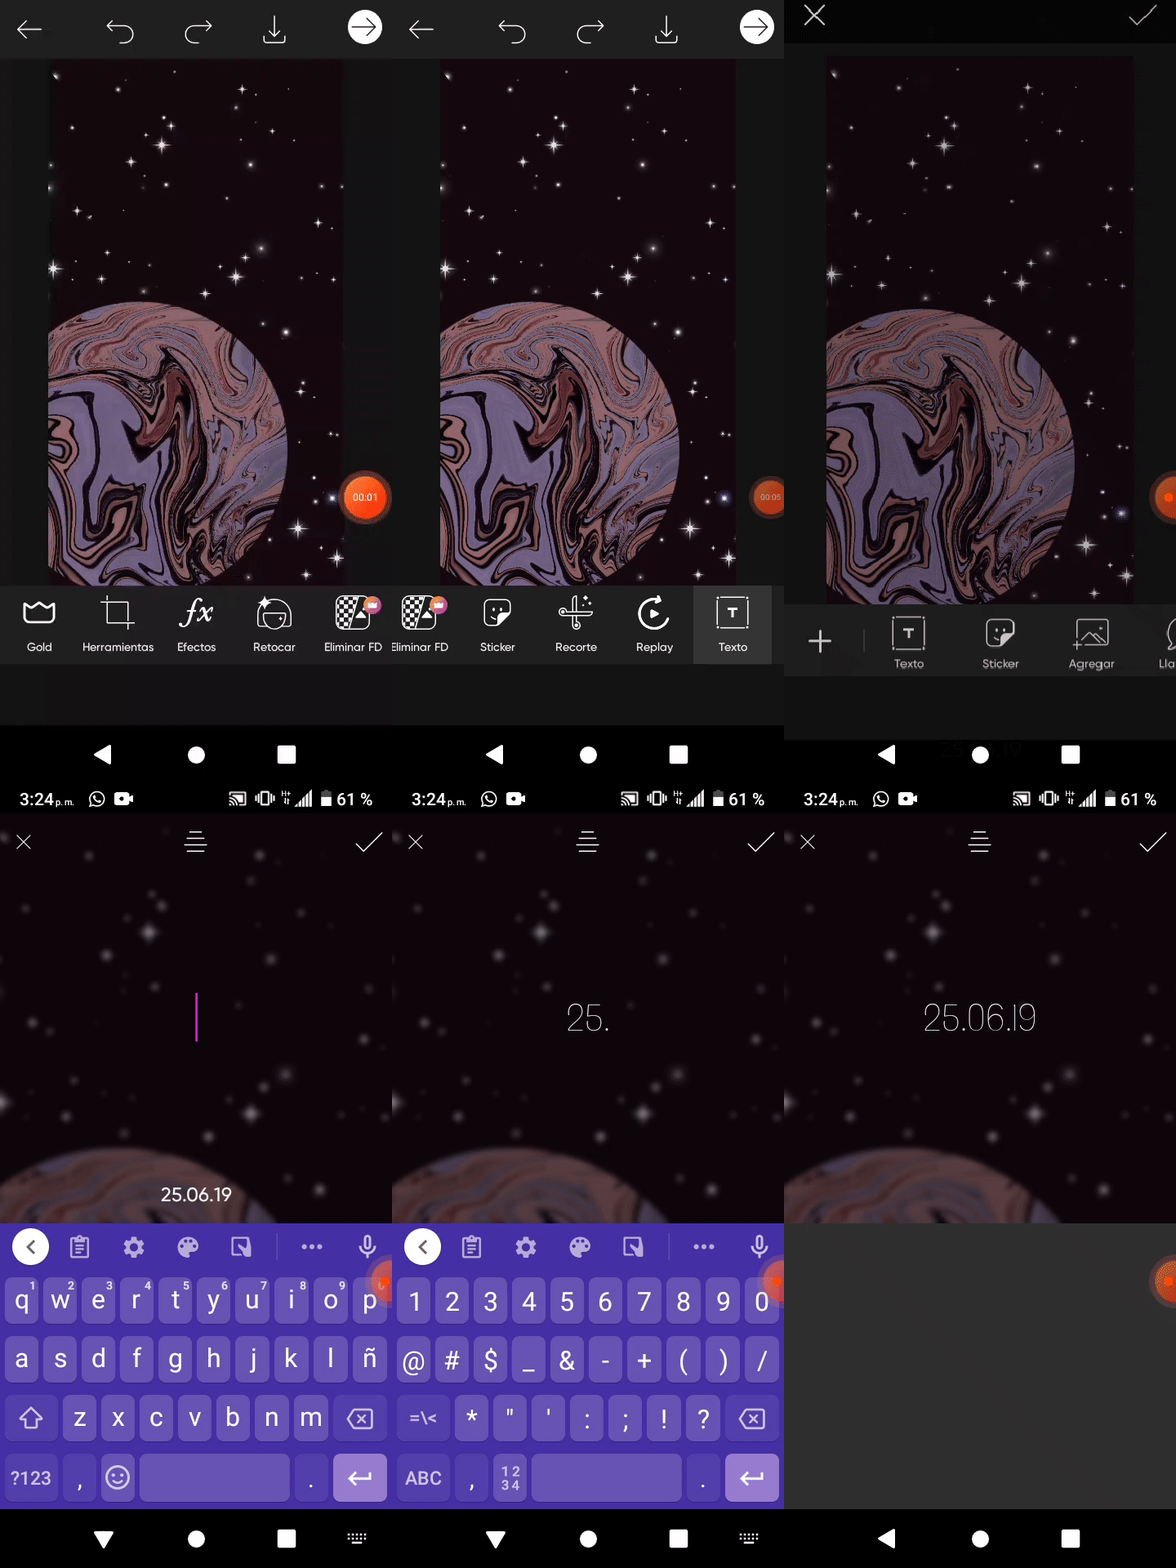
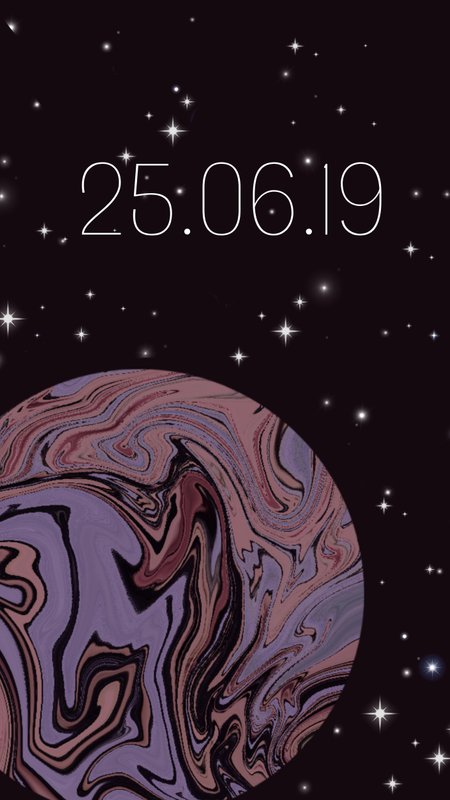
Por último, y esto es opcional. Escribimos la fecha, que en mi caso es una muy especial para mi novio y para mí, y la ajustamos en la parte inferior. Si no lo desean, simplemente lo dejan así, y le dan a guardar su creación.
.gif)
Lastly, and this is optional. We write the date, which in my case is a very special one for my boyfriend and me, and we adjust it at the bottom. If you don't want it, just leave it like that, and hit save creating it.

Y listo, así de fácil se hace nuestro planeta de fotos.

And that's it, that's how easy it is to make our planet of photos.
Cabe destacar que pueden hacer muchos diseños más, con los efectos que más deseen, por ejemplo, aquí le adjunto un fondo de Saturno que hice con esta foto.


It should be noted that you can make many more designs, with the effects you most want, for example, here I am attaching a background of Saturn that I made with this photo.
De verdad espero que les haya gustado, y que intenten realizar este lindo detalle para los que más quieren.
I really hope you liked it, and that you try to make this nice detail for those you love the most.